Statements, Tax Invoices, Receipts & Refunds
Information on account screen printables in RMS.
-
Information
-
Statement
-
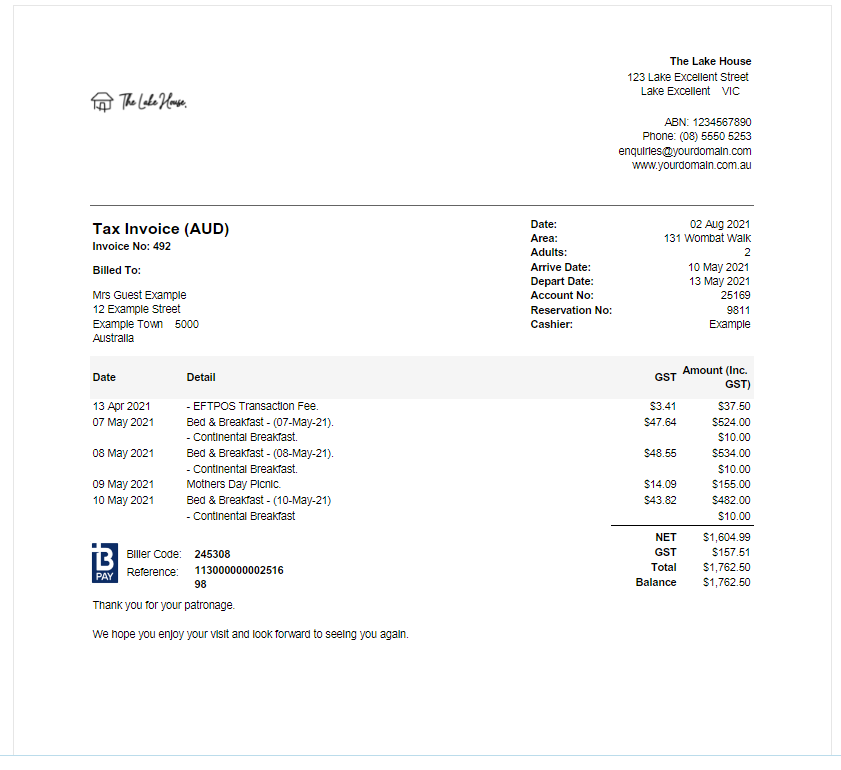
Tax Invoice
-
Receipt
-
Refund
- Add Button
Information
A default template is provided to all customers as part of the base RMS subscription.

Selecting 'Print' for a Statement, Tax Invoice or Receipt in RMS will automatically open a print dialogue box for users to select the number of copies and printer to send the document to.
-
Statement
-
Tax Invoice
-
Receipt
-
Refund
- Add Button
Use
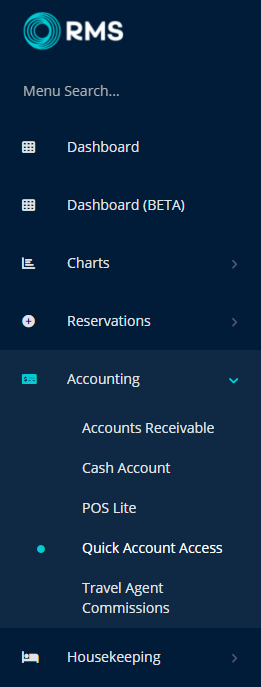
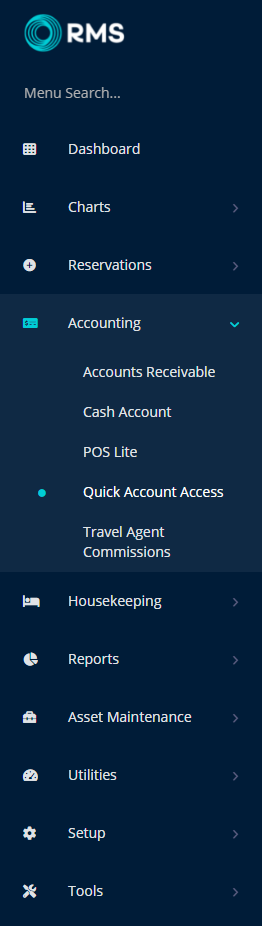
- Go to Accounting > Quick Account Access in RMS.
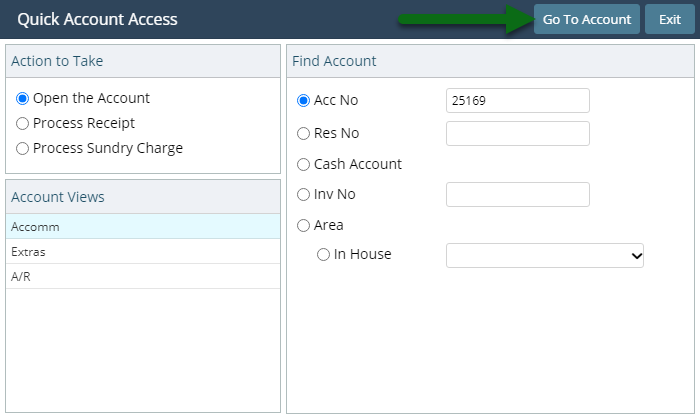
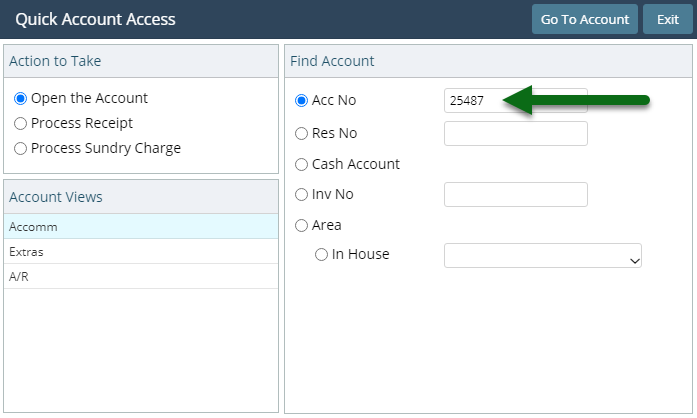
- Enter the Reservation Number or Account Number.
- Select the Account Type.
- Select 'Go to Account'.
- Select a Transaction.
- Select the 'Statement' menu and choose 'Print' or 'Email'.
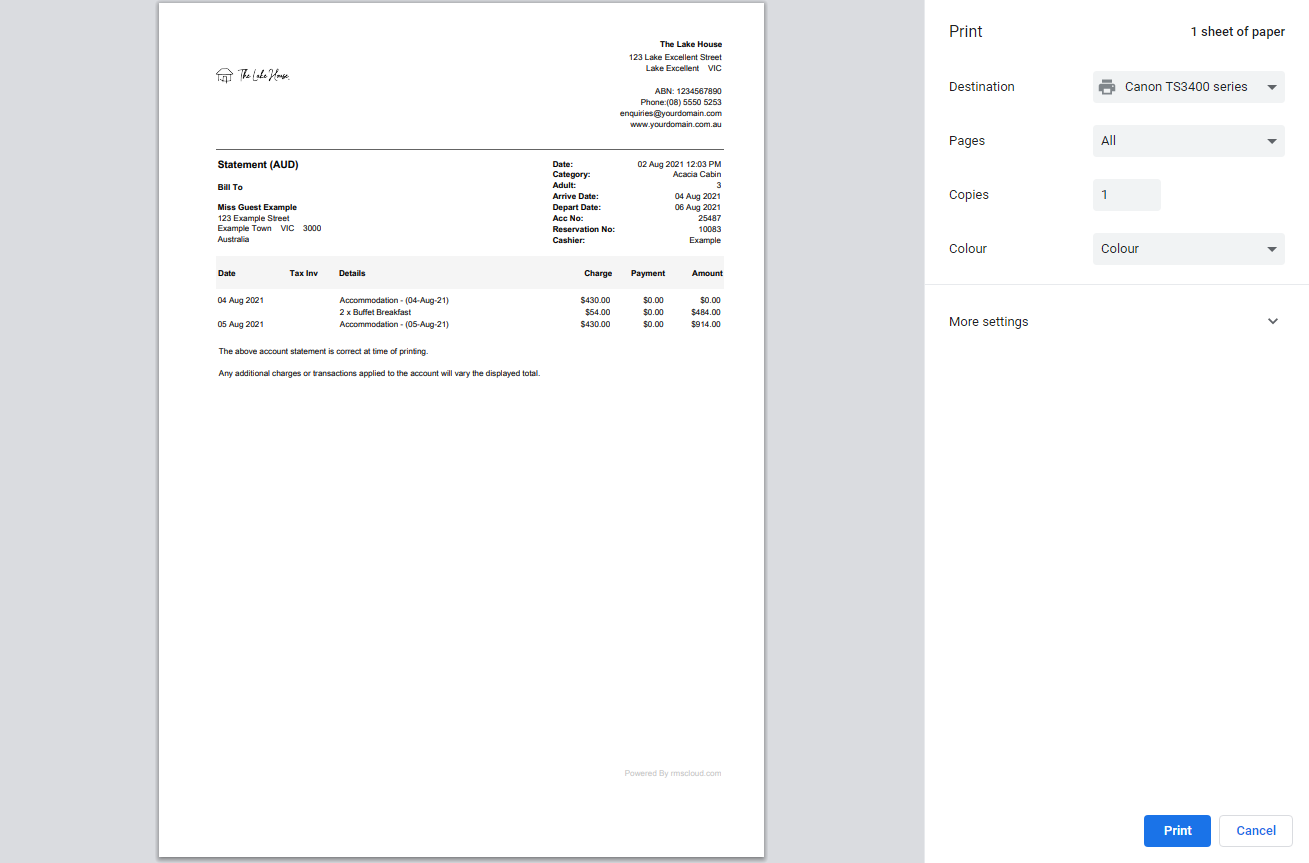
- Print: Select 'Print' on the browser's print dialogue box.
- Email: Select or enter the email recipients and choose 'Email/Exit'.

Account Types 'Accomm' and 'Extras' are default System Labels that can be customised.
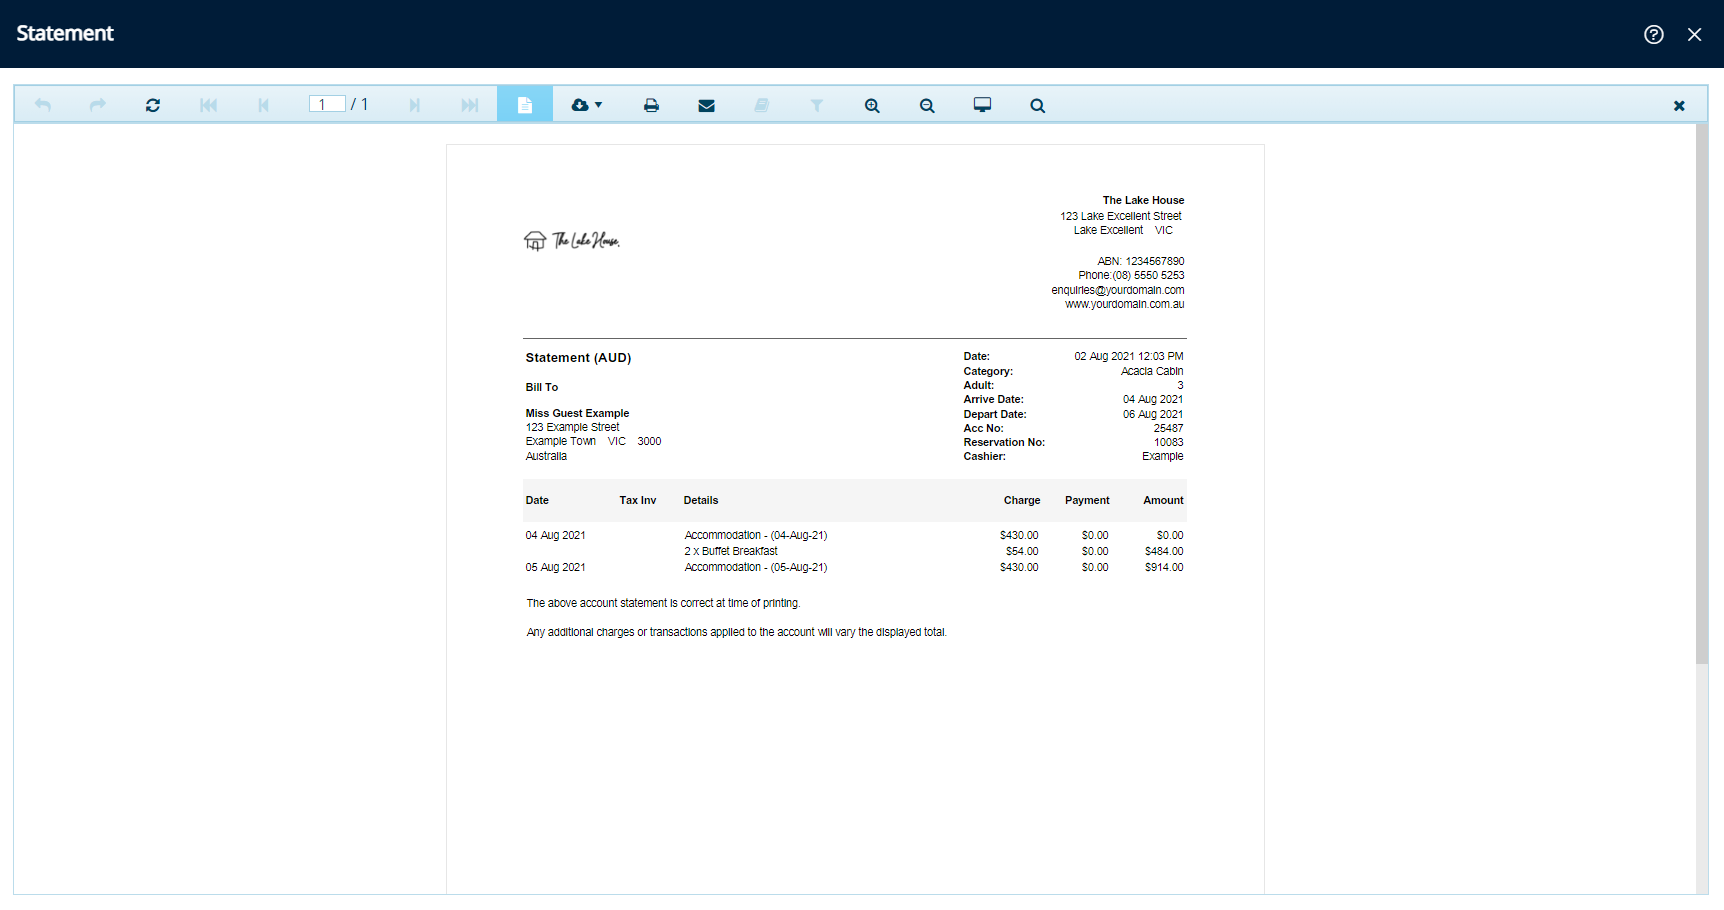
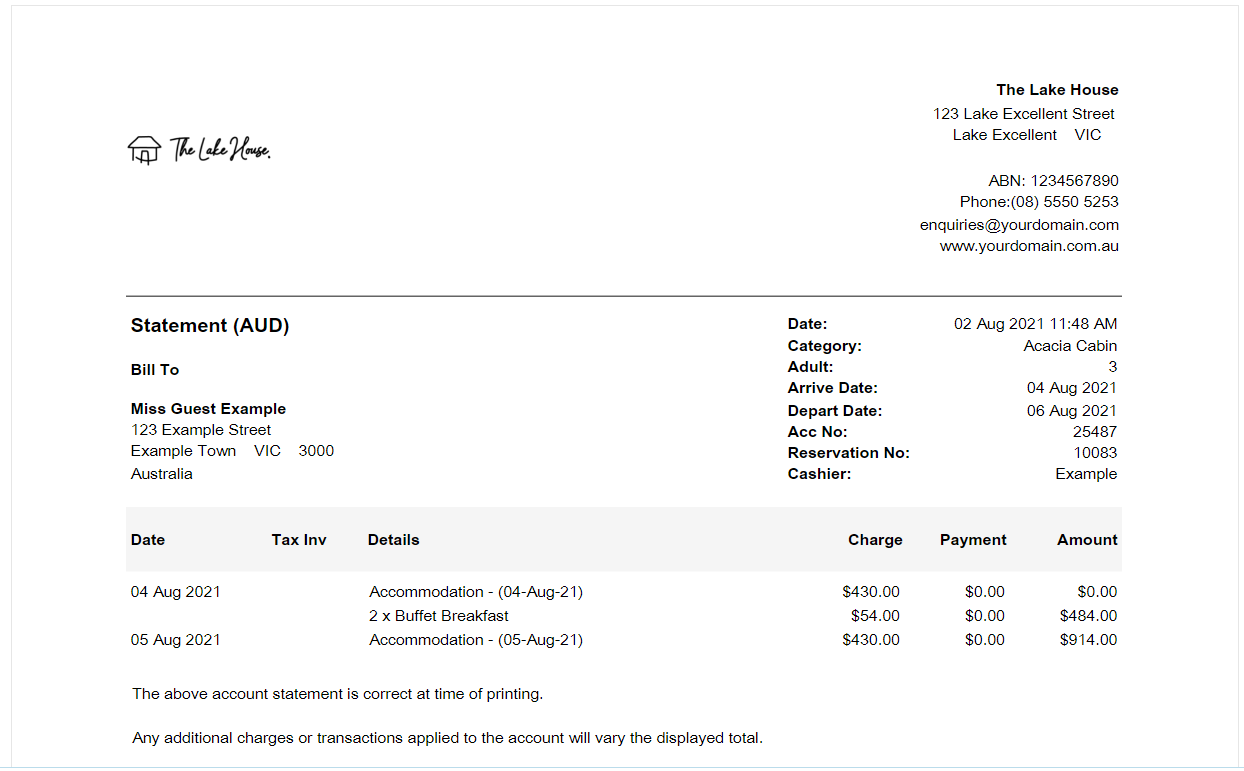
Selecting 'Print' will generate the Statement on screen and automatically open a browser print dialogue box to send the Statement to the selected printer.
-
Guide
- Add Button
Guide
Go to Accounting > Quick Account Access in RMS.

Enter the Reservation Number or Account Number.
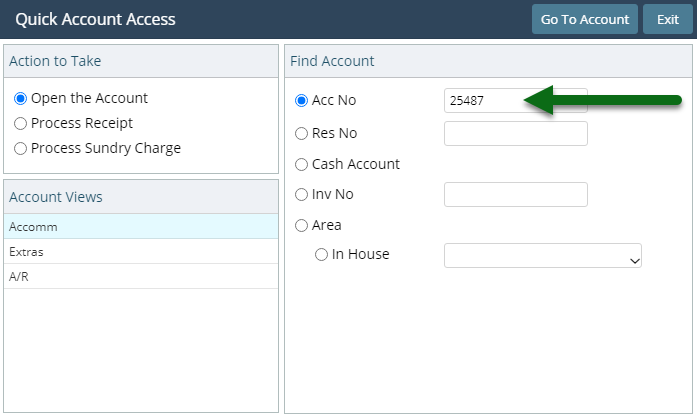
Select the Account Type.
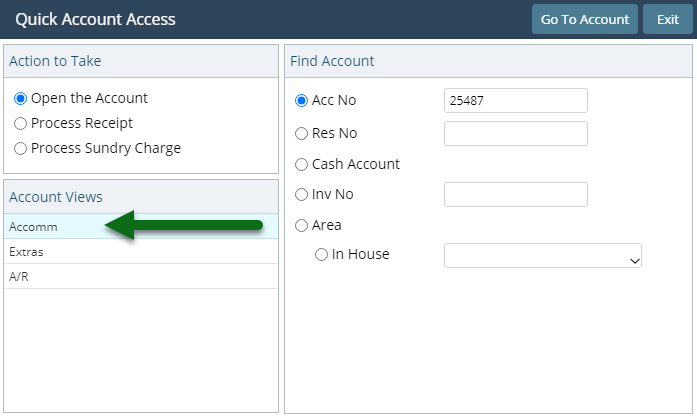
Select 'Go to Account'.
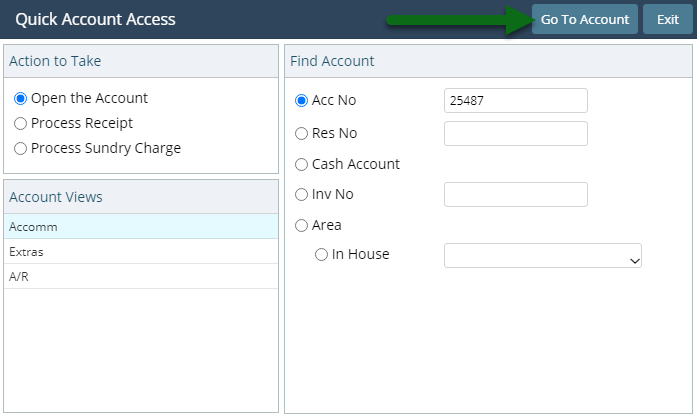
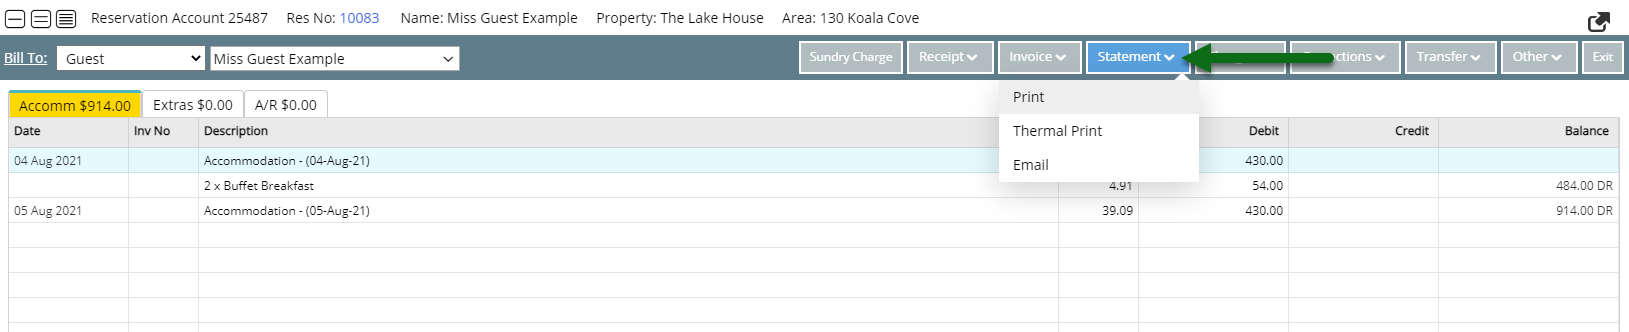
Select a Transaction.

Select the 'Statement' menu and choose 'Print' or 'Email'.
Print: Select 'Print' on the browser's print dialogue box.
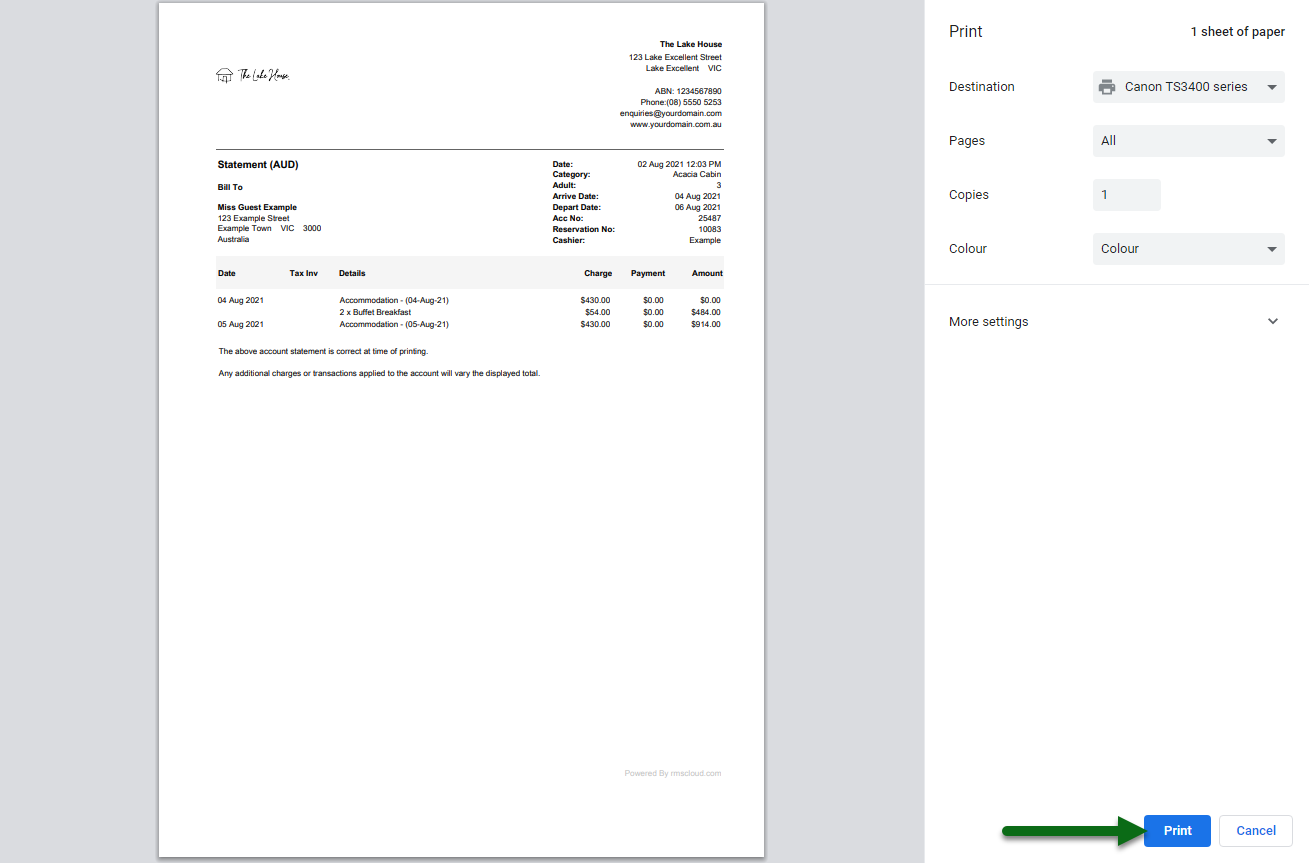
The Statement will be generated on screen and the Internet browser's print dialogue box automatically opened to send the generated Statement to the selected printer.
Email: Select or enter the email recipients and choose 'Email/Exit'.
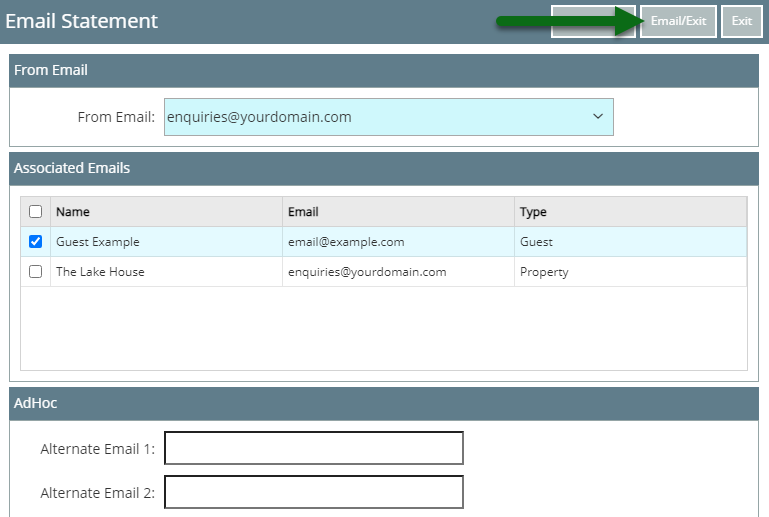
The Statement will be emailed to the selected recipients.
Use
- Go to Accounting > Quick Account Access in RMS.
- Enter the Account or Reservation Number.
- Select 'Go to Account'.
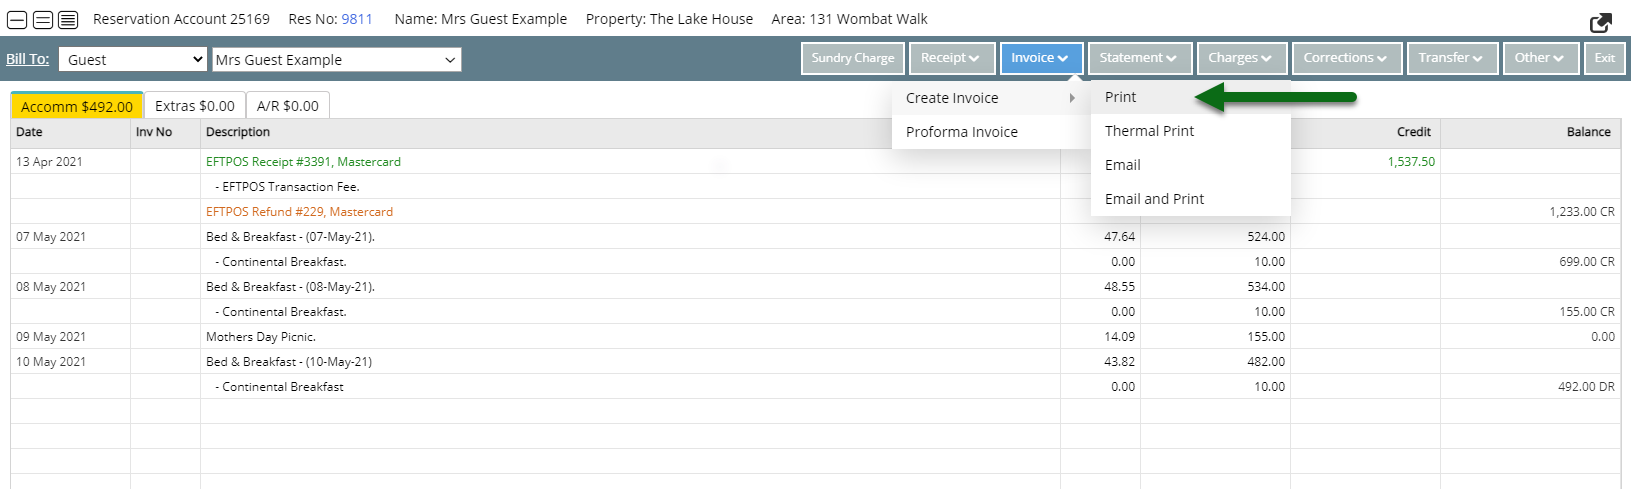
- Select 'Invoice'.
- Select 'Create Invoice' and choose 'Print' or 'Email'.
- Print: Select 'Print' on the browser's print dialogue box.
- Email: Select or enter the email recipients and choose 'Email/Exit'.

The Account Bill To will determine the party listed on the Tax Invoice as responsible for payment.
The Tax Invoice will be allocated a unique identifying number and all transactions itemised on the Tax Invoice will be locked from changes unless the Tax Invoice is cancelled.
Only transactions not currently allocated to a Tax Invoice will be included on a new invoice except Receipts. Receipts are not included on a Tax Invoice by default.
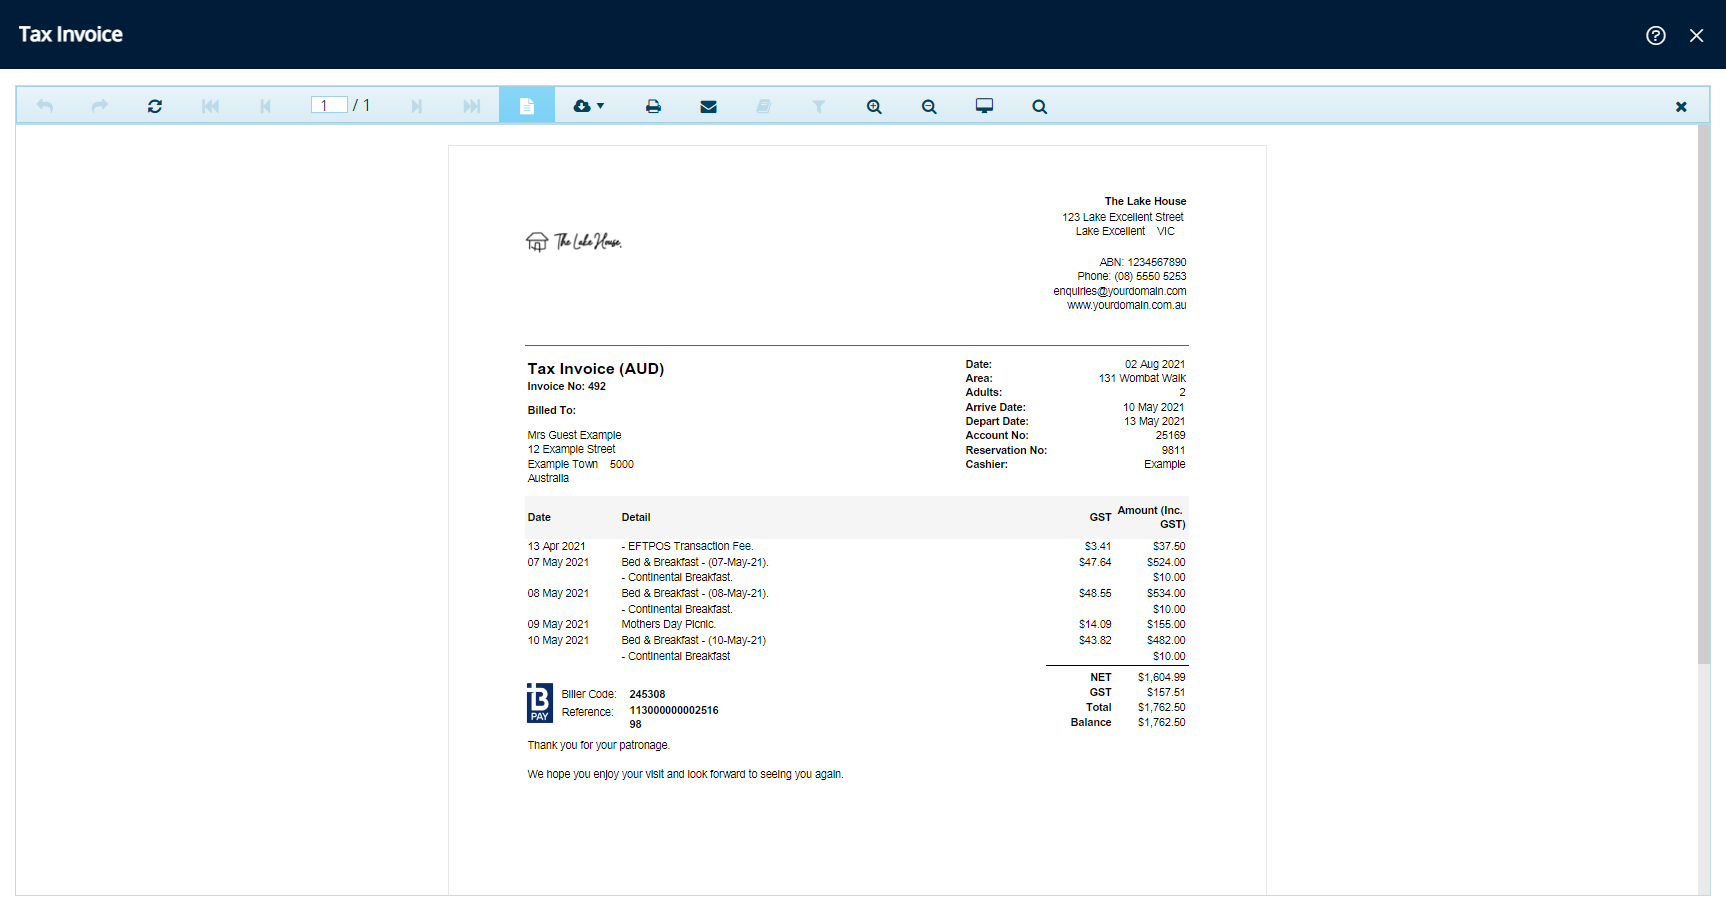
Selecting 'Print' will generate the Tax Invoice on screen and automatically open a browser print dialogue box to send the Tax Invoice to the selected printer.
-
Guide
- Add Button
Guide
Go to Accounting > Quick Account Access in RMS.
Enter the Account or Reservation Number.

Select 'Go to Account'.
Select 'Invoice'.

Select 'Create Invoice' and choose 'Print' or 'Email'.
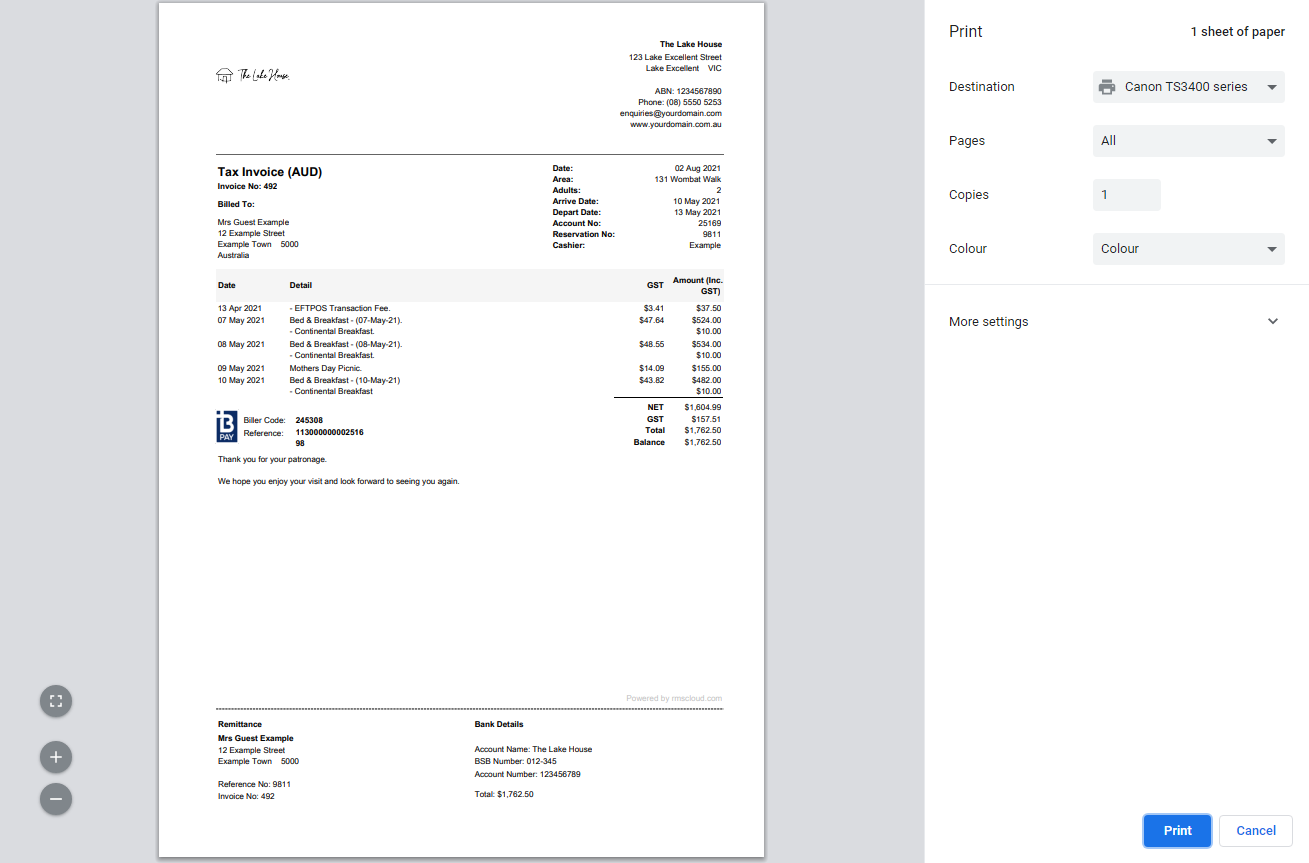
Print: Select 'Print' on the browser's print dialogue box.
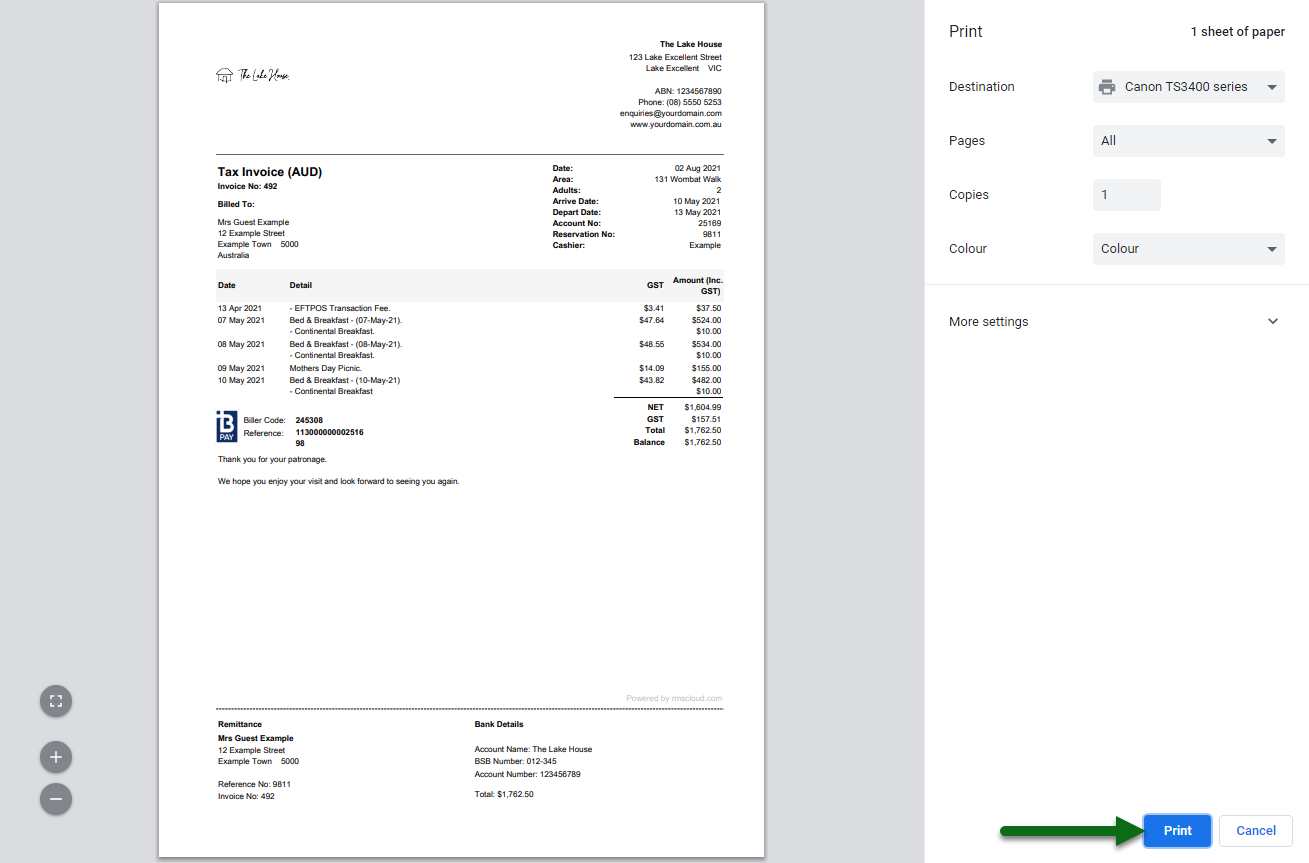
The Tax Invoice will be generated on screen and the Internet browser's print dialogue box automatically opened to send the generated Tax Invoice to the selected printer.
Email: Select or enter the email recipients and choose 'Email/Exit'.
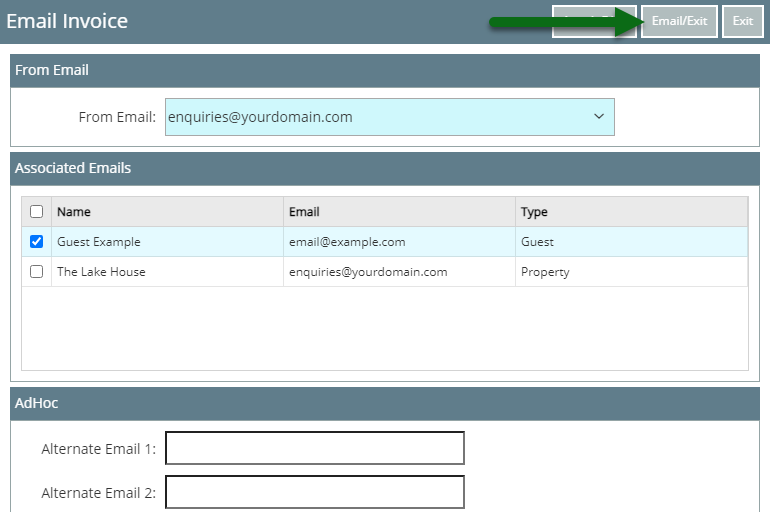
The Tax Invoice will be emailed to the selected recipients.
Use
- Go to Accounting > Quick Account Access in RMS.
- Enter the Reservation Number or Account Number.
- Select the Account Type and choose 'Go to Account'.
- Select 'Receipt' and choose 'Create Receipt'.
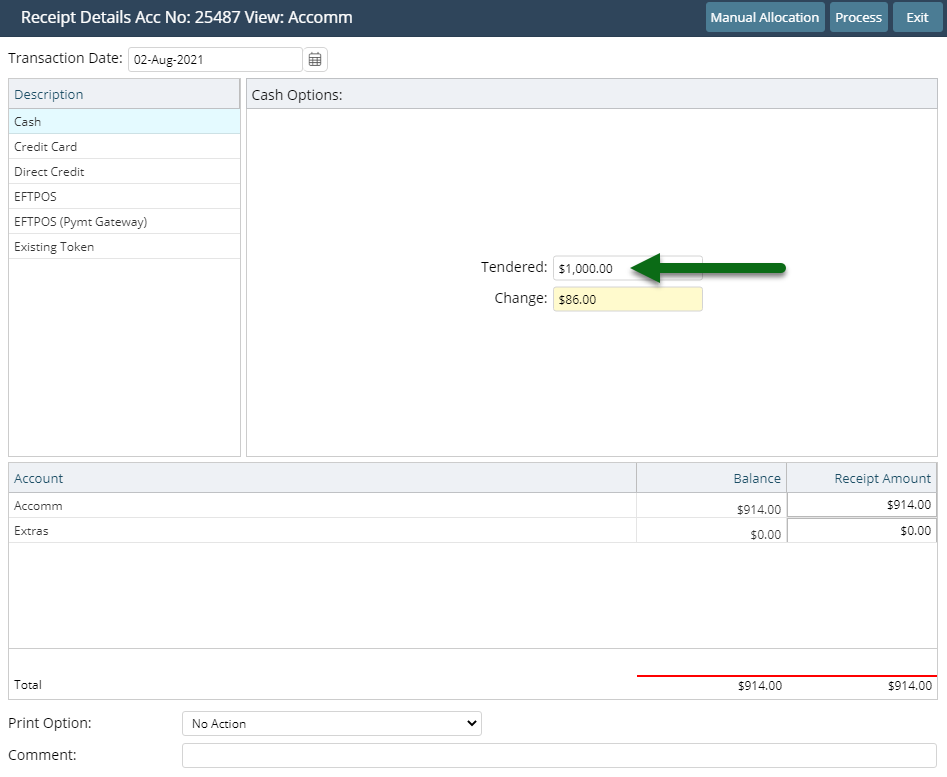
- Select the Payment Method.
- Select & Enter the Payment Details.
- Cash: Enter the Tendered Amount.
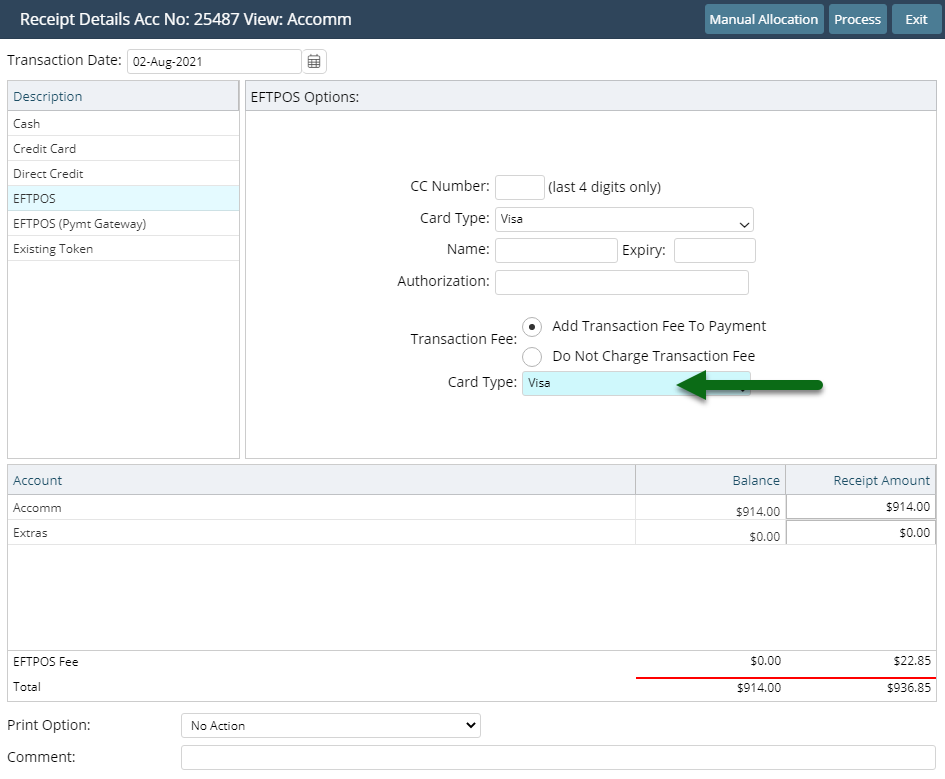
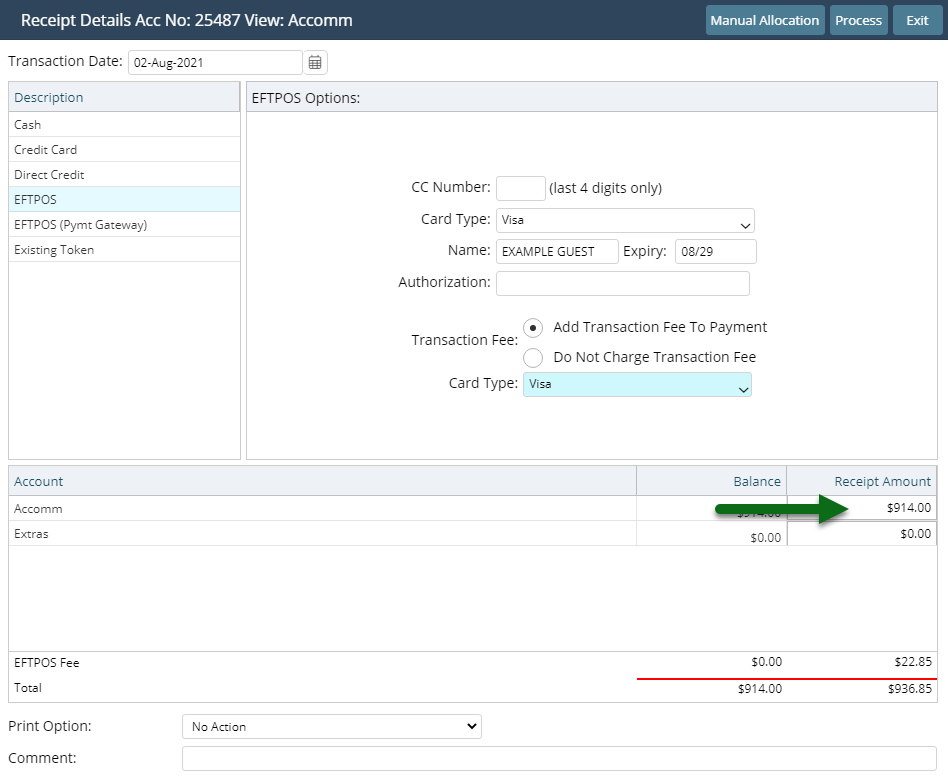
- EFTPOS: Select the Card Type & Transaction Fee option.
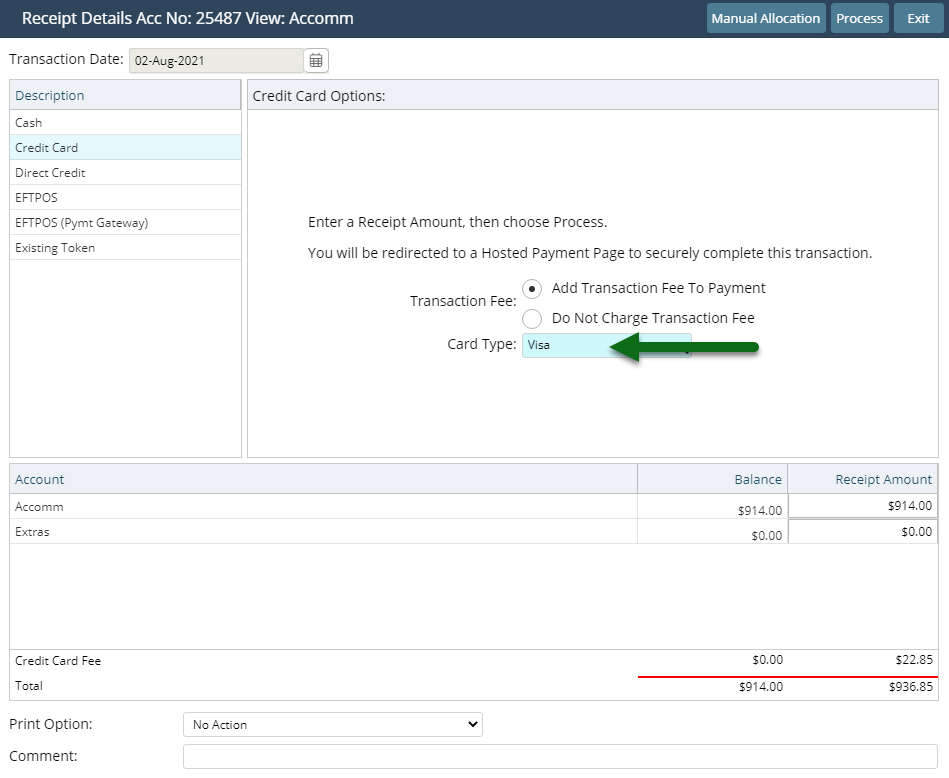
- Credit Card: Select the Card Type and Transaction Fee option.
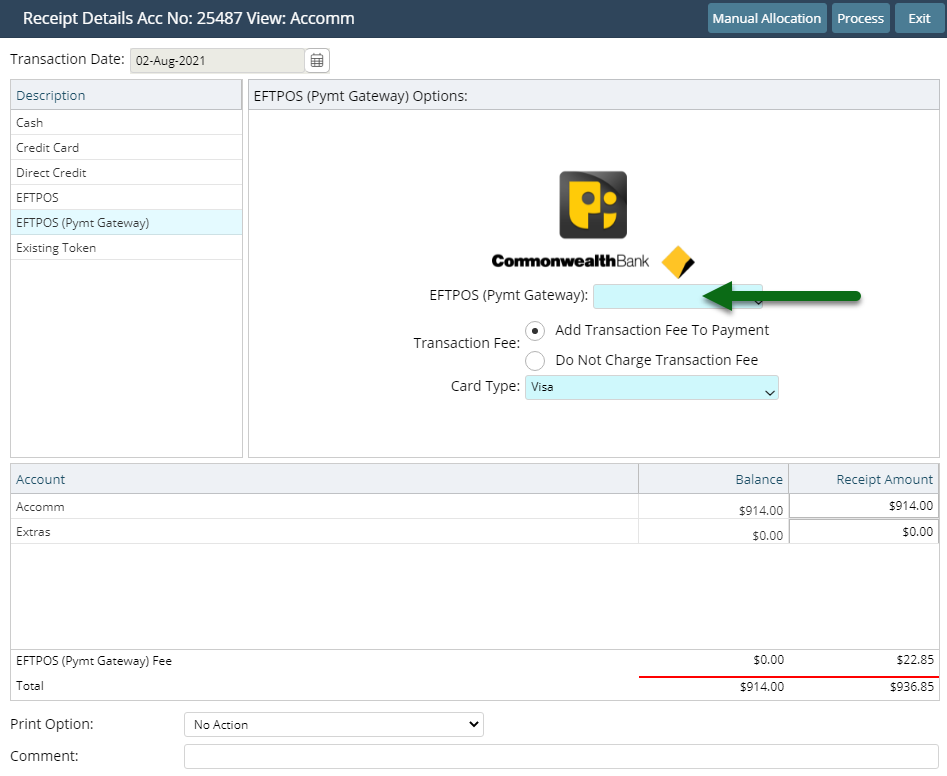
- EFTPOS Payment Gateway: Select the Terminal & Card Type.
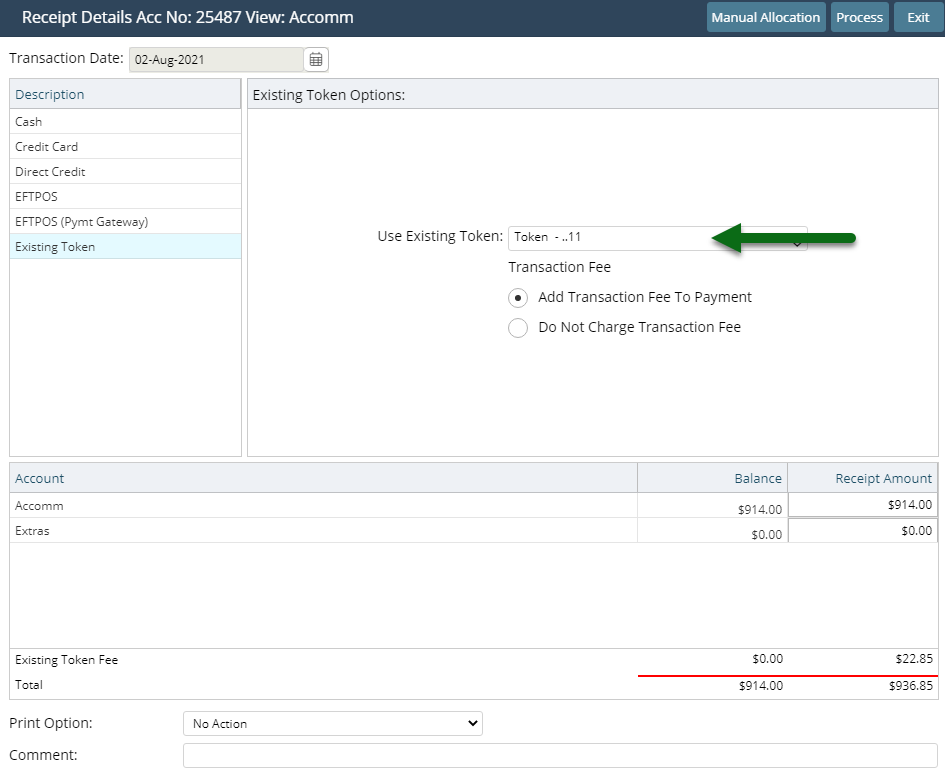
- Existing Token: Select an existing CC Token & Transaction Fee option.
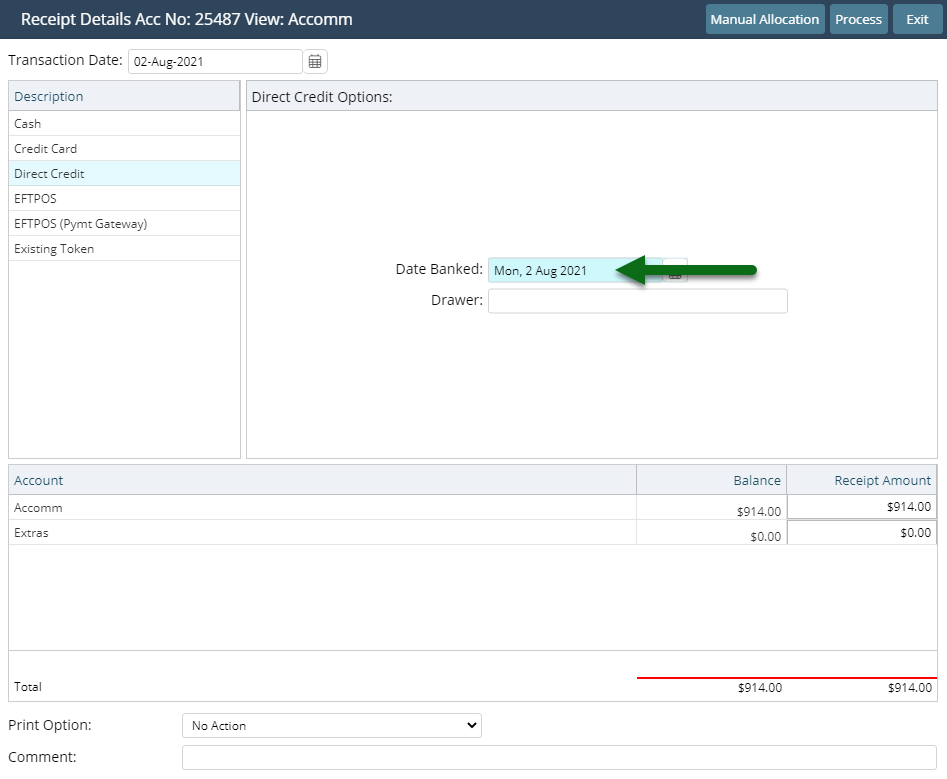
- Direct Credit: Select the Date Banked and enter the Drawer.
- Enter the Receipt Amount.
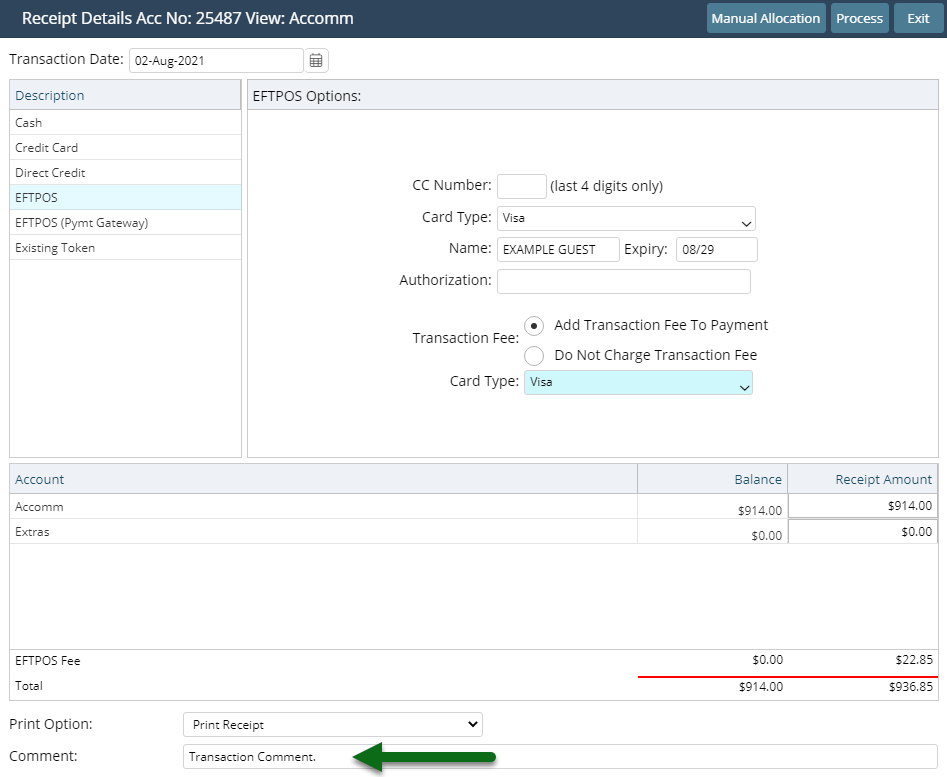
- Optional: Select a Print Action.
- Optional: Enter a Comment.
- Select 'Process'.

Available Receipt Types are determined by the Accounting Options setup.
Account Types and Receipt Types are default System Labels that can be customised.
The Print Action will default to the option selected on the previous Receipt processed.
-
Guide
- Add Button
Guide
Go to Accounting > Quick Account Access in RMS.
Enter the Reservation Number or Account Number.
Select the Account Type and choose 'Go to Account'.

Select 'Receipt' and choose 'Create Receipt'.

Select the Payment Method.

Select & Enter the Payment Details.
Cash: Enter the Tendered Amount.
EFTPOS: Select the Card Type & Transaction Fee option.
Credit Card: Select the Card Type and Transaction Fee option.
EFTPOS Payment Gateway: Select the Terminal & Card Type.
Existing Token: Select an existing CC Token & Transaction Fee option.
Direct Credit: Select the Date Banked and enter the Drawer.
Enter the Receipt Amount.
Optional: Select a Print Action.

Optional: Enter a Comment.
Select 'Process'.
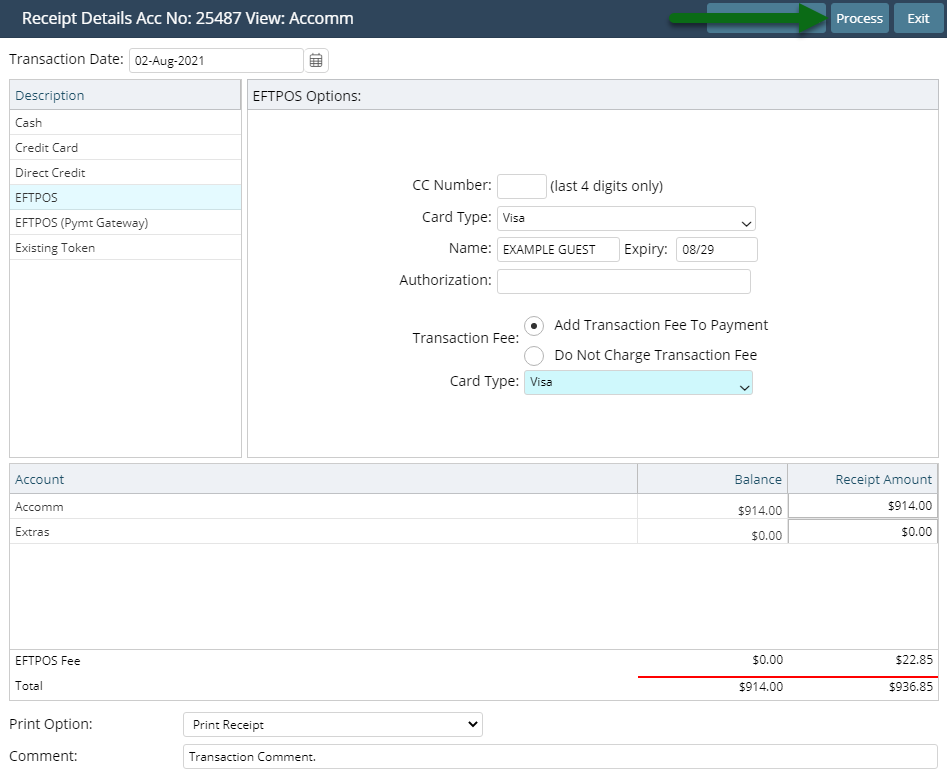
The Receipt will be recorded on the account with a unique identifying number and the selected Print Action will be triggered.
Use
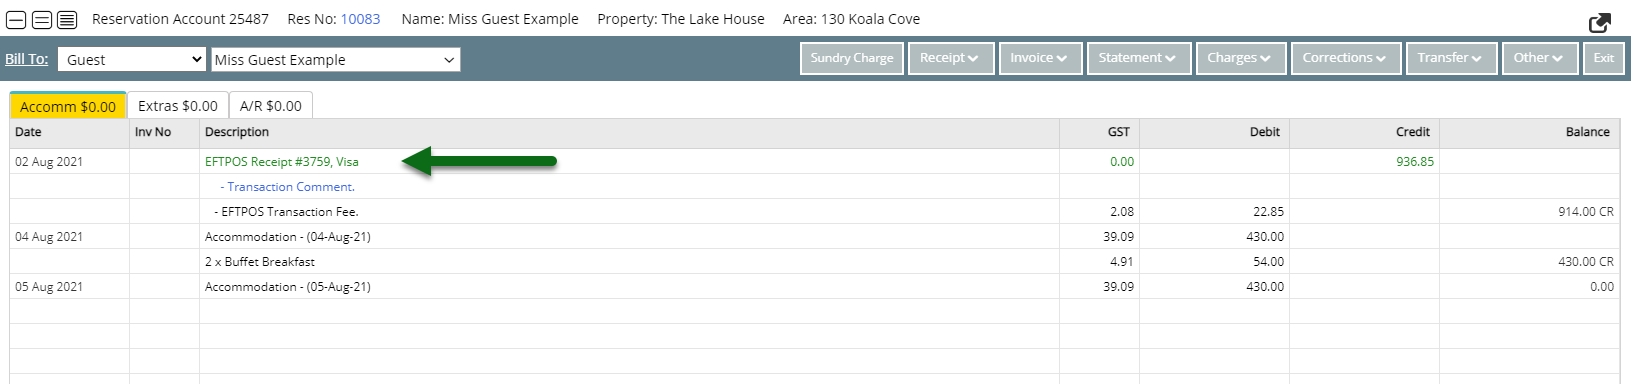
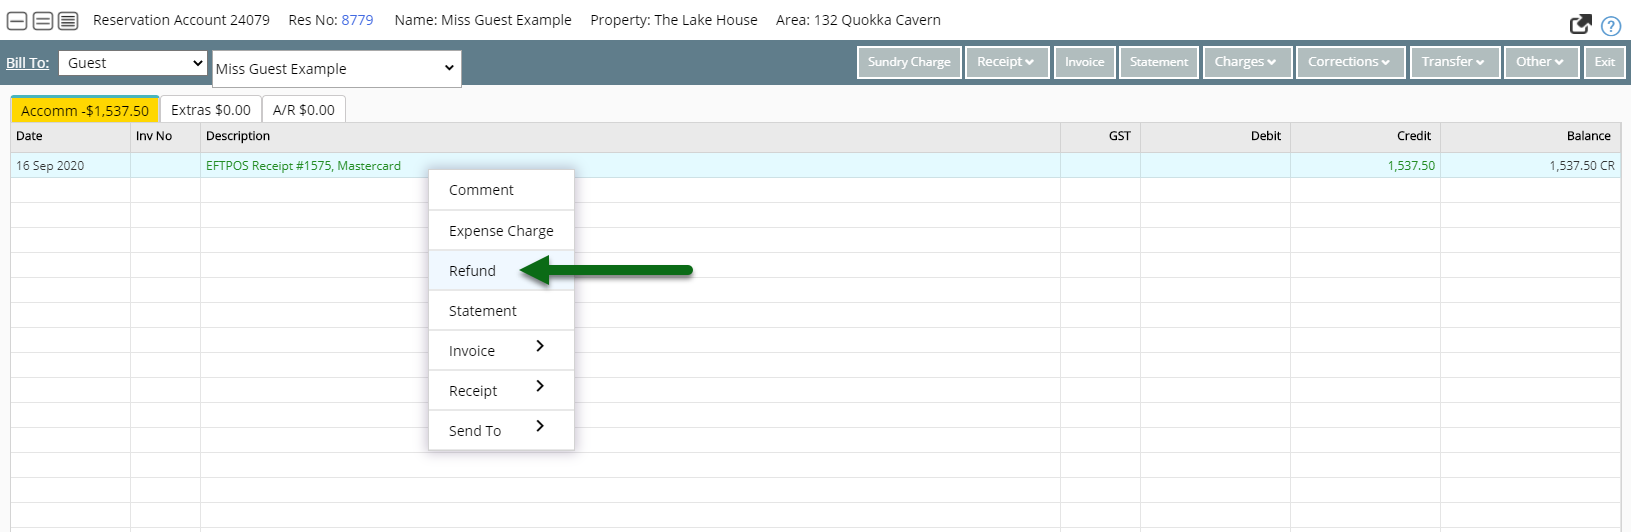
- Open an Account in RMS.
- Right Click an unallocated Receipt and choose 'Refund'.
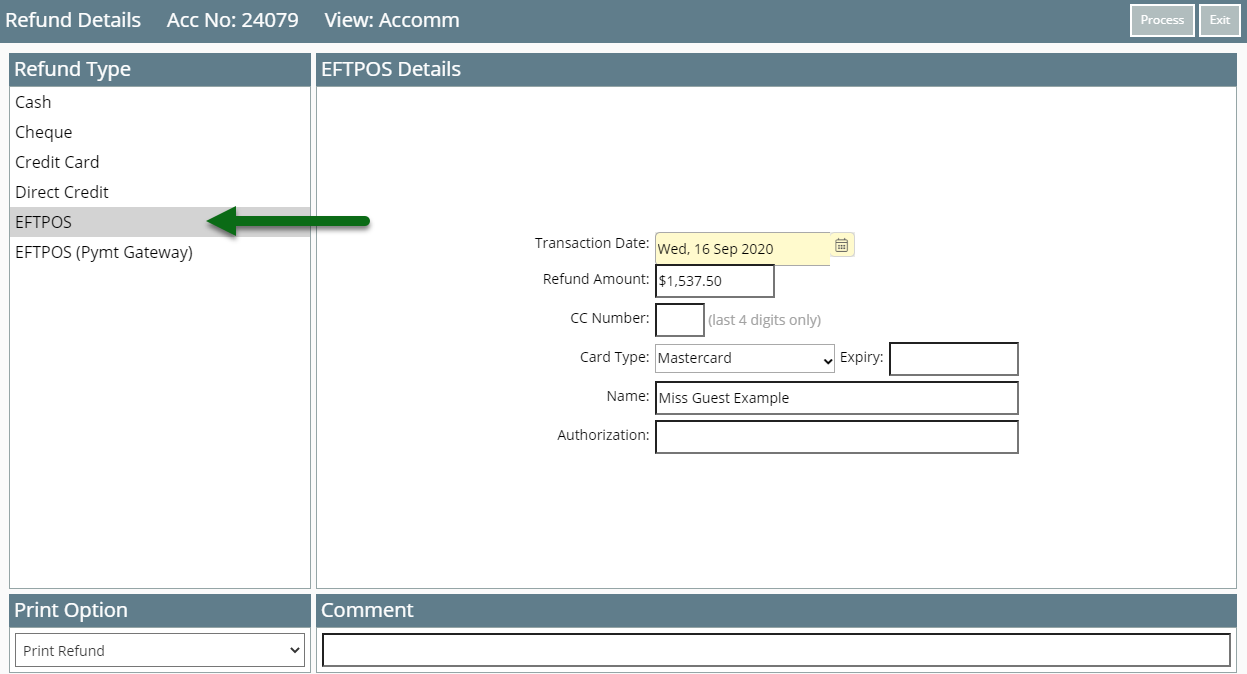
- Select the Refund Type.
- Select the Print Option.
- Process.
-
Guide
- Add Button
Guide
Open an Account in RMS.
Right Click an unallocated Receipt and choose 'Refund'.
Select the Refund Type.
Select the Print Option.
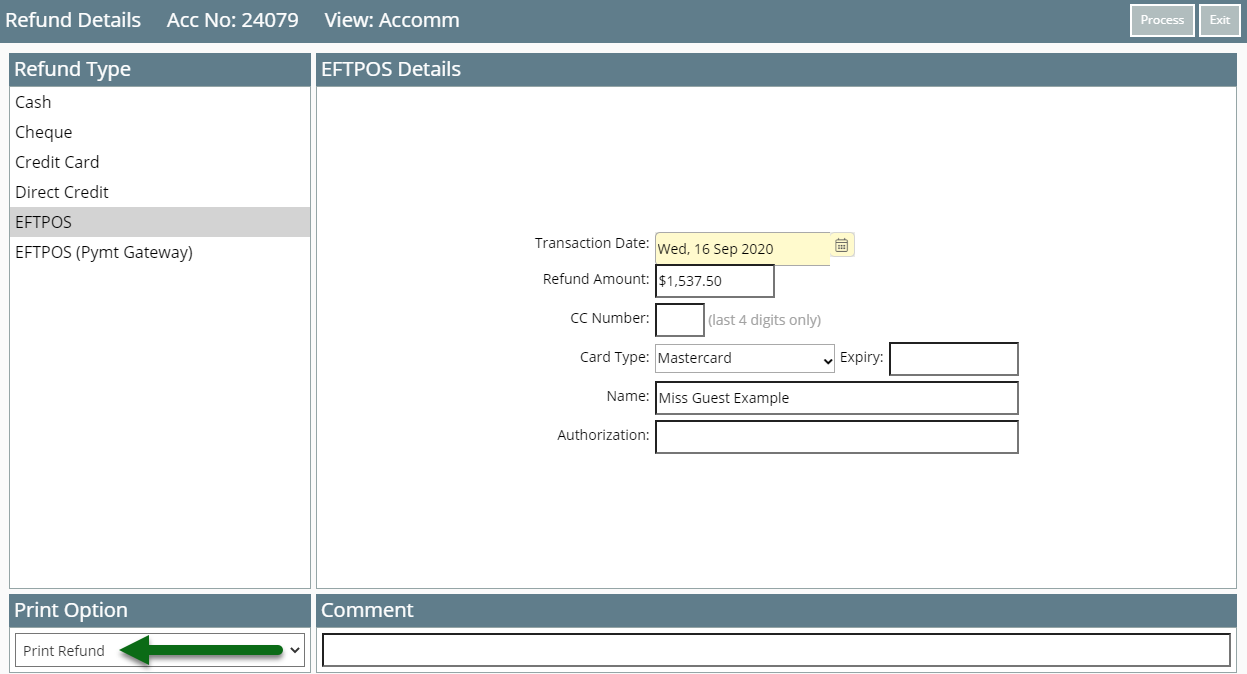
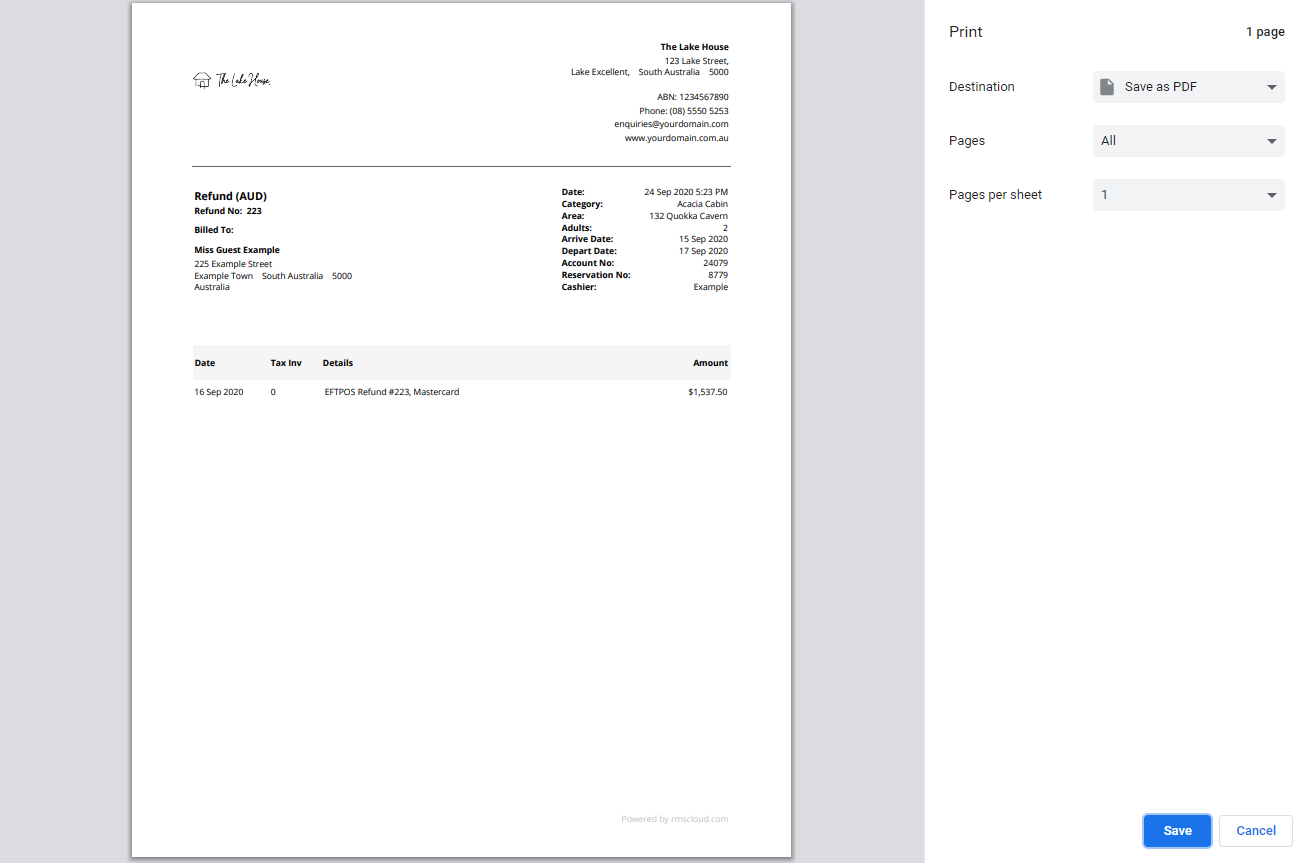
Select 'Process' to complete the Refund in RMS.
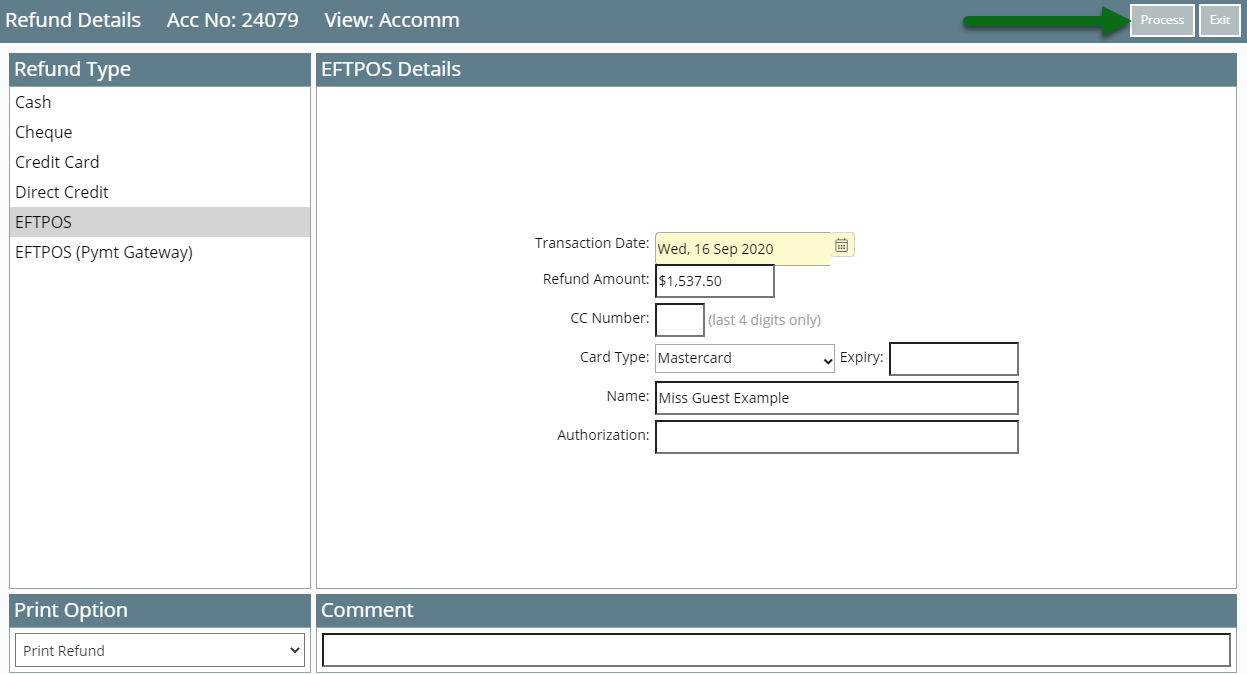
If 'Print Refund' was the Print Action selected a print preview and print dialogue box will open to complete printing.

Use
- Go to Accounting > Quick Account Access in RMS.
- Enter the Reservation Number or Account Number.
- Select the Account Type.
- Select 'Go to Account'.
- Select a Transaction.
- Select the 'Statement' menu and choose 'Print' or 'Email'.
- Print: Select 'Print' on the browser's print dialogue box.
- Email: Select or enter the email recipients and choose 'Email/Exit'.
Account Types 'Accomm' and 'Extras' are default System Labels that can be customised.
Selecting 'Print' will generate the Statement on screen and automatically open a browser print dialogue box to send the Statement to the selected printer.
-
Guide
- Add Button
Guide
Go to Accounting > Quick Account Access in RMS.
Enter the Reservation Number or Account Number.
Select the Account Type.
Select 'Go to Account'.
Select a Transaction.
Select the 'Statement' menu and choose 'Print' or 'Email'.
Print: Select 'Print' on the browser's print dialogue box.
The Statement will be generated on screen and the Internet browser's print dialogue box automatically opened to send the generated Statement to the selected printer.
Email: Select or enter the email recipients and choose 'Email/Exit'.
The Statement will be emailed to the selected recipients.
Use
- Go to Accounting > Quick Account Access in RMS.
- Enter the Account or Reservation Number.
- Select 'Go to Account'.
- Select 'Invoice'.
- Select 'Create Invoice' and choose 'Print' or 'Email'.
- Print: Select 'Print' on the browser's print dialogue box.
- Email: Select or enter the email recipients and choose 'Email/Exit'.
The Account Bill To will determine the party listed on the Tax Invoice as responsible for payment.
The Tax Invoice will be allocated a unique identifying number and all transactions itemised on the Tax Invoice will be locked from changes unless the Tax Invoice is cancelled.
Only transactions not currently allocated to a Tax Invoice will be included on a new invoice except Receipts. Receipts are not included on a Tax Invoice by default.
Selecting 'Print' will generate the Tax Invoice on screen and automatically open a browser print dialogue box to send the Tax Invoice to the selected printer.
-
Guide
- Add Button
Guide
Go to Accounting > Quick Account Access in RMS.
Enter the Account or Reservation Number.
Select 'Go to Account'.
Select 'Invoice'.
Select 'Create Invoice' and choose 'Print' or 'Email'.
Print: Select 'Print' on the browser's print dialogue box.
The Tax Invoice will be generated on screen and the Internet browser's print dialogue box automatically opened to send the generated Tax Invoice to the selected printer.
Email: Select or enter the email recipients and choose 'Email/Exit'.
The Tax Invoice will be emailed to the selected recipients.
Use
- Go to Accounting > Quick Account Access in RMS.
- Enter the Reservation Number or Account Number.
- Select the Account Type and choose 'Go to Account'.
- Select 'Receipt' and choose 'Create Receipt'.
- Select the Payment Method.
- Select & Enter the Payment Details.
- Cash: Enter the Tendered Amount.
- EFTPOS: Select the Card Type & Transaction Fee option.
- Credit Card: Select the Card Type and Transaction Fee option.
- EFTPOS Payment Gateway: Select the Terminal & Card Type.
- Existing Token: Select an existing CC Token & Transaction Fee option.
- Direct Credit: Select the Date Banked and enter the Drawer.
- Enter the Receipt Amount.
- Optional: Select a Print Action.
- Optional: Enter a Comment.
- Select 'Process'.
Available Receipt Types are determined by the Accounting Options setup.
Account Types and Receipt Types are default System Labels that can be customised.
The Print Action will default to the option selected on the previous Receipt processed.
-
Guide
- Add Button
Guide
Go to Accounting > Quick Account Access in RMS.
Enter the Reservation Number or Account Number.
Select the Account Type and choose 'Go to Account'.
Select 'Receipt' and choose 'Create Receipt'.
Select the Payment Method.
Select & Enter the Payment Details.
Cash: Enter the Tendered Amount.
EFTPOS: Select the Card Type & Transaction Fee option.
Credit Card: Select the Card Type and Transaction Fee option.
EFTPOS Payment Gateway: Select the Terminal & Card Type.
Existing Token: Select an existing CC Token & Transaction Fee option.
Direct Credit: Select the Date Banked and enter the Drawer.
Enter the Receipt Amount.
Optional: Select a Print Action.
Optional: Enter a Comment.
Select 'Process'.
The Receipt will be recorded on the account with a unique identifying number and the selected Print Action will be triggered.
Use
- Open an Account in RMS.
- Right Click an unallocated Receipt and choose 'Refund'.
- Select the Refund Type.
- Select the Print Option.
- Process.
-
Guide
- Add Button
Guide
Open an Account in RMS.
Right Click an unallocated Receipt and choose 'Refund'.
Select the Refund Type.
Select the Print Option.
Select 'Process' to complete the Refund in RMS.
If 'Print Refund' was the Print Action selected a print preview and print dialogue box will open to complete printing.