Setup Tracking Categories in RMS
Mapping the Xero Tracking Categories in RMS.
Steps Required
Have your System Administrator complete the following.
- Go to Setup > Accounting > Financial Interface in RMS.
- Navigate to the 'Additional Interface Codes' tab.
- Enter Tracking Category 1 in Additional Interface 1.
- Enter Tracking Category 2 in Additional Interface 2.
- Save/Exit.
Visual Guide
Go to Setup > Accounting > Financial Interface in RMS.
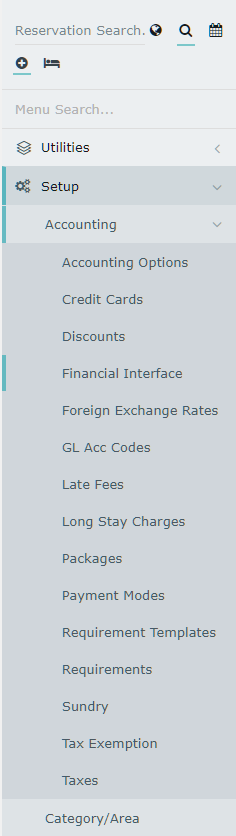
Navigate to the 'Additional Interface Codes' tab.
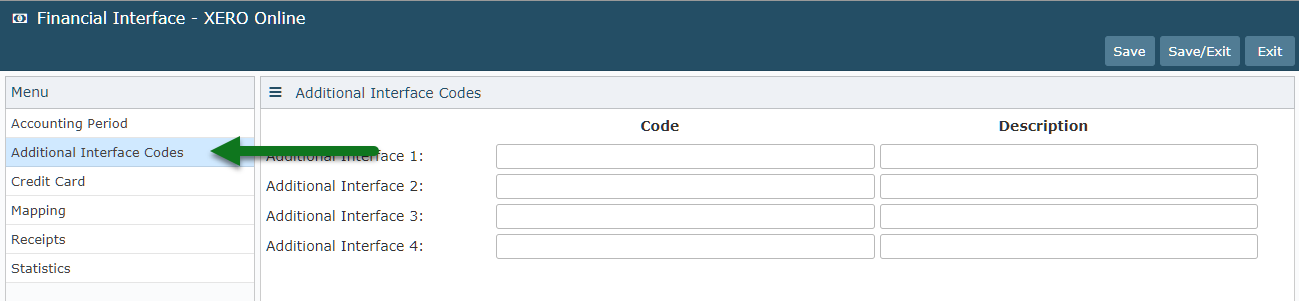
Enter Tracking Category 1 in Additional Interface 1.
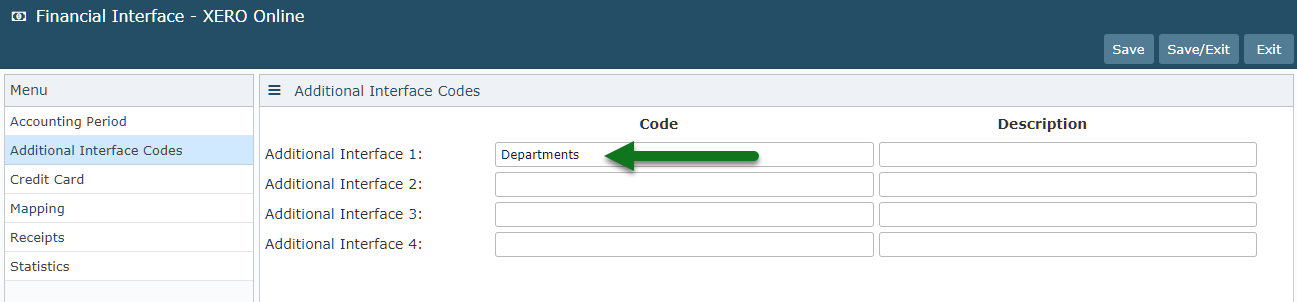
Enter Tracking Category 2 in Additional Interface 2.
Select 'Save/Exit' to store the changes made.

Financial Exports to Xero made from RMS after these changes will include the Xero Tracking Categories setup against the relevant transactions.