Area Inventory
Add an Inventory Item to an Area in RMS.
Area Inventory is the record of Inventory Items on an Area.
-
Information
-
Setup
- Add Button
Information
Area Inventory is the record of Inventory Items on an Area.
An Area is the physical space available for a Reservation within a Category.
The Category Classification determines the type of Reservation available for an Area in that Category.
An Inventory Item is an appliance or piece of furniture that can be recorded on an Area for simplified stocktake, reporting and maintenance.
Area Inventory includes the ability to record the date purchased, quantity and monetary value.

Category, Area, Reservation, Guest and Rate are default System Labels that can be customised.

System Administrators will require Security Profile access to setup this feature.
-
Setup
- Add Button
Setup
Have your System Administrator complete the following.
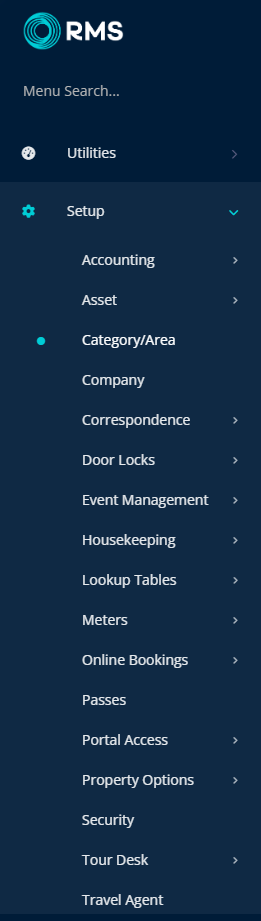
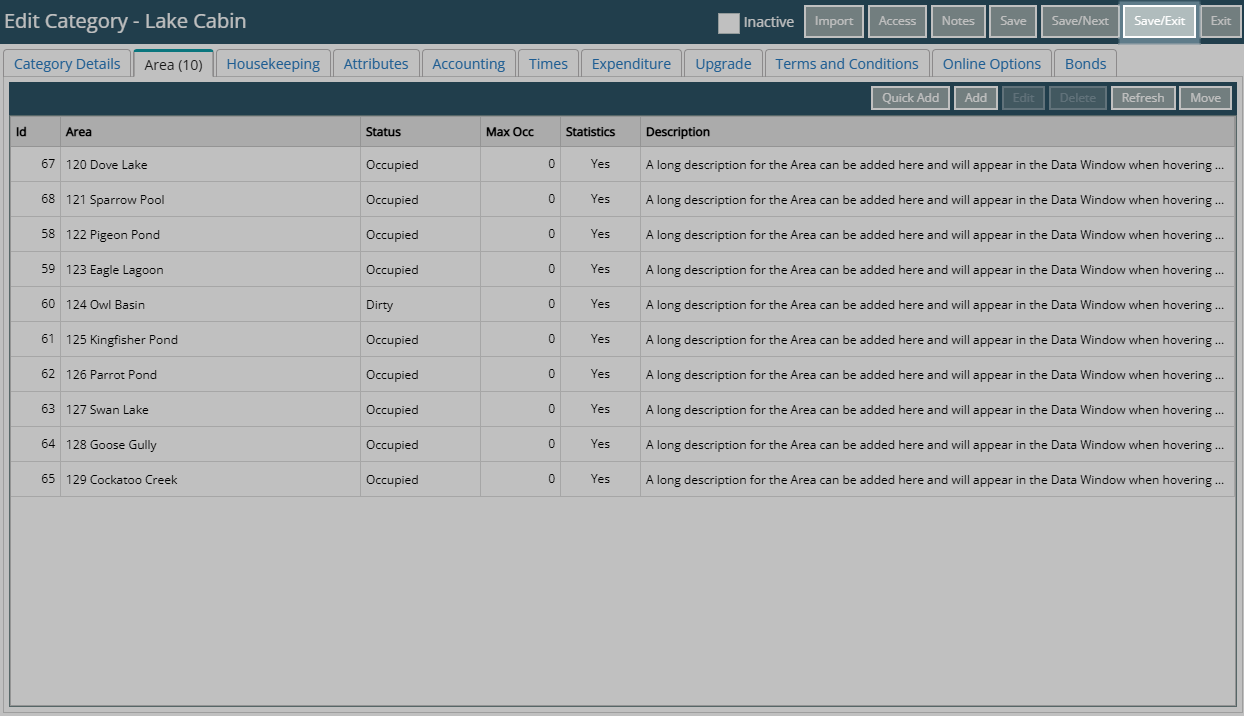
- Go to Setup > Category/Area in the Side Menu of RMS.
- Select the
 'Edit' icon on an existing Category.
 - Navigate to the 'Area' tab.
- Select an existing Area and choose 'Edit'.
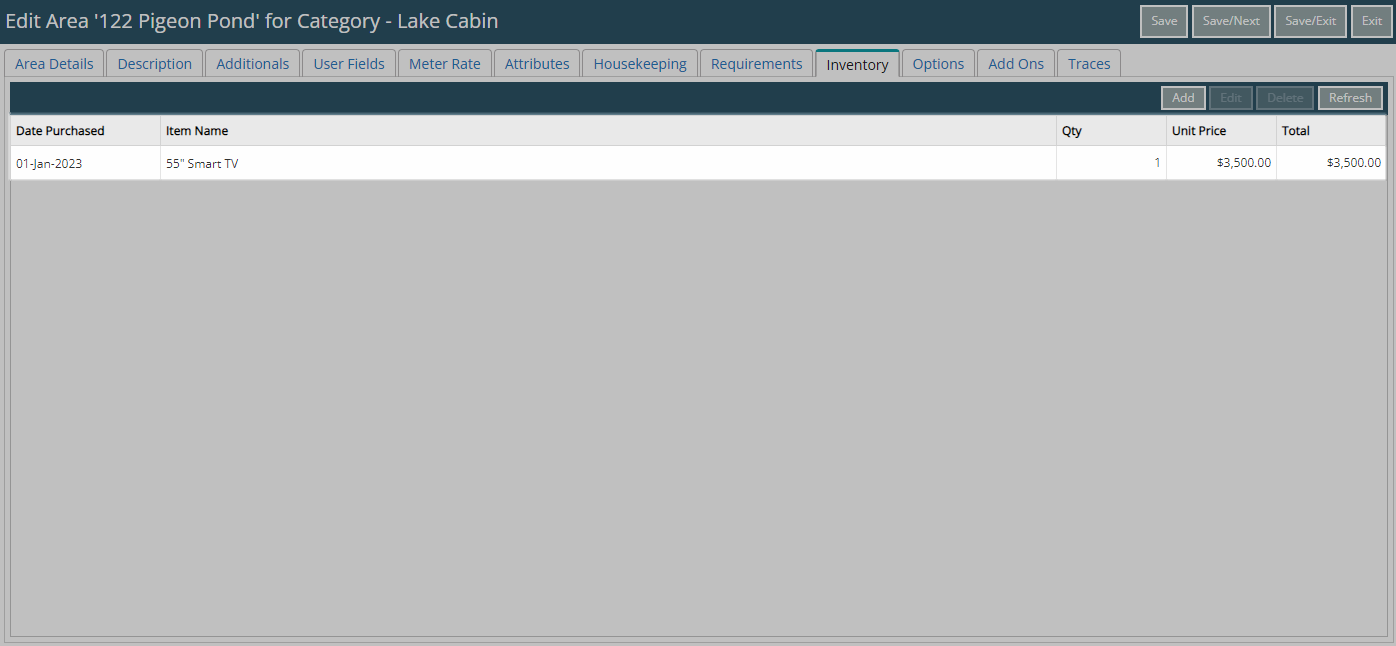
- Navigate to the 'Inventory' tab.
- Select 'Add'.
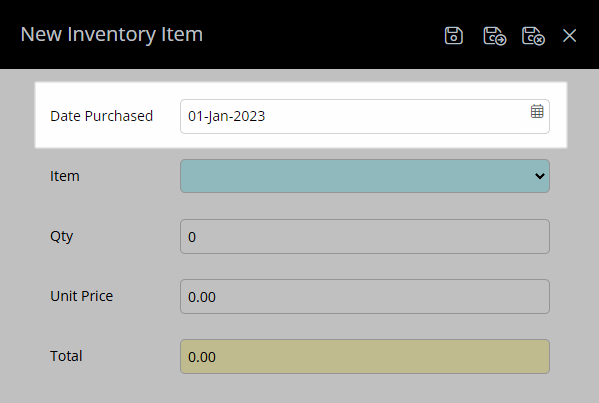
- Select the Date Purchased.
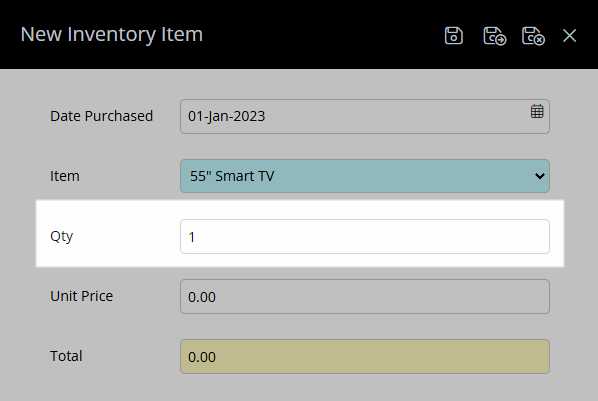
- Select an Inventory Item.
- Enter the Quantity.
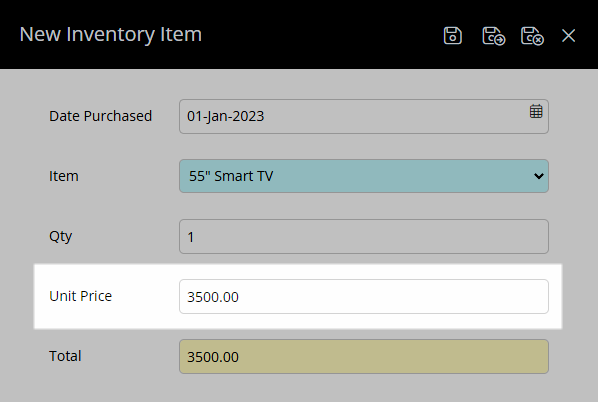
- Enter the Unit Price.
- Save/Exit.

The Unit Price entered is per item and will be multiplied by the entered Quantity to calculate the Total Value.
-
Guide
- Add Button
Guide
Go to Setup > Category/Area in the Side Menu of RMS.
Select the ![]() 'Edit' icon on an existing Category.
'Edit' icon on an existing Category.

Navigate to the 'Area' tab.
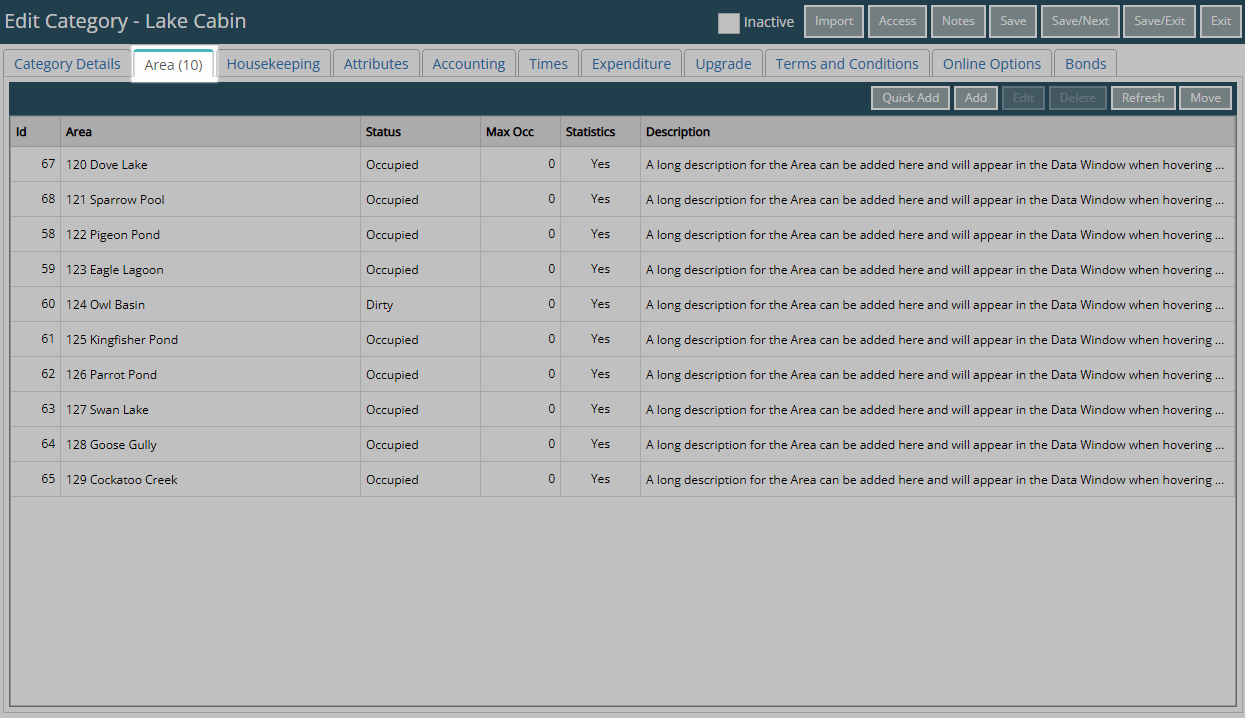
Select an existing Area and choose 'Edit'.

Navigate to the 'Inventory' tab.
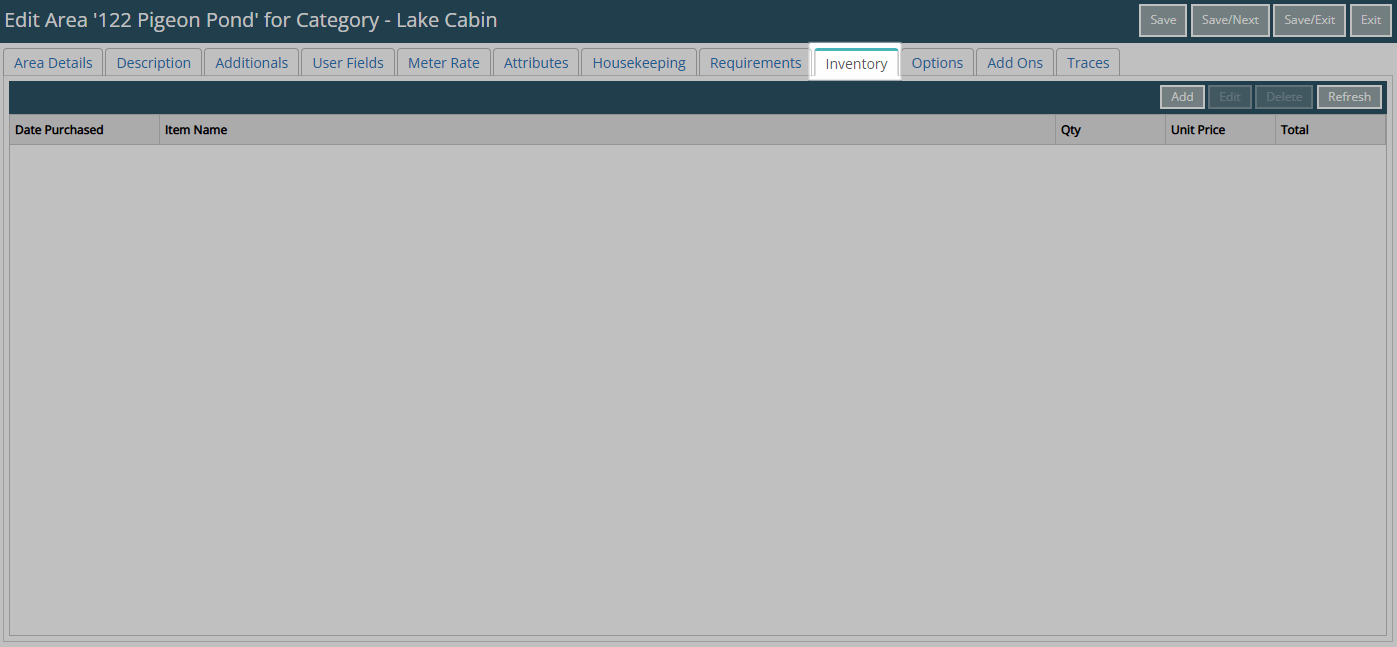
Select 'Add'.
Select the Date Purchased.
Select an Inventory Item.

Enter the Quantity.
Enter the Unit Price.
Select the  'Save/Exit' icon to store the changes made and return to the Area.

Select 'Save/Exit' to store the changes made and leave the Area.
Select 'Save/Exit' to store the changes made and leave the Category.
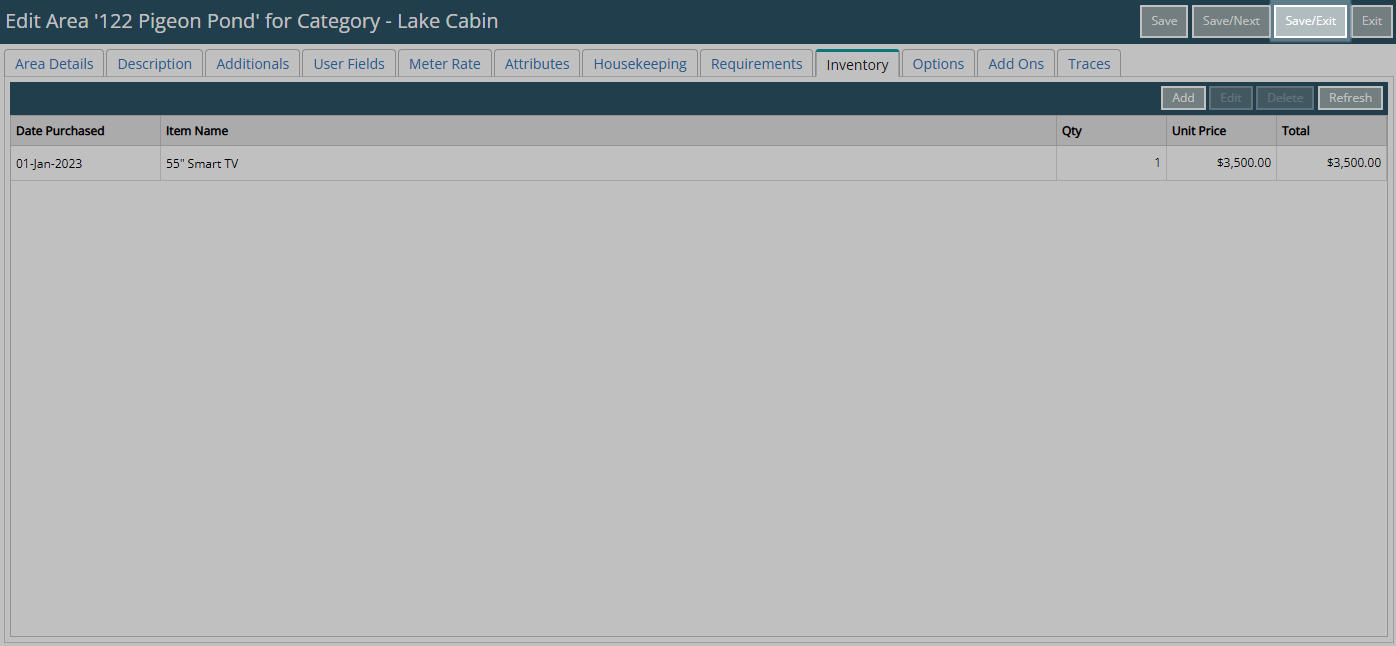
The Inventory Items added to the Area will be available as a record on the Area.
Setup
Have your System Administrator complete the following.
- Go to Setup > Category/Area in the Side Menu of RMS.
- Select the 'Edit' icon on an existing Category.
- Navigate to the 'Area' tab.
- Select an existing Area and choose 'Edit'.
- Navigate to the 'Inventory' tab.
- Select 'Add'.
- Select the Date Purchased.
- Select an Inventory Item.
- Enter the Quantity.
- Enter the Unit Price.
- Save/Exit.
The Unit Price entered is per item and will be multiplied by the entered Quantity to calculate the Total Value.
-
Guide
- Add Button
Guide
Go to Setup > Category/Area in the Side Menu of RMS.
Select the ![]() 'Edit' icon on an existing Category.
'Edit' icon on an existing Category.
Navigate to the 'Area' tab.
Select an existing Area and choose 'Edit'.
Navigate to the 'Inventory' tab.
Select 'Add'.
Select the Date Purchased.
Select an Inventory Item.
Enter the Quantity.
Enter the Unit Price.
Select the 'Save/Exit' icon to store the changes made and return to the Area.
Select 'Save/Exit' to store the changes made and leave the Area.
Select 'Save/Exit' to store the changes made and leave the Category.
The Inventory Items added to the Area will be available as a record on the Area.