Single Sign On
Setup Single Sign On in RMS.
Single Sign On (SSO) allows users to access multiple applications using a single login with an Identity Provider.
-
Information
-
Setup
- Add Button
Information
Single Sign On (SSO) centralises user authentication to a single Identity Provider (IdP) that can provide access to multiple configured applications.
Activating SSO in RMS will require users to be authenticated by the Identity Provider to access RMS.

RMS must be setup in the Indentity Provider prior to activating SSO in RMS.
Activating SSO in RMS without completing the neccessary setup in the IdP will lock all users out of RMS.
-
Setup
- Add Button
Setup
The following setup will need to be completed by the IT Administrator and RMS System Administrator.
-
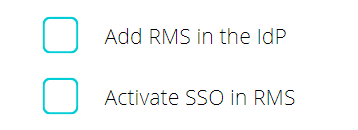
Step 1 - Add RMS in the IdP
- Add Button
Step 1 - Add RMS in the IdP
This step is performed outside of RMS and should be completed by the IT Administrator.
Add RMS as a SAML Application or Endpoint with the Identity Provider (IdP) using the below information.
RMS Entity ID: https://app.rmscloud.com
RMS Digital Registration Card Entity ID: https://regocard.rmscloud.com/
Assertion URL: https://[environment][appname][datacentre#].rmscloud.com/SAML/Assertion
Login URL: https://[environment][appname][datacentre#].rmscloud.com/sso/[RMSclientID#]
RMS URL Example: https://app2.rmscloud.com

The complete property specific URL can be obtained by logging into RMS using an Internet Browser and copying the URL after successful login.

IT Administrators should consult the documentation of their Identity Provider for further assistance with this step.
Complete the following before continuing.
-
Step 2 - Setup SSO in RMS
- Add Button
Step 2 - Setup SSO in RMS
After RMS has been added to the Identity Provider, SSO can be activated in RMS.
Selecting the SSO Username Type as 'Federation ID' will require a Federation ID to be setup on all RMS Users before continuing.

SSO cannot be trialled independently in the RMS Training Database.
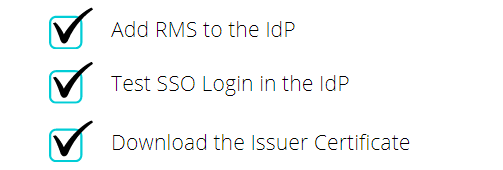
Use the 'Test Login' or 'Test Application' feature within the IdP to ensure RMS has been added correctly prior to activating SSO in RMS.
-
Setup
- Add Button
Setup
Have your System Administrator complete the following.
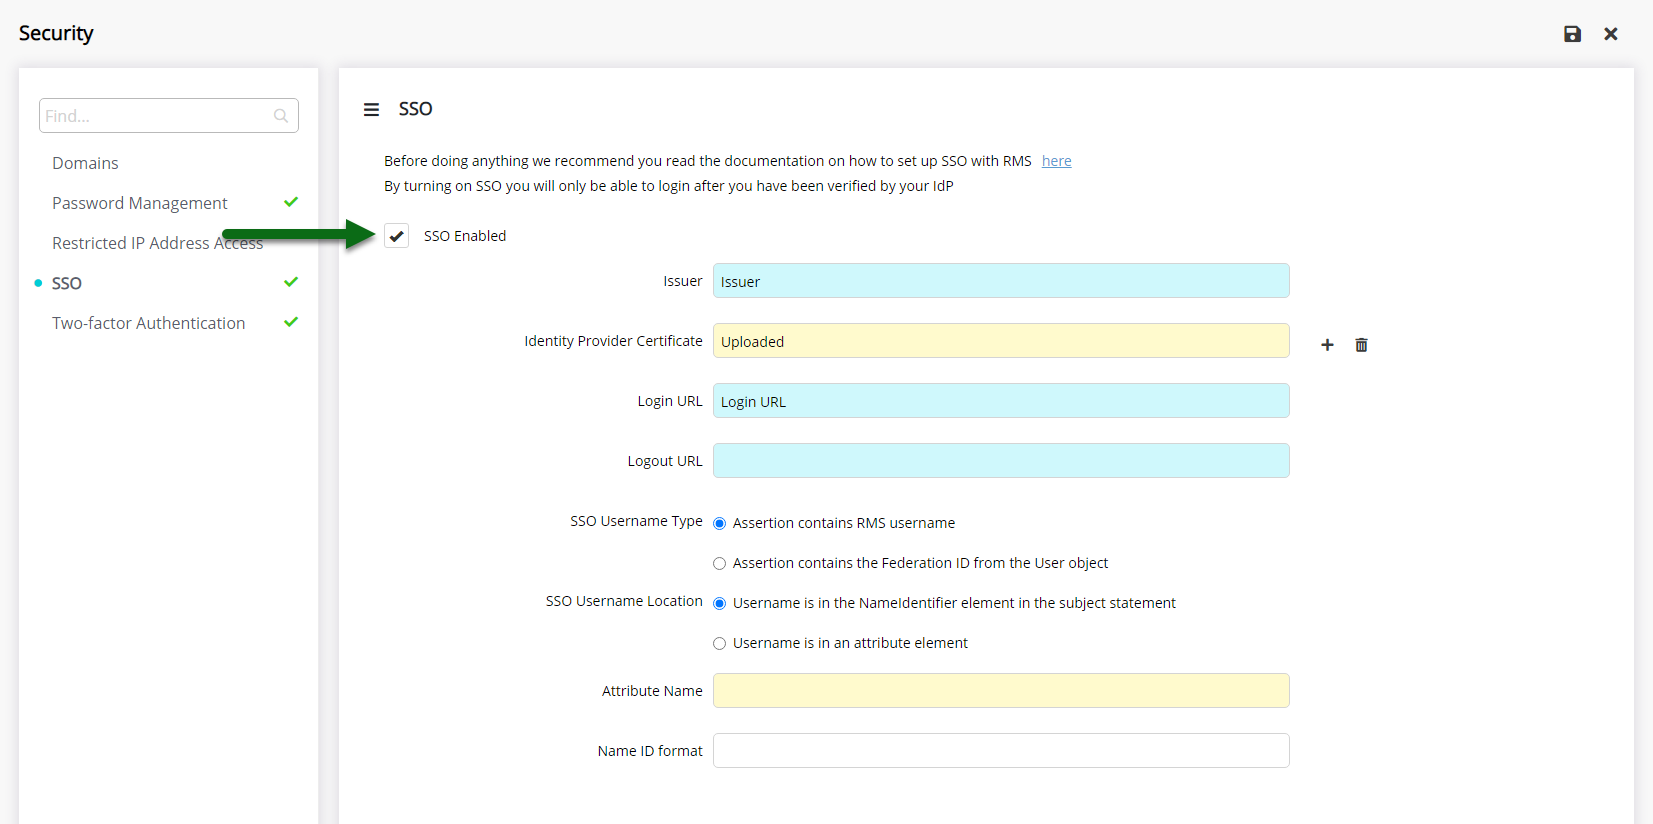
- Go to Setup > Security in RMS.
- Navigate to the 'SSO' tab.
- Select the checkbox 'SSO Enabled'.
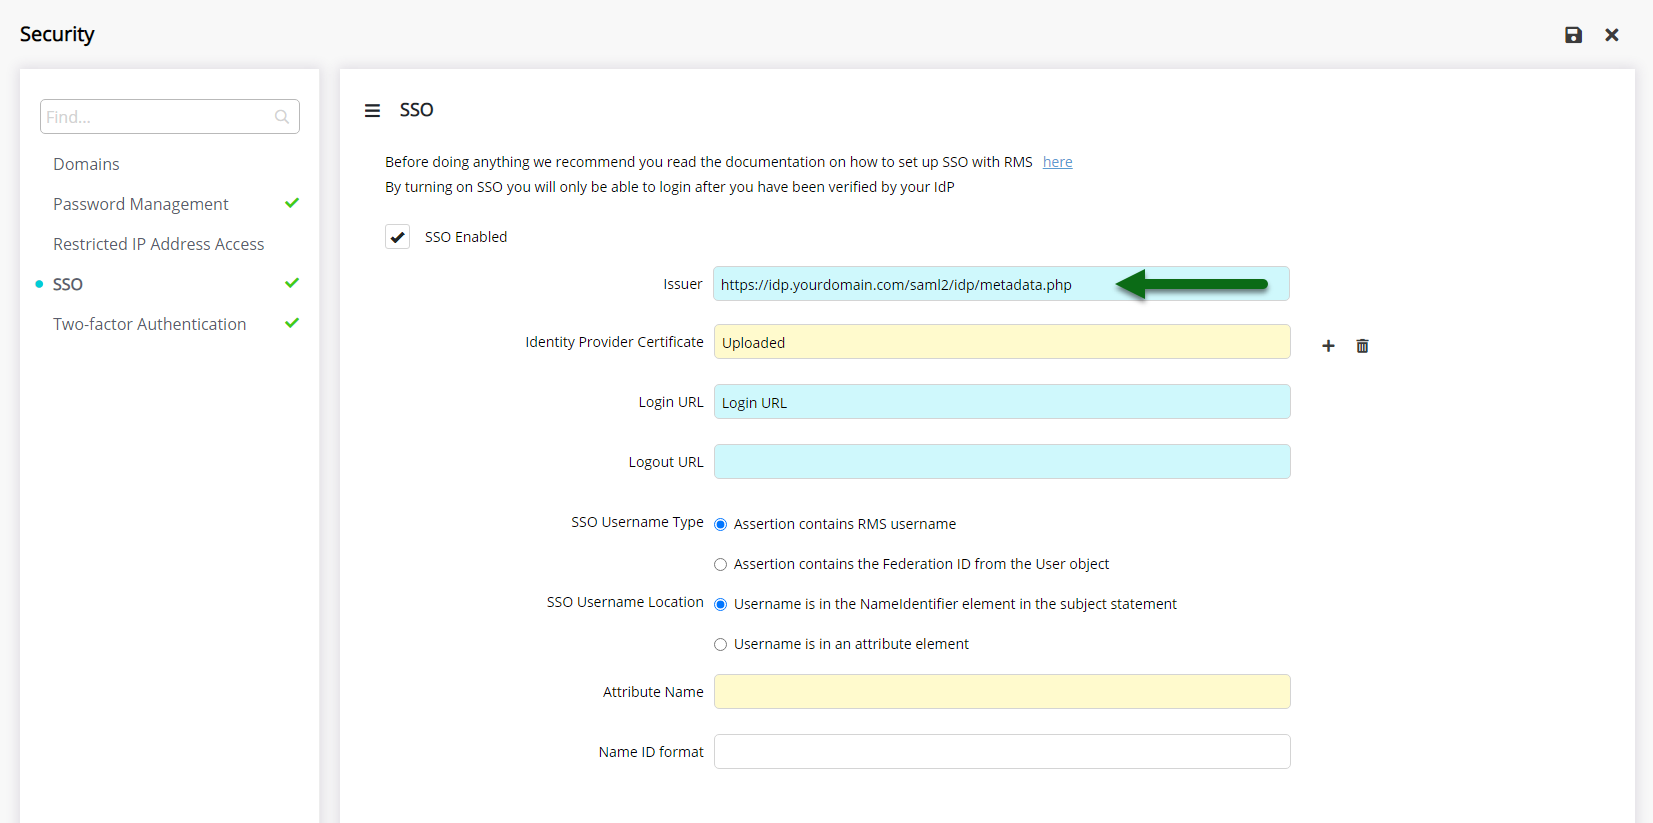
- Enter the Issuer.
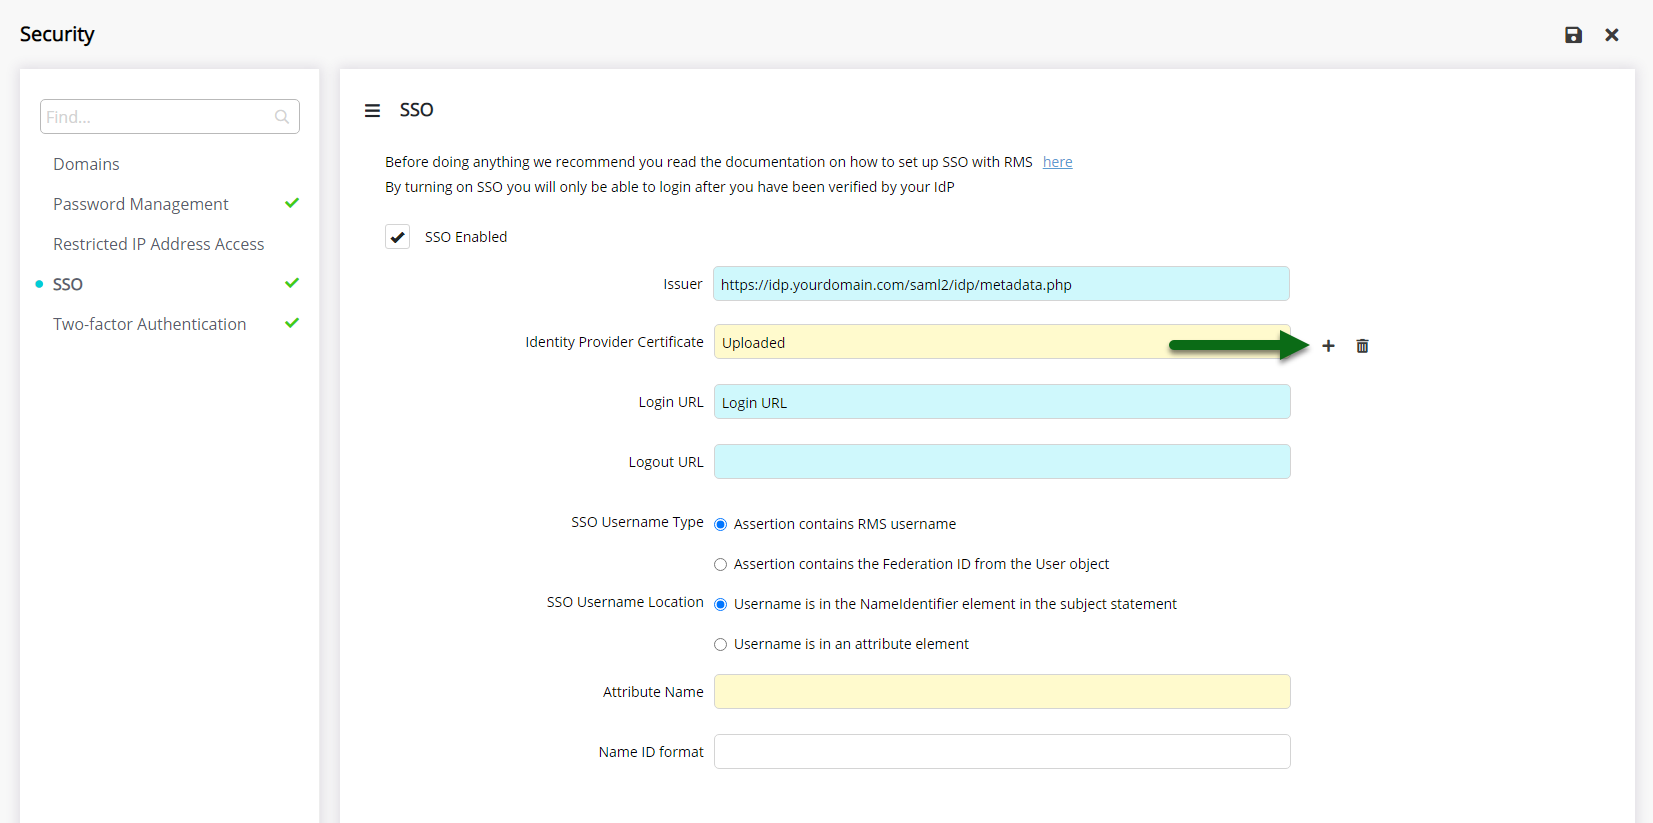
- Upload the IdP Issuer Certificate.
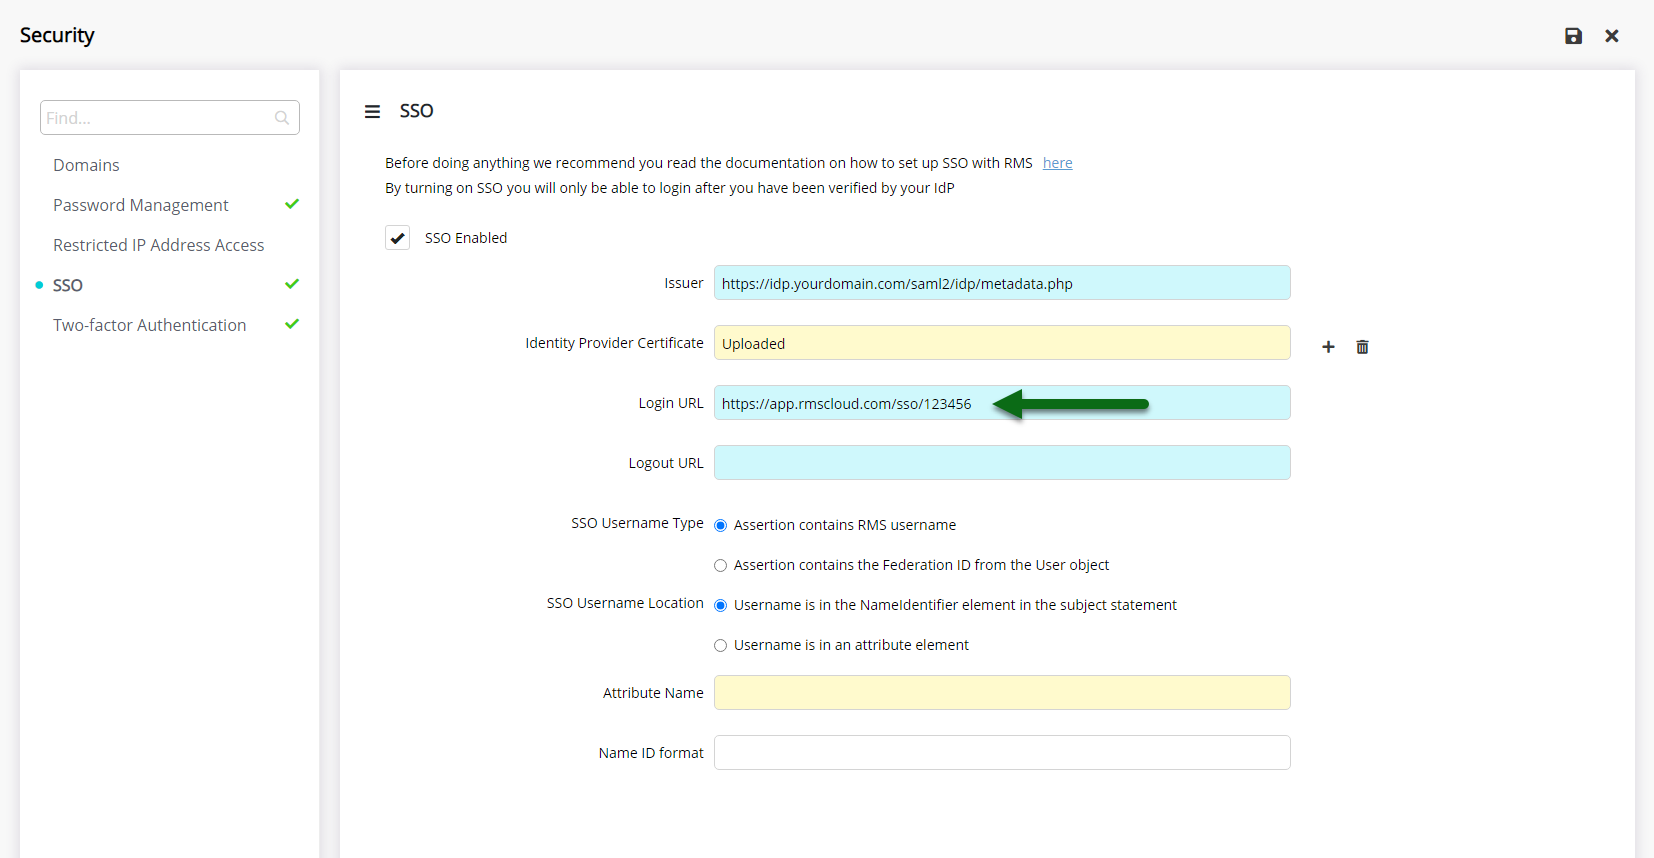
- Enter the Login URL.
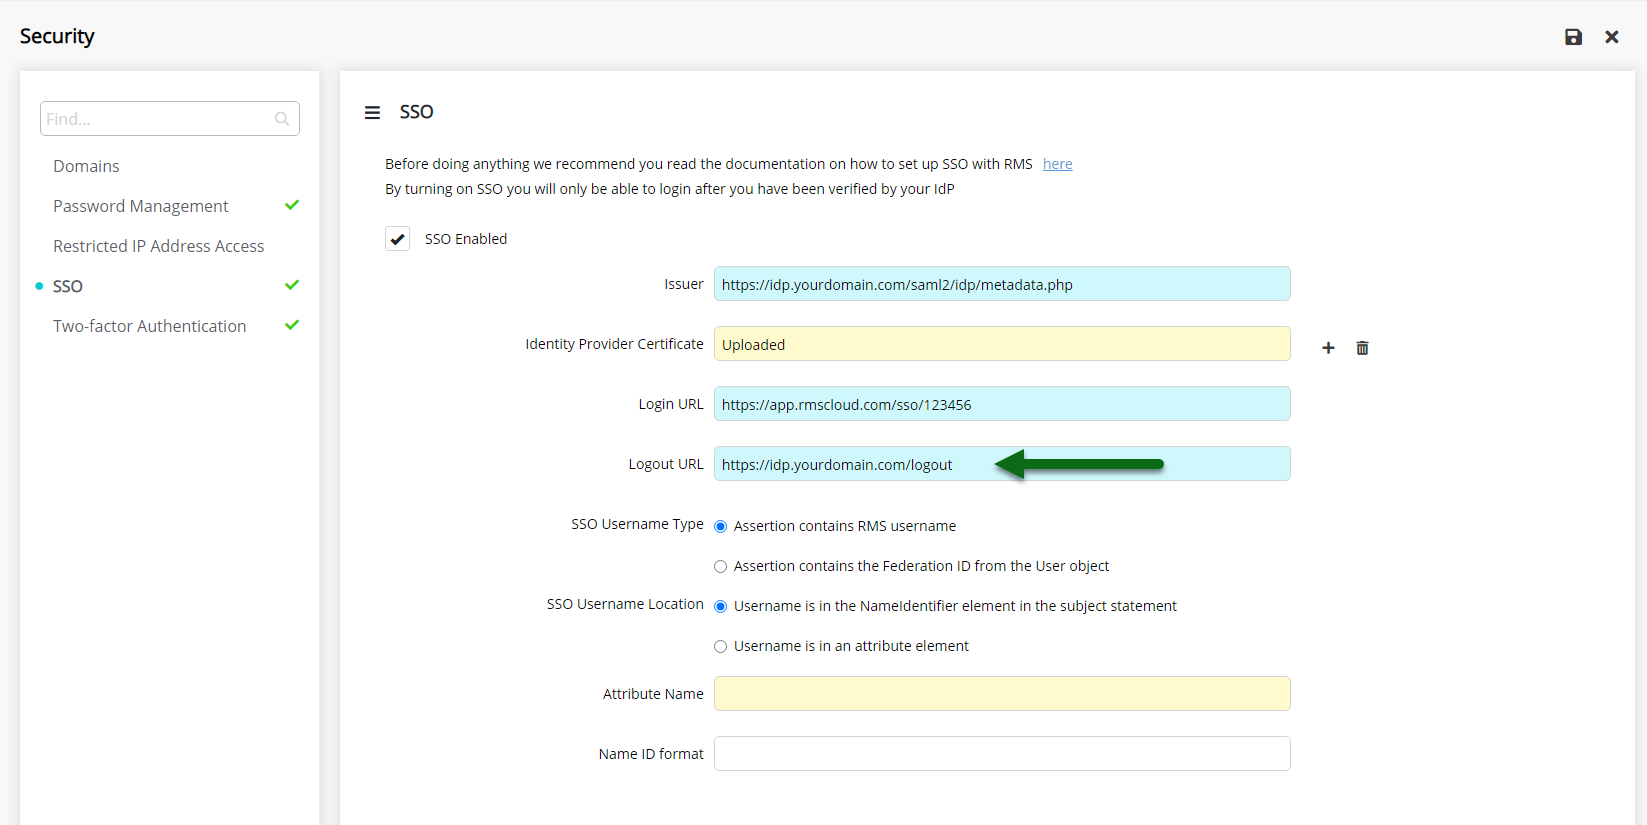
- Enter the Logout URL.
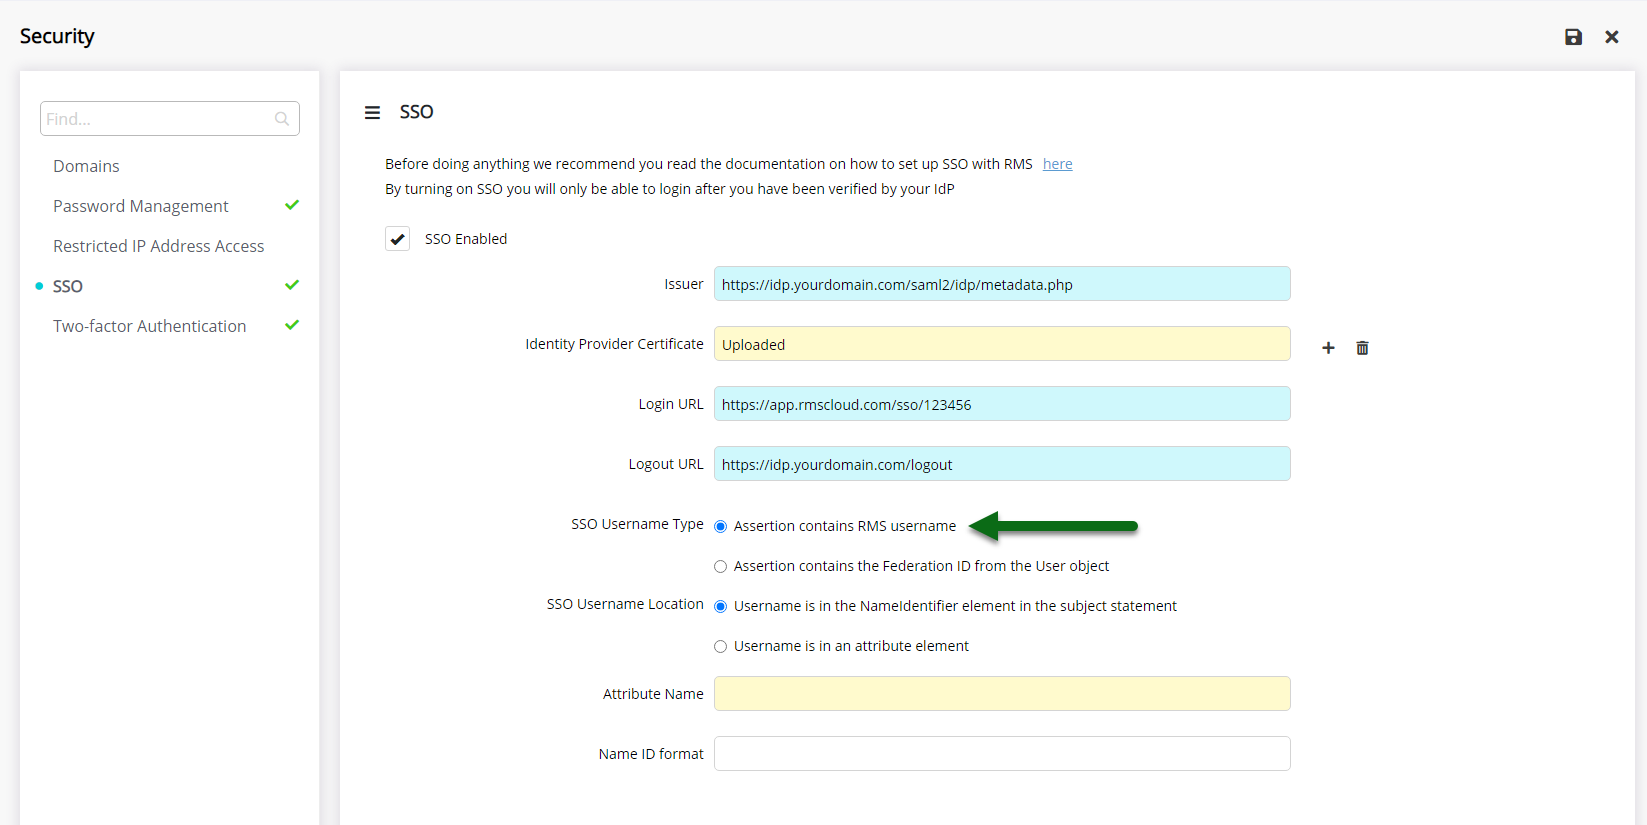
- Select the SSO Username Type.
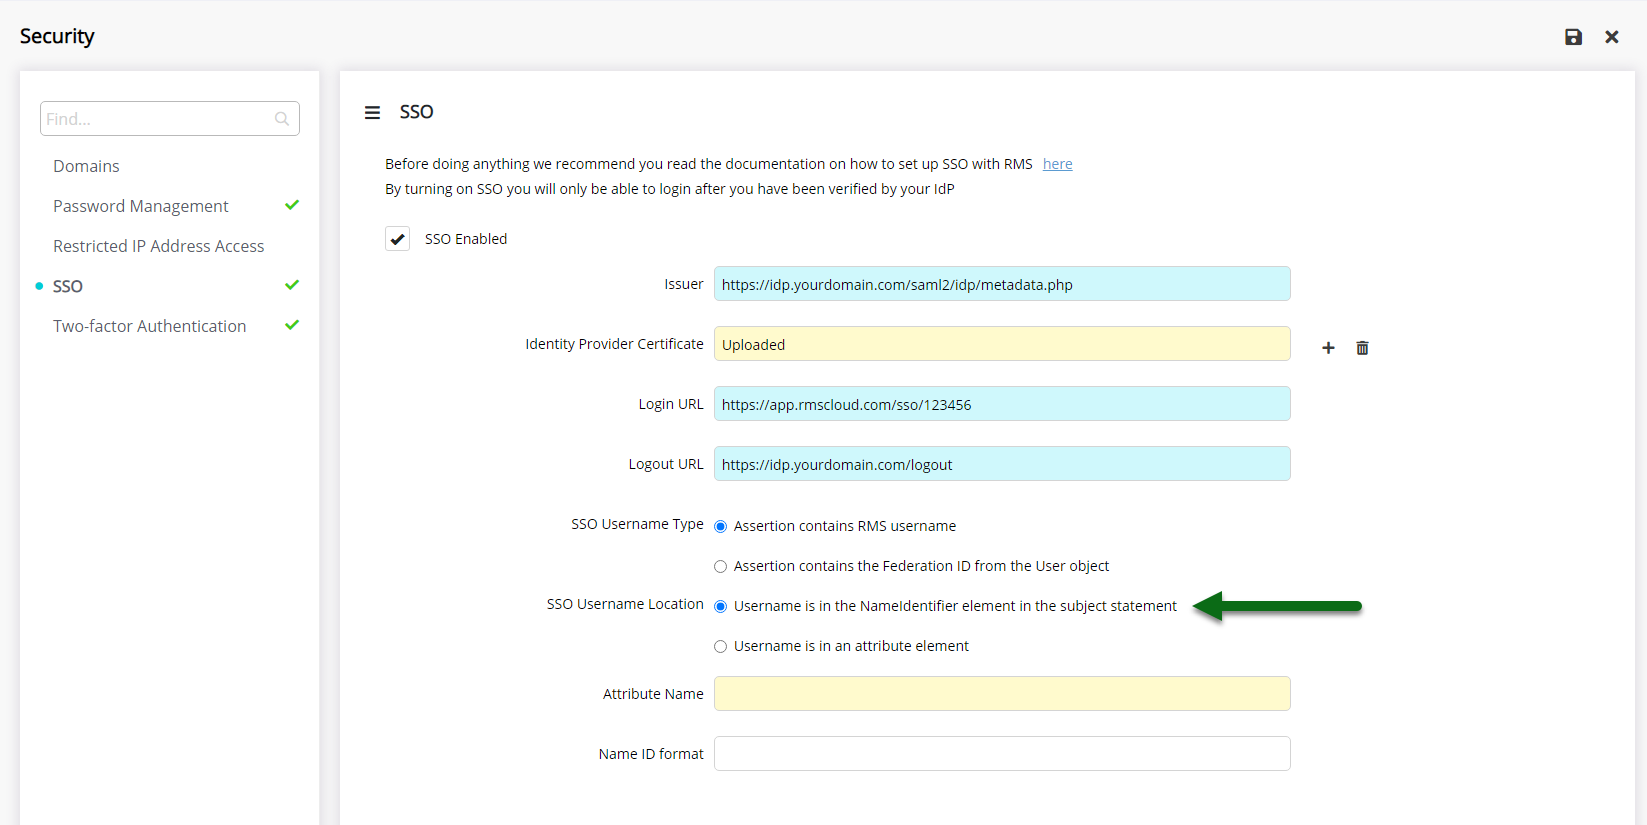
- Select the SSO Username Location.
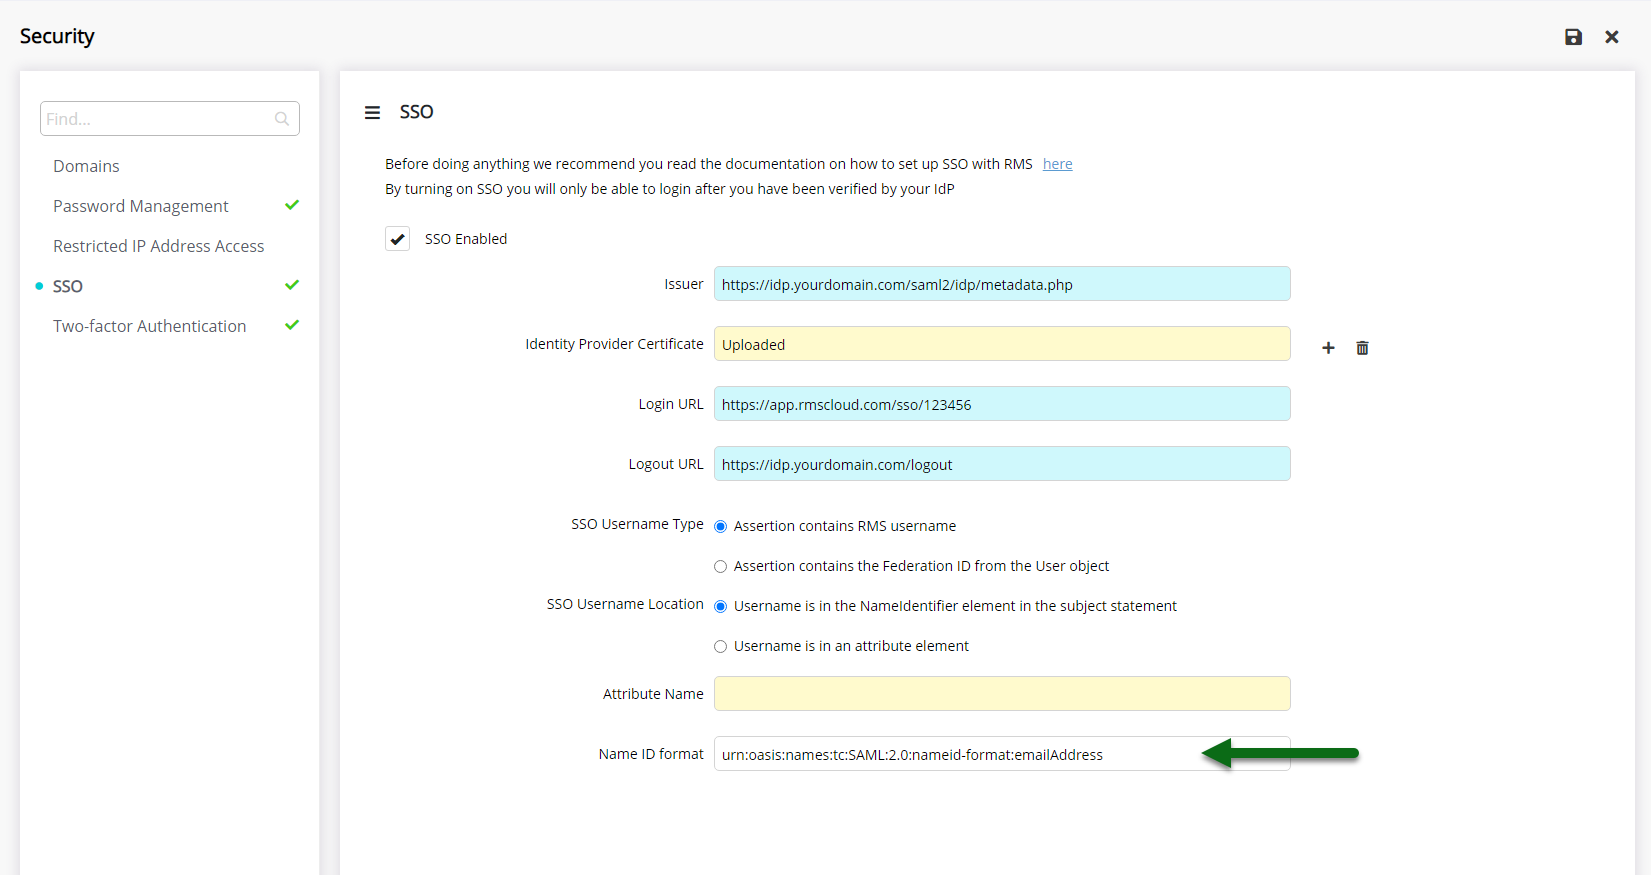
- Optional: Enter the Name ID Format.
- Select 'Save'.

Users will be locked out of RMS if the appropriate setup and testing has not been completed in the IdP before saving.

IdP Issuer Certificates will be in the file format of .txt .cer or .pfx.
Selecting the SSO Username Type as 'Federation ID' requires a Federation ID to be setup on all RMS users before continuing.
Selecting the SSO Username Location as 'Attribute Element' requires an Attribute Name to be specified.
-
Guide
-
Finish
- Add Button
Guide
Go to Setup > Security in RMS.
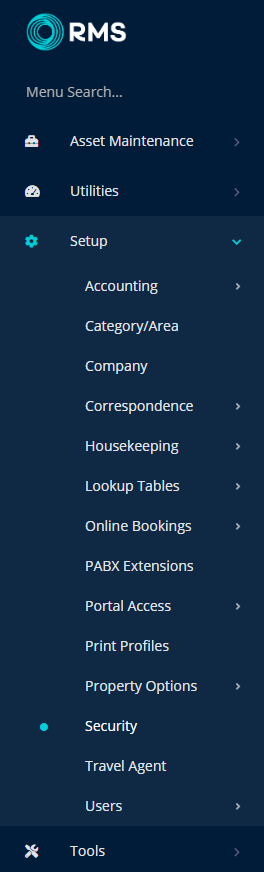
Navigate to the 'SSO' tab.
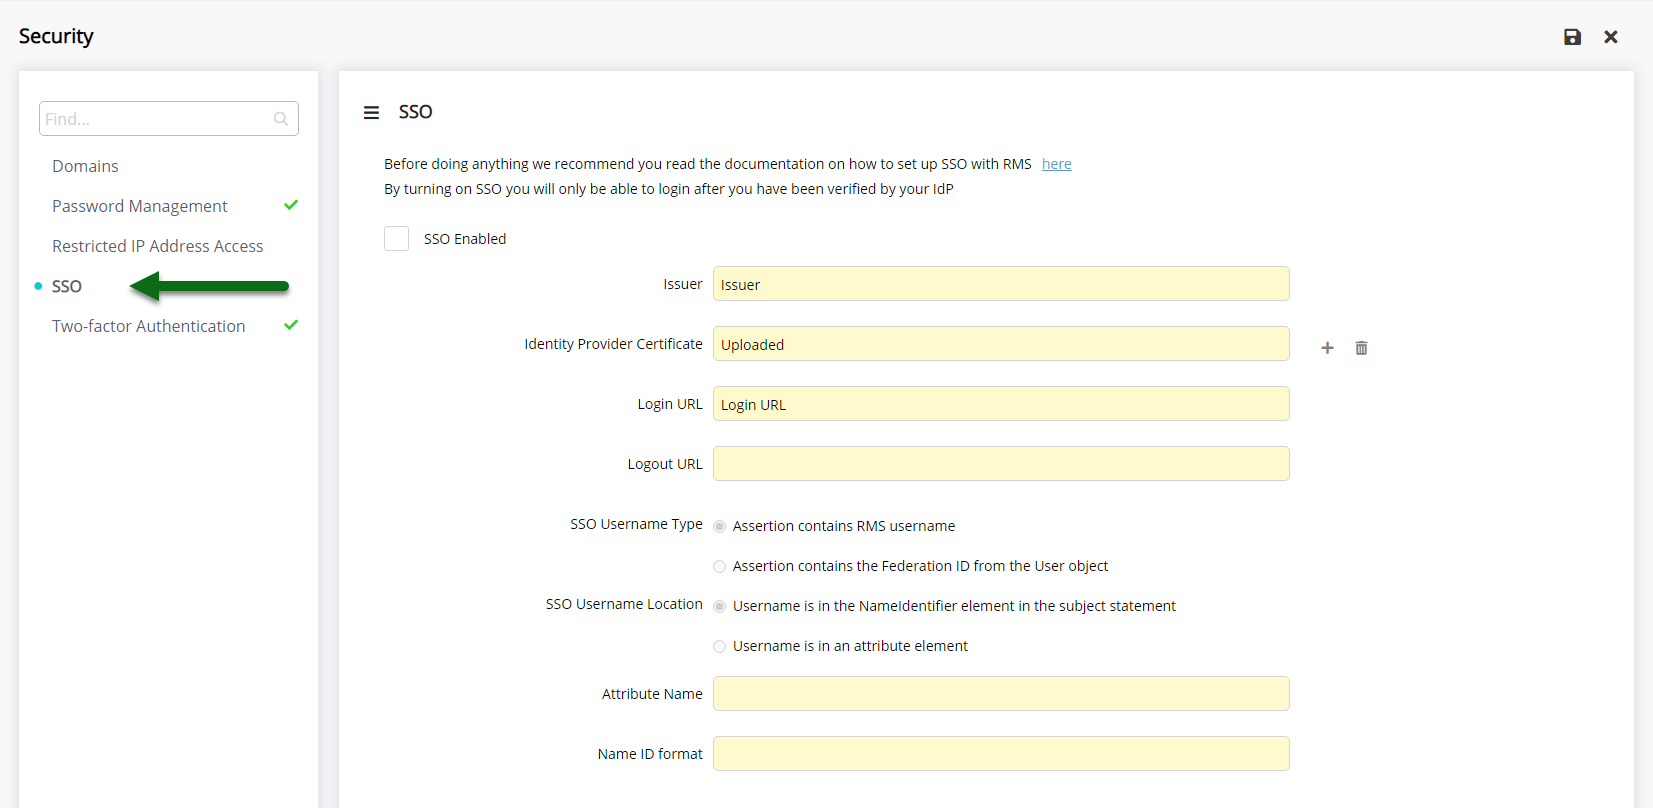
Select the checkbox 'SSO Enabled'.
Enter the Issuer.
Upload the IdP Issuer Certificate.
Enter the Login URL.
Enter the Logout URL.
Select the SSO Username Type.
Select the SSO Username Location.
Optional: Enter the Name ID Format.
Select 'Save' to activate SSO in RMS and store the changes made.
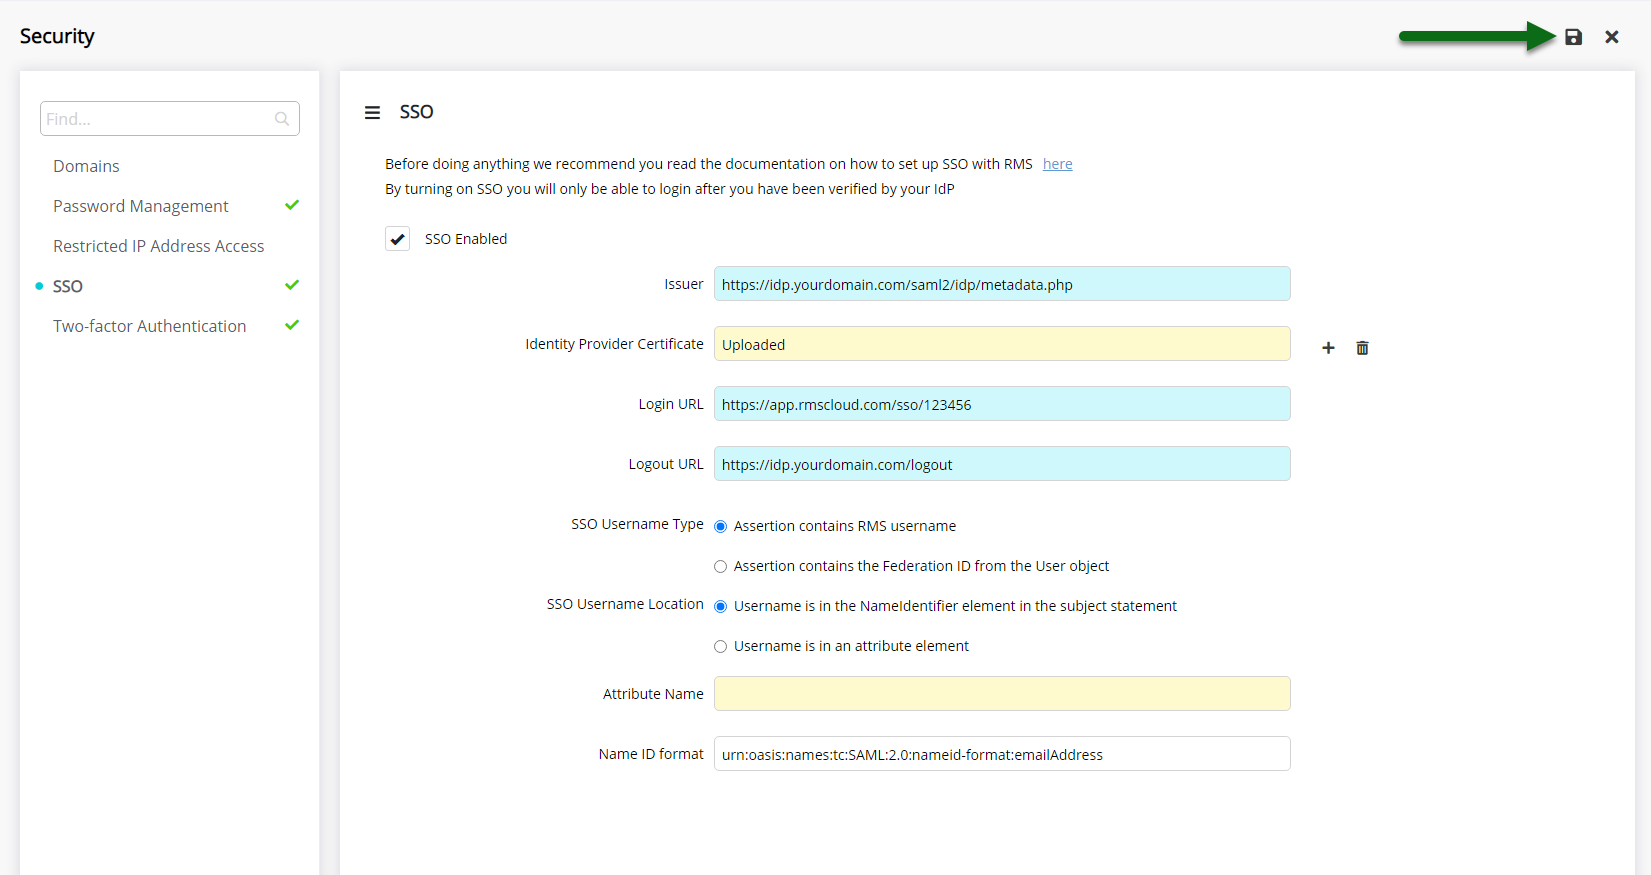

Users will be locked out of RMS if the appropriate setup and testing has not been completed in the IdP before saving.
-
Finish
- Add Button
Finish
SSO is now active in RMS.
Users will need to be logged in and authenticated with the Identity Provider to gain access to RMS.

Use the below URL in the Internet Browser to access the RMS Training Database when SSO is active in RMS.
Replace [RMSClientID#] in the below URL with the property's RMS Client ID.
https://app.rmscloud.com/sso/[RMSclientID#]/training
Finish
SSO is now active in RMS.
Users will need to be logged in and authenticated with the Identity Provider to gain access to RMS.
Use the below URL in the Internet Browser to access the RMS Training Database when SSO is active in RMS.
Replace [RMSClientID#] in the below URL with the property's RMS Client ID.
https://app.rmscloud.com/sso/[RMSclientID#]/training
Setup
The following setup will need to be completed by the IT Administrator and RMS System Administrator.
-
Step 1 - Add RMS in the IdP
- Add Button
Step 1 - Add RMS in the IdP
This step is performed outside of RMS and should be completed by the IT Administrator.
Add RMS as a SAML Application or Endpoint with the Identity Provider (IdP) using the below information.
RMS Entity ID: https://app.rmscloud.com
RMS Digital Registration Card Entity ID: https://guestportal.rmscloud.com/DRC
Assertion URL: https://[environment][appname][datacentre#].rmscloud.com/SAML/Assertion
Login URL: https://[environment][appname][datacentre#].rmscloud.com/sso/[RMSclientID#]
RMS URL Example: https://app2.rmscloud.com
The complete property specific URL can be obtained by logging into RMS using an Internet Browser and copying the URL after successful login.
IT Administrators should consult the documentation of their Identity Provider for further assistance with this step.
Complete the following before continuing.
-
Step 2 - Setup SSO in RMS
- Add Button
Step 2 - Setup SSO in RMS
After RMS has been added to the Identity Provider, SSO can be activated in RMS.
Selecting the SSO Username Type as 'Federation ID' will require a Federation ID to be setup on all RMS Users before continuing.
SSO cannot be trialled independently in the RMS Training Database.
Use the 'Test Login' or 'Test Application' feature within the IdP to ensure RMS has been added correctly prior to activating SSO in RMS.
-
Setup
- Add Button
Setup
Have your System Administrator complete the following.
- Go to Setup > Security in RMS.
- Navigate to the 'SSO' tab.
- Select the checkbox 'SSO Enabled'.
- Enter the Issuer.
- Upload the IdP Issuer Certificate.
- Enter the Login URL.
- Enter the Logout URL.
- Select the SSO Username Type.
- Select the SSO Username Location.
- Optional: Enter the Name ID Format.
- Select 'Save'.

Users will be locked out of RMS if the appropriate setup and testing has not been completed in the IdP before saving.
IdP Issuer Certificates will be in the file format of .txt .cer or .pfx.
Selecting the SSO Username Type as 'Federation ID' requires a Federation ID to be setup on all RMS users before continuing.
Selecting the SSO Username Location as 'Attribute Element' requires an Attribute Name to be specified.
-
Guide
-
Finish
- Add Button
Guide
Go to Setup > Security in RMS.
Navigate to the 'SSO' tab.
Select the checkbox 'SSO Enabled'.
Enter the Issuer.
Upload the IdP Issuer Certificate.
Enter the Login URL.
Enter the Logout URL.
Select the SSO Username Type.
Select the SSO Username Location.
Optional: Enter the Name ID Format.
Select 'Save' to activate SSO in RMS and store the changes made.
Users will be locked out of RMS if the appropriate setup and testing has not been completed in the IdP before saving.
-
Finish
- Add Button
Finish
SSO is now active in RMS.
Users will need to be logged in and authenticated with the Identity Provider to gain access to RMS.
Use the below URL in the Internet Browser to access the RMS Training Database when SSO is active in RMS.
Replace [RMSClientID#] in the below URL with the property's RMS Client ID.
https://app.rmscloud.com/sso/[RMSclientID#]/training