IDeaS
Information on the IDeaS interface available in RMS.
IDeaS provide industry-leading revenue management solutions for businesses of all types and sizes in the global hospitality and travel industries.
IDeaS transform the appropriate data into clear and actionable insight so that customers can price, forecast and report with speed and confidence; improving business performance.
The IDeaS interfaces available are not included in the base RMS subscription.
-
Information
-
Setup
- Add Button
Information
There are 3 interface options available between IDeaS and RMS.
The IDeaS G2 interface allows IDeaS to receive a daily update from RMS including Occupancy Details, Rate Types & Market Segments which will be used in IDeaS to provide revenue management recommendations.
The IDeaS G3 interface allows IDeaS to receive a daily update from RMS including Occupancy Details, Rate Types & Market Segments with the ability to override the Rate Amounts and Person Base for mapped Rate Types based on the IDeaS algorithms.
The IDeaS G3 - Rate Manager Premium interface includes everything from the G3 interface with the added option of sending up to 3 additional daily updates to IDeaS (IDeaS Intra Day Processing).
IDeaS G3 will update Rate Amounts using occupancy based pricing. Manual Rate Overrides on the reservation will ignore the rate amount sent from IDeaS.
IDeaS G3 -iDeaS offers a Rate Decision Upload feature with Occupancy-Based Pricing (OBP) as a module; however, RMSCloud does not support OBP when distributing rates to Online Travel Agents (OTAs)

The option 'Allow Moving Reservations Across Properties' cannot be used when interfacing with Revenue Management tools including IDeaS.
Please note, it is not advised to move reservations from a room type with an IdeaS room code, to a room type without an IdeaS room code, as this will result in data discrepancies in the integration
The IDeaS interfaces available are not included in the base RMS subscription.
Contact RMS Sales for more information.
-
Setup
- Add Button
Setup
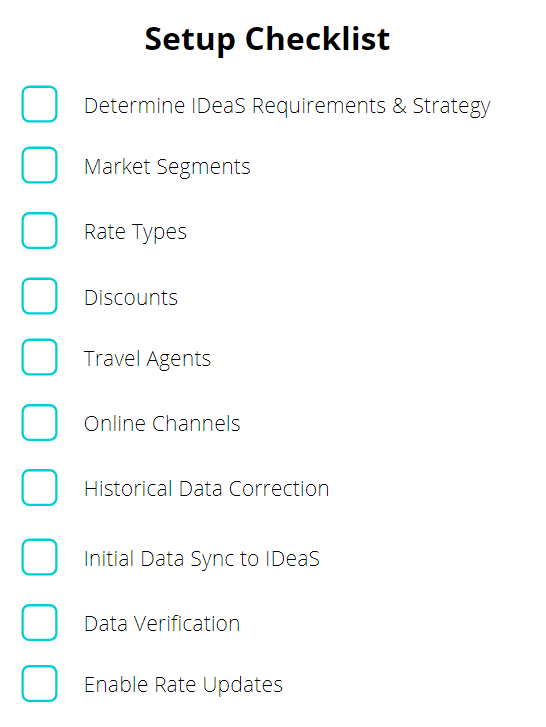
Setup of the IDeaS interface in RMS involves identifying the revenue management strategy, segmenting RMS setup to fit with the identified strategy, activating the interface and completing the first data sync with data verification.
Ensure to complete each step before continuing through the setup process for optimal results.
-
Step 1 - Determine IDeaS Requirements & Strategy
- Add Button
Step 1 - Determine IDeaS Requirements & Strategy
Prior to activating the IDeaS interface the property's RMS data should be reviewed and updated to ensure it is segmented in a way that allows IDeaS to gain a detailed insight into the property's reservation patterns.
The only way IDeaS can provide accurate pricing decisions for the property is if the setup in RMS is segmented to suit the revenue management strategy.
Discuss with IDeaS their system requirements and the property's specific objectives prior to modifying the setup in RMS to ensure optimal results.
Categories & Areas, Market Segments and Rate Types are mandatory requirements in RMS to facilitate the IDeaS decision system to work effectively.
The property's revenue management team should liaise with the IDeaS team to ensure the property's current configuration of these features in RMS will produce the best results from the IDeaS system.
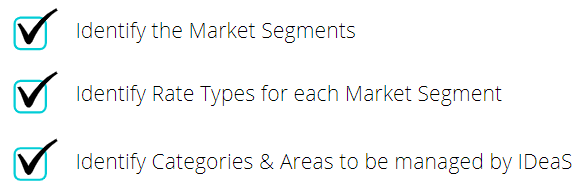
Before continuing to Step 2 ensure that the Market Segments for the property have been identified, the Rate Types applicable to each Market Segment have been determined and the Categories & Areas to be managed by IDeaS have been identified.
-
Step 2 - Market Segments
- Add Button
Step 2 - Market Segments
Market Segments are used in RMS to segment Categories, Areas, Rate Types, Discounts, Travel Agents, Online Channels and Reservations into their respective market categories.
These Market Segments will be used by the IDeaS algorithm to appropriately analyse and make recommendations or adjustments based on the Market Segments allocated in RMS.
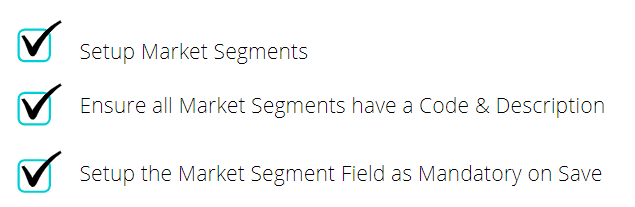
IDeaS will represent the Market Segments setup in RMS using the 'Code' field on the Market Segment.
Setup the Market Segment field as 'Mandatory on Save' for the Reservation Screen to ensure optimal ongoing success with the IDeaS integration.
Before continuing ensure all Market Segments have been setup in RMS and the Market Segment field has been setup as 'Mandatory on Save' for reservations.
-
Step 3 - Rate Types
- Add Button
Step 3 - Rate Types
Rate Types are the charge description or charge type that identifies a particular set of pricing in RMS.
Assigning a Market Segment to a Rate Type in RMS will have that Market Segment automatically populated on a reservation when that Rate Type is selected and enables accurate segmentation for IDeaS analysis.
Rate Types that were used in the past 2 years that are no longer in use should also be updated to include a Code & Market Segment for IDeaS analysis.
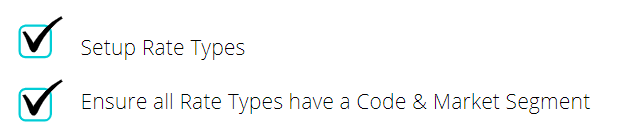
Before continuing ensure all Rate Types & Derived Rate Types have been setup in RMS with a Rate Code & Market Segment.
-
Step 4 - Discounts
- Add Button
Step 4 - Discounts
Discounts are optional setup that can be applied to a reservation or charge to reduce its cost in RMS.
IDeaS will use the Market Segment allocated to the selected Rate Type on a reservation for any Discounts unless that Discount has a separate Market Segment selected on it's setup.
Market Segments setup on a Travel Agent will override any set on the Rate Type for that reservation.
Before continuing ensure any Discounts that apply to a specific market have that Market Segment selected on the Discount Setup.
-
Step 5 - Travel Agents
- Add Button
Step 5 - Travel Agents
Travel Agents are companies or individuals that provide travel and tourism-related activities to individuals.
Market Segments setup on a Travel Agent will override any set on the Discount or Rate Type for that reservation.
Before continuing ensure any Travel Agents that apply to a specific market have that Market Segment selected on their Travel Agent profile.

-
Step 6 - Online Channels
- Add Button
Step 6 - Online Channels
Online Channels include any Online Travel Agents, GDS or Distributors connected with the RMS Channel Manager.
Market Segments setup on an Online Channel will be overridden by any Market Segment setup on the Rate Type selected on the Reservation.
Before continuing ensure any Online Channels that apply to a specific market have that Market Segment selected on the Channel Connection Information.

-
Step 7 - Historical Data Correction
- Add Button
Step 7 - Historical Data Correction
The IDeaS algorithm requires at least 12-24 months historical data to complete analysis for recommendations and adjustments.
If setup changes were made during Steps 2-6 a correction of historical data in RMS will be required before continuing.
RMS has created a collection of data correction algorithms for updating historical data to prevent the need for users making manual adjustments in RMS.
Due to the nature of the RMS Correction Algorithms the changes cannot be reversed.
Before continuing ensure all neccessary Market Segment setup has been completed (Steps 2 - 6) and has been verified by the property's System Administrator and Revenue Management Team then log a Service Request for an IDeaS Historical Data Correction to be performed.

-
Step 8 - Initial Data Sync to IDeaS
- Add Button
Step 8 - Initial Data Sync to IDeaS
After RMS has confirmed completion of the IDeaS Historical Data Correction the property's System Administrator can setup IDeaS as the property's Rate Manager and complete an initial data sync to IDeaS.
The initial data sync to IDeaS will commence within 30 minutes of completing setup of IDeaS as the property's Rate Manager and can take up to 6 hours to complete the full 12-24 months of data in RMS.
Before continuing to Step 9 ensure that IDeaS has been setup as the property's Rate Manager (below) and IDeaS have confirmed completion of the initial data sync from RMS.

-
Setup Property Rate Manager
- Add Button
Setup
Have your System Administrator complete the following.
- Go to Setup > Property Options > Property Information in RMS.
- Select 'Edit' on an existing Property.
- Navigate to the 'Rate Manager' tab.
- Select the IDeaS Interface as the Rate Manager Type (G2 or G3).
- Select the Start Date as the date historical data begins in RMS.
- Enter the Chain Code supplied by IDeaS.
- Enter the Hotel Code supplied by IDeaS.
- Enter the Username supplied by IDeaS.
- Enter the Password supplied by IDeaS.
- Select 'Market Segment' as the Group Extract By option.
- For TAX/GST Inclusive property, tick "Send revenue tax exclusive" tick box
- IDeaS G3 - Rate Manager Premium Only: Select the IDeaS Update Times.
- Select the BAR or RACK Rate Type IDeaS will manage and choose the '>' button.
- Save/Exit.
- For Room Code Setup, Go to Setup > Category/Area in RMS. For Accommodation Categories that you wish to send to iDeaS, Go to each category and in Extra Details, enter Room Code in the "Code" Field
-
Guide
-
Step 9 - Data Verification & IDeaS Training
- Add Button
Guide
Go to Setup > Property Options > Property Information in RMS.

Select 'Edit' on an existing Property.

Navigate to the 'Rate Manager' tab.

Select the IDeaS Interface as the Rate Manager Type (G2 or G3).

Select the Start Date as the date historical data begins in RMS.

Enter the Chain Code supplied by IDeaS.

Enter the Hotel Code supplied by IDeaS.

Enter the Username supplied by IDeaS.

Enter the Password supplied by IDeaS.

Select 'Market Segment' as the Group Extract By option.

Select 'Send revenue tax exclusive' tick box for GST inclusive property.

IDeaS G3 - Rate Manager Premium Only: Select the IDeaS Update Times.

Select the Best Available Rate or Rack Rate Type that IDeaS will manage and choose the '>' button.
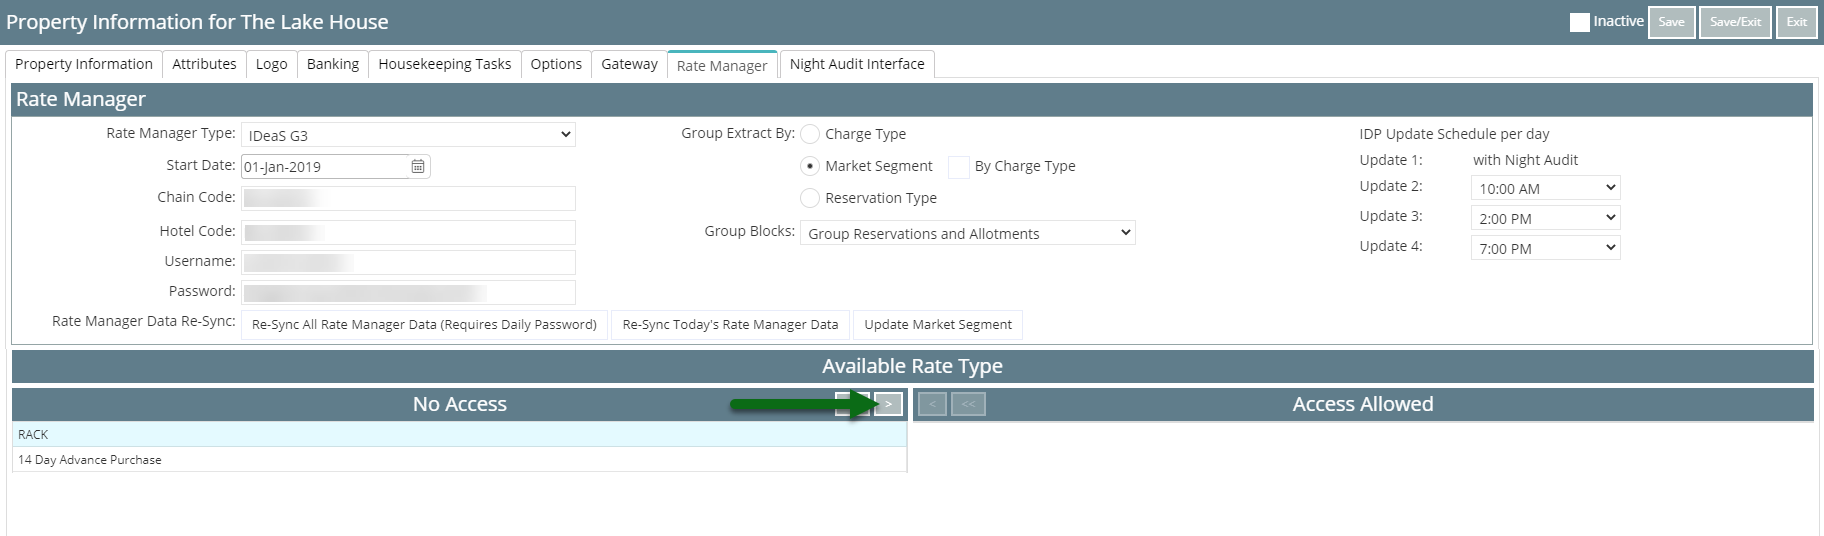
Select 'Save/Exit' to store the changes made.
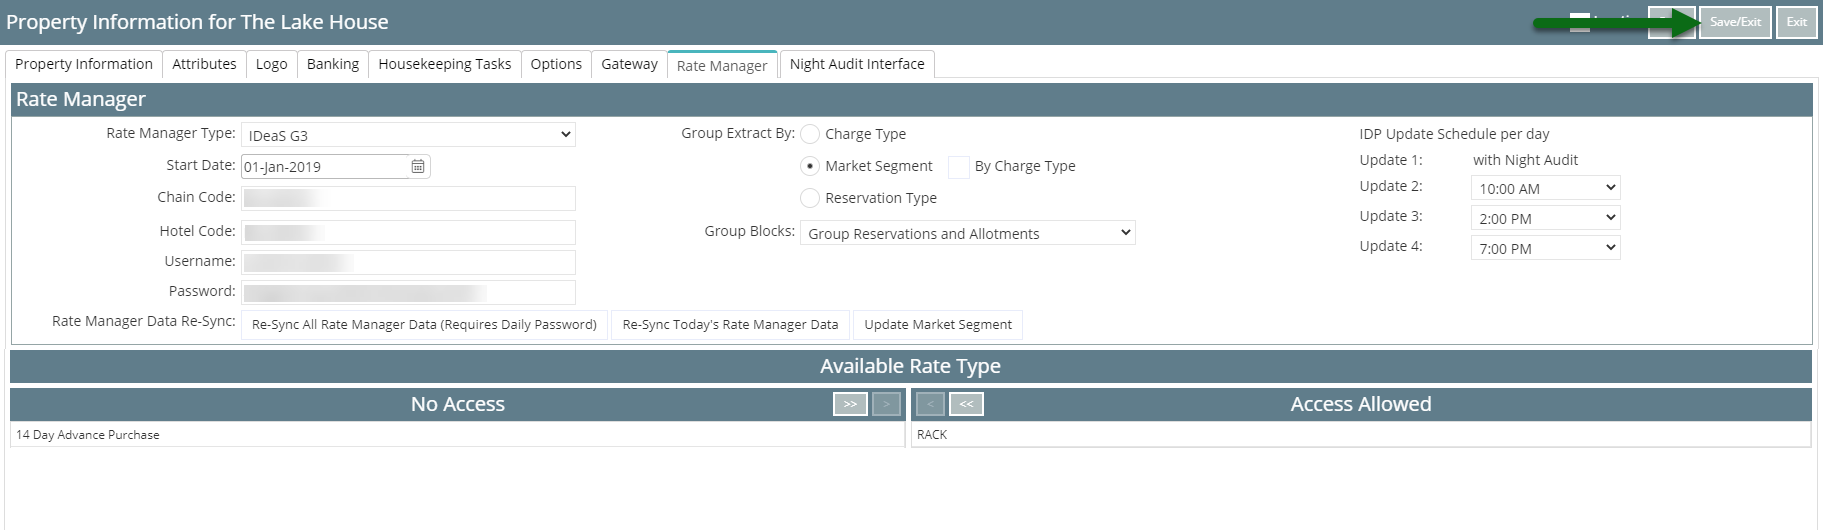
The initial data sync will commence within 30 minutes of selecting 'Save' and can take up to 6 hours to complete.
Continue to Step 9 after IDeaS confirm the initial data sync is complete.
-
Step 9 - Data Verification & IDeaS Training
- Add Button
Step 9 - Data Verification & IDeaS Training
Once IDeaS confirm the initial data sync from RMS has been completed the property's System Administrator & Revenue Management Team will need to log into IDeaS and verify the data configuration in RMS has been accurately reflected in IDeaS.
At this stage the IDeaS team will train the required users at the property on how to use IDeaS effectively.
Contact IDeaS for more information on this process.
Before continuing ensure the appropriate staff at the property are familiar with IDeaS and the interactions with RMS.
-
Step 10 - Enable IDeaS Rate Updates
- Add Button
Step 10 - Enable IDeaS Rate Updates
Properties with the IDeaS G3 interface that have verified the data synced to IDeaS reflects the required Market Segments can enable real-time Rate Updates from IDeaS to RMS.
This step is completed in IDeaS.
Once enabled IDeaS will use its pricing algorithms to update the Best Available or Rack Rate Type in RMS.

Step 9 - Data Verification & IDeaS Training
Once IDeaS confirm the initial data sync from RMS has been completed the property's System Administrator & Revenue Management Team will need to log into IDeaS and verify the data configuration in RMS has been accurately reflected in IDeaS.
At this stage the IDeaS team will train the required users at the property on how to use IDeaS effectively.
Contact IDeaS for more information on this process.
Before continuing ensure the appropriate staff at the property are familiar with IDeaS and the interactions with RMS.

-
Step 10 - Enable IDeaS Rate Updates
- Add Button
Step 10 - Enable IDeaS Rate Updates
Properties with the IDeaS G3 interface that have verified the data synced to IDeaS reflects the required Market Segments can enable real-time Rate Updates from IDeaS to RMS.
This step is completed in IDeaS.
Once enabled IDeaS will use its pricing algorithms to update the Best Available or Rack Rate Type in RMS.
Setup
Setup of the IDeaS interface in RMS involves identifying the revenue management strategy, segmenting RMS setup to fit with the identified strategy, activating the interface and completing the first data sync with data verification.
Ensure to complete each step before continuing through the setup process for optimal results.

-
Step 1 - Determine IDeaS Requirements & Strategy
- Add Button
Step 1 - Determine IDeaS Requirements & Strategy
Prior to activating the IDeaS interface the property's RMS data should be reviewed and updated to ensure it is segmented in a way that allows IDeaS to gain a detailed insight into the property's reservation patterns.
The only way IDeaS can provide accurate pricing decisions for the property is if the setup in RMS is segmented to suit the revenue management strategy.
Discuss with IDeaS their system requirements and the property's specific objectives prior to modifying the setup in RMS to ensure optimal results.
Categories & Areas, Market Segments and Rate Types are mandatory requirements in RMS to facilitate the IDeaS decision system to work effectively.
The property's revenue management team should liaise with the IDeaS team to ensure the property's current configuration of these features in RMS will produce the best results from the IDeaS system.
Before continuing to Step 2 ensure that the Market Segments for the property have been identified, the Rate Types applicable to each Market Segment have been determined and the Categories & Areas to be managed by IDeaS have been identified.
-
Step 2 - Market Segments
- Add Button
Step 2 - Market Segments
Market Segments are used in RMS to segment Categories, Areas, Rate Types, Discounts, Travel Agents, Online Channels and Reservations into their respective market categories.
These Market Segments will be used by the IDeaS algorithm to appropriately analyse and make recommendations or adjustments based on the Market Segments allocated in RMS.
IDeaS will represent the Market Segments setup in RMS using the 'Code' field on the Market Segment.
Setup the Market Segment field as 'Mandatory on Save' for the Reservation Screen to ensure optimal ongoing success with the IDeaS integration.
Before continuing ensure all Market Segments have been setup in RMS and the Market Segment field has been setup as 'Mandatory on Save' for reservations.
-
Step 3 - Rate Types
- Add Button
Step 3 - Rate Types
Rate Types are the charge description or charge type that identifies a particular set of pricing in RMS.
Assigning a Market Segment to a Rate Type in RMS will have that Market Segment automatically populated on a reservation when that Rate Type is selected and enables accurate segmentation for IDeaS analysis.
Rate Types that were used in the past 2 years that are no longer in use should also be updated to include a Code & Market Segment for IDeaS analysis.
Before continuing ensure all Rate Types & Derived Rate Types have been setup in RMS with a Rate Code & Market Segment.
-
Step 4 - Discounts
- Add Button
Step 4 - Discounts
Discounts are optional setup that can be applied to a reservation or charge to reduce its cost in RMS.
IDeaS will use the Market Segment allocated to the selected Rate Type on a reservation for any Discounts unless that Discount has a separate Market Segment selected on it's setup.
Market Segments setup on a Travel Agent will override any set on the Rate Type for that reservation.
Before continuing ensure any Discounts that apply to a specific market have that Market Segment selected on the Discount Setup.
-
Step 5 - Travel Agents
- Add Button
Step 5 - Travel Agents
Travel Agents are companies or individuals that provide travel and tourism-related activities to individuals.
Market Segments setup on a Travel Agent will override any set on the Discount or Rate Type for that reservation.
Before continuing ensure any Travel Agents that apply to a specific market have that Market Segment selected on their Travel Agent profile.
-
Step 6 - Online Channels
- Add Button
Step 6 - Online Channels
Online Channels include any Online Travel Agents, GDS or Distributors connected with the RMS Channel Manager.
Market Segments setup on an Online Channel will be overridden by any Market Segment setup on the Rate Type selected on the Reservation.
Before continuing ensure any Online Channels that apply to a specific market have that Market Segment selected on the Channel Connection Information.
-
Step 7 - Historical Data Correction
- Add Button
Step 7 - Historical Data Correction
The IDeaS algorithm requires at least 12-24 months historical data to complete analysis for recommendations and adjustments.
If setup changes were made during Steps 2-6 a correction of historical data in RMS will be required before continuing.
RMS has created a collection of data correction algorithms for updating historical data to prevent the need for users making manual adjustments in RMS.
Due to the nature of the RMS Correction Algorithms the changes cannot be reversed.
Before continuing ensure all neccessary Market Segment setup has been completed (Steps 2 - 6) and has been verified by the property's System Administrator and Revenue Management Team then log a Service Request for an IDeaS Historical Data Correction to be performed.

-
Step 8 - Initial Data Sync to IDeaS
- Add Button
Step 8 - Initial Data Sync to IDeaS
After RMS has confirmed completion of the IDeaS Historical Data Correction the property's System Administrator can setup IDeaS as the property's Rate Manager and complete an initial data sync to IDeaS.
The initial data sync to IDeaS will commence within 30 minutes of completing setup of IDeaS as the property's Rate Manager and can take up to 6 hours to complete the full 12-24 months of data in RMS.
Before continuing to Step 9 ensure that IDeaS has been setup as the property's Rate Manager (below) and IDeaS have confirmed completion of the initial data sync from RMS.
-
Setup Property Rate Manager
- Add Button
Setup
Have your System Administrator complete the following.
- Go to Setup > Property Options > Property Information in RMS.
- Select 'Edit' on an existing Property.
- Navigate to the 'Rate Manager' tab.
- Select the IDeaS Interface as the Rate Manager Type (G2 or G3).
- Select the Start Date as the date historical data begins in RMS.
- Enter the Chain Code supplied by IDeaS.
- Enter the Hotel Code supplied by IDeaS.
- Enter the Username supplied by IDeaS.
- Enter the Password supplied by IDeaS.
- Select 'Market Segment' as the Group Extract By option.
- IDeaS G3 - Rate Manager Premium Only: Select the IDeaS Update Times.
- Select the BAR or RACK Rate Type IDeaS will manage and choose the '>' button.
- Save/Exit.
-
Guide
-
Step 9 - Data Verification & IDeaS Training
- Add Button
Guide
Go to Setup > Property Options > Property Information in RMS.
Select 'Edit' on an existing Property.
Navigate to the 'Rate Manager' tab.
Select the IDeaS Interface as the Rate Manager Type (G2 or G3).
Select the Start Date as the date historical data begins in RMS.
Enter the Chain Code supplied by IDeaS.
Enter the Hotel Code supplied by IDeaS.
Enter the Username supplied by IDeaS.
Enter the Password supplied by IDeaS.
Select 'Market Segment' as the Group Extract By option.
IDeaS G3 - Rate Manager Premium Only: Select the IDeaS Update Times.
Select the Best Available Rate or Rack Rate Type that IDeaS will manage and choose the '>' button.
Select 'Save/Exit' to store the changes made.
The initial data sync will commence within 30 minutes of selecting 'Save' and can take up to 6 hours to complete.
Continue to Step 9 after IDeaS confirm the initial data sync is complete.
-
Step 9 - Data Verification & IDeaS Training
- Add Button
Step 9 - Data Verification & IDeaS Training
Once IDeaS confirm the initial data sync from RMS has been completed the property's System Administrator & Revenue Management Team will need to log into IDeaS and verify the data configuration in RMS has been accurately reflected in IDeaS.
At this stage the IDeaS team will train the required users at the property on how to use IDeaS effectively.
Contact IDeaS for more information on this process.
Before continuing ensure the appropriate staff at the property are familiar with IDeaS and the interactions with RMS.
-
Step 10 - Enable IDeaS Rate Updates
- Add Button
Step 10 - Enable IDeaS Rate Updates
Properties with the IDeaS G3 interface that have verified the data synced to IDeaS reflects the required Market Segments can enable real-time Rate Updates from IDeaS to RMS.
This step is completed in IDeaS.
Once enabled IDeaS will use its pricing algorithms to update the Best Available or Rack Rate Type in RMS.