Gift Cards
Sell gift vouchers and accept voucher payments on the RMS Internet Booking Engine and Guest Portal in RMS.
Gift Cards provide prepaid vouchers that can be accepted as payment for reservations in RMS.
-
Information
-
Setup
- Add Button
Information
Gift Cards provide prepaid vouchers that can be accepted as payment for reservations in RMS.
Gift Cards can be sold using the Gift Card Portal, RMS Internet Booking Engine or Guest Portal.
The Gift Card Portal provides ecommerce of gift cards and vouchers when using RMS Pay or Windcave as the Payment Gateway.
The Gift Card Portal uses the Photos and Colours setup for the RMS Internet Booking Engine.
Gift Cards can be purchased for an individual property or at the enterprise level to be used at any of the properties within the RMS database.
A Form Letter setup with the merge field <<GiftCard_Table>> must be selected to use as the Gift Card.
Gift Cards can be configured for up to four preset values with the option of allowing custom values.
Gift Cards can be setup to expire at the entered number of days, weeks or years.
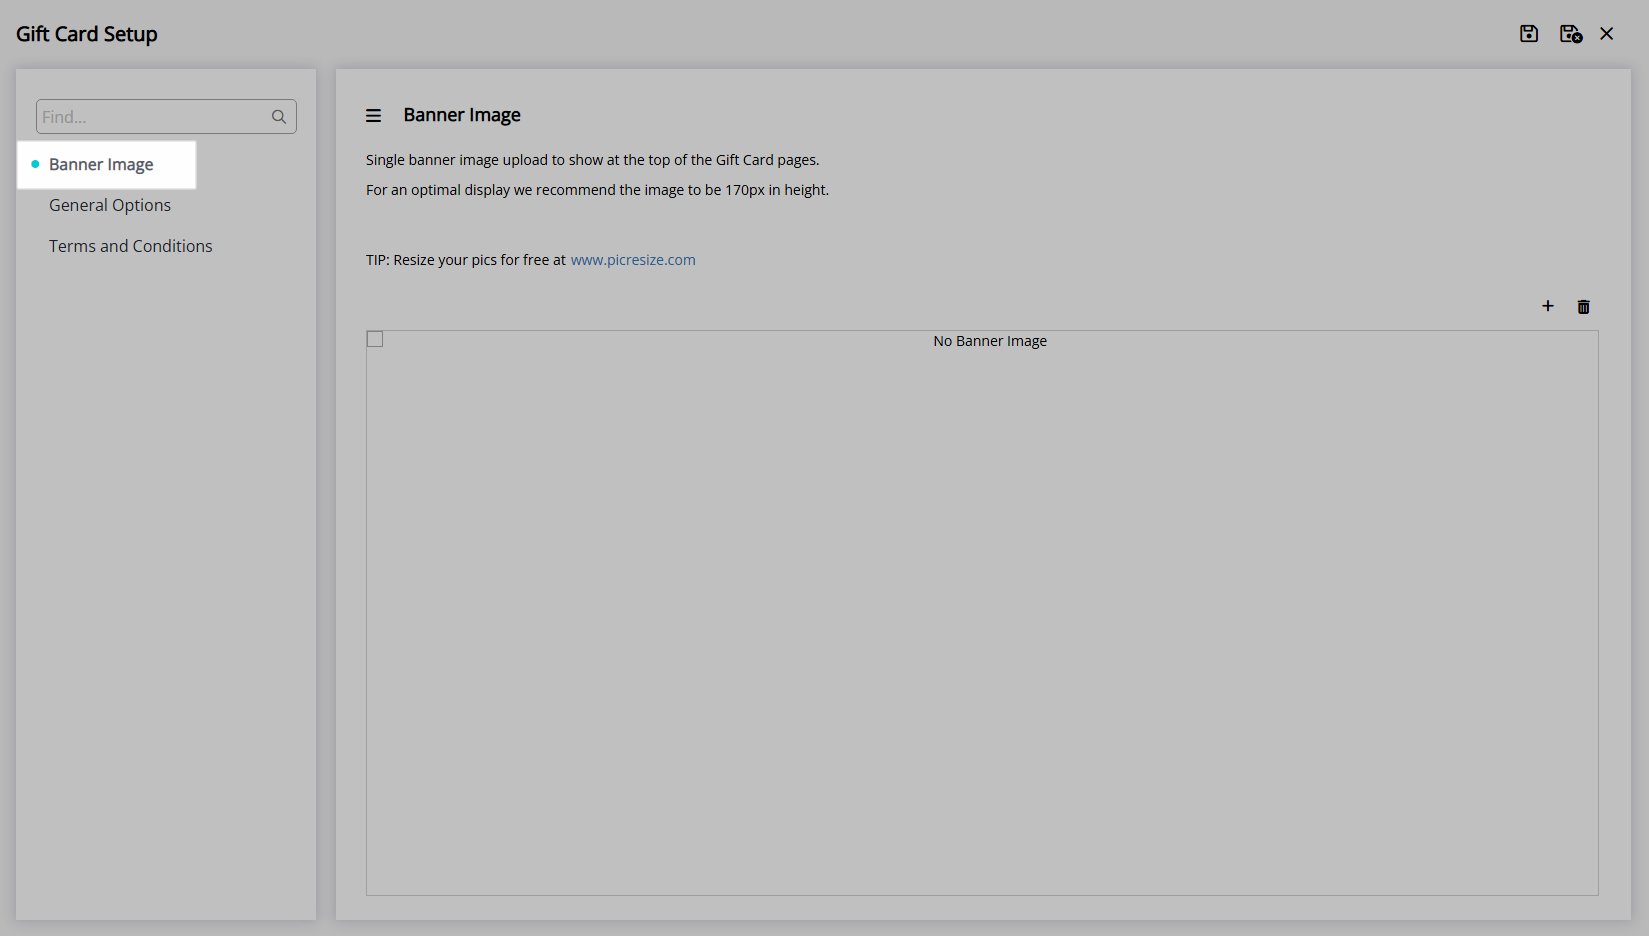
A custom Banner Image can be setup for the Gift Card Portal with a recommended image height of 170px.

Guest and Reservation are default System Labels that can be customised.
Gift Cards are currently unavailable for Owner & Trust Accounting properties.

System Administrators will require Security Profile access to use this feature.
-
Setup
- Add Button
Setup
Have your System Administrator complete the following.
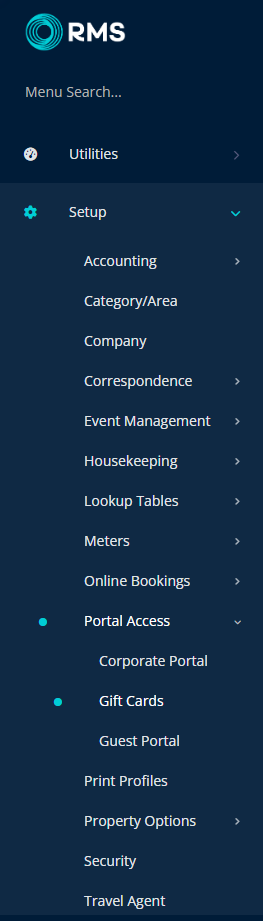
- Go to Setup > Portal Access > Gift Cards in RMS.
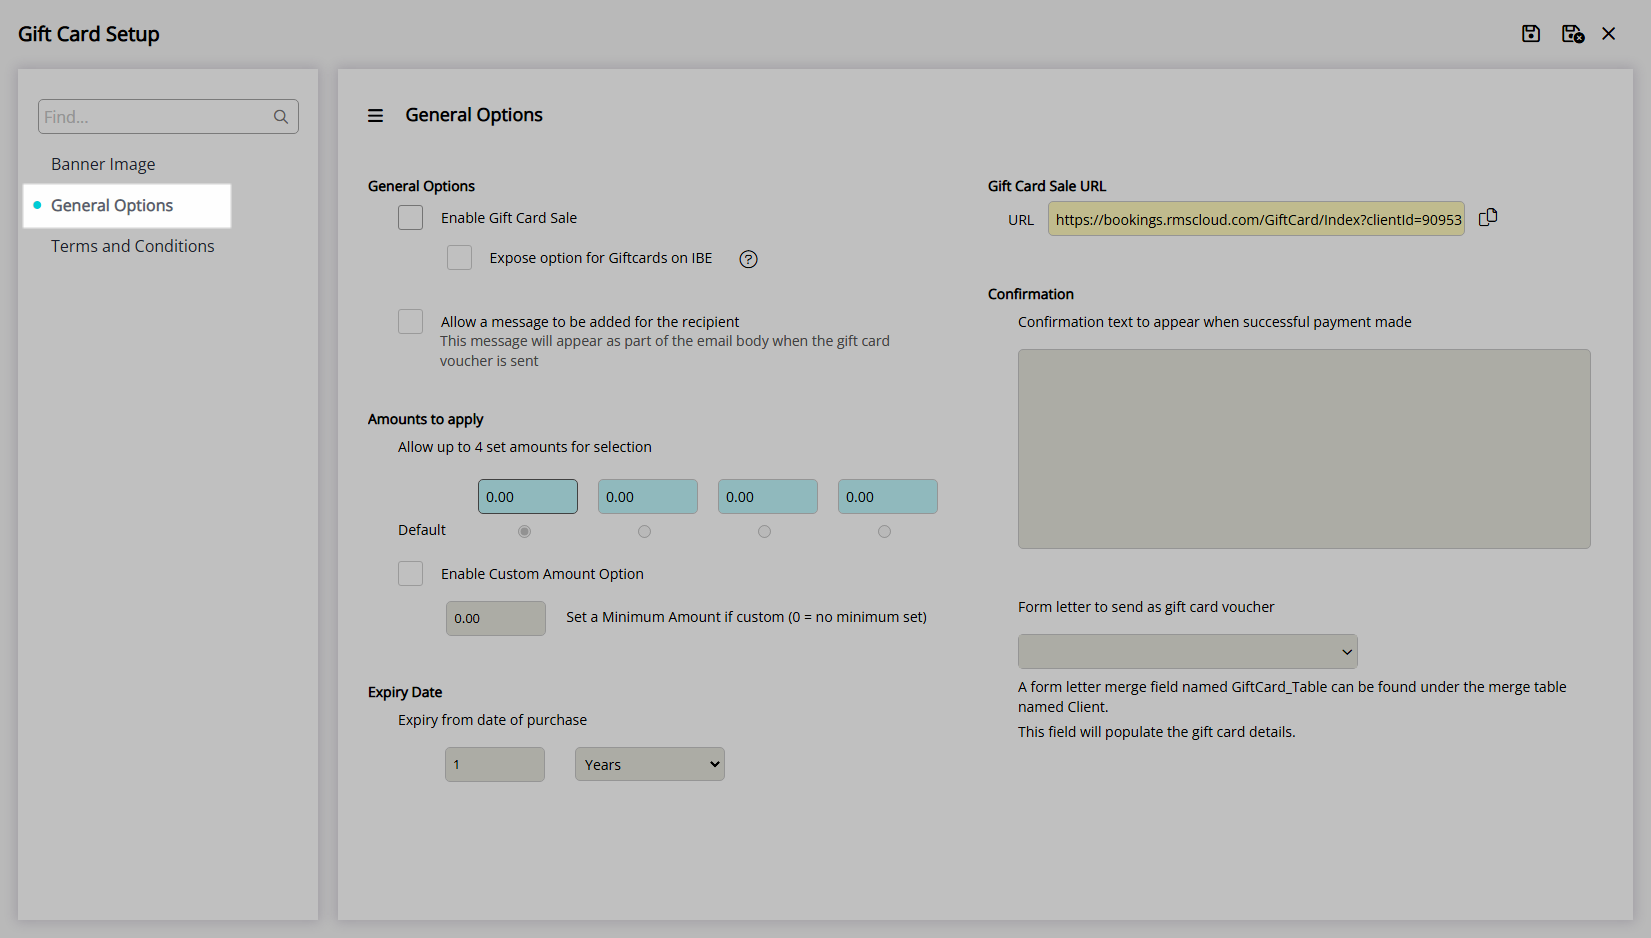
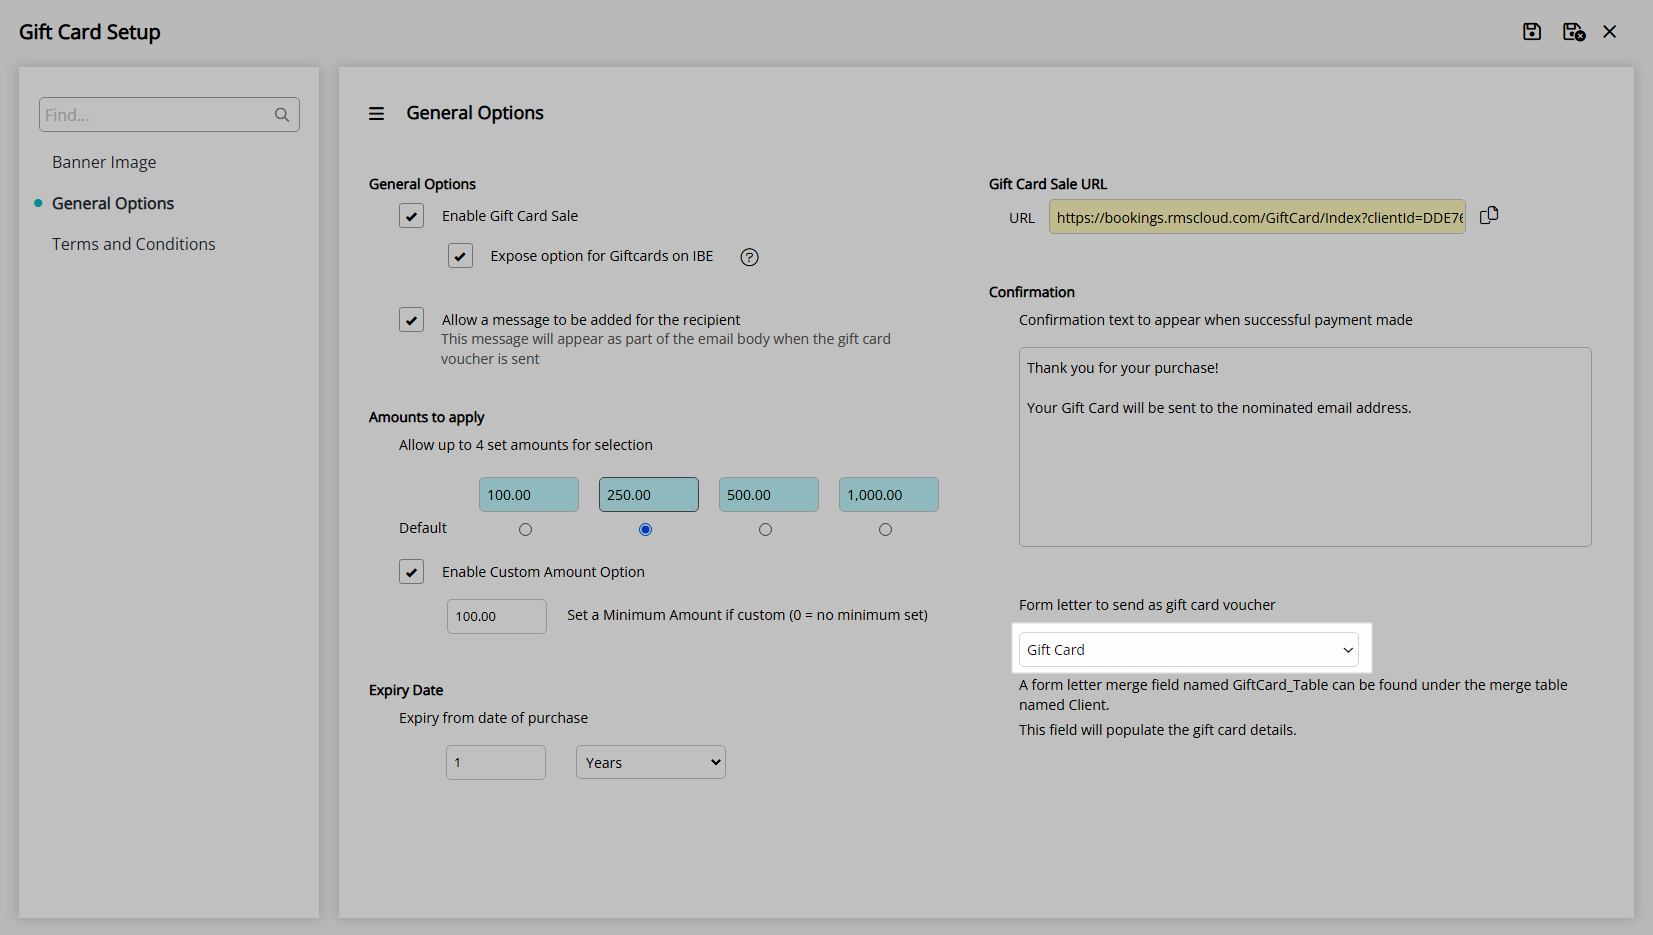
- Navigate to the 'General Options' tab.
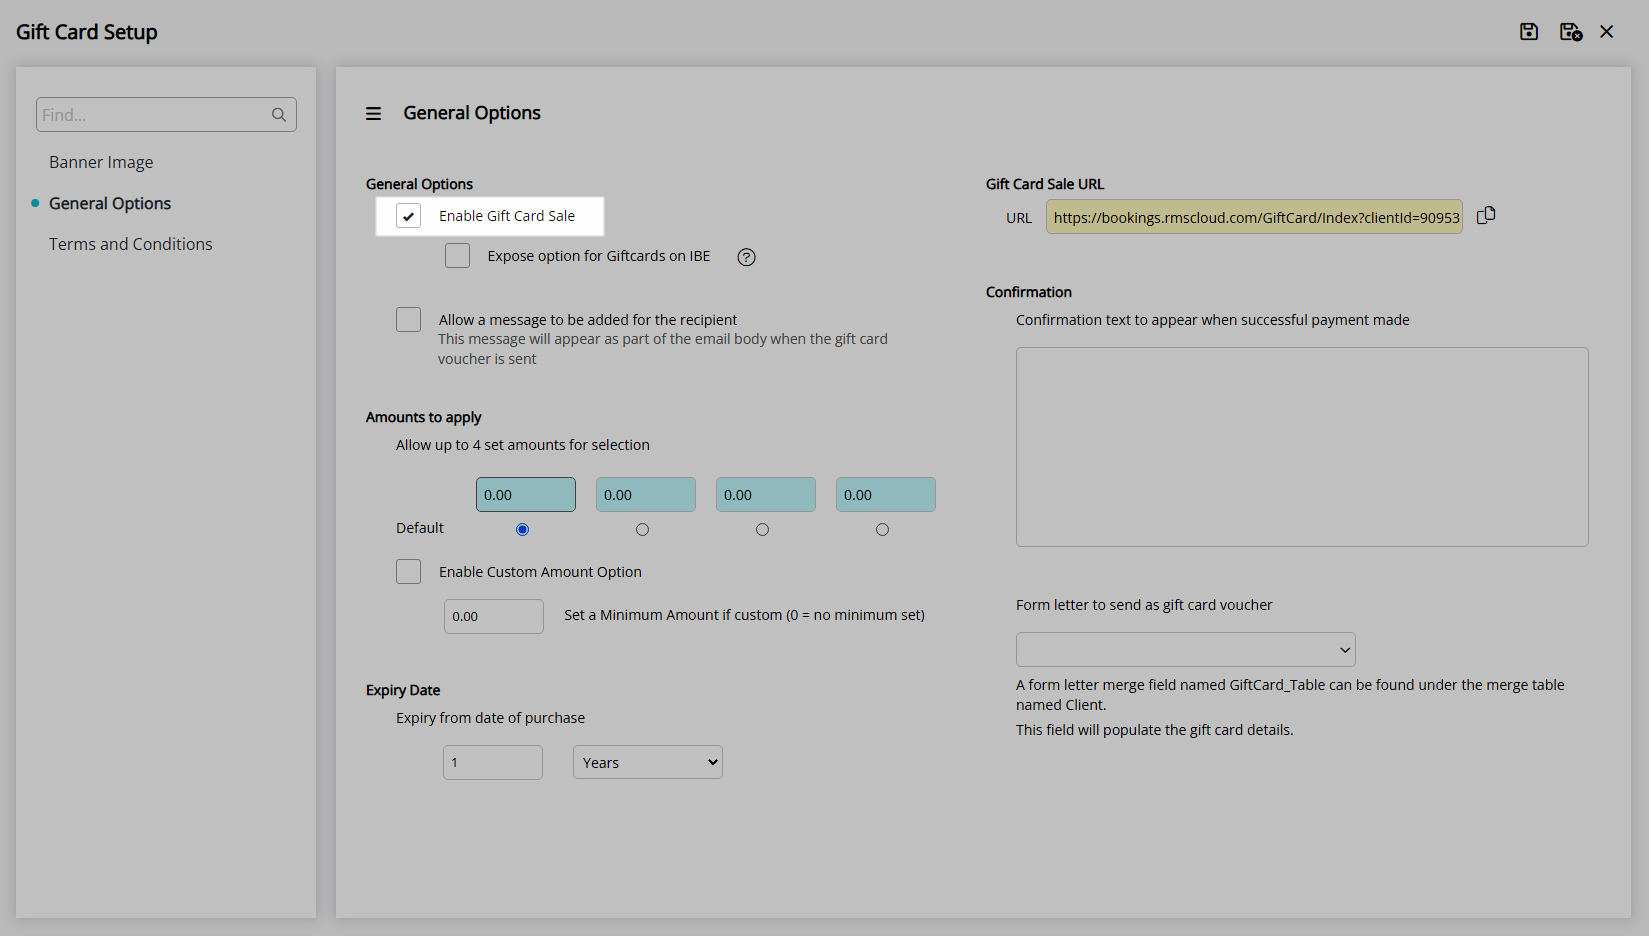
- Select the checkbox 'Enable Gift Card Sale'.
- Optional: Select the checkbox 'Expose options for Gift Cards on the IBE'.
- Optional: Select the checkbox 'Allow a message to be added for the recipient'.
- Enter the Preset Gift Card Amounts.
- Select the Default Gift Card Value.
-
Optional: Select the checkbox 'Enable Custom Amount Option'.
- Optional: Enter a Minimum Value.
- Select and enter the Gift Card Expiry Period.
- Enter the Payment Confirmation Text.
- Select the Form Letter to be used as the Gift Card.
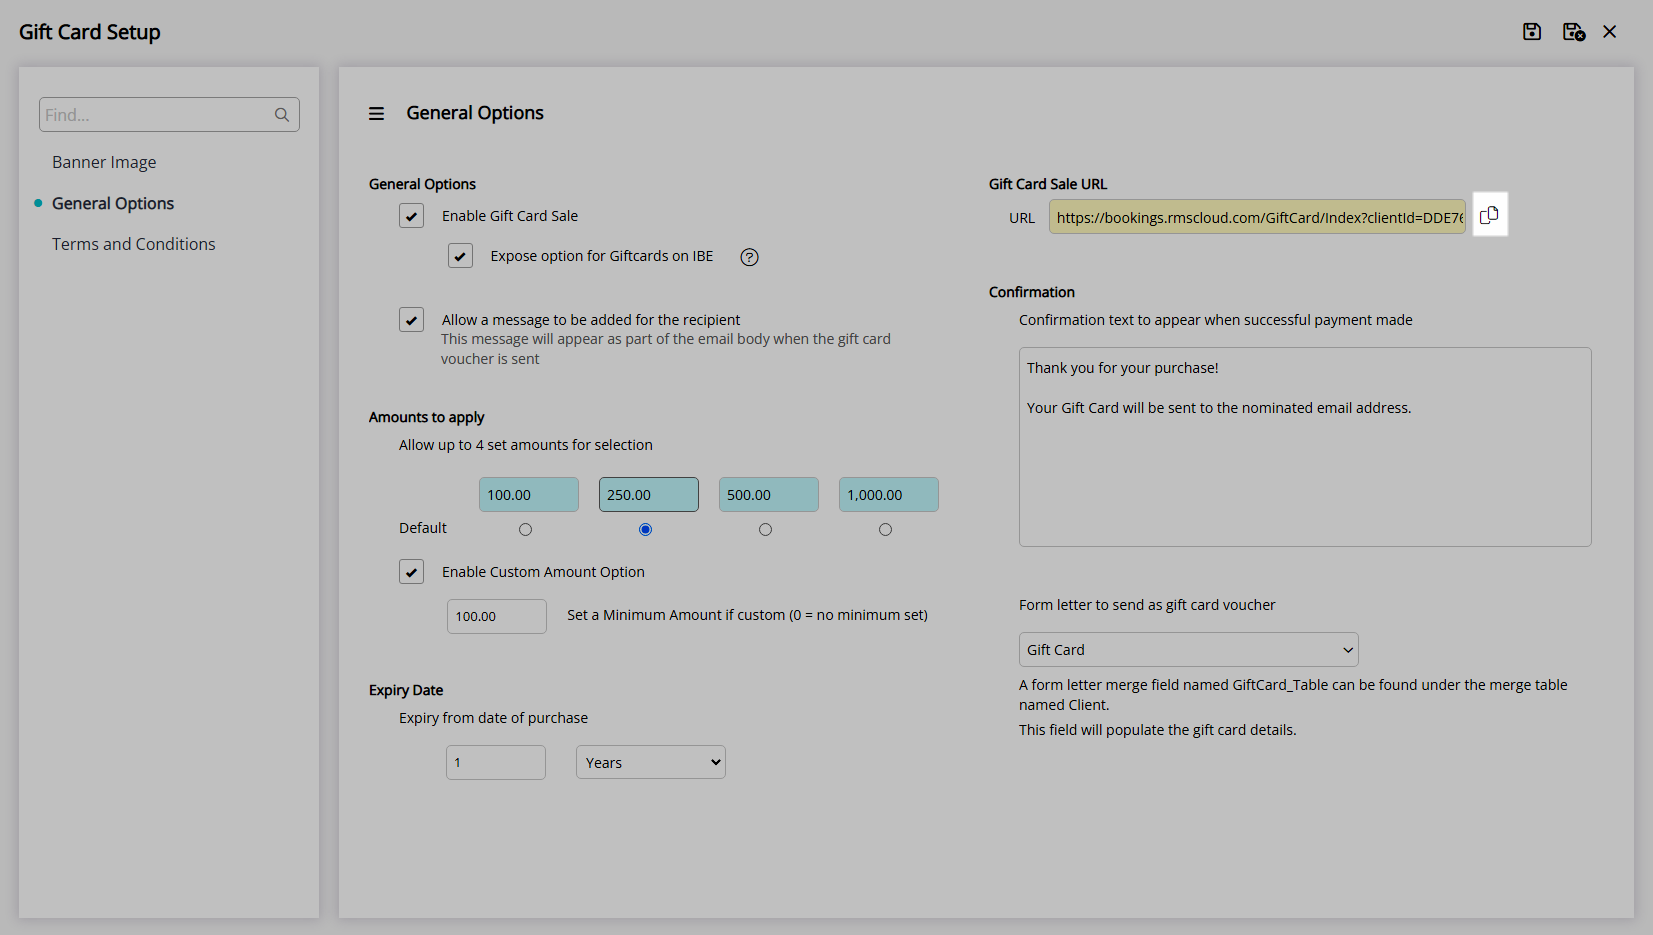
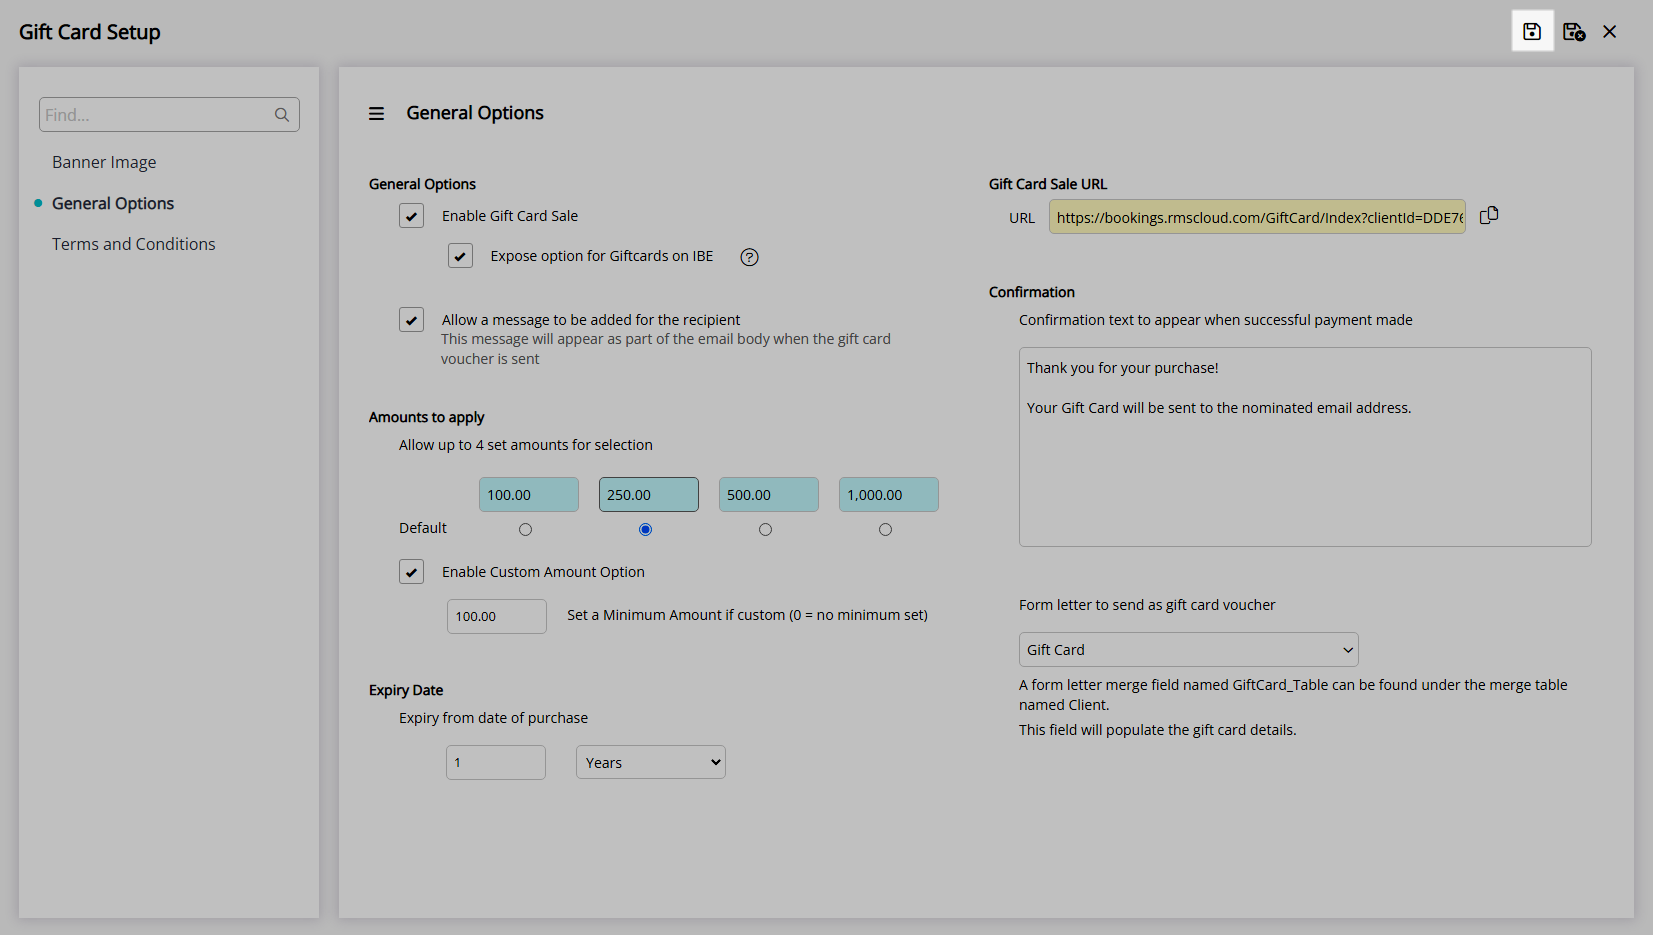
- Select the
 'Copy URL' icon.
 - Save.
-
Optional: Setup a custom Banner Image.
- Navigate to the 'Banner Image' tab.
- Select the
 'Add' icon.
 - Select an Image and choose 'Ok'.
- Save.
-
Optional: Setup Gift Card Terms & Conditions.
- Navigate to the 'Terms & Conditions' tab.
- Enter the Gift Card Terms & Conditions.
- Save.
- Save/Exit.

A Form Letter setup with the merge field <<GiftCard_Table>> must be selected to use as the Gift Card.
The Gift Card Portal provides ecommerce of gift cards and vouchers when using RMS Pay or Windcave as the Payment Gateway.
-
Guide
- Add Button
Guide
Go to Setup > Portal Access > Gift Cards in RMS.
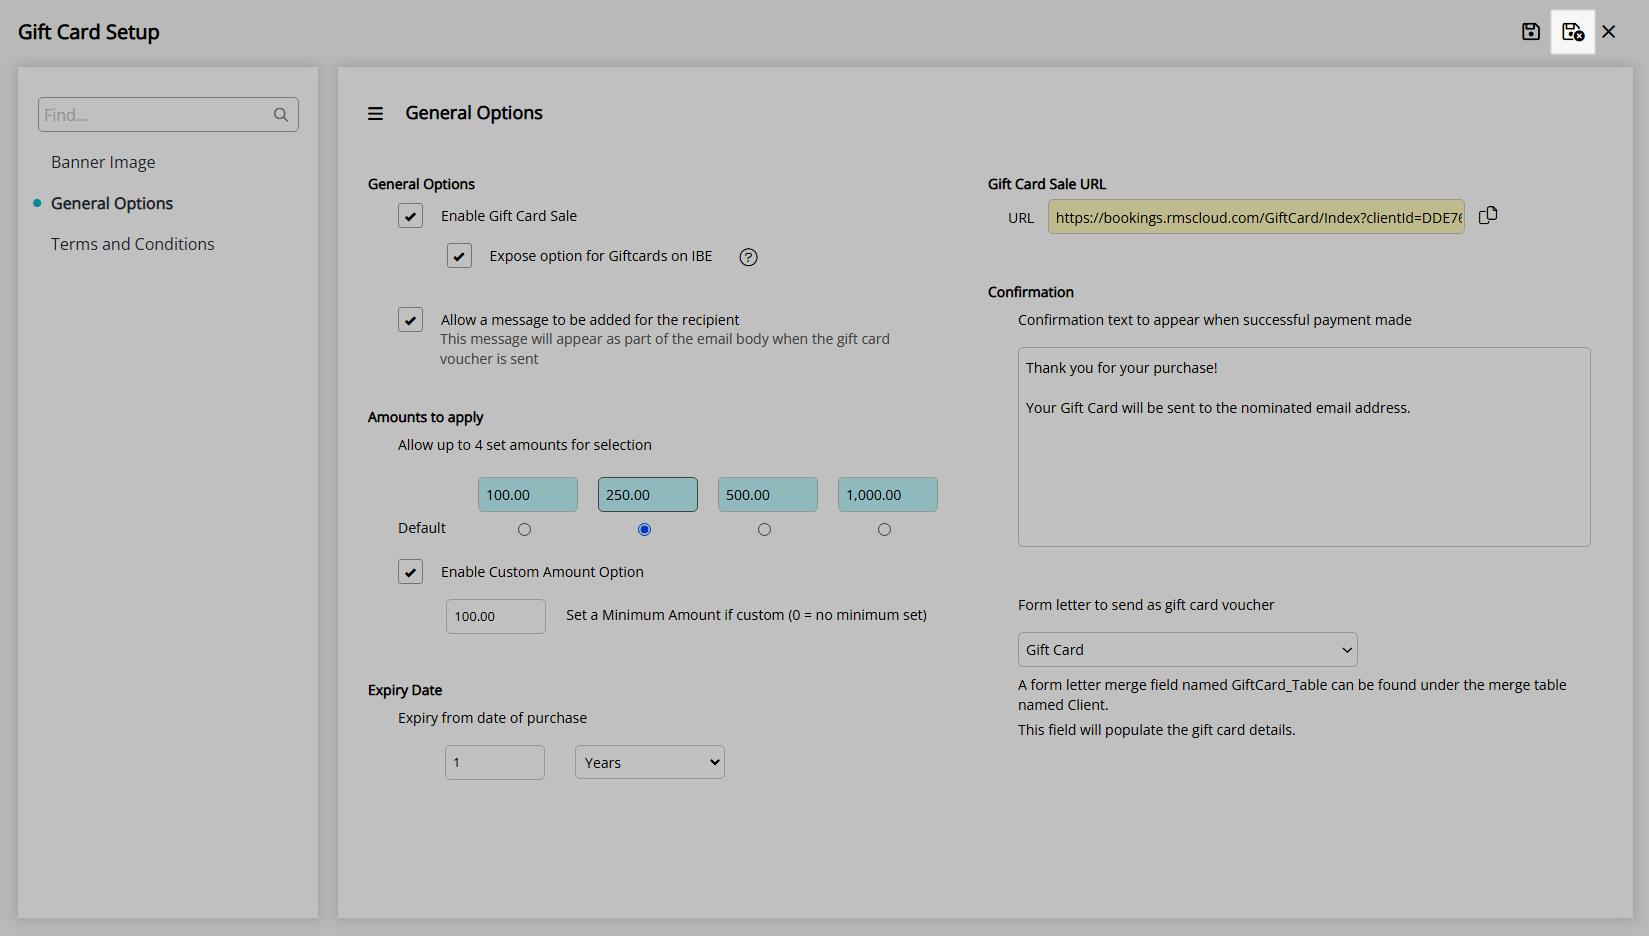
Navigate to the 'General Options' tab.
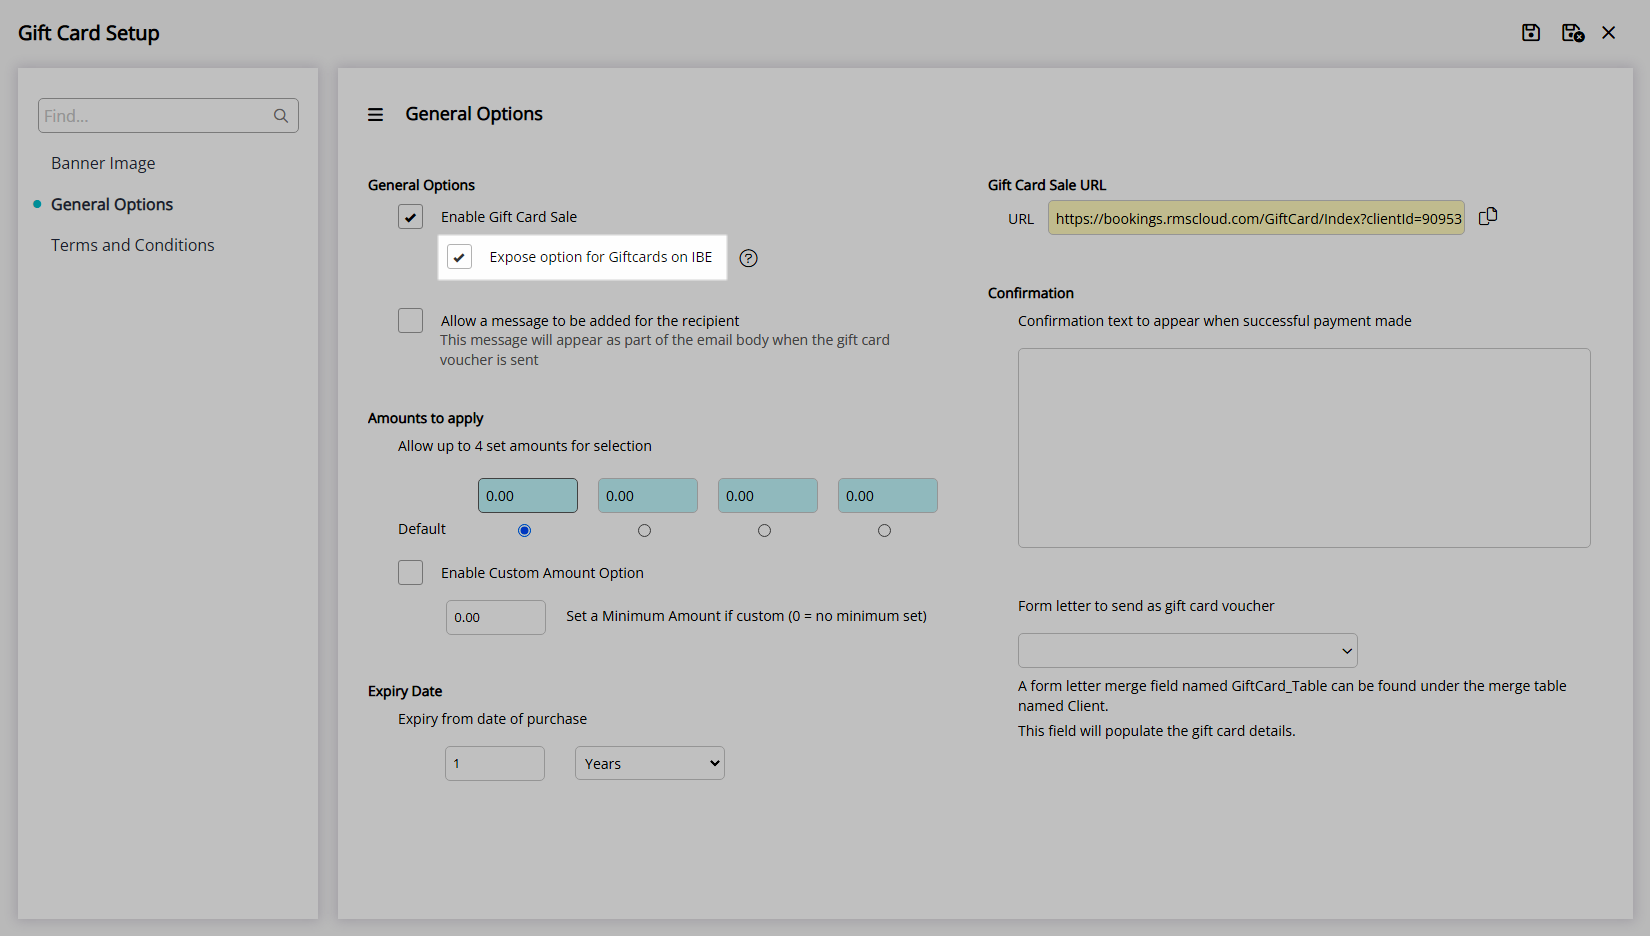
Select the checkbox 'Enable Gift Card Sale'.
Optional: Select the checkbox 'Expose options for Gift Cards on the IBE'.
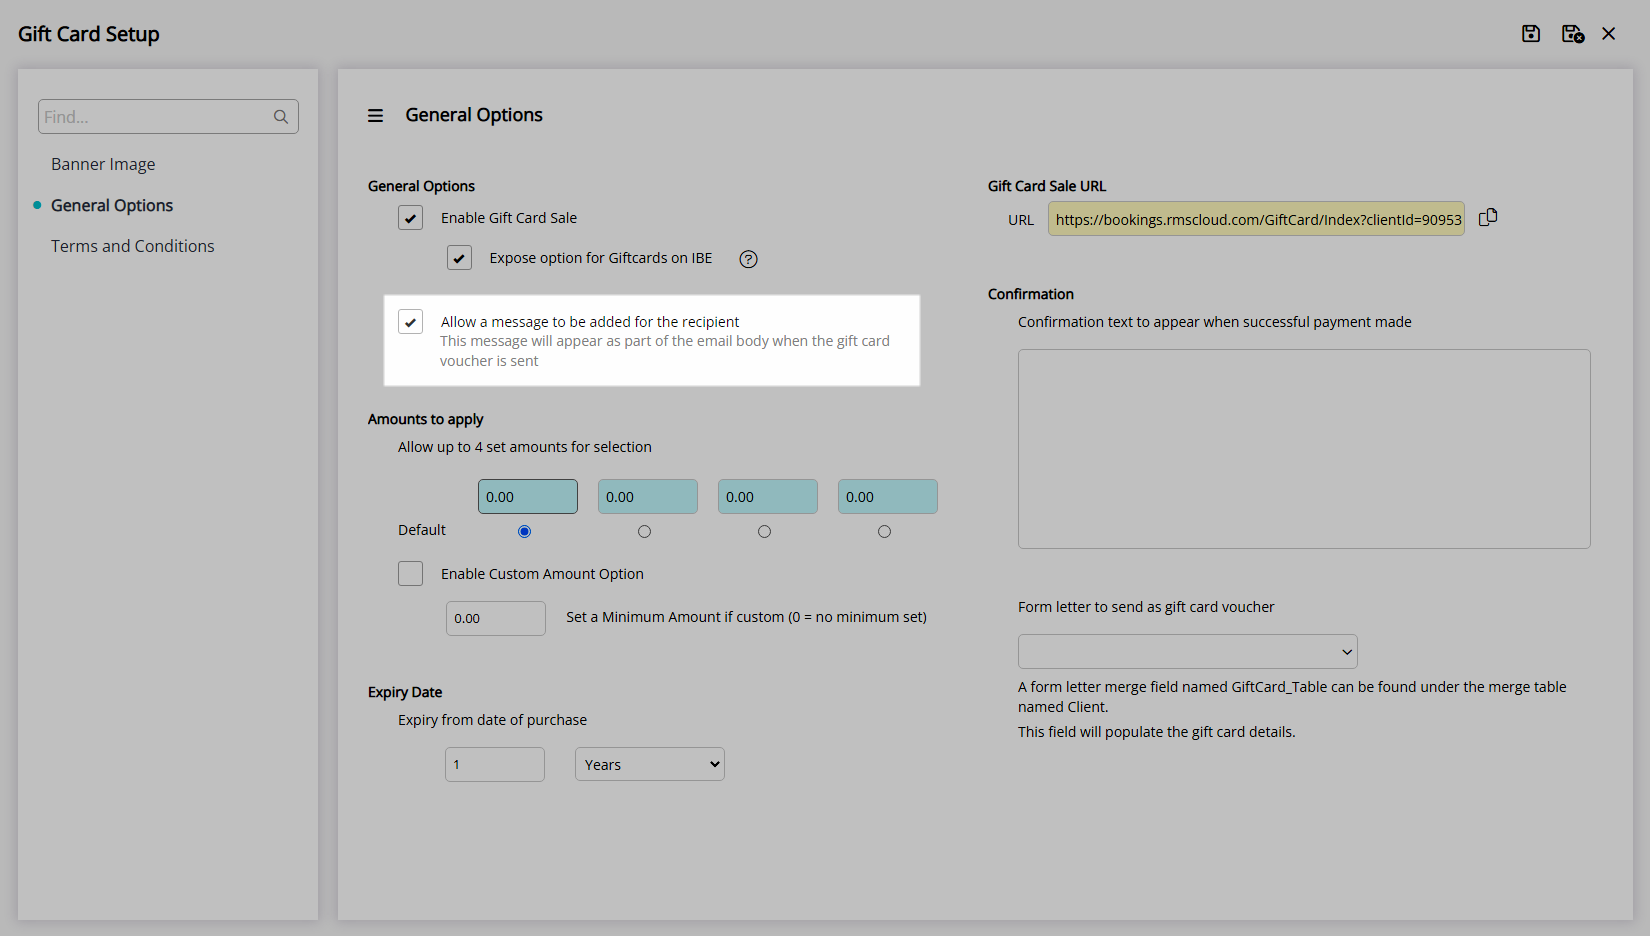
Optional: Select the checkbox 'Allow a message to be added for the recipient'.
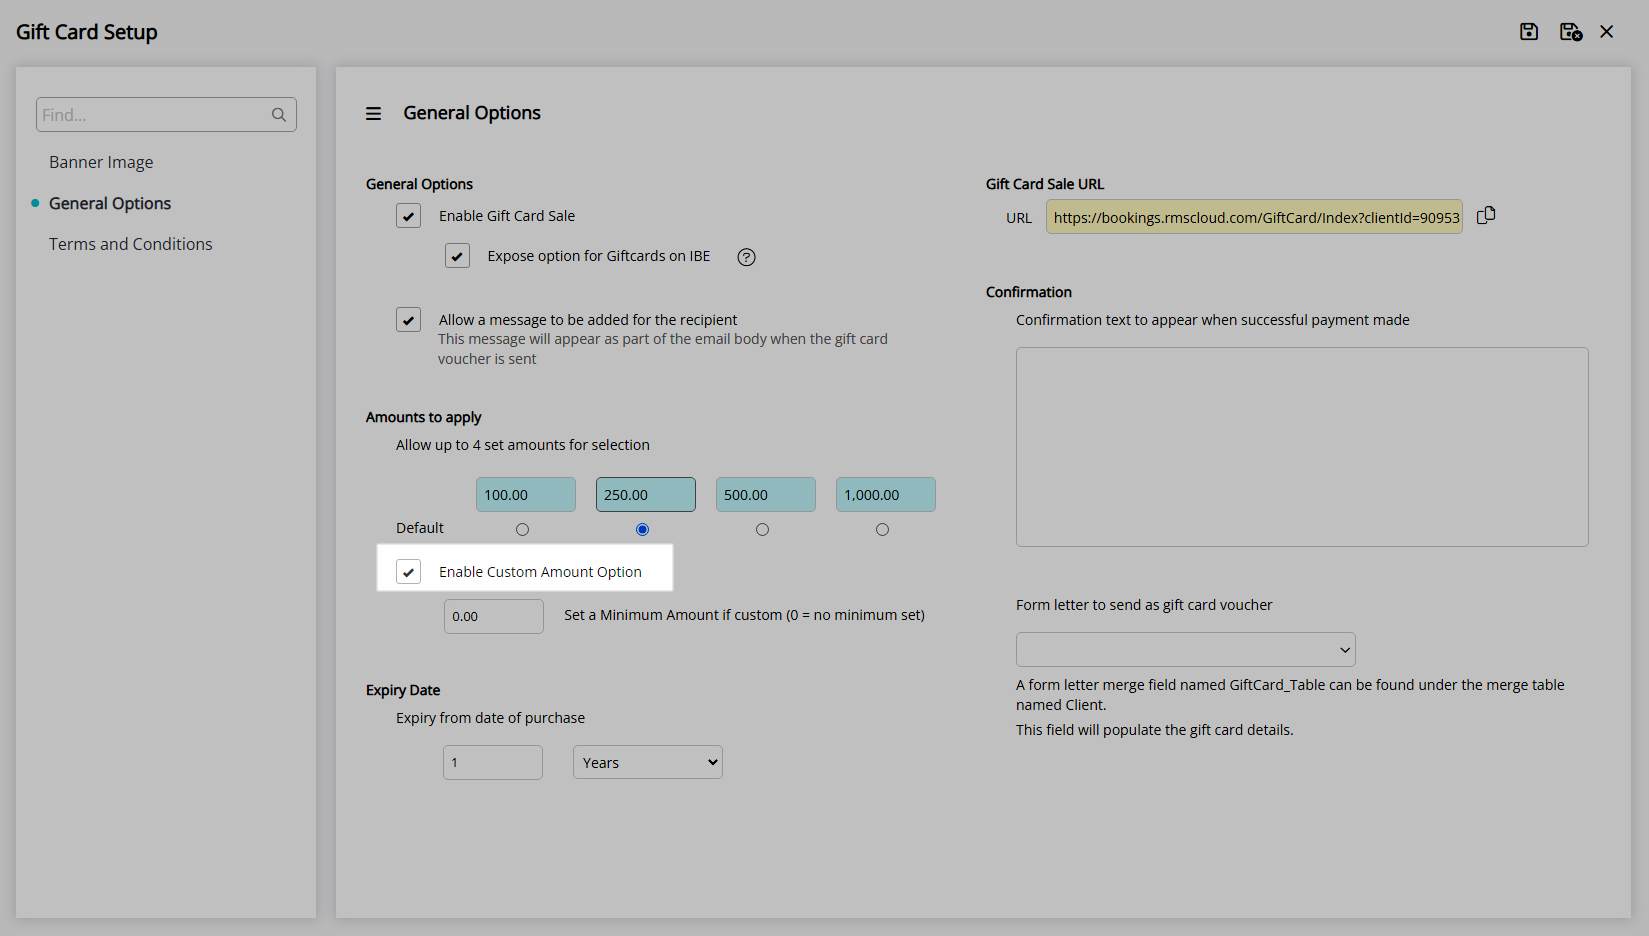
Enter the Preset Gift Card Amounts.
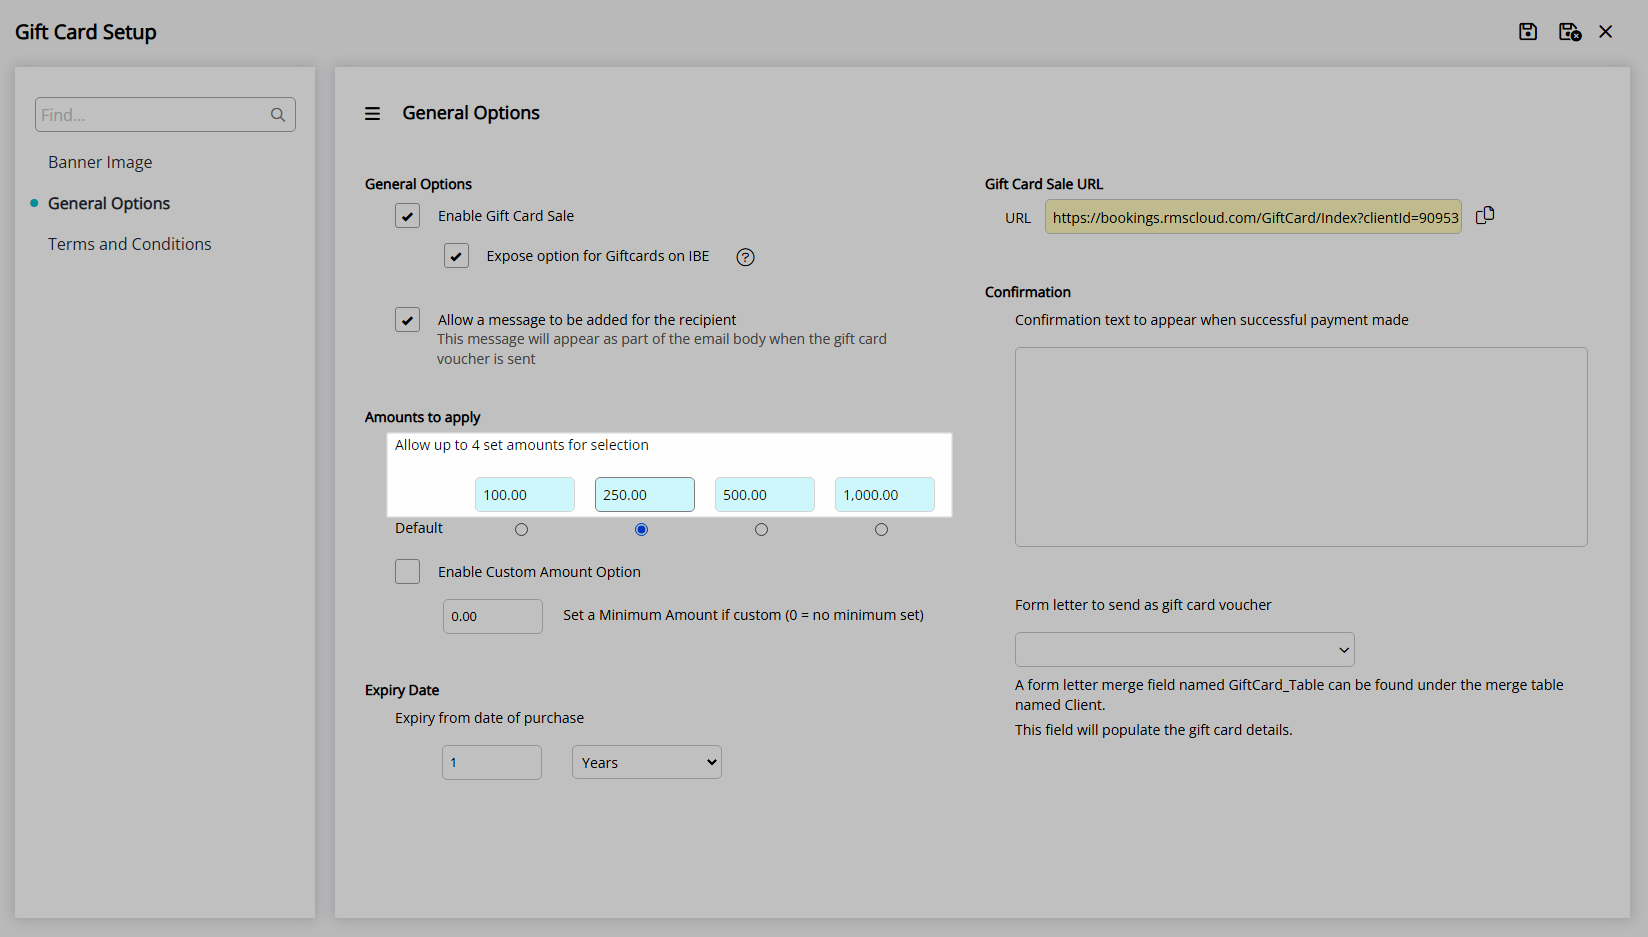
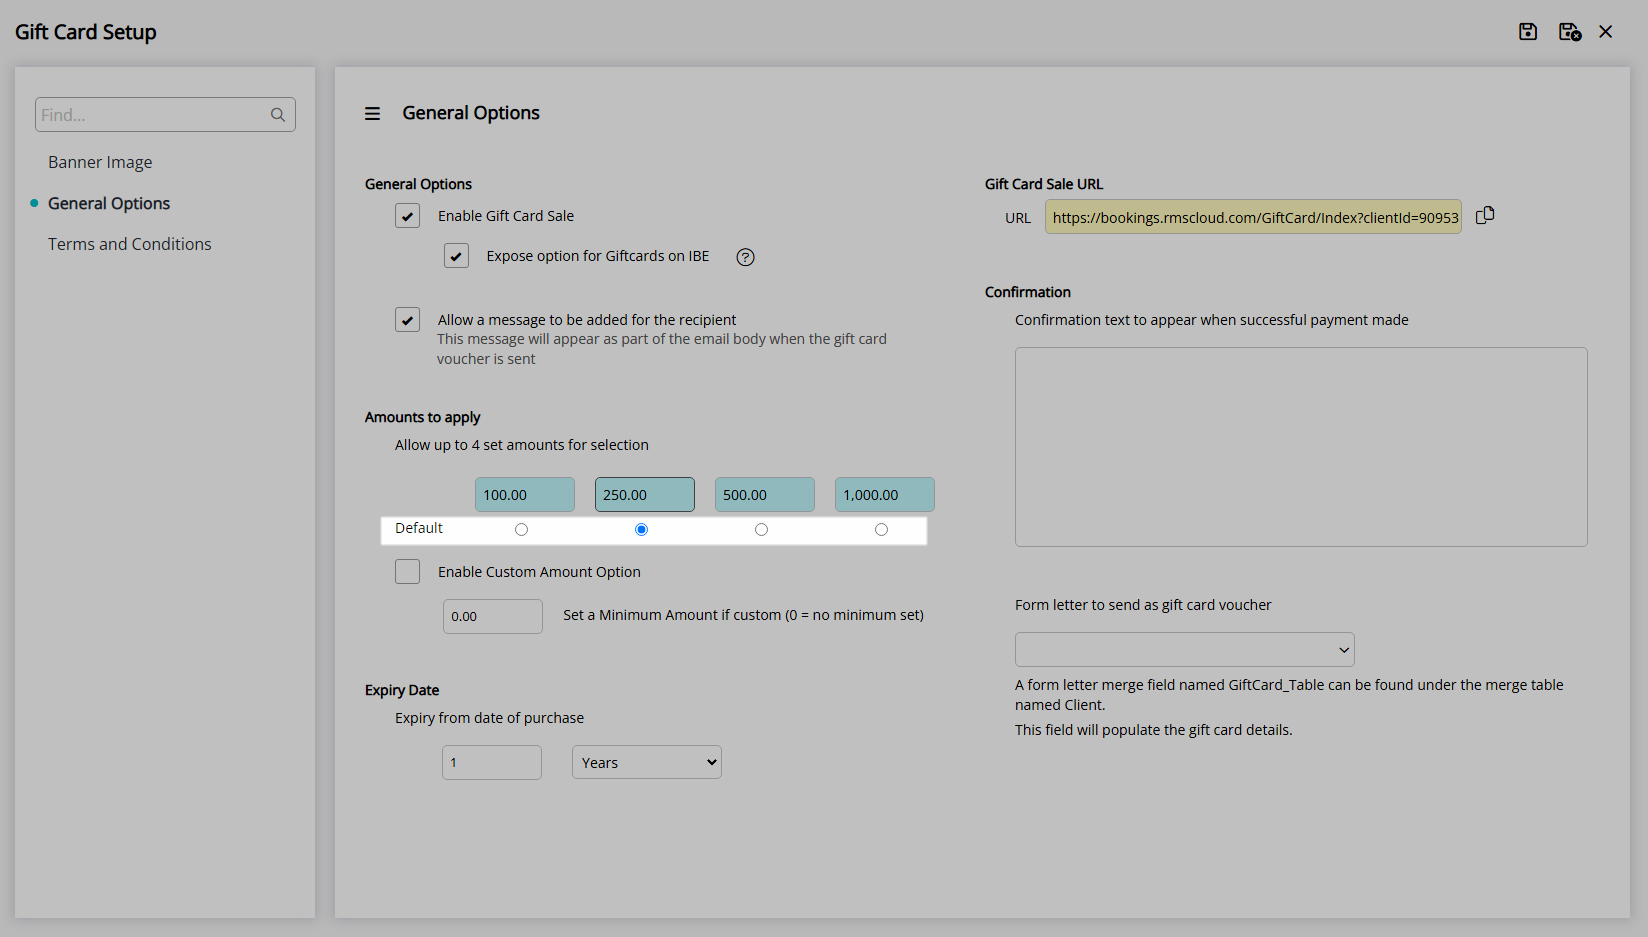
Select the Default Gift Card Value.
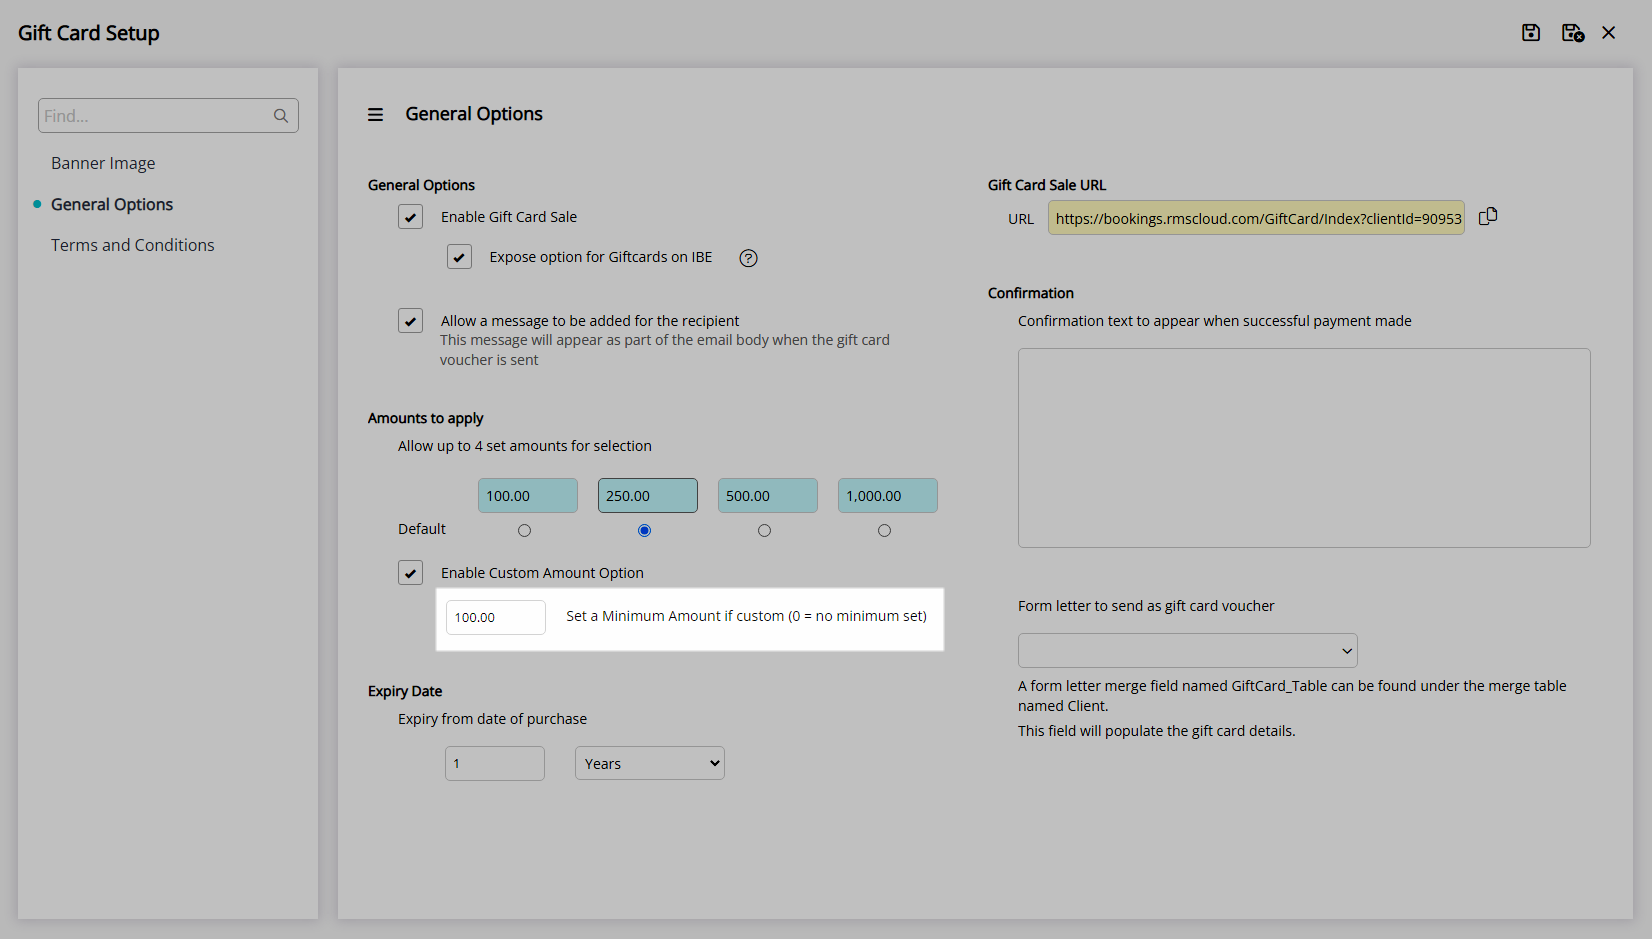
Optional: Select the checkbox 'Enable Custom Amount Option'.
Optional: Enter a Minimum Value.
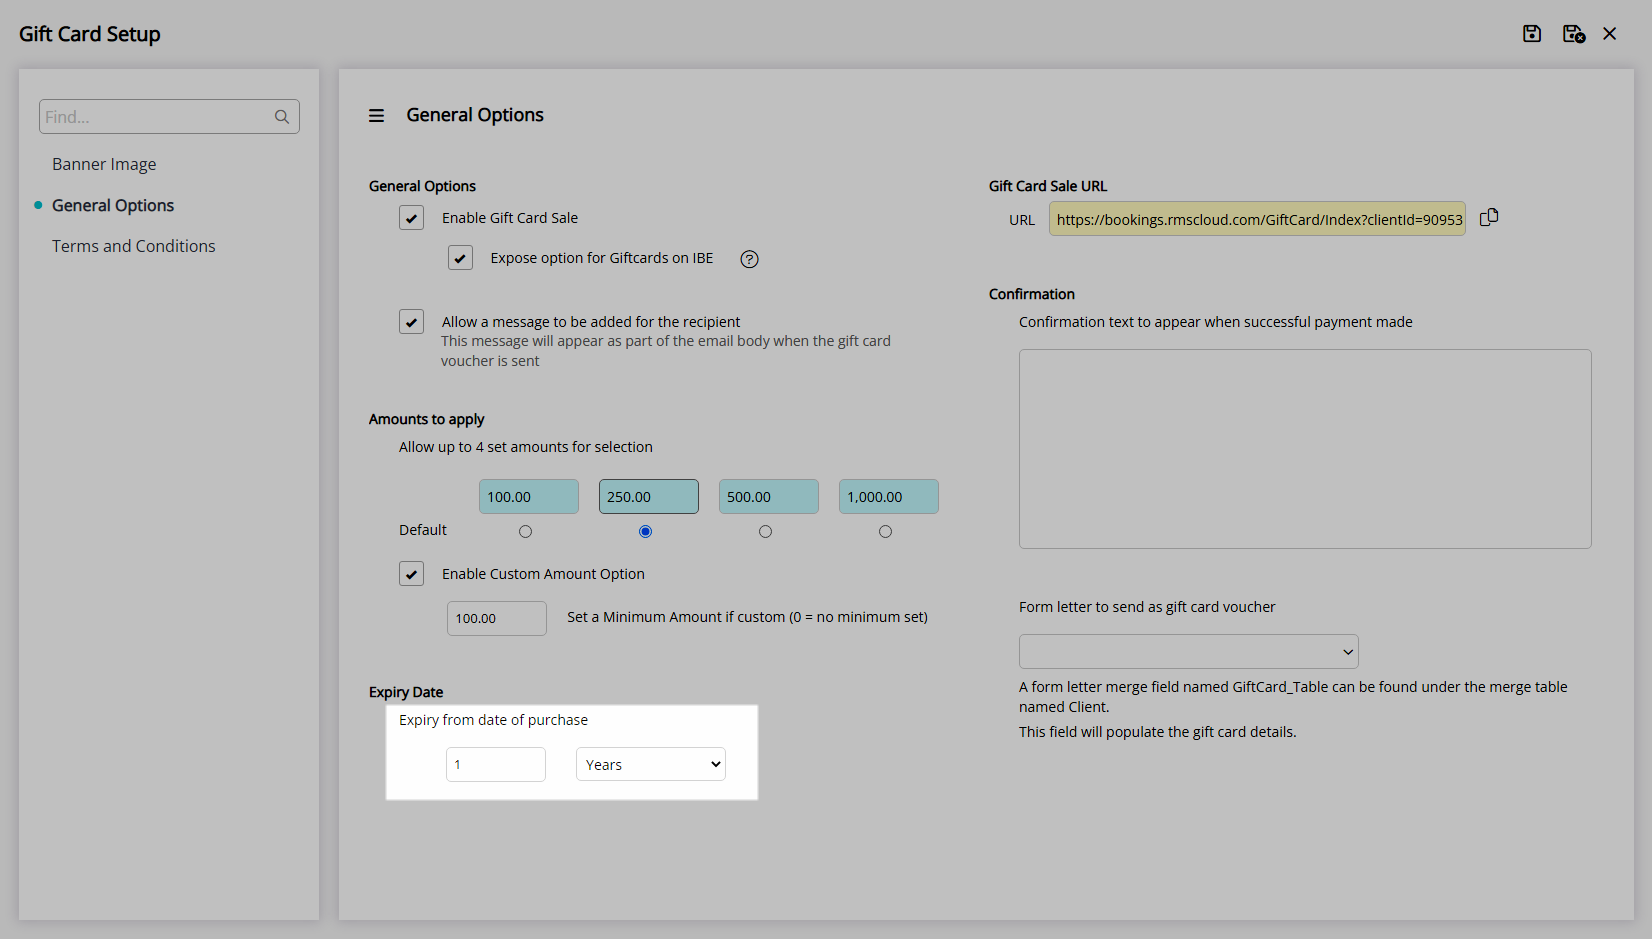
Select and enter the Gift Card Expiry Period.
Enter the Payment Confirmation Text.
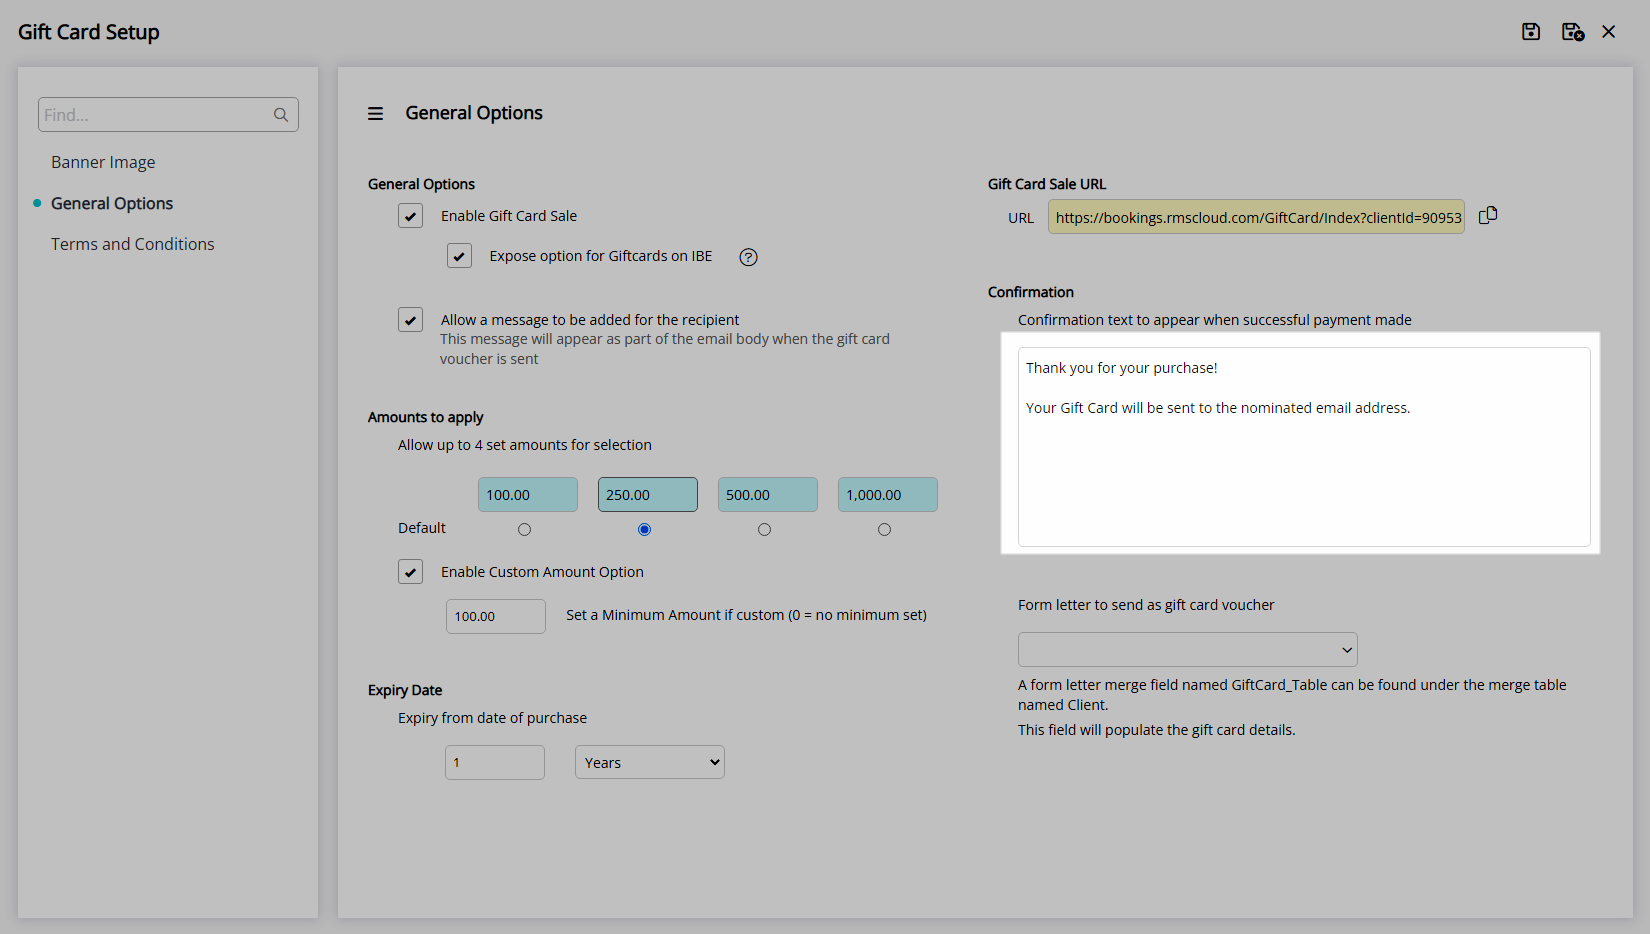
Select the Form Letter to be used as the Gift Card.
Select the ![]() 'Copy URL' icon.
'Copy URL' icon.
Select 'Save' to store the changes made.
Optional: Setup a custom Banner Image.
Navigate to the 'Banner Image' tab.
Select the  'Add' icon.
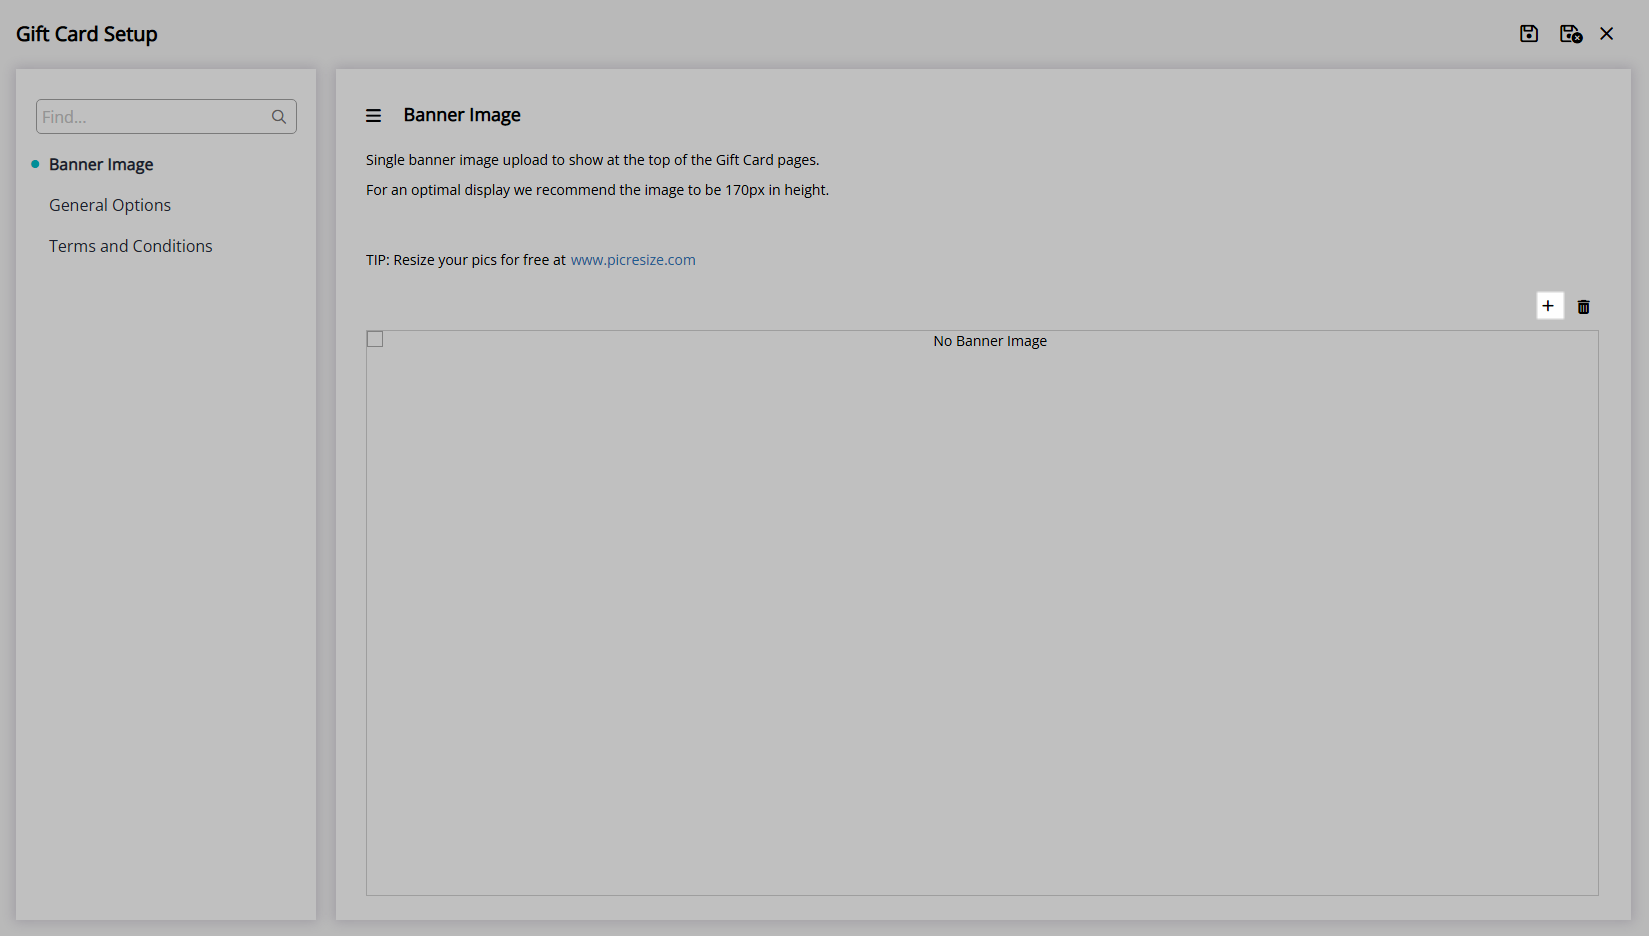
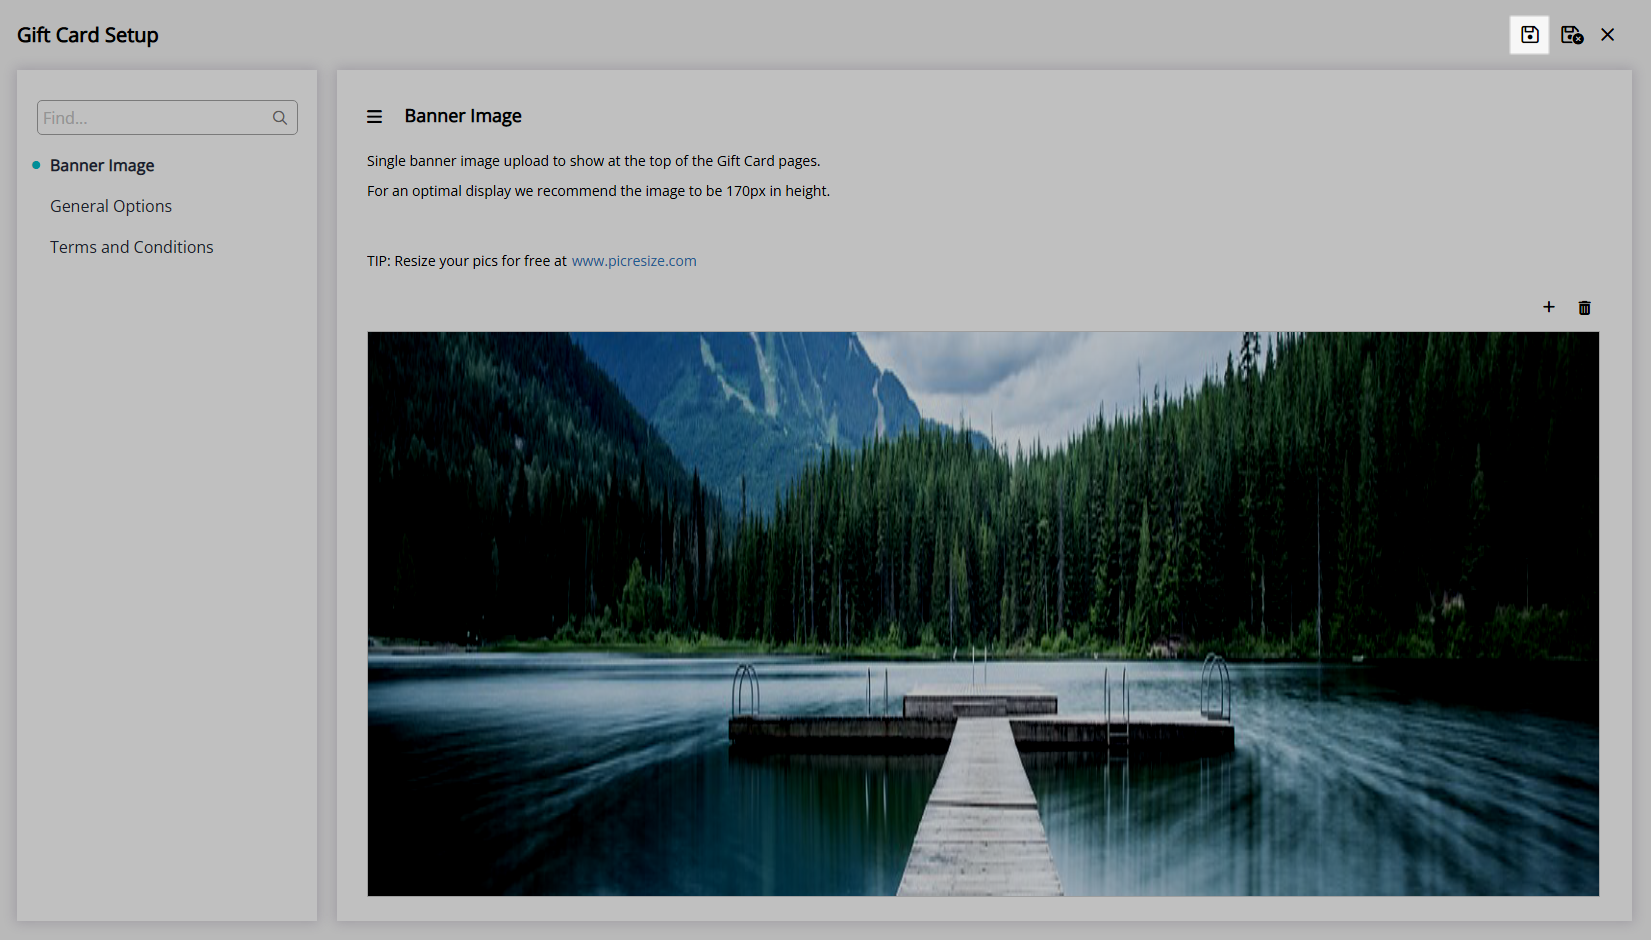
Select an Image and choose 'Ok'.
Select 'Save' to store the changes made.
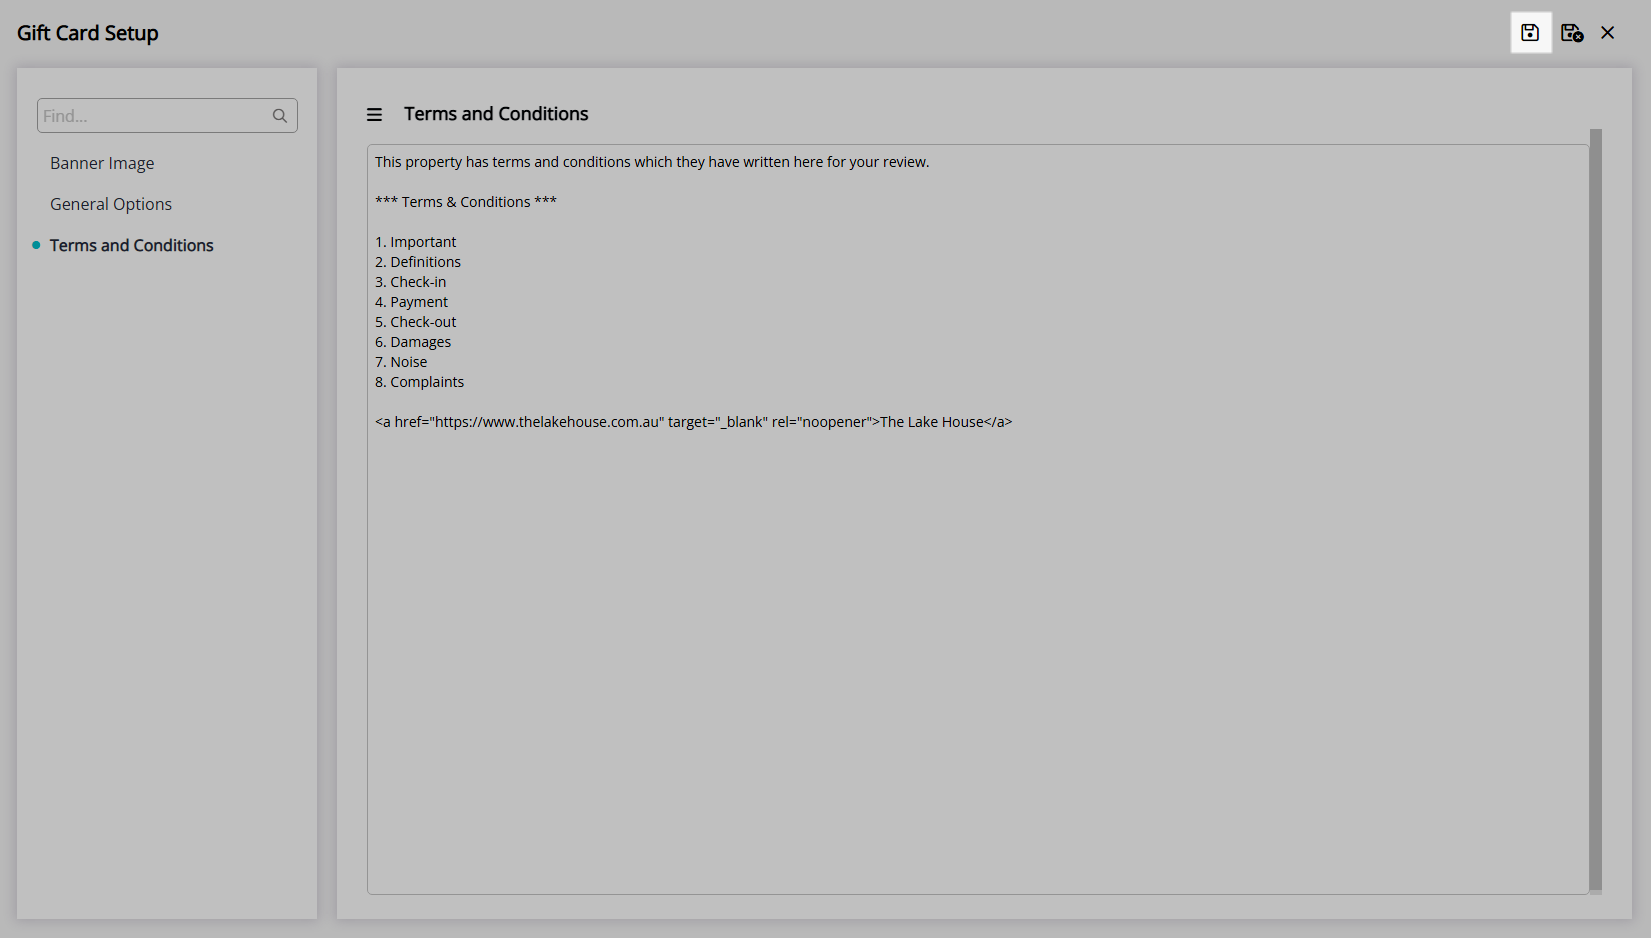
Optional: Setup Gift Card Terms & Conditions.
Navigate to the 'Terms & Conditions' tab.
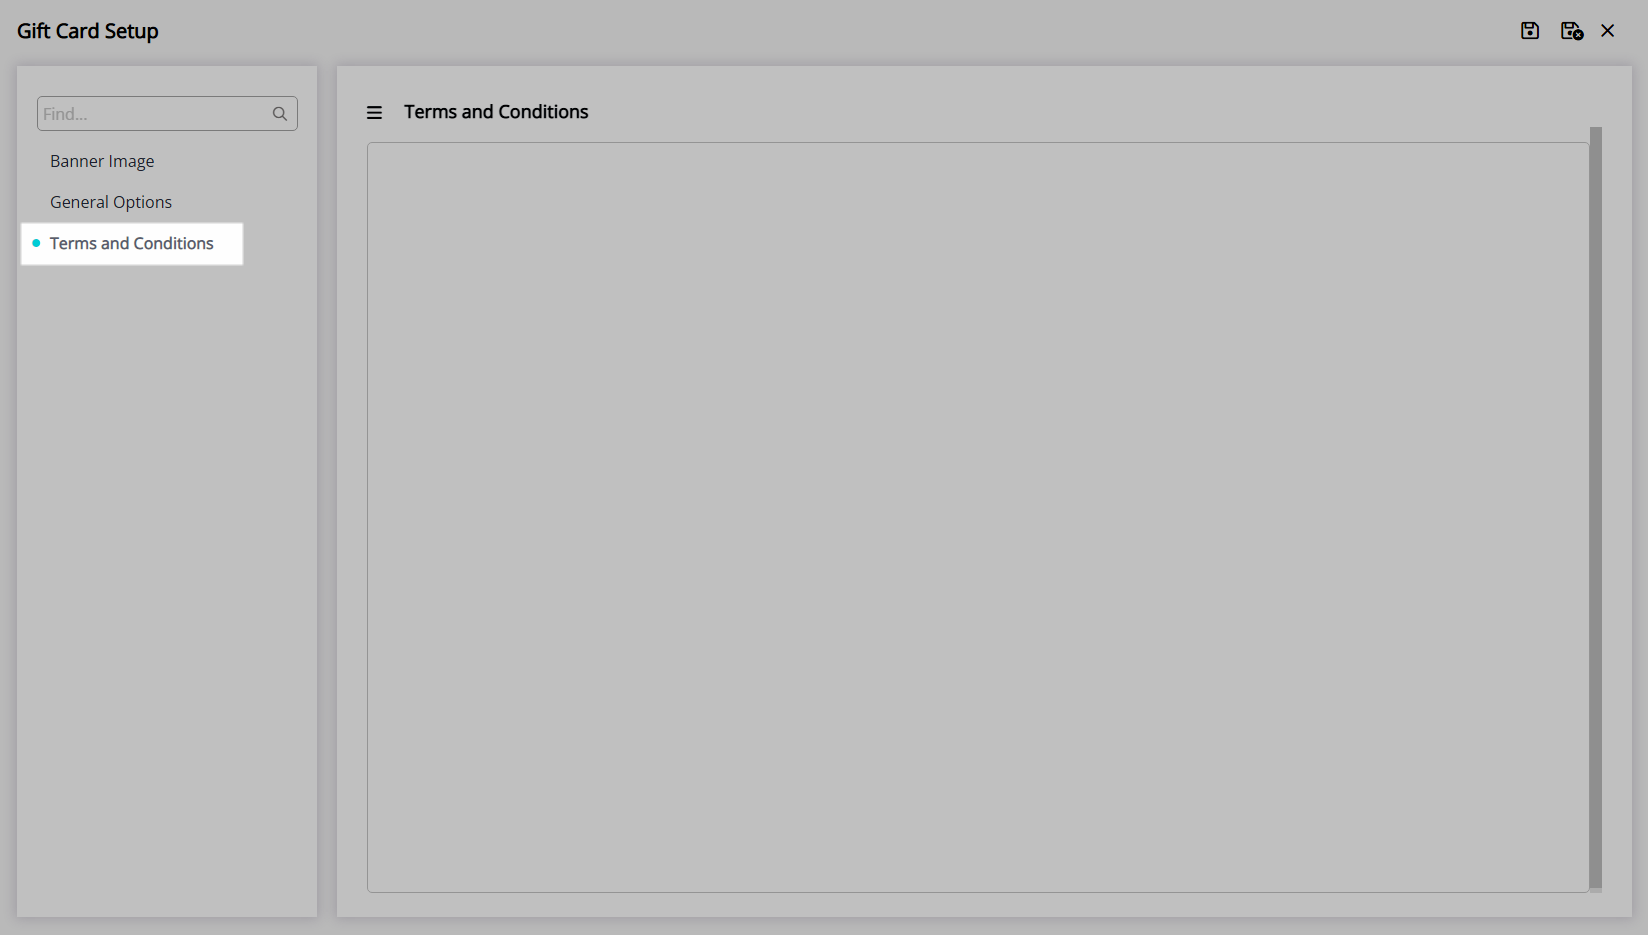
Enter the Gift Card Terms & Conditions.
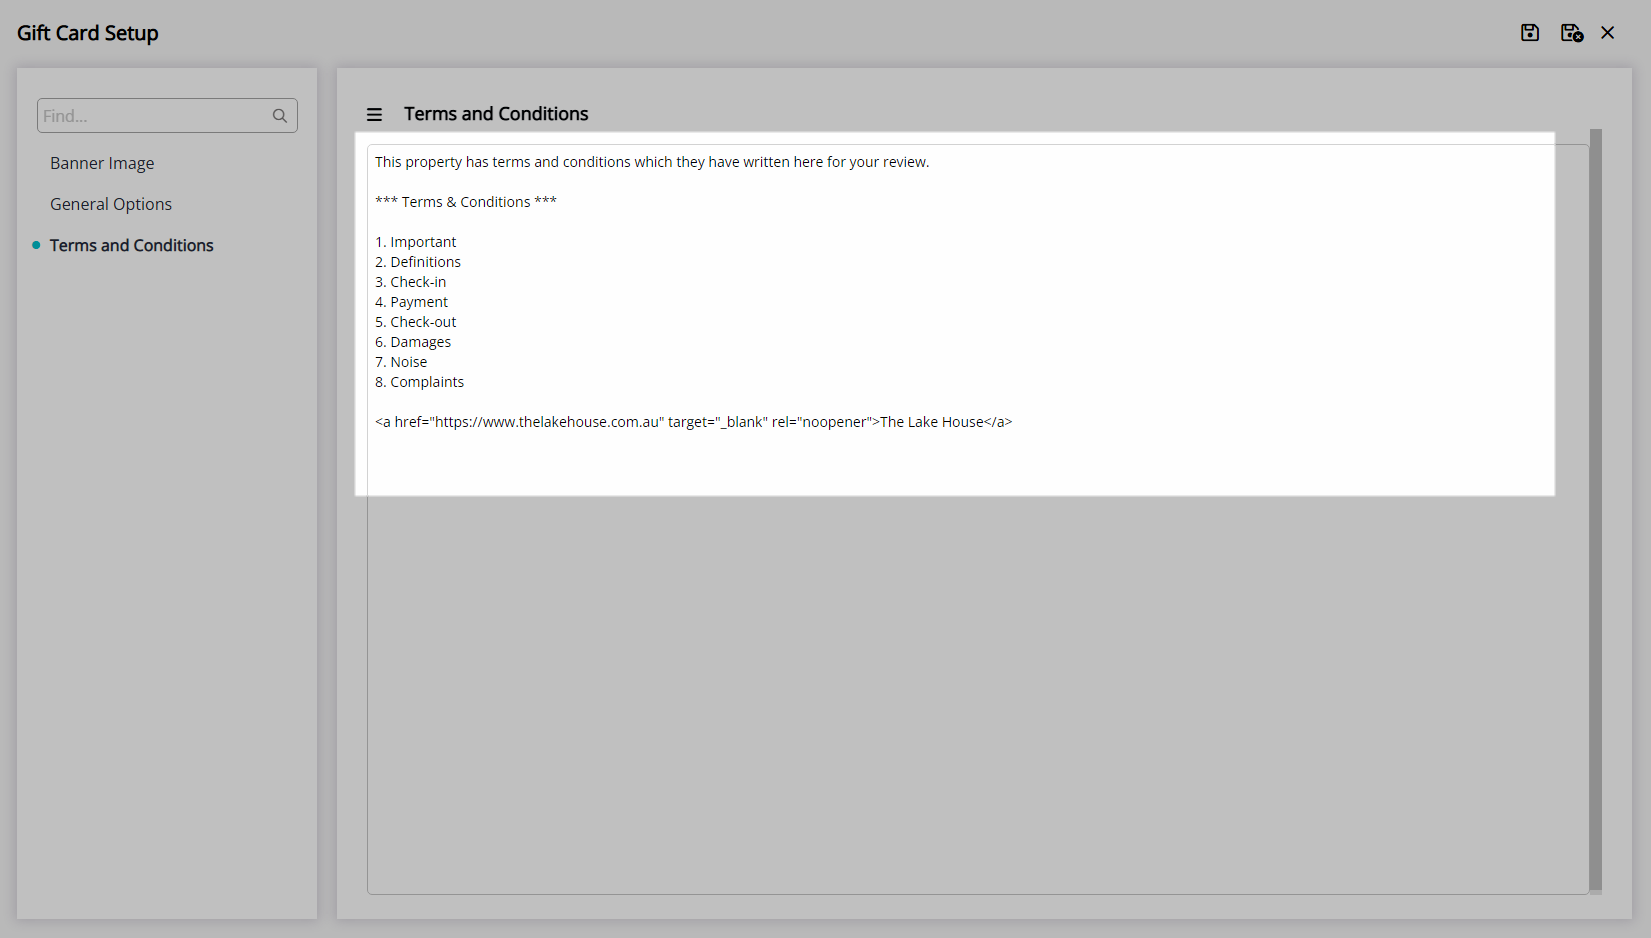
Select 'Save' to store the changes made.
Select 'Save/Exit' to store the changes made and leave the Gift Card setup.
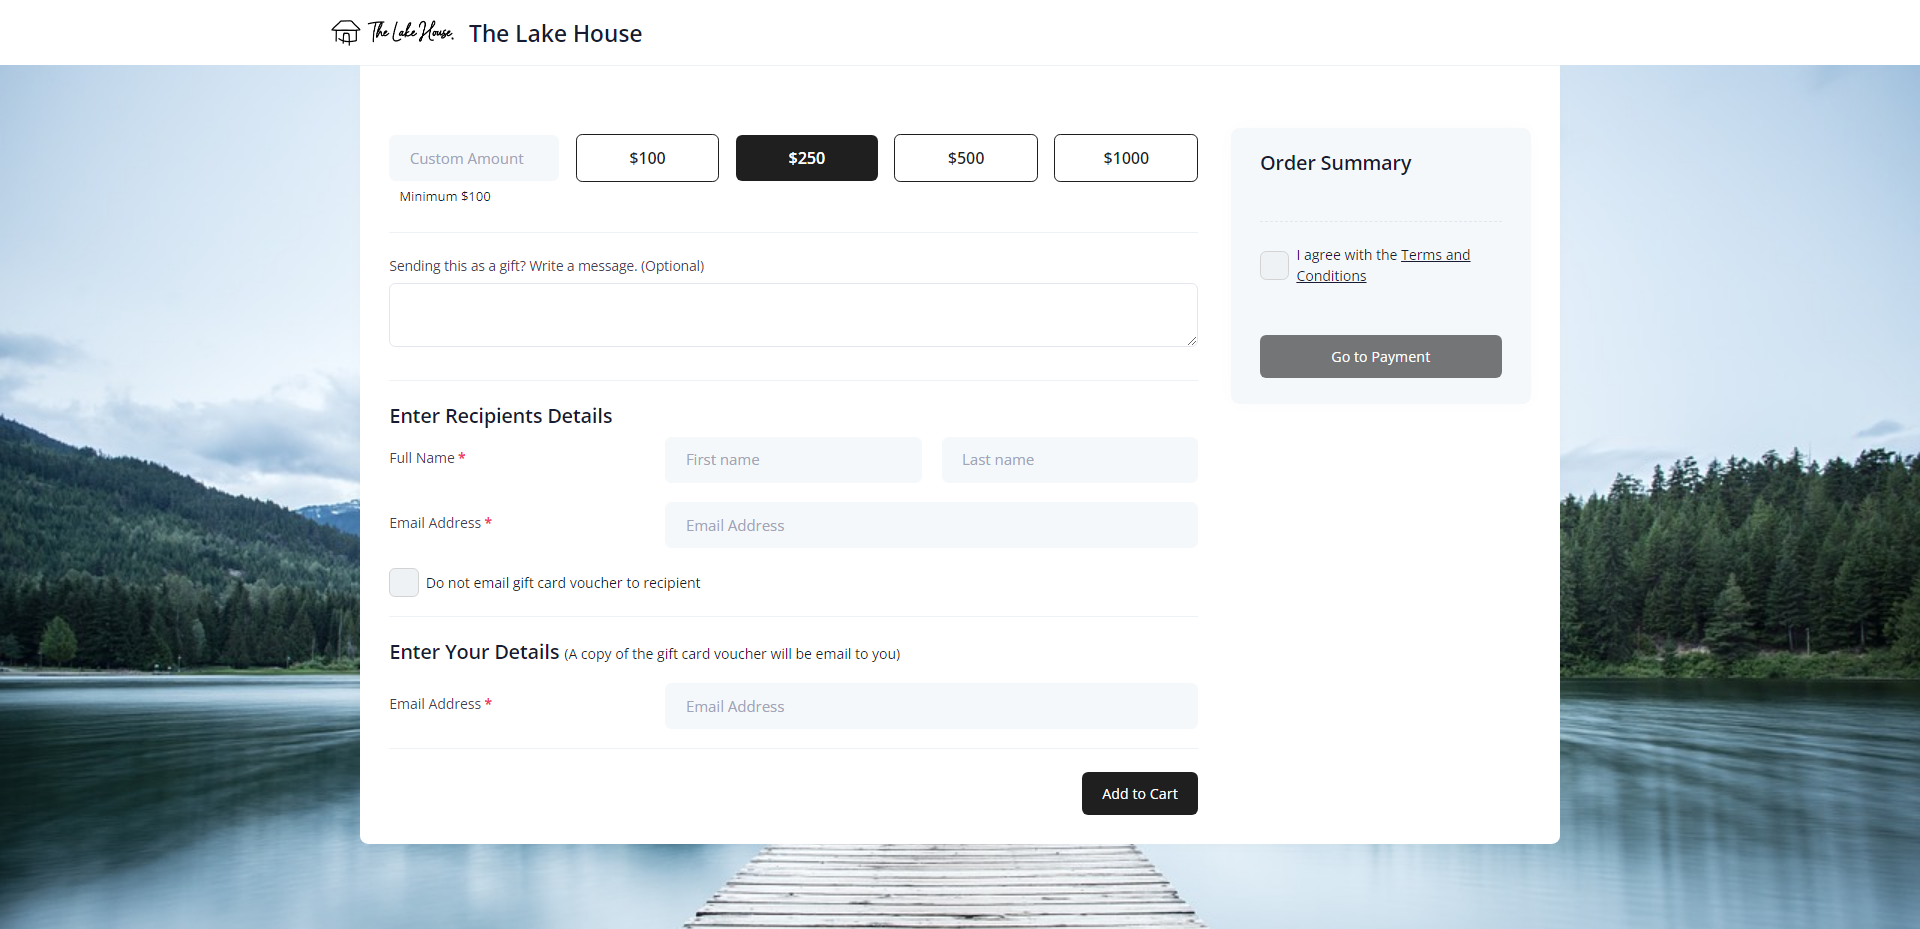
The Gift Card Portal URL can be used to purchase Gift Cards using the options entered during setup.

Setup
Have your System Administrator complete the following.
- Go to Setup > Portal Access > Gift Cards in RMS.
- Navigate to the 'General Options' tab.
- Select the checkbox 'Enable Gift Card Sale'.
- Optional: Select the checkbox 'Expose options for Gift Cards on the IBE'.
- Optional: Select the checkbox 'Allow a message to be added for the recipient'.
- Enter the Preset Gift Card Amounts.
- Select the Default Gift Card Value.
-
Optional: Select the checkbox 'Enable Custom Amount Option'.
- Optional: Enter a Minimum Value.
- Select and enter the Gift Card Expiry Period.
- Enter the Payment Confirmation Text.
- Select the Form Letter to be used as the Gift Card.
- Select the
 'Copy URL' icon.
 - Save.
-
Optional: Setup a custom Banner Image.
- Navigate to the 'Banner Image' tab.
- Select the
 'Add' icon.
 - Select an Image and choose 'Ok'.
- Save.
-
Optional: Setup Gift Card Terms & Conditions.
- Navigate to the 'Terms & Conditions' tab.
- Enter the Gift Card Terms & Conditions.
- Save.
- Save/Exit.

A Form Letter setup with the merge field <<GiftCard_Table>> must be selected to use as the Gift Card.
The Gift Card Portal provides ecommerce of gift cards and vouchers when using RMS Pay or Windcave as the Payment Gateway.
-
Guide
- Add Button
Guide
Go to Setup > Portal Access > Gift Cards in RMS.
Navigate to the 'General Options' tab.
Select the checkbox 'Enable Gift Card Sale'.
Optional: Select the checkbox 'Expose options for Gift Cards on the IBE'.
Optional: Select the checkbox 'Allow a message to be added for the recipient'.
Enter the Preset Gift Card Amounts.
Select the Default Gift Card Value.
Optional: Select the checkbox 'Enable Custom Amount Option'.
Optional: Enter a Minimum Value.
Select and enter the Gift Card Expiry Period.
Enter the Payment Confirmation Text.
Select the Form Letter to be used as the Gift Card.
Select the ![]() 'Copy URL' icon.
'Copy URL' icon.
Select 'Save' to store the changes made.
Optional: Setup a custom Banner Image.
Navigate to the 'Banner Image' tab.
Select the 'Add' icon.
Select an Image and choose 'Ok'.
Select 'Save' to store the changes made.
Optional: Setup Gift Card Terms & Conditions.
Navigate to the 'Terms & Conditions' tab.
Enter the Gift Card Terms & Conditions.
Select 'Save' to store the changes made.
Select 'Save/Exit' to store the changes made and leave the Gift Card setup.
The Gift Card Portal URL can be used to purchase Gift Cards using the options entered during setup.