Managing Groups
Group management tools available on a master reservation in RMS.
Table of Contents
Group Cover PageGroup AccountCharge RoutingGroup Management ToolsAreaAuto AllocateRemove from MasterArea ListBulk CancelGuestQuick AddPrint Guest ListA Master Reservation is a group of reservations for guests travelling together, linked by a group name and reservation number. A group reservation can be created using the ‘Master Reservation’ option on the Booking Chart, by adding areas to a new or existing reservation, combining existing reservations, on Quick Quote, or with the Master Reservation tool when set up as Book by Category.
An existing group reservation can be managed using the group management tools available on the group cover page of a Master Reservation, which includes a group account, charge routing, an area list, and other group management tools.
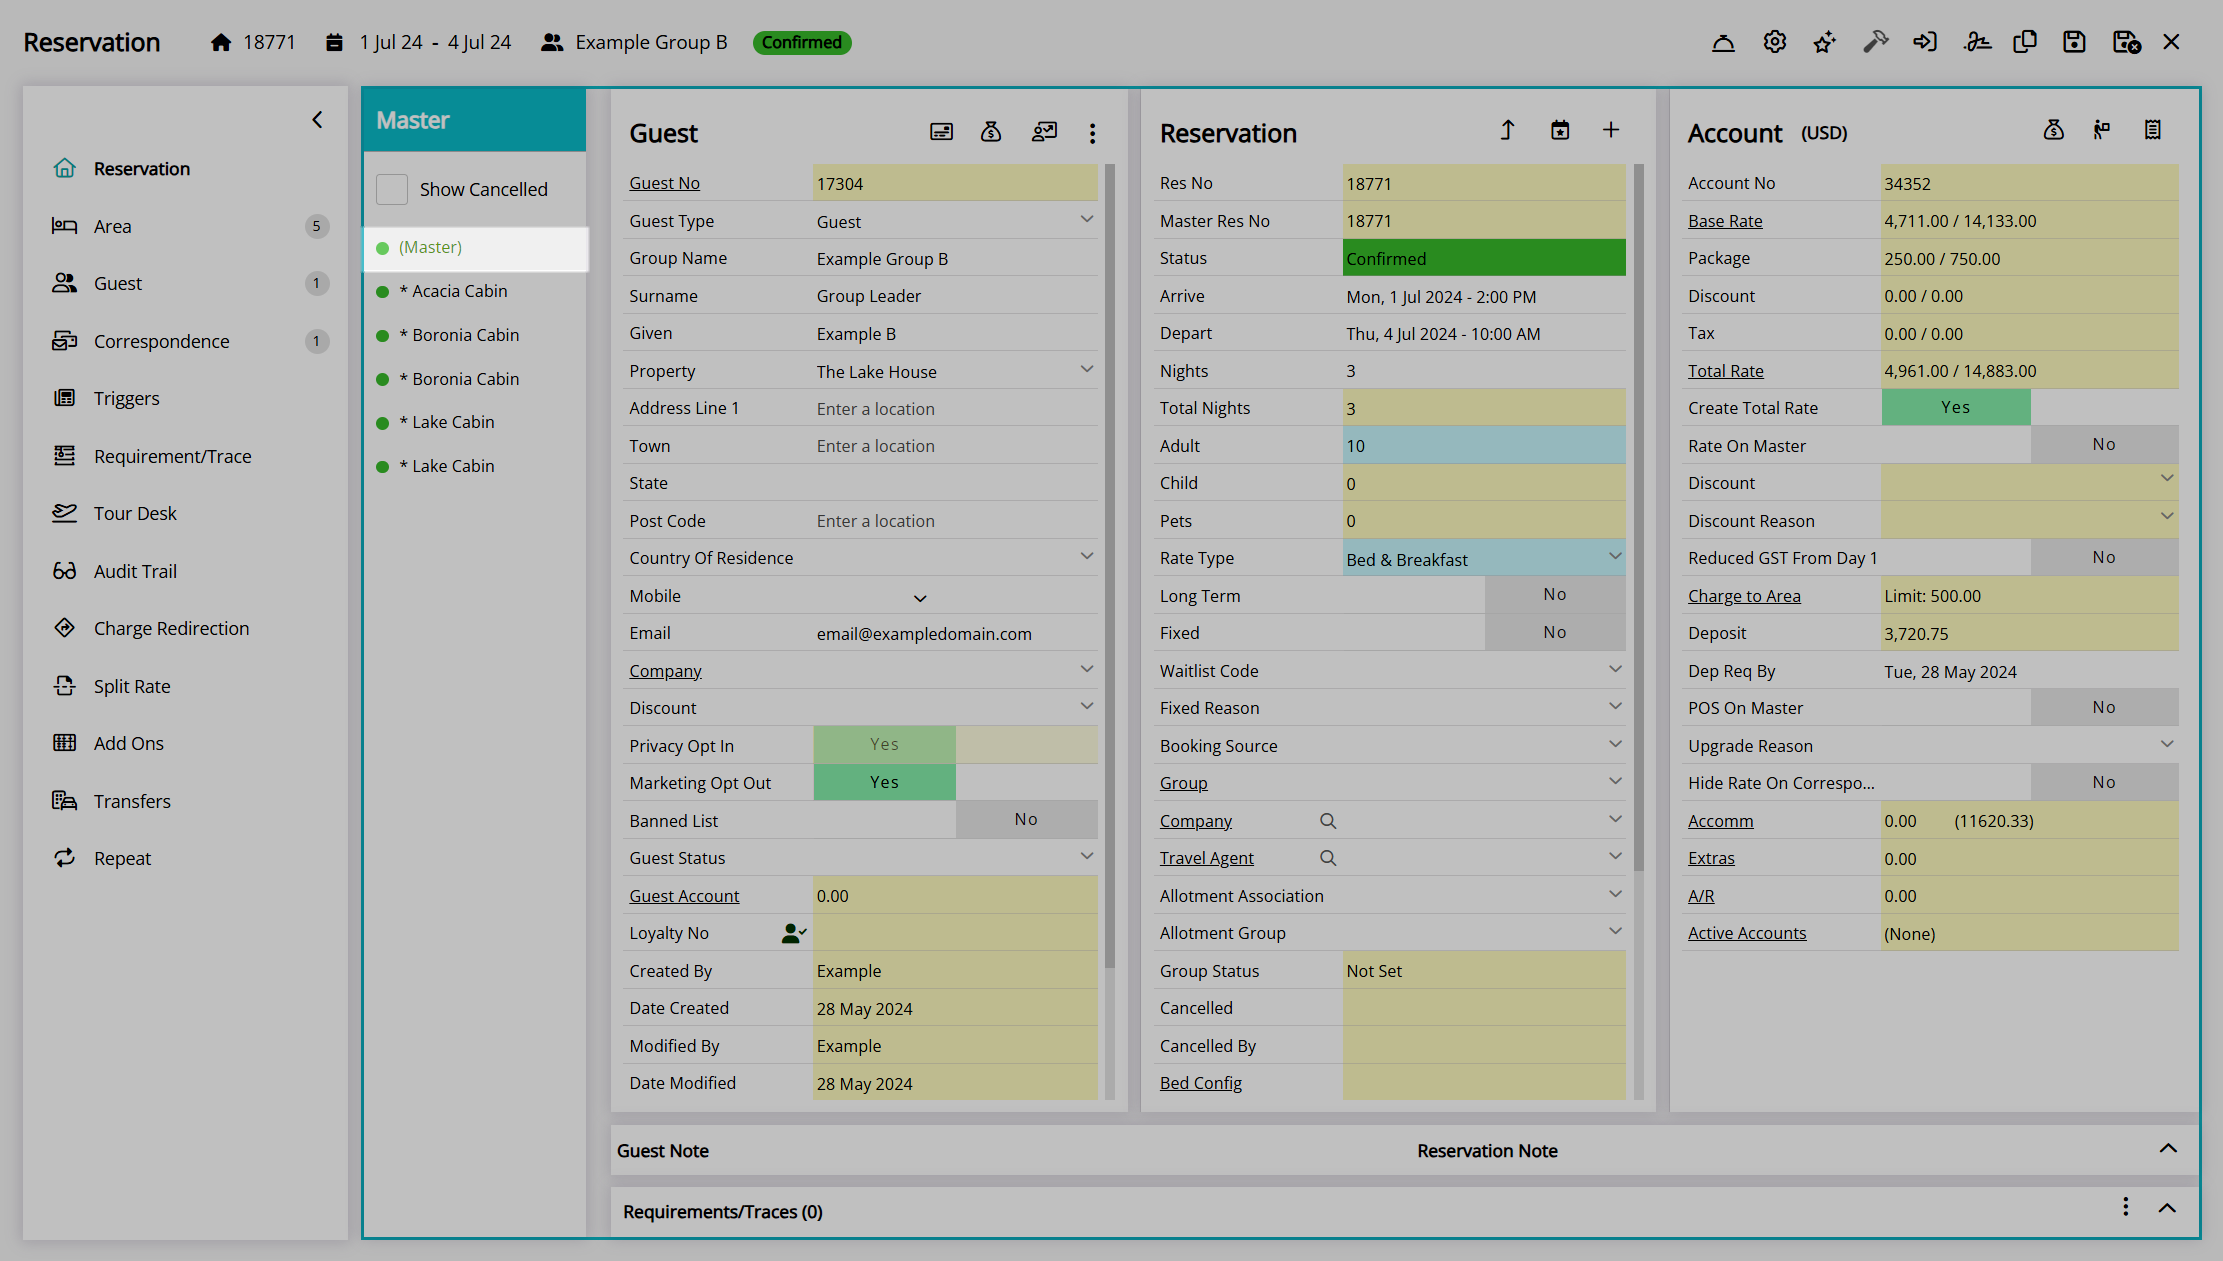
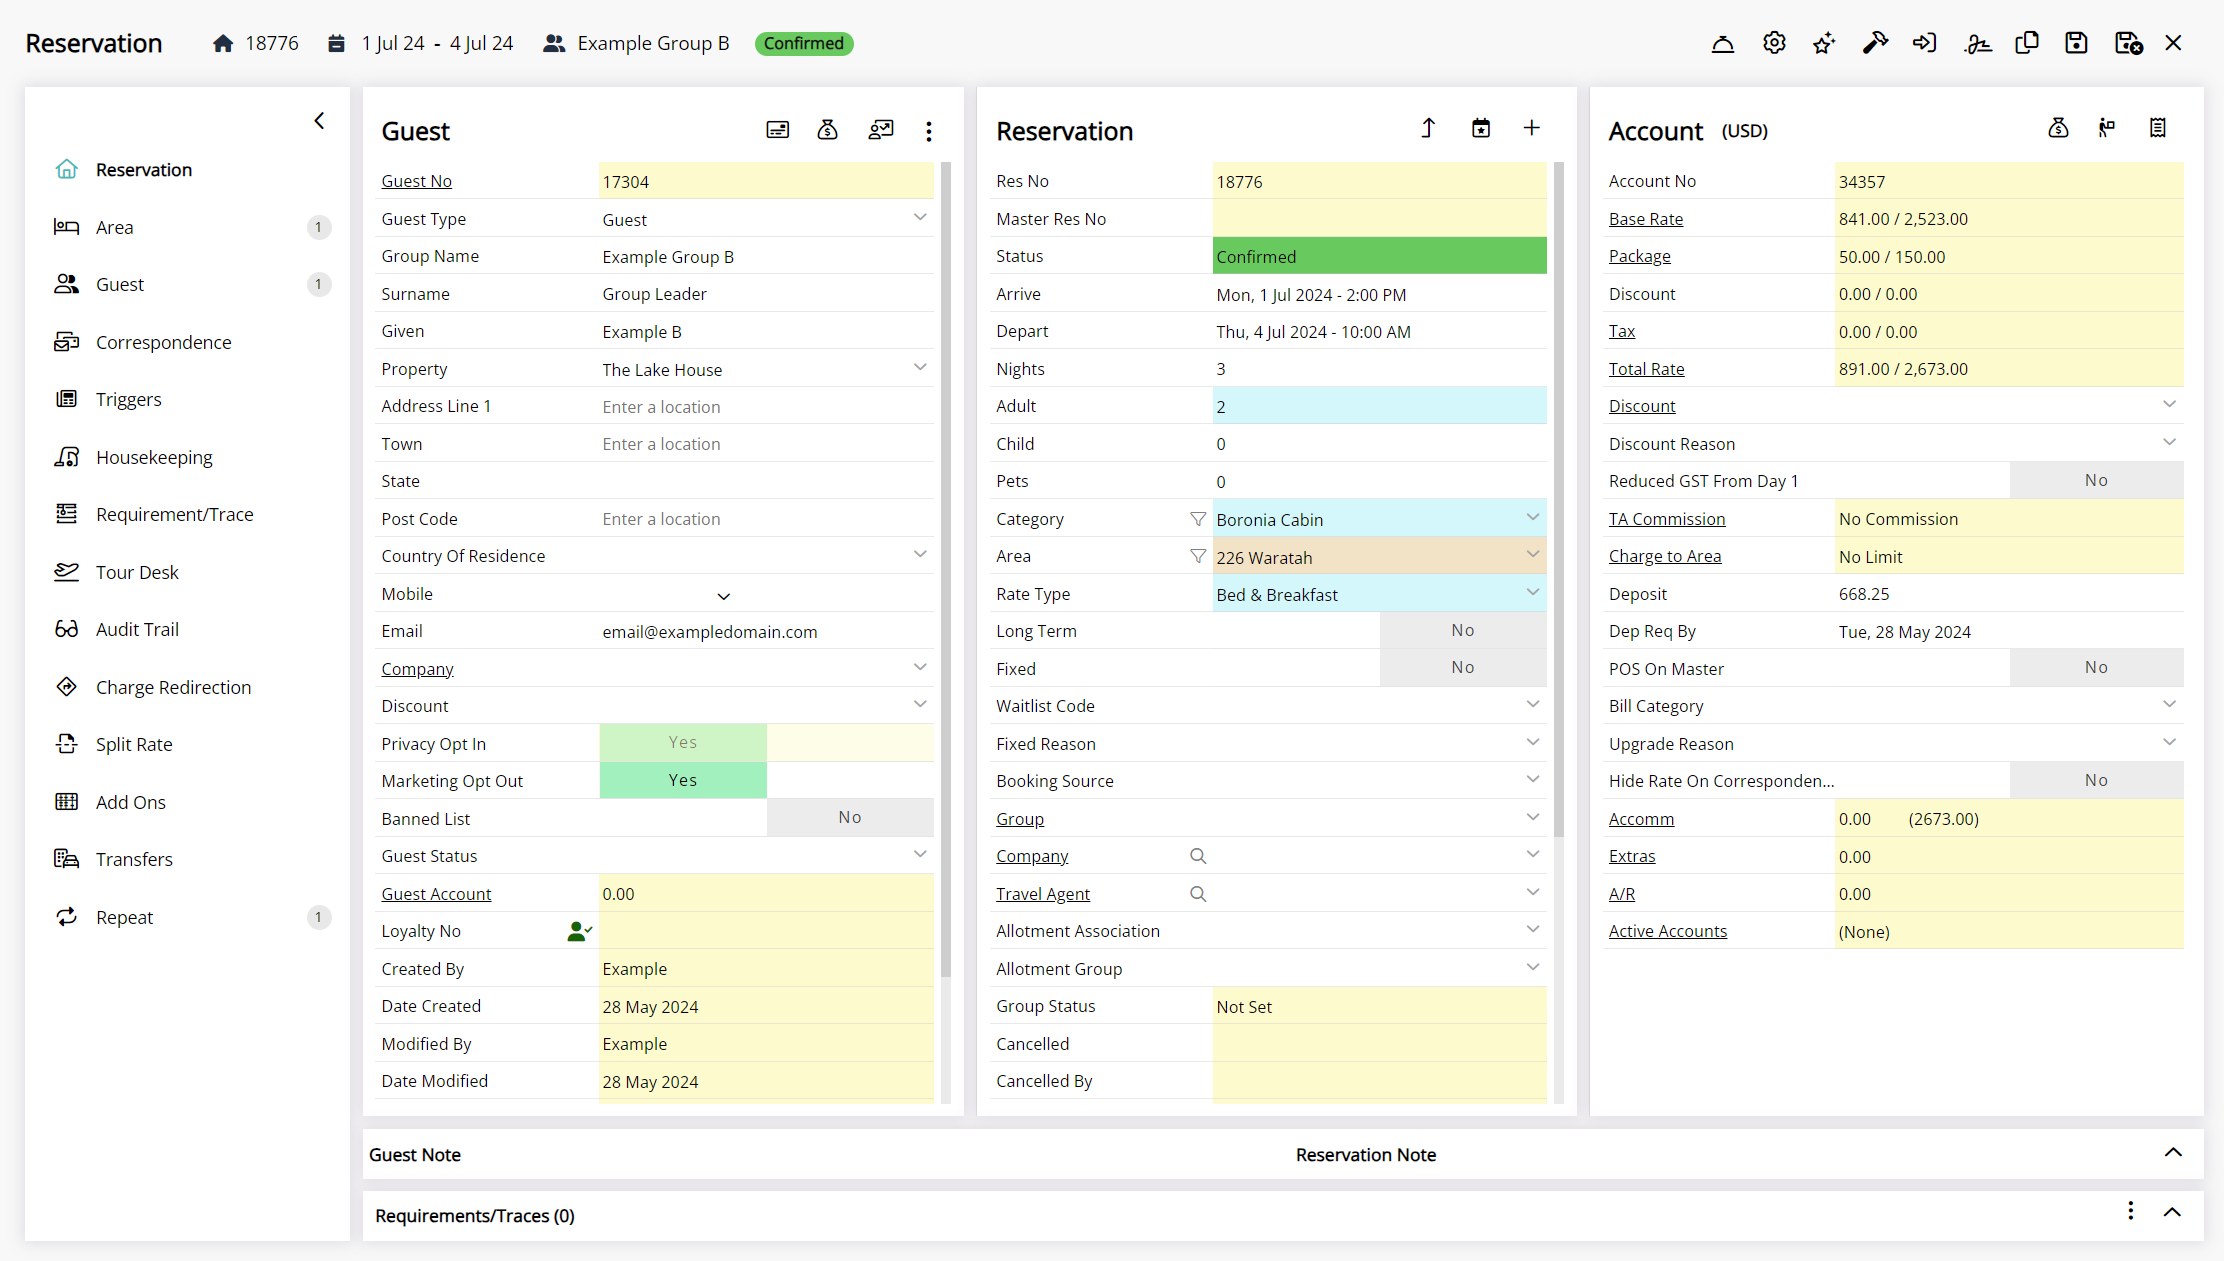
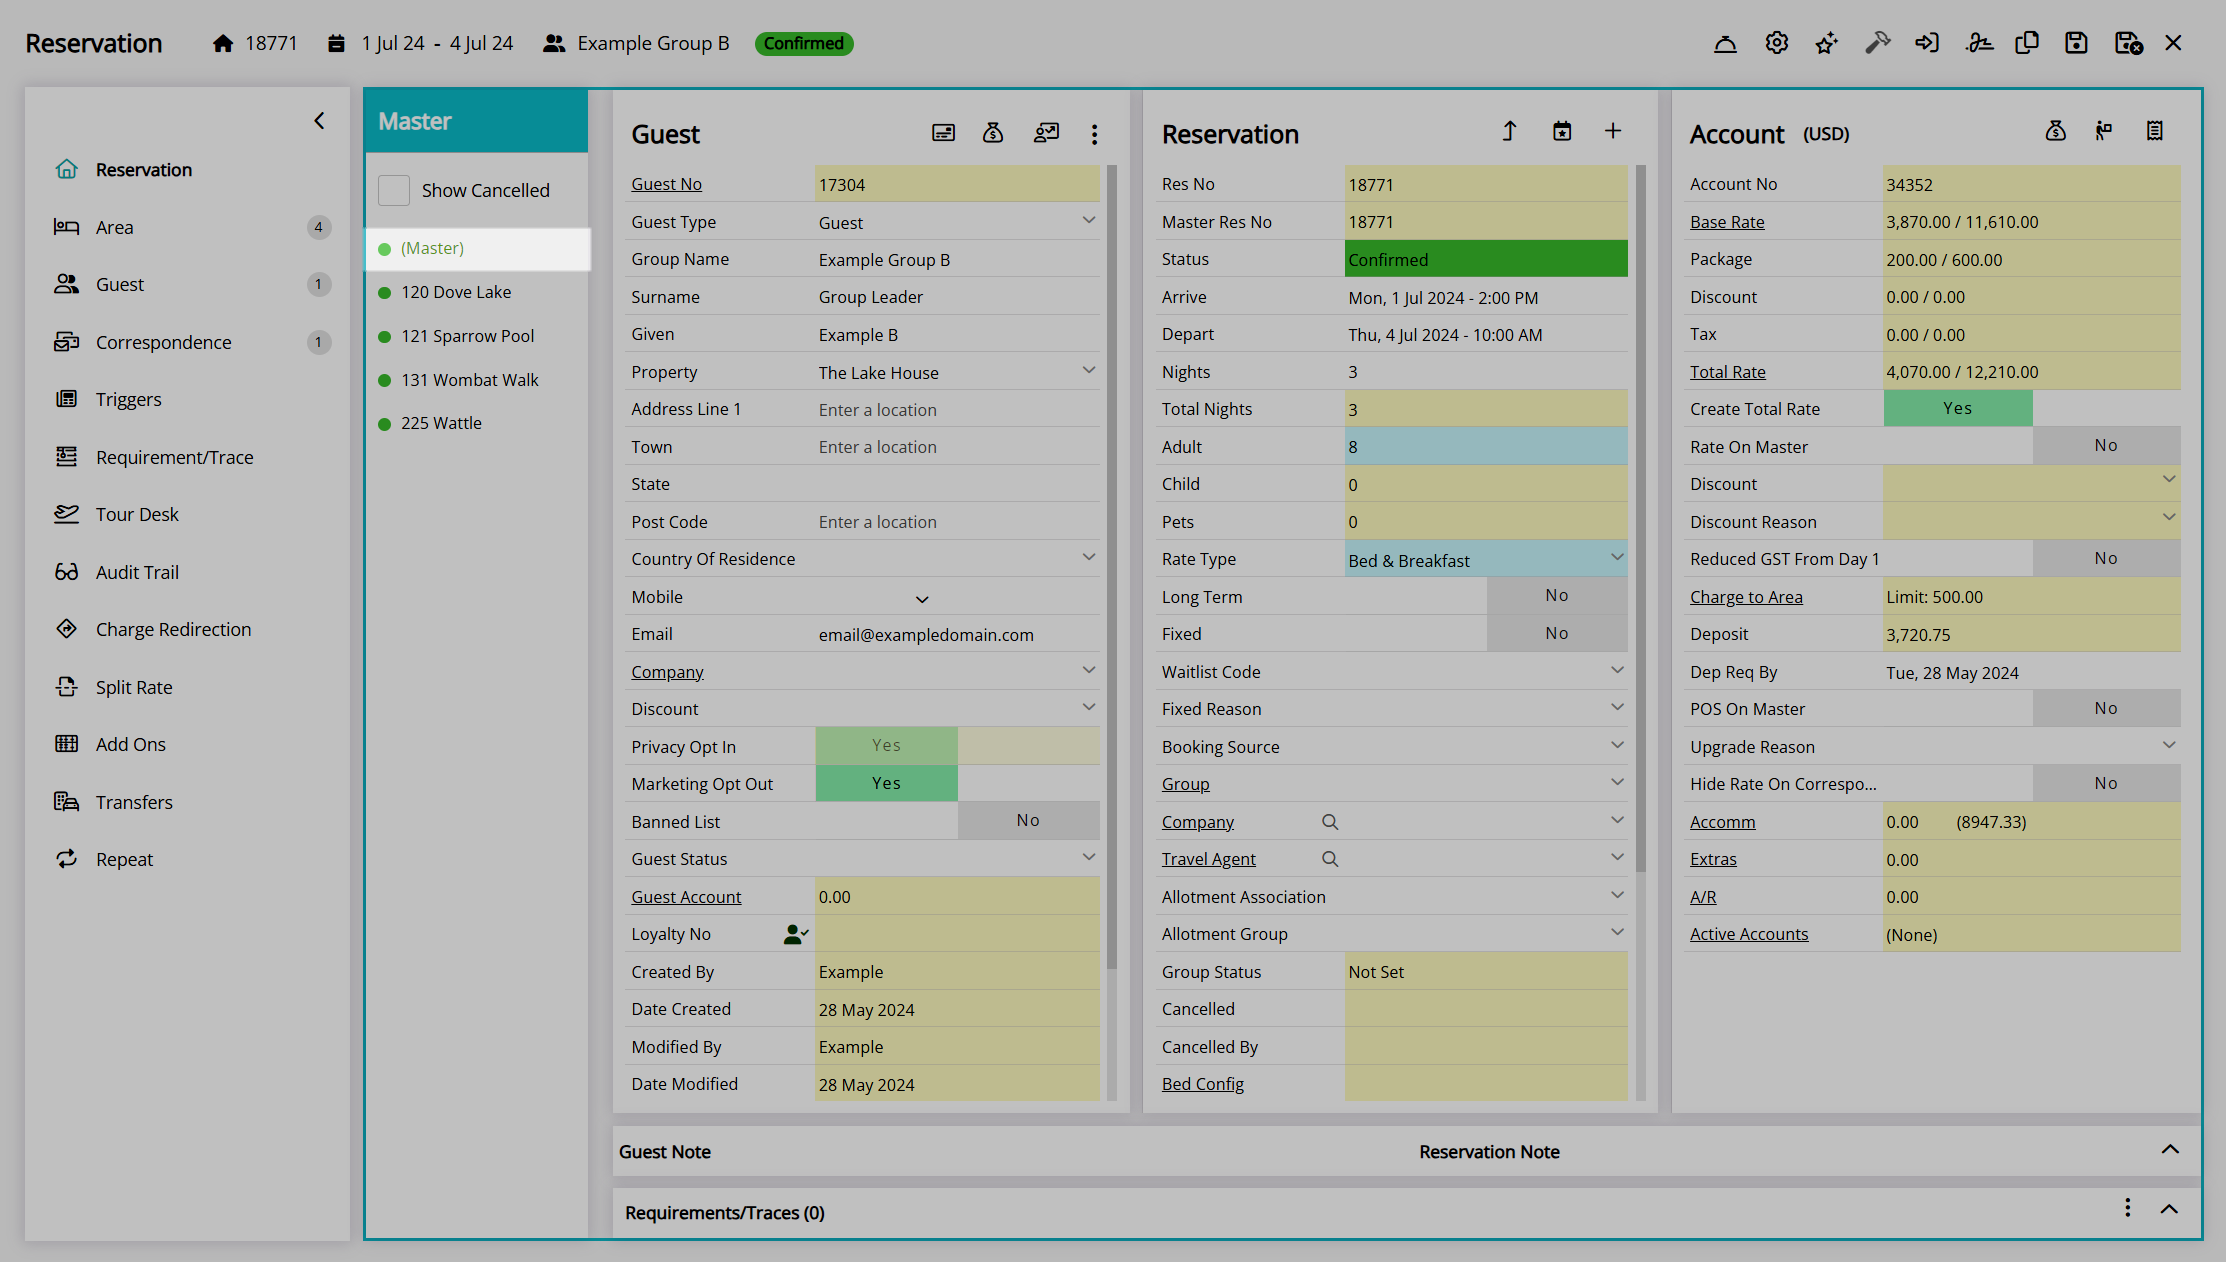
Group Cover Page
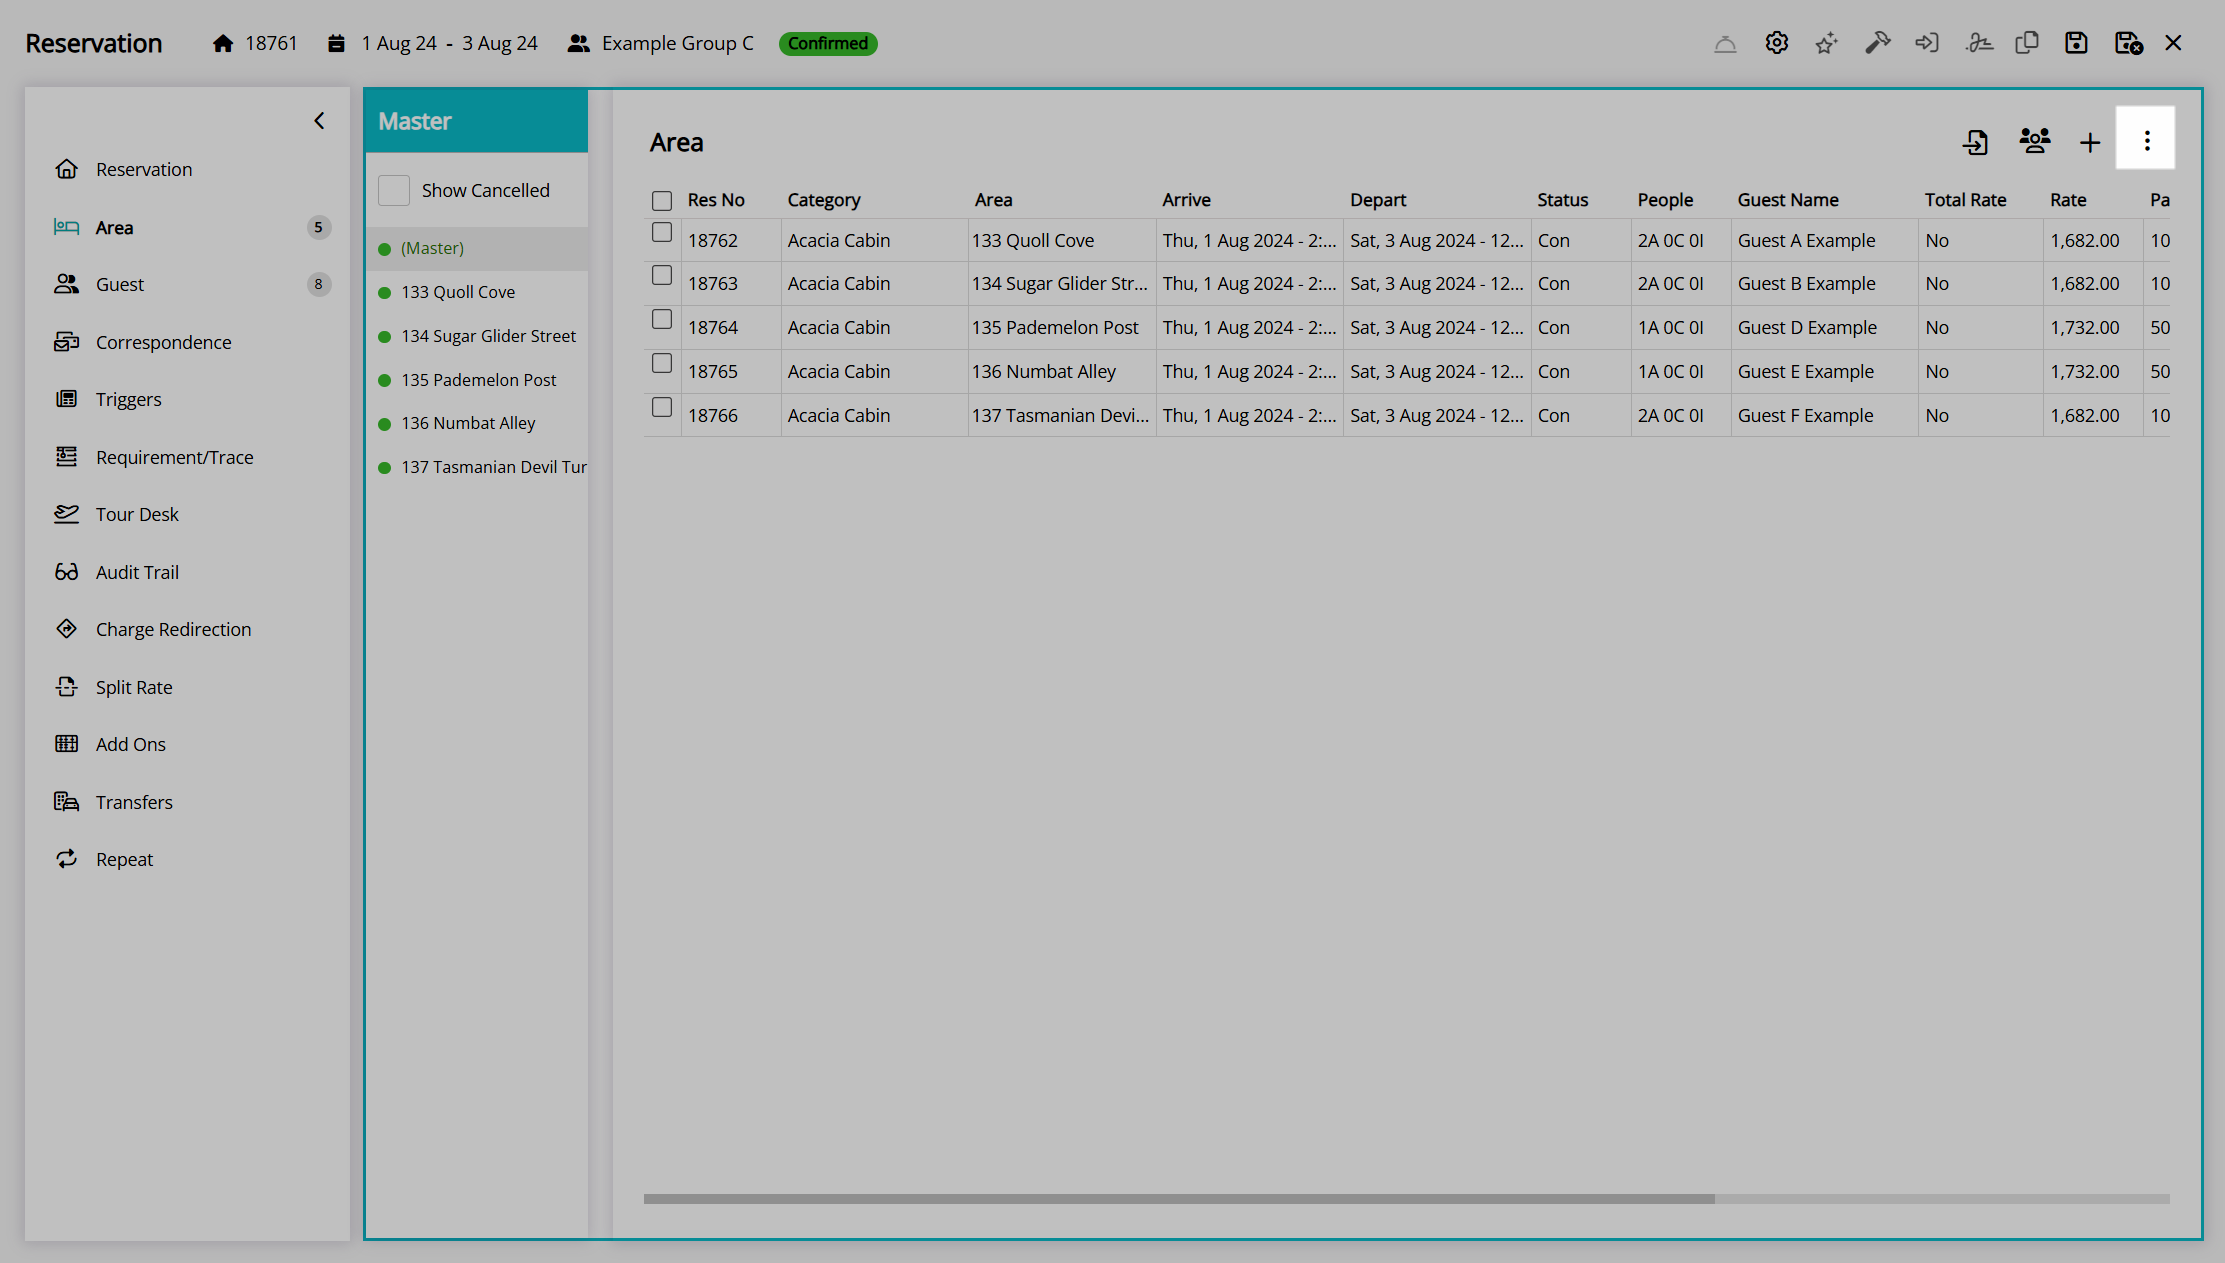
The group cover page—shown as (Master) in the navigator pane of a Master Reservation—includes the guest details for the group leader, a summary of reservation details for all reservations within the group, and a group account.
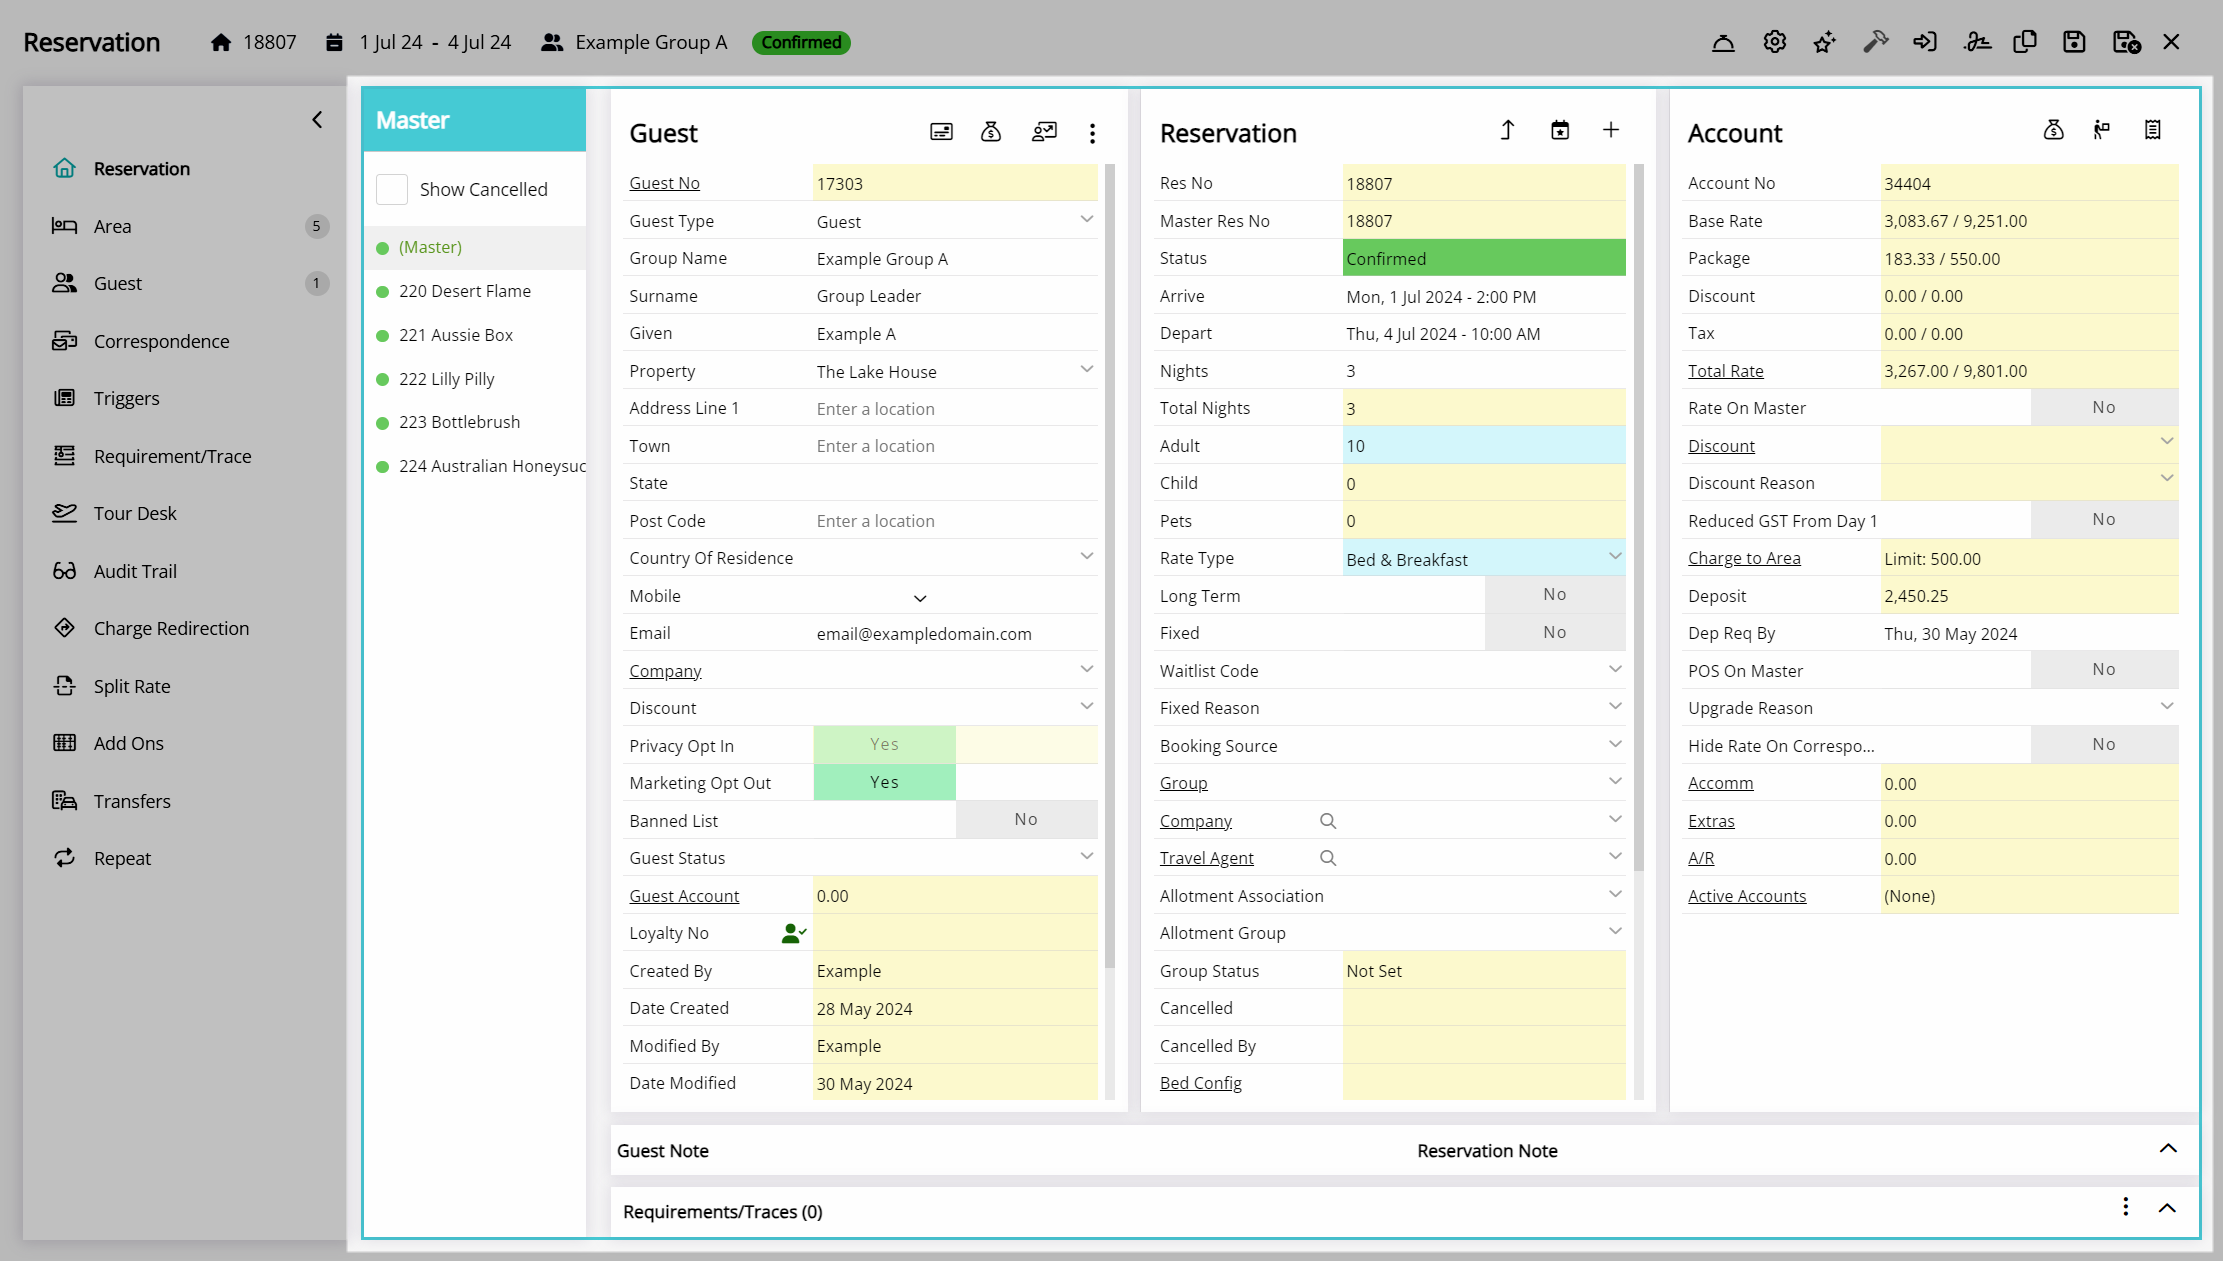
The navigator pane will appear automatically on a Master Reservation to enable quick toggling between the group cover page and each reservation.

Reservations will appear in the navigator pane by the area allocated to the reservation or the reservation's category if no area is assigned.
Reservation details are shown on the group cover page to summarise all reservations. The arrival date and departure date shown will use the earliest arrival and latest departure from all reservations in the group.
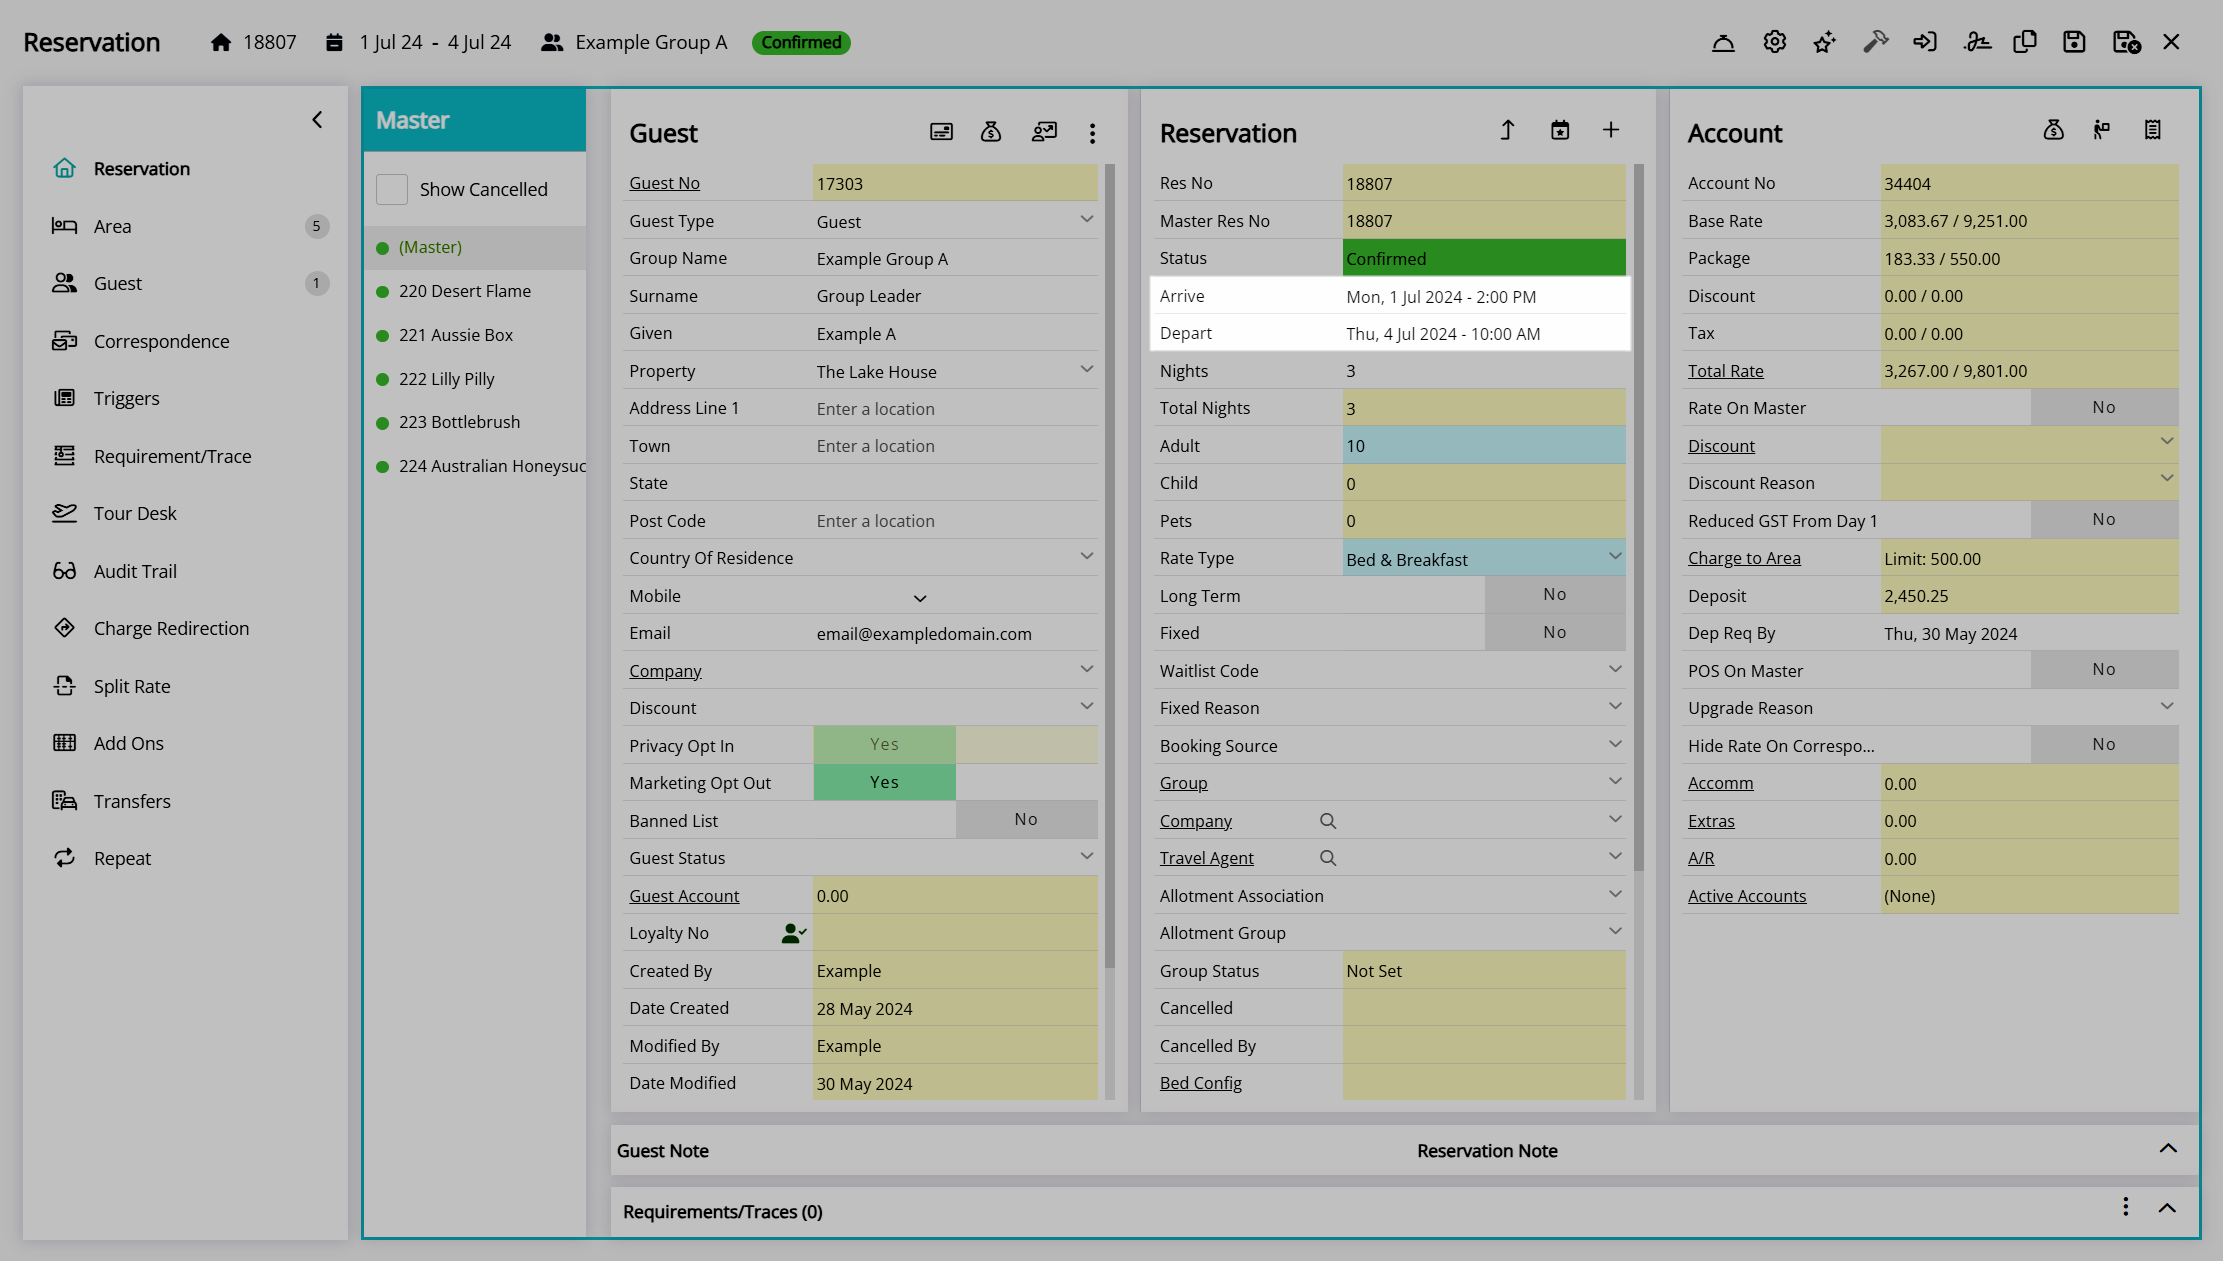
Totals shown for the number of days or nights and the number of guests will be a sum of all reservation stay dates and the number of guests for each reservation within the group.
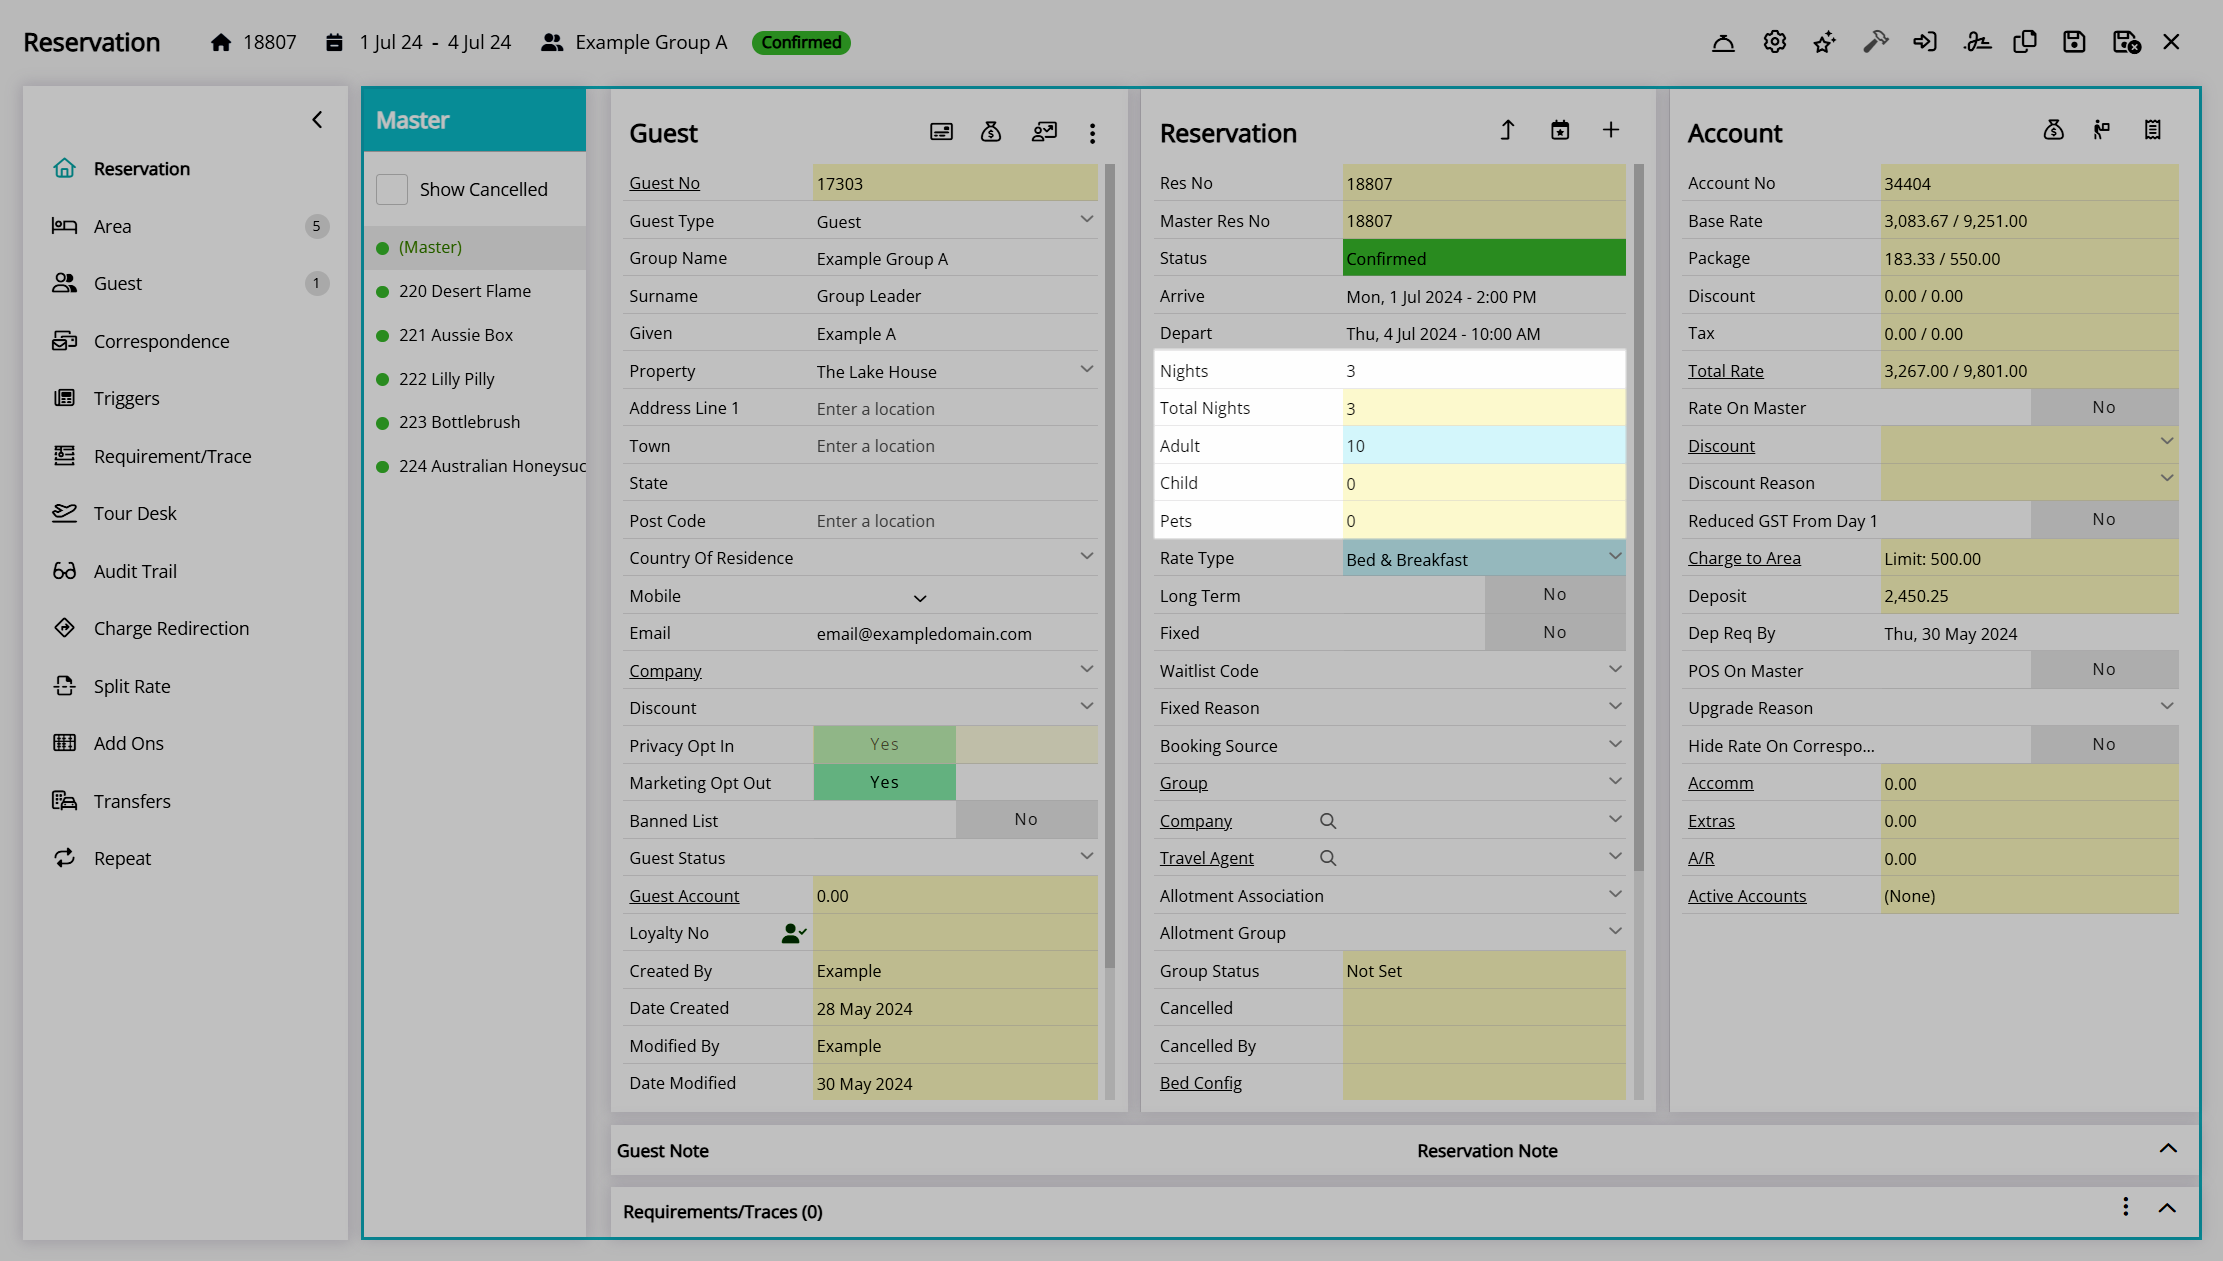
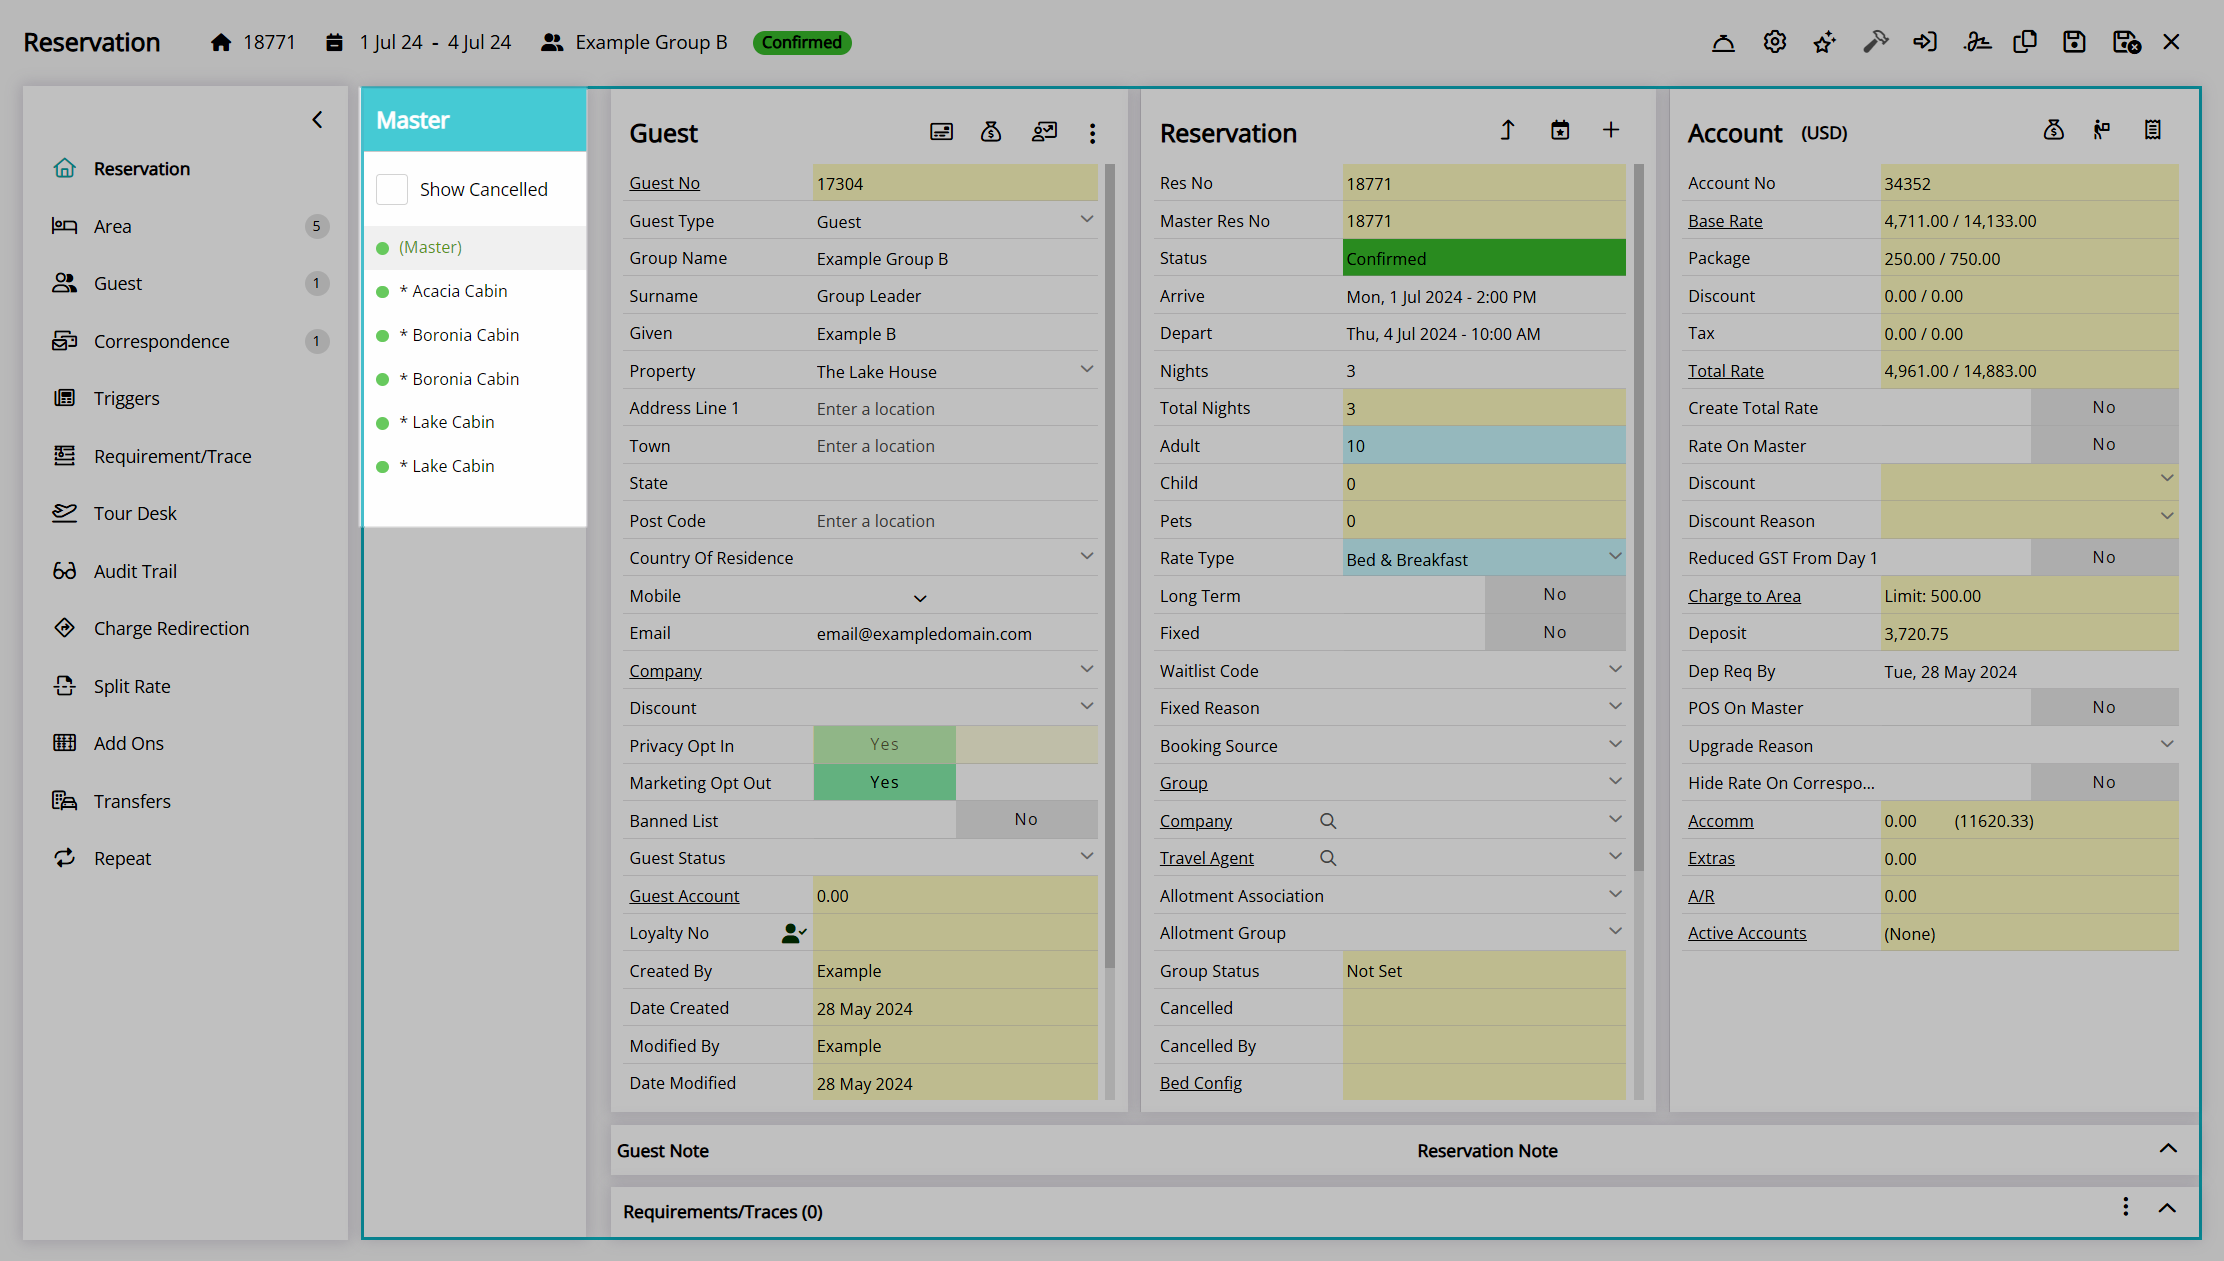
Totals shown on the group account reflect the sum of the rate, packages, taxes, deposits, and other charges for all reservations within the group and include charge routing options to determine how accommodation, point of sale, requirement, and other charges are directed between the group account and the individual reservation accounts.
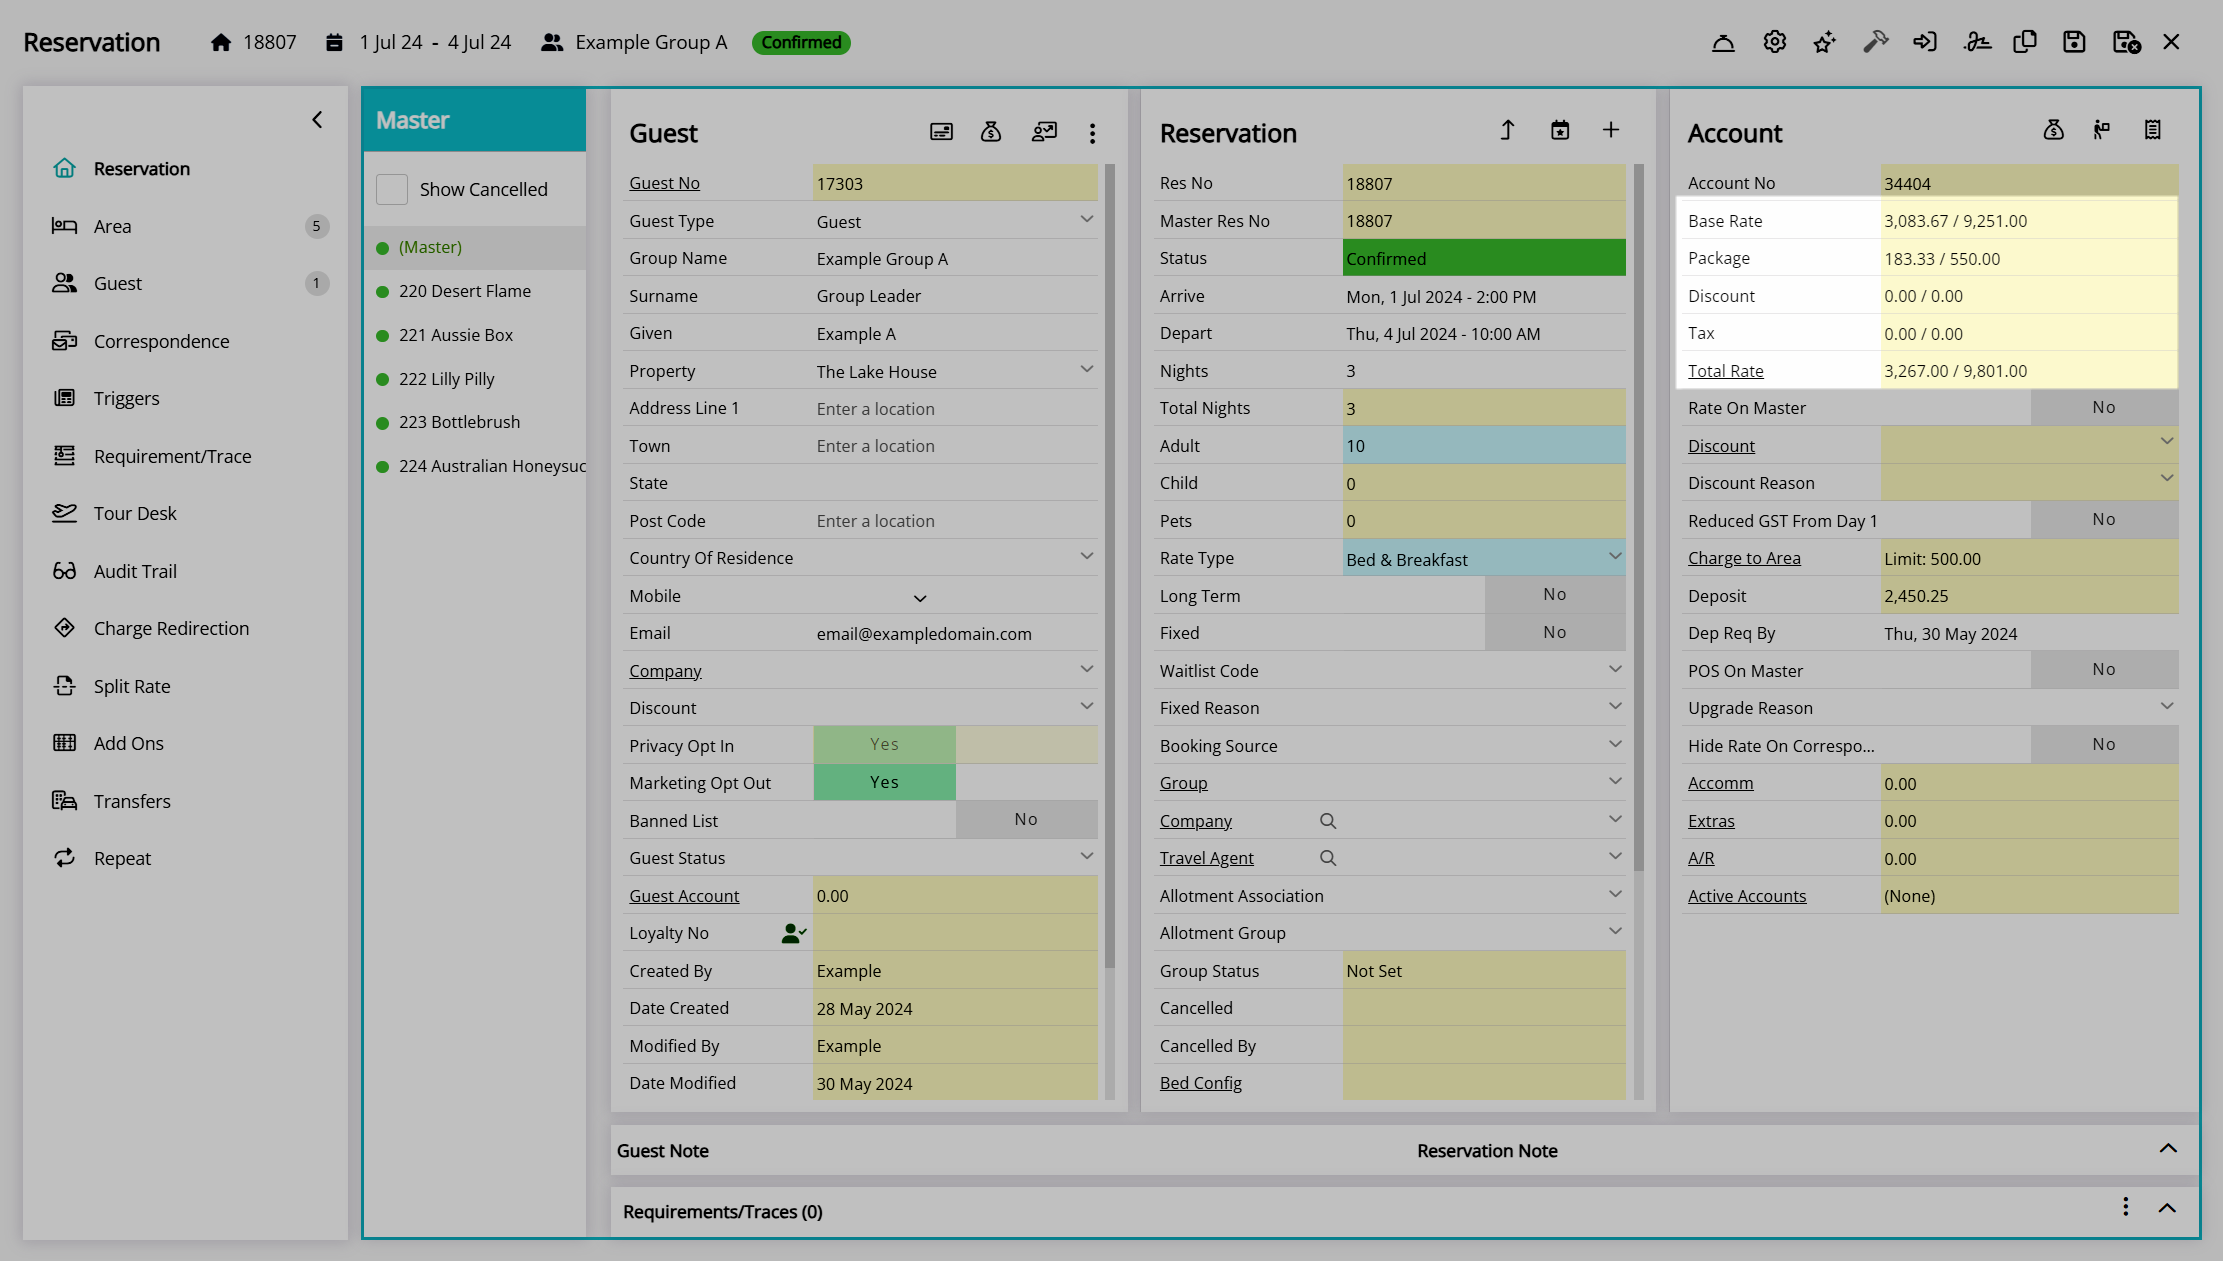
Group Account
The group account is accessible on the group cover page—shown as (Master) in the navigator pane—and can be used to consolidate charges for all reservations within the group to a single statement or tax invoice or for charges and payments that apply to the group account instead of any individual reservation account within the group.
The charge routing options selected on the group cover page will determine where charges for accommodation, point of sale, requirements, and other incidentals are created.
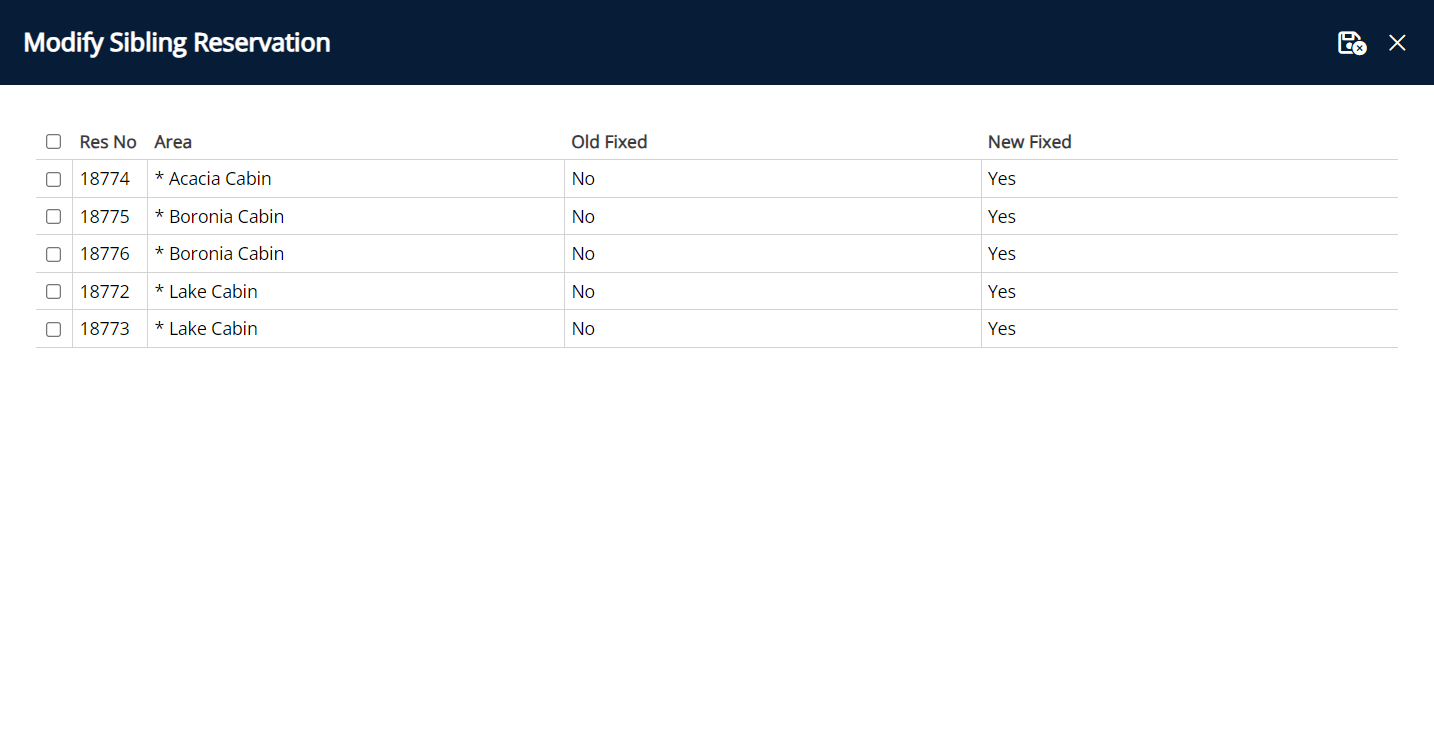
Any changes to the reservation details or group account details on the reservation screen will prompt you with an option to apply the changes to all sibling reservations within the group, including any changes to the reservation status initiated on the group cover page.
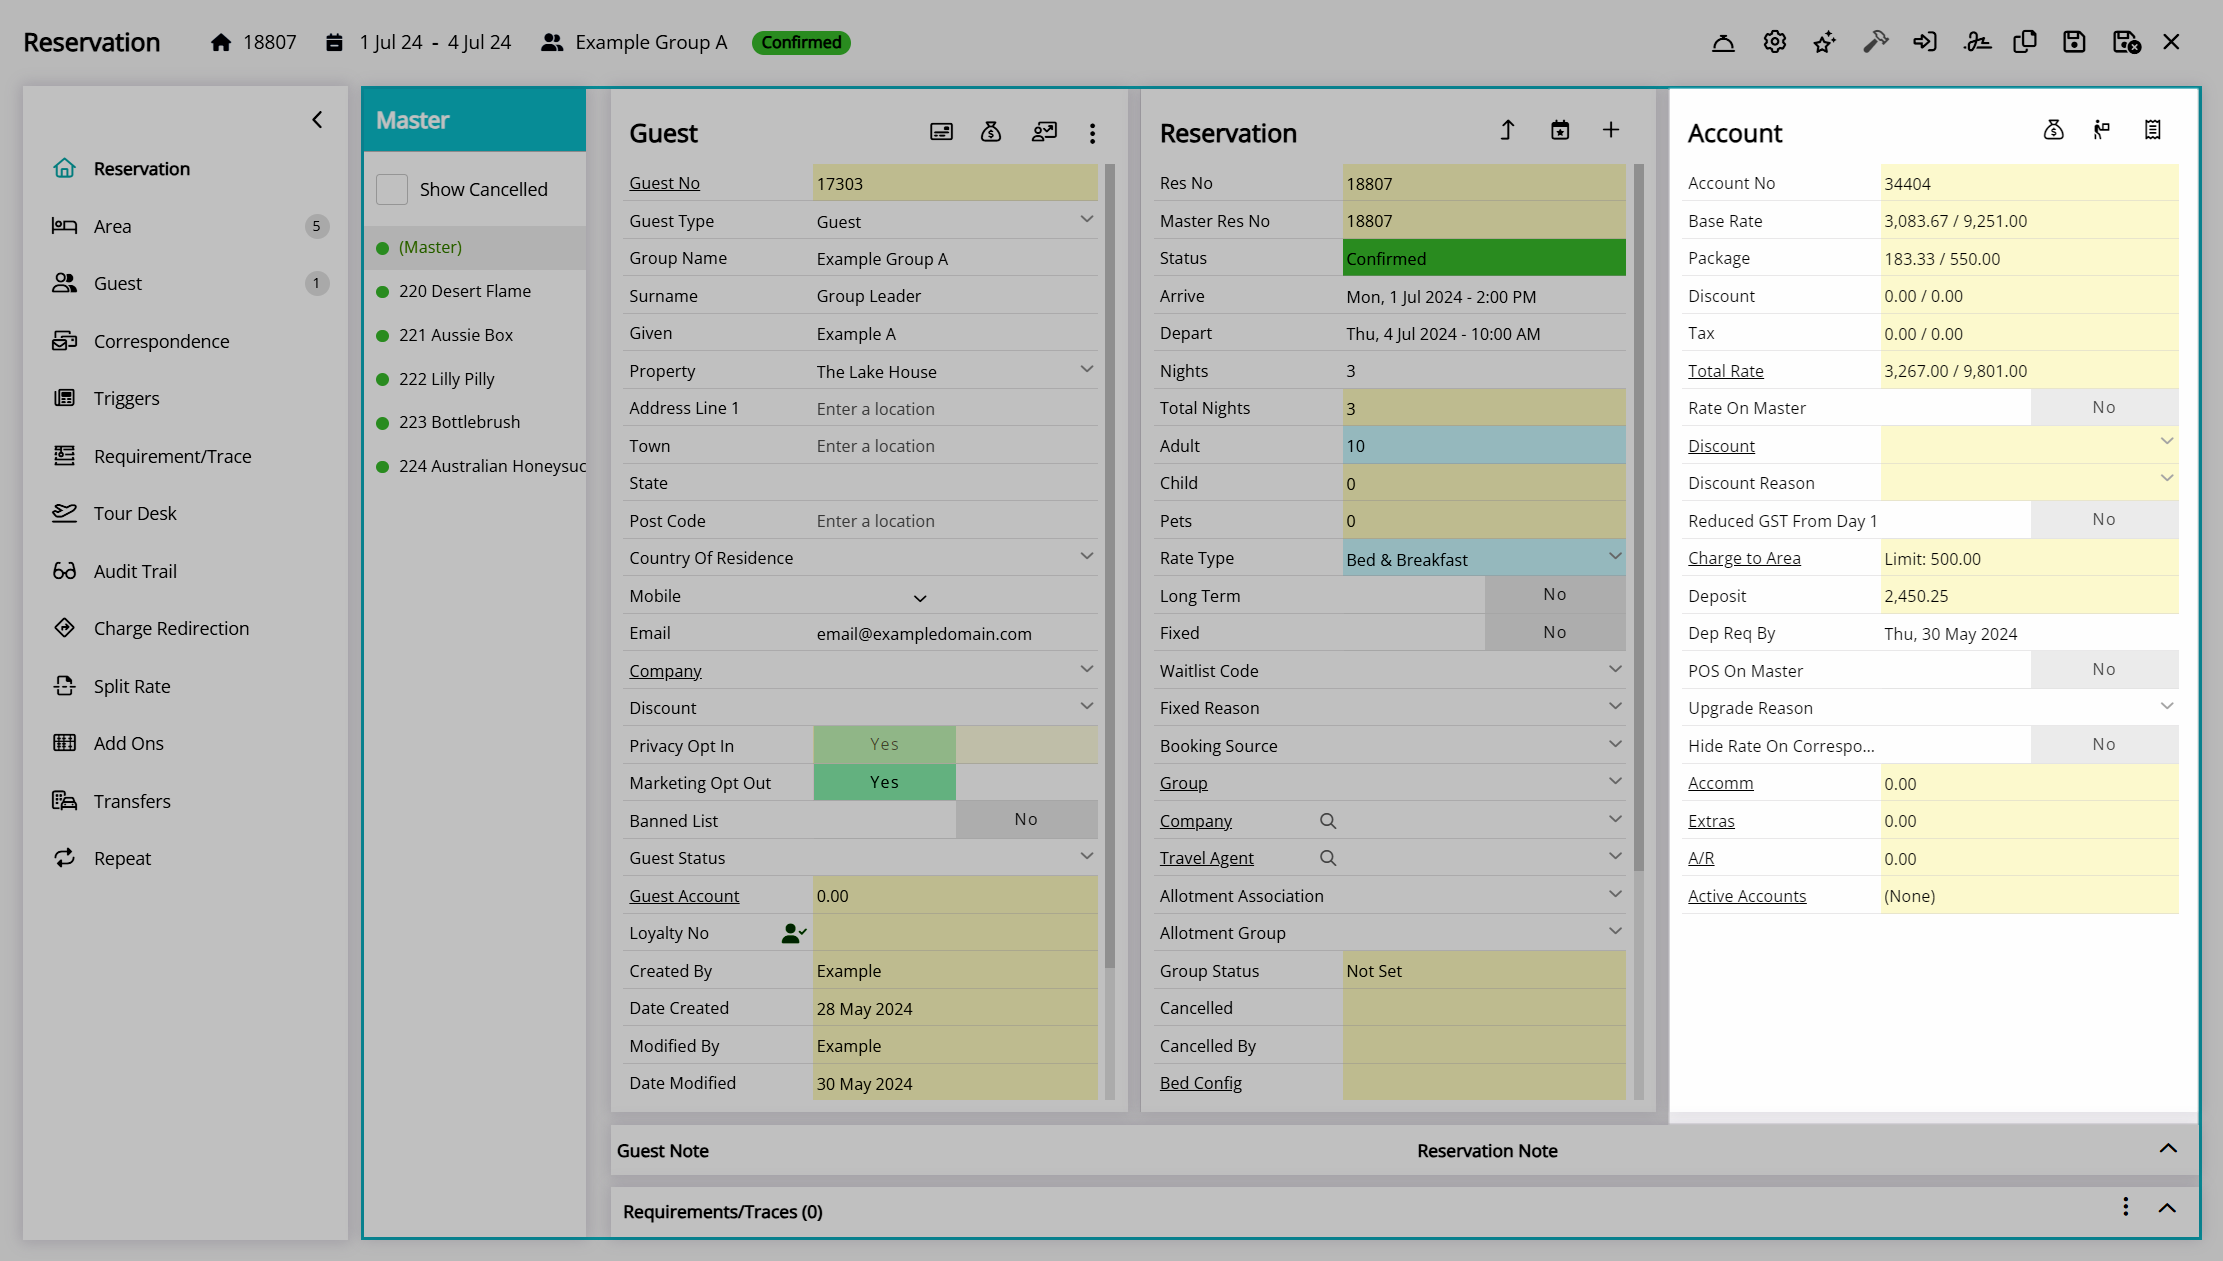
Charge Routing
Charge routing on the group cover page can be used to determine which individuals are responsible for payment of each type of charge associated with a reservation.
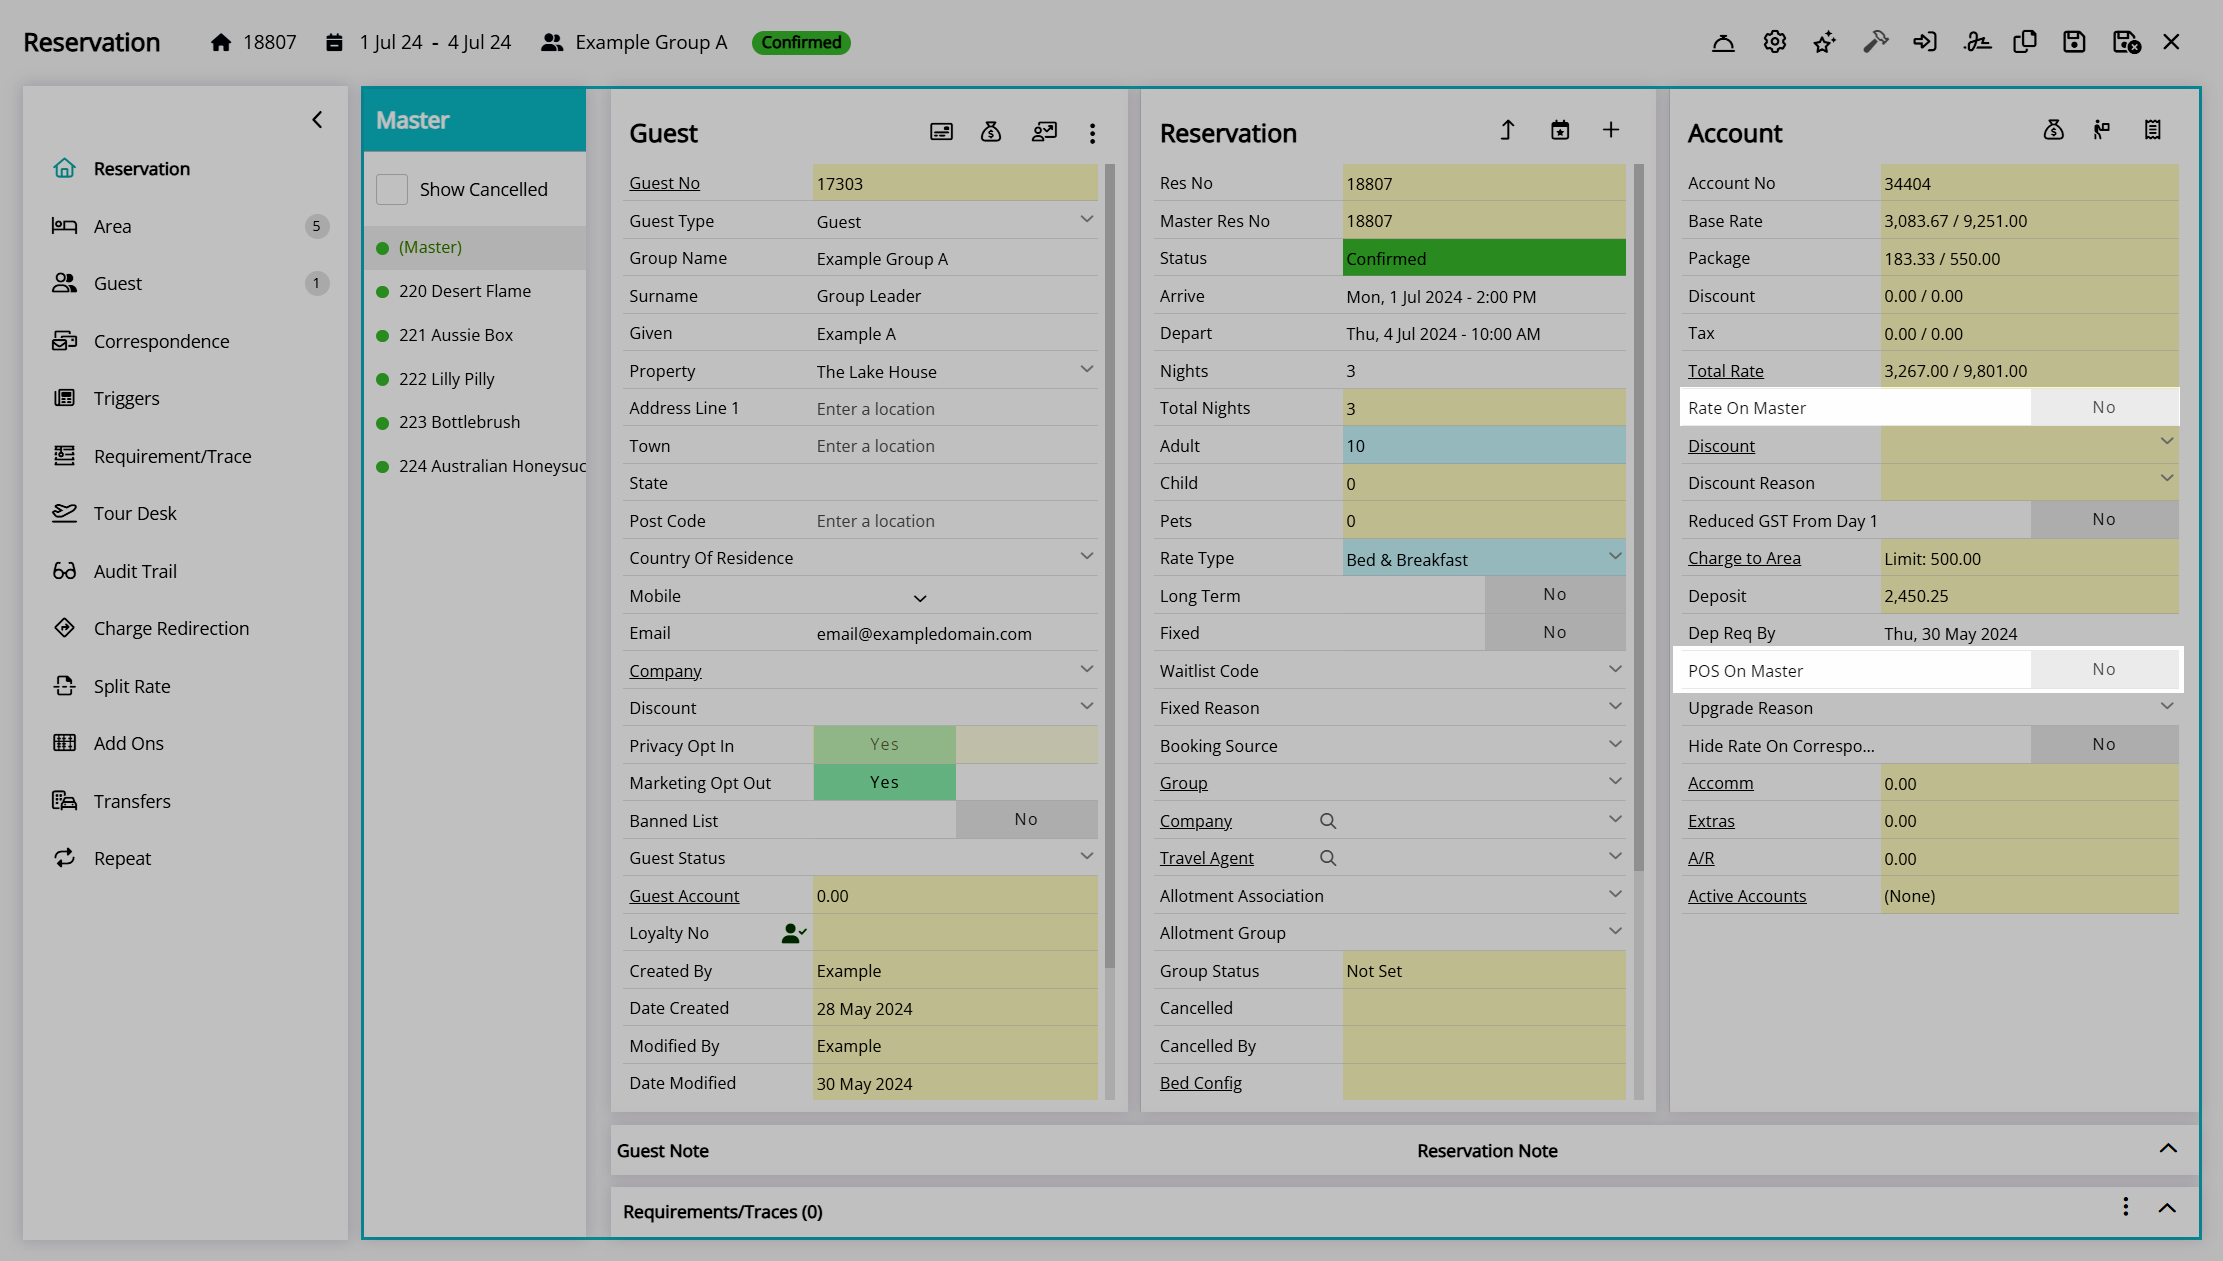
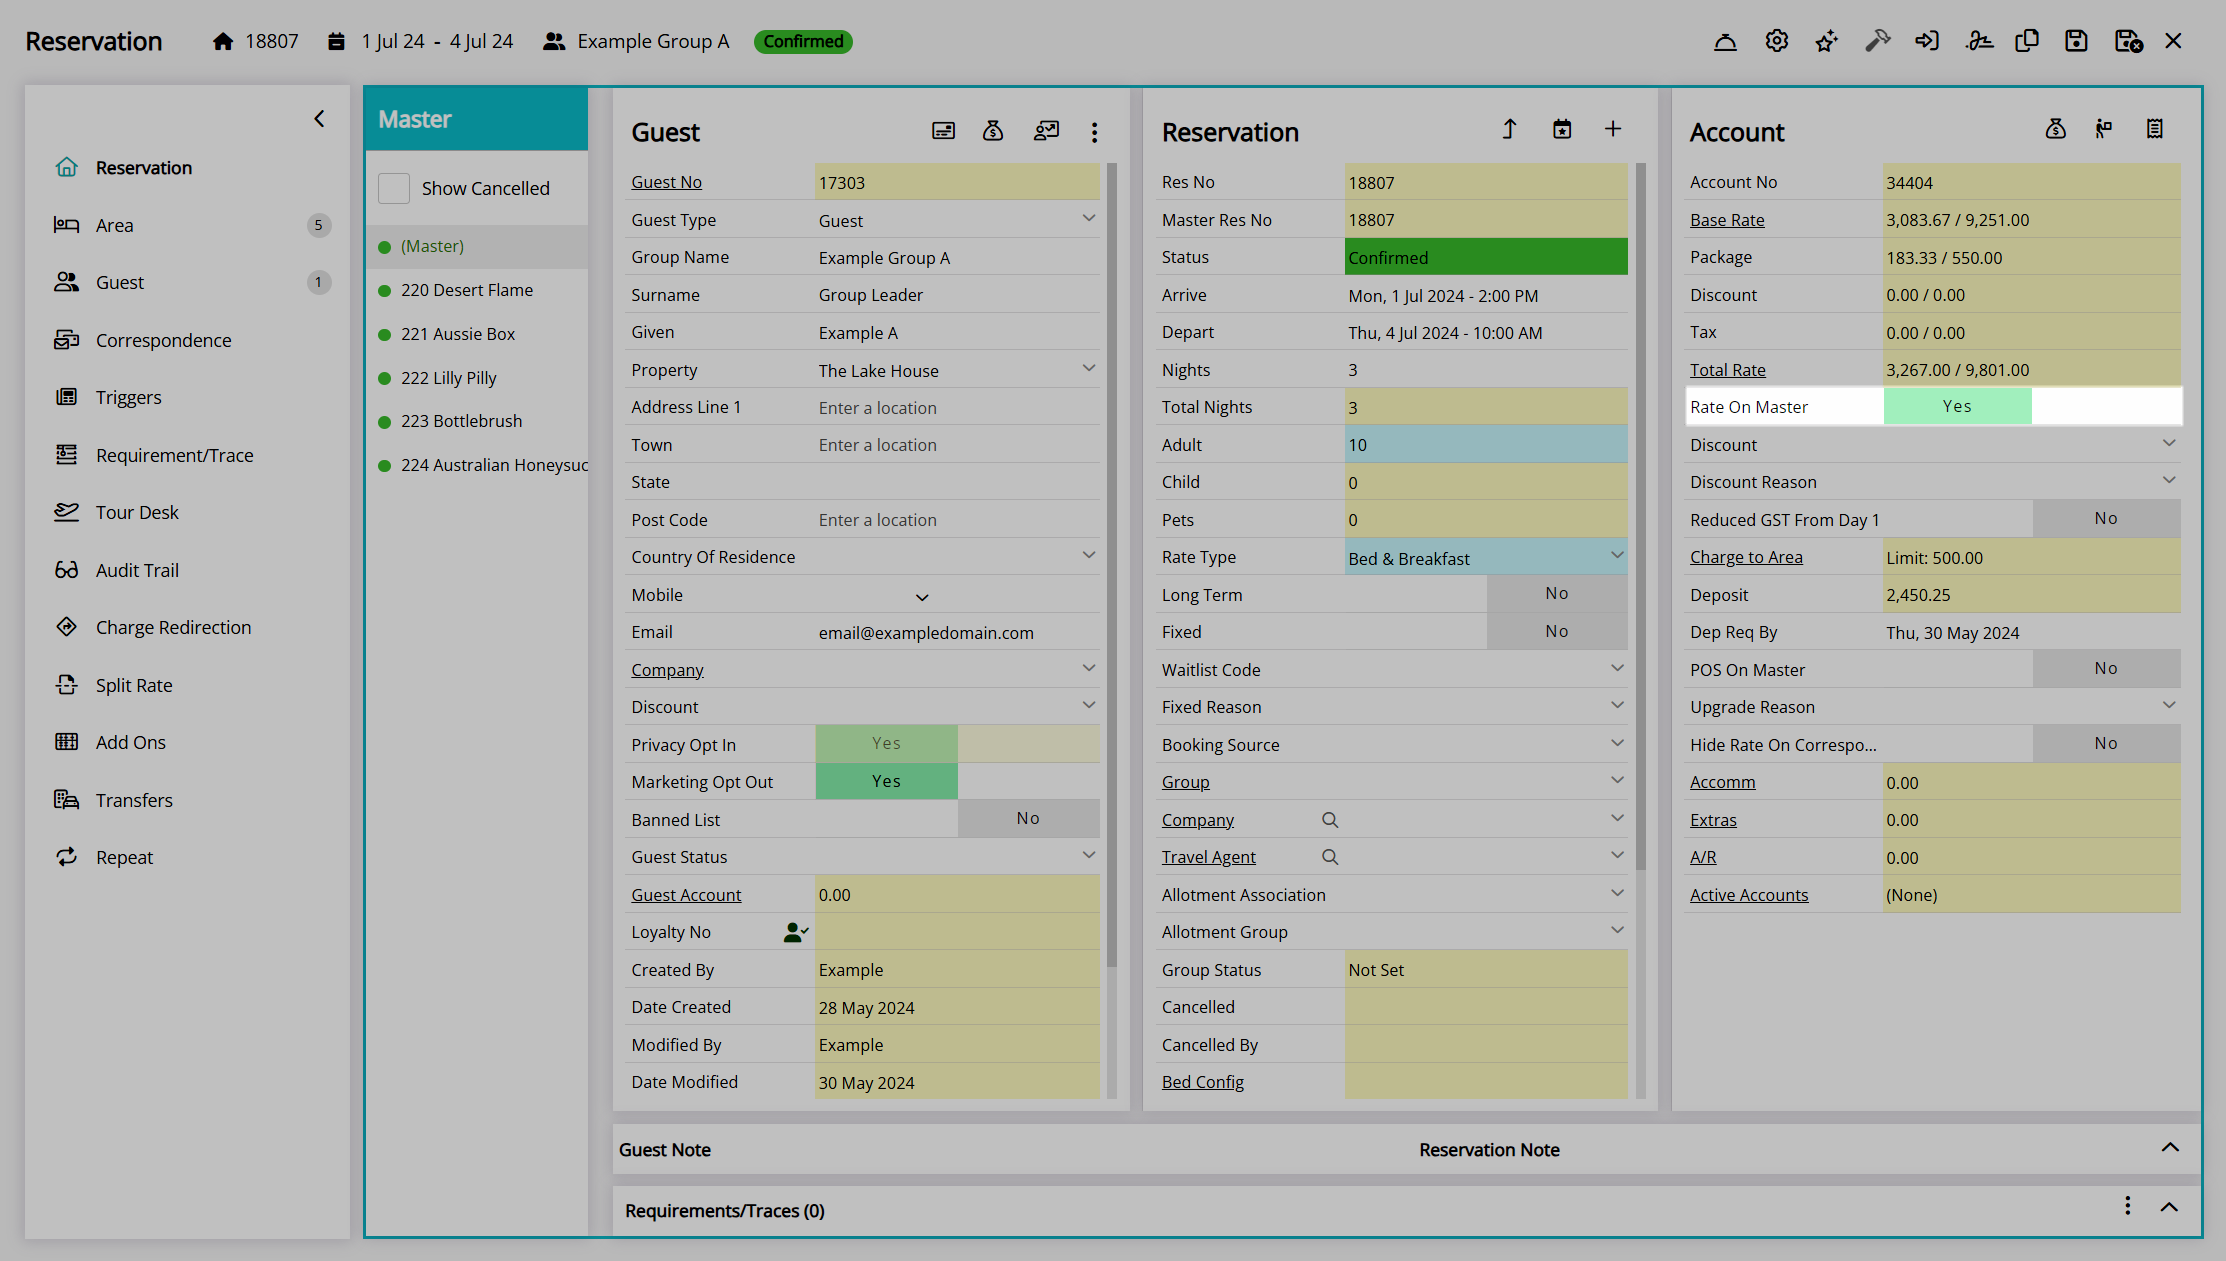
The 'Rate on Master' toggle on the group account column sets RMS to either create all accommodation charges from rates onto the group account or to keep them created on each reservation account.
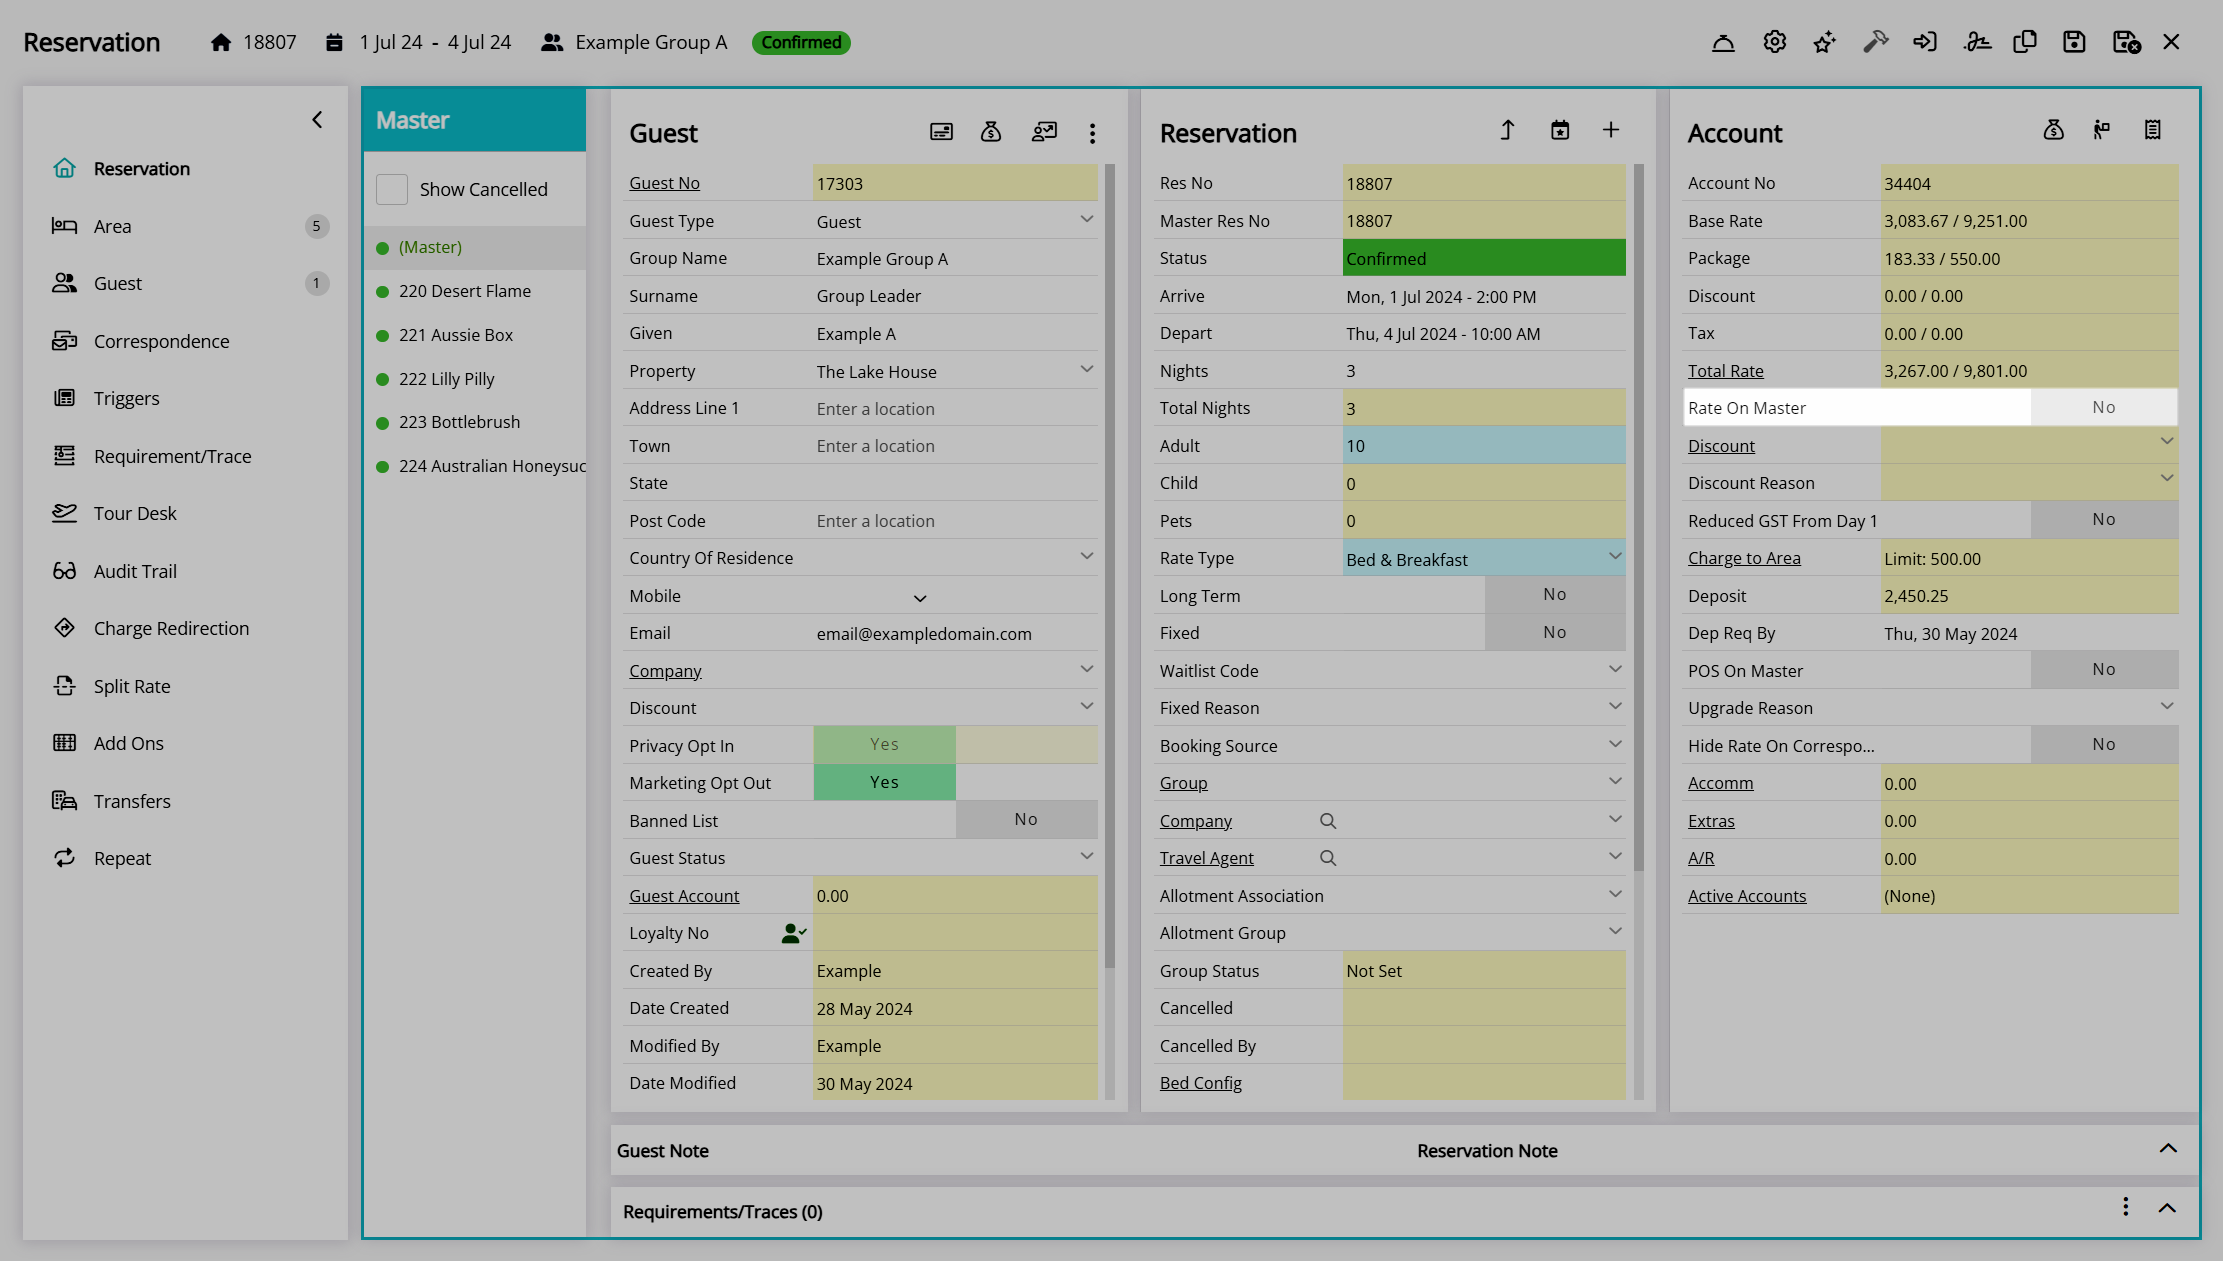
When 'Rate on Master' is set to 'Yes', all accommodation charges for the selected rate types will be created on the group account.
Rate creation will use the Rate Creation Method set up for the property—either nightly rate or total rate—to determine how many accommodation transactions are created for the duration of each reservation.

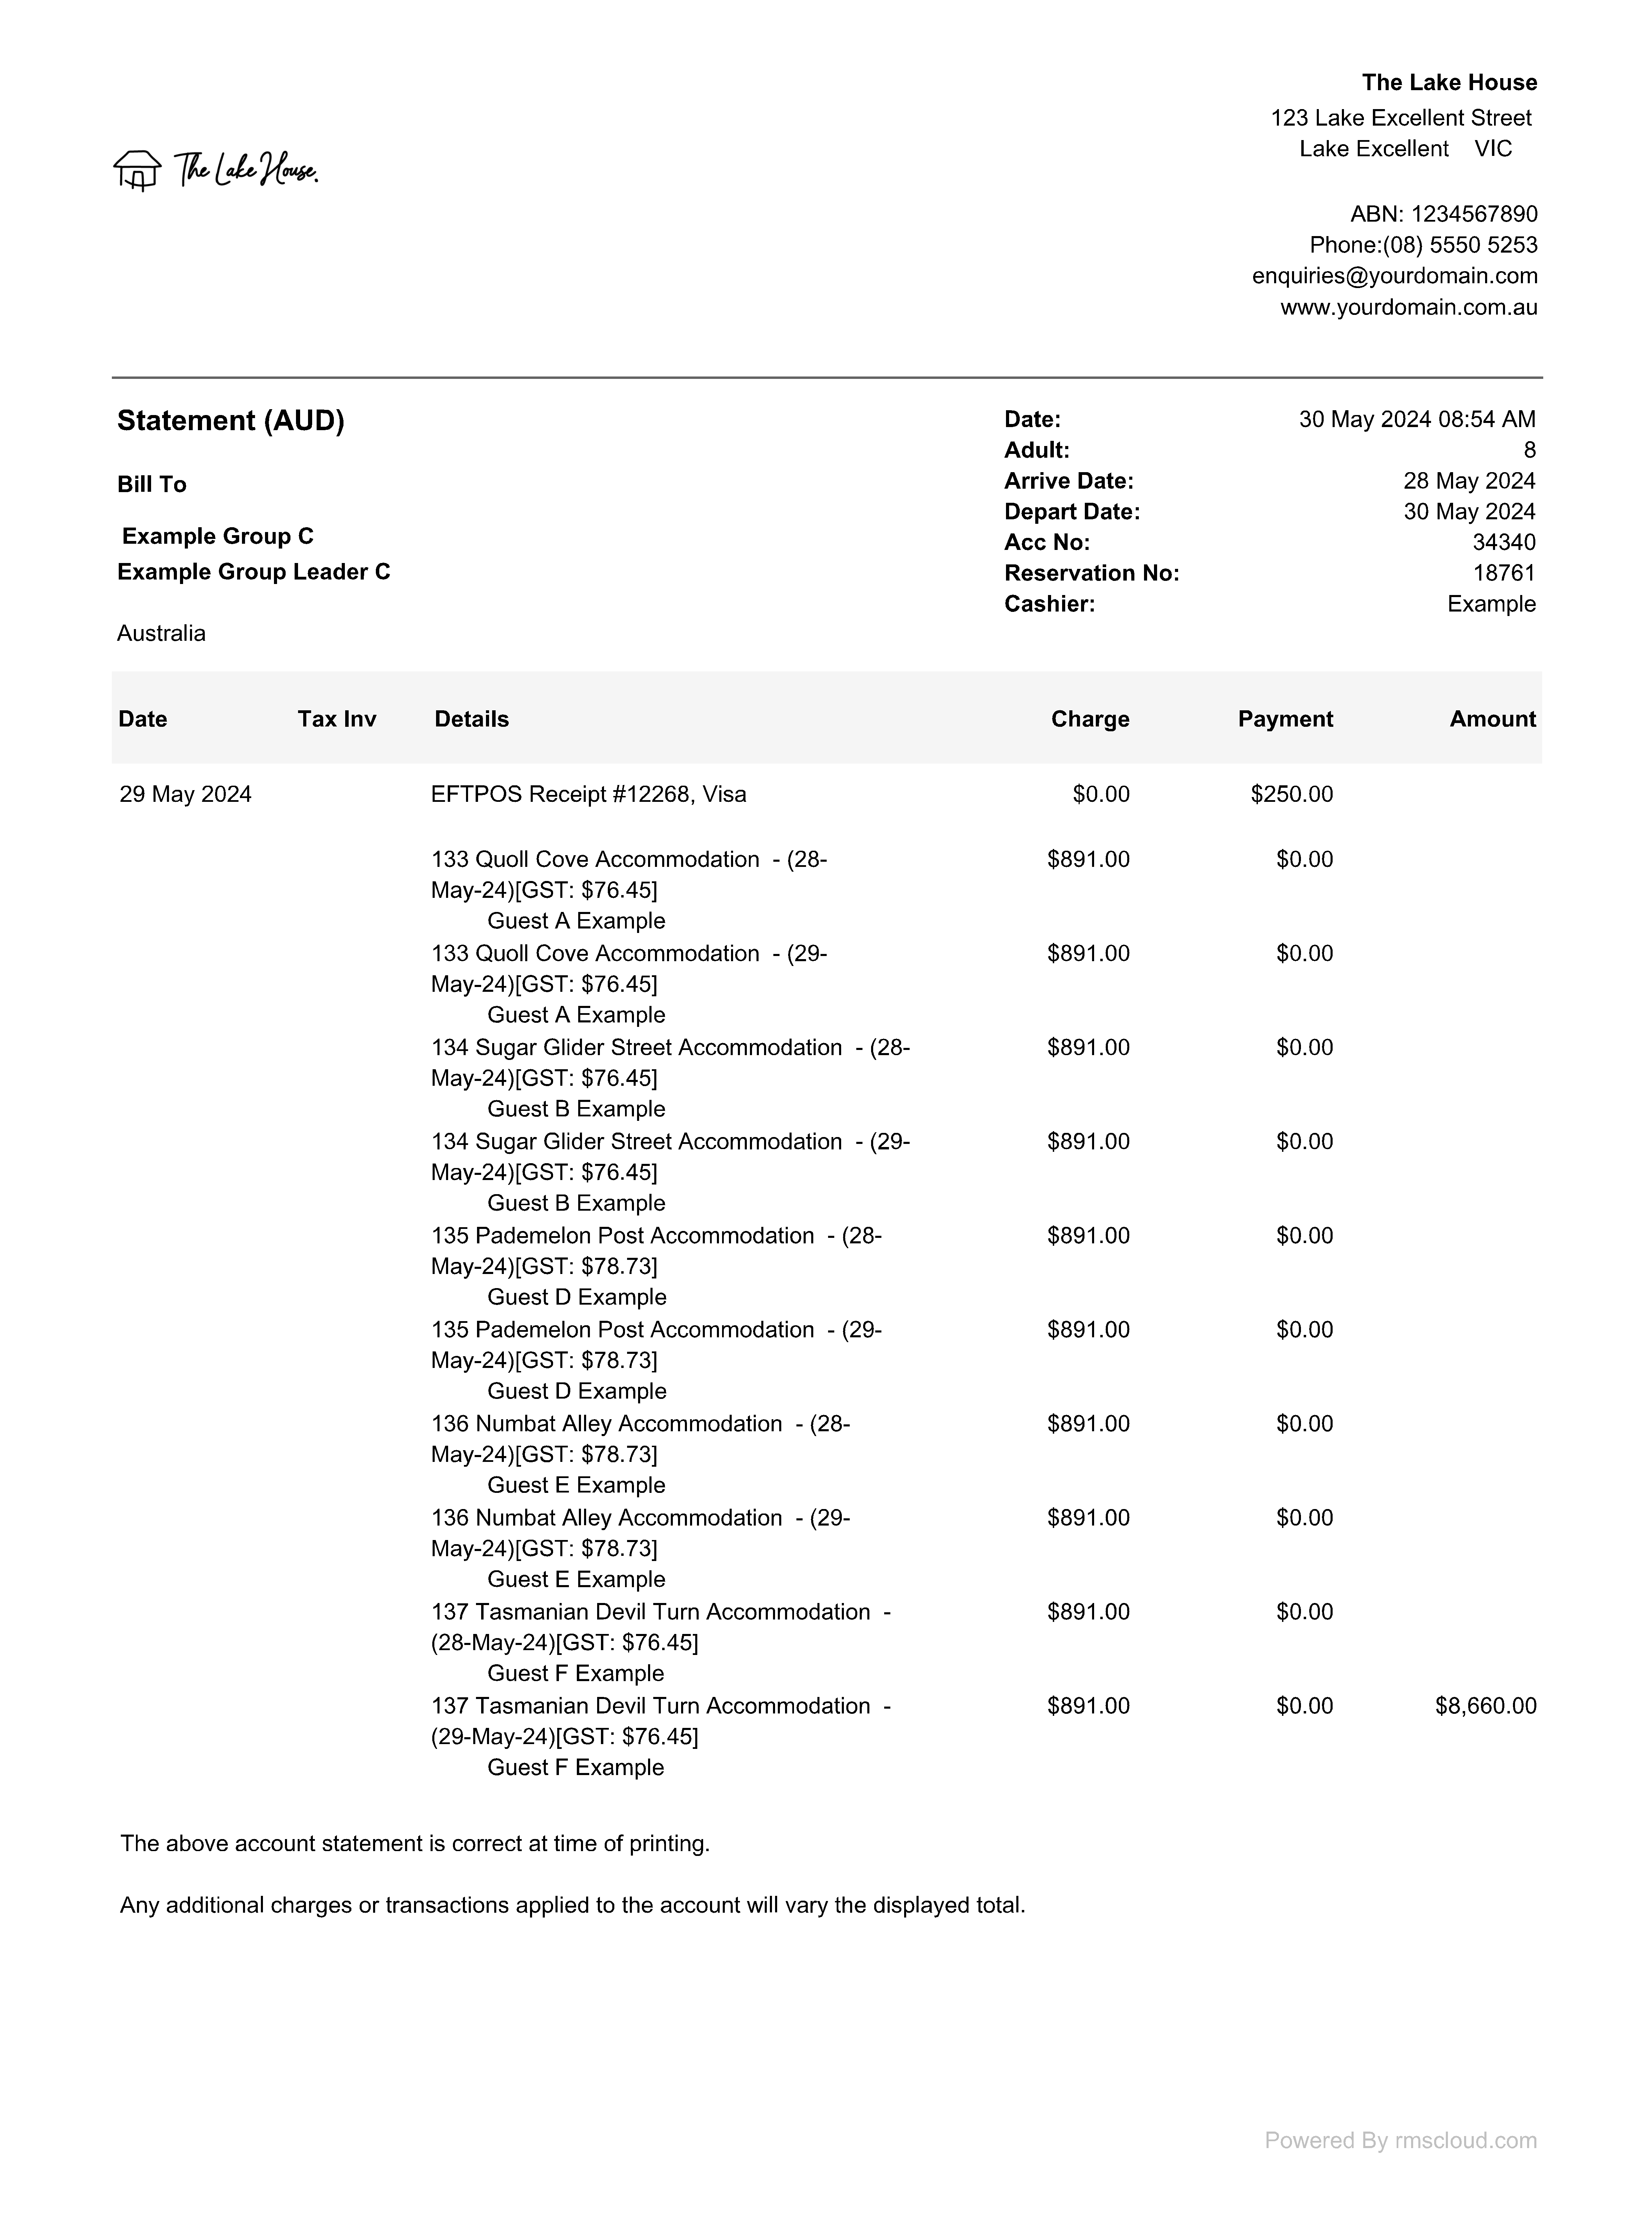
When all accommodation charges are on the group account, a single tax invoice or statement can be created for all reservations within the group.
Changing the 'Rate on Master' option after accommodation charges have been created on any reservation accounts will result in the charges being voided and recreated based on the new selection.
The 'POS on Master' toggle on the group account column sets the routing of any point of sale charges to either be created on the group account or the individual reservation account they apply to.

Group Management Tools
The group cover page—shown as (Master) in the navigator pane—includes group management tools under the  'Options' menu on both the 'Area' and 'Guest' tabs.
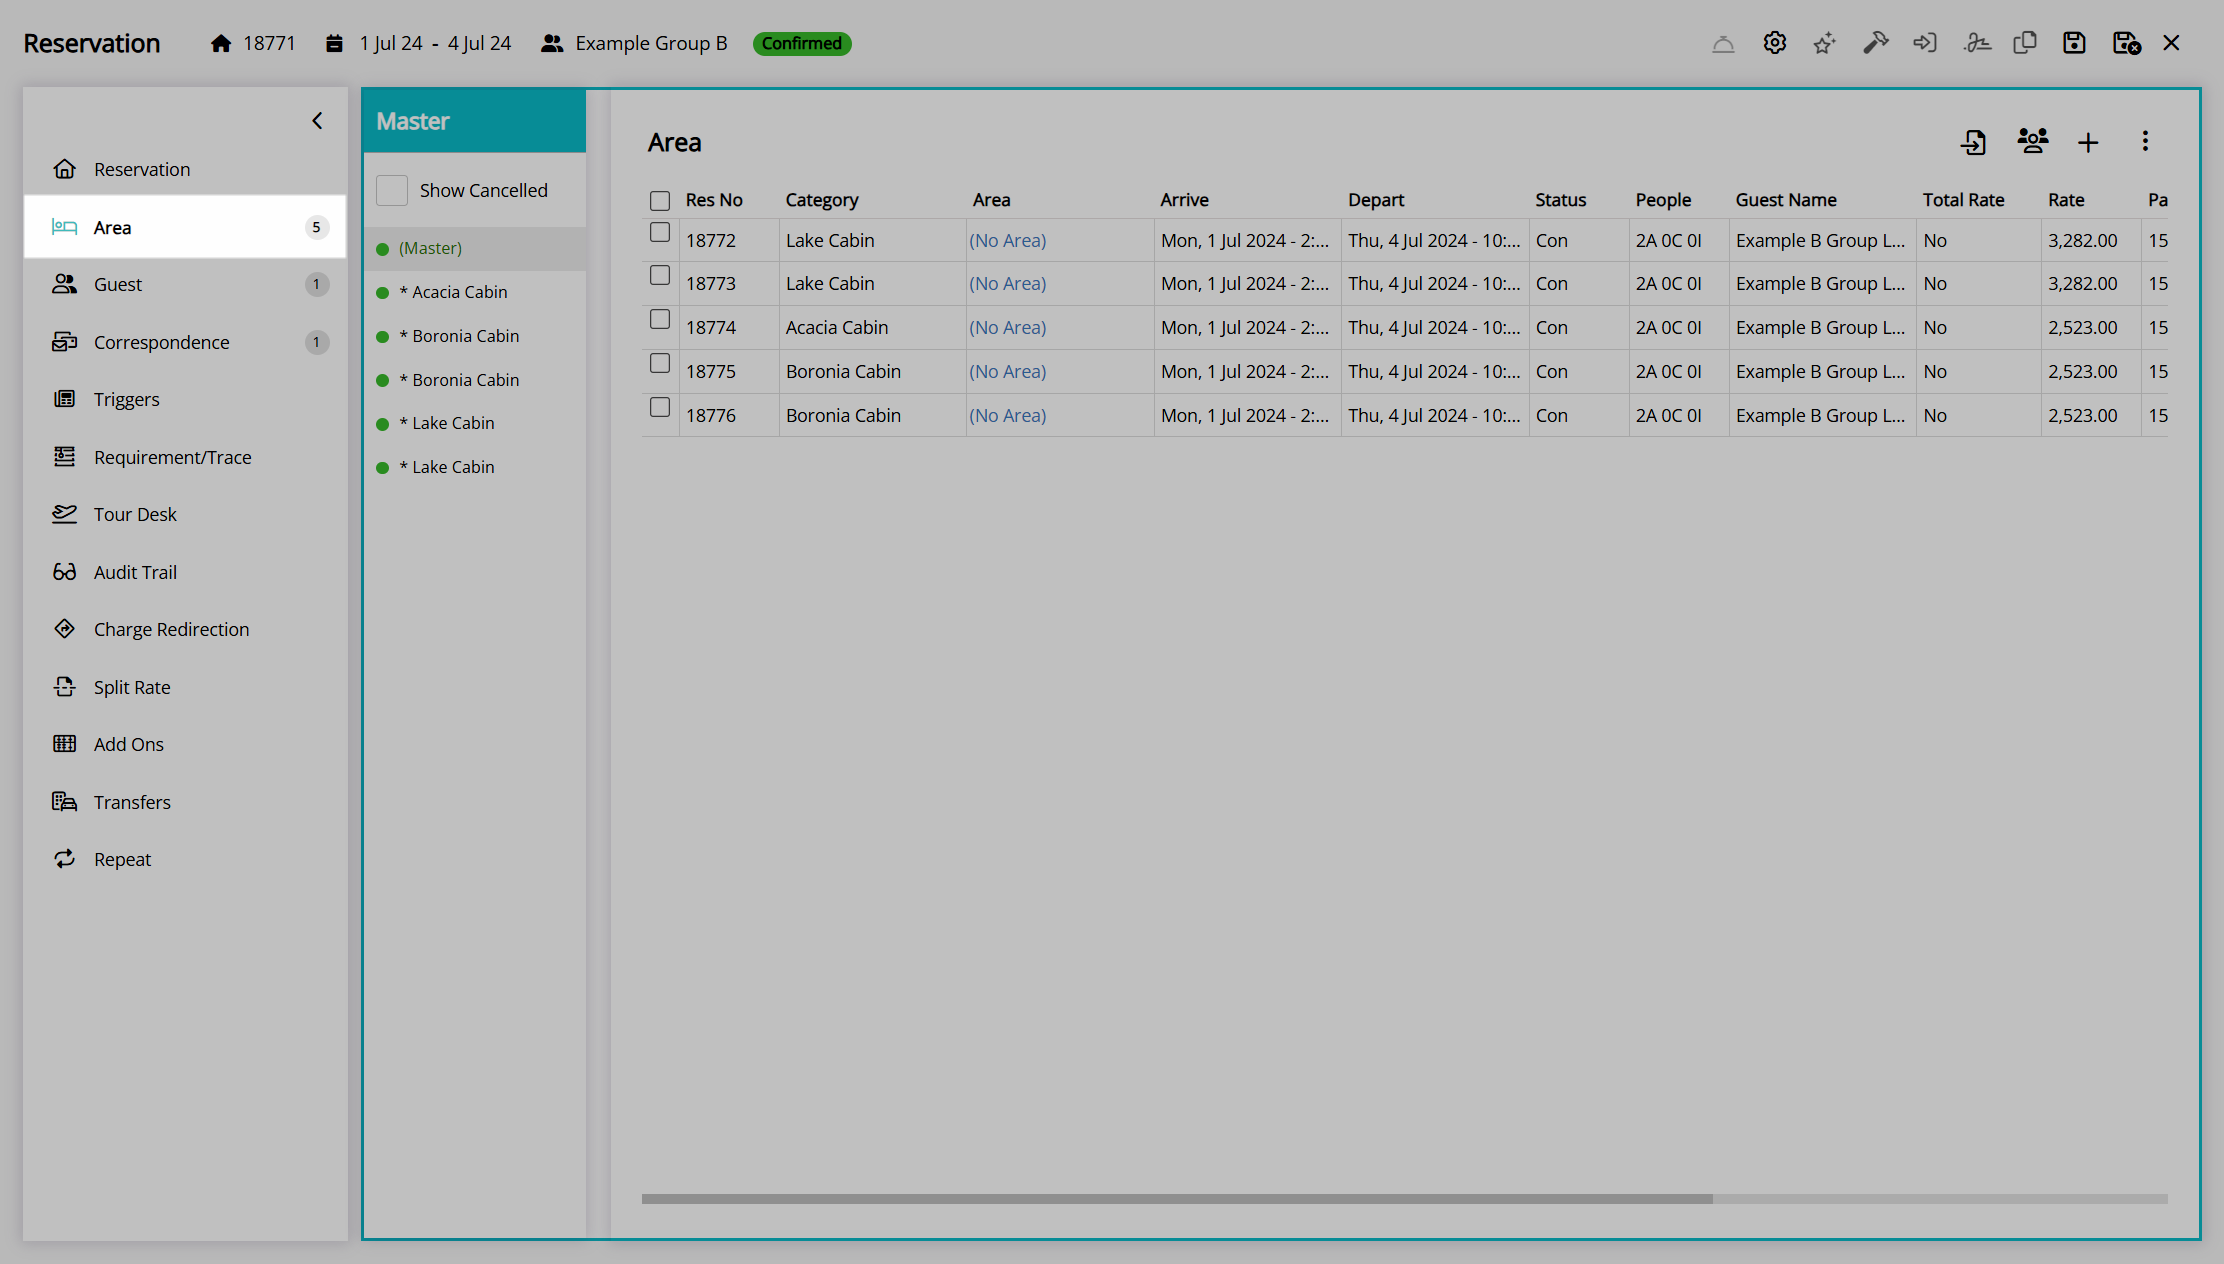
Area
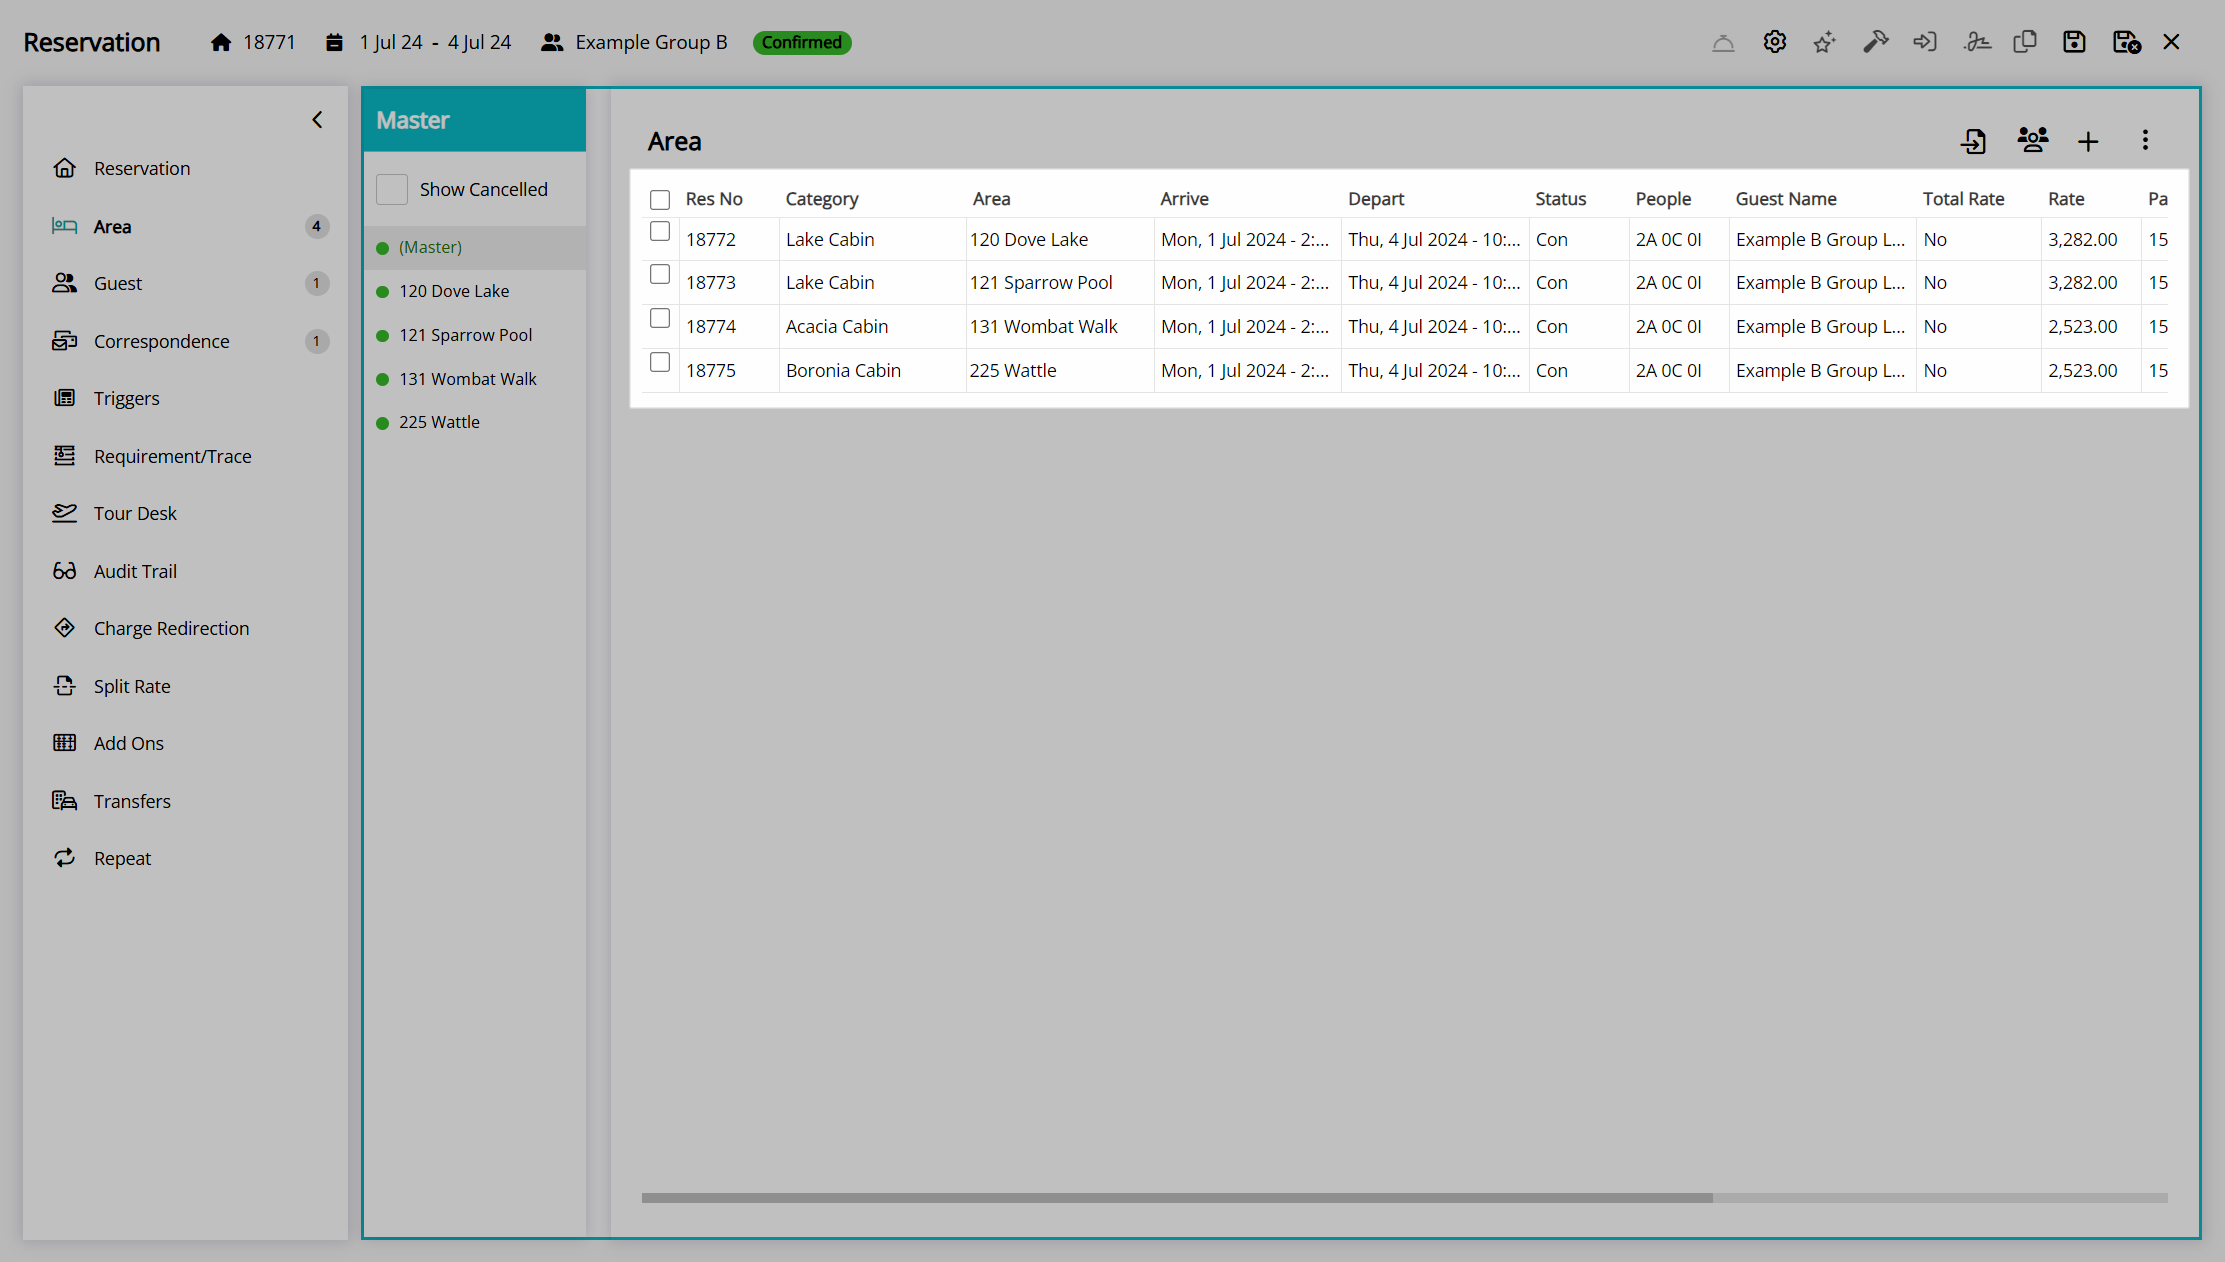
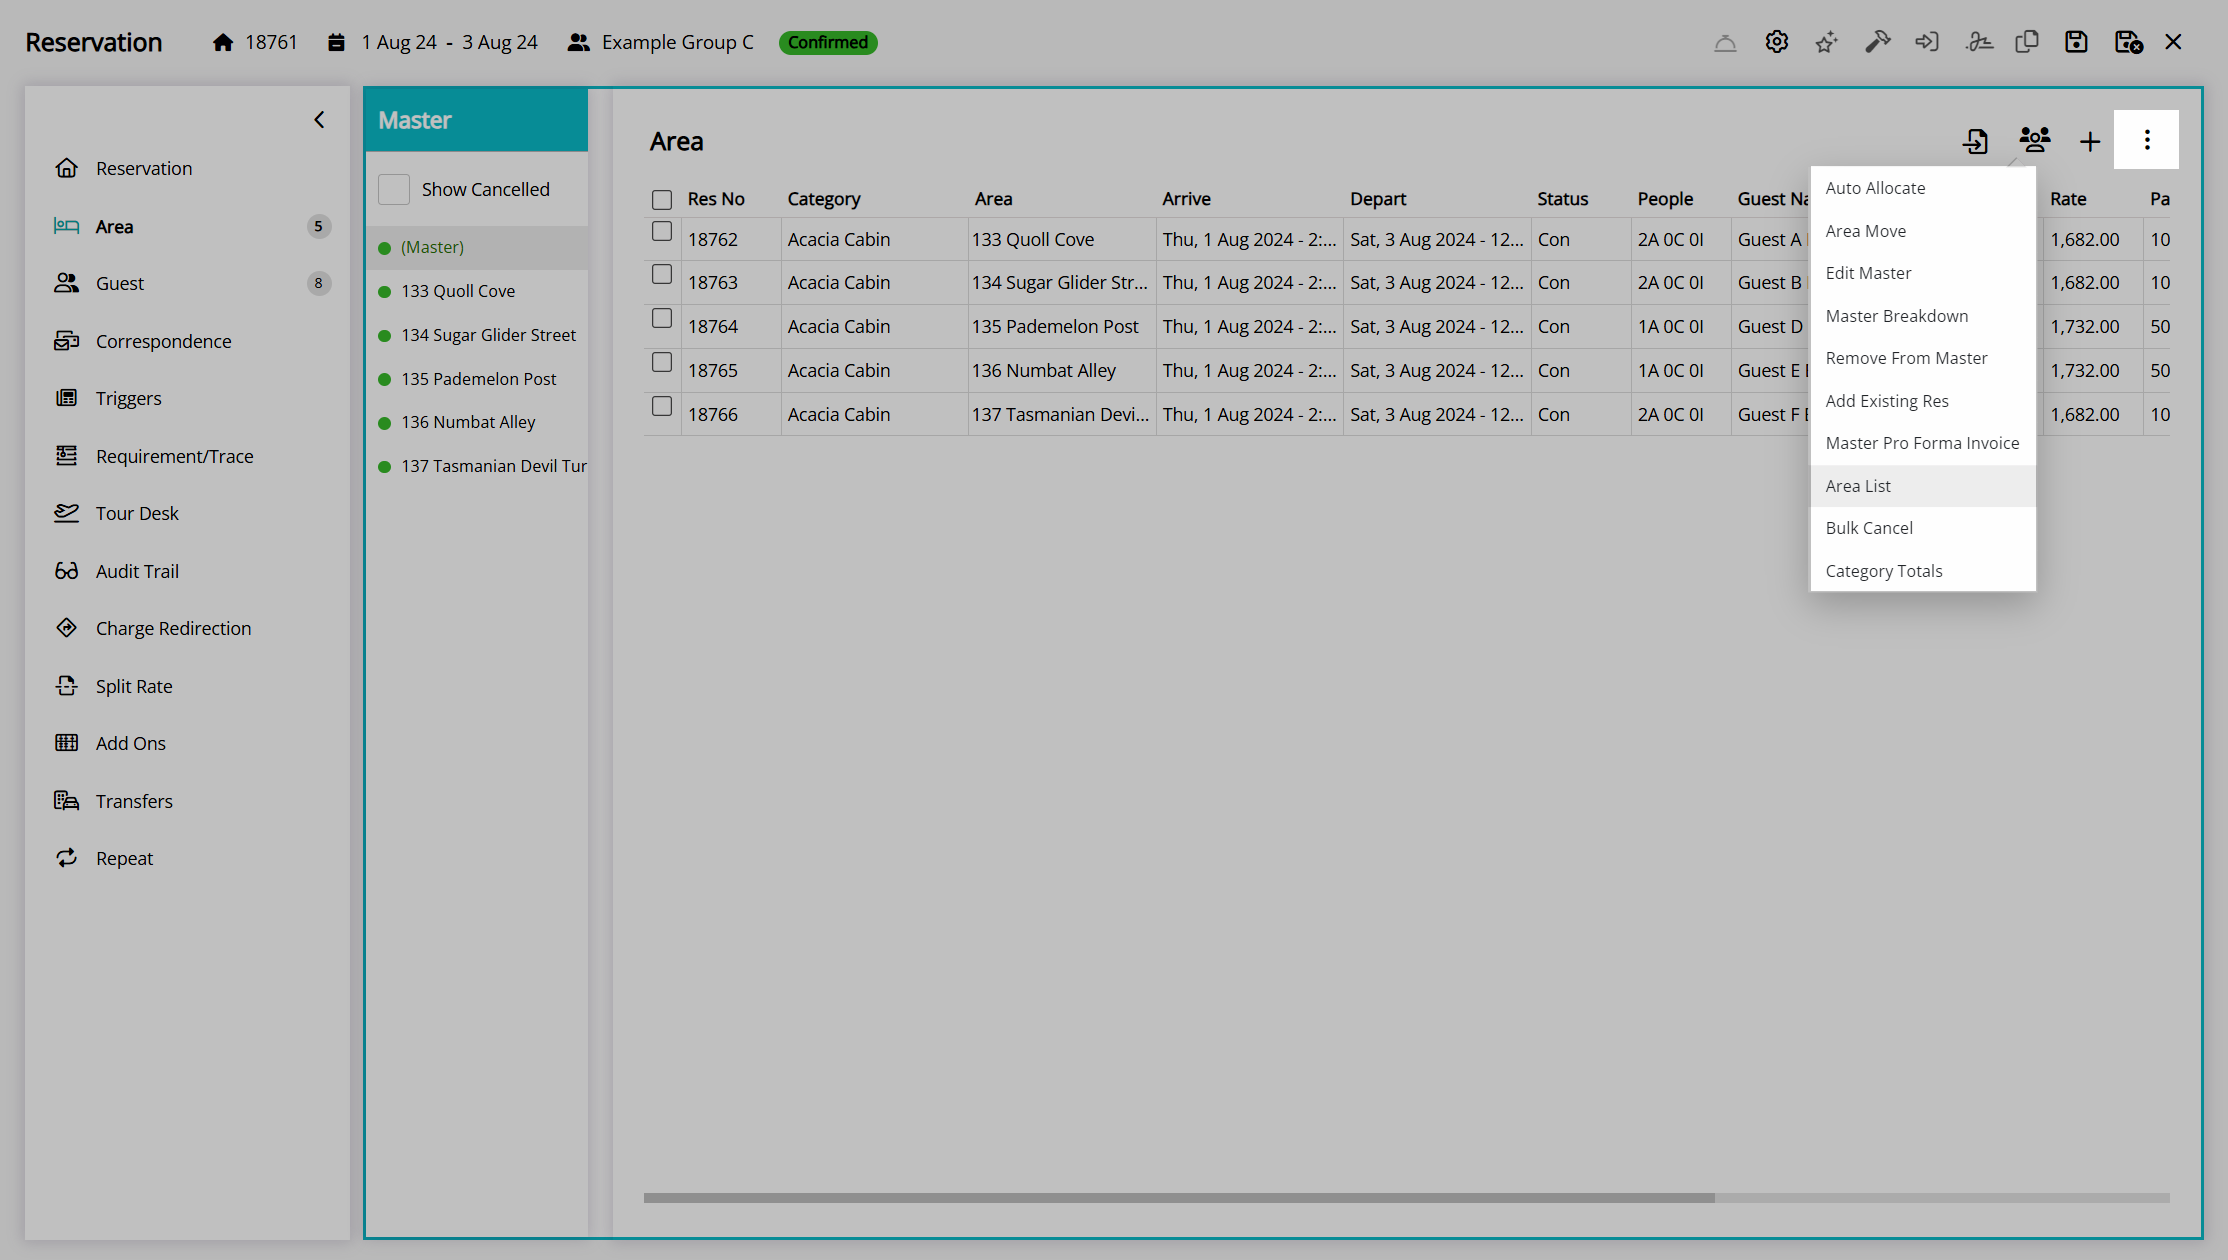
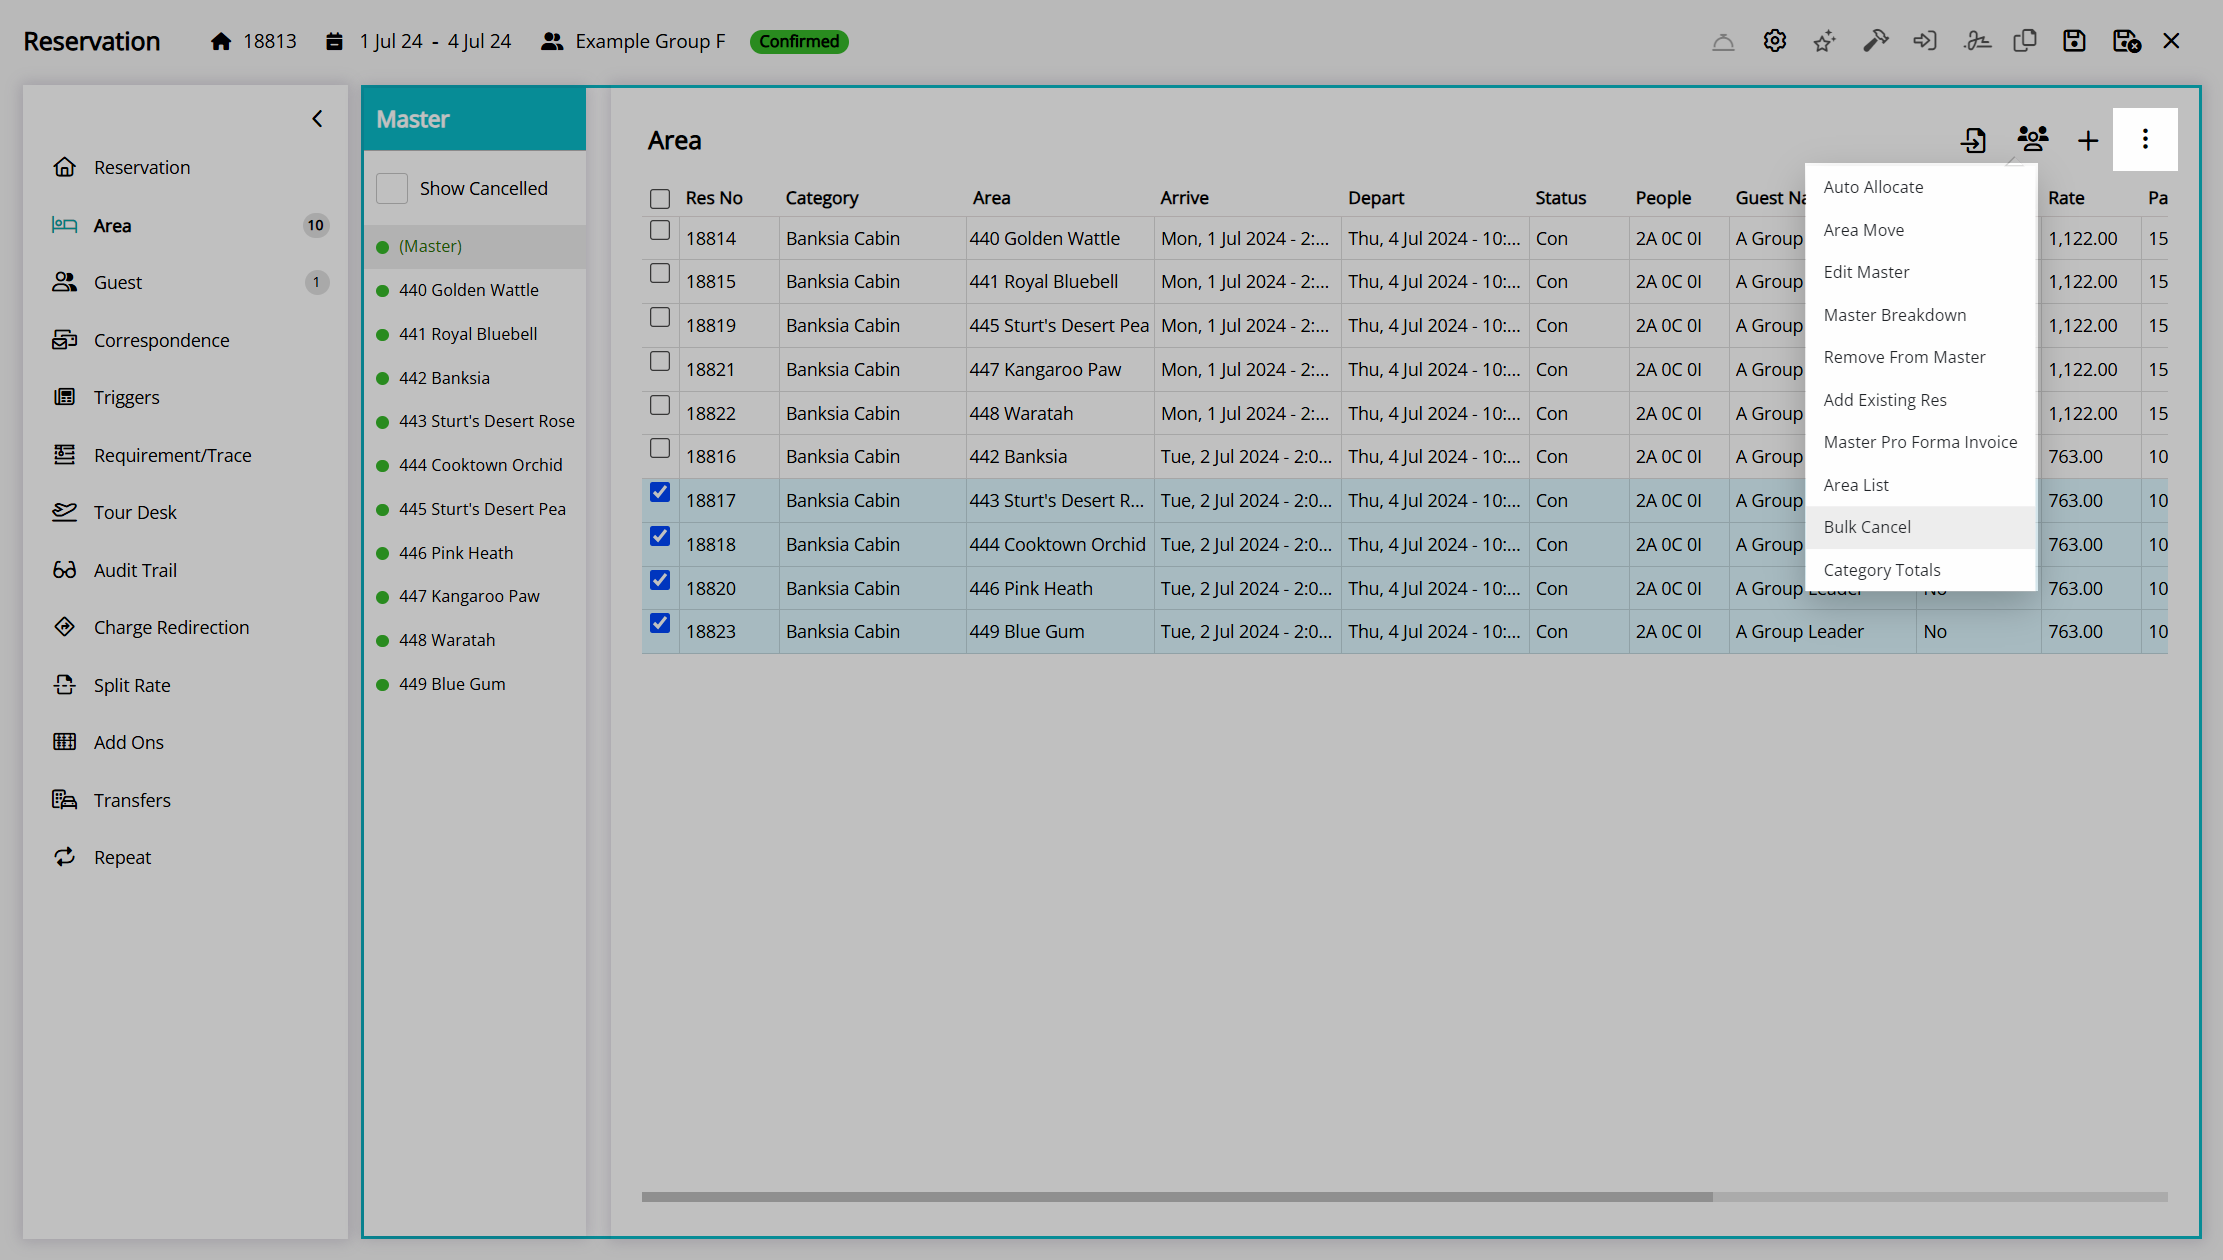
The 'Area' tab on the group cover page includes the full list of areas or categories for all reservations within the group and the following group management tools under the  'Options' menu:
Auto Allocate
The 'Auto Allocate' option on the 'Area' tab of the group cover page can be used by properties set up as Book by Category to bulk allocate areas to all reservations within the group.
- Go to the Toolbar Menu Reservation Search in RMS.
- Enter the Group Name or Reservation Number and press 'Enter'.
- Select '(Master)' in the Navigator Pane.
- Navigate to the 'Area' tab.
- Select the
 'Options' icon.
 - Select the option 'Auto Allocate'.
- Select 'Yes' to confirm.
- Save/Exit.
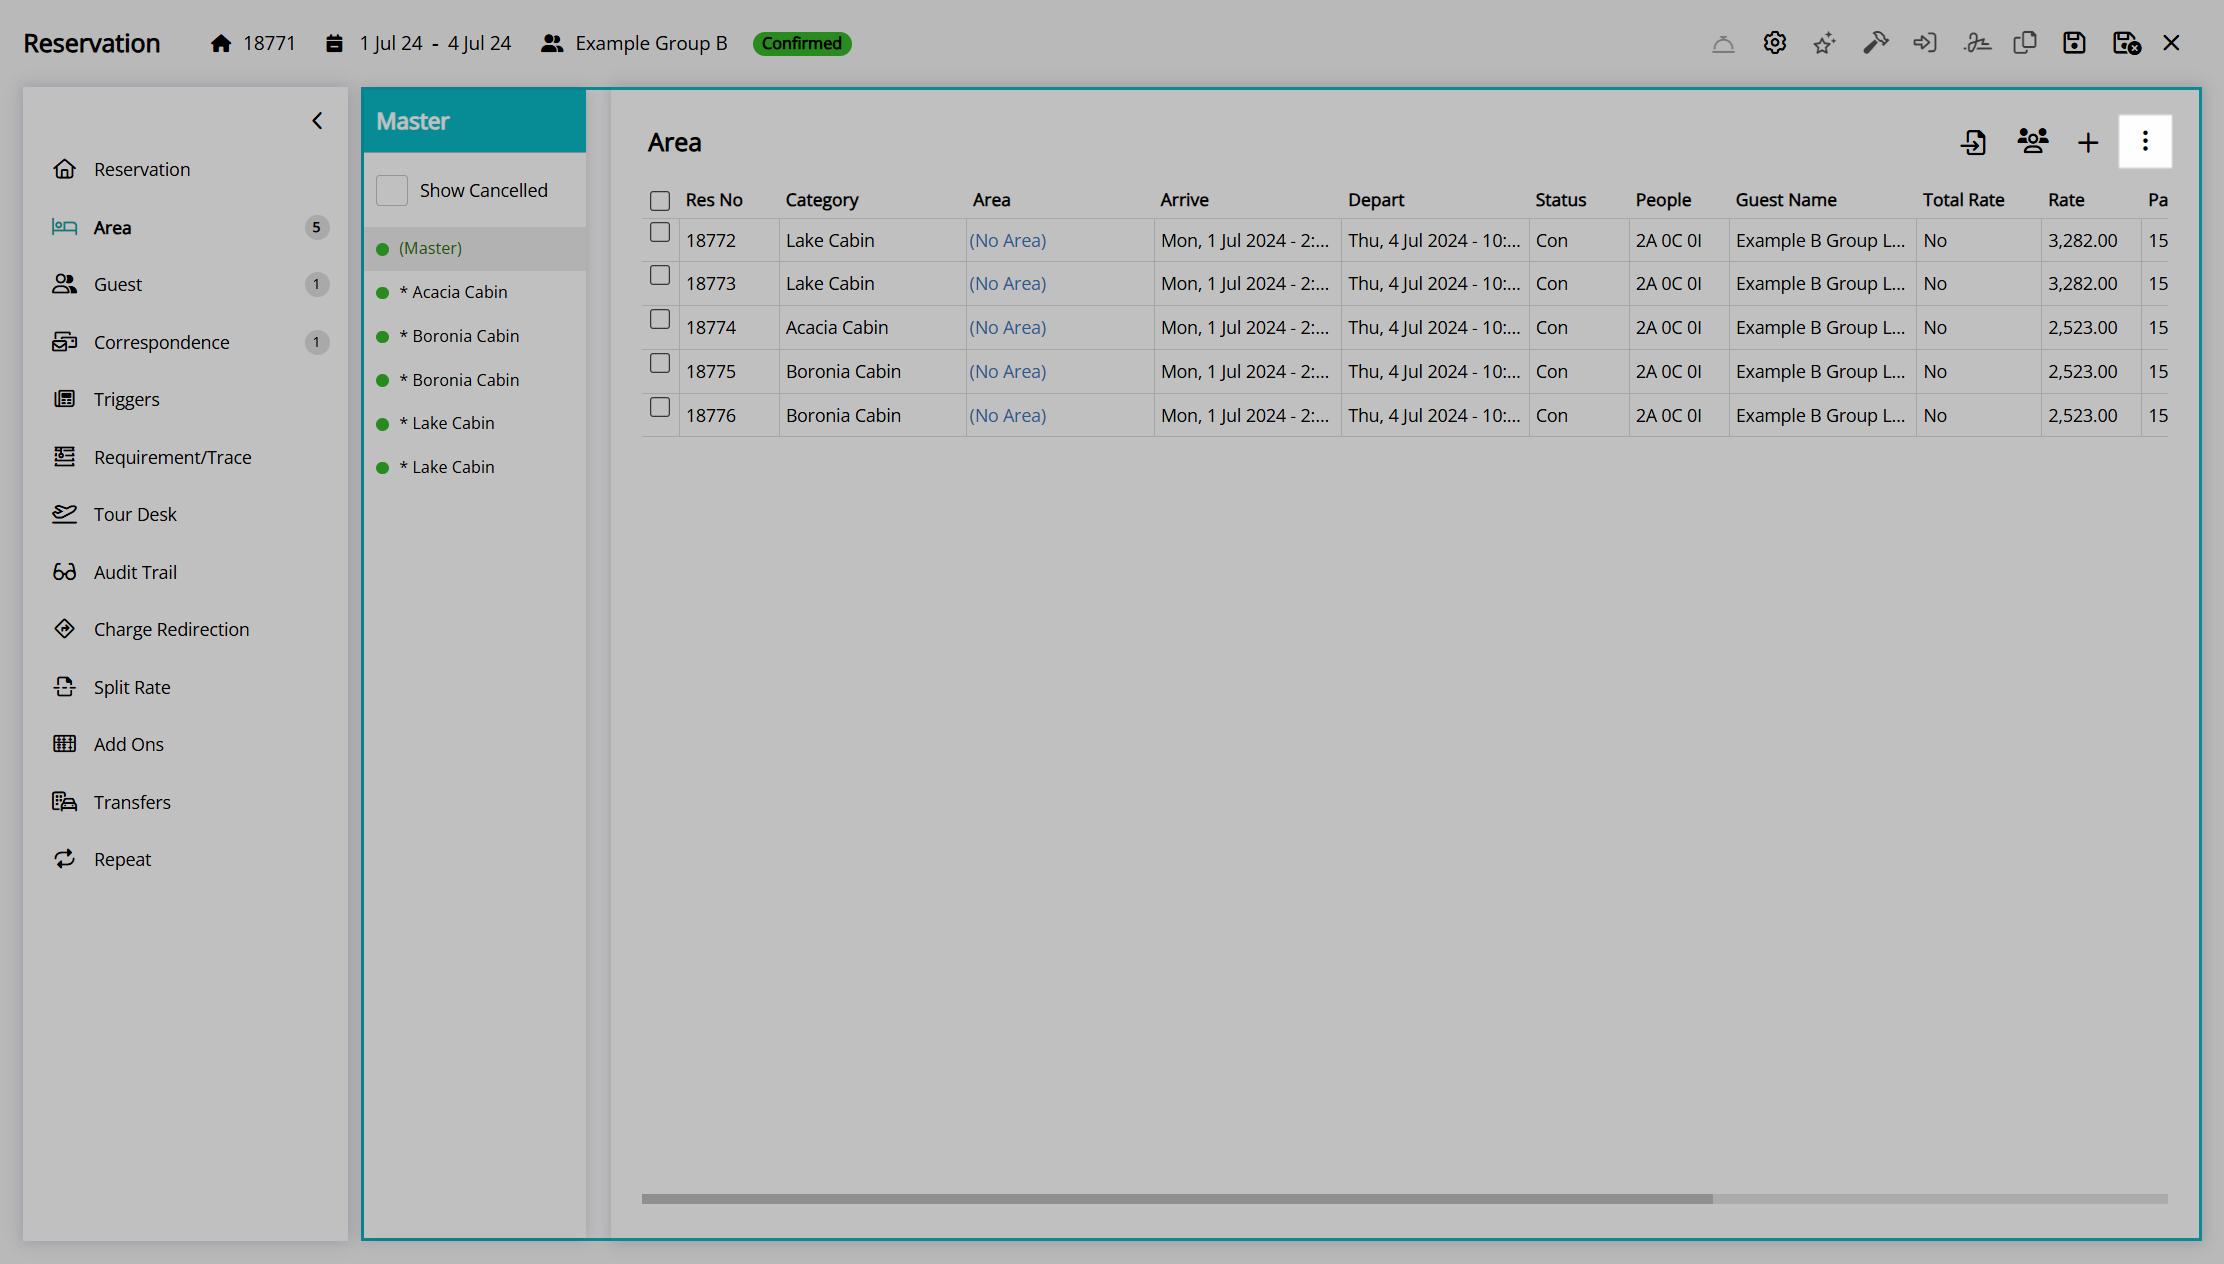
Go to the Toolbar Menu Reservation Search in RMS, enter the Group Name or Reservation Number and press 'Enter'.

Select '(Master)' in the Navigator Pane to open the group cover page.
Navigate to the 'Area' tab.
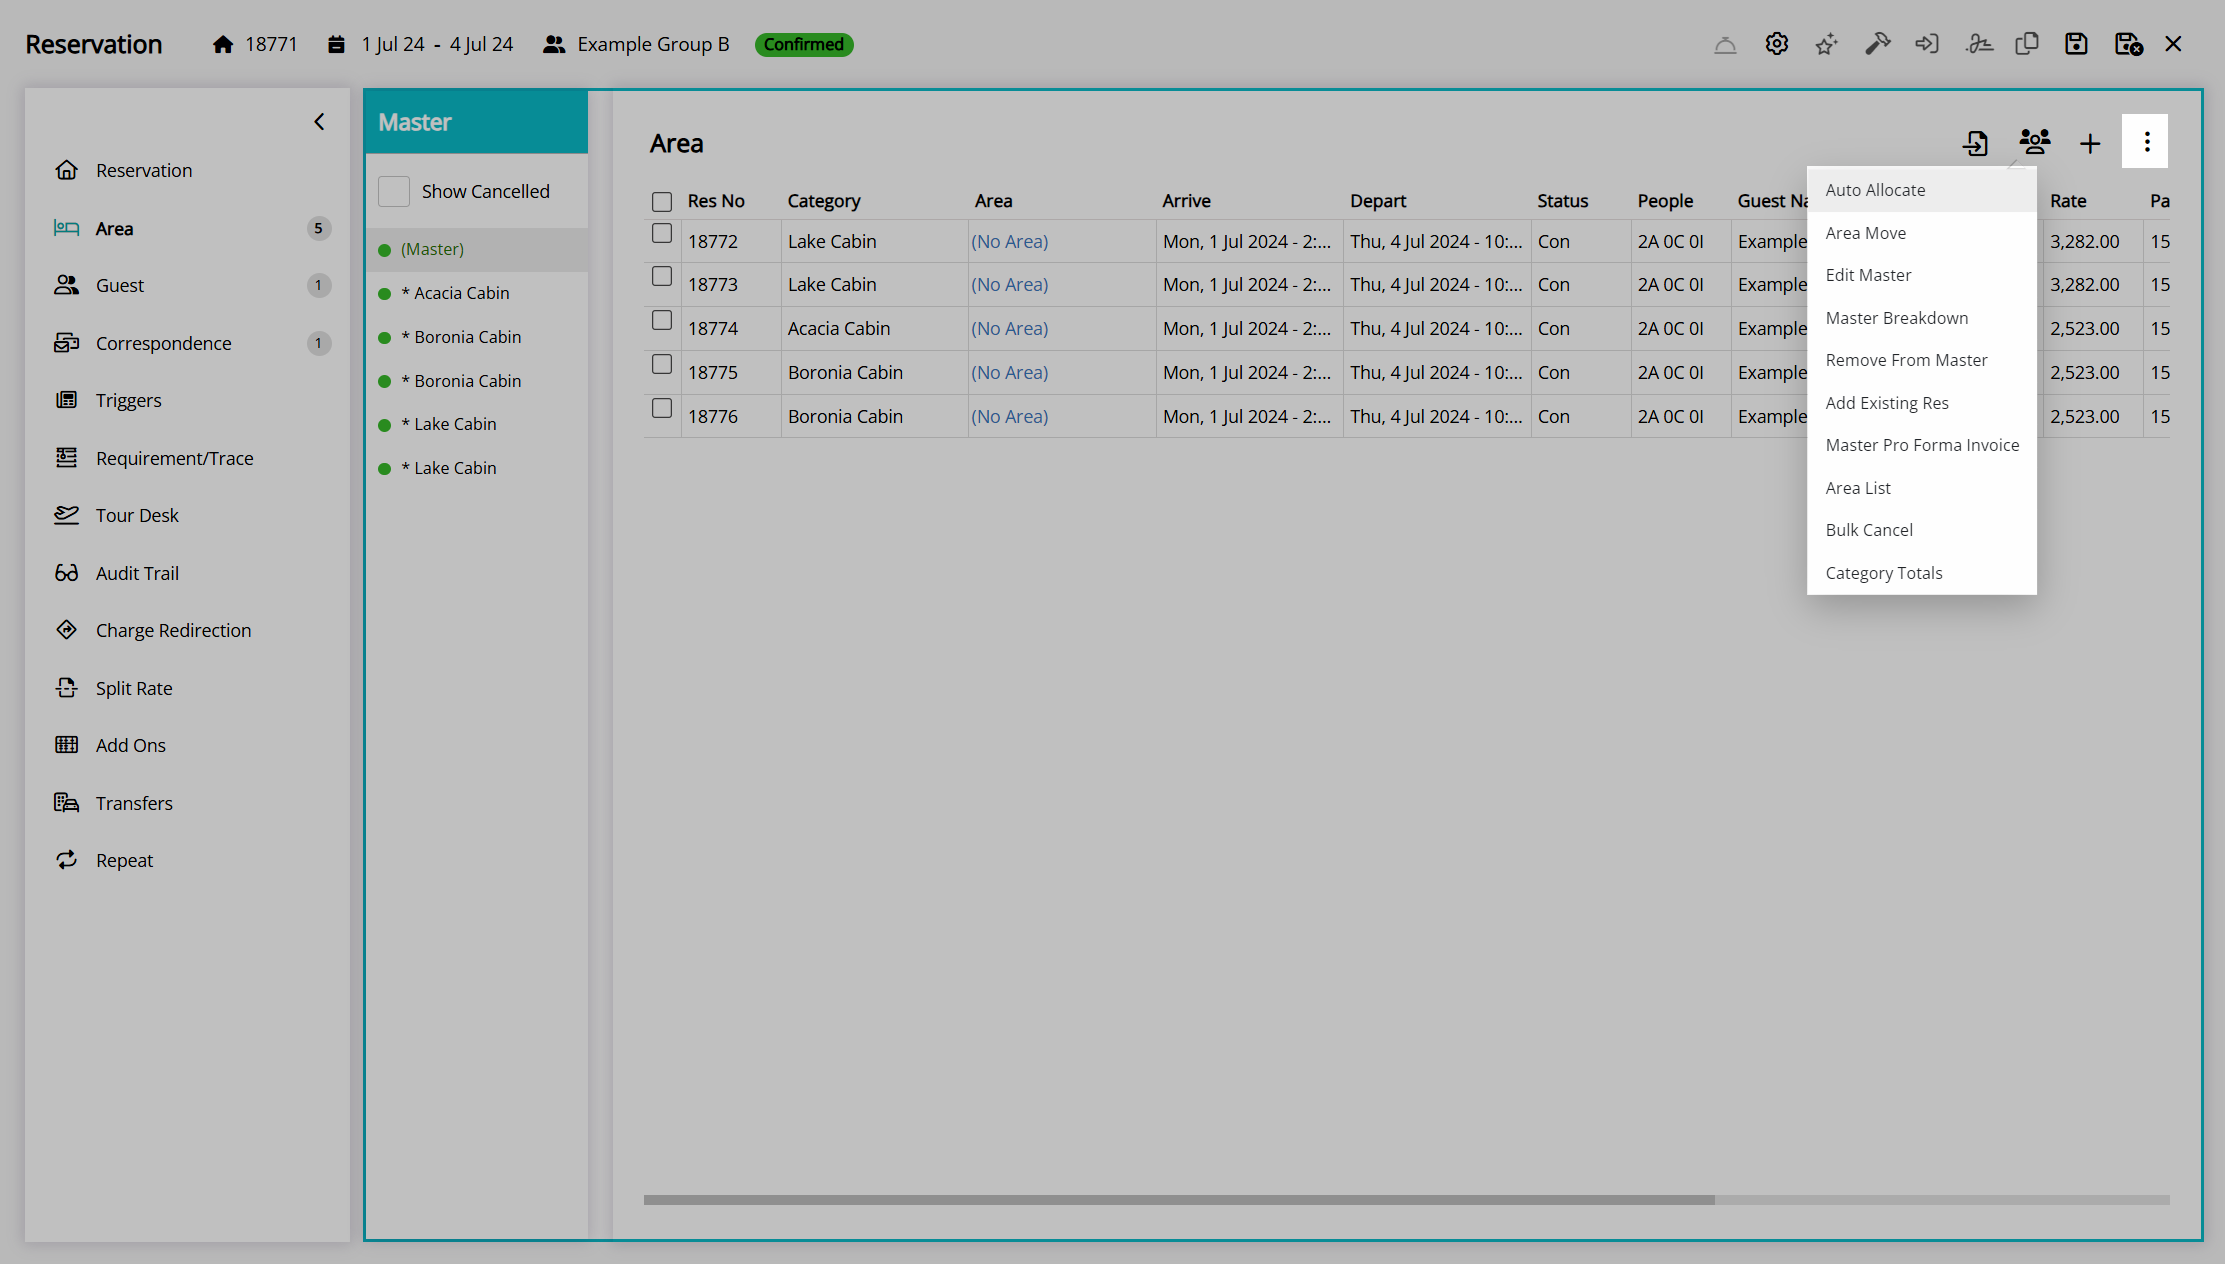
Select the  'Options' icon.
Select the option 'Auto Allocate'.
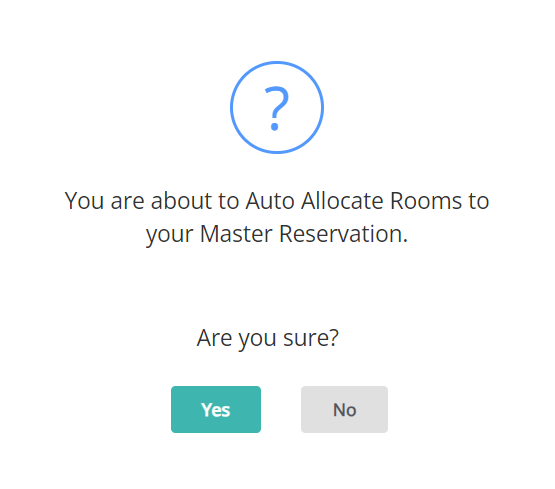
Select 'Yes' to confirm.
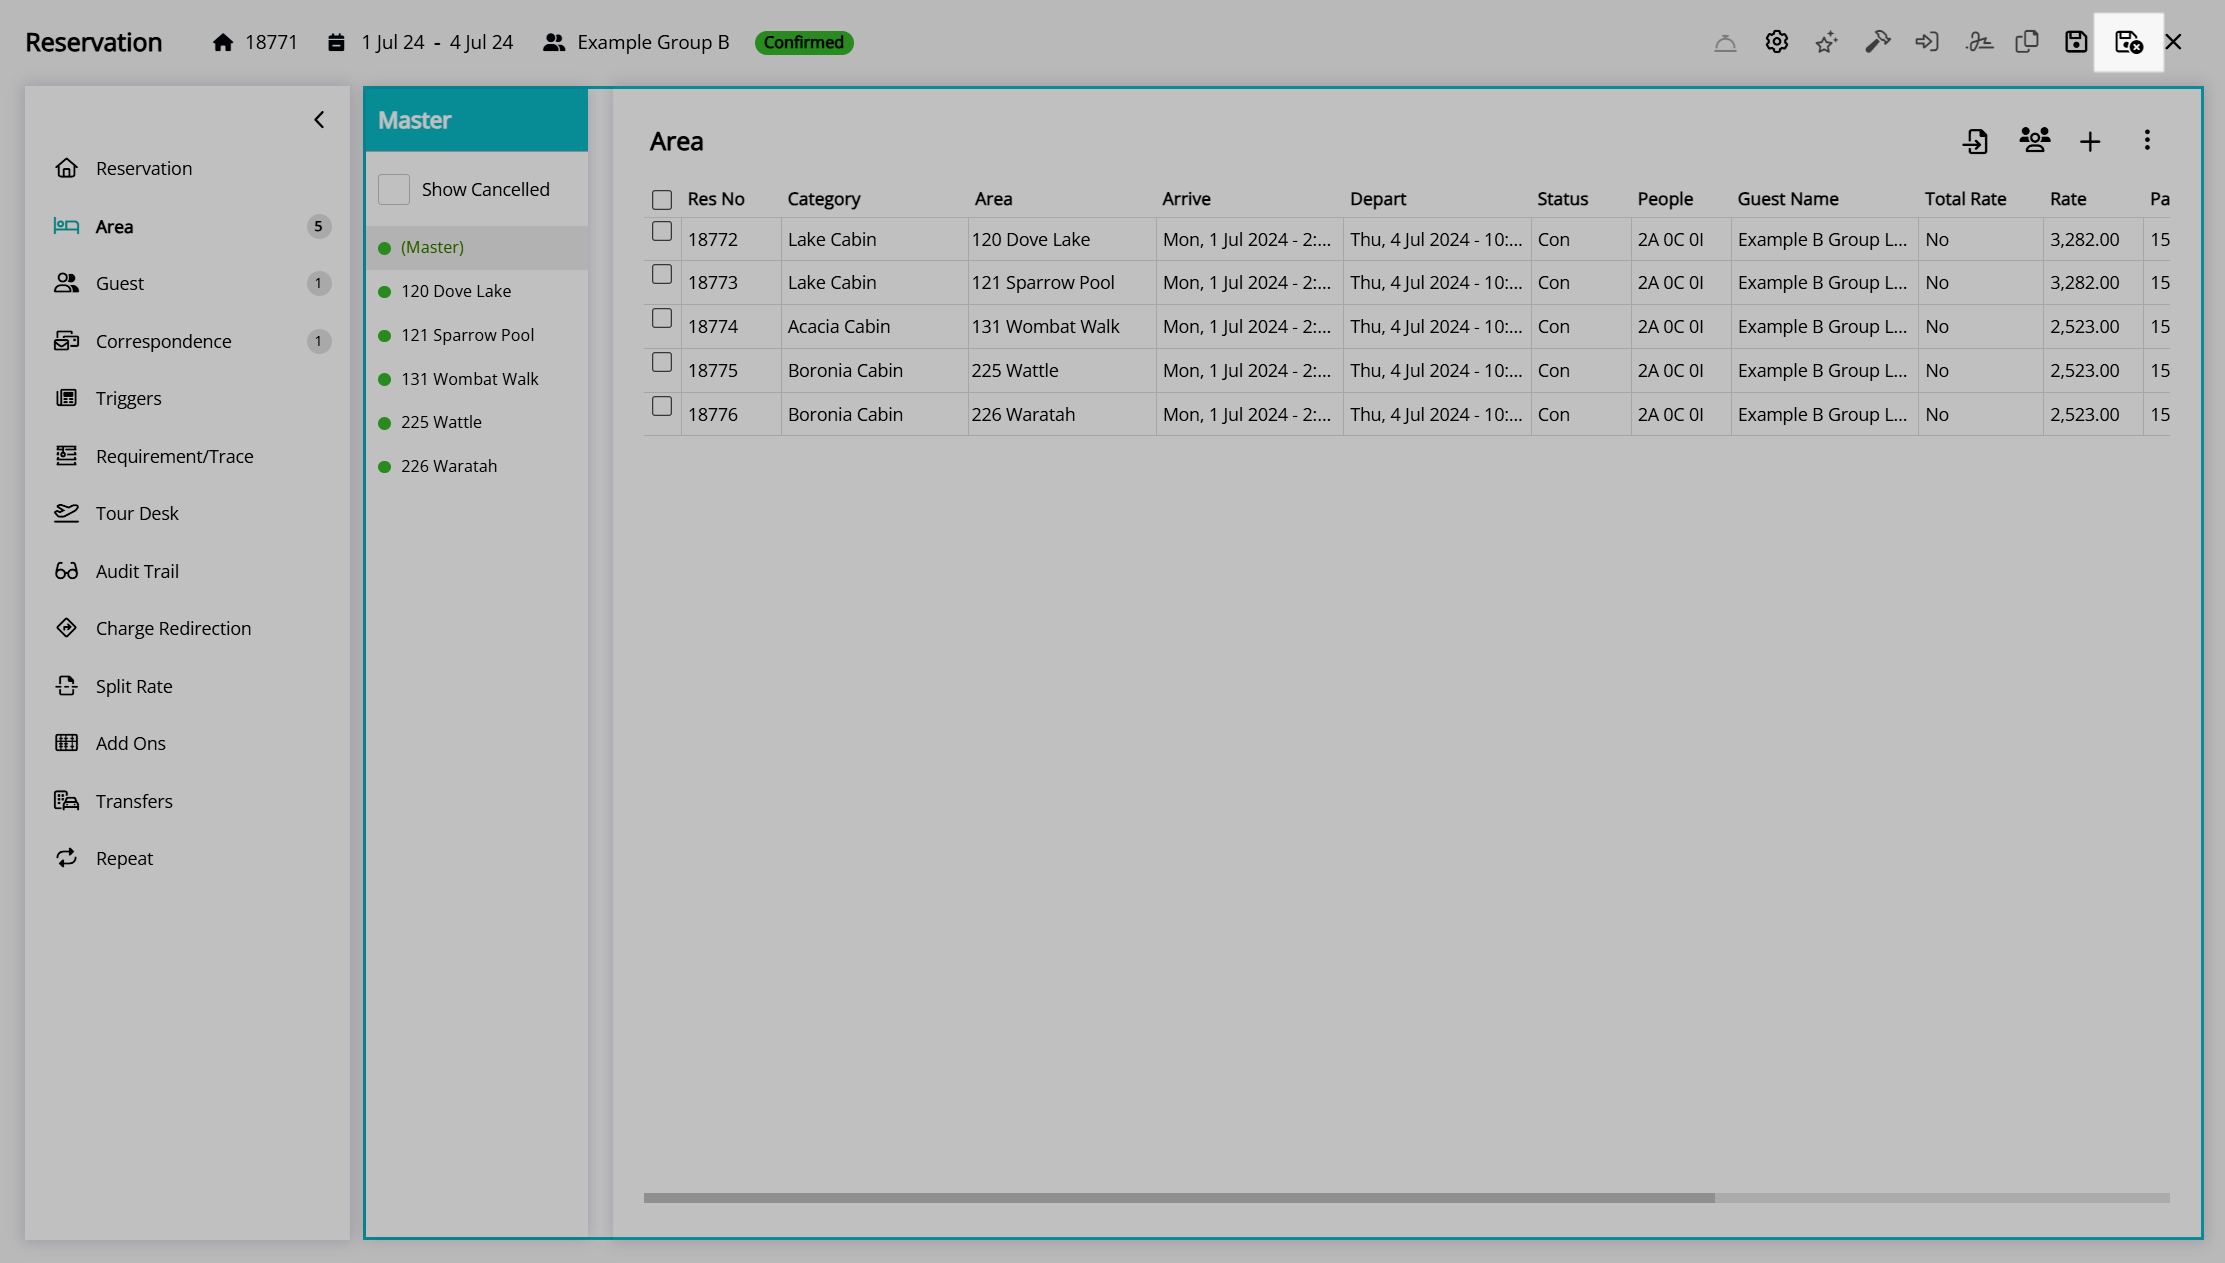
Select the  'Save/Exit' icon to store the changes made and leave the group reservation.
Remove from Master
The 'Remove from Master' option on the 'Area' tab of the group cover page will remove the selected reservation from the group, converting it to a standalone, individual reservation.
- Go to the Toolbar Menu Reservation Search in RMS.
- Enter the Group Name or Reservation Number and press 'Enter'.
- Select '(Master)' in the Navigator Pane.
- Navigate to the 'Area' tab.
- Select the checkbox for a Reservation.
- Select the
 'Options' icon.
 - Select the option 'Remove from Master'.
- Select 'Yes' to confirm.
- Save/Exit.
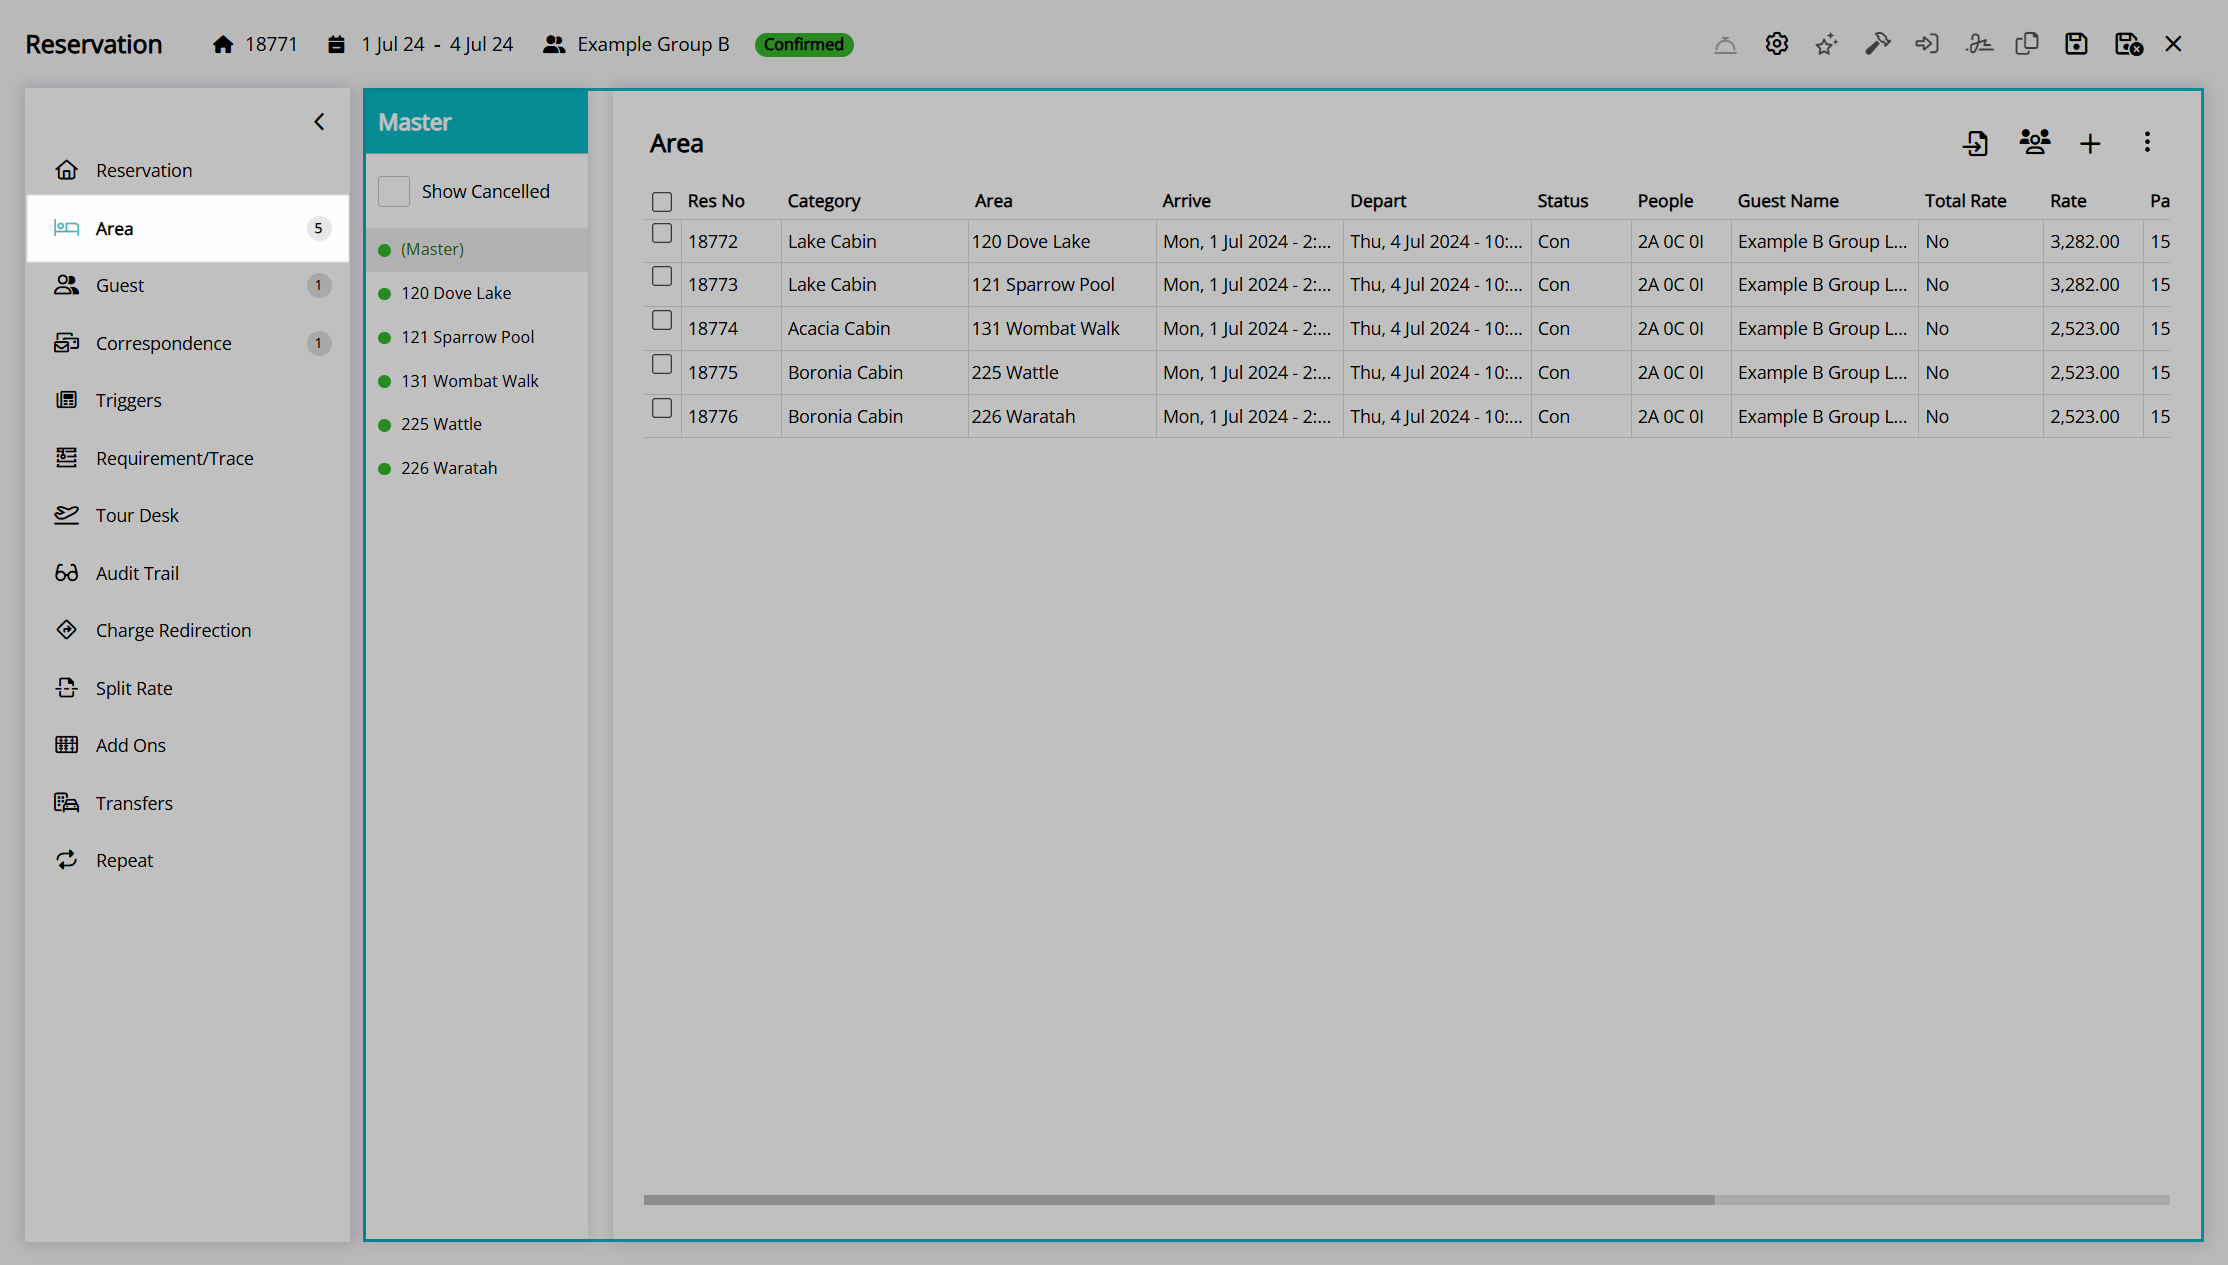
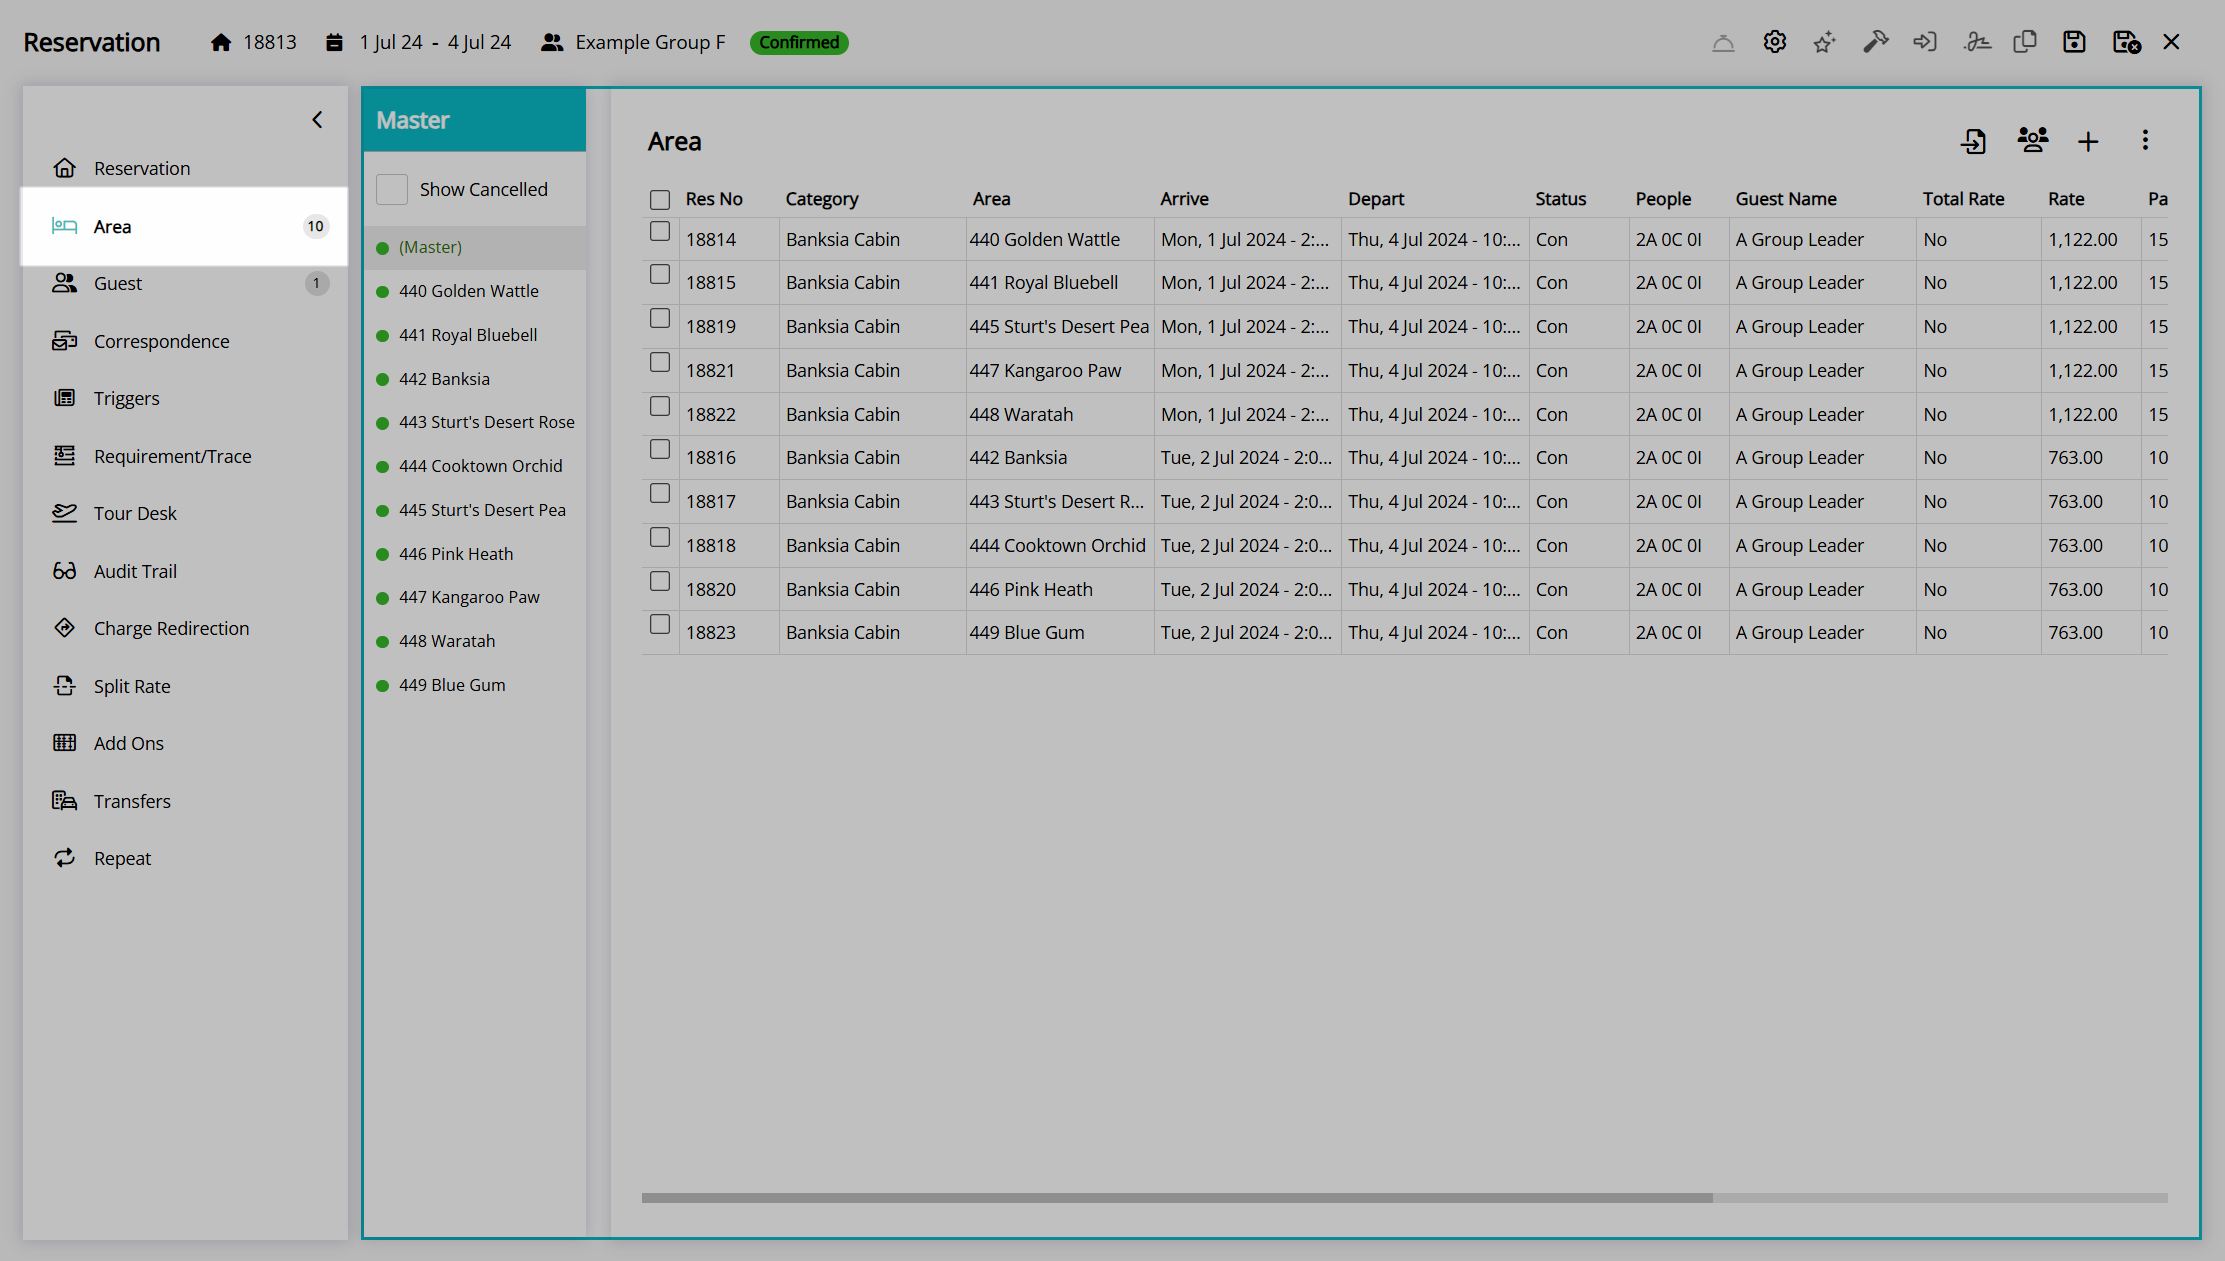
Go to the Toolbar Menu Reservation Search in RMS, enter the Group Name or Reservation Number and press 'Enter'.
Select '(Master)' in the Navigator Pane to open the group cover page.

Navigate to the 'Area' tab.
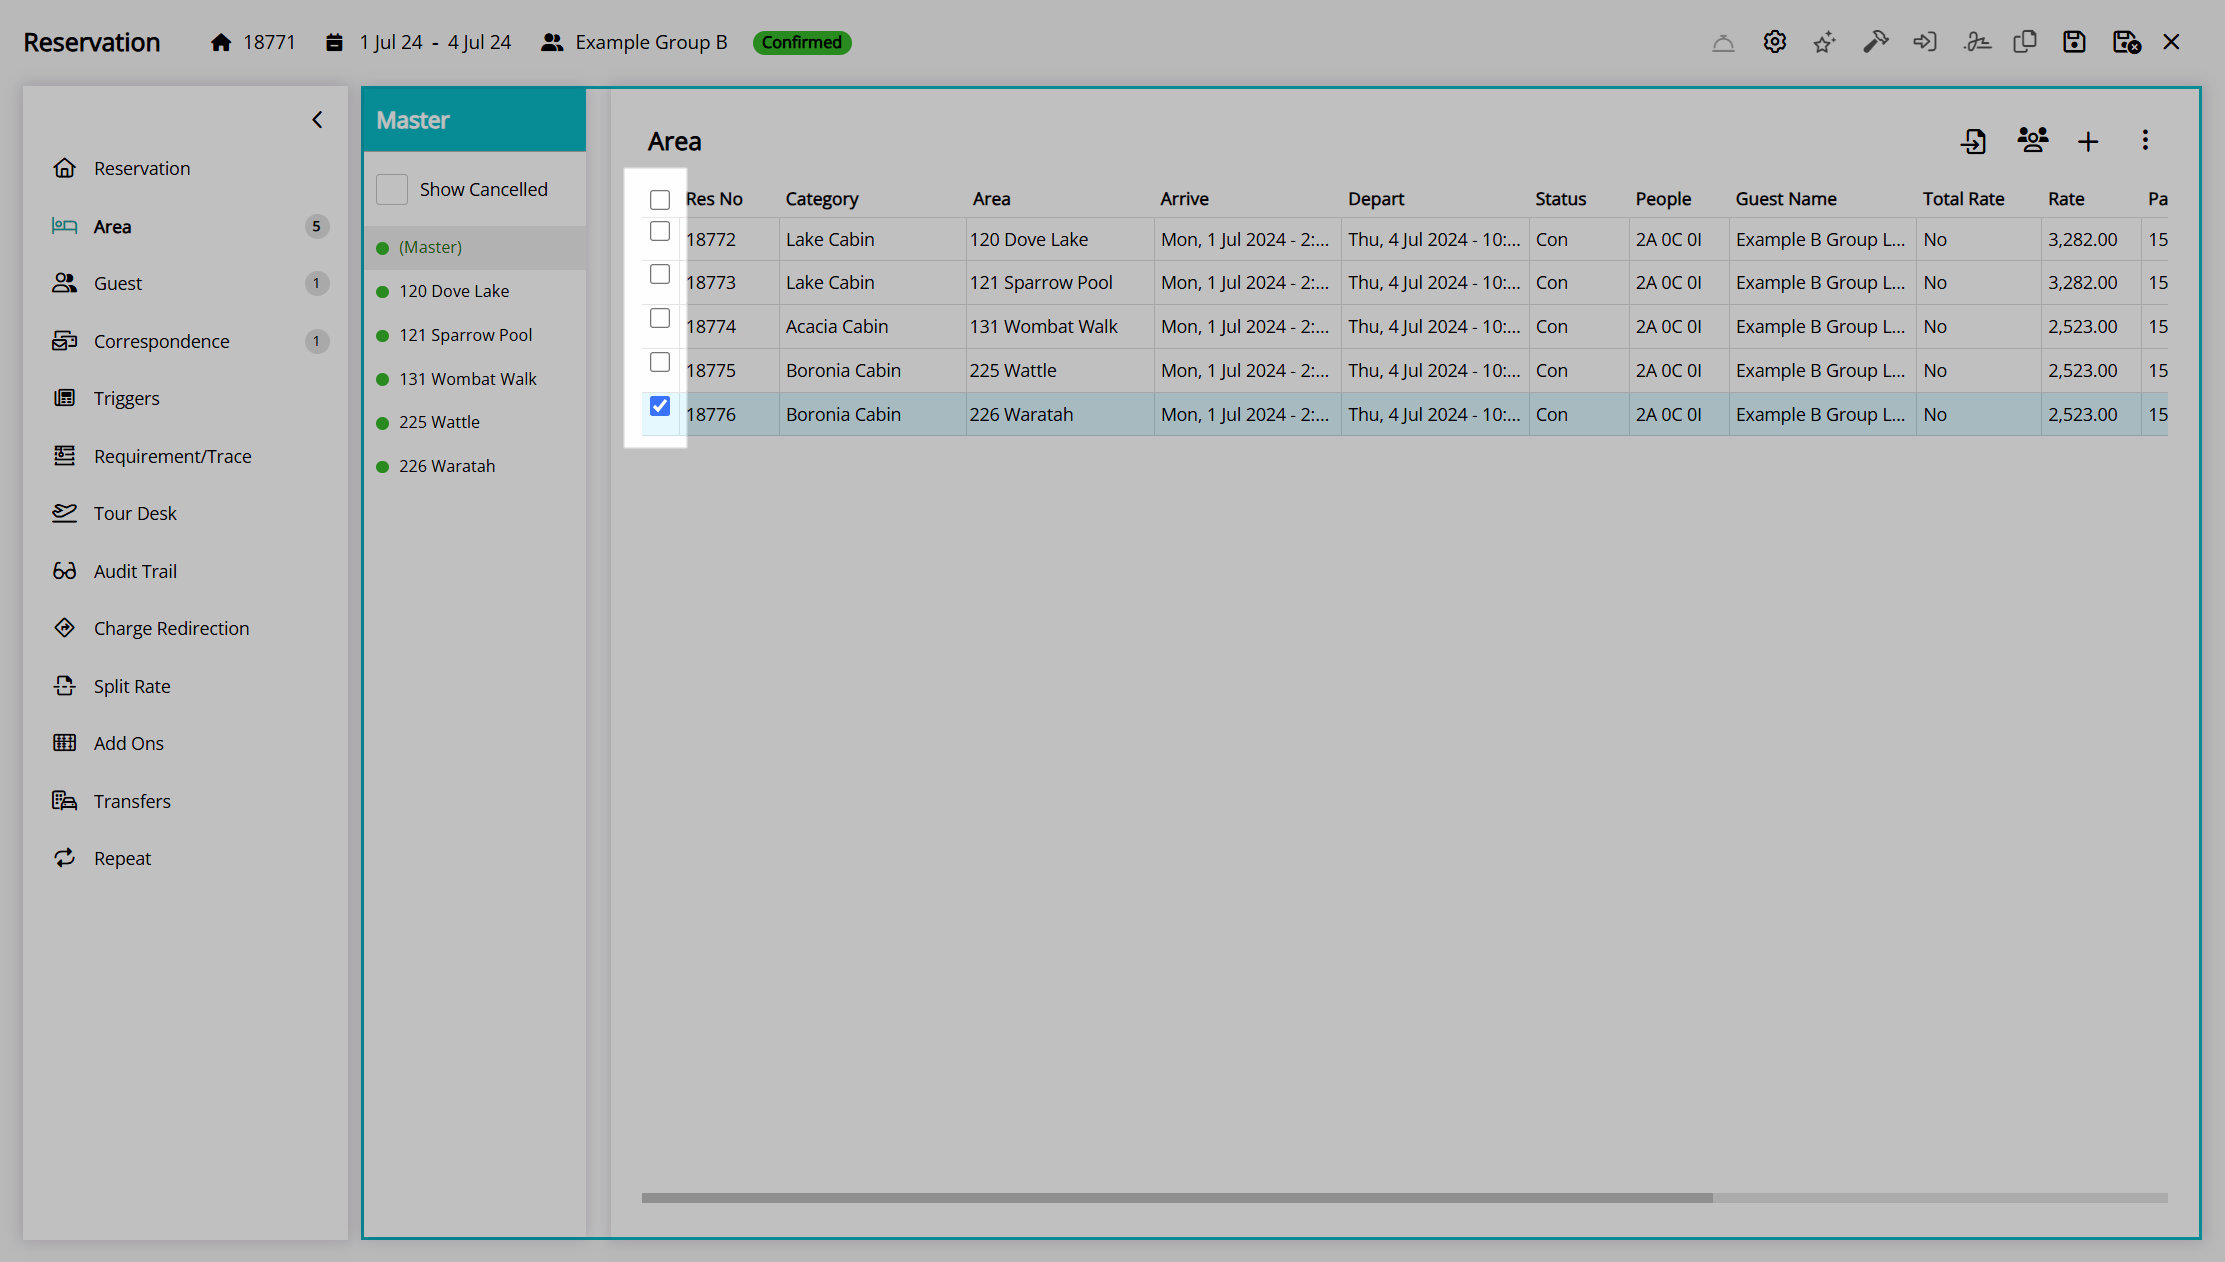
Select the checkbox for a reservation.
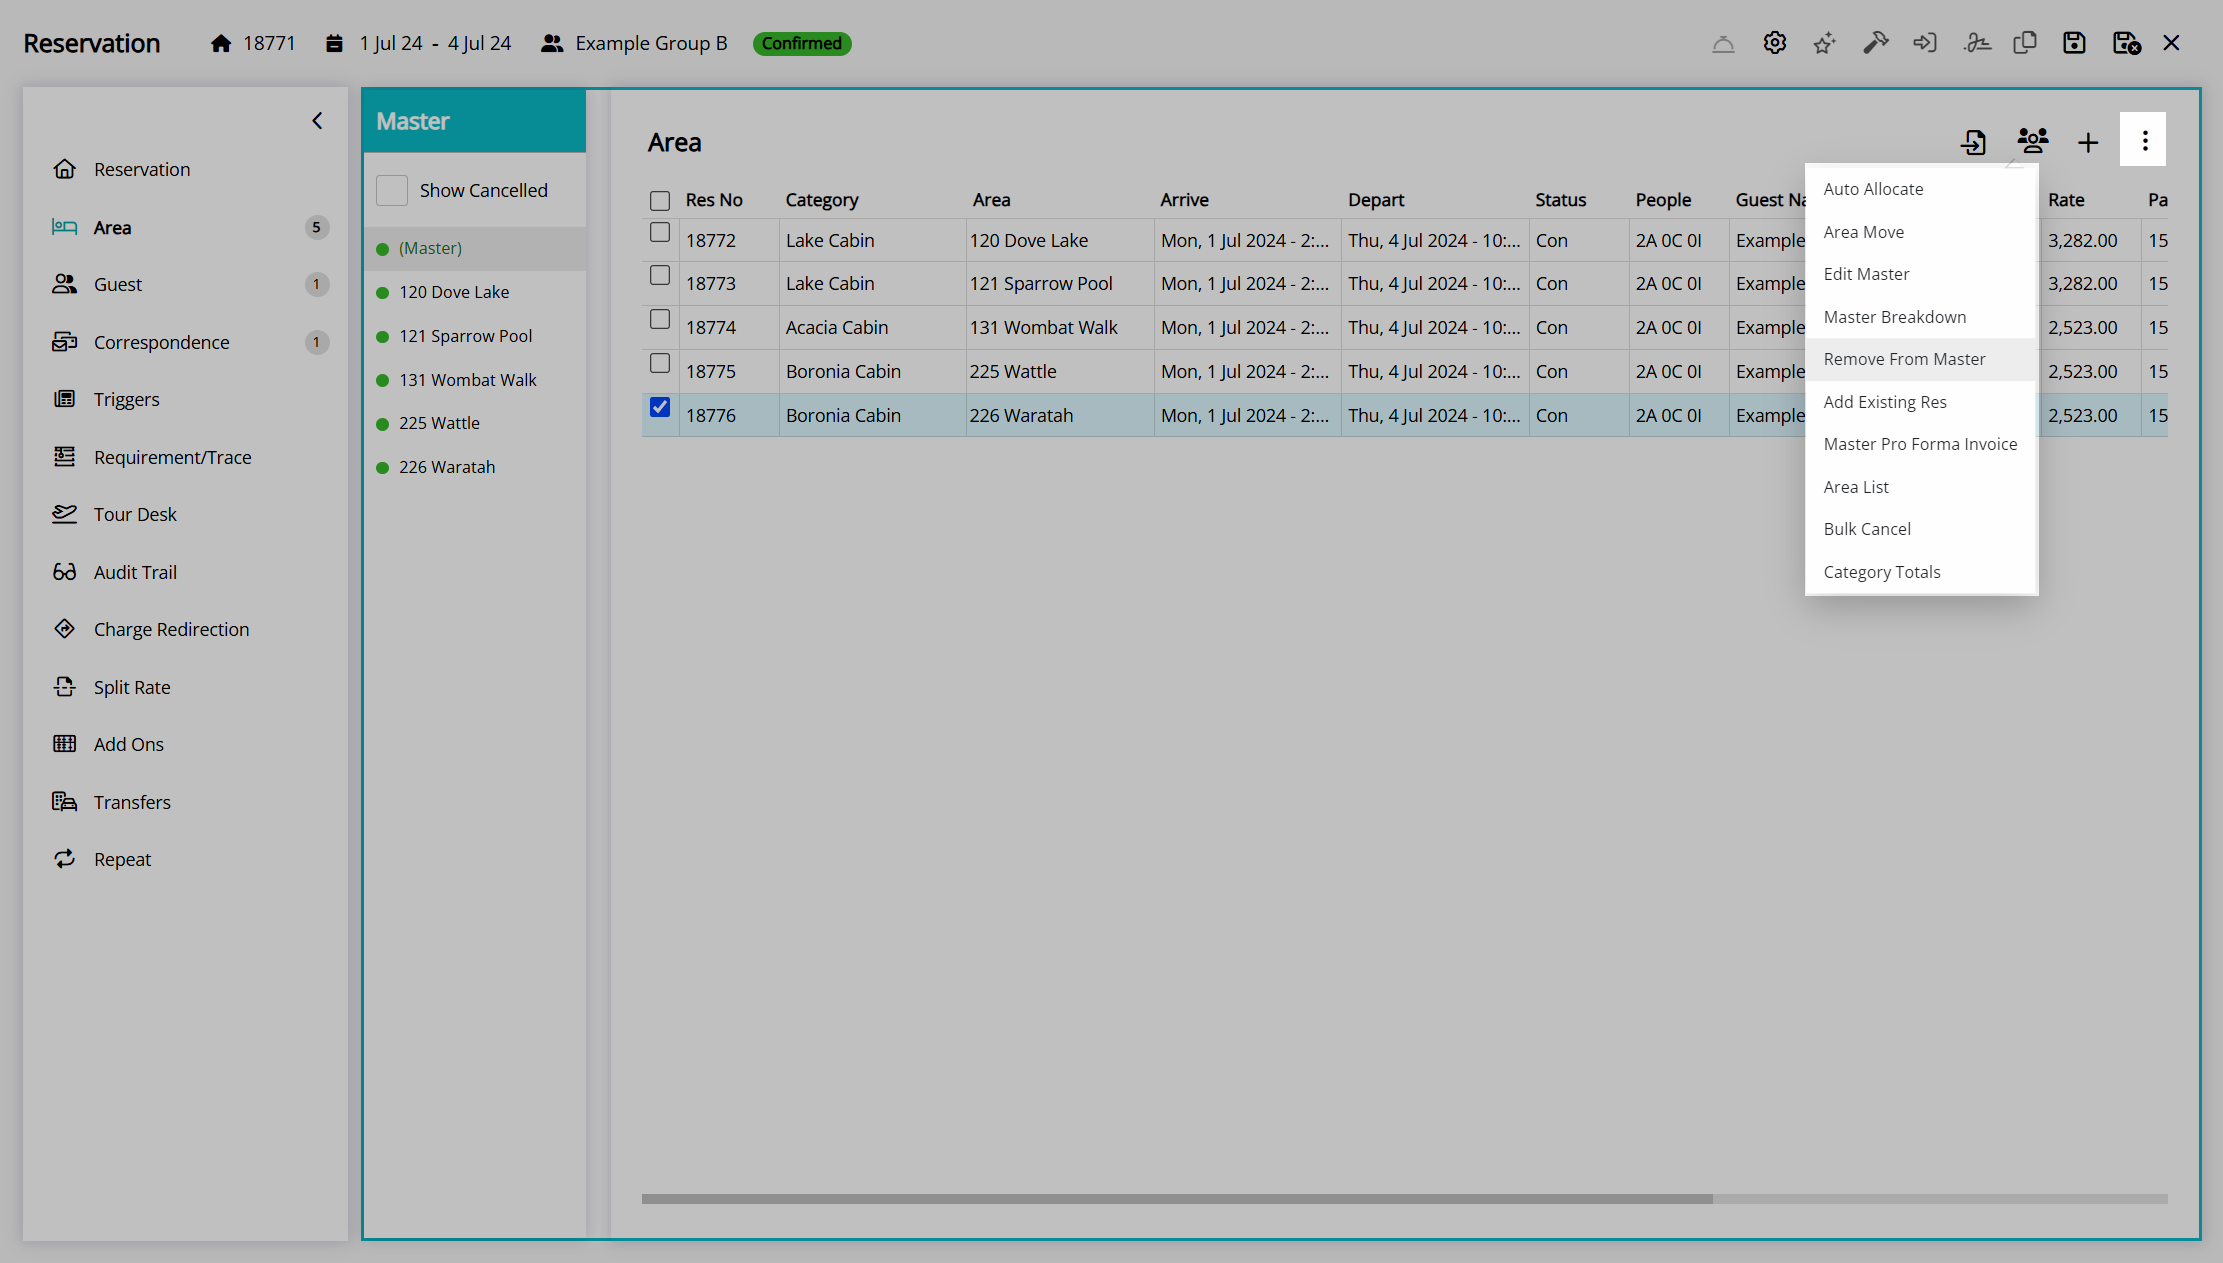
Select the 'Options' icon.

Select the option 'Remove from Master'.
Select 'Yes' to confirm separating the reservation.
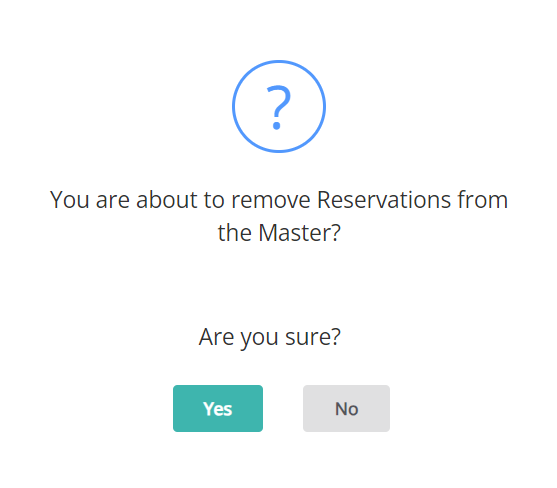
The selected reservations will be removed from the group and converted to individual reservations.
The Guest Profile on the reservation removed from the group will remain associated with the individual reservation and will need to have any group name manually removed.
 'Save/Exit' icon to store the changes made and leave the reservation.
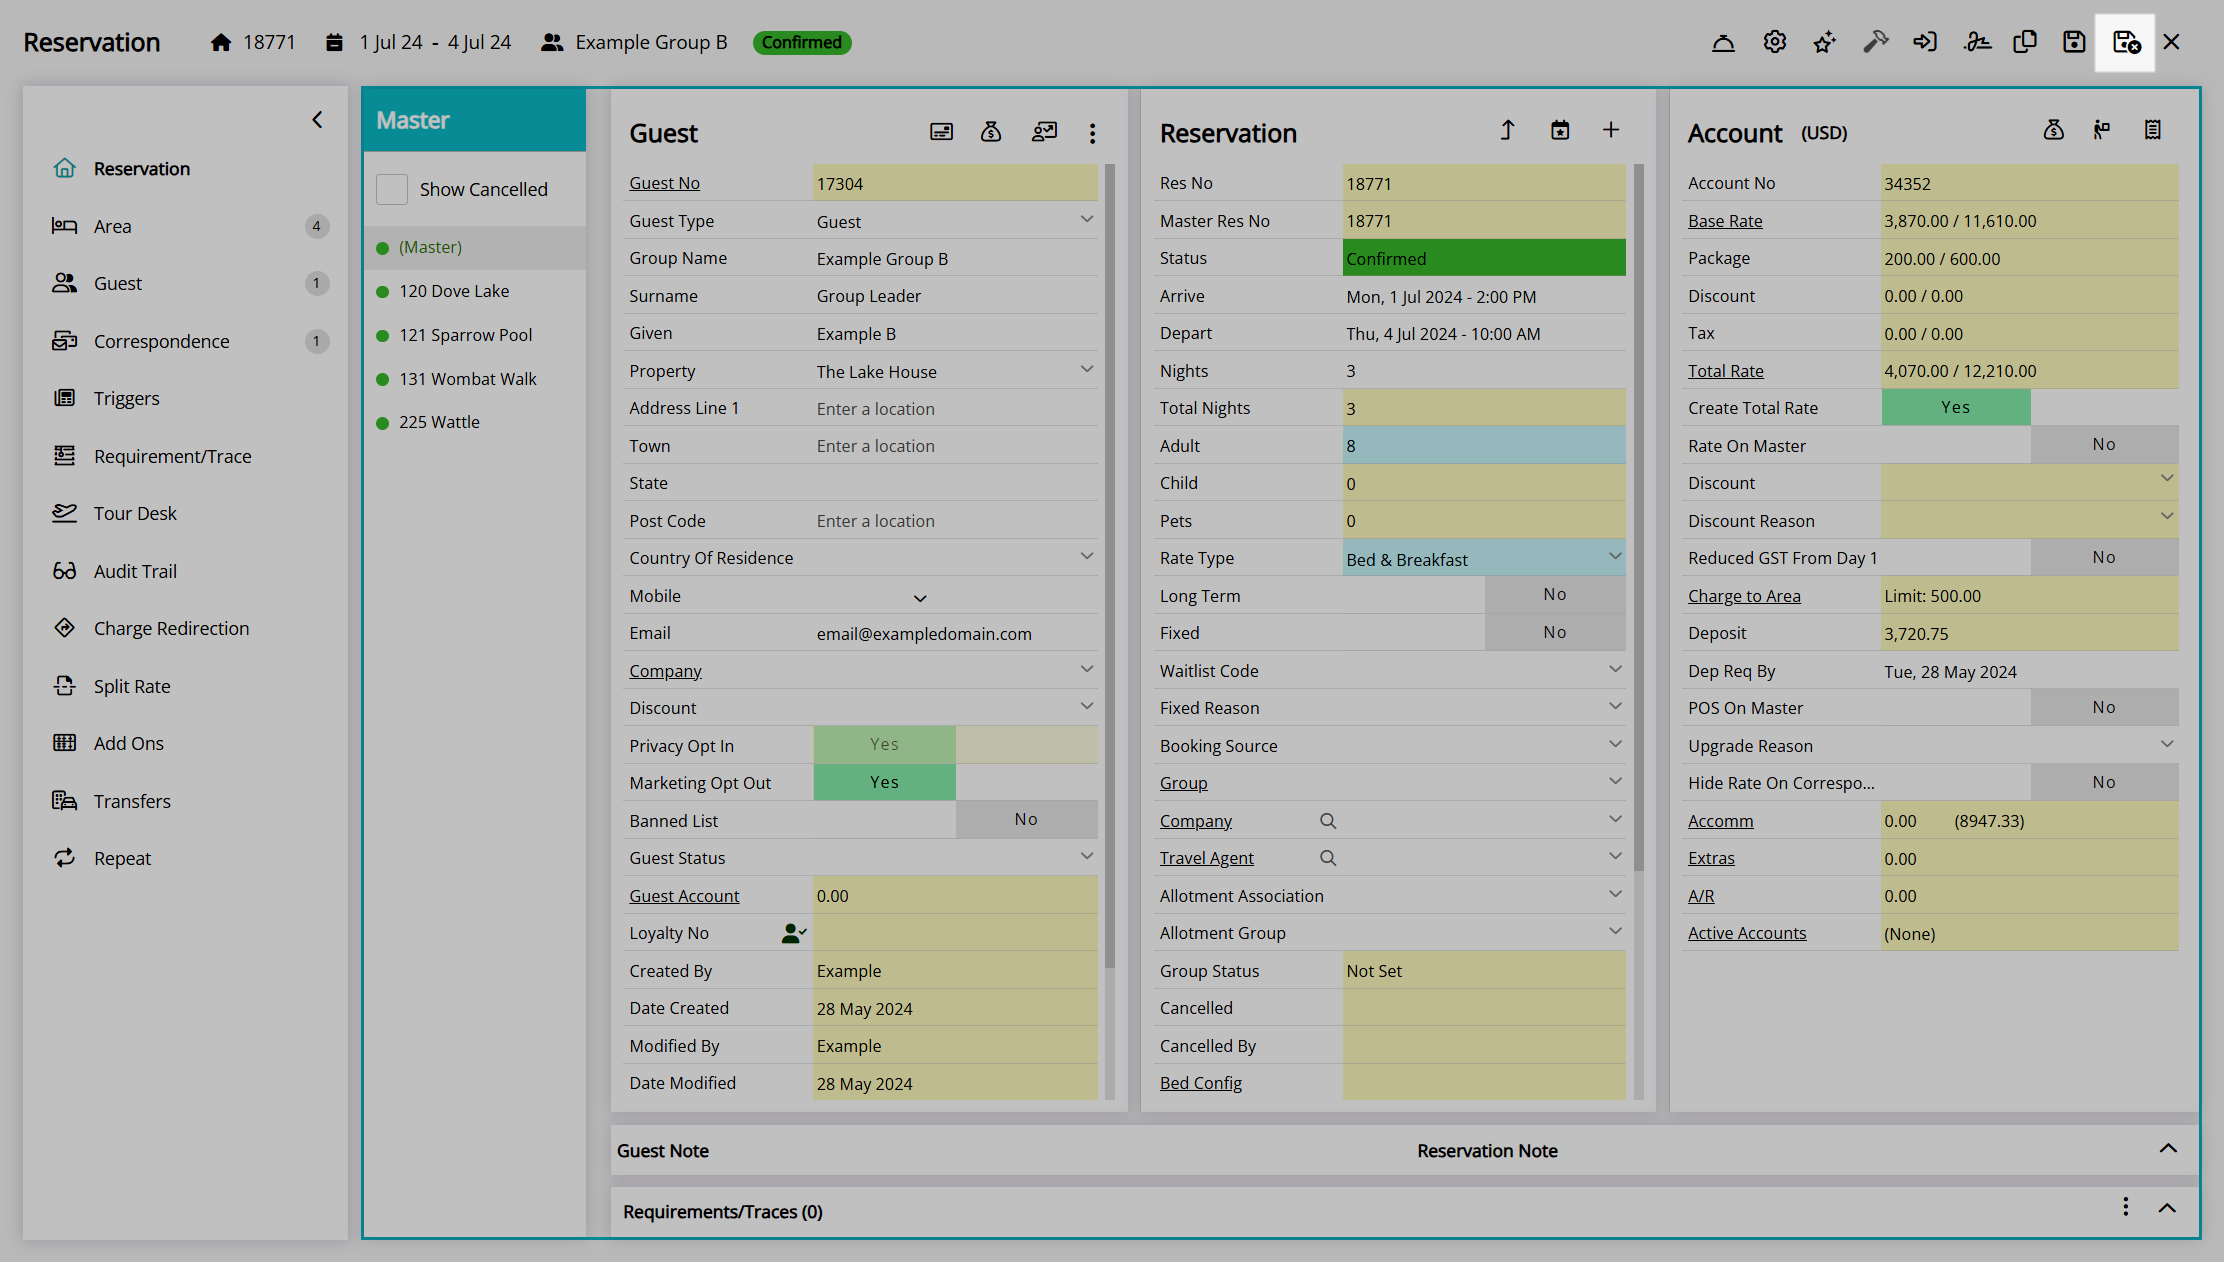
Area List
The 'Area List' option on the 'Area' tab of the group cover page will generate a printable Area List report for the group that can be provided to the group leader, tour leader, or other staff to provide key reservation information for this group.
- Go to the Toolbar Menu Reservation Search in RMS.
- Enter the Group Name or Reservation Number and press 'Enter'.
- Select '(Master)' in the Navigator Pane.
- Navigate to the 'Area' tab.
- Select the
 'Options' icon.
 - Select the 'Area List' option.
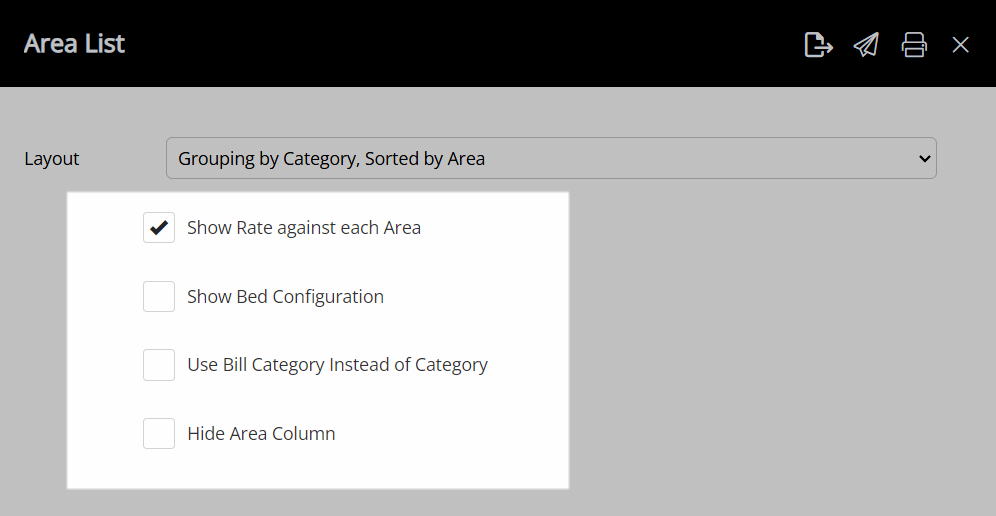
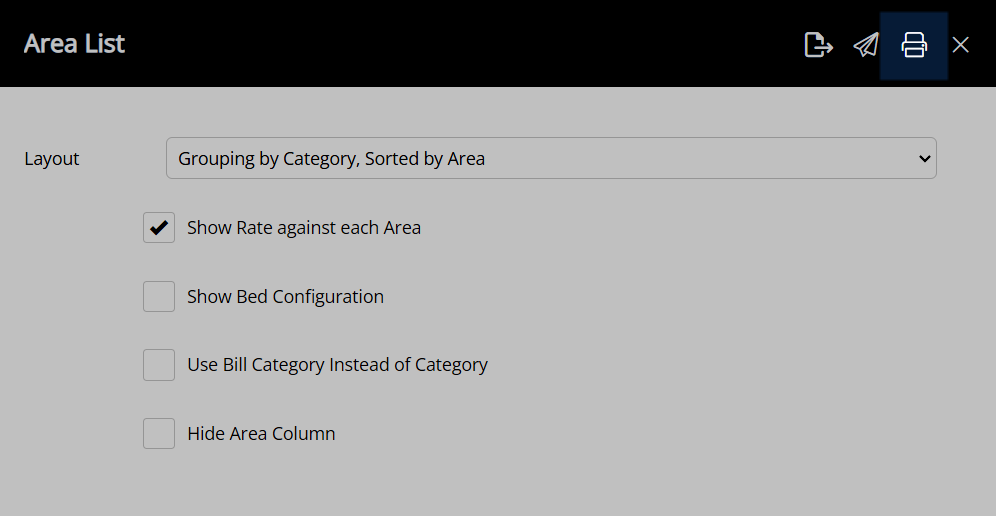
- Select an Area List Layout.
- Select the Area List Options.
- Select the
 'Print' icon.
 'Email' icon to send the Area List instead of printing.
Go to the Toolbar Menu Reservation Search in RMS, enter the Group Name or Reservation Number and press 'Enter'.
Select '(Master)' in the Navigator Pane to open the group cover page.

Navigate to the 'Area' tab.
Select the 'Options' icon.
Select the 'Area List' option.
Select an Area List Layout.
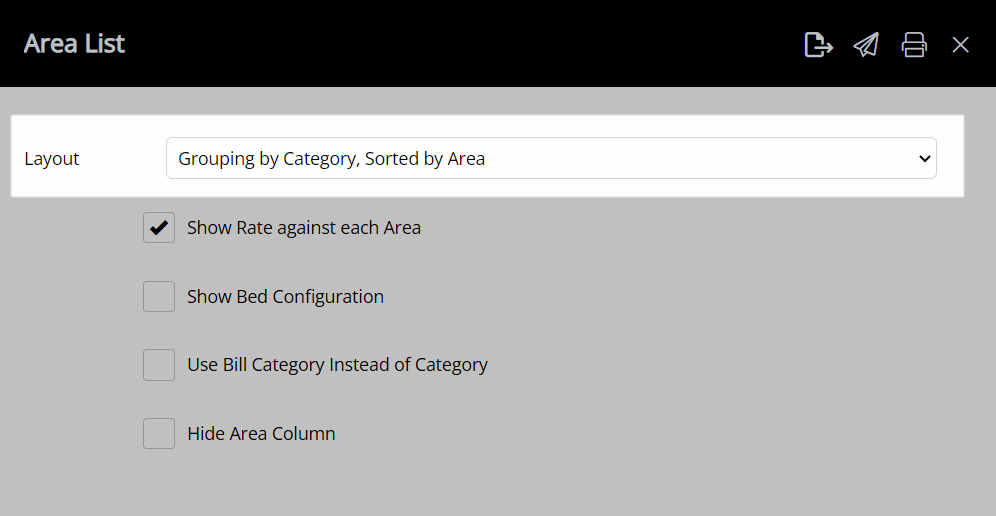
Select the Area List Options.
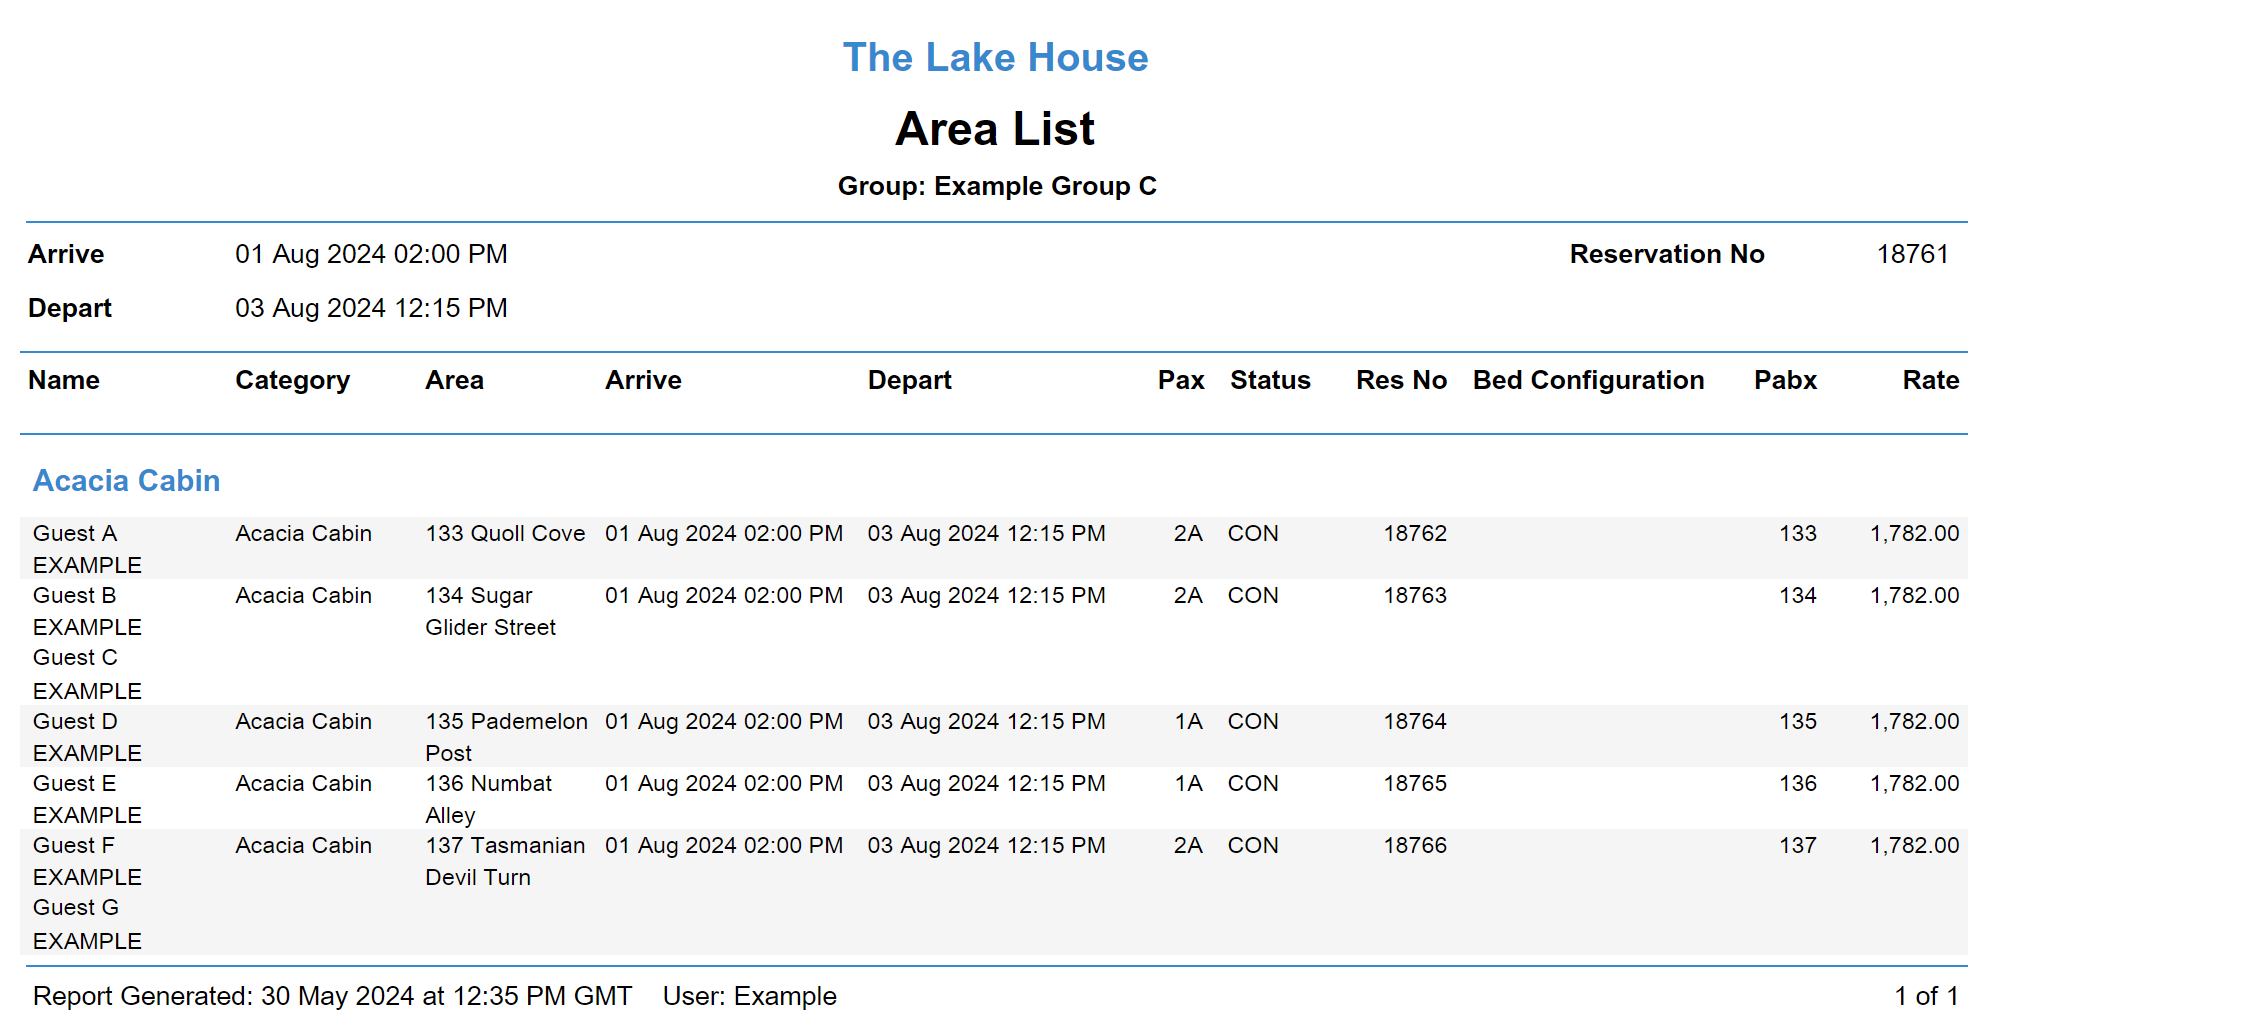
Select the  'Print' icon.
An Area List will be generated using the selected options to display the areas for all reservations within the group.
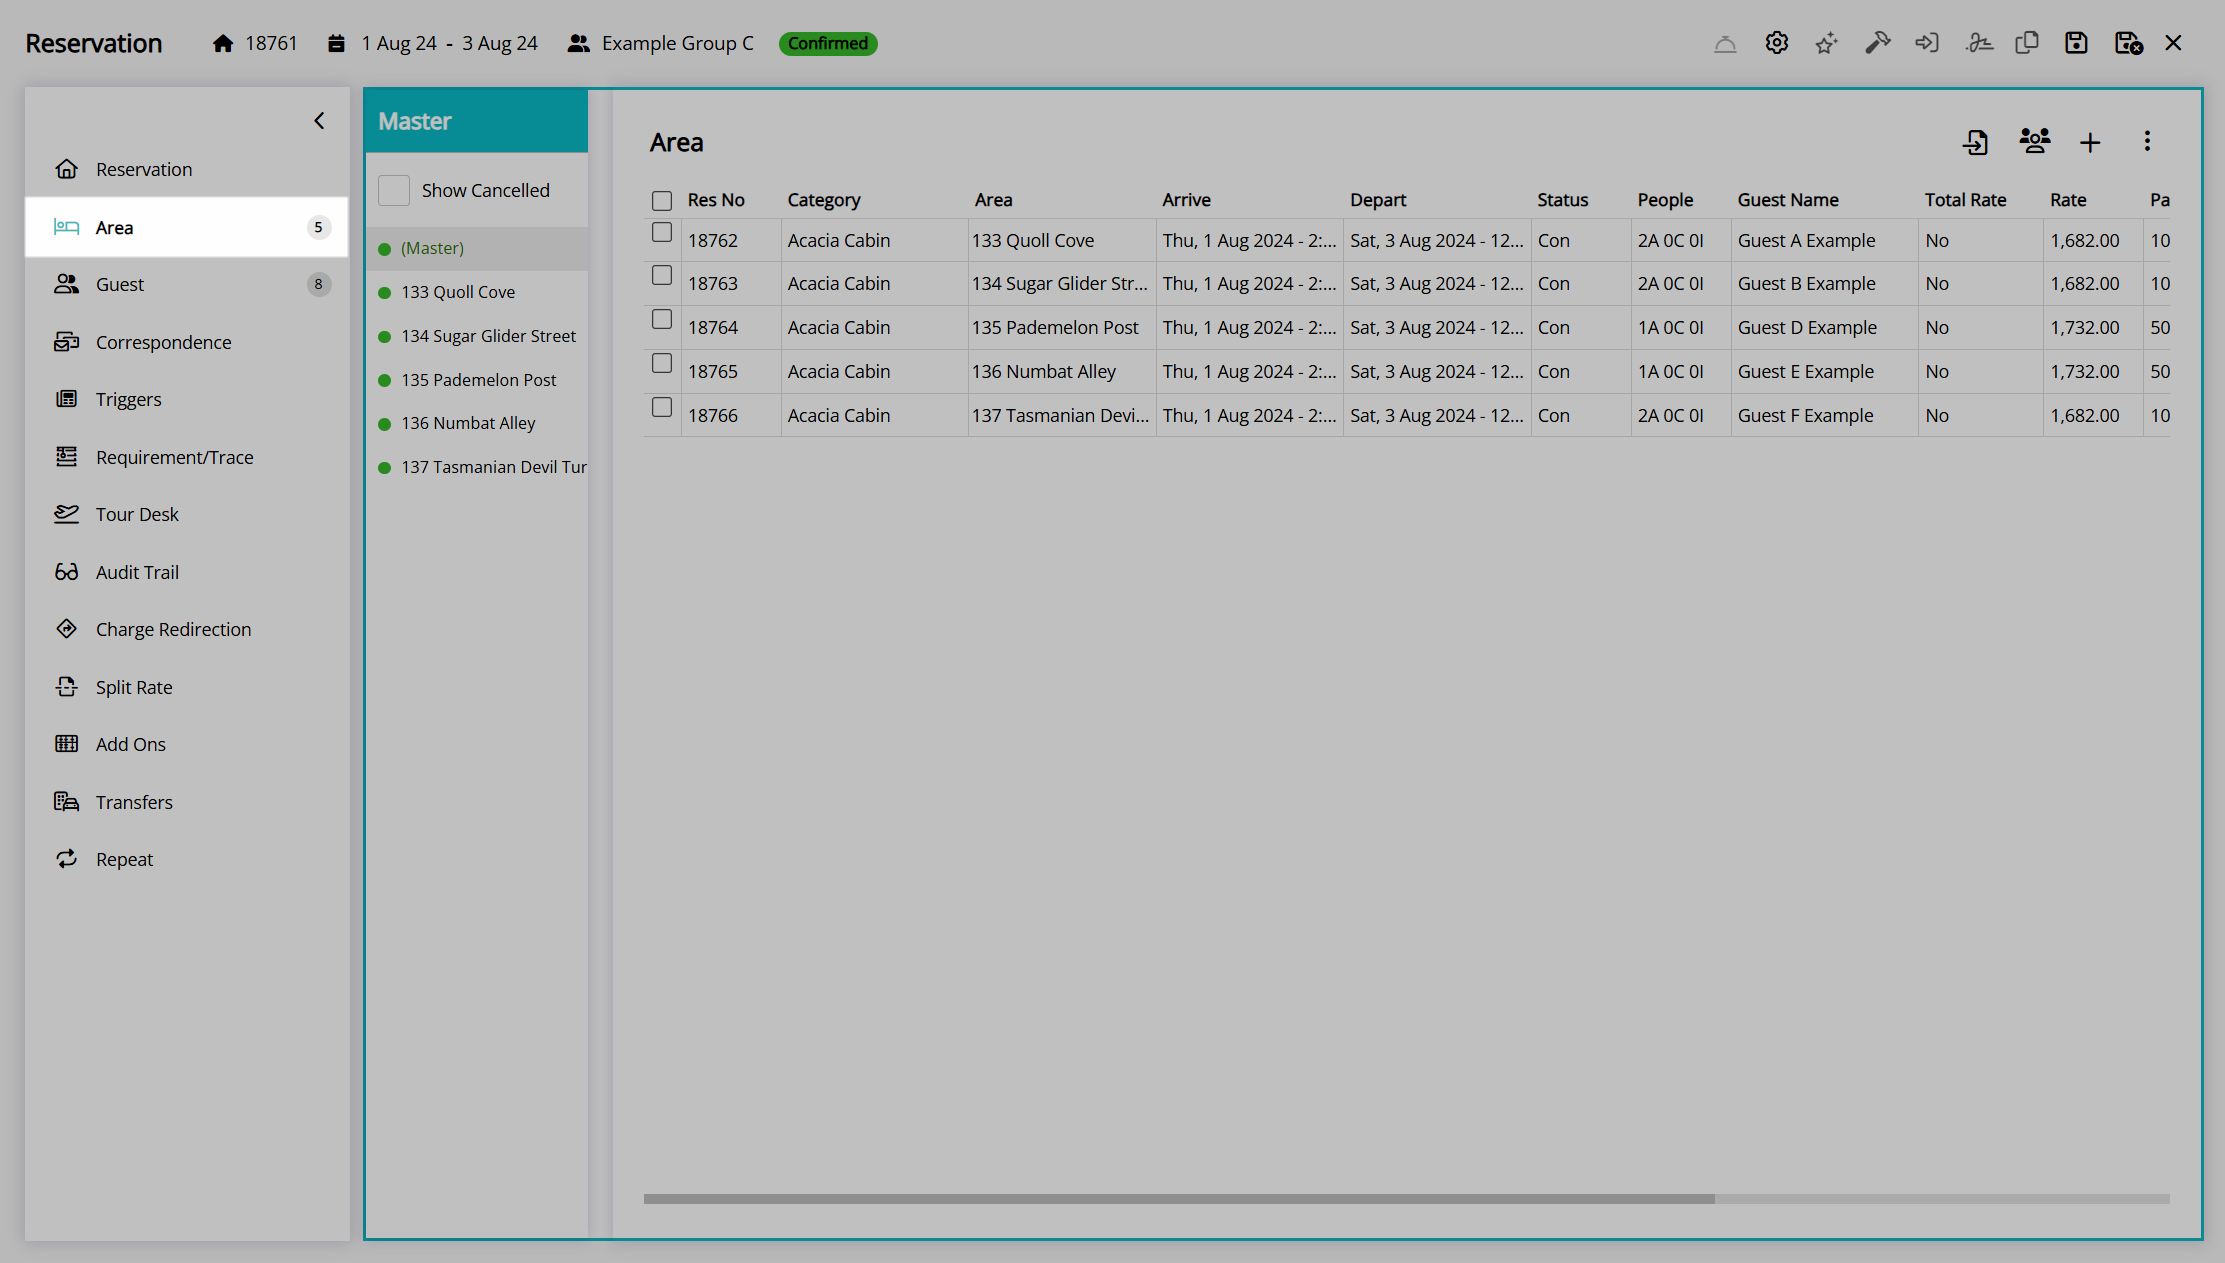
Bulk Cancel
The 'Bulk Cancel' option on the 'Area' tab of the group cover page will quickly cancel multiple reservations within the group without cancelling the entire group.
Changing the reservation status on the group cover page will change the reservation status for all reservations in the group, whilst changing the reservation status on a single reservation within the group will only apply to that reservation.
Use the 'Bulk Cancel' option to cancel multiple reservations within the group simultaneously without cancelling the entire group.
- Go to the Toolbar Menu Reservation Search in RMS.
- Enter the Group Name or Reservation Number and press 'Enter'.
- Select '(Master)' in the Navigator Pane.
- Navigate to the 'Area' tab.
- Select the checkbox for multiple Reservations.
- Select the
 'Options' icon.
 - Select the option 'Bulk Cancel'.
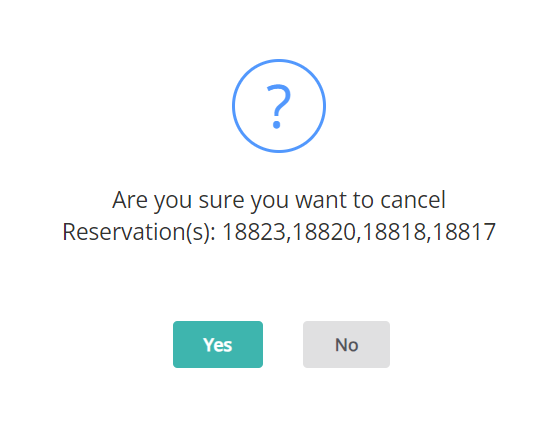
- Select 'Yes' to confirm.
Go to the Toolbar Menu Reservation Search in RMS, enter the Group Name or Reservation Number and press 'Enter'.
Select '(Master)' in the Navigator Pane to open the group cover page.

Navigate to the 'Area' tab.
Select the checkbox for multiple Reservations.
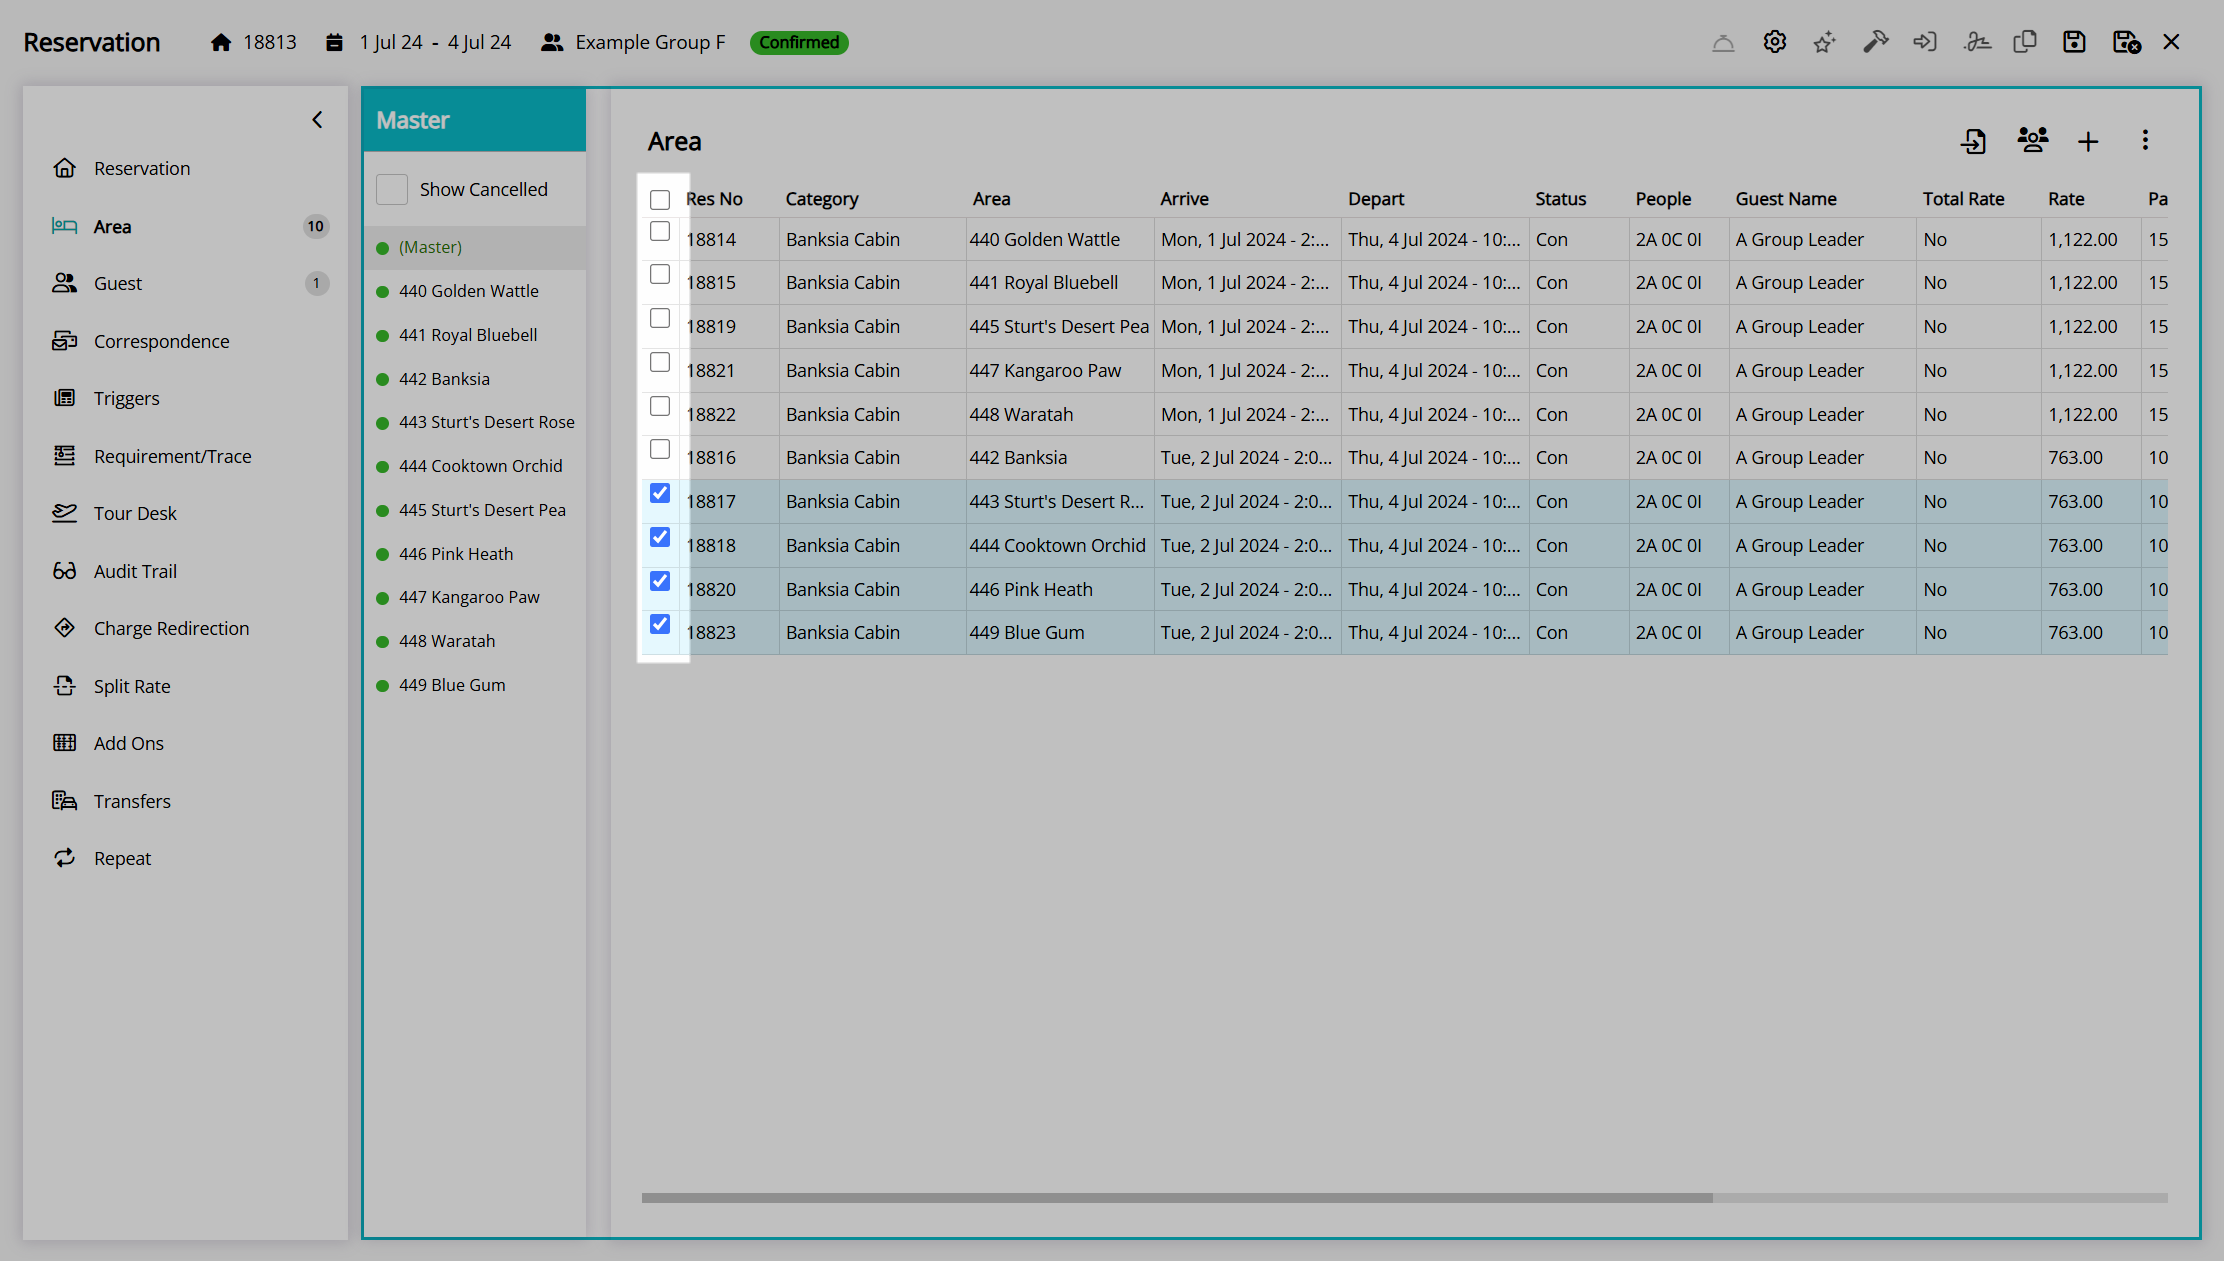
Select the  'Options' icon.
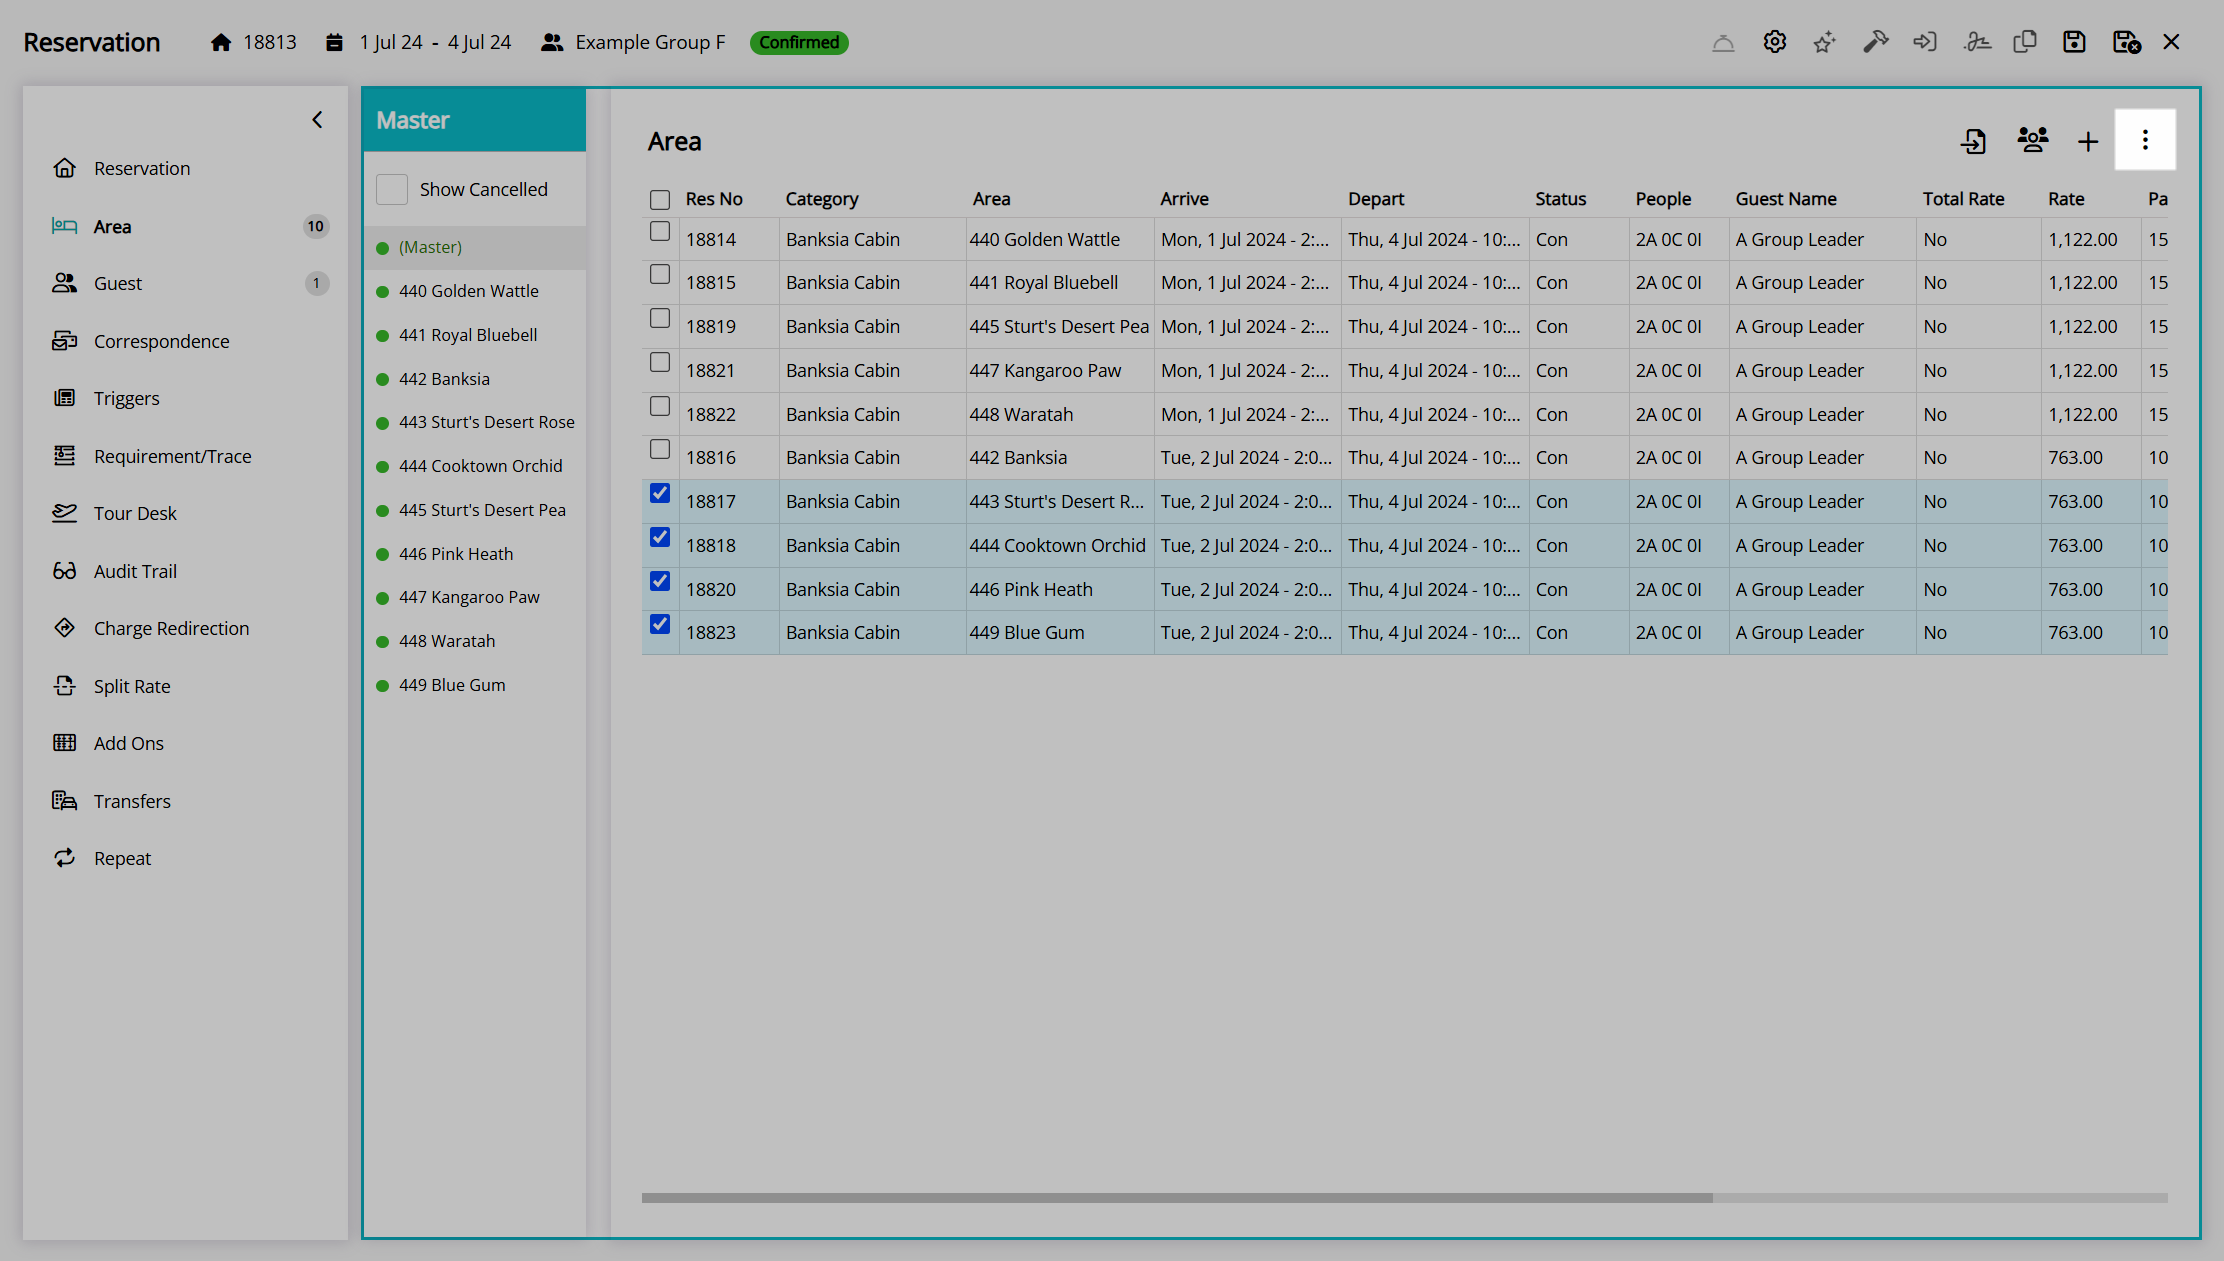
Select the option 'Bulk Cancel'.
Select 'Yes' to confirm cancelling the selected reservations.
The selected reservations will be cancelled and can still be viewed in the group by selecting the 'Show Cancelled' checkbox in the navigator pane.

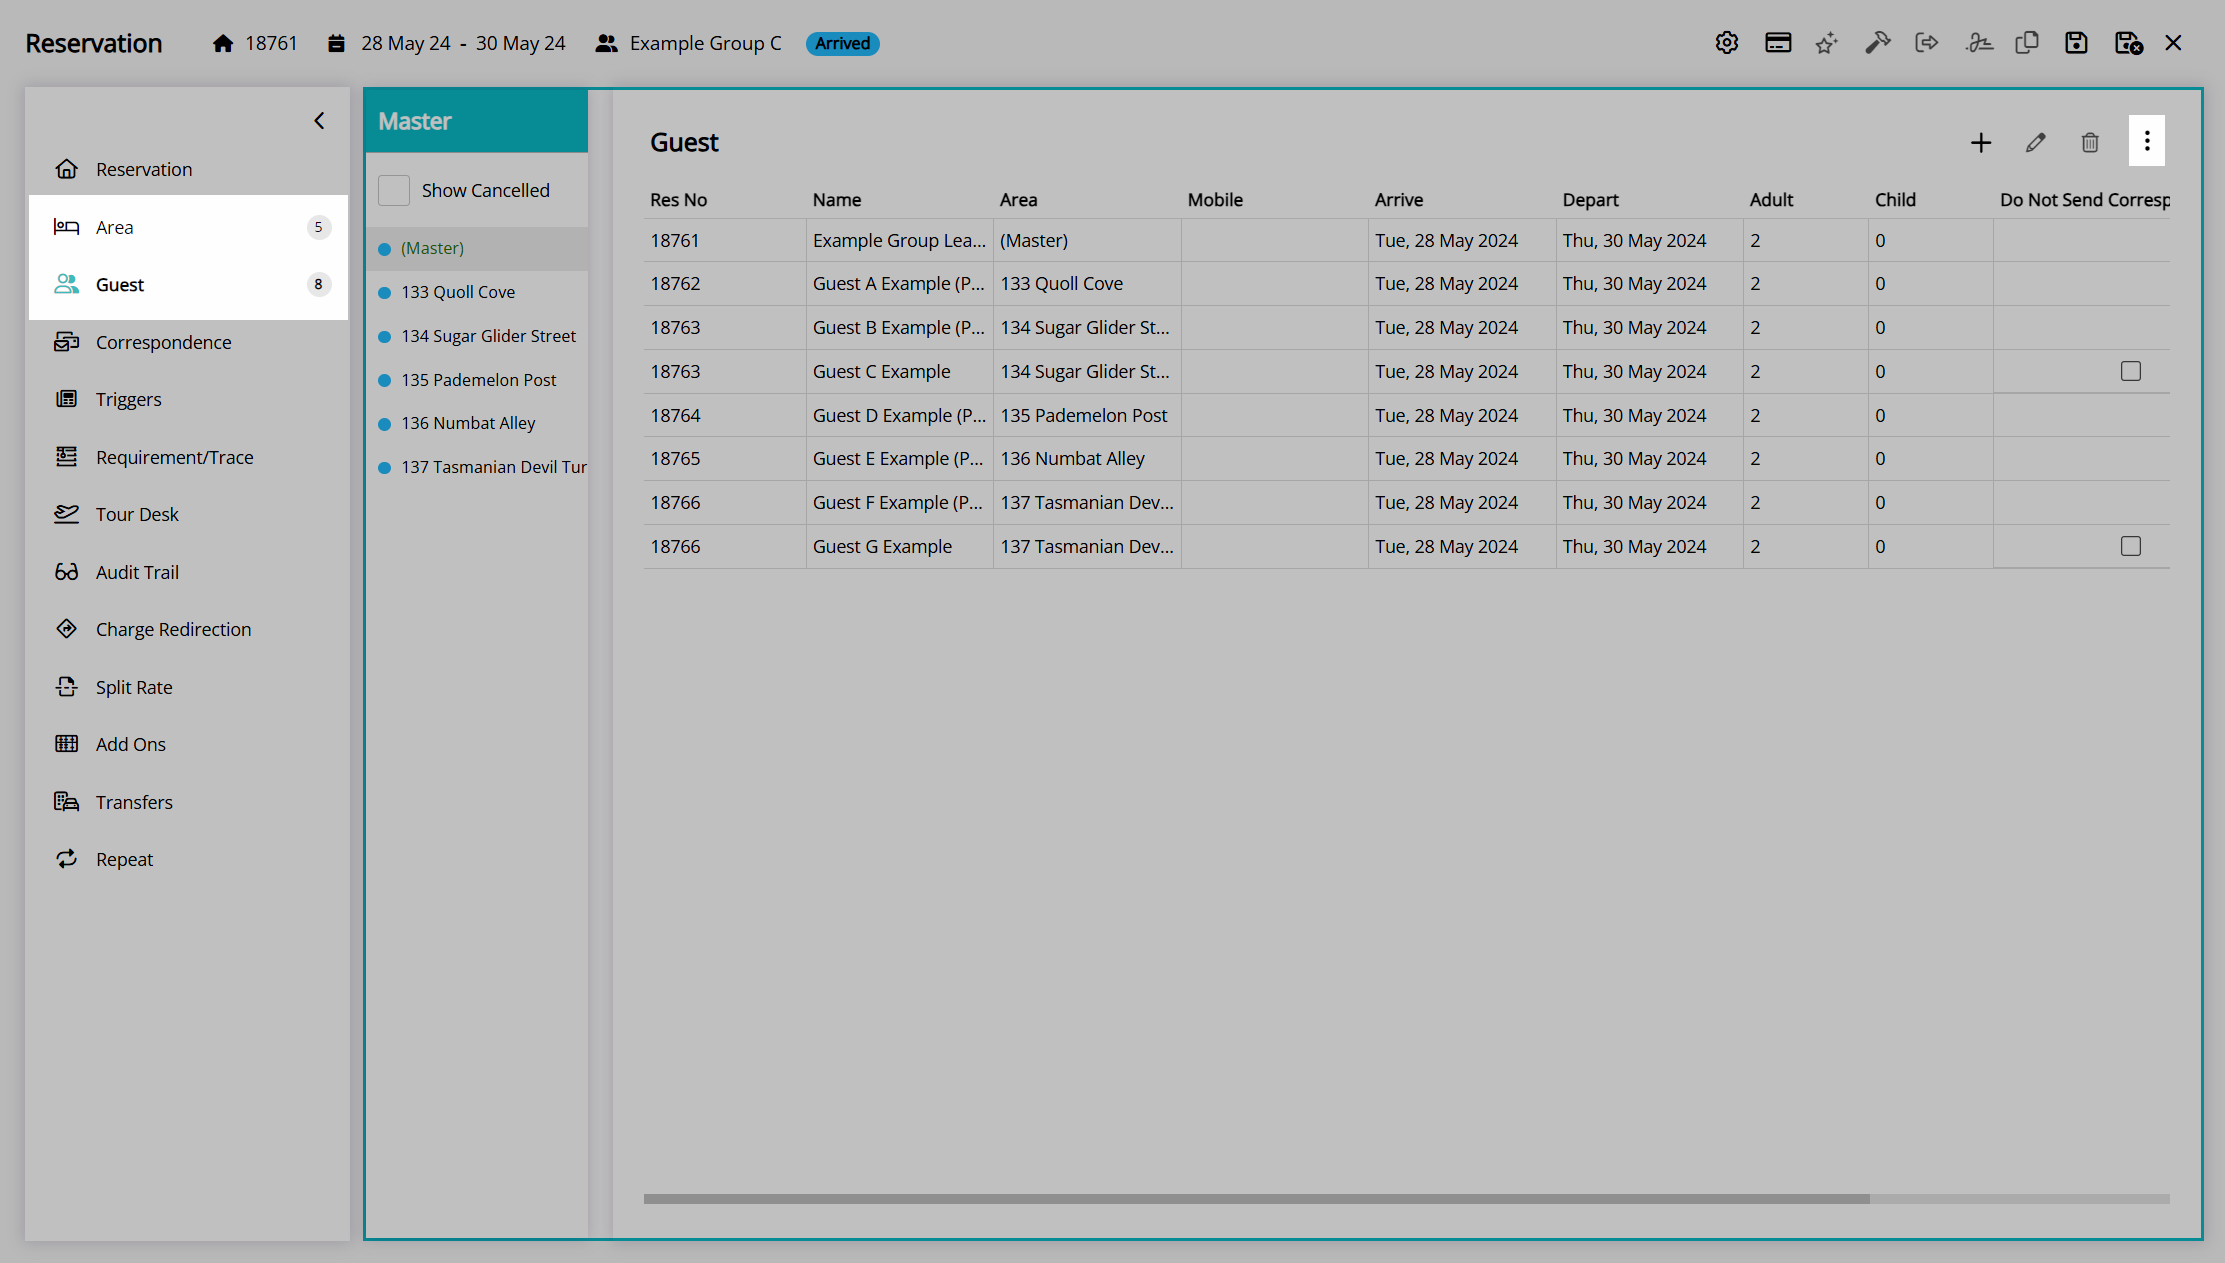
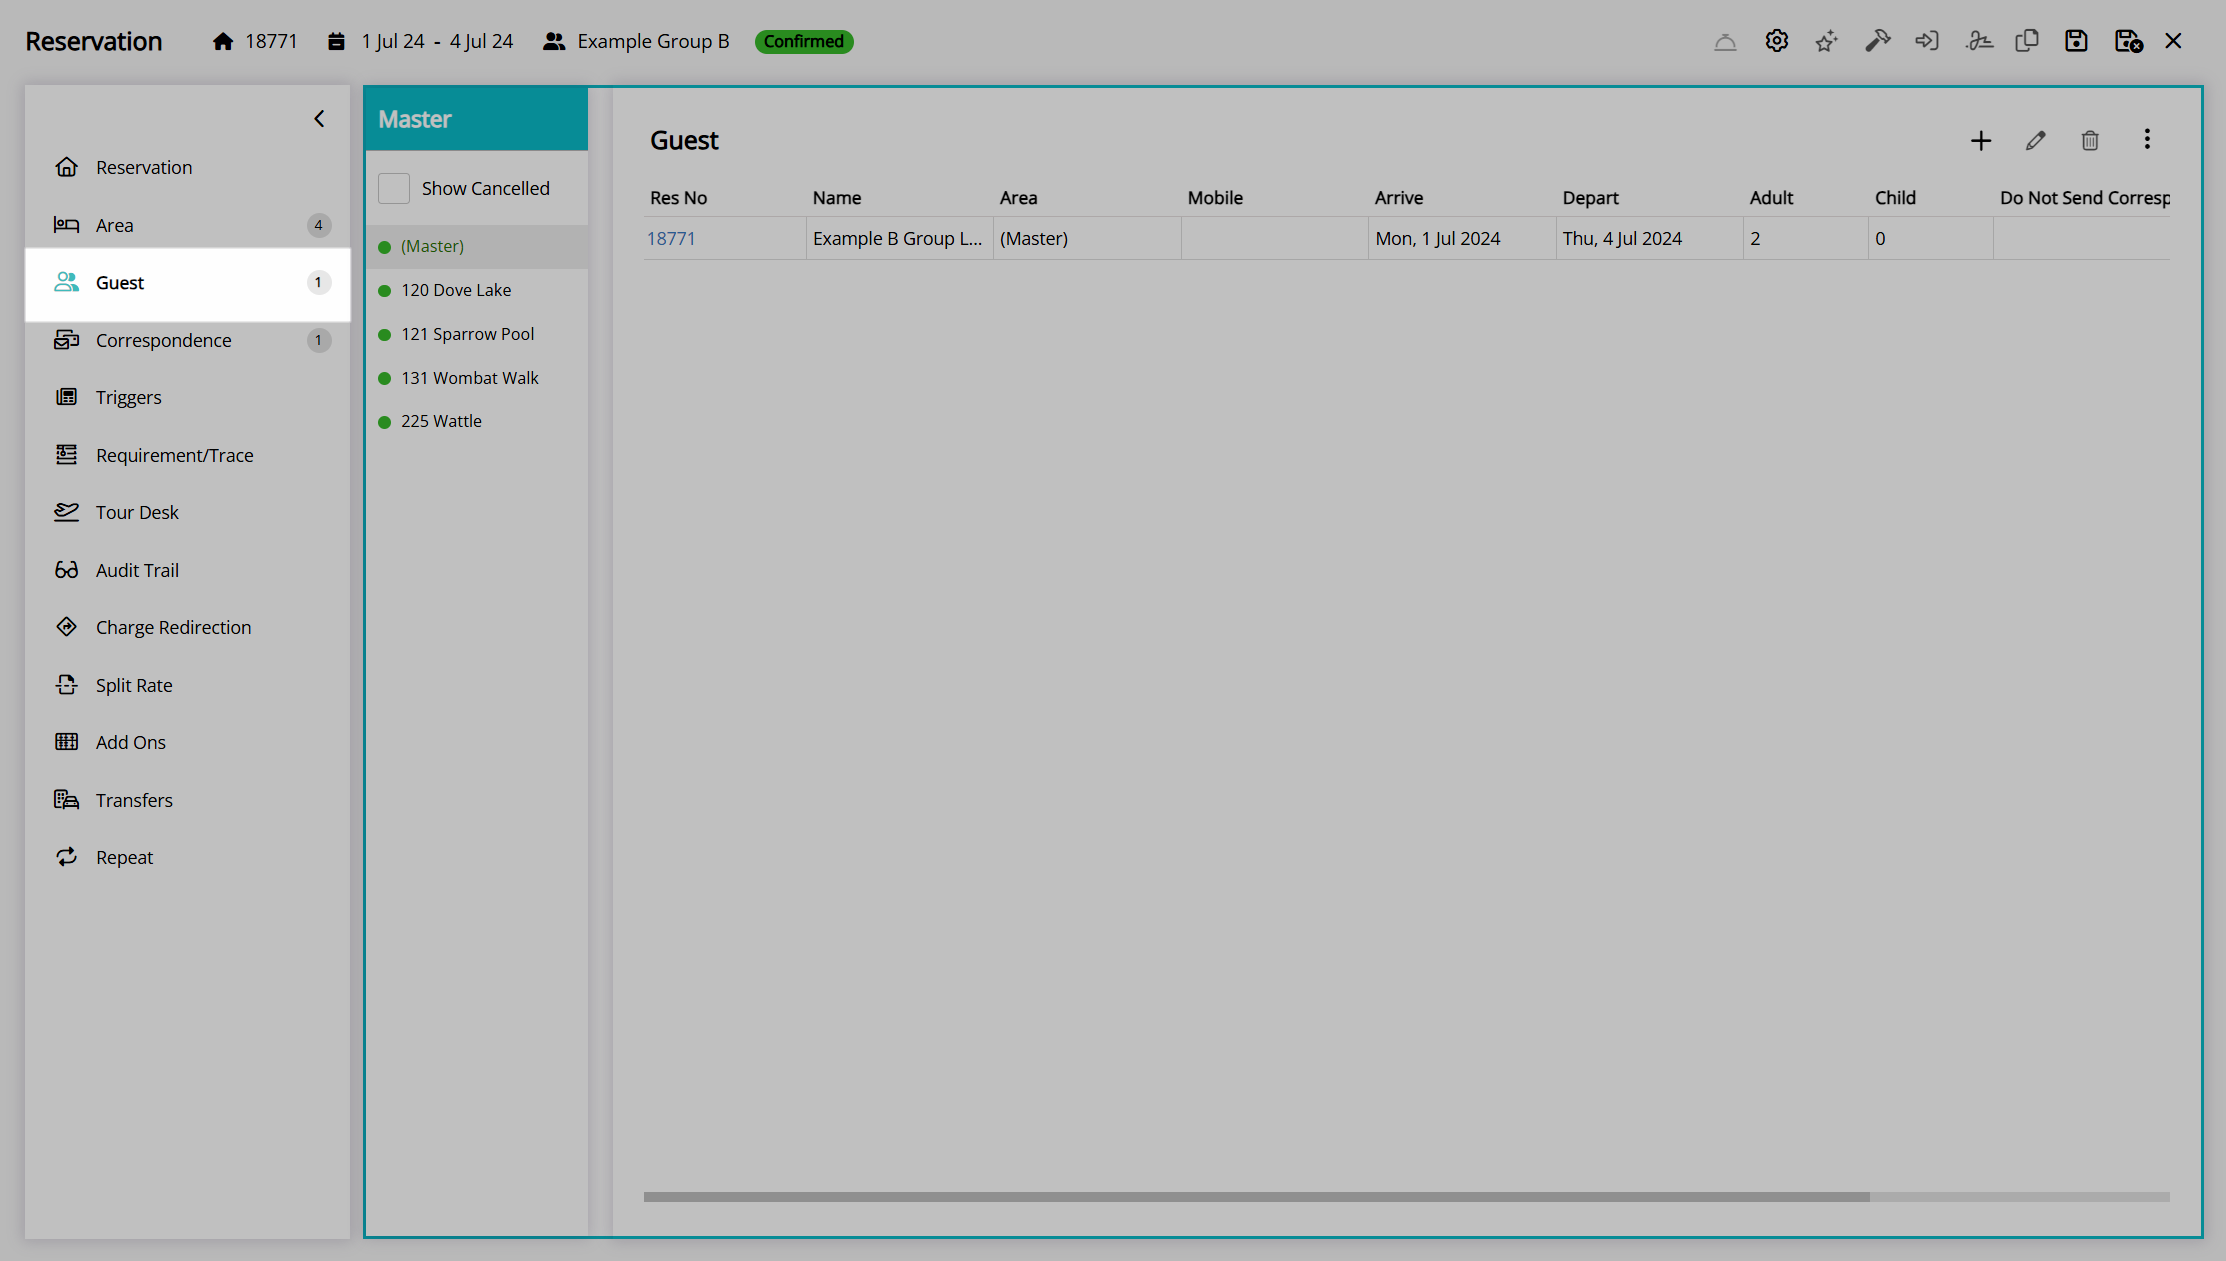
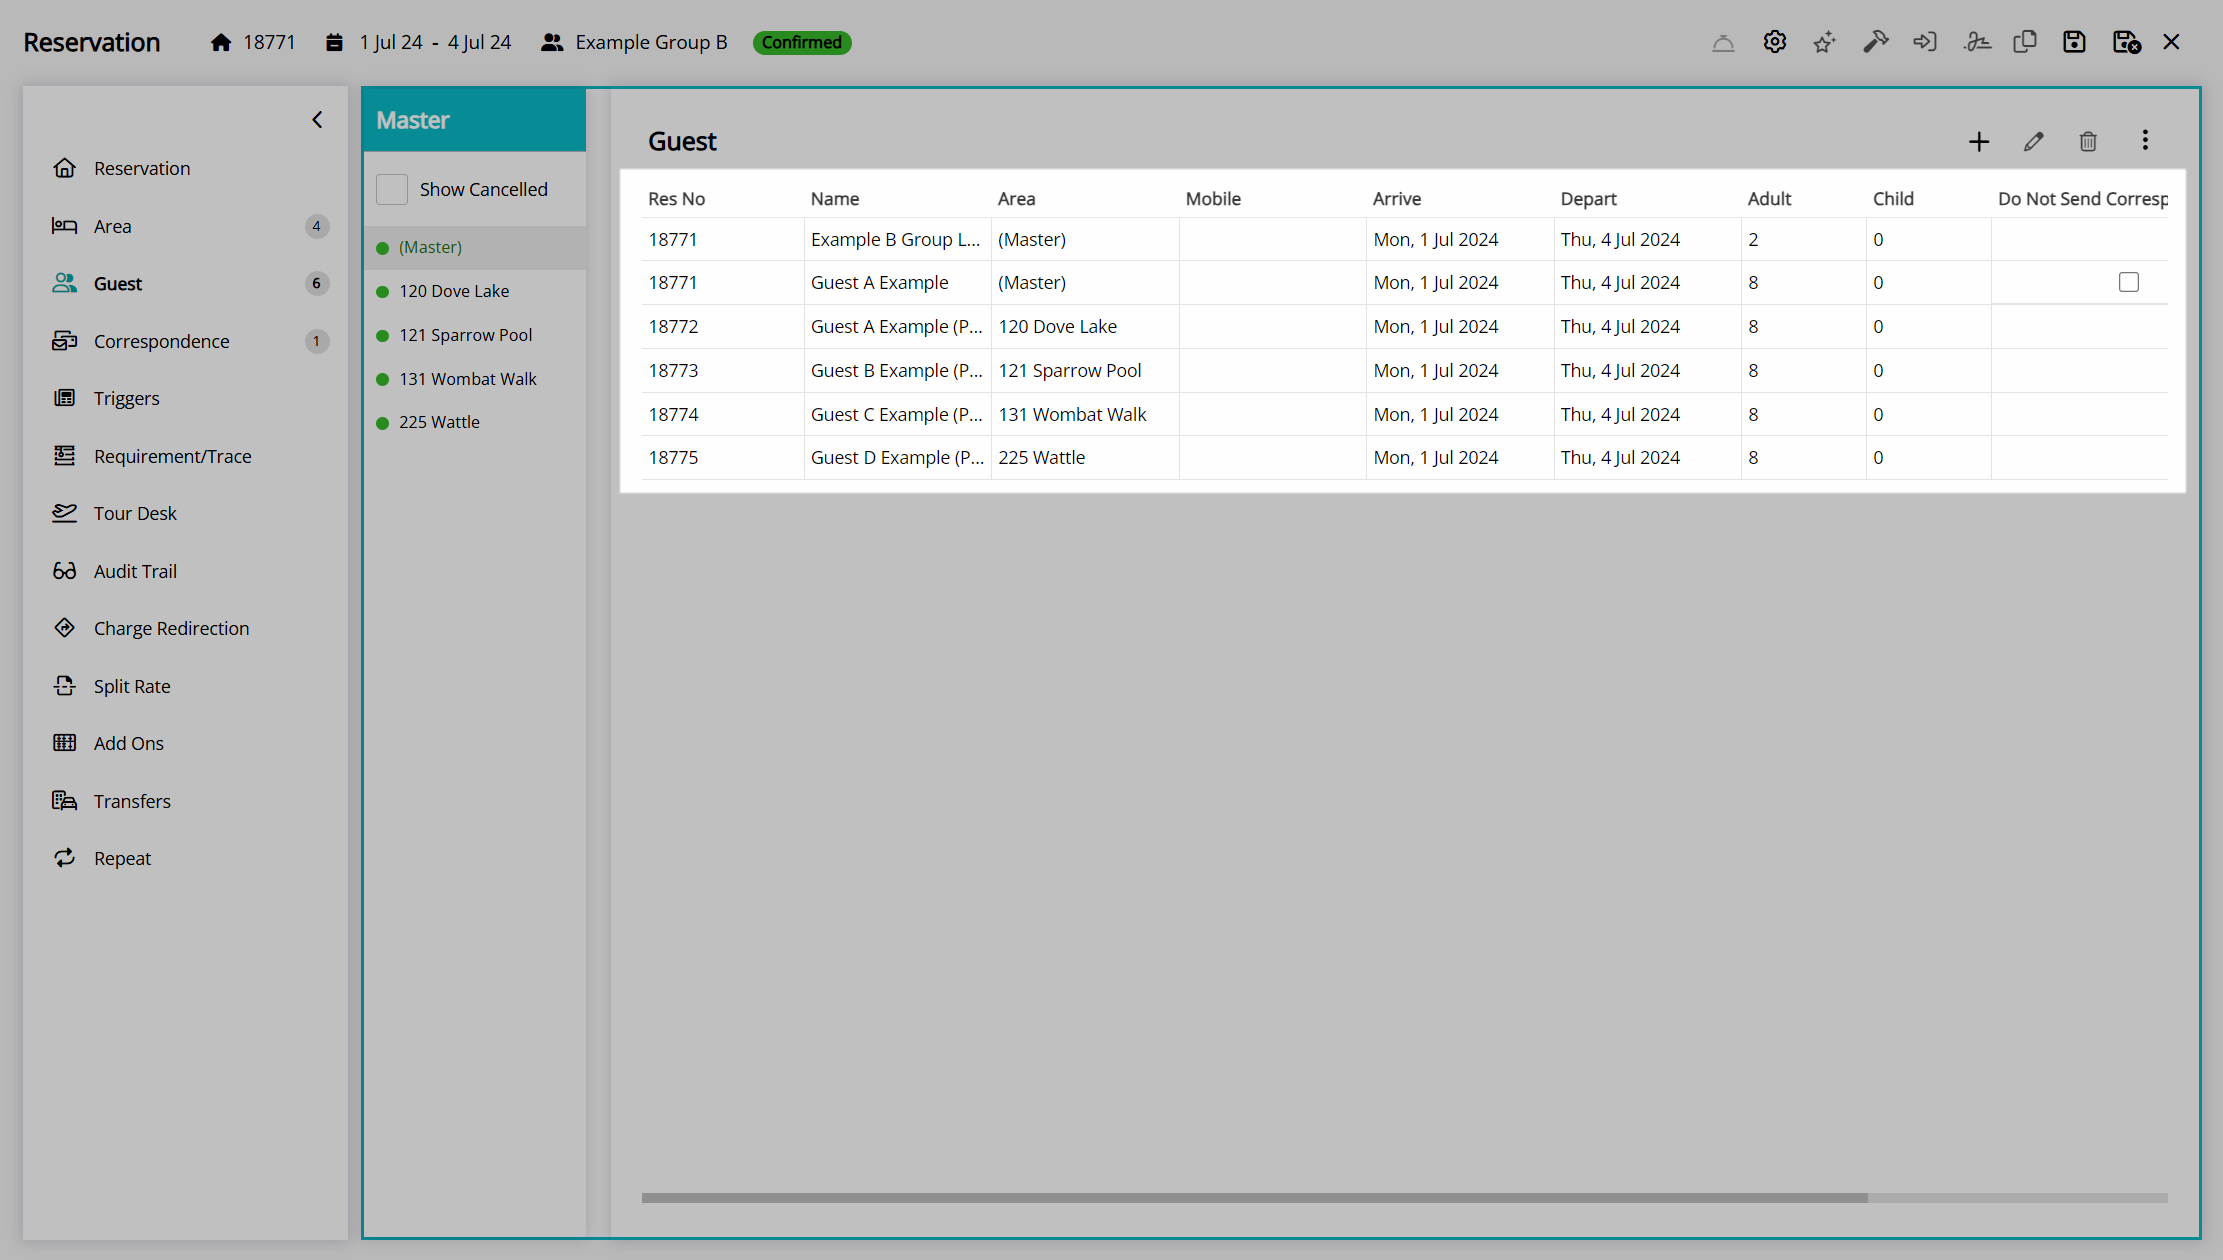
Guest
The 'Guest' tab on the group cover page includes the full guest list for all reservations within the group and the following group management tools under the 'Options' menu:
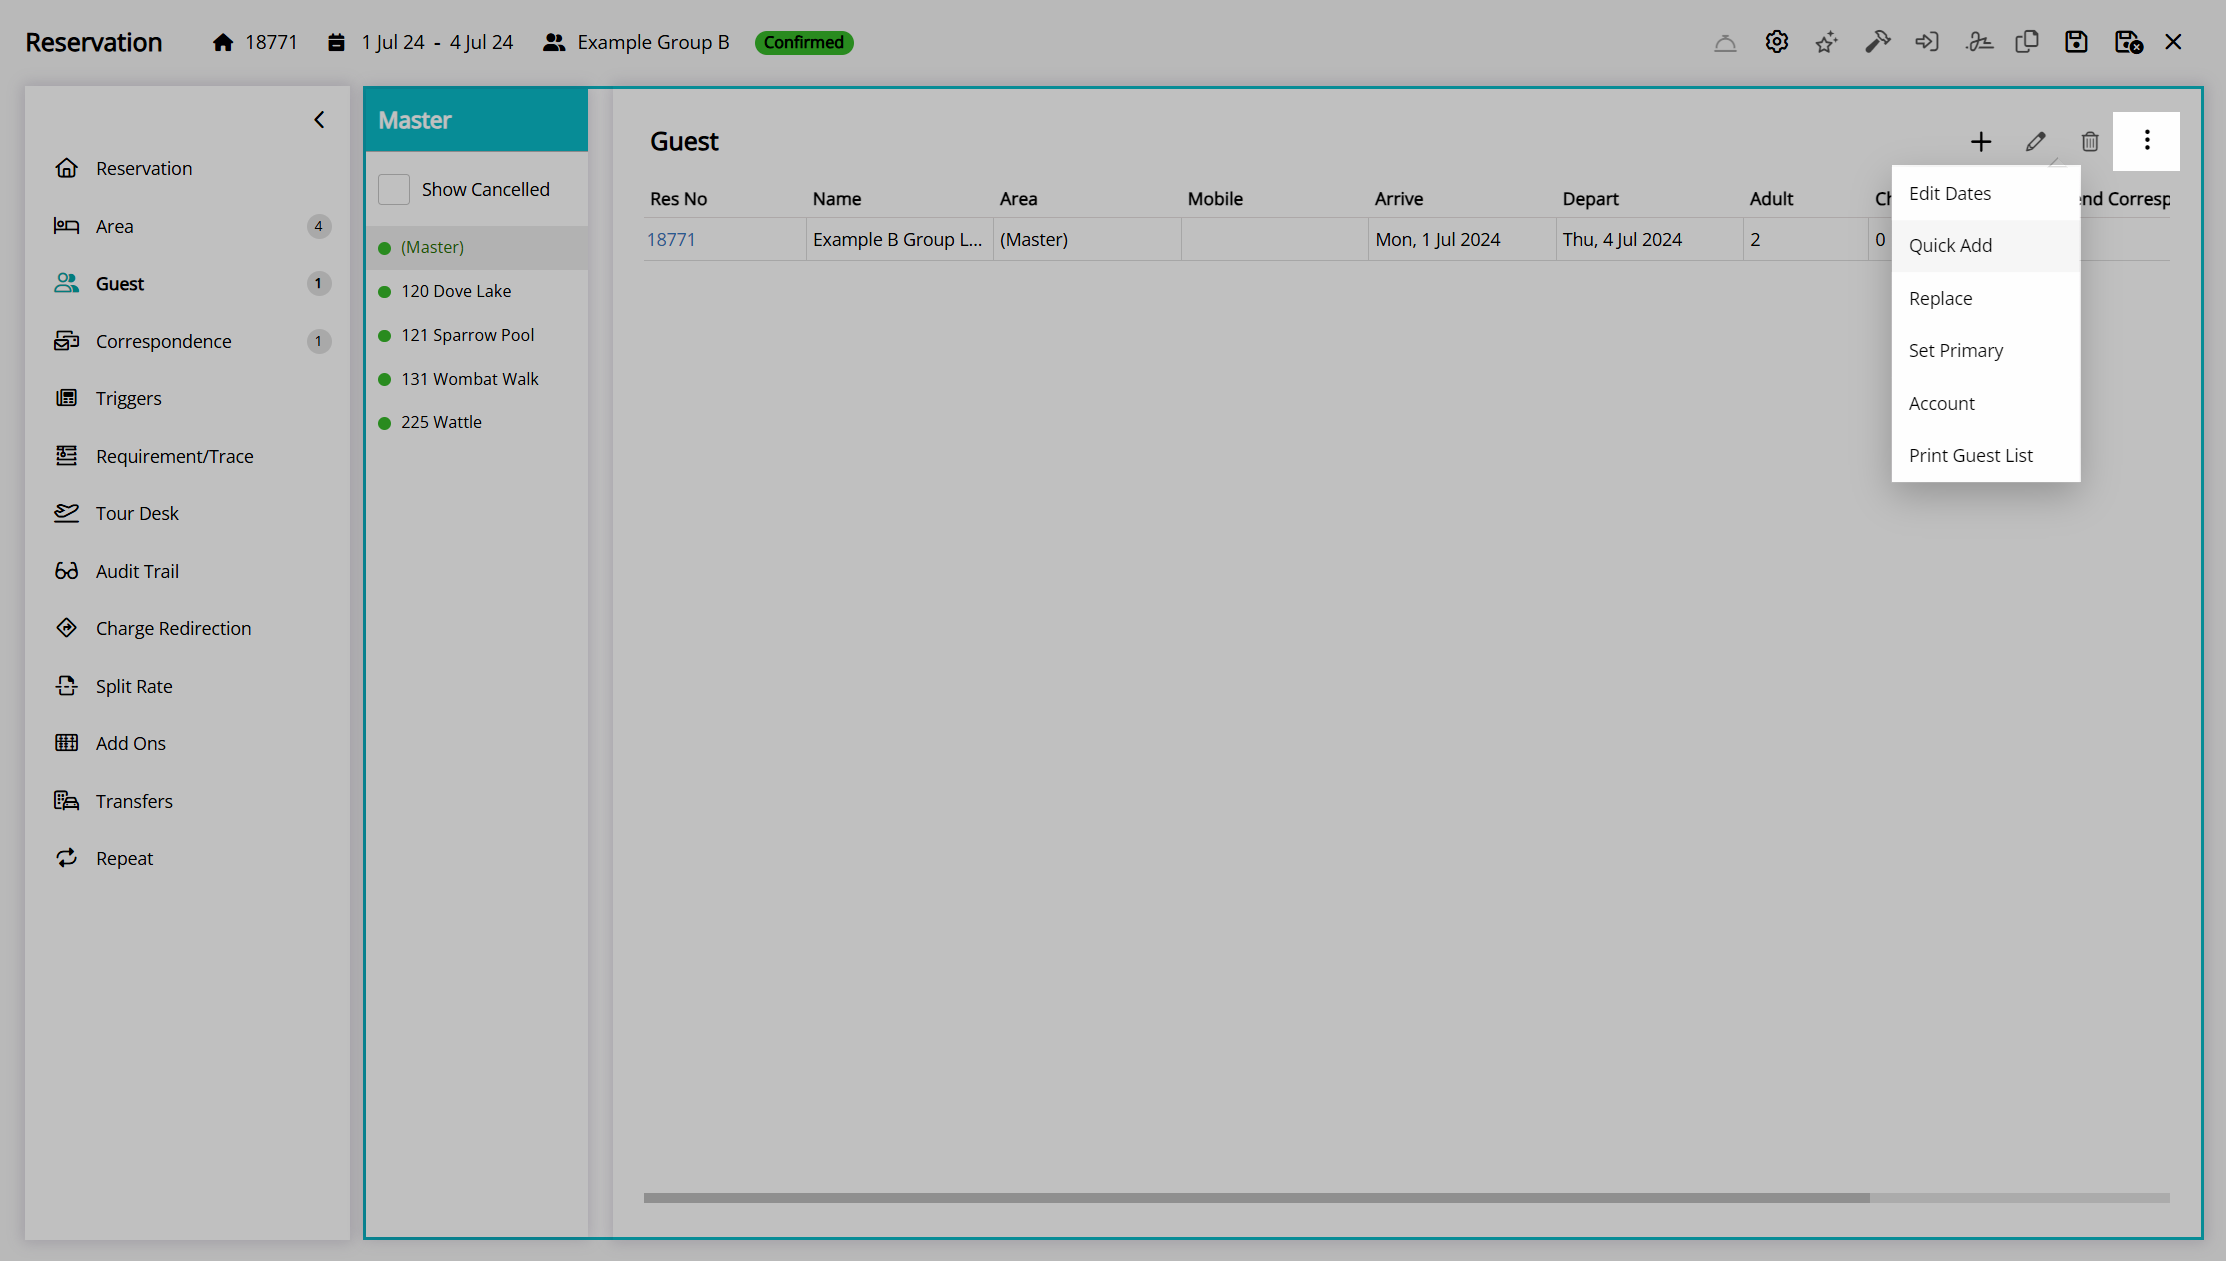
Quick Add
The 'Quick Add' option on the 'Guest' tab of the group cover page opens a simplified guest list that can be used to enter basic guest information for each reservation in the group.
- Go to the Toolbar Menu Reservation Search in RMS.
- Enter the Group Name or Reservation Number and press 'Enter'.
- Select the '(Master)' in the Navigator Pane.
- Navigate to the 'Guest' tab.
- Select the
 'Options' icon.
 - Select the option 'Quick Add'.
- Enter the Guest Given and Guest Surname for each reservation.
- Save/Exit.
Go to the Toolbar Menu Reservation Search in RMS, enter the Group Name or Reservation Number and press 'Enter'.

Select the '(Master)' in the Navigator Pane.
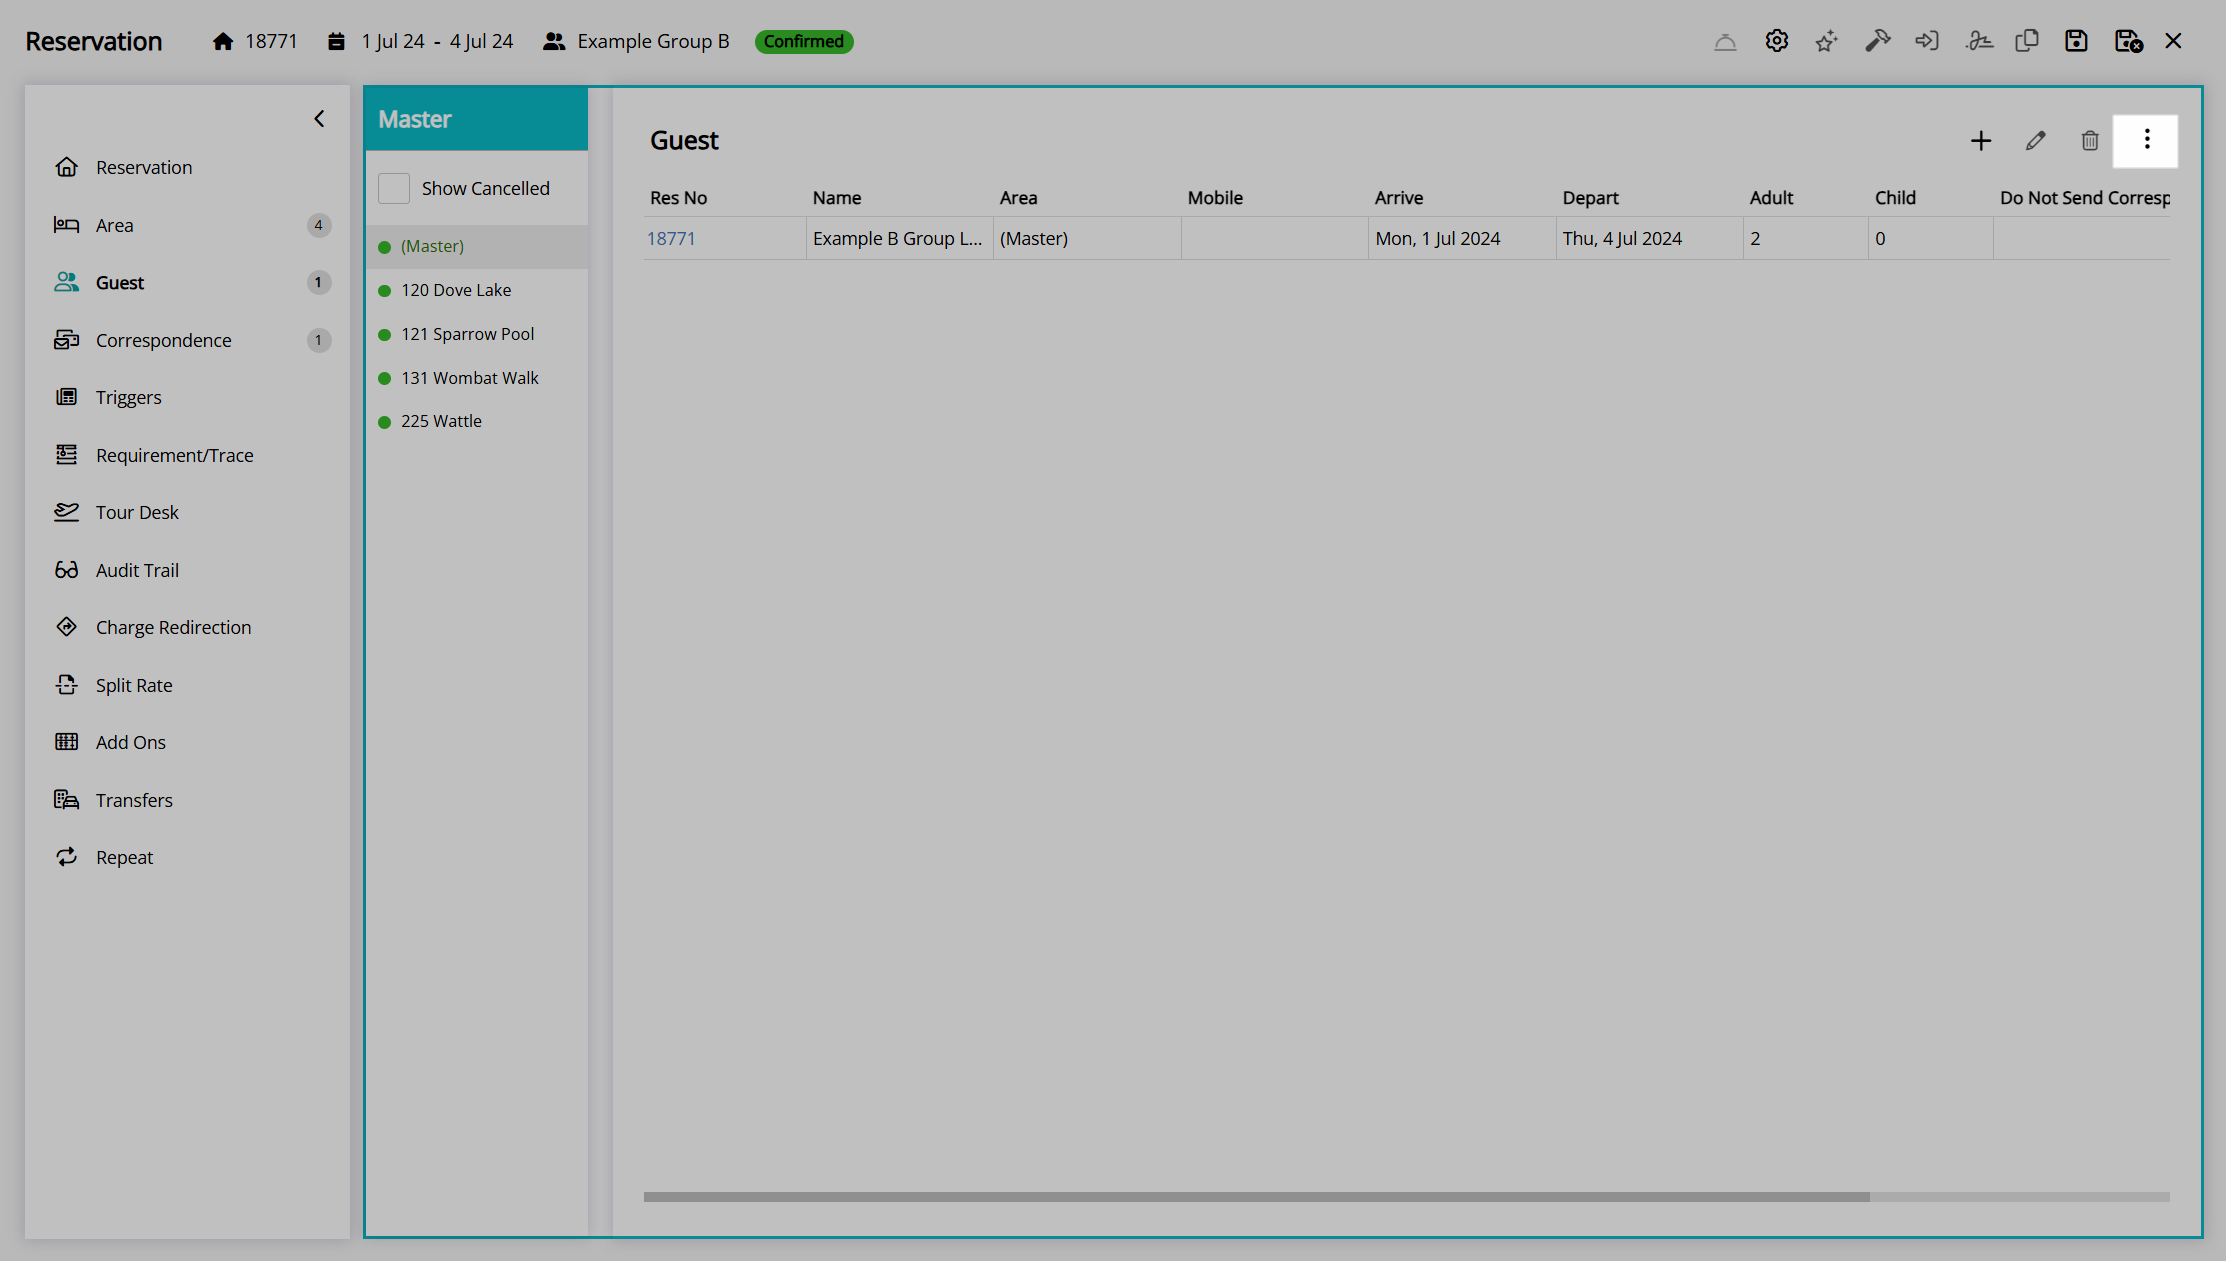
Navigate to the 'Guest' tab.
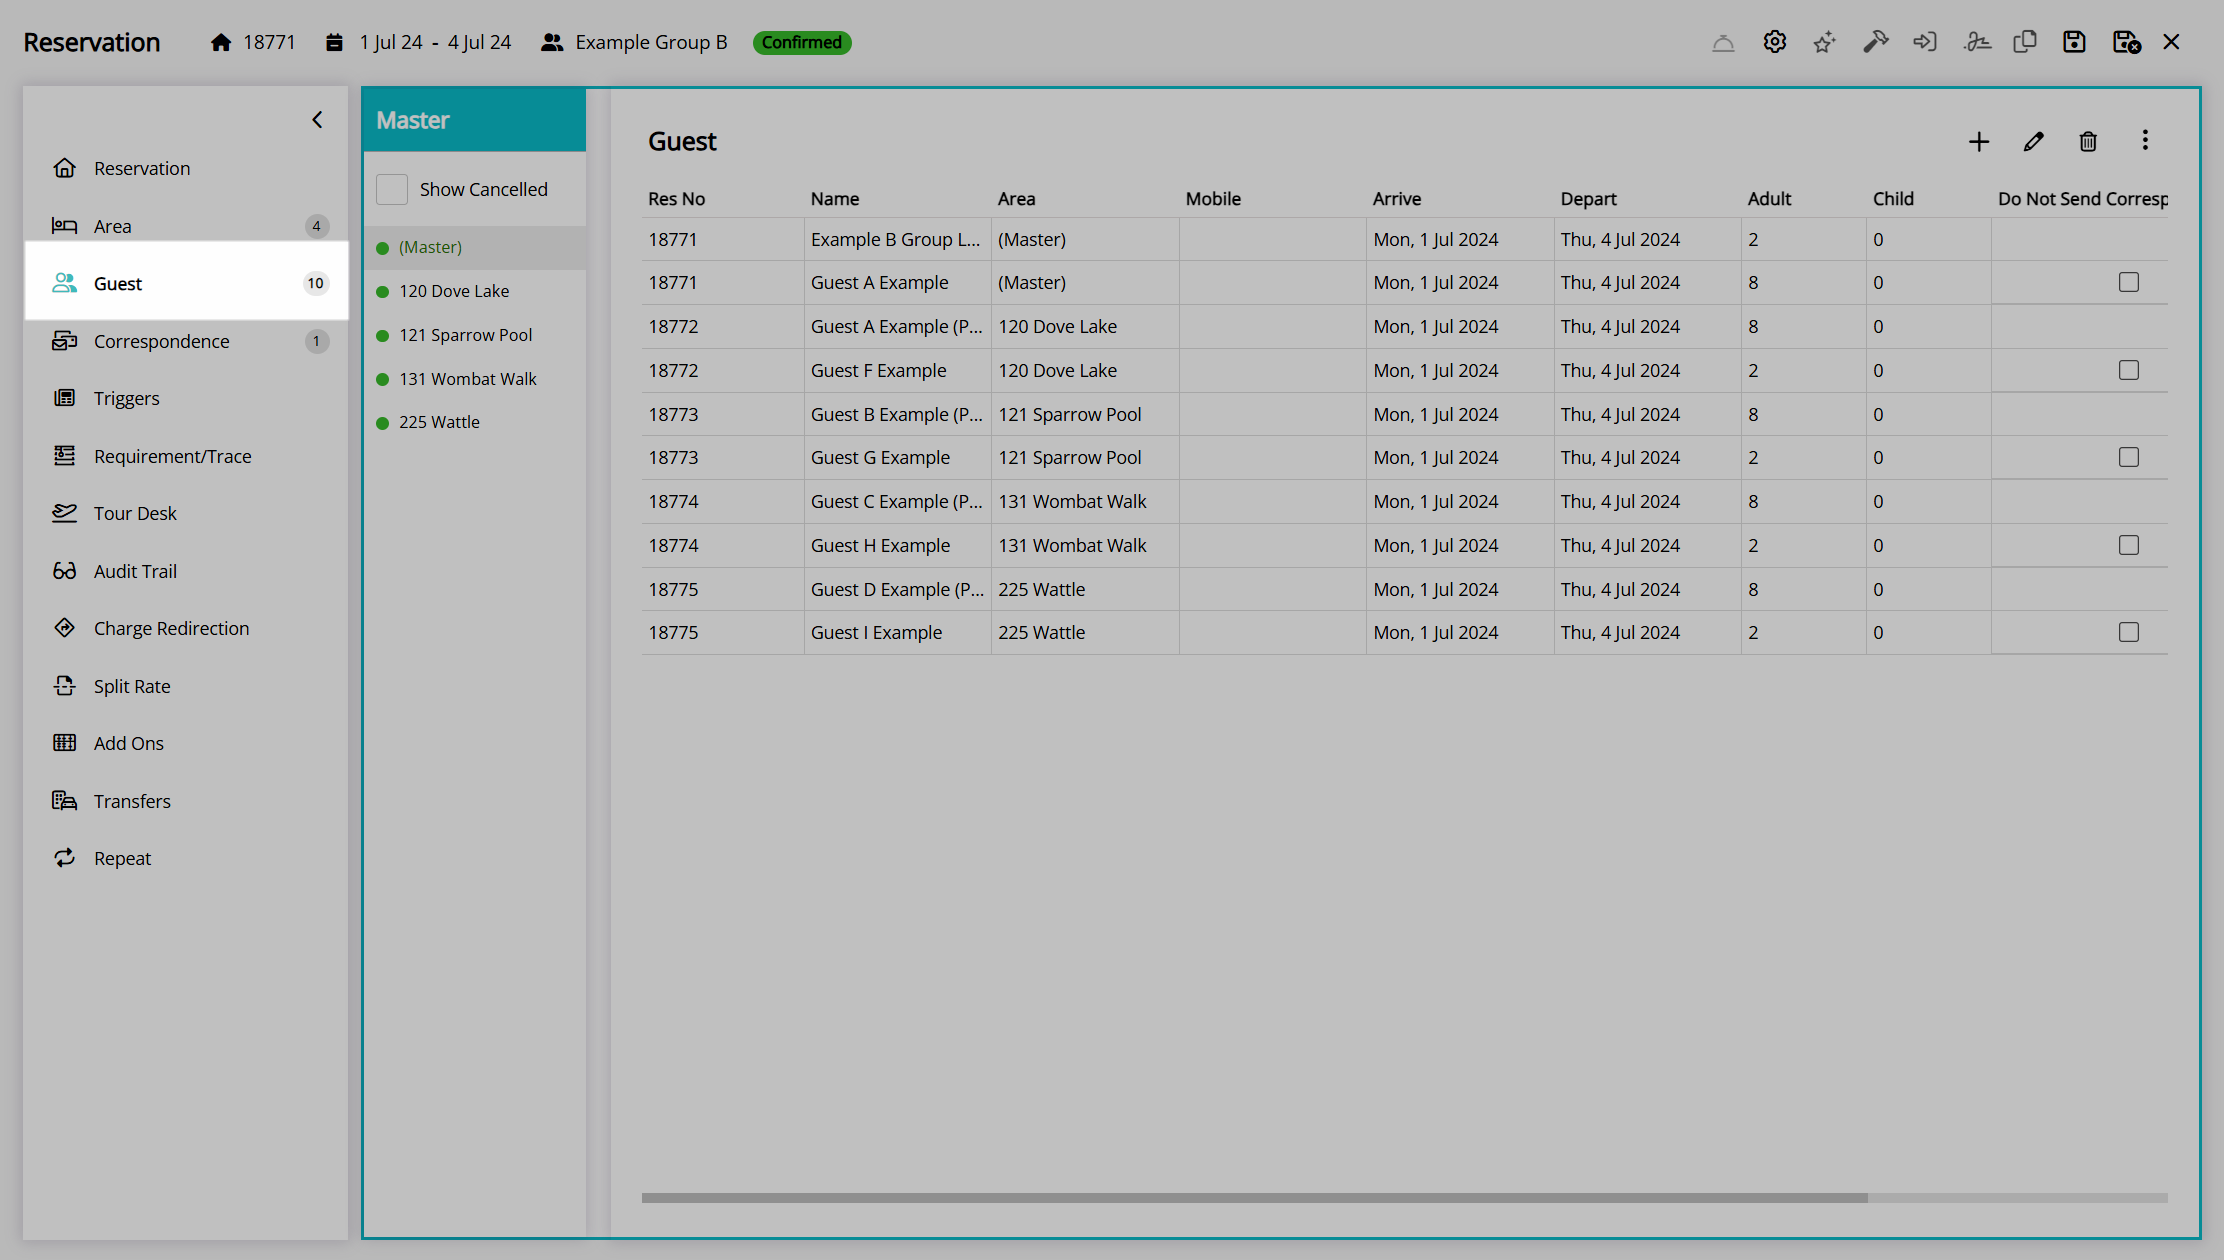
Select the  'Options' icon.
Select the option 'Quick Add'.
Enter the Guest Given and Guest Surname for each reservation.
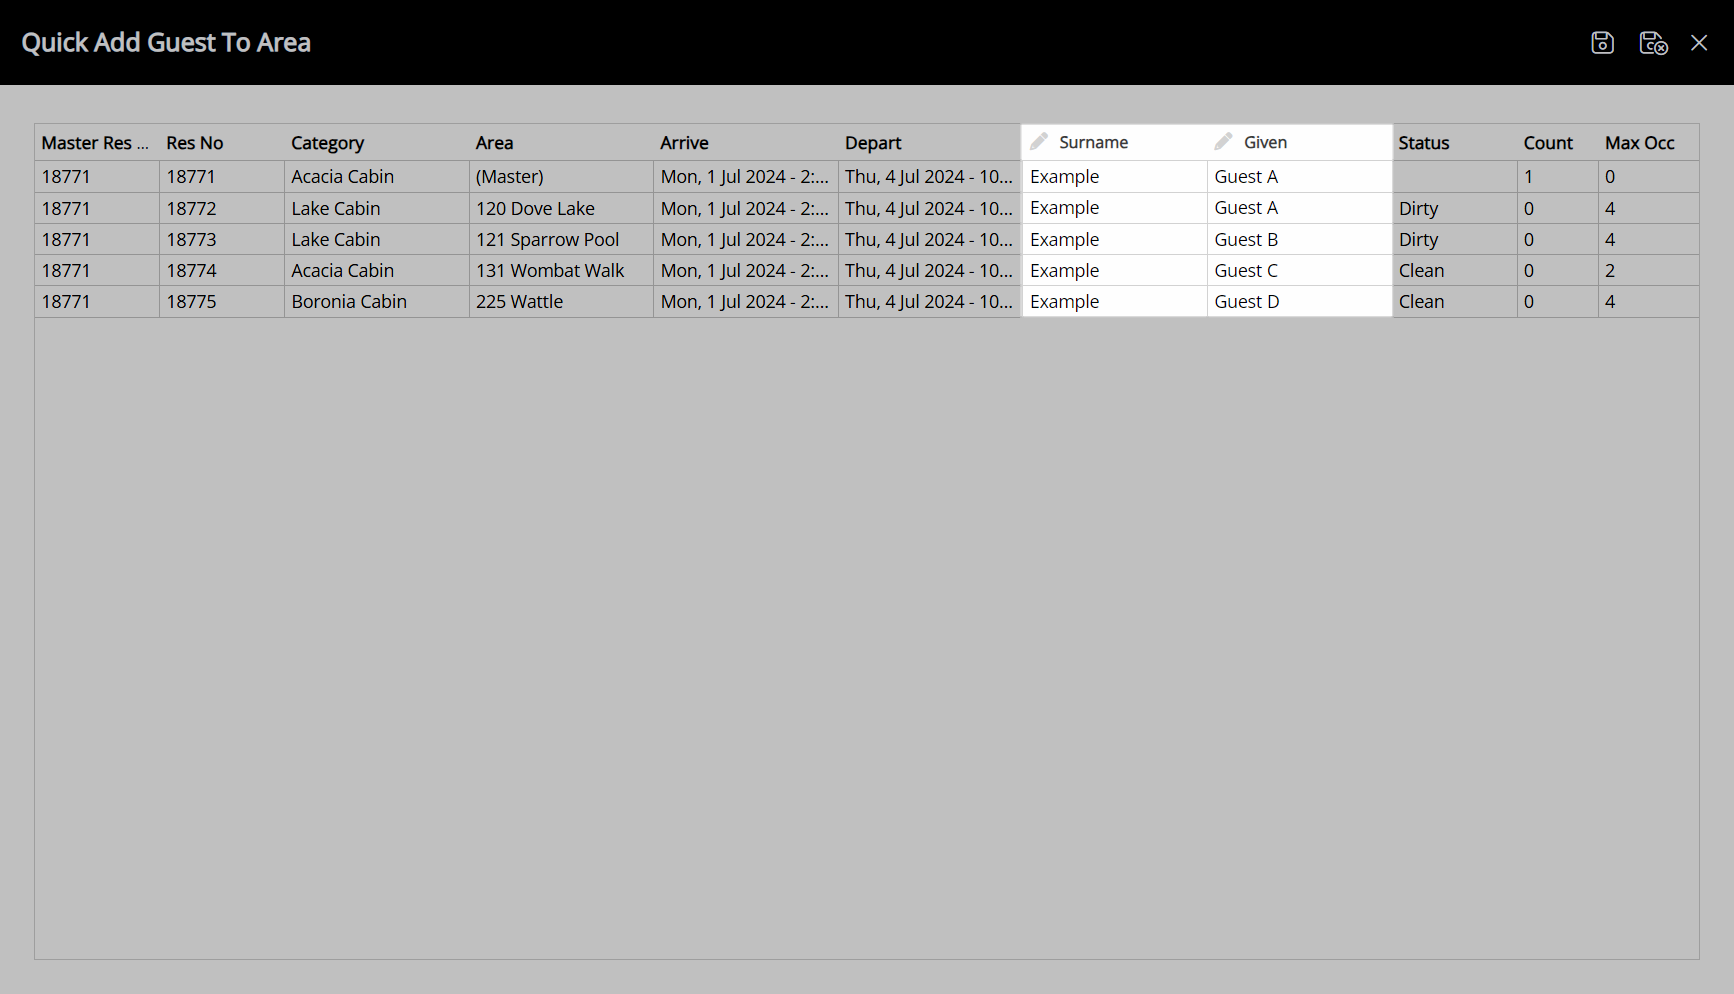
Select the  'Save/Exit' icon to update the guest details on all reservations in the group using the information entered.
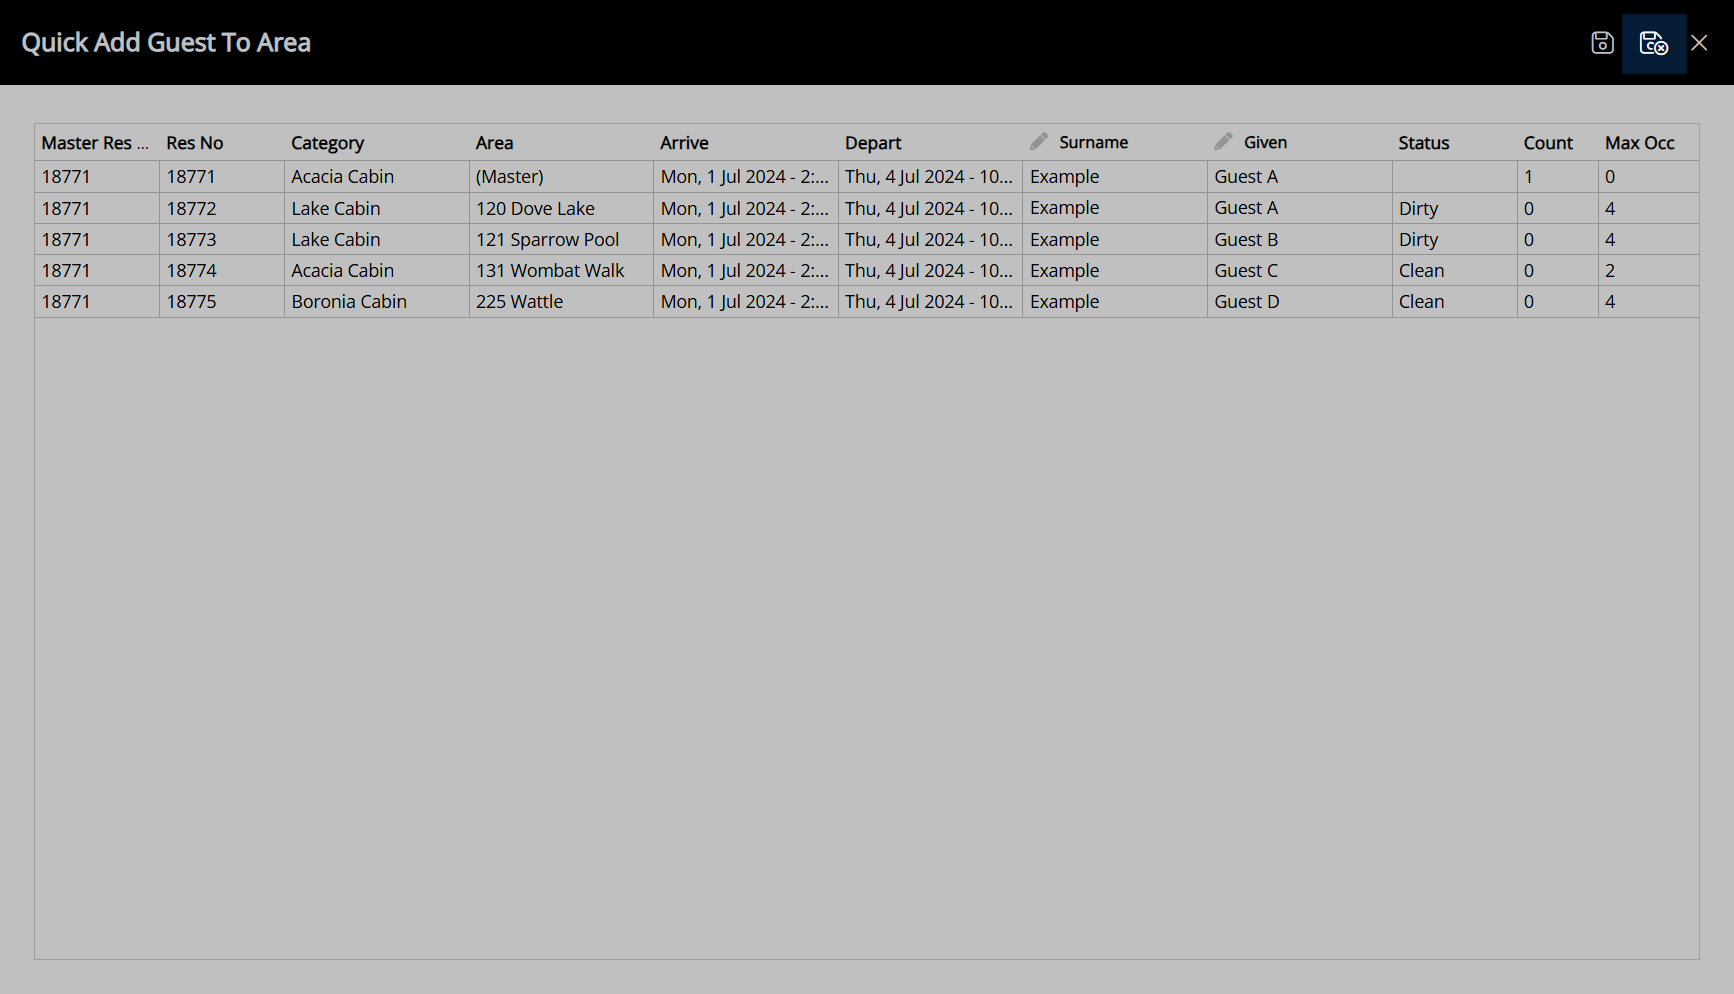
A new Guest Profile will be created using the given name and surname entered for each reservation, and they will be set as the primary guest if they are the first guest added to the reservation or a secondary guest if a primary guest already exists.
Print Guest List
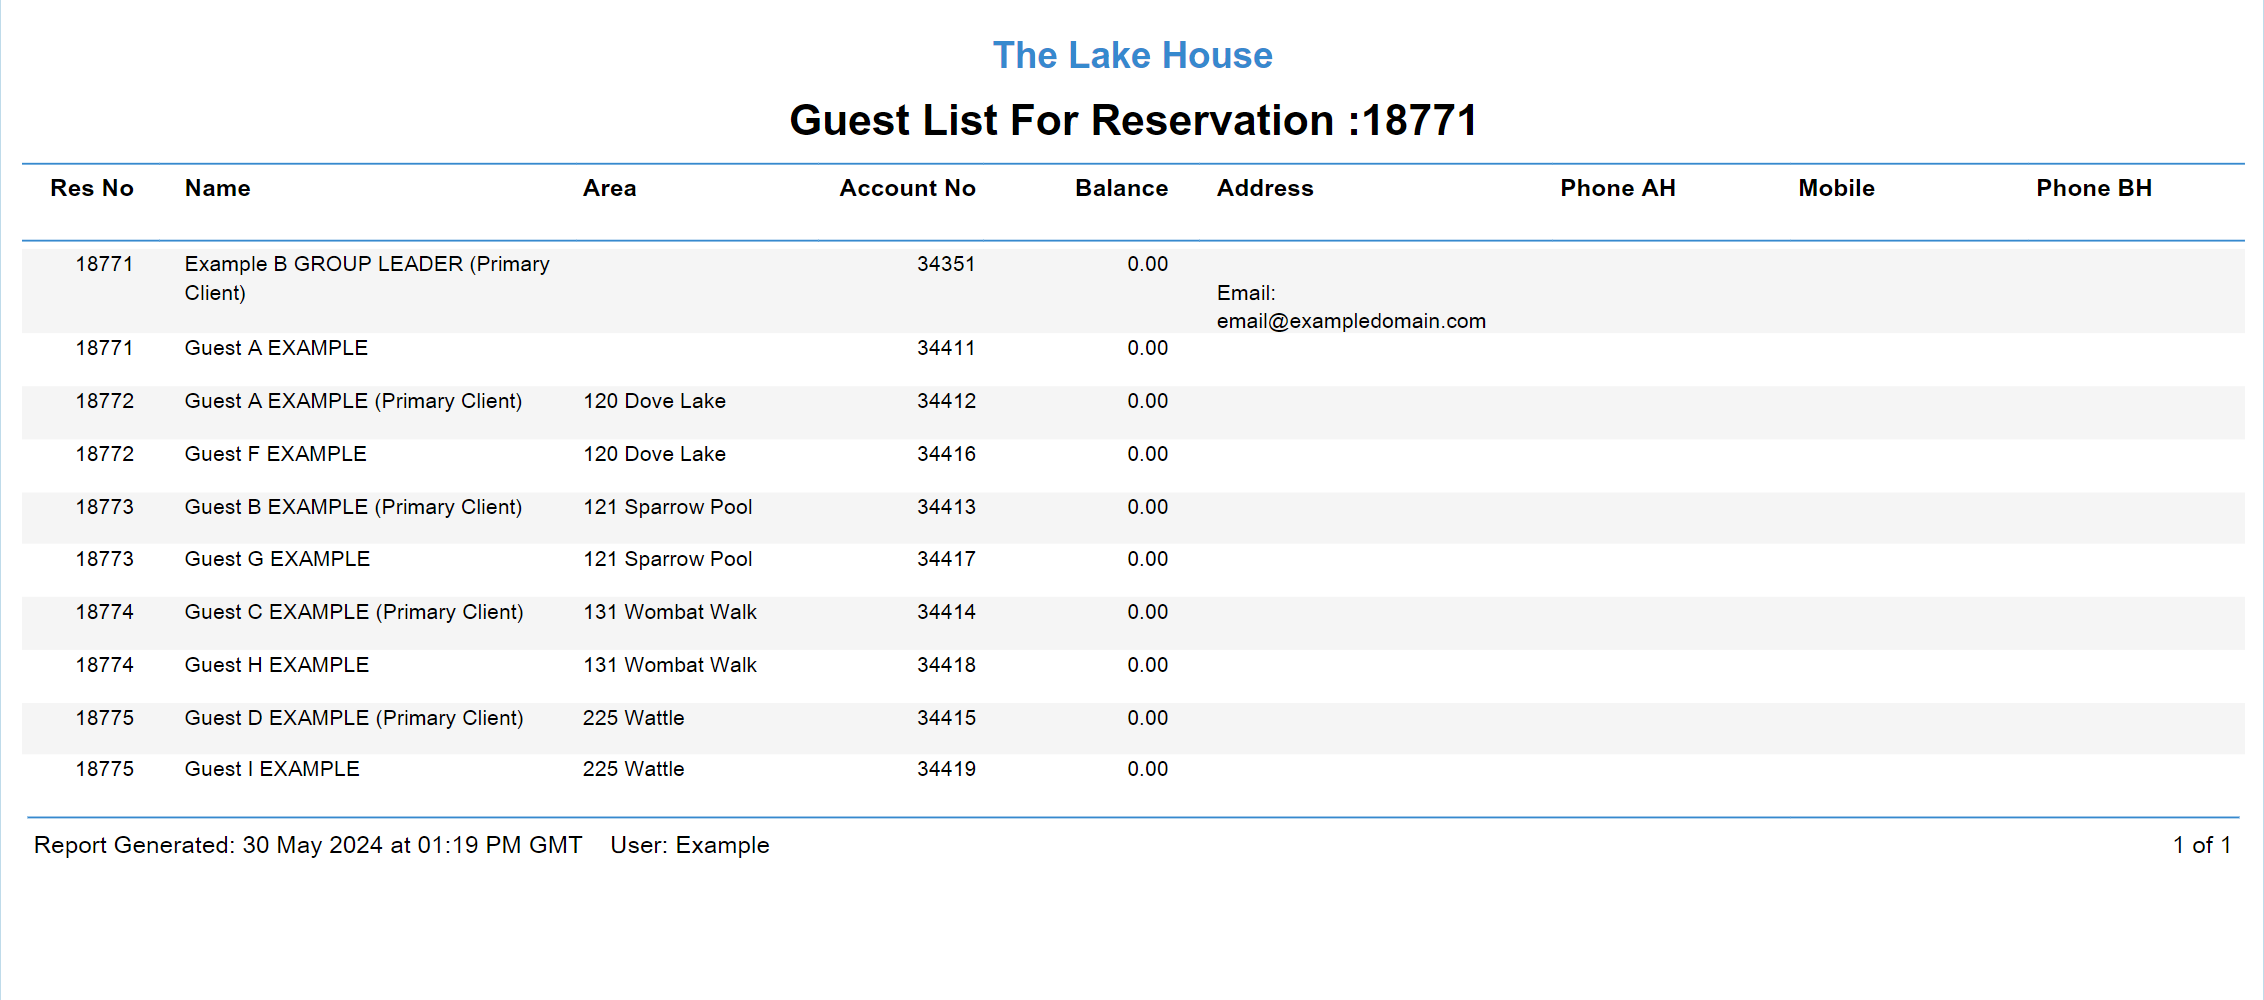
The 'Print Guest List' option on the 'Guest' tab of the group cover page will generate a printable Guest List report for the group that can be provided to the group leader, tour leader, or other staff to provide key guest and reservation information for this group.
- Go to the Toolbar Menu Reservation Search in RMS.
- Enter the Group Name or Reservation Number and press 'Enter'.
- Select the '(Master)' in the Navigator Pane.
- Navigate to the 'Guest' tab.
- Select the
 'Options' icon.
 - Select the option 'Print Guest List'.
Go to the Toolbar Menu Reservation Search in RMS, enter the Group Name or Reservation Number, and press 'Enter'.

Select the '(Master)' in the Navigator Pane.

Navigate to the 'Guest' tab.
Select the  'Options' icon.
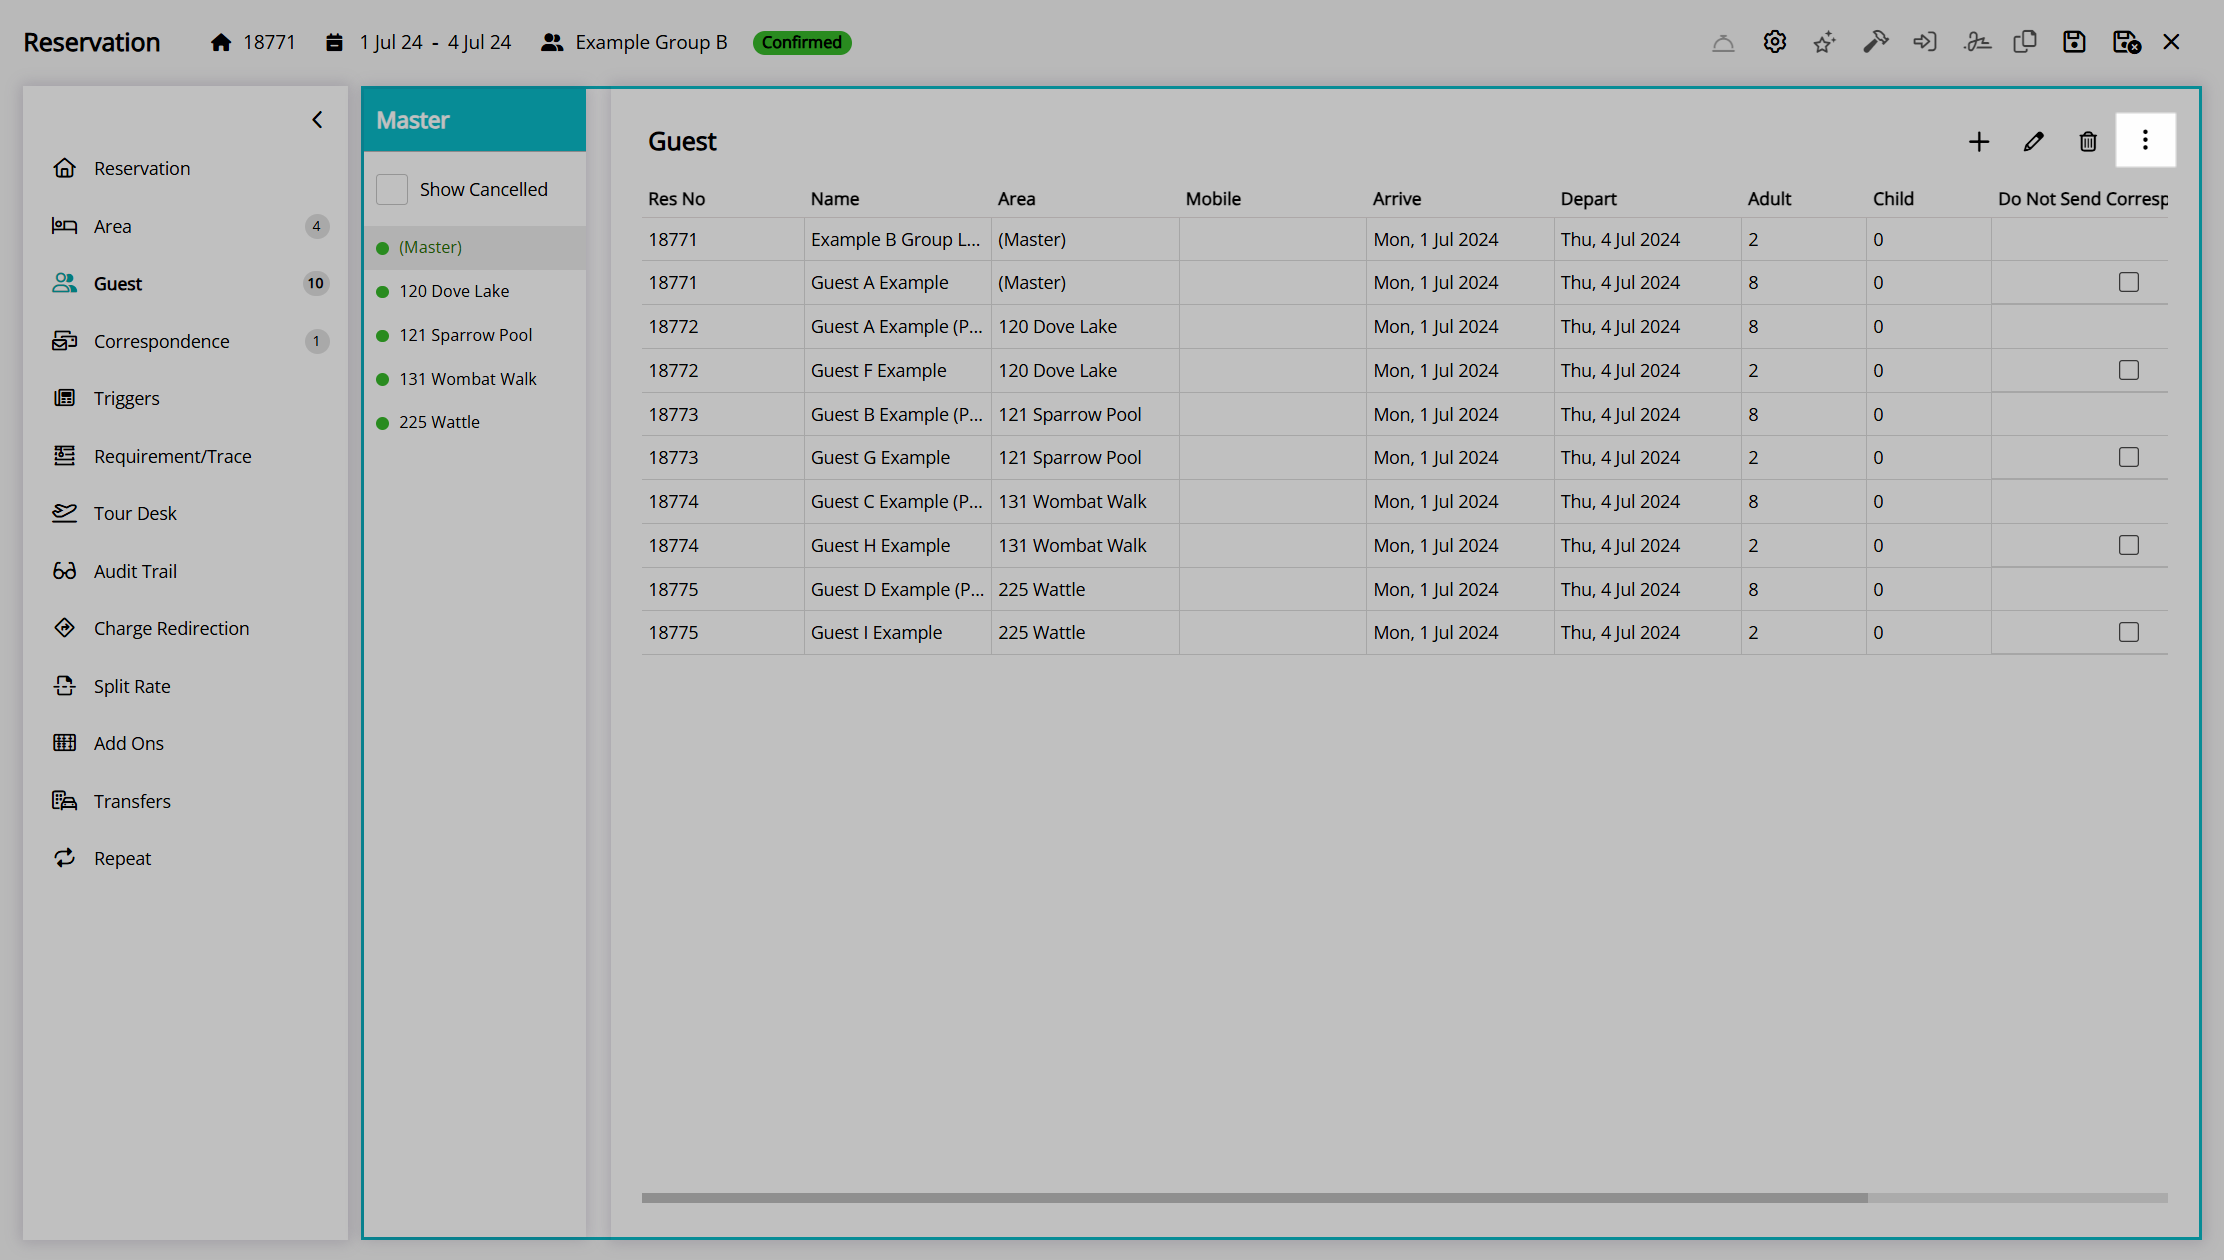
Select the option 'Print Guest List'.

A Guest List will be generated with the guest information for all guests on reservations in this group.