Group Reservations
Managing reservations for groups travelling together in RMS.
Table of Contents
Master ReservationsCreate a Group ReservationManaging Group ReservationsAuto AllocateRemove from MasterArea ListBulk CancelQuick AddPrint Guest ListGroups (Group Allotment)A group of guests travelling together for the same event, tour group, or travelling party can be managed in RMS using a Master Reservation and Groups (Group Allotments).
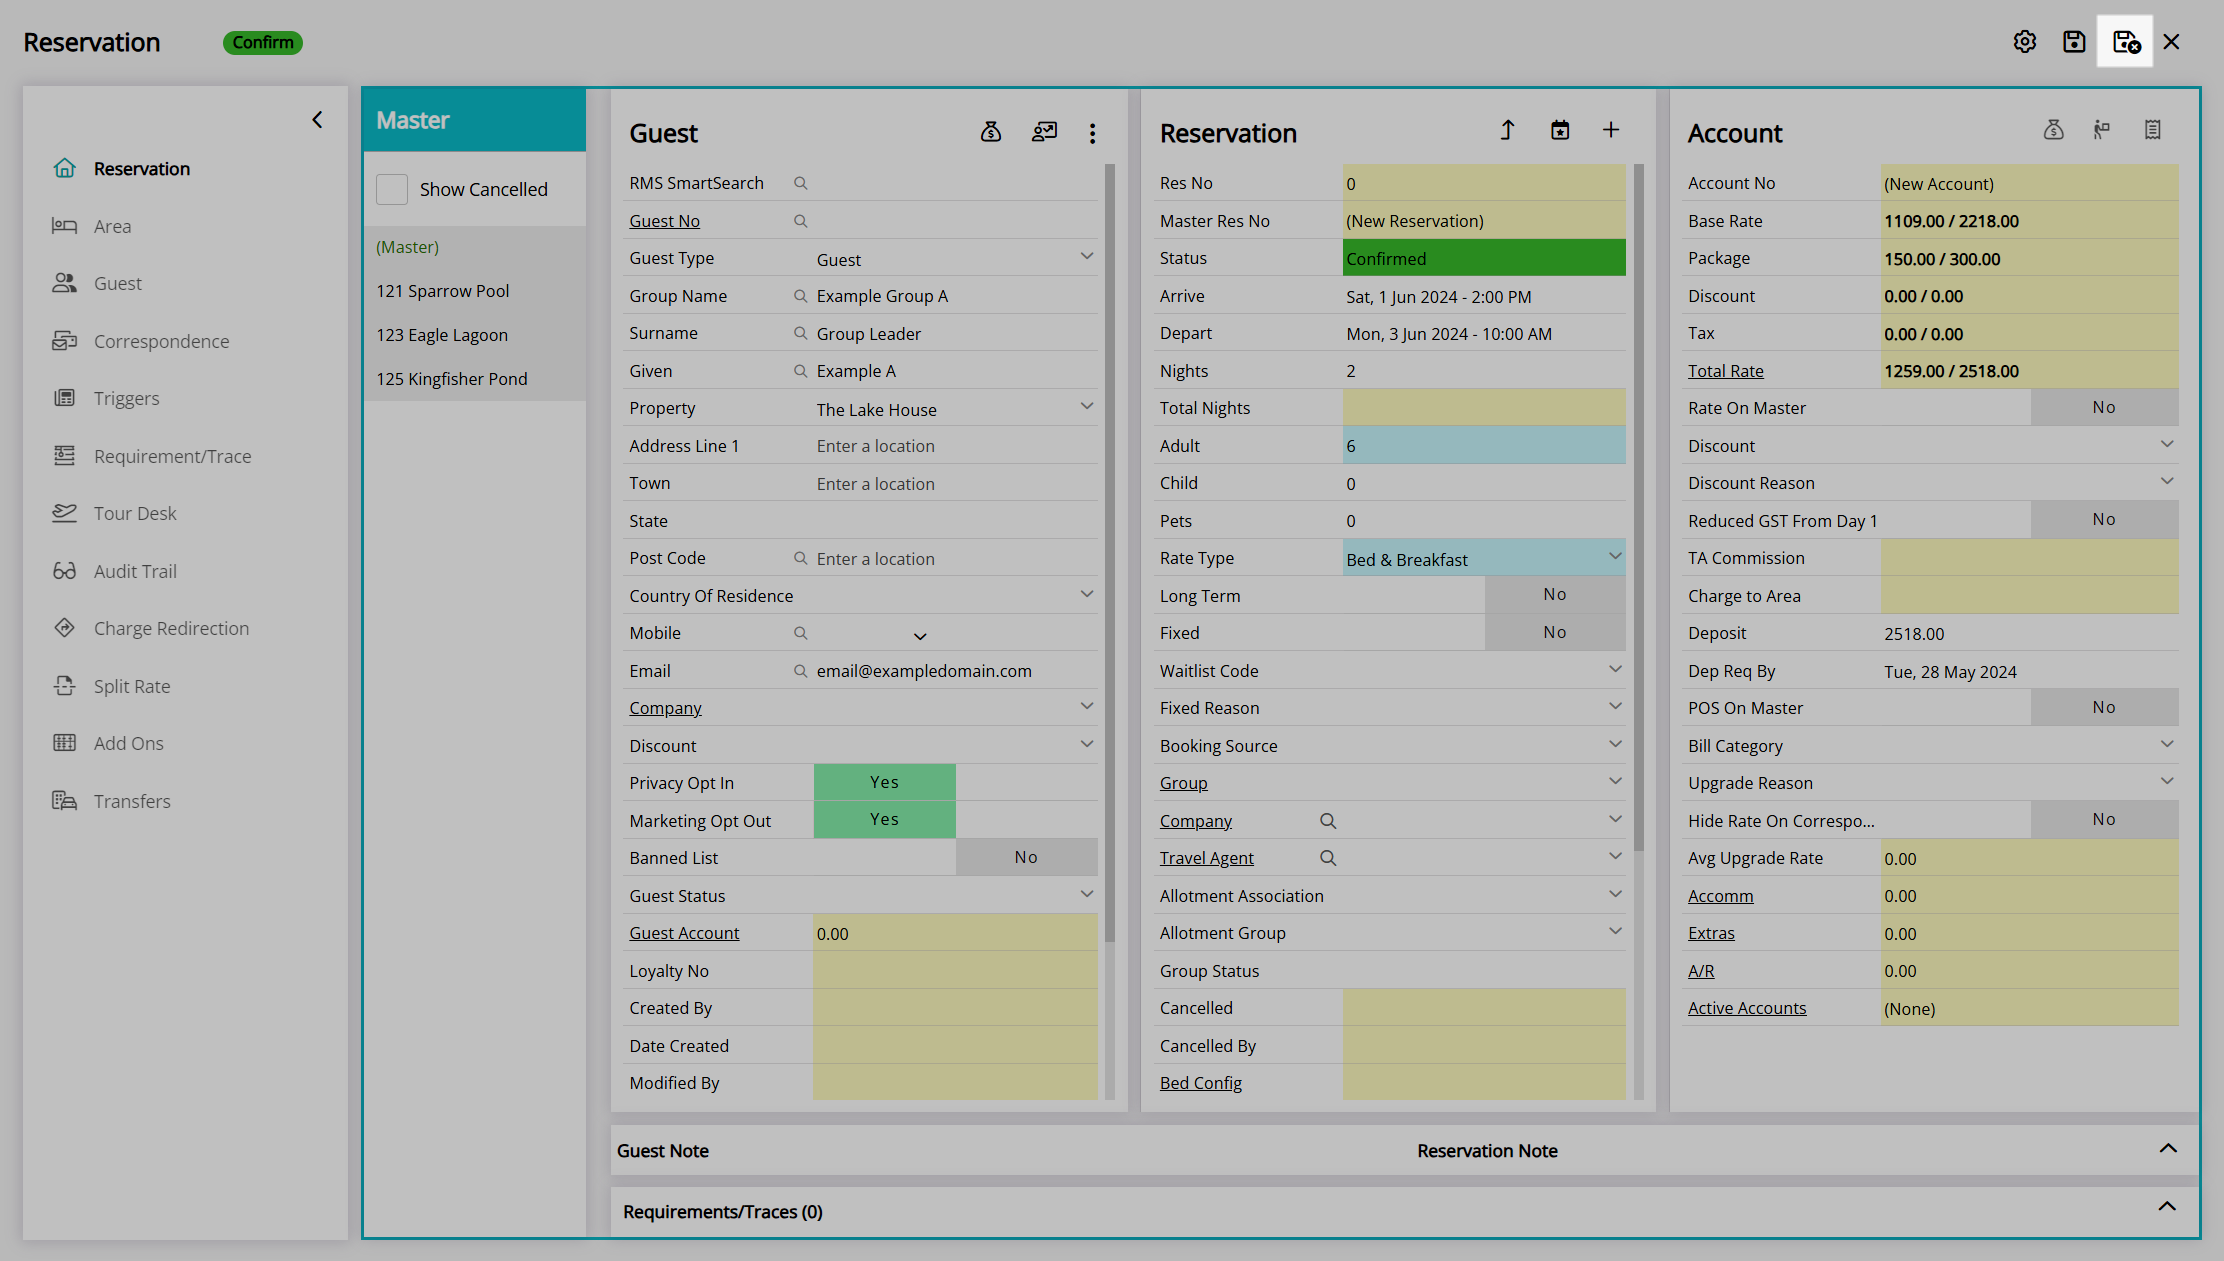
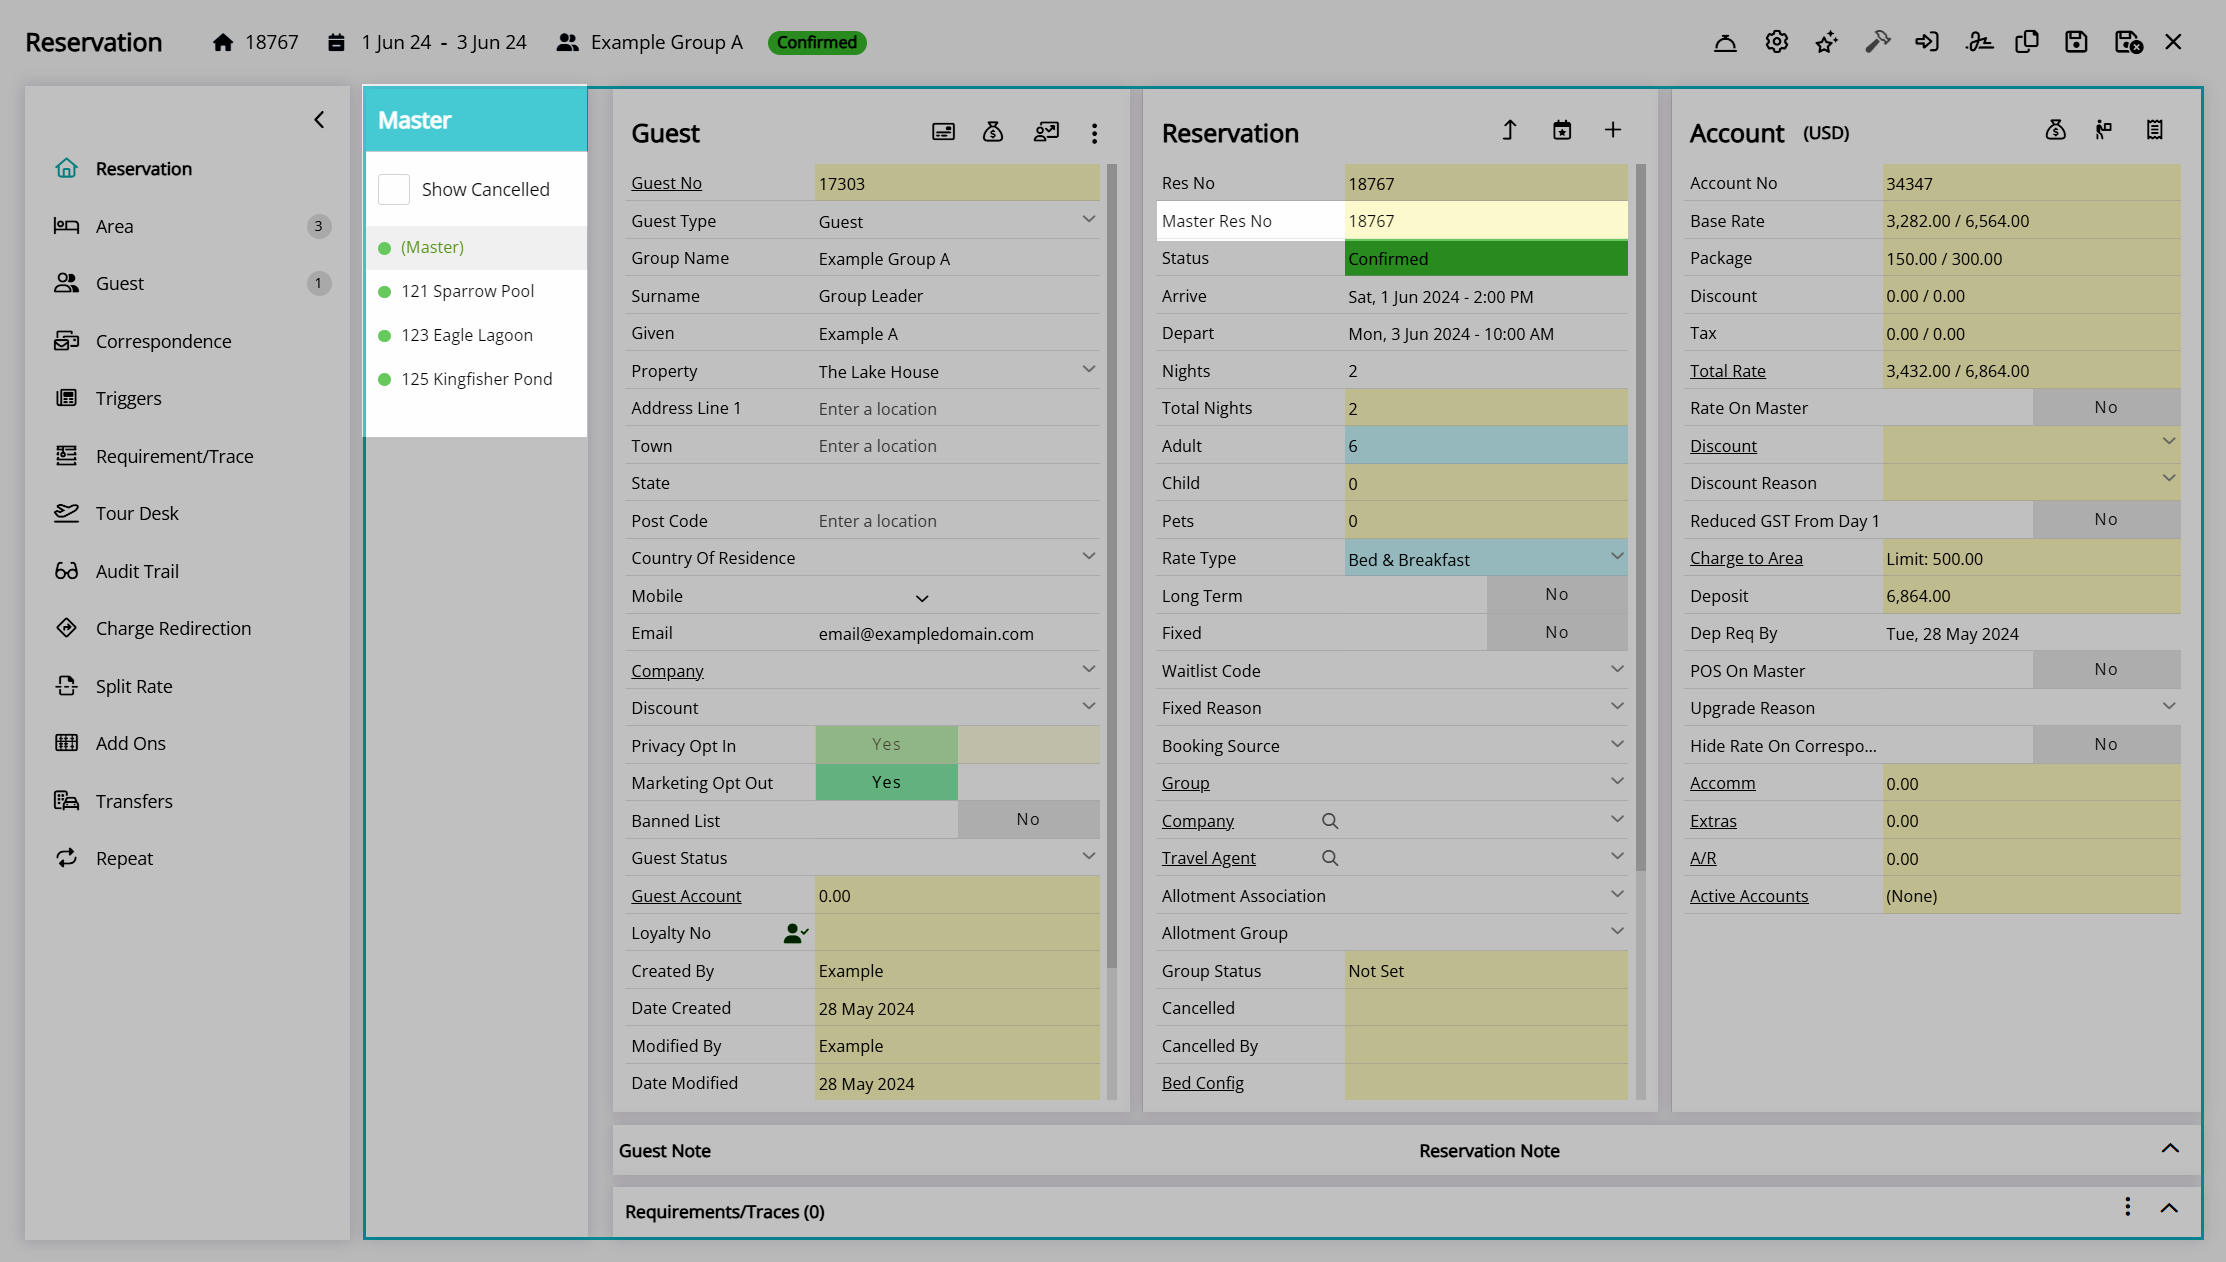
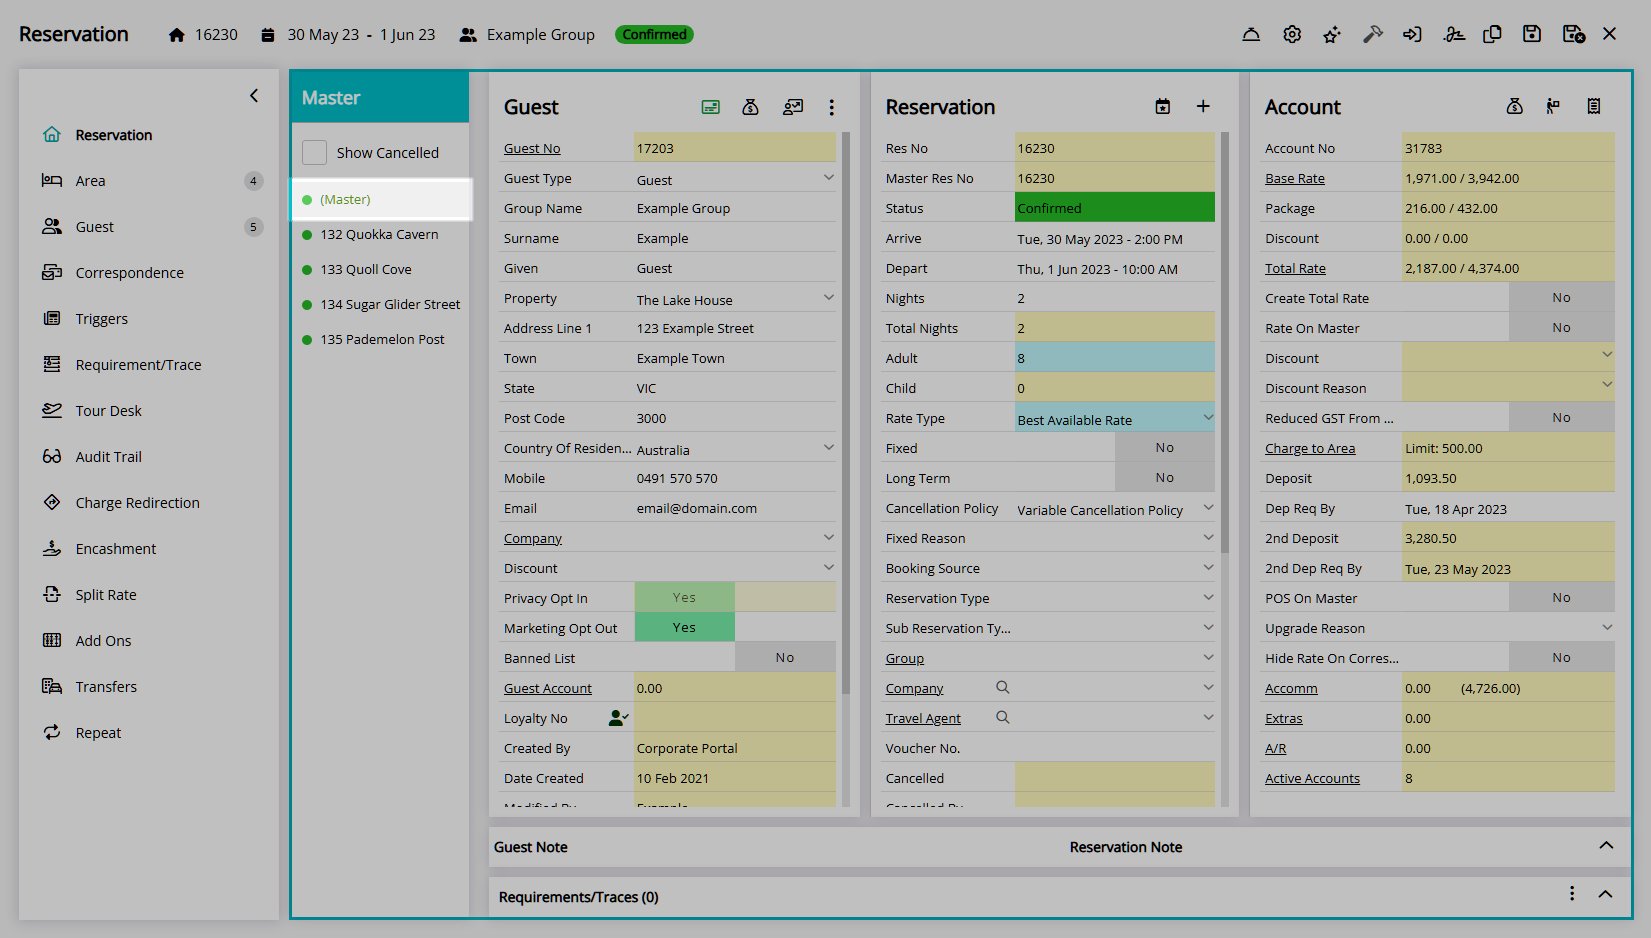
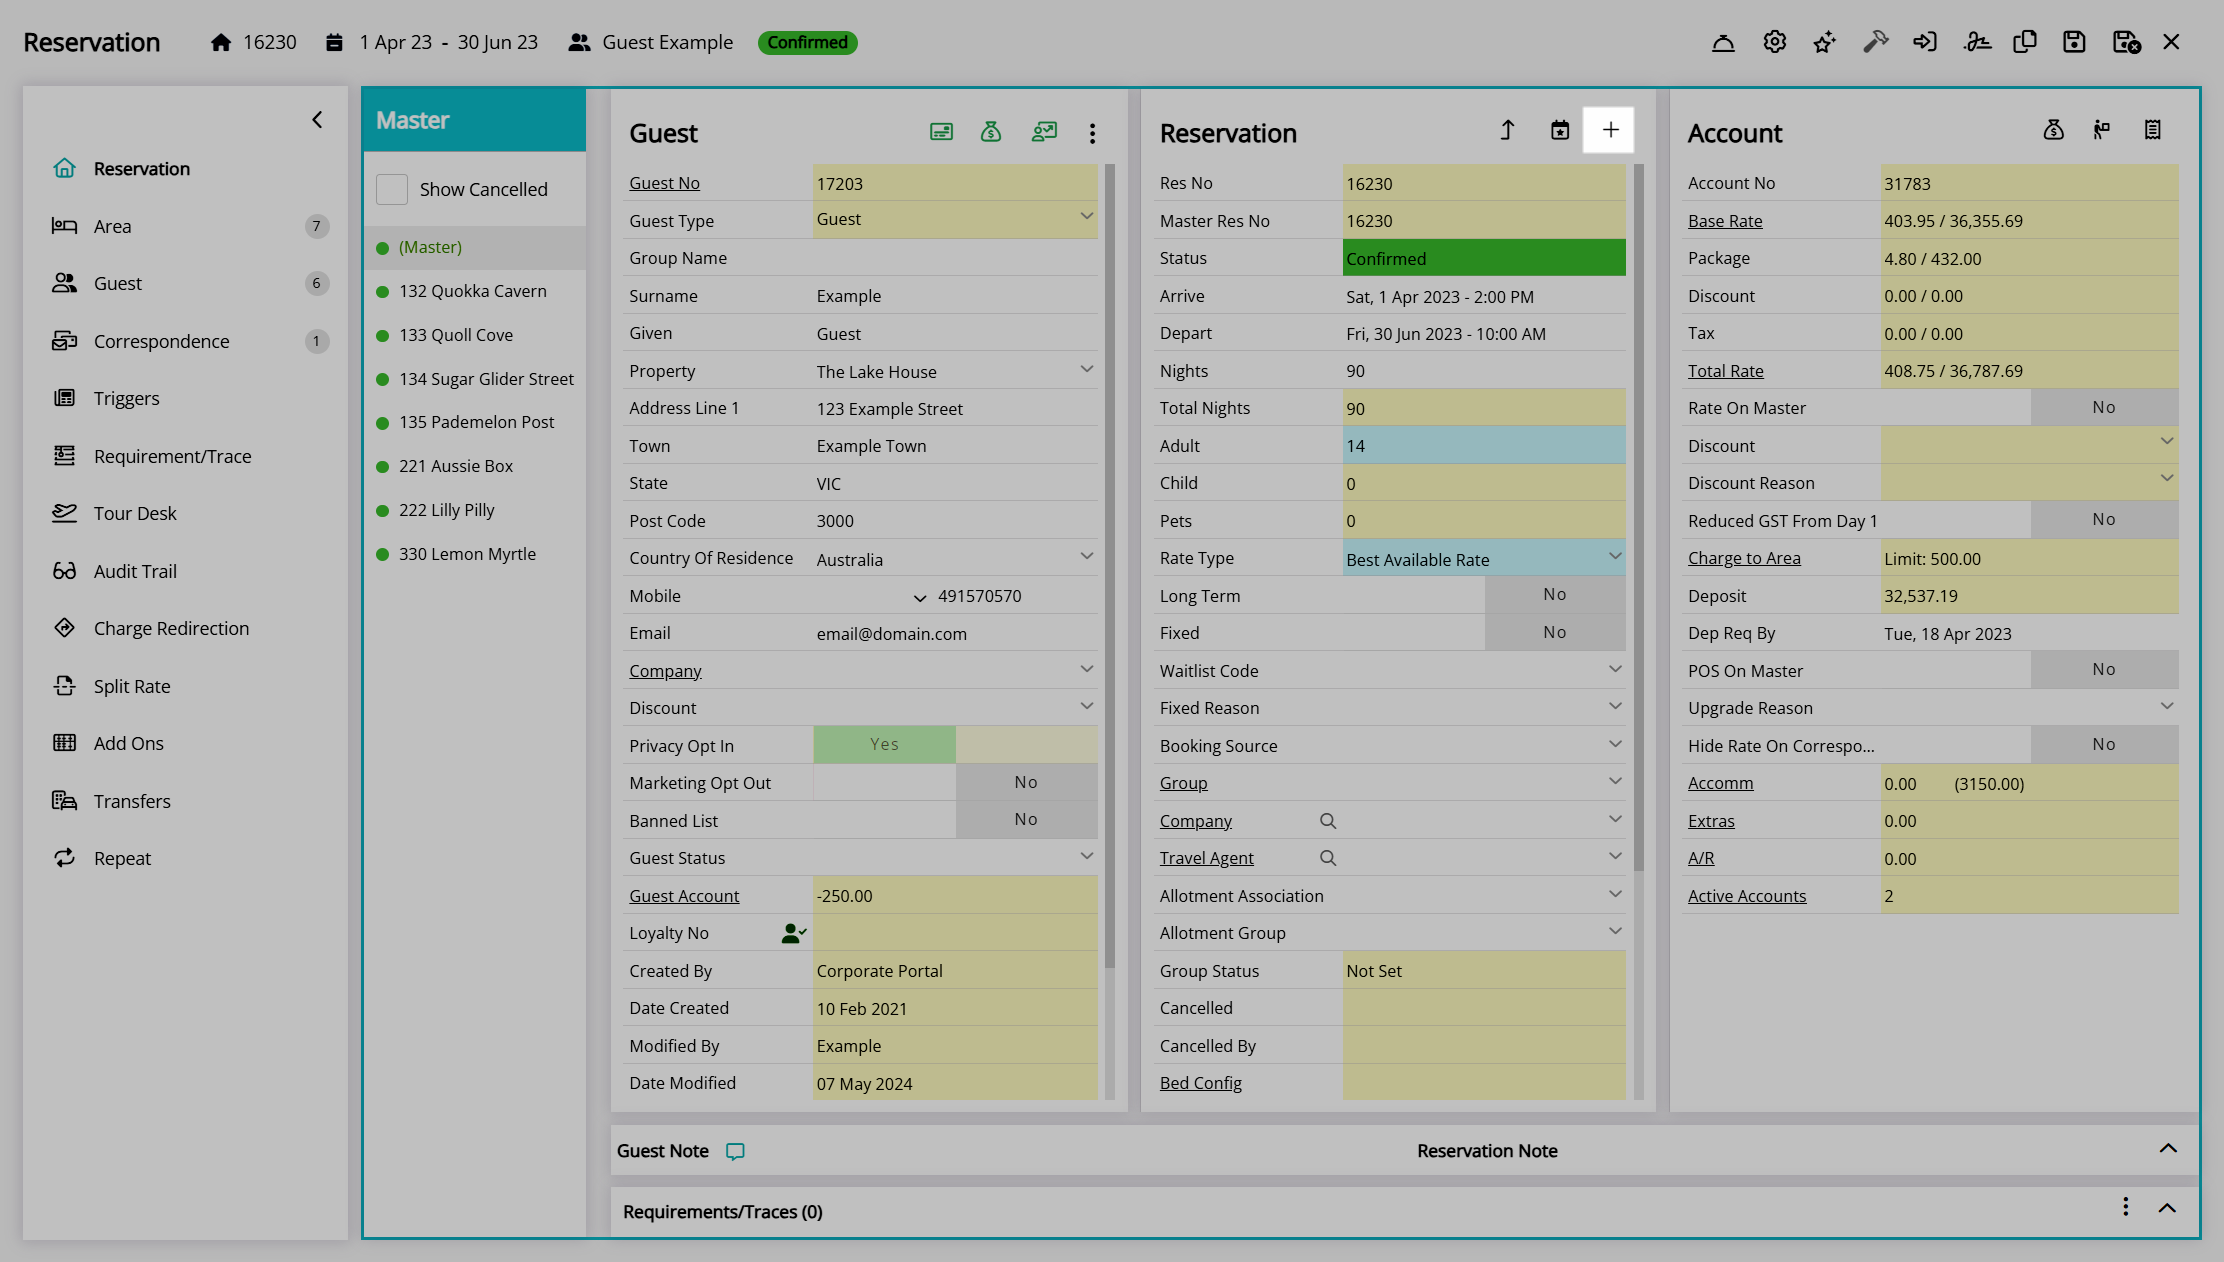
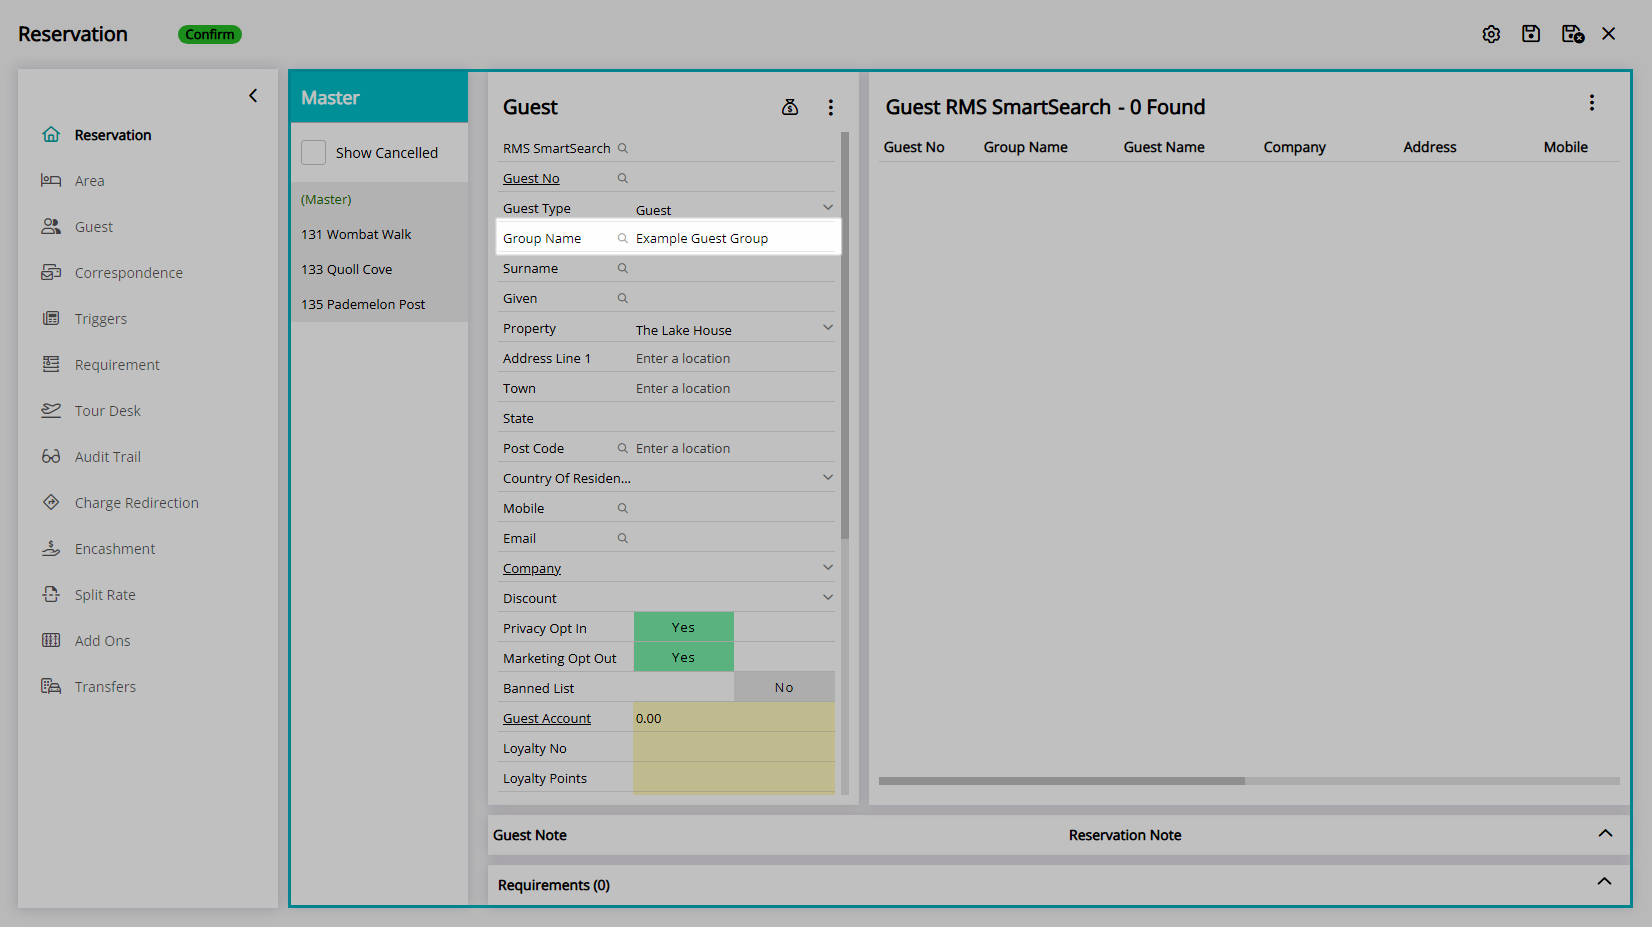
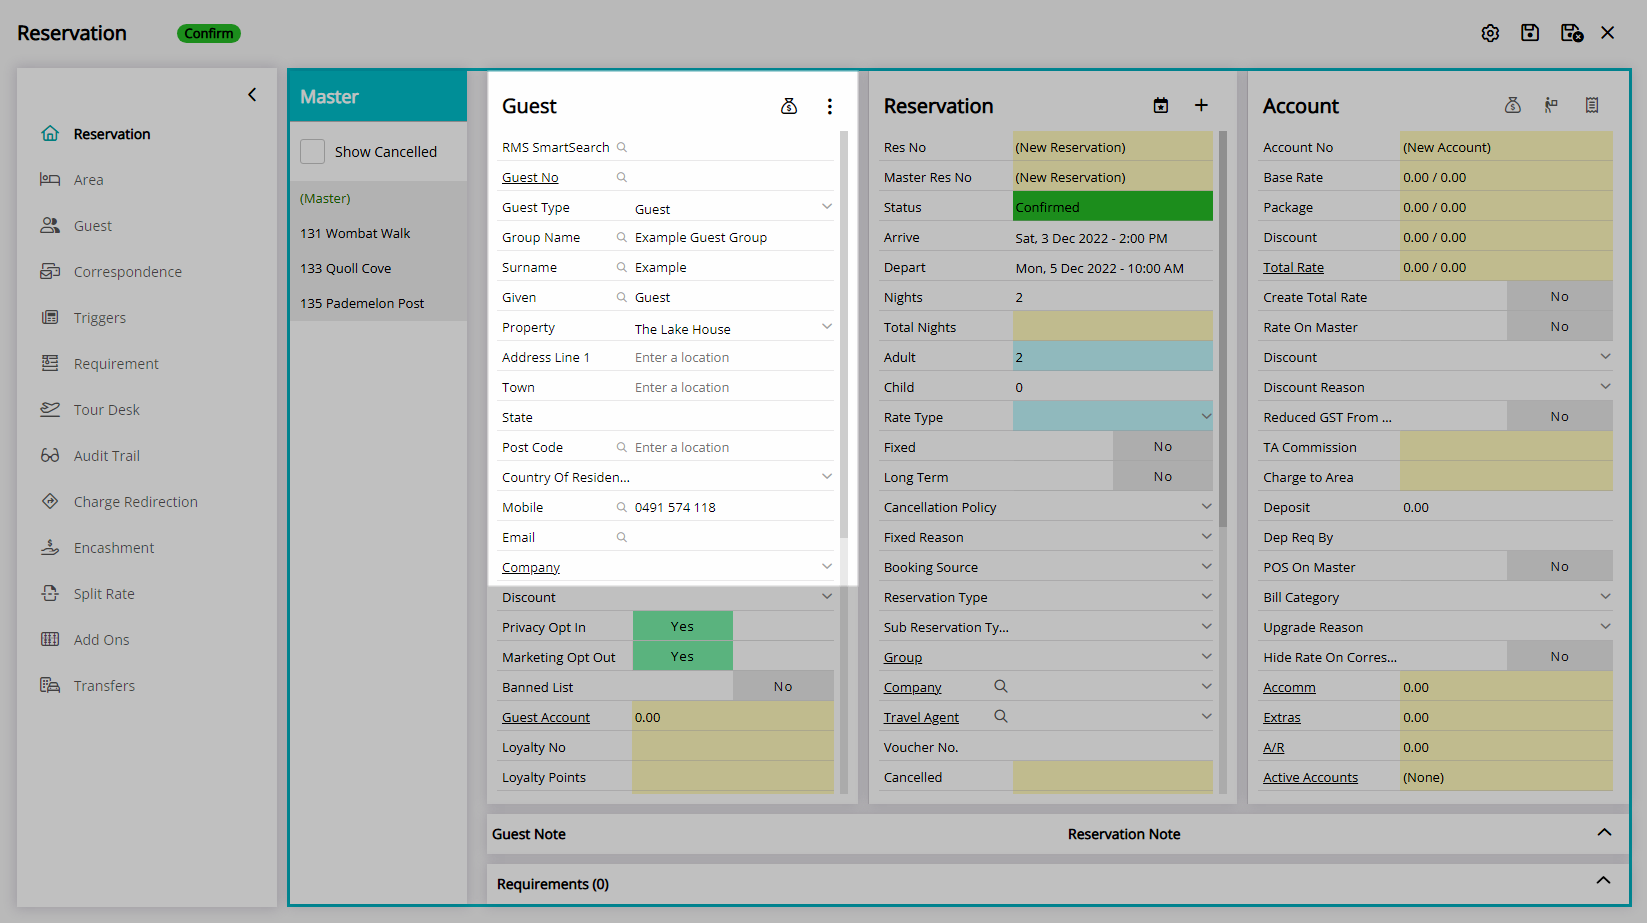
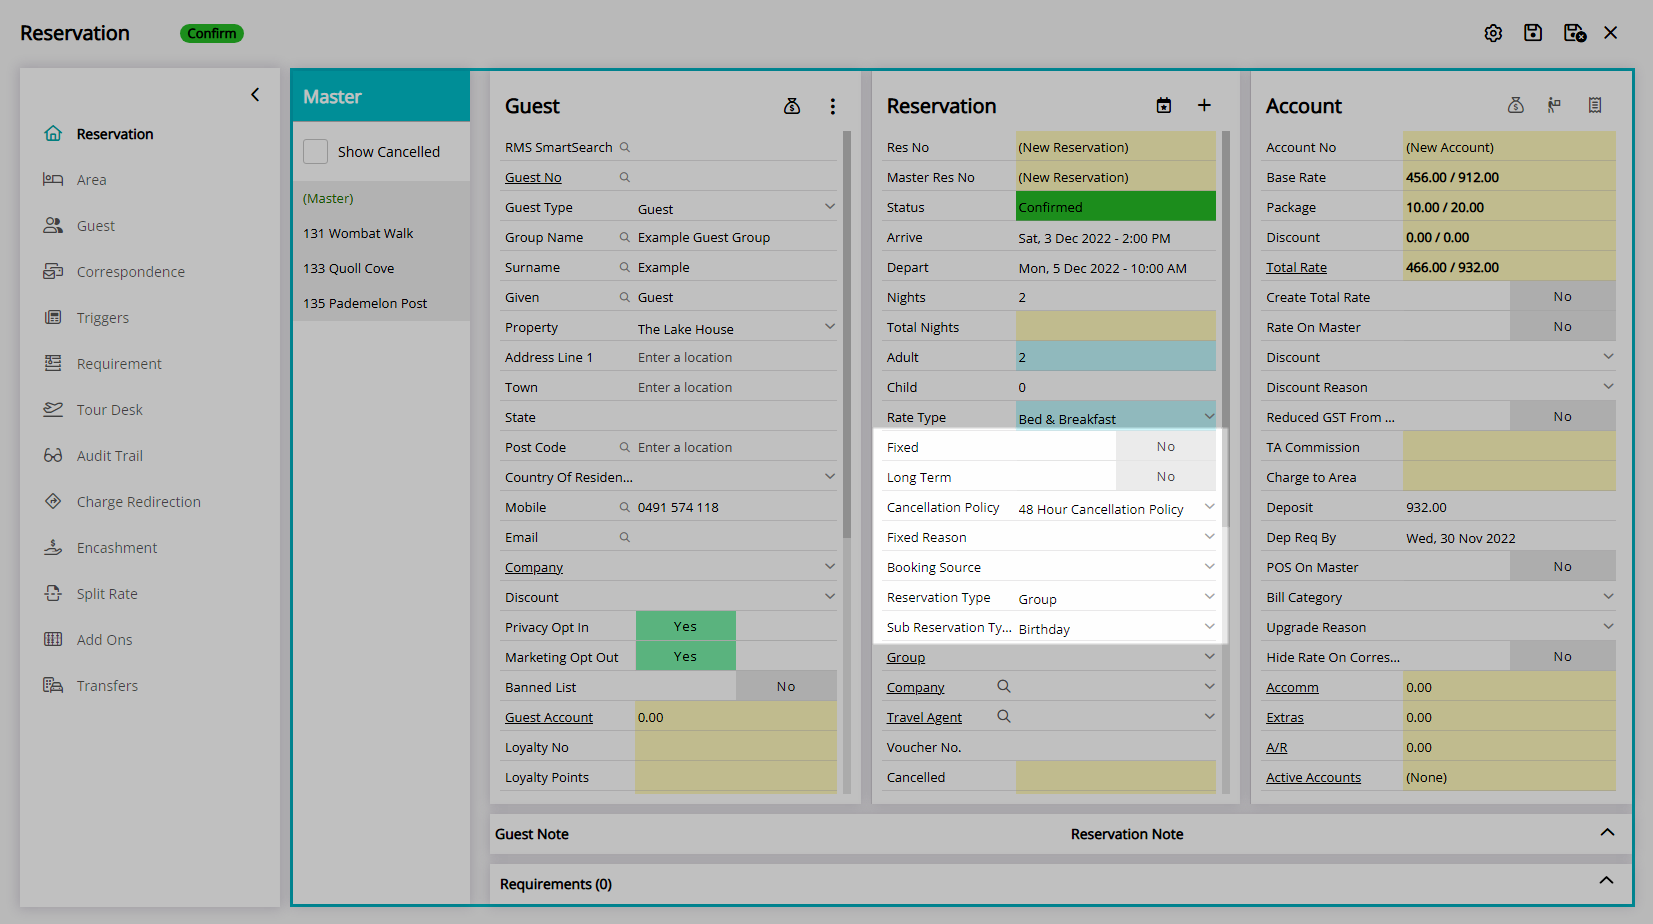
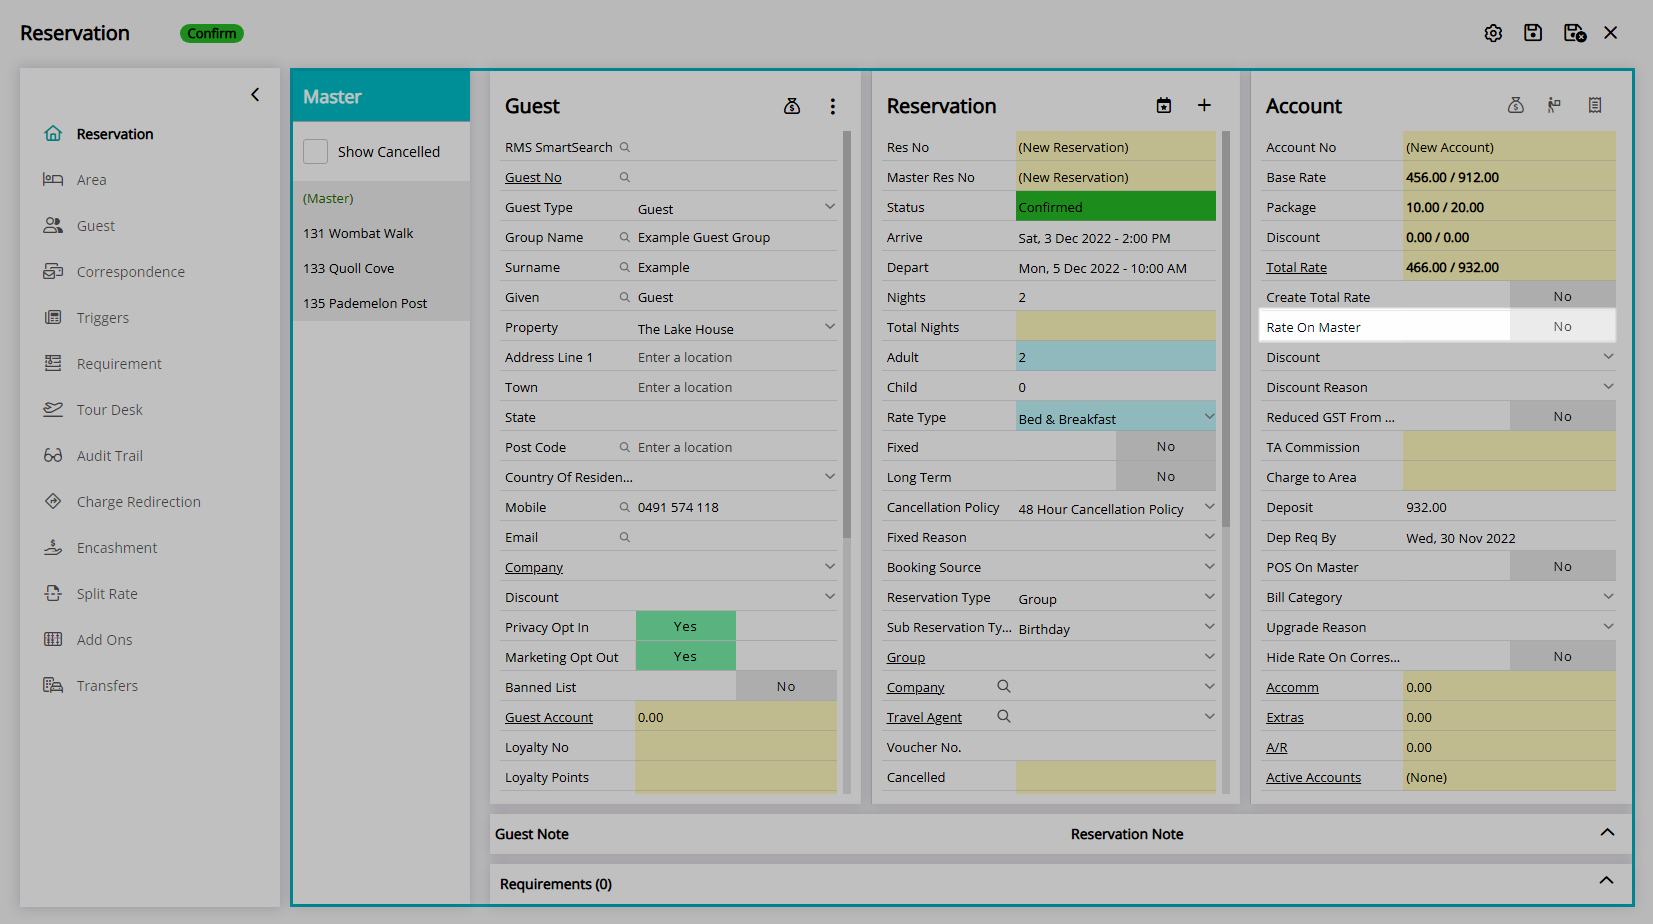
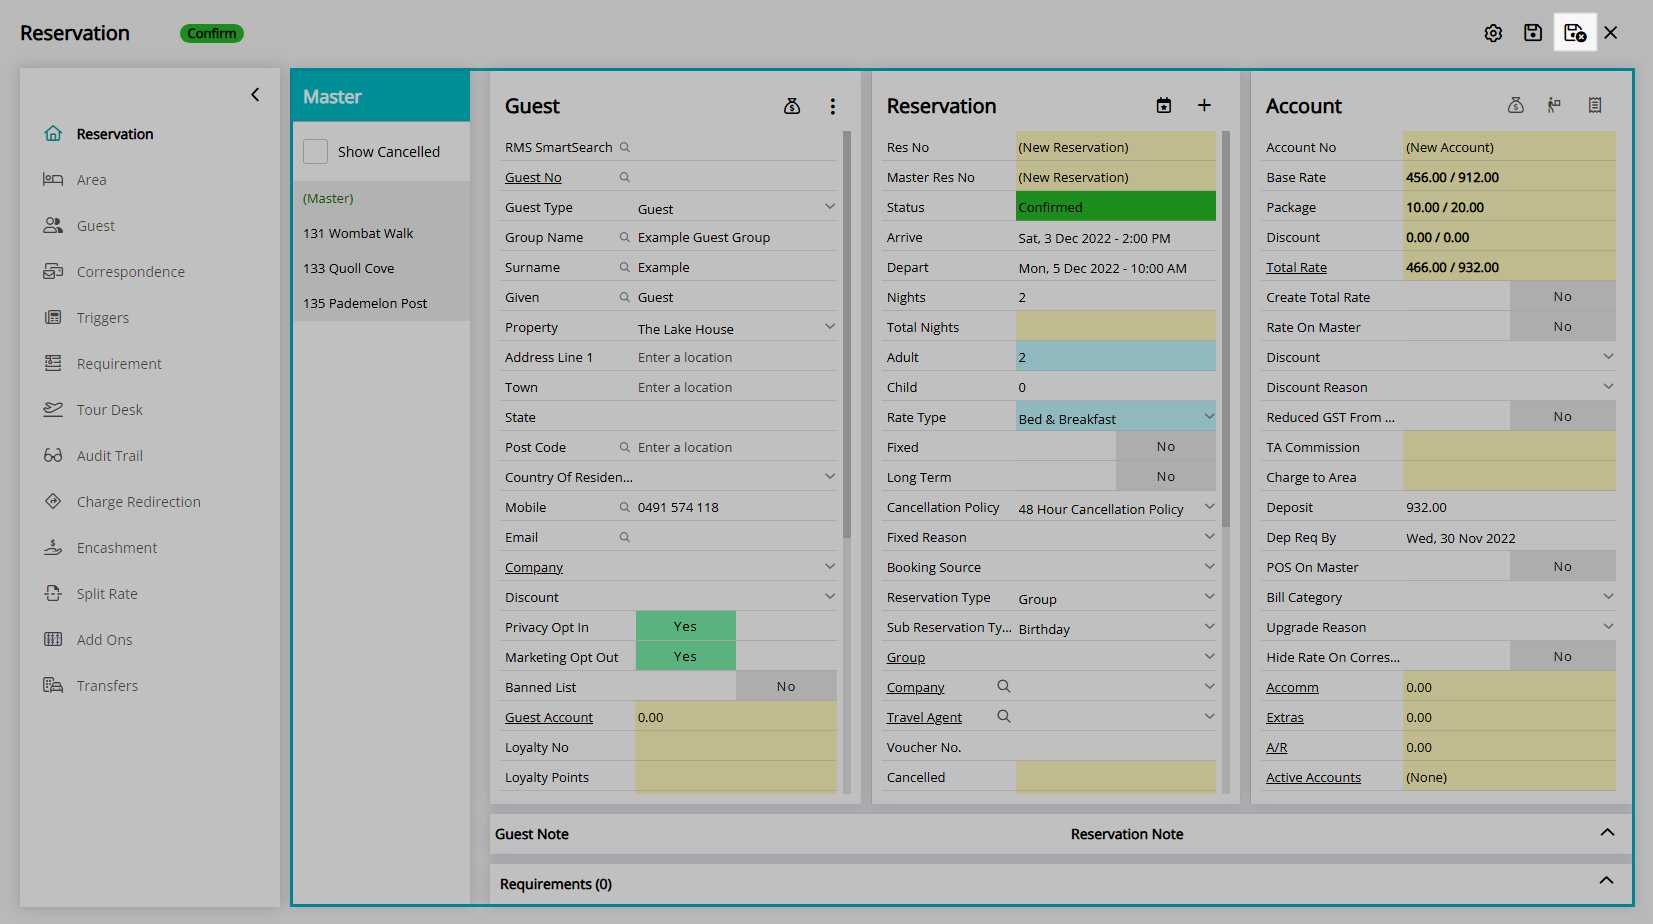
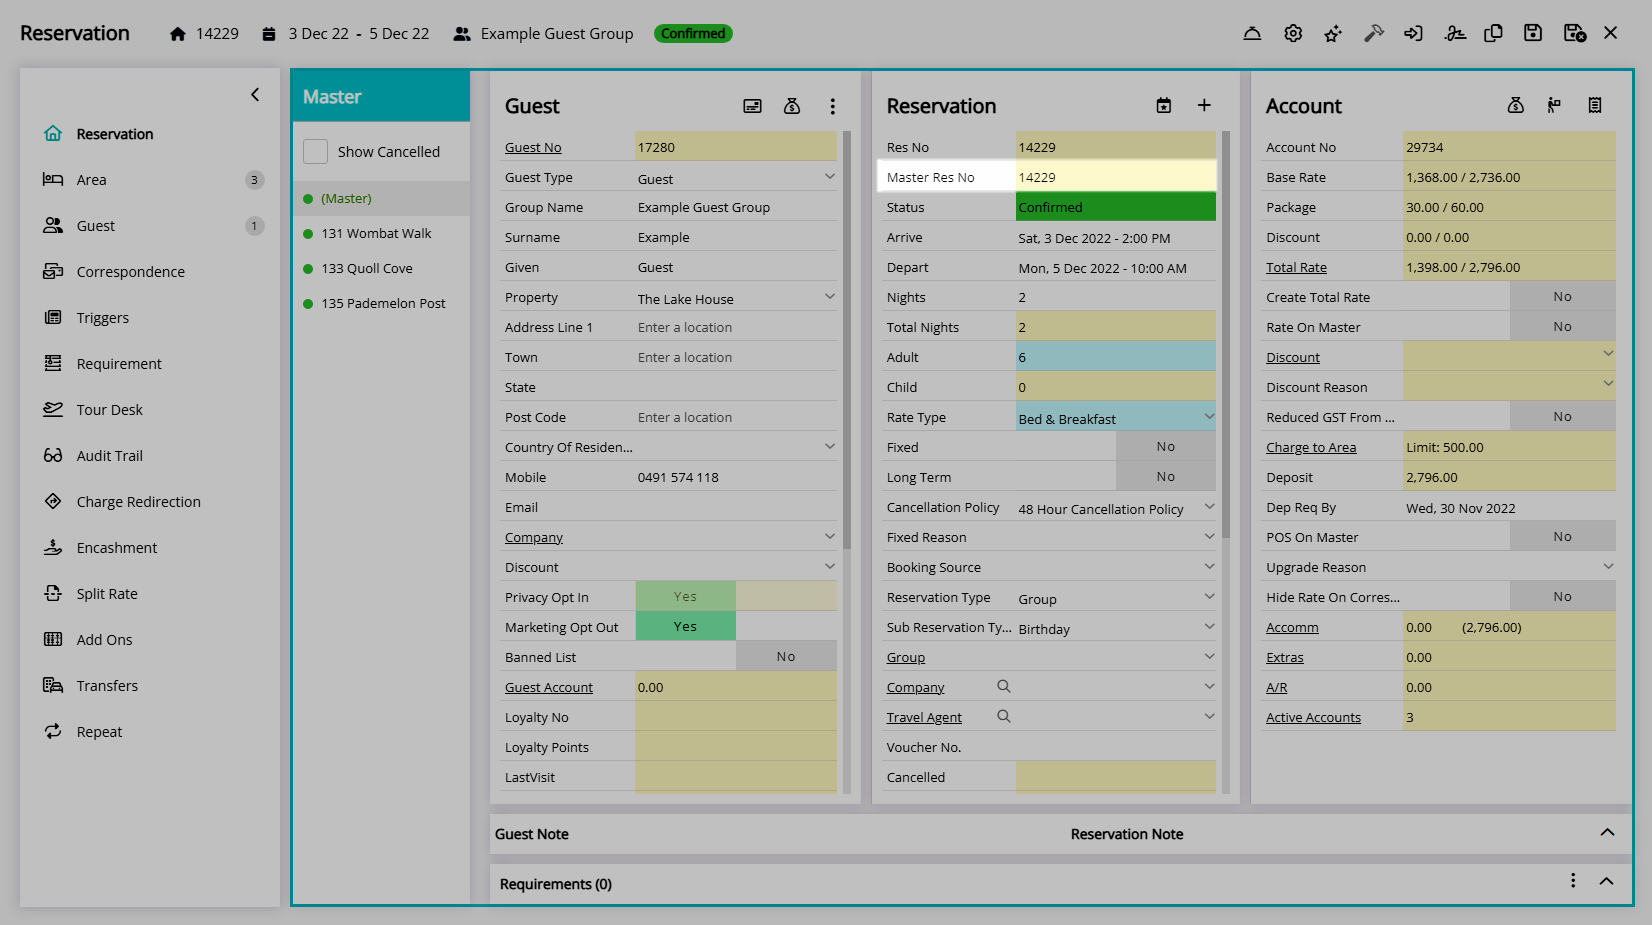
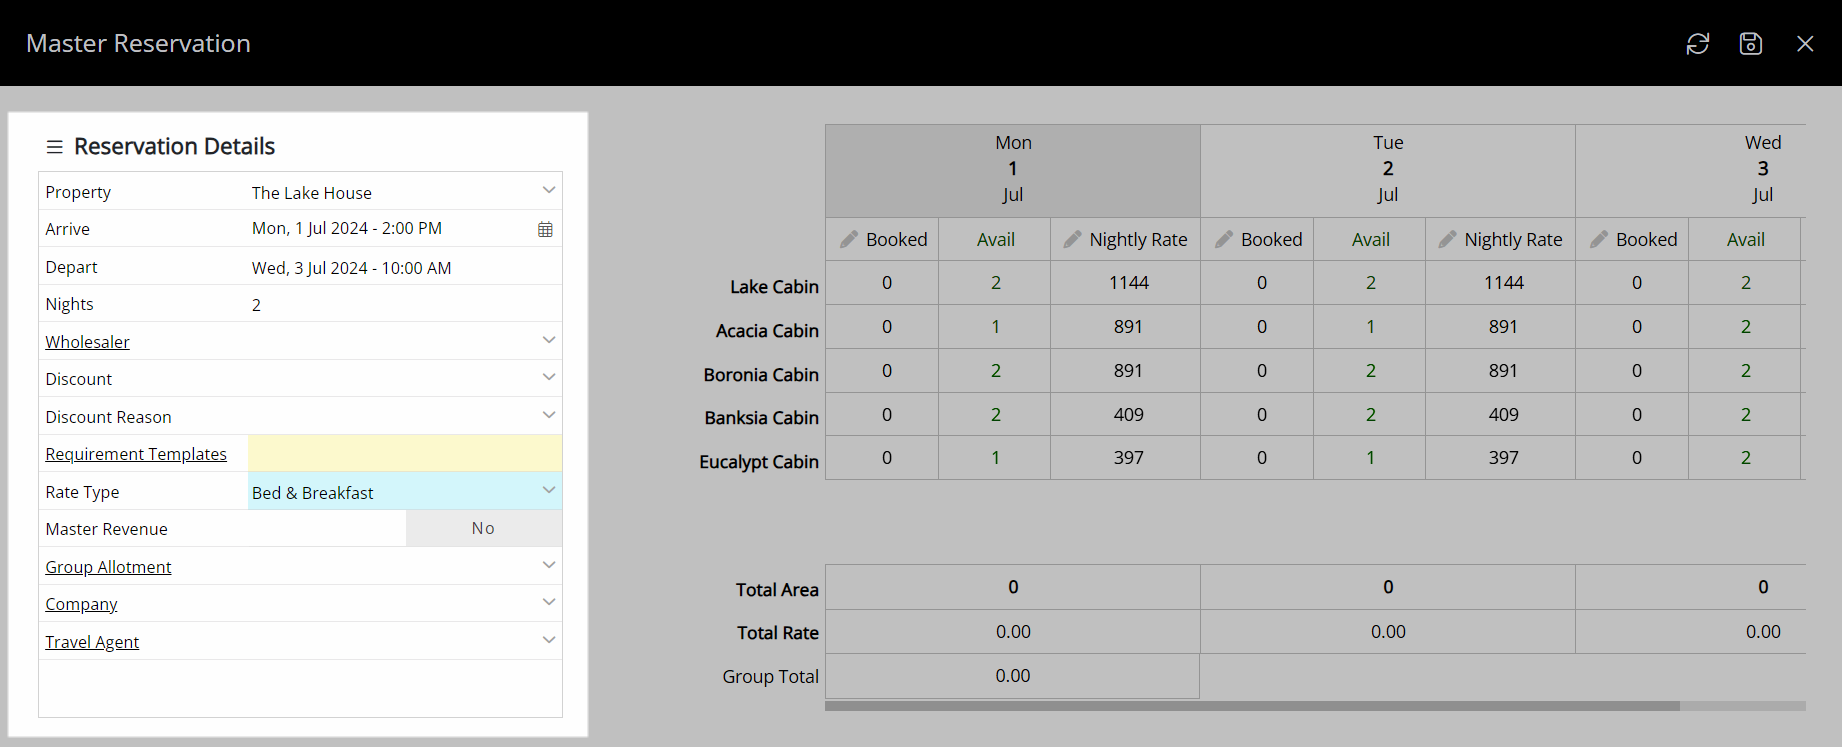
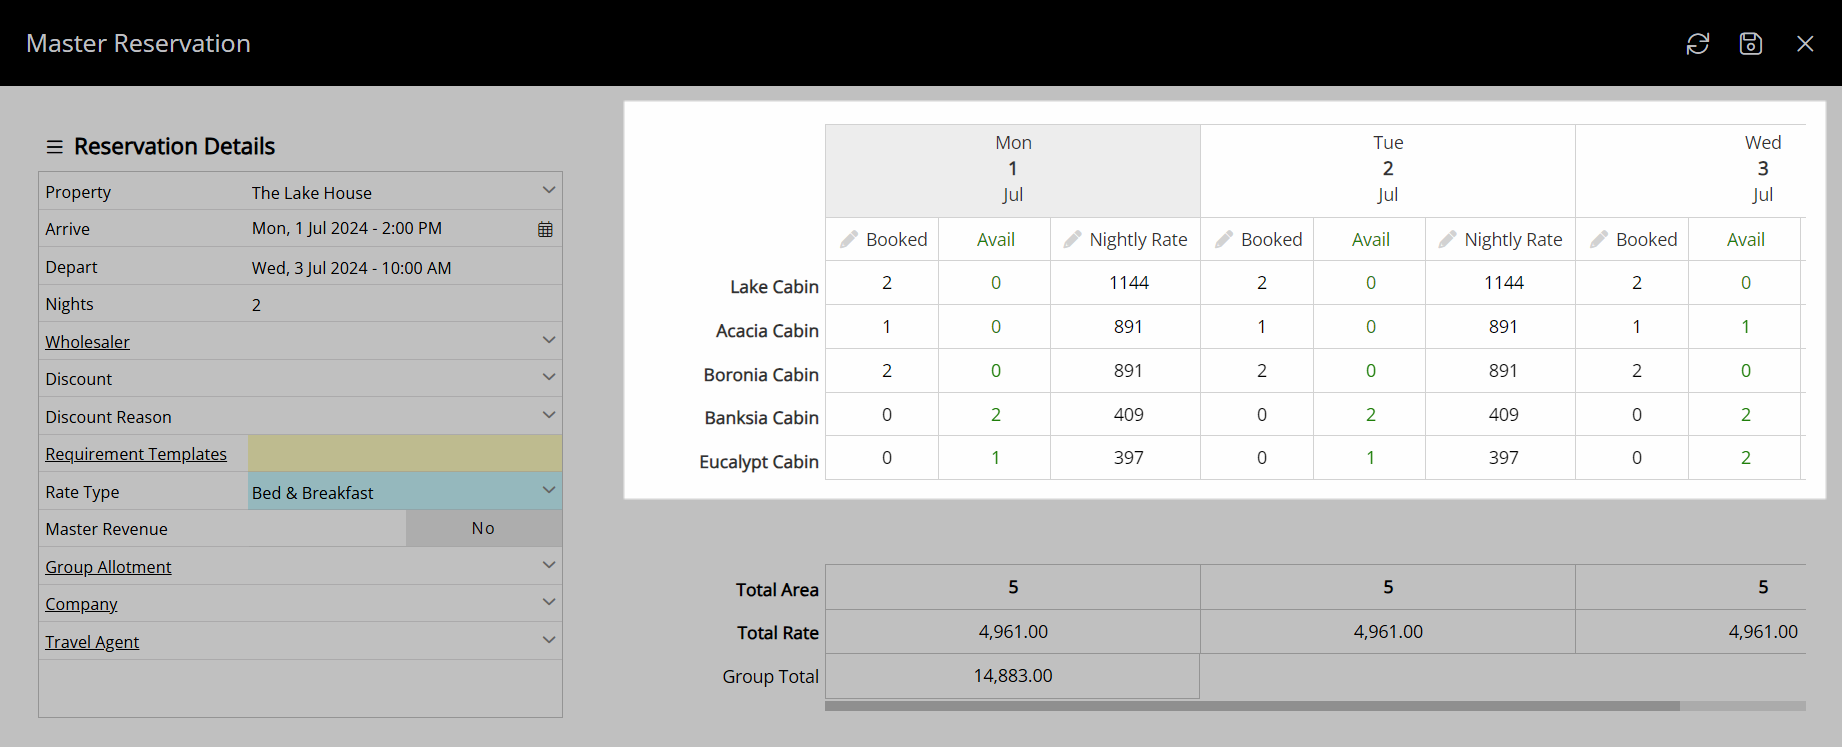
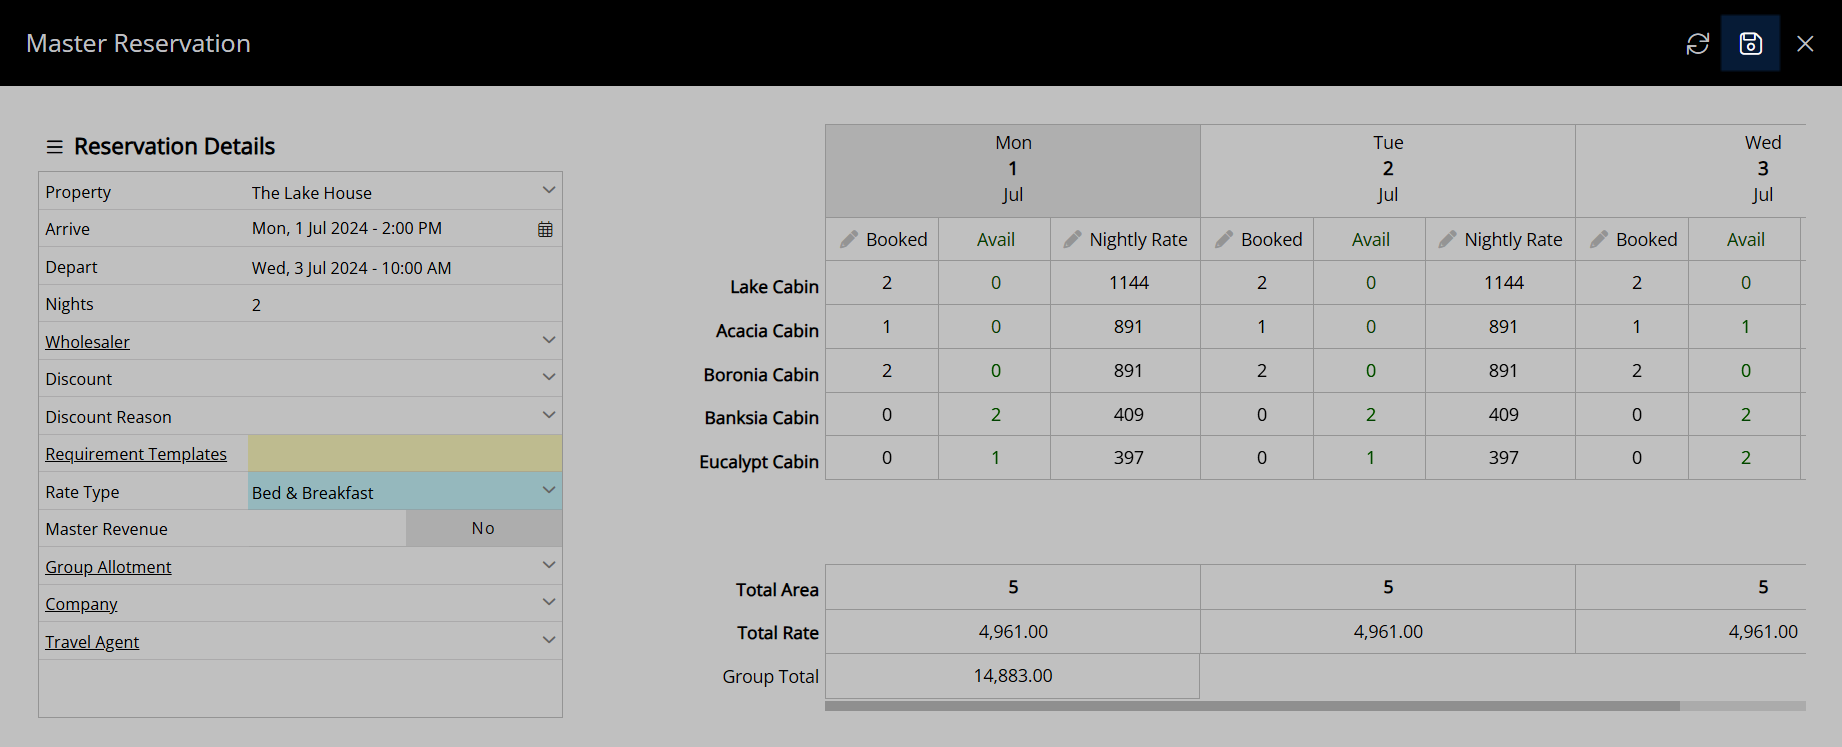
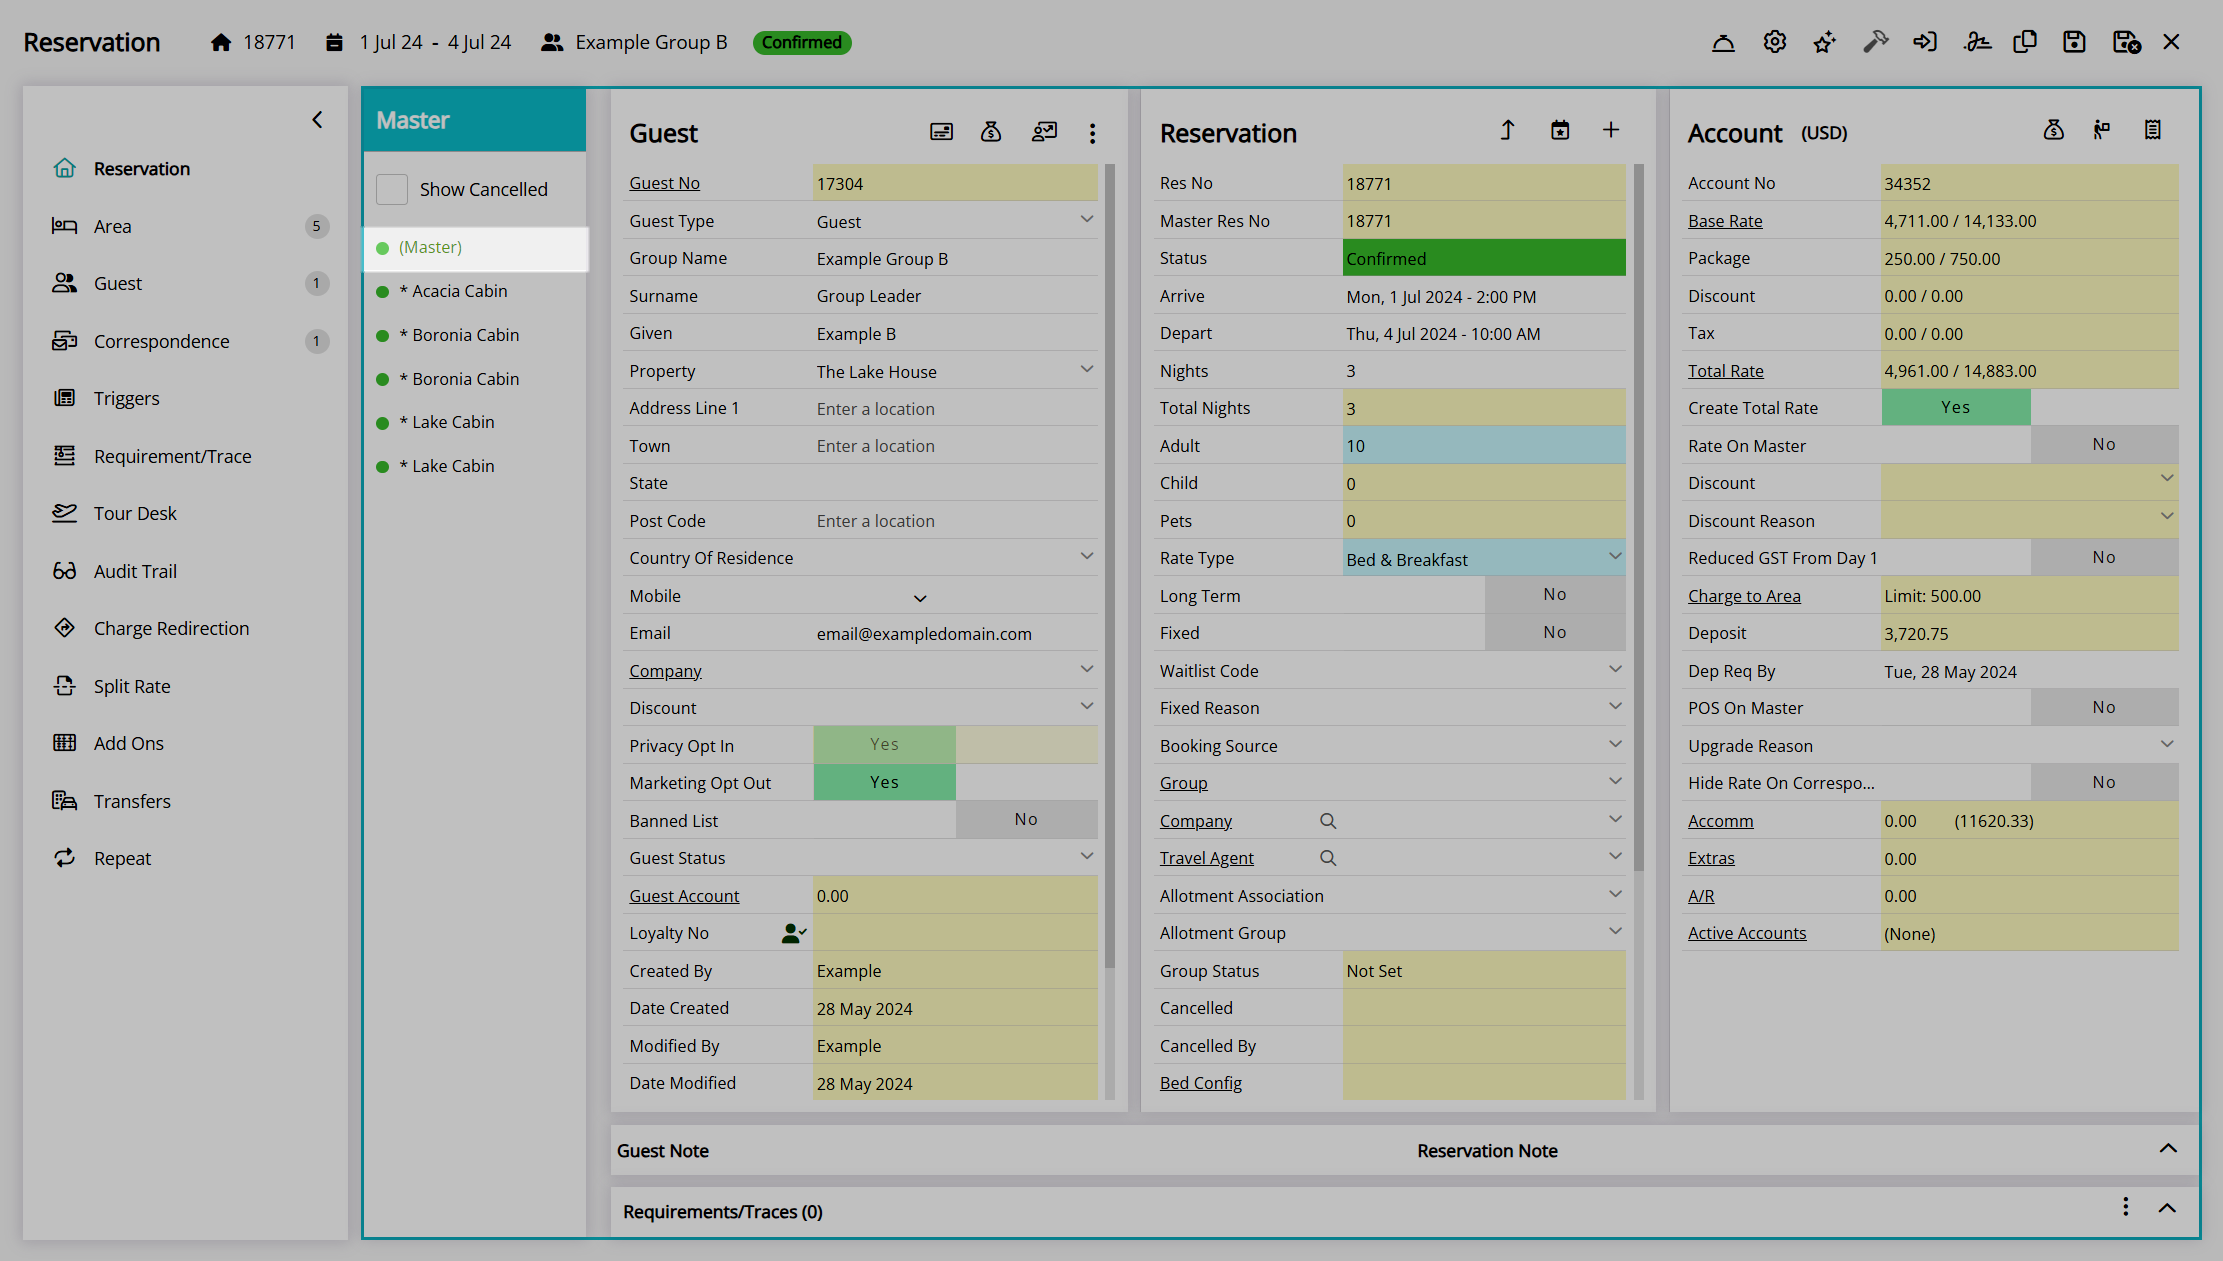
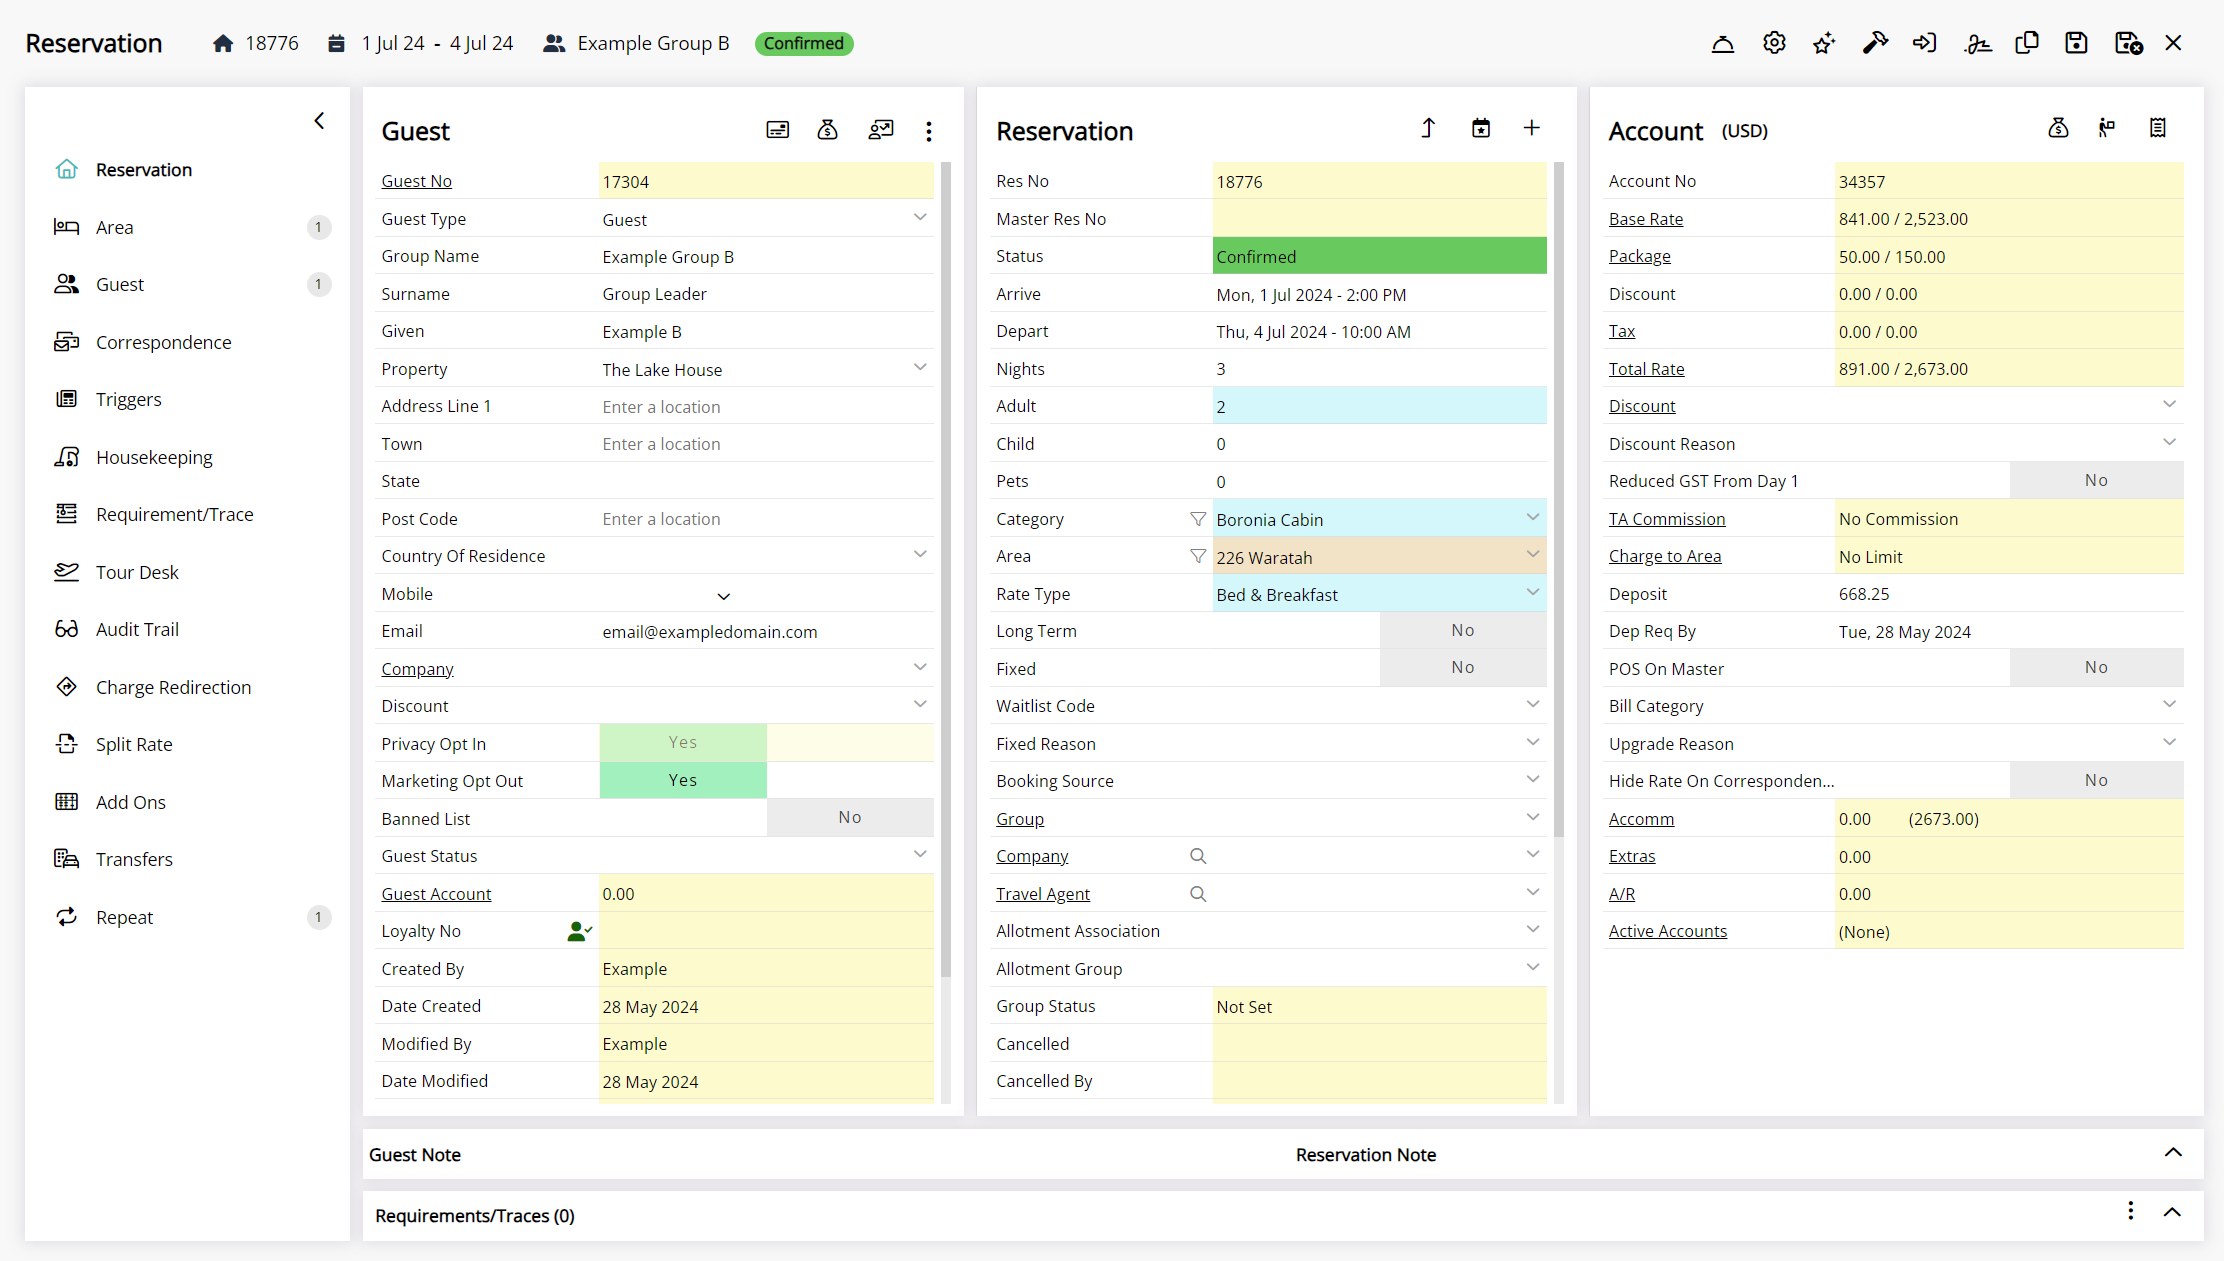
A Master Reservation is a group of reservations for guests travelling together, linked by a group name and reservation number.
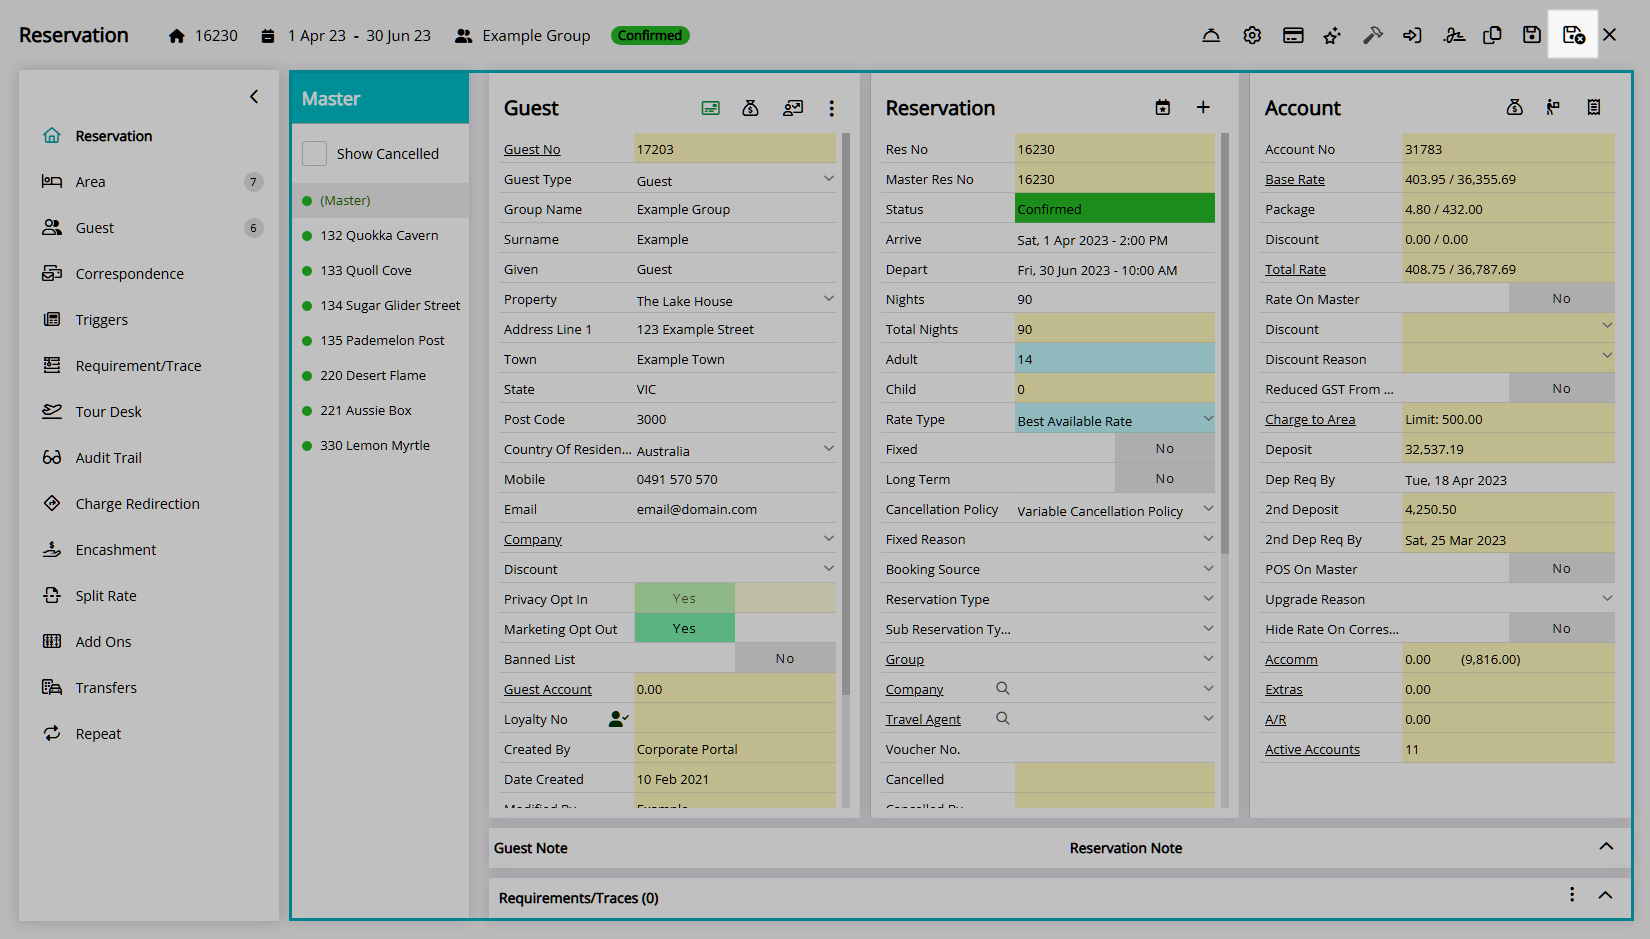
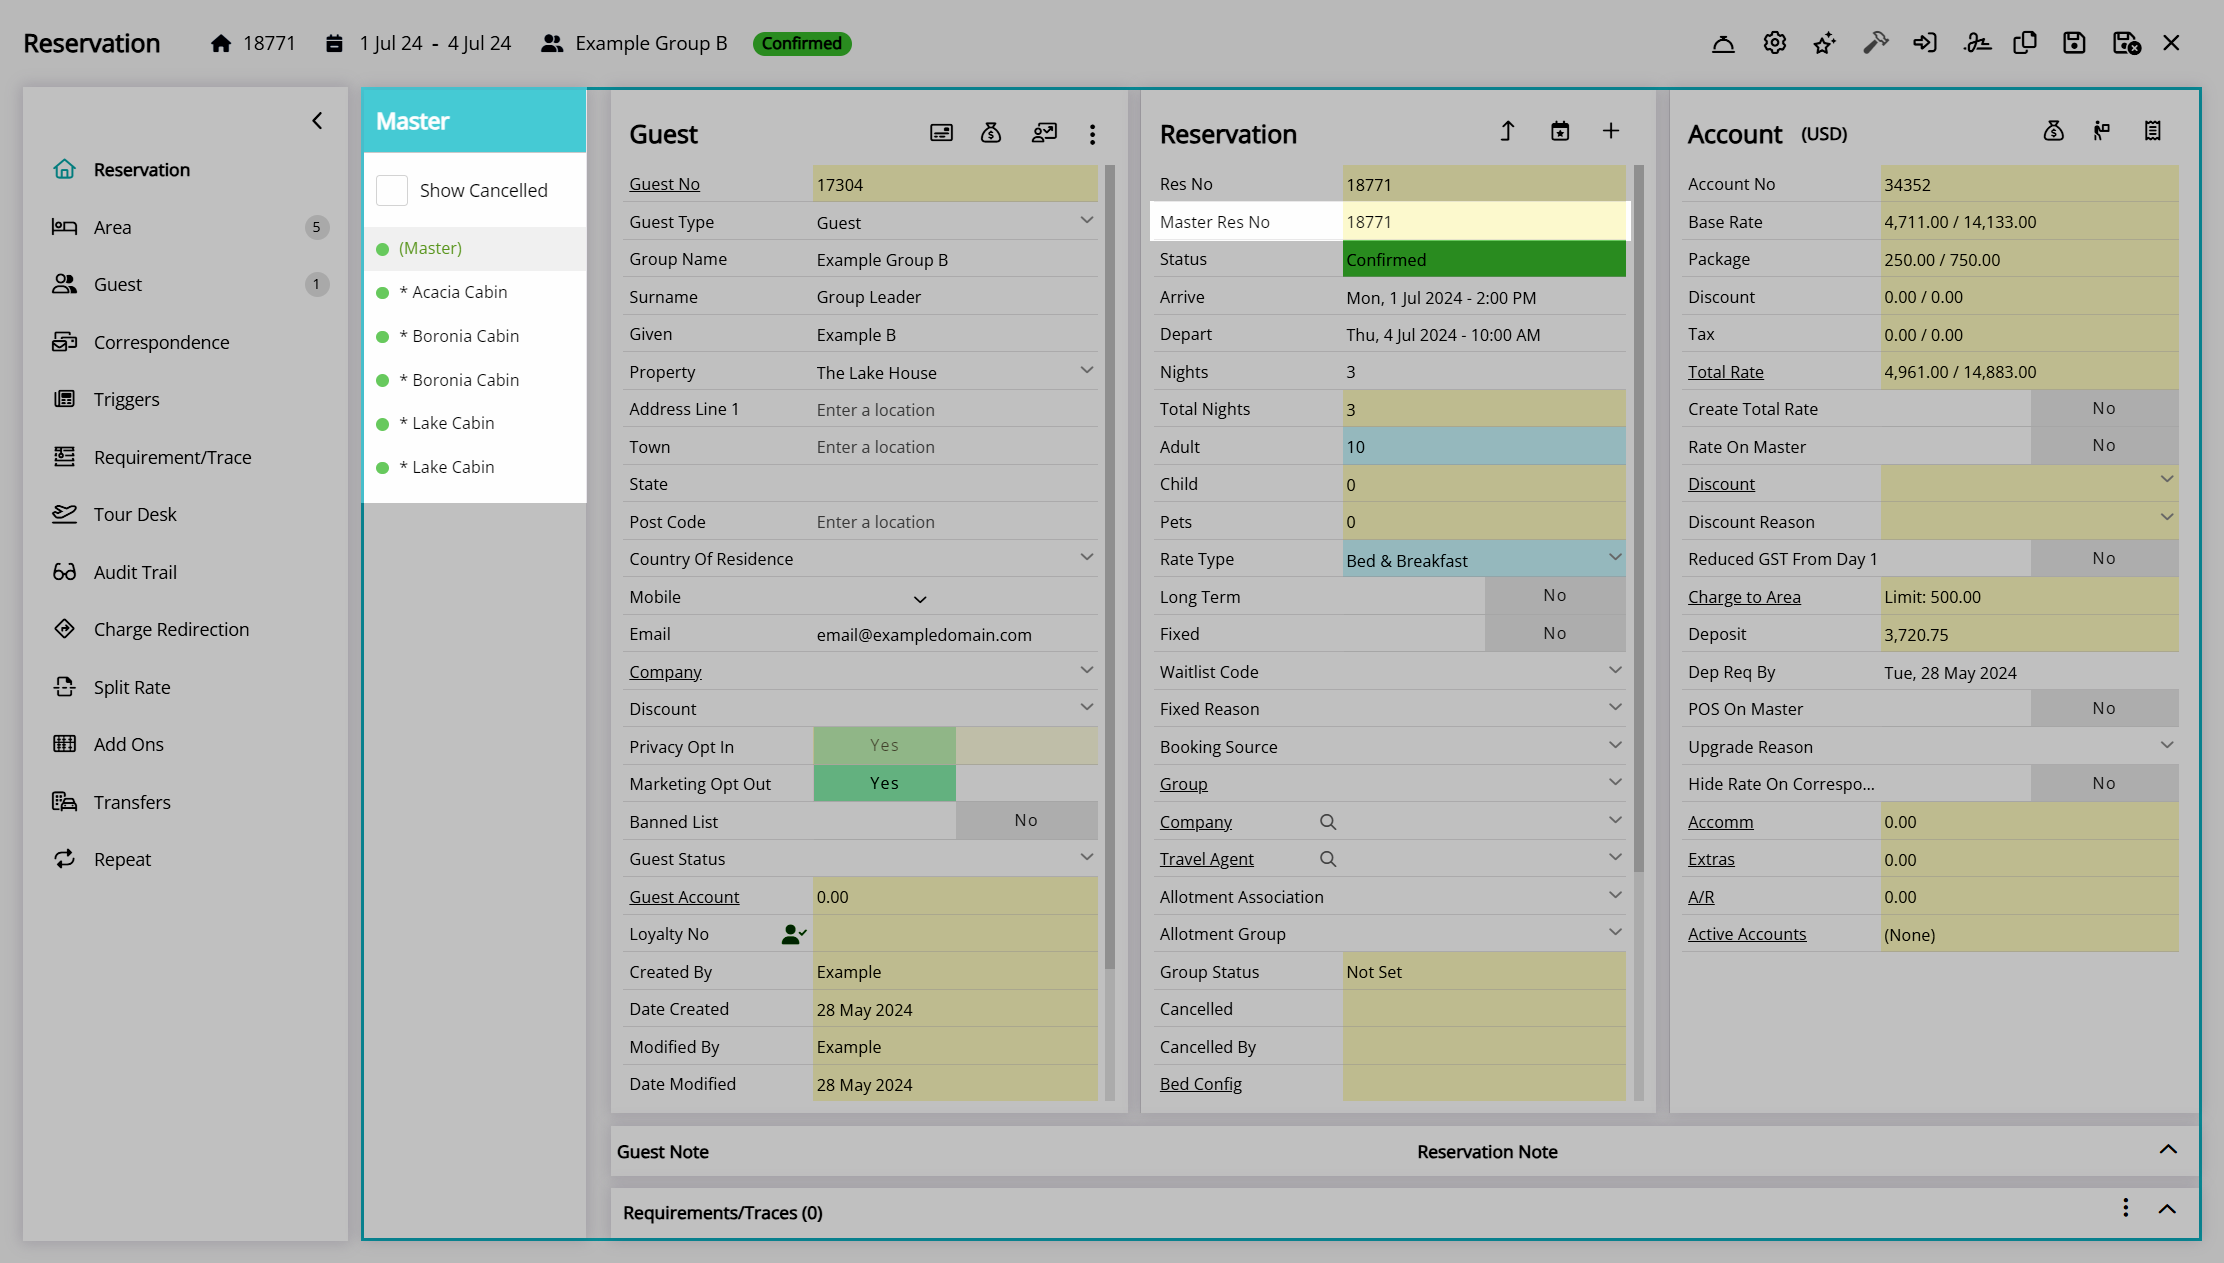
The group cover page—shown as (Master) in the navigator pane of the reservation— includes the guest details for the group leader, a summary of reservation details for all reservations in the group, and a group account. Each reservation within the group includes its guest details, reservation details, and reservation account, which contributes to the summary shown on the cover page.
A wide range of group reservation options exist on a Master Reservation, including account features that determine the routing of charges, an area list, a guest list, and group management tools.
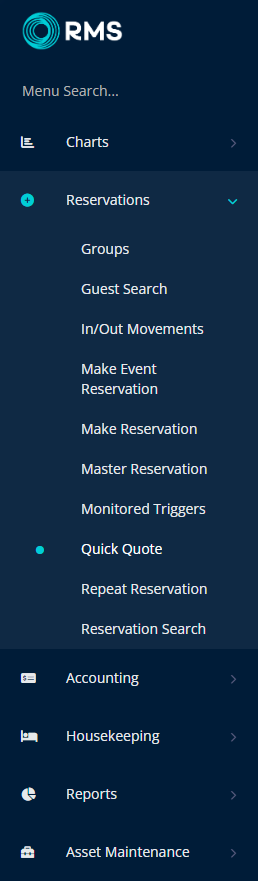
A Master Reservation can be created on the reservation screen for a new or existing reservation or by combining existing reservations, on the Booking Chart, using Quick Quote, or with the Master Reservation utility when set up as Book by Category.
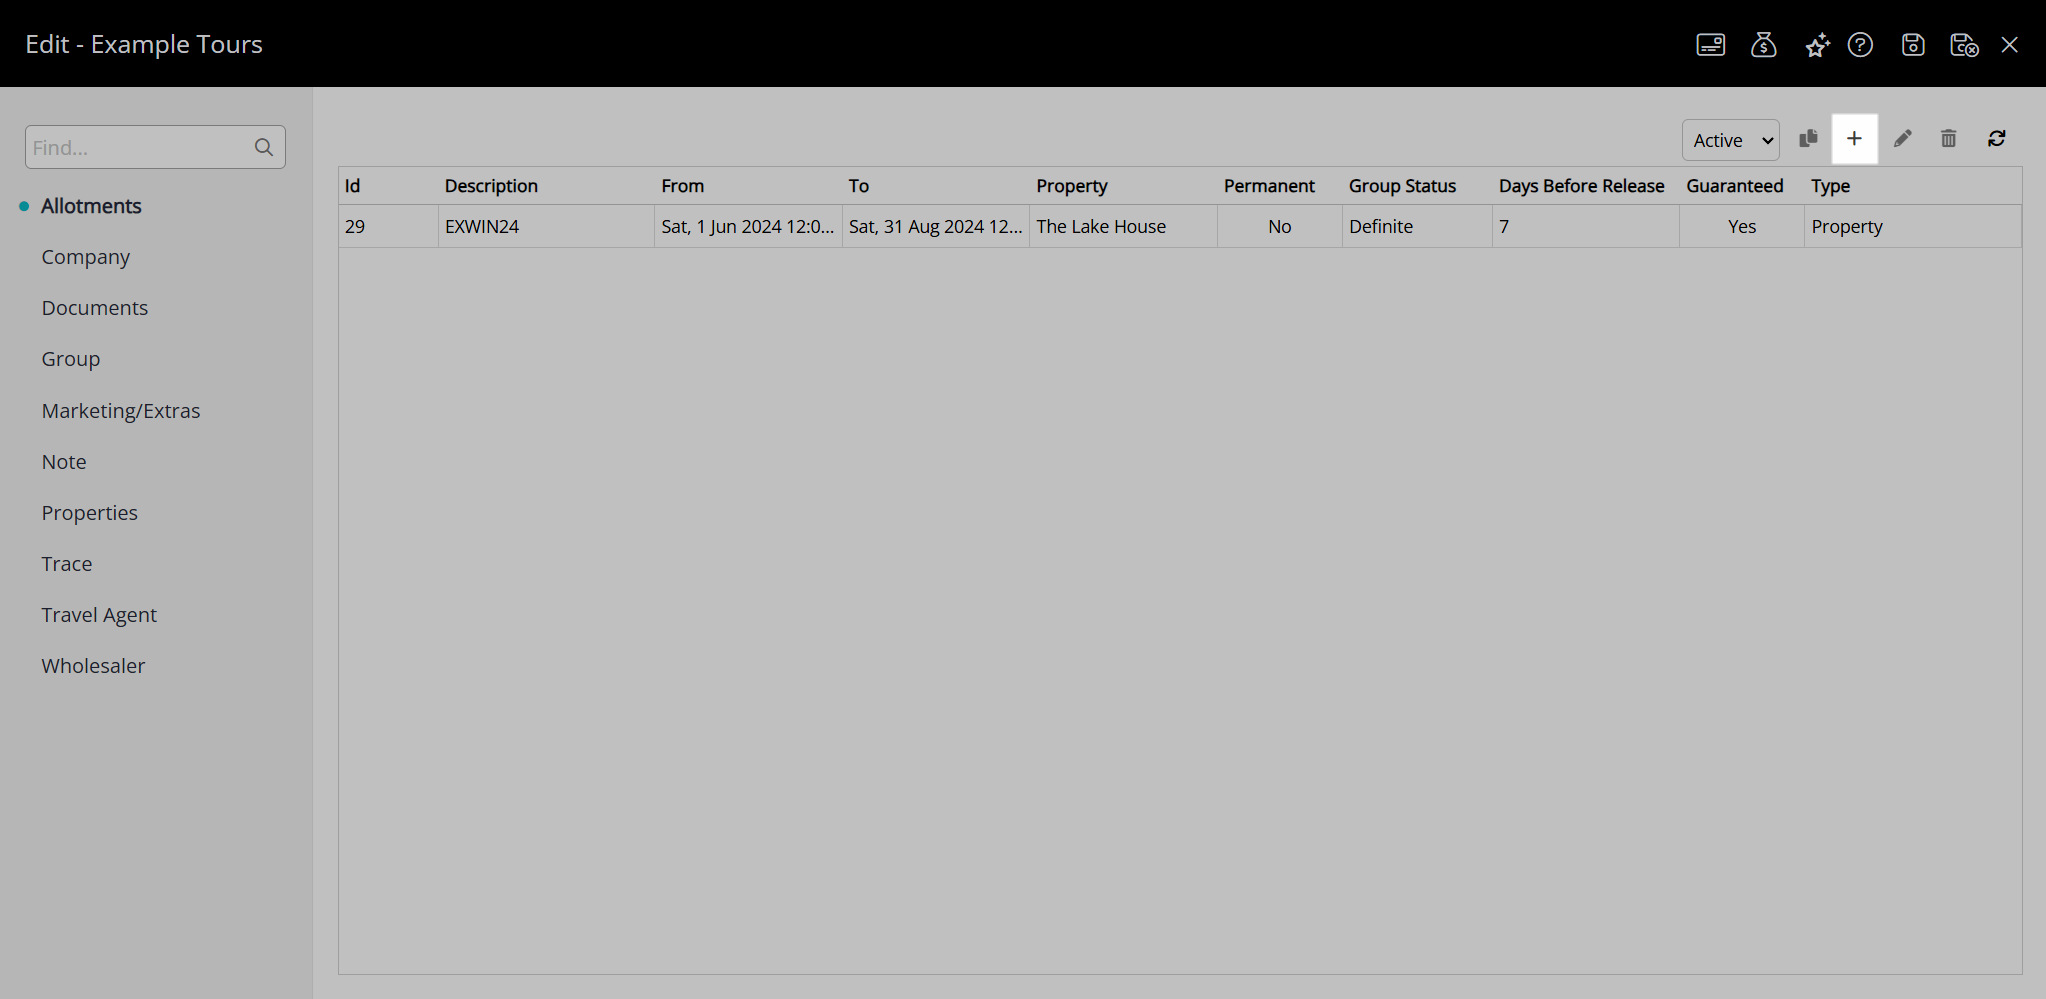
A Group is a named allotment that can be used for a company, travel agent, or party of guests travelling together on a group reservation.
The allotment of inventory can be set at a property, category, or area level with access to set rates and a unique code to enter and book on the RMS Internet Booking Engine.
Property allotments reserve inventory for the named group at the nominated property without limitations on the category or area booked. Category allotments limit the named group to a set number of inventory within the specified categories only, and an area allotment reserves specific areas that are only to be used by the named group.
Groups can be used to create and manage inventory allotments for guests travelling together as part of the same event or tour group. They can be guaranteed or non-guaranteed with access to specific rates. A guaranteed allotment will preserve the entered inventory for consumption by the named group until the prescribed release back period opens up any unused allotments to unrestricted use.
Groups include multiple features to define the entities that can consume the reserved inventory and automate specific reservation details for the named group.
Master Reservations
A Master Reservation is a group of reservations for guests travelling together, linked by a group name and reservation number.
The group cover page—shown as (Master) in the navigator pane of the reservation— includes the guest details for the group leader, a summary of reservation details for all reservations in the group, and a group account. Each reservation within the group includes its guest details, reservation details, and reservation account, which contributes to the summary shown on the cover page.
A wide range of group reservation options exist on a Master Reservation, including account features that determine the routing of charges, an area list, a guest list, and group management tools.
A Master Reservation can be created on the reservation screen for a new or existing reservation or by combining existing reservations, on the Booking Chart, using Quick Quote, or with the Master Reservation utility when set up as Book by Category.
Create a Group Reservation
A Master Reservation can be created in the following ways in RMS:
Add New Reservation
- Select the
 'Add Reservation' icon in the Toolbar Menu or navigate to Reservations > Make Reservation in the side menu of RMS.
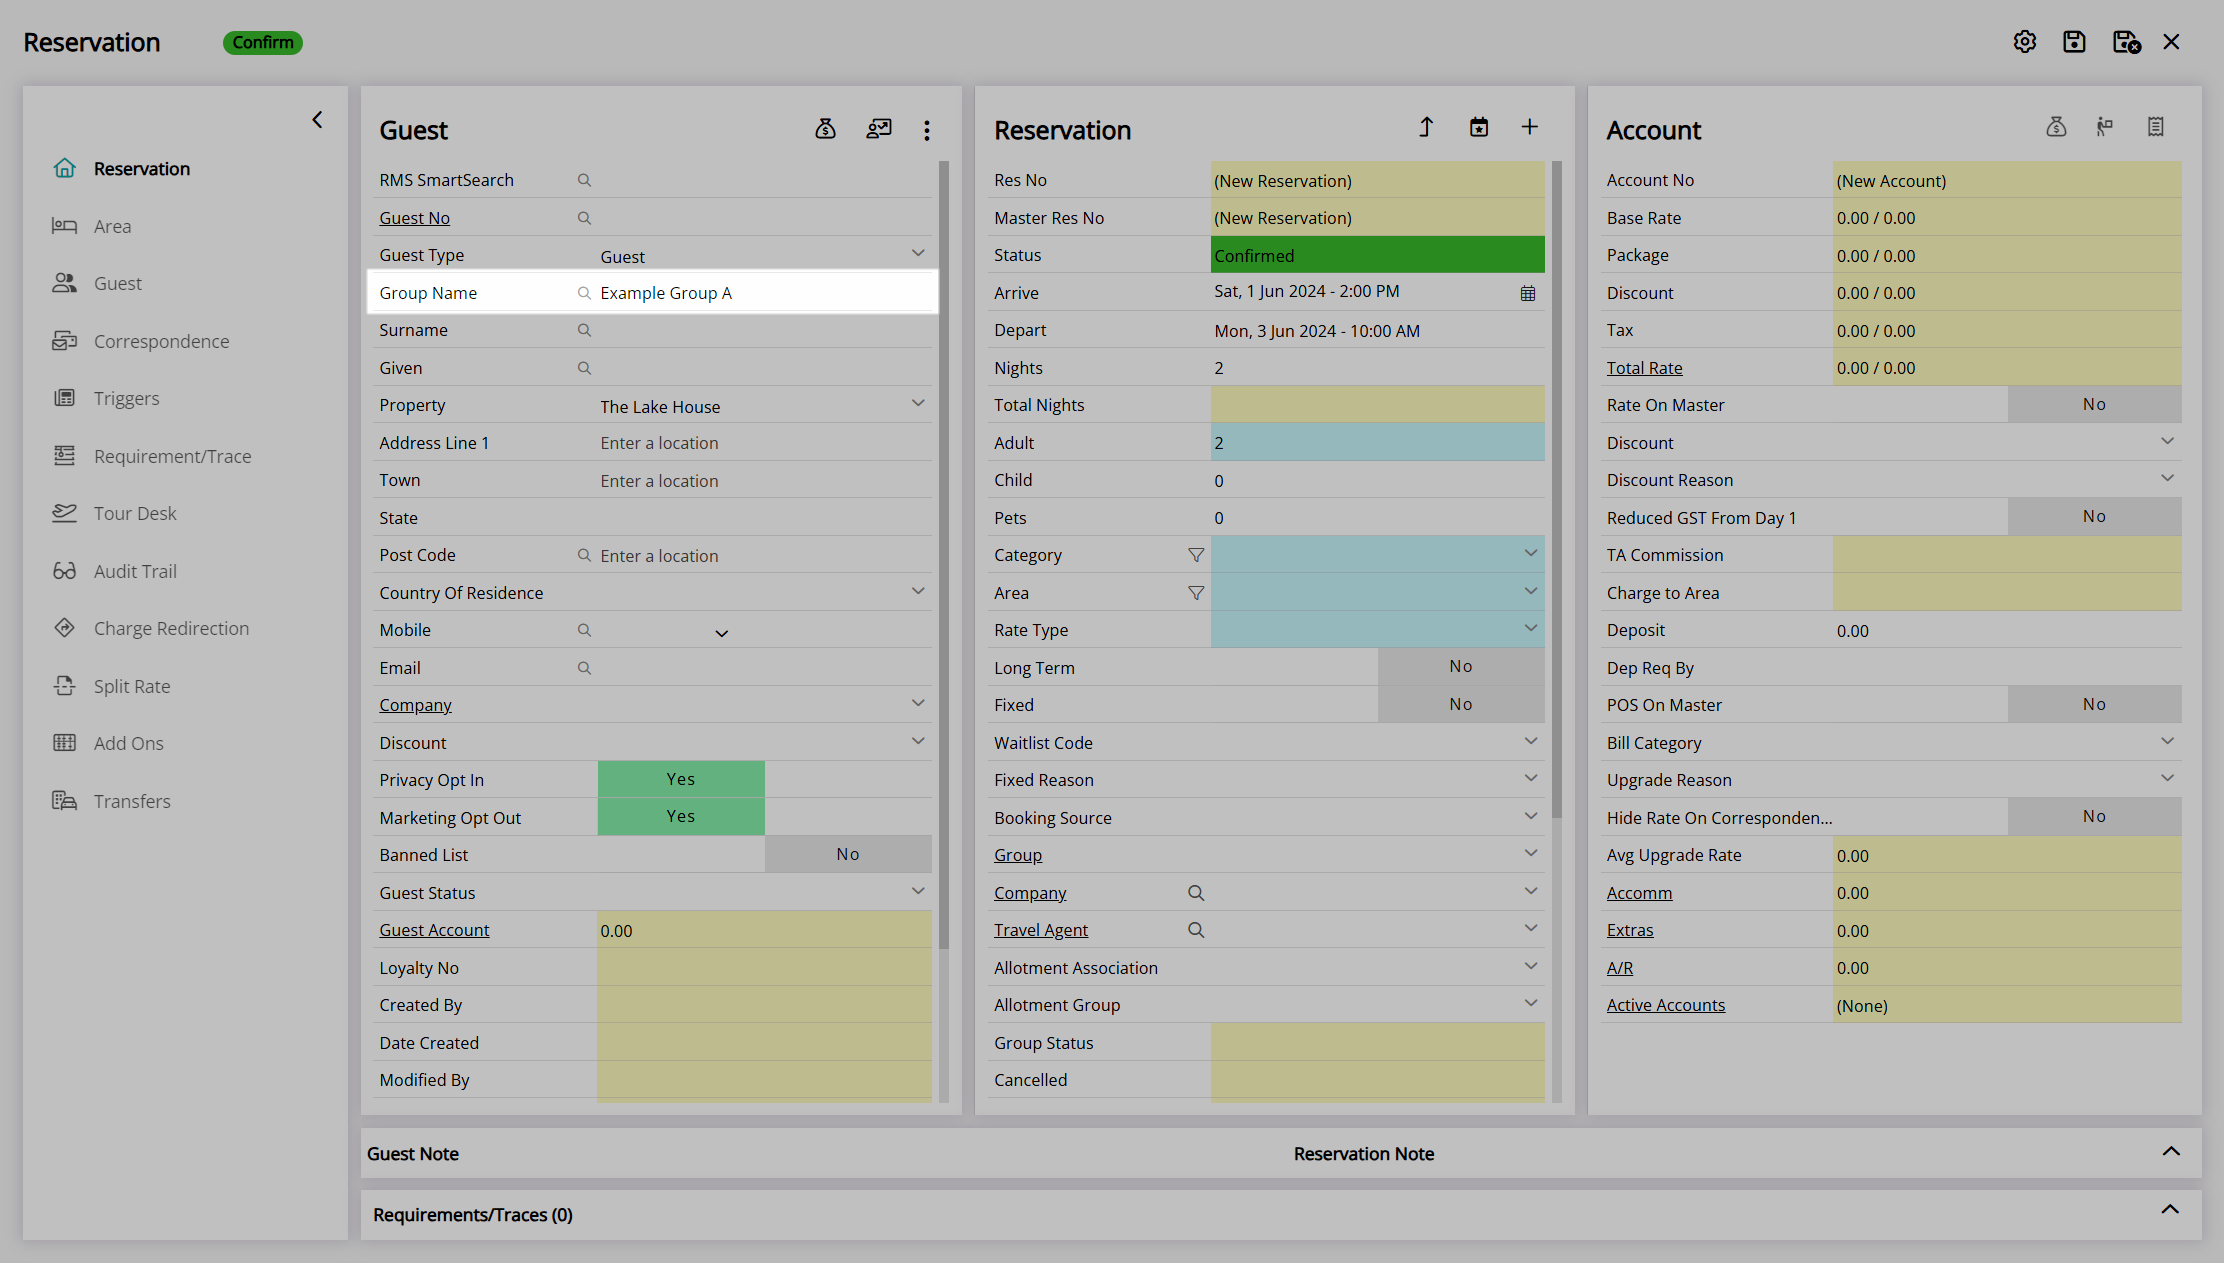
 - Enter a Group Name.
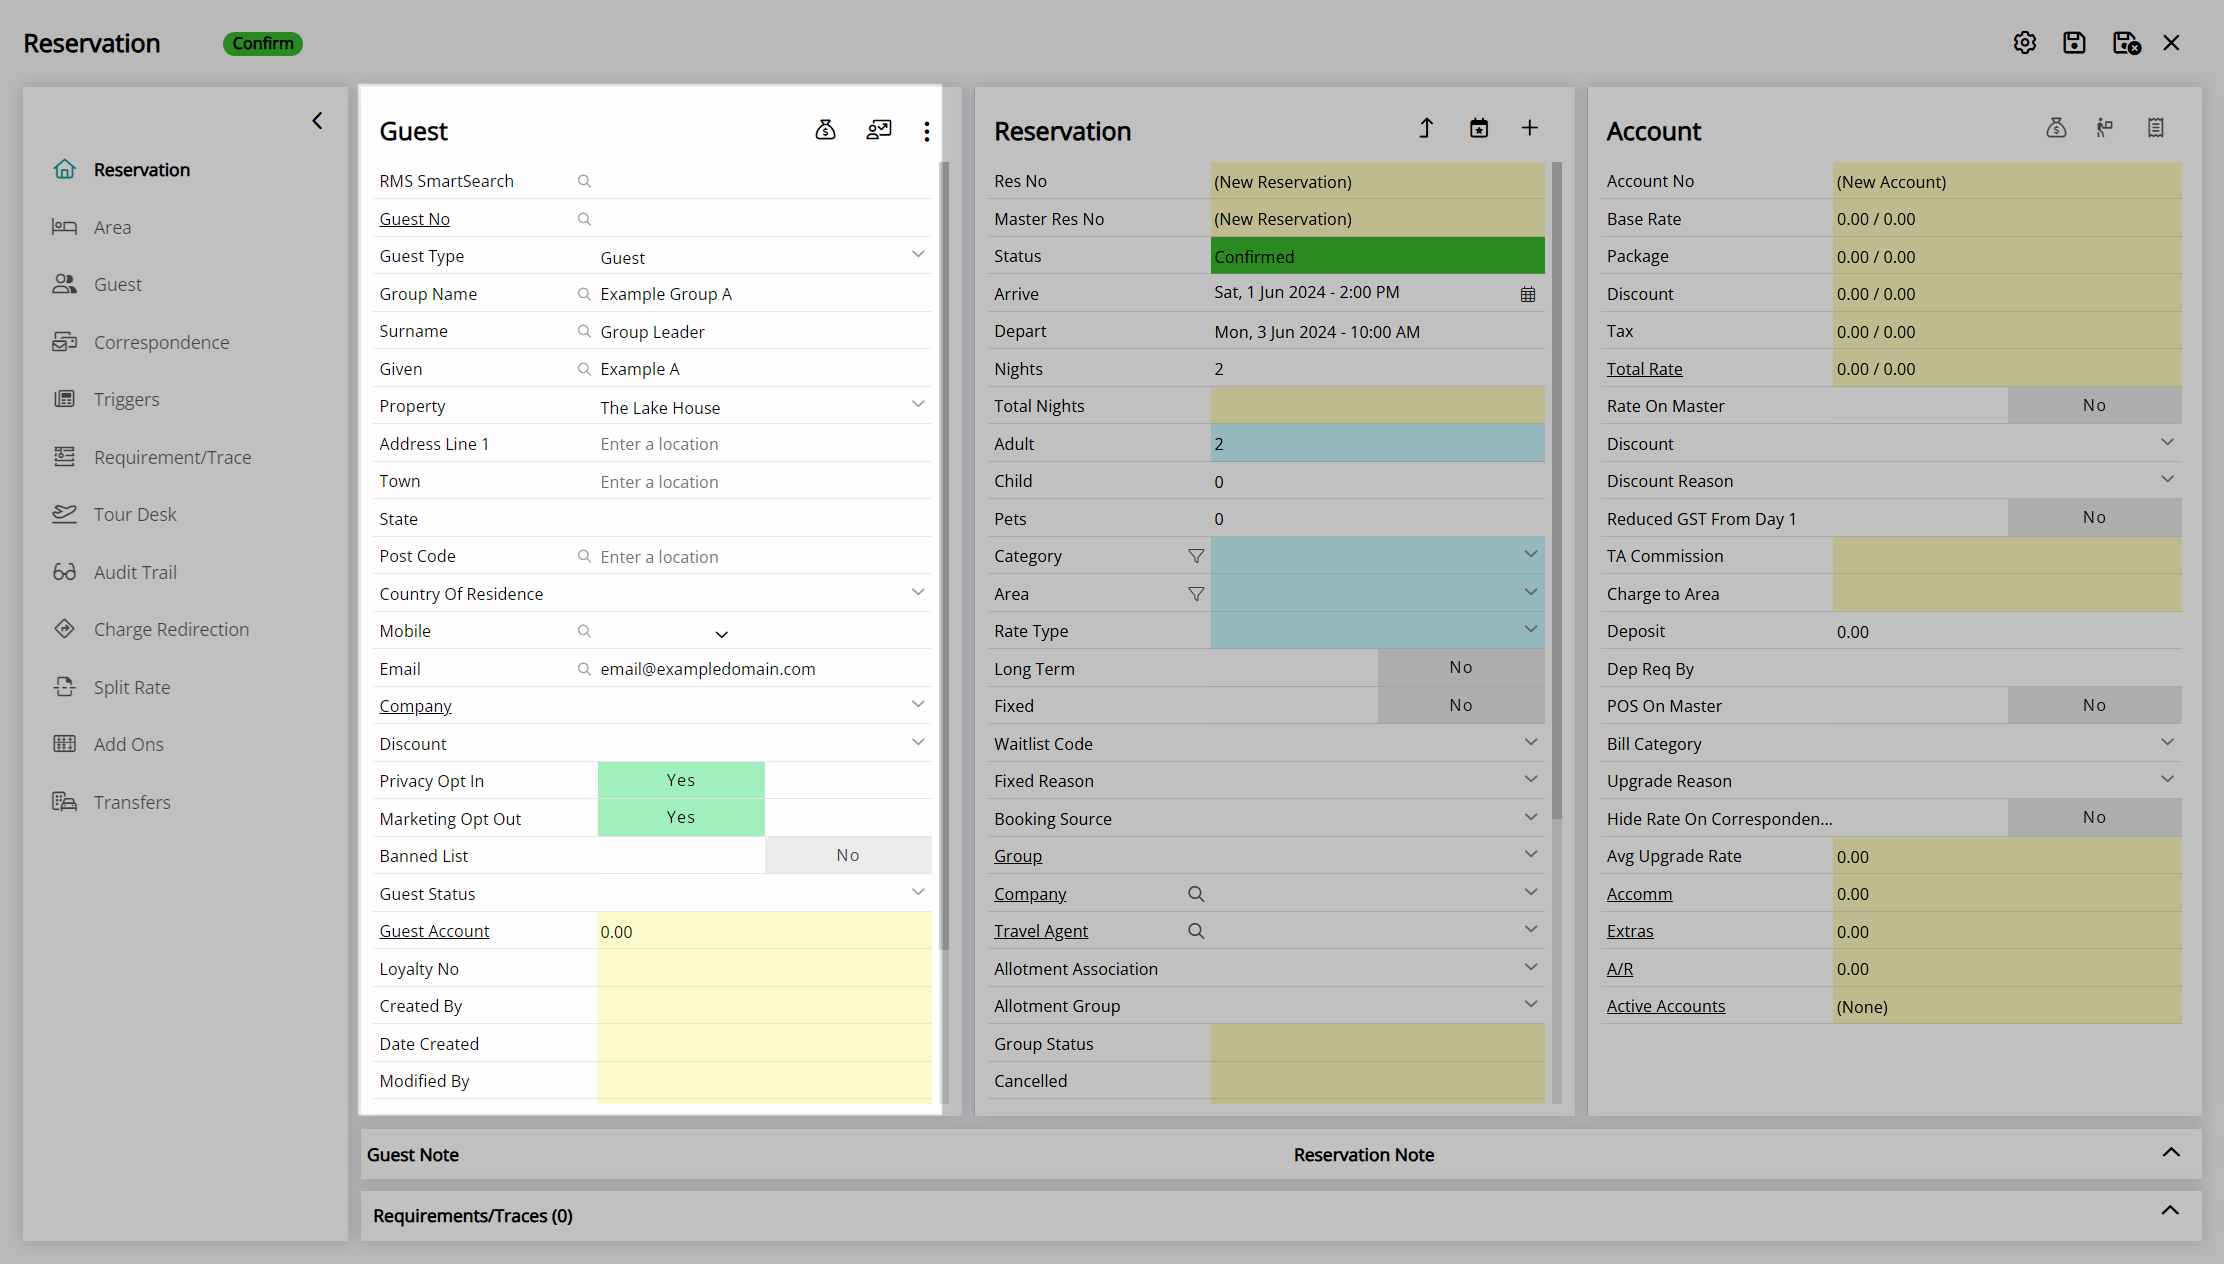
- Enter the Group Leader Guest Details.
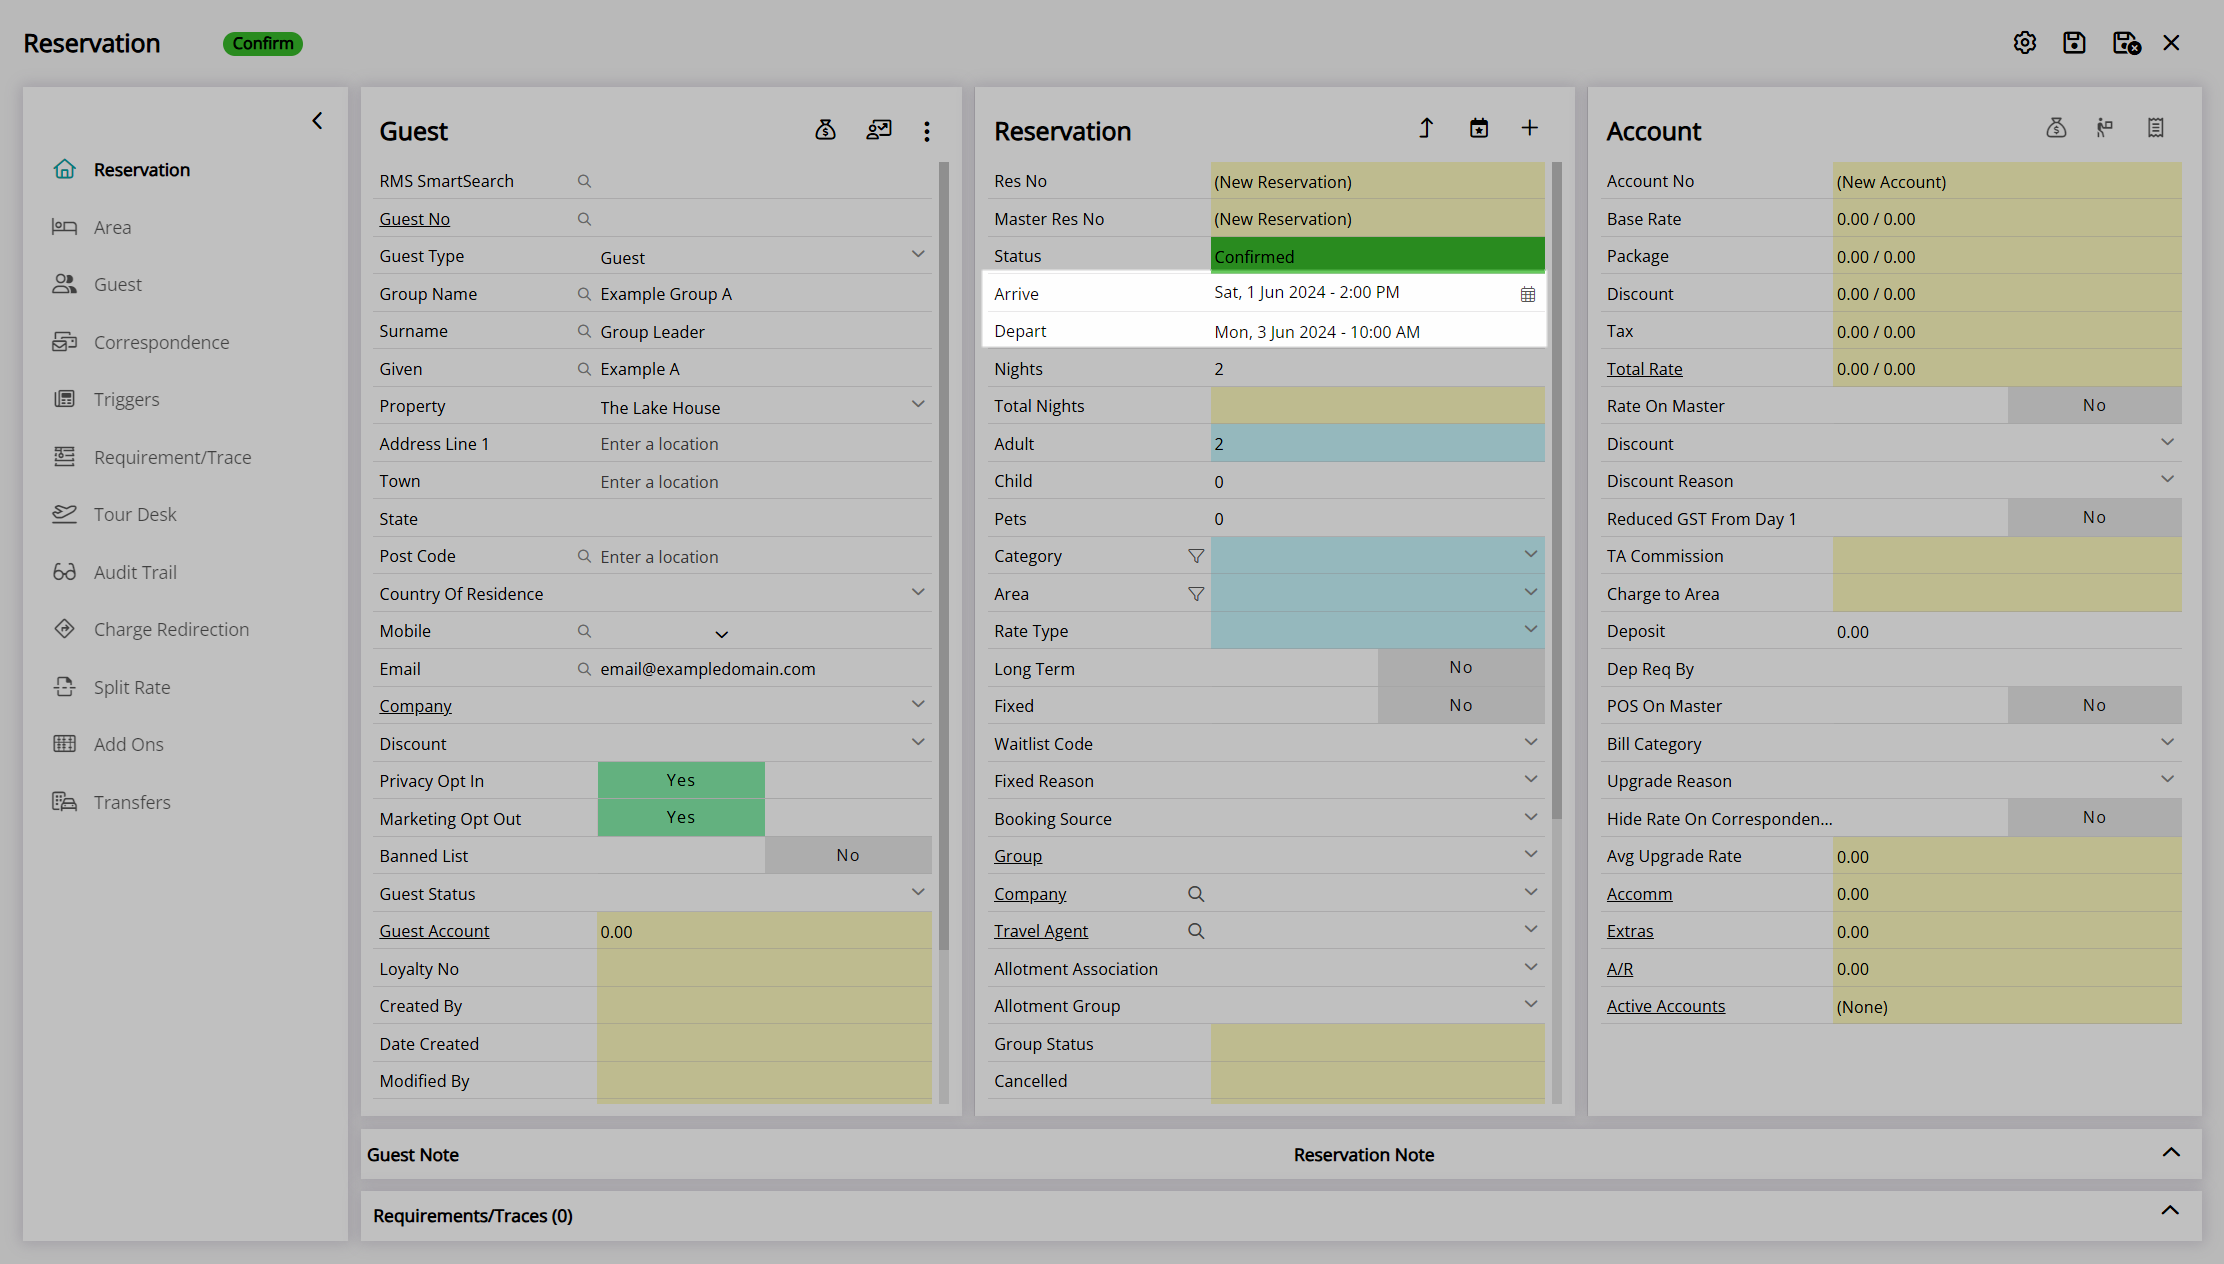
- Select an Arrive and Depart Date.
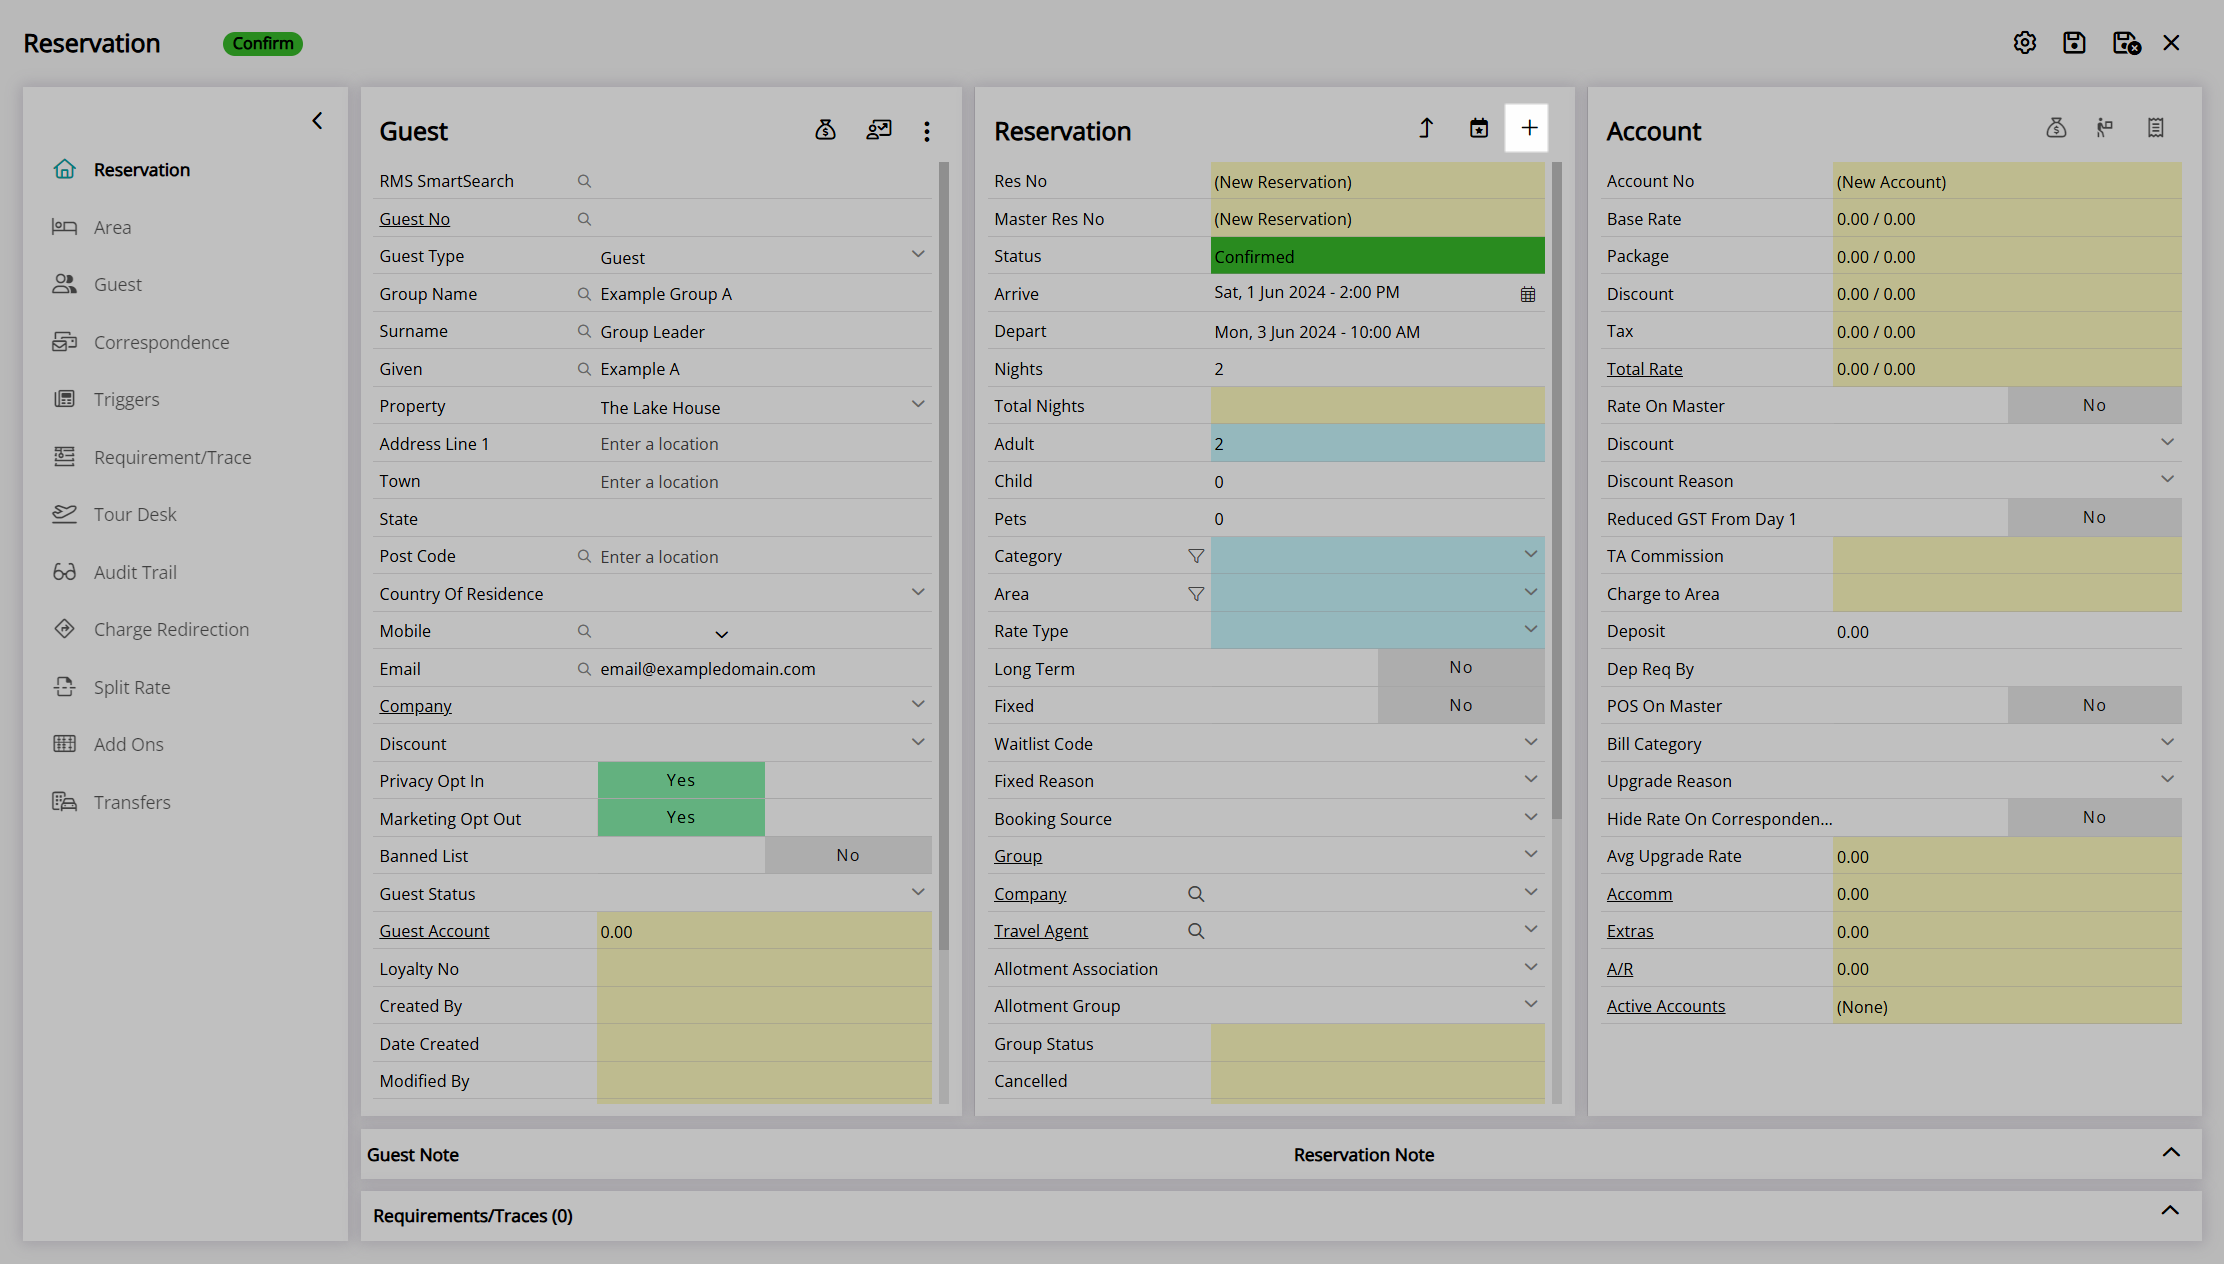
- Select the
 'Add Area' icon.
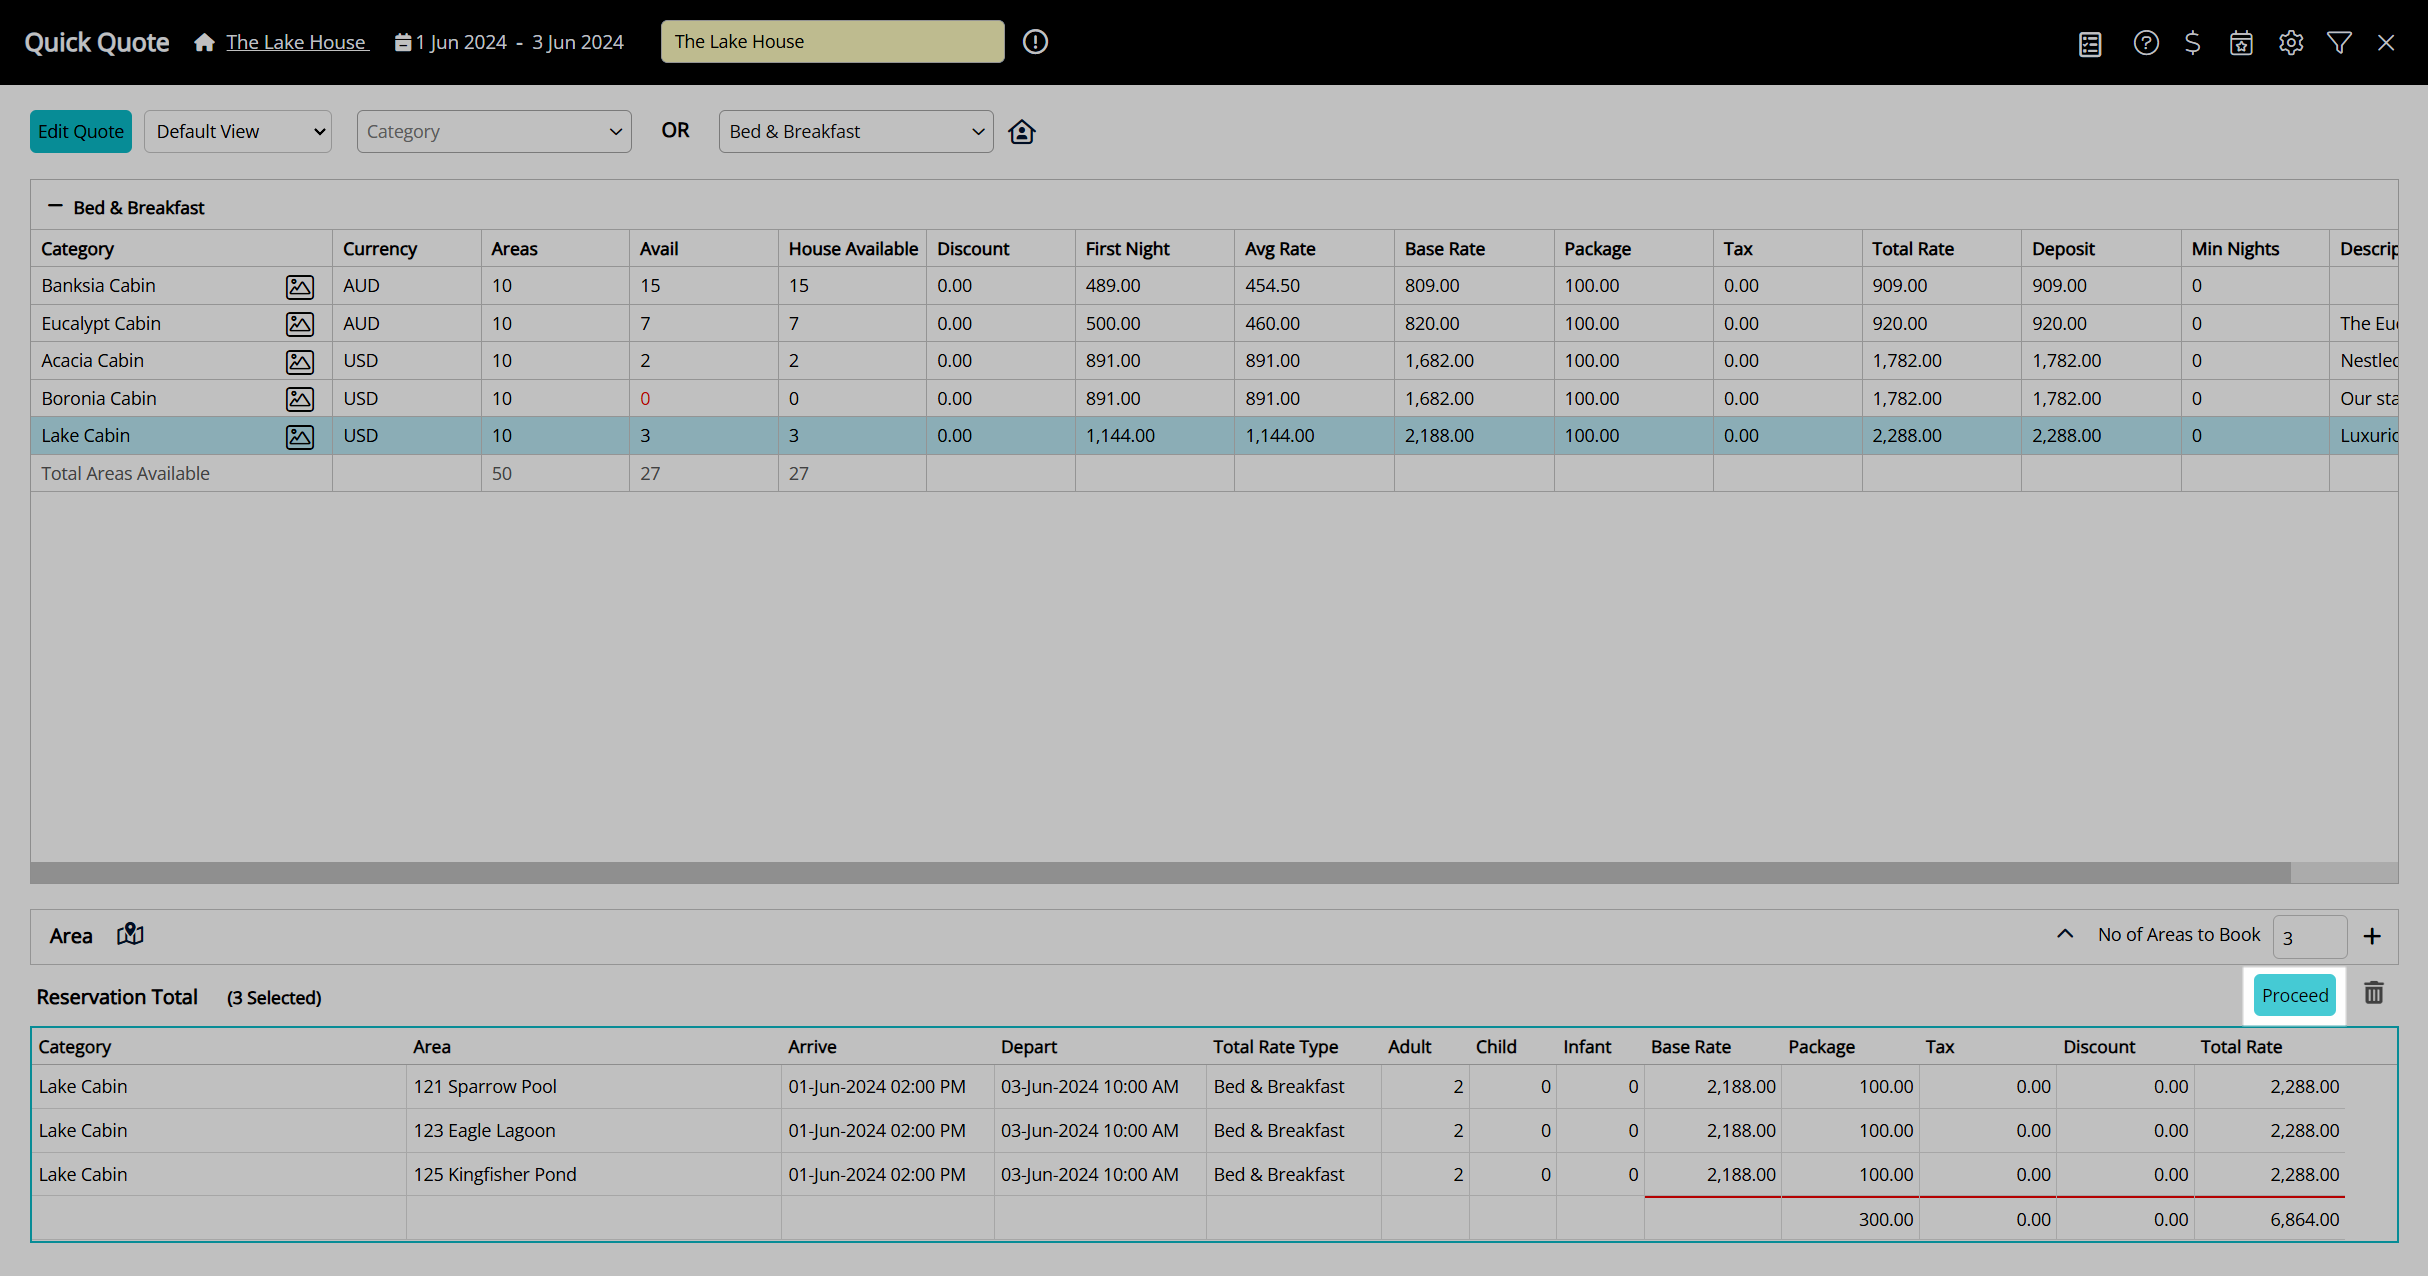
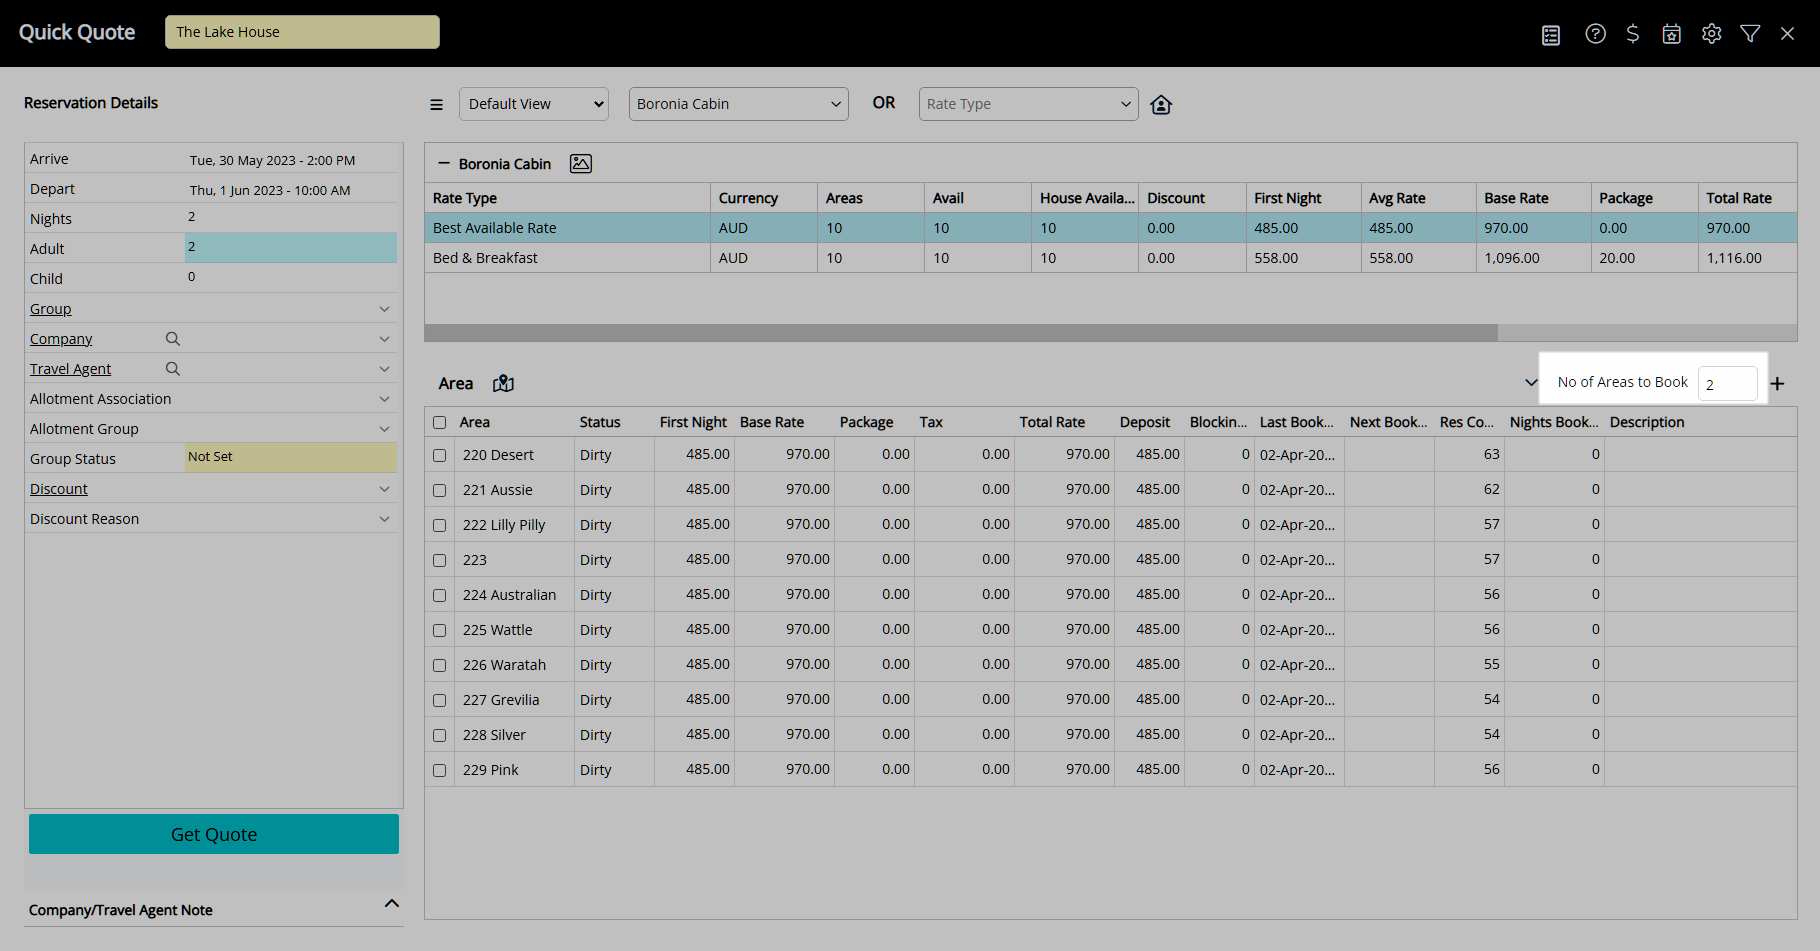
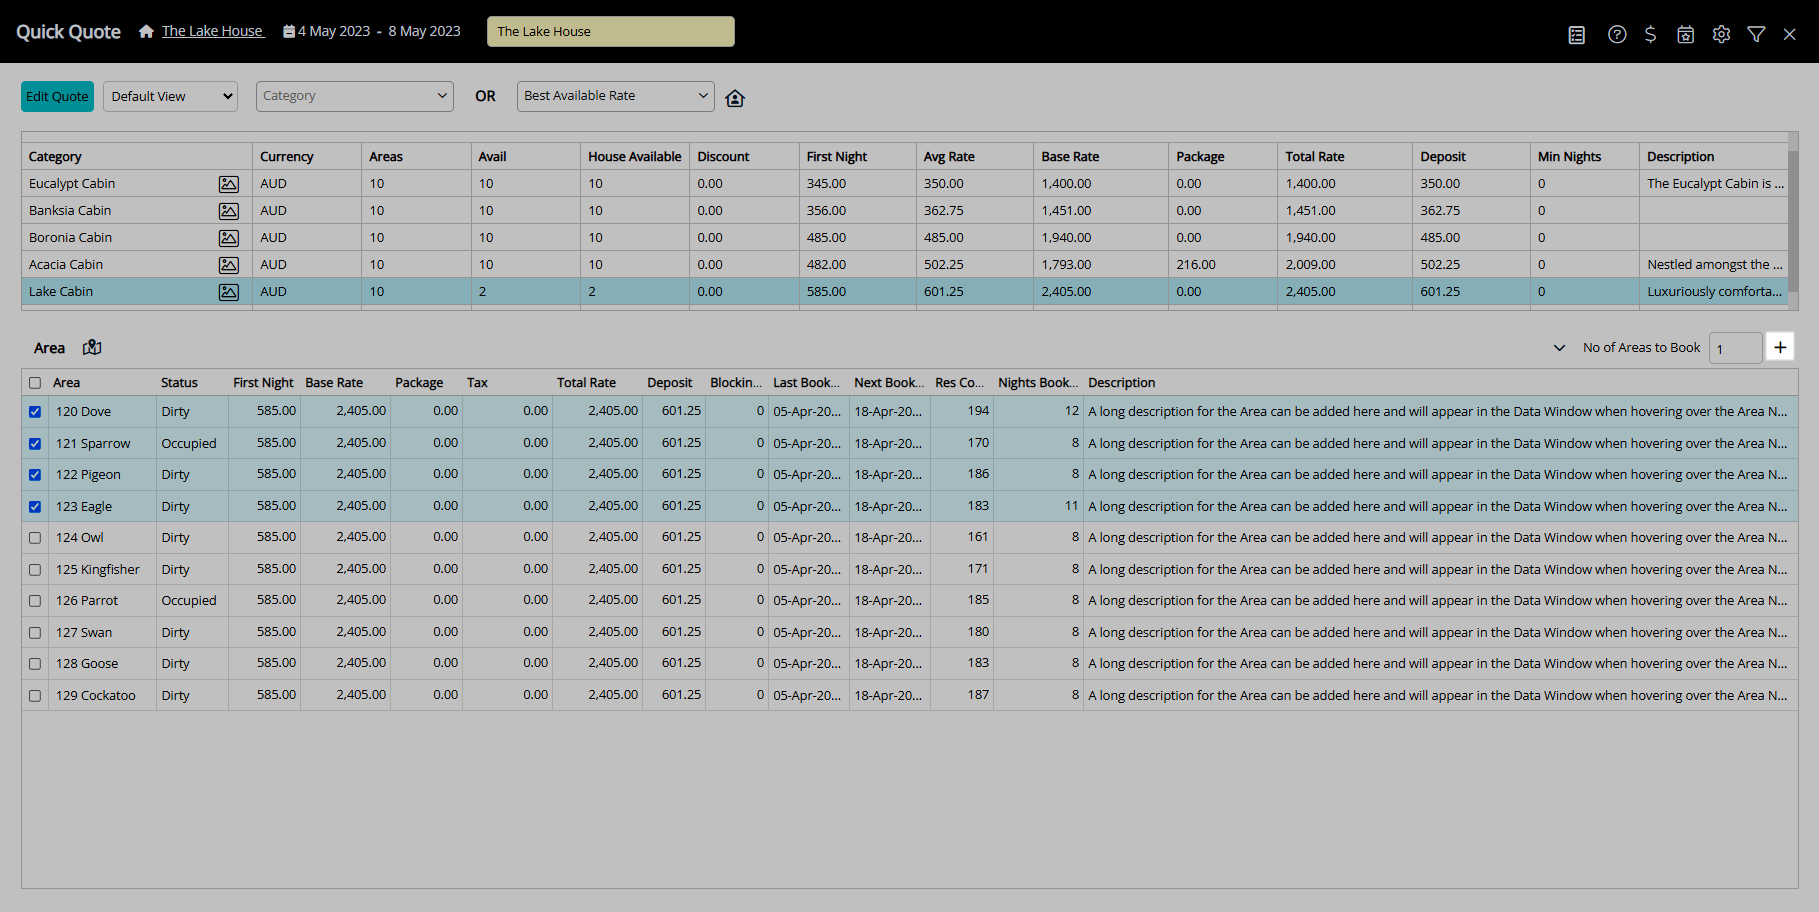
 - Perform a Quick Quote Search.
- Select a Category or Rate Type.
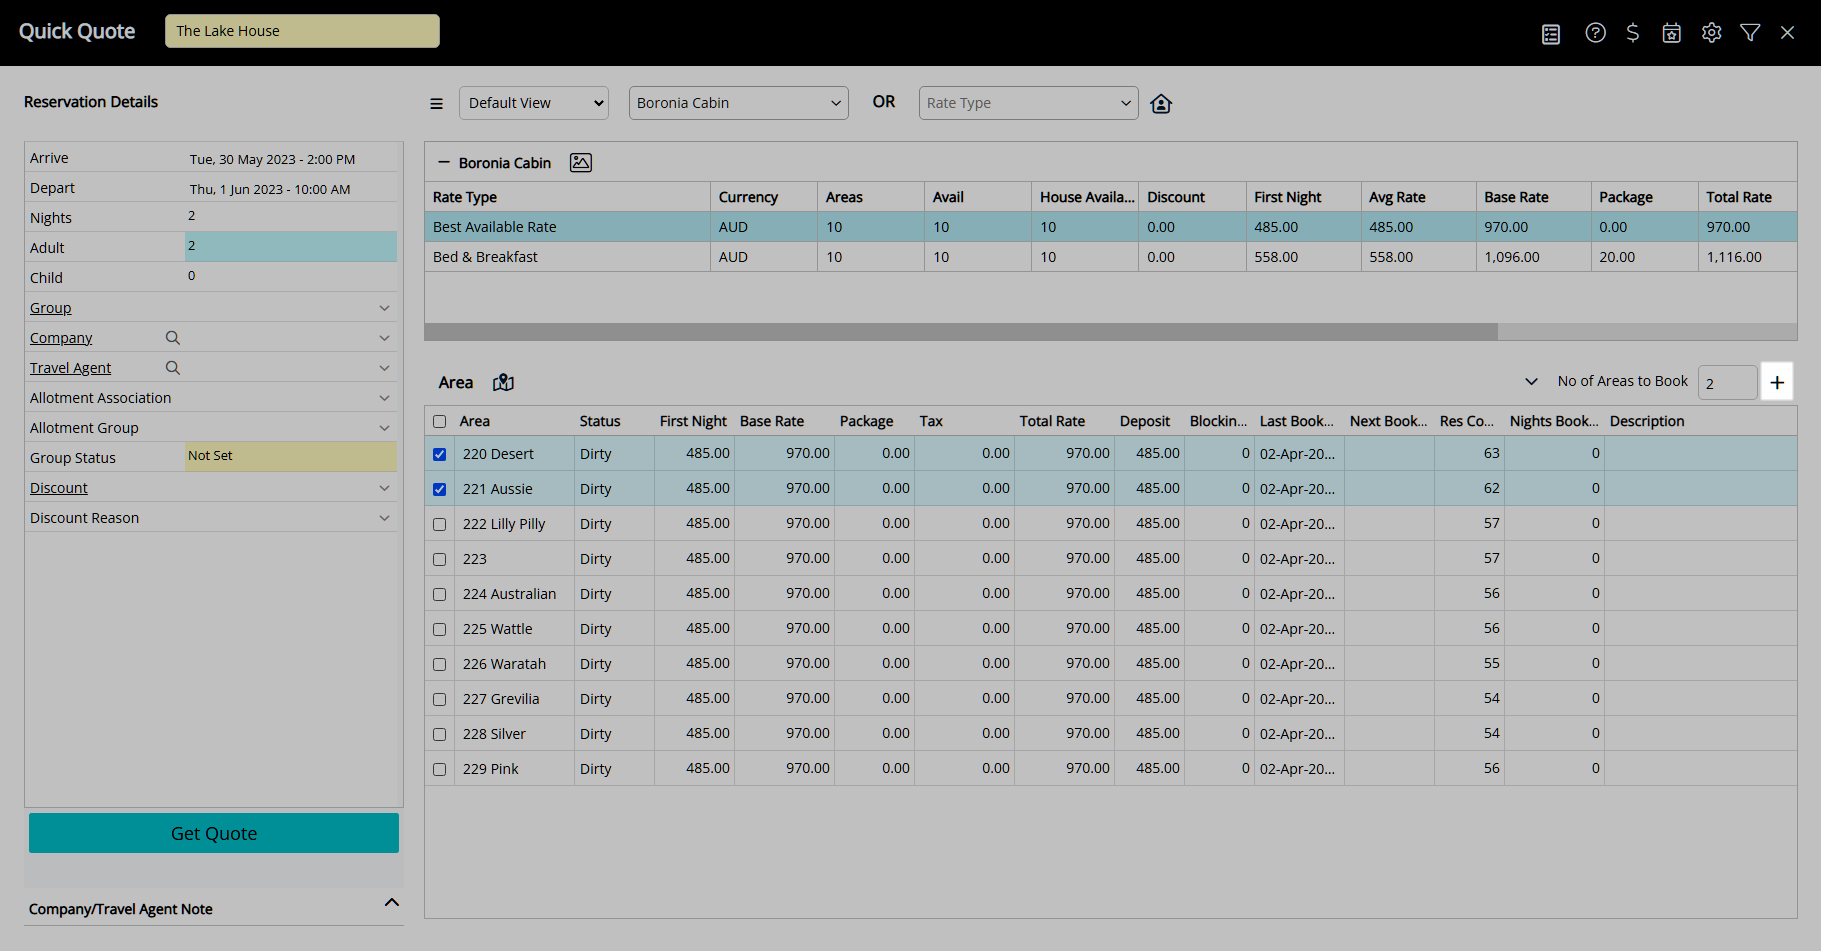
- Select the checkbox for an Area or enter the Number of Areas to Book.
- Select the
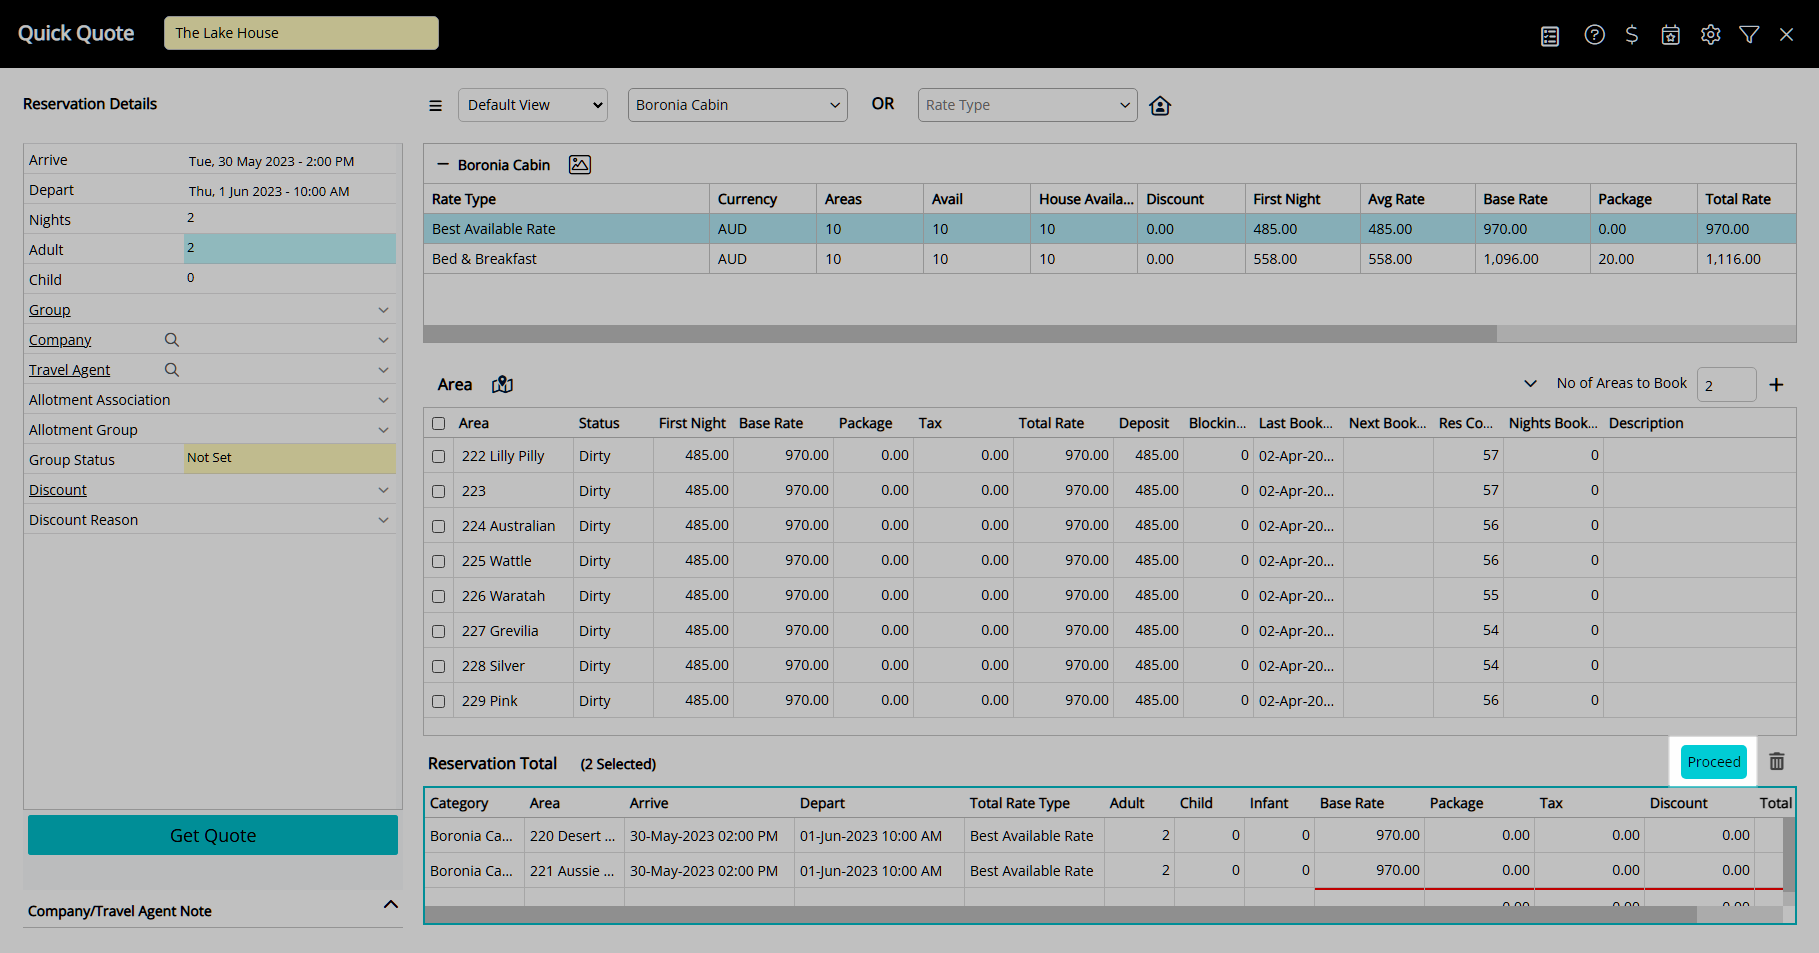
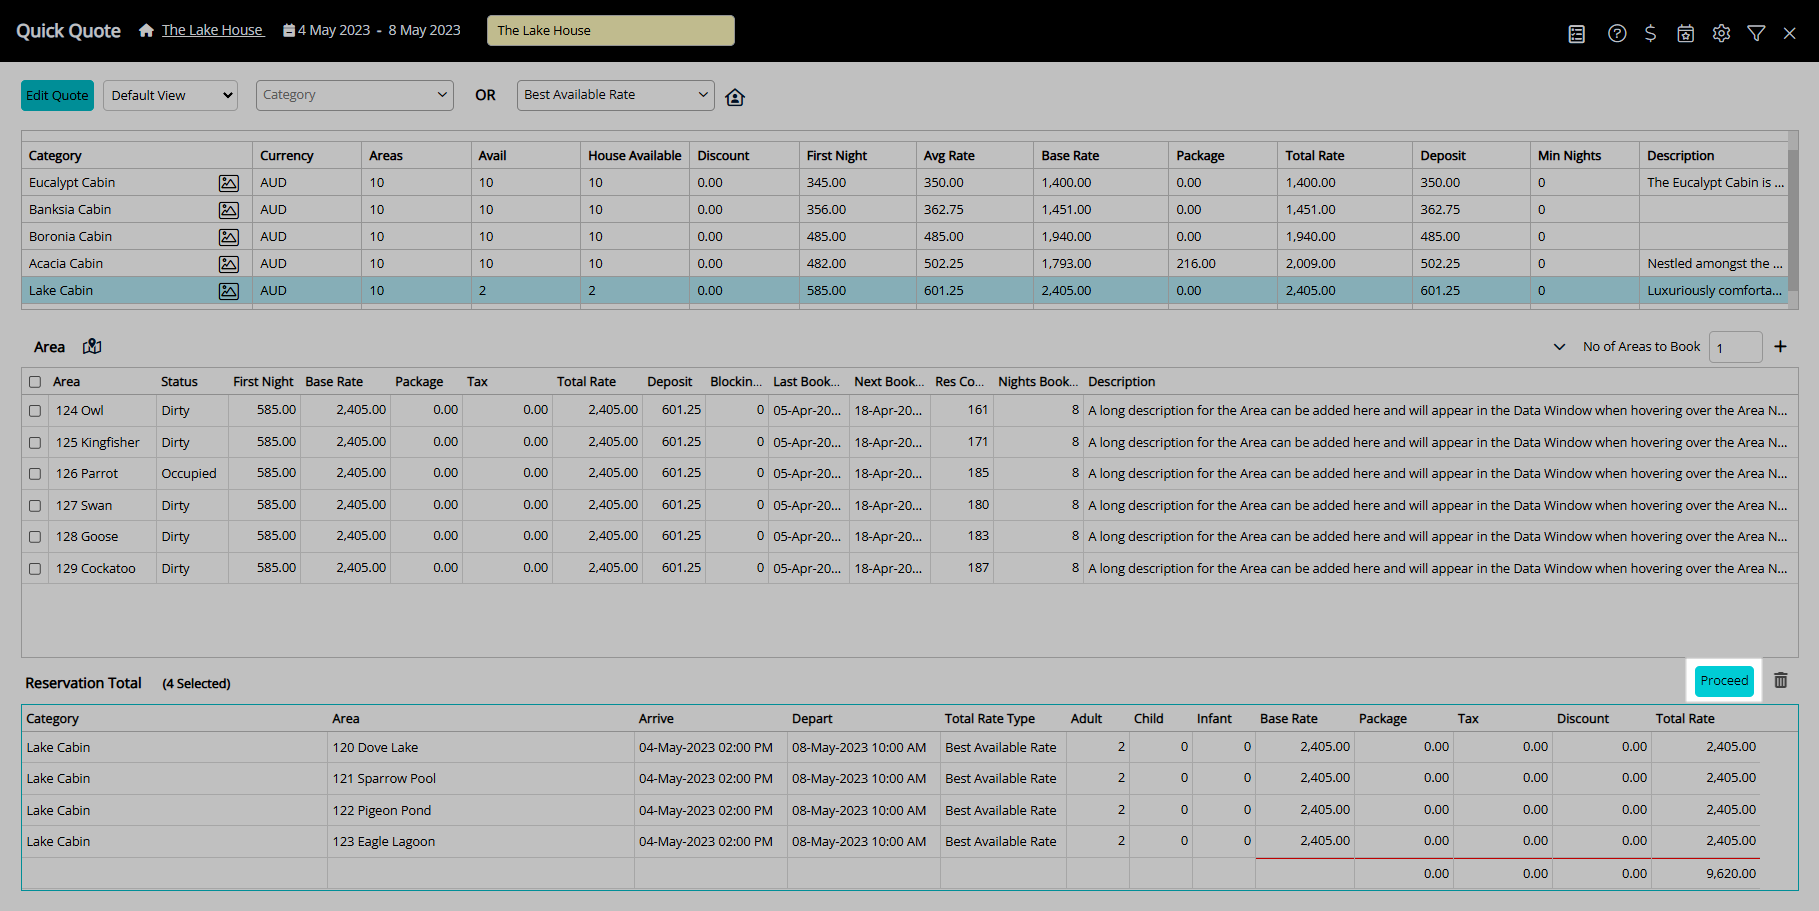
 'Add to Reservation' icon.
 - Select 'Proceed'.
- Save/Exit.
Select the ![]() 'Add Reservation' icon in the Toolbar Menu or navigate to Reservations > Make Reservation in the side menu of RMS.
'Add Reservation' icon in the Toolbar Menu or navigate to Reservations > Make Reservation in the side menu of RMS.

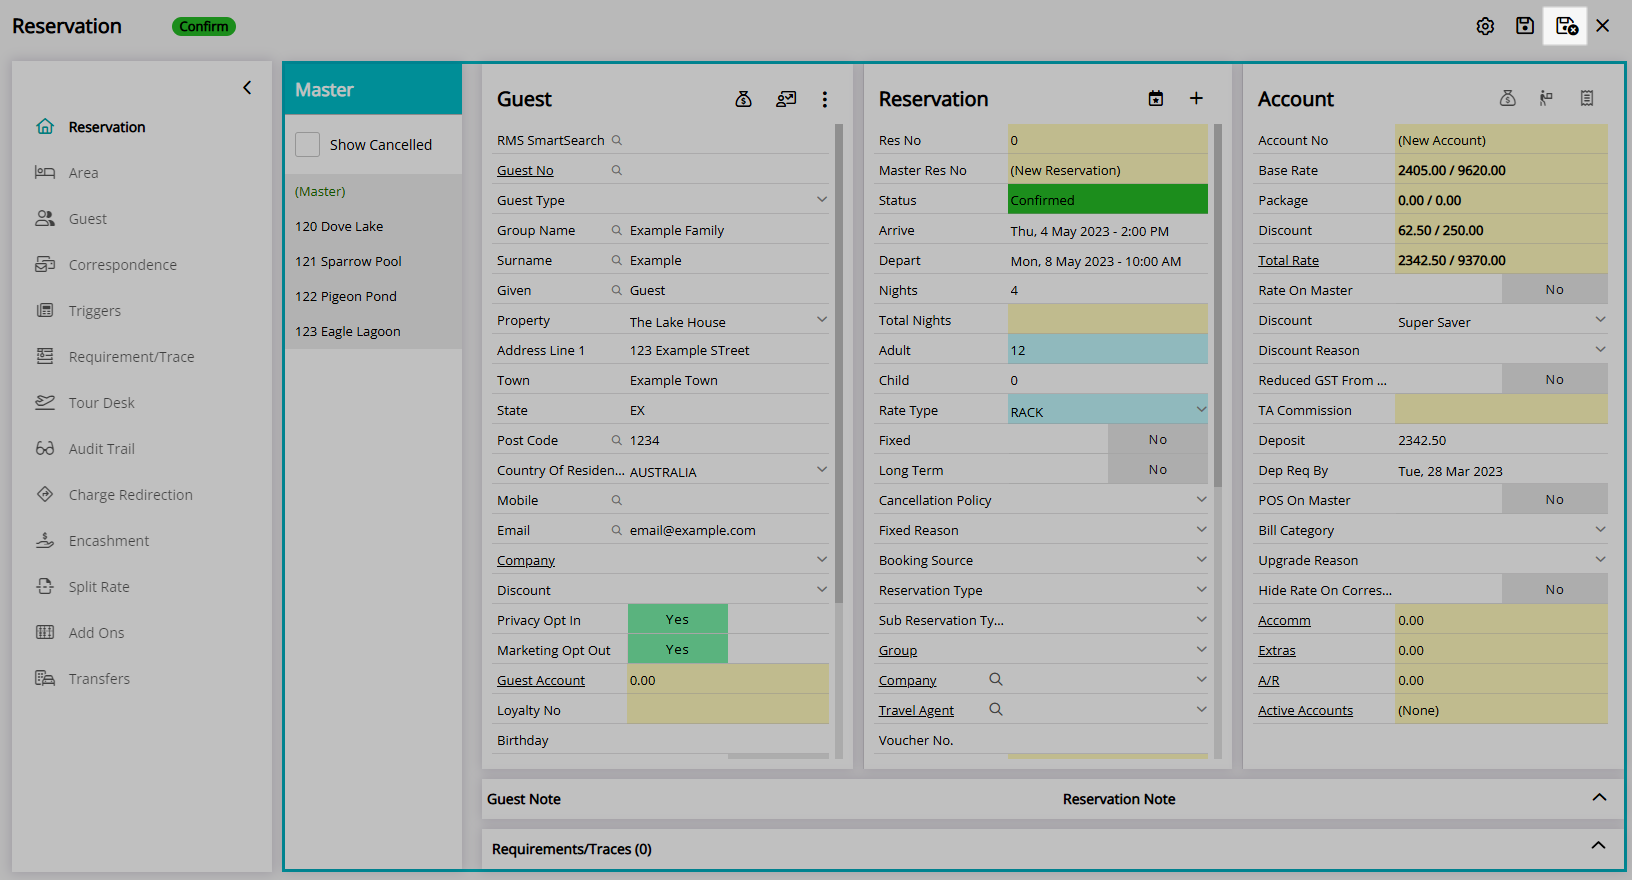
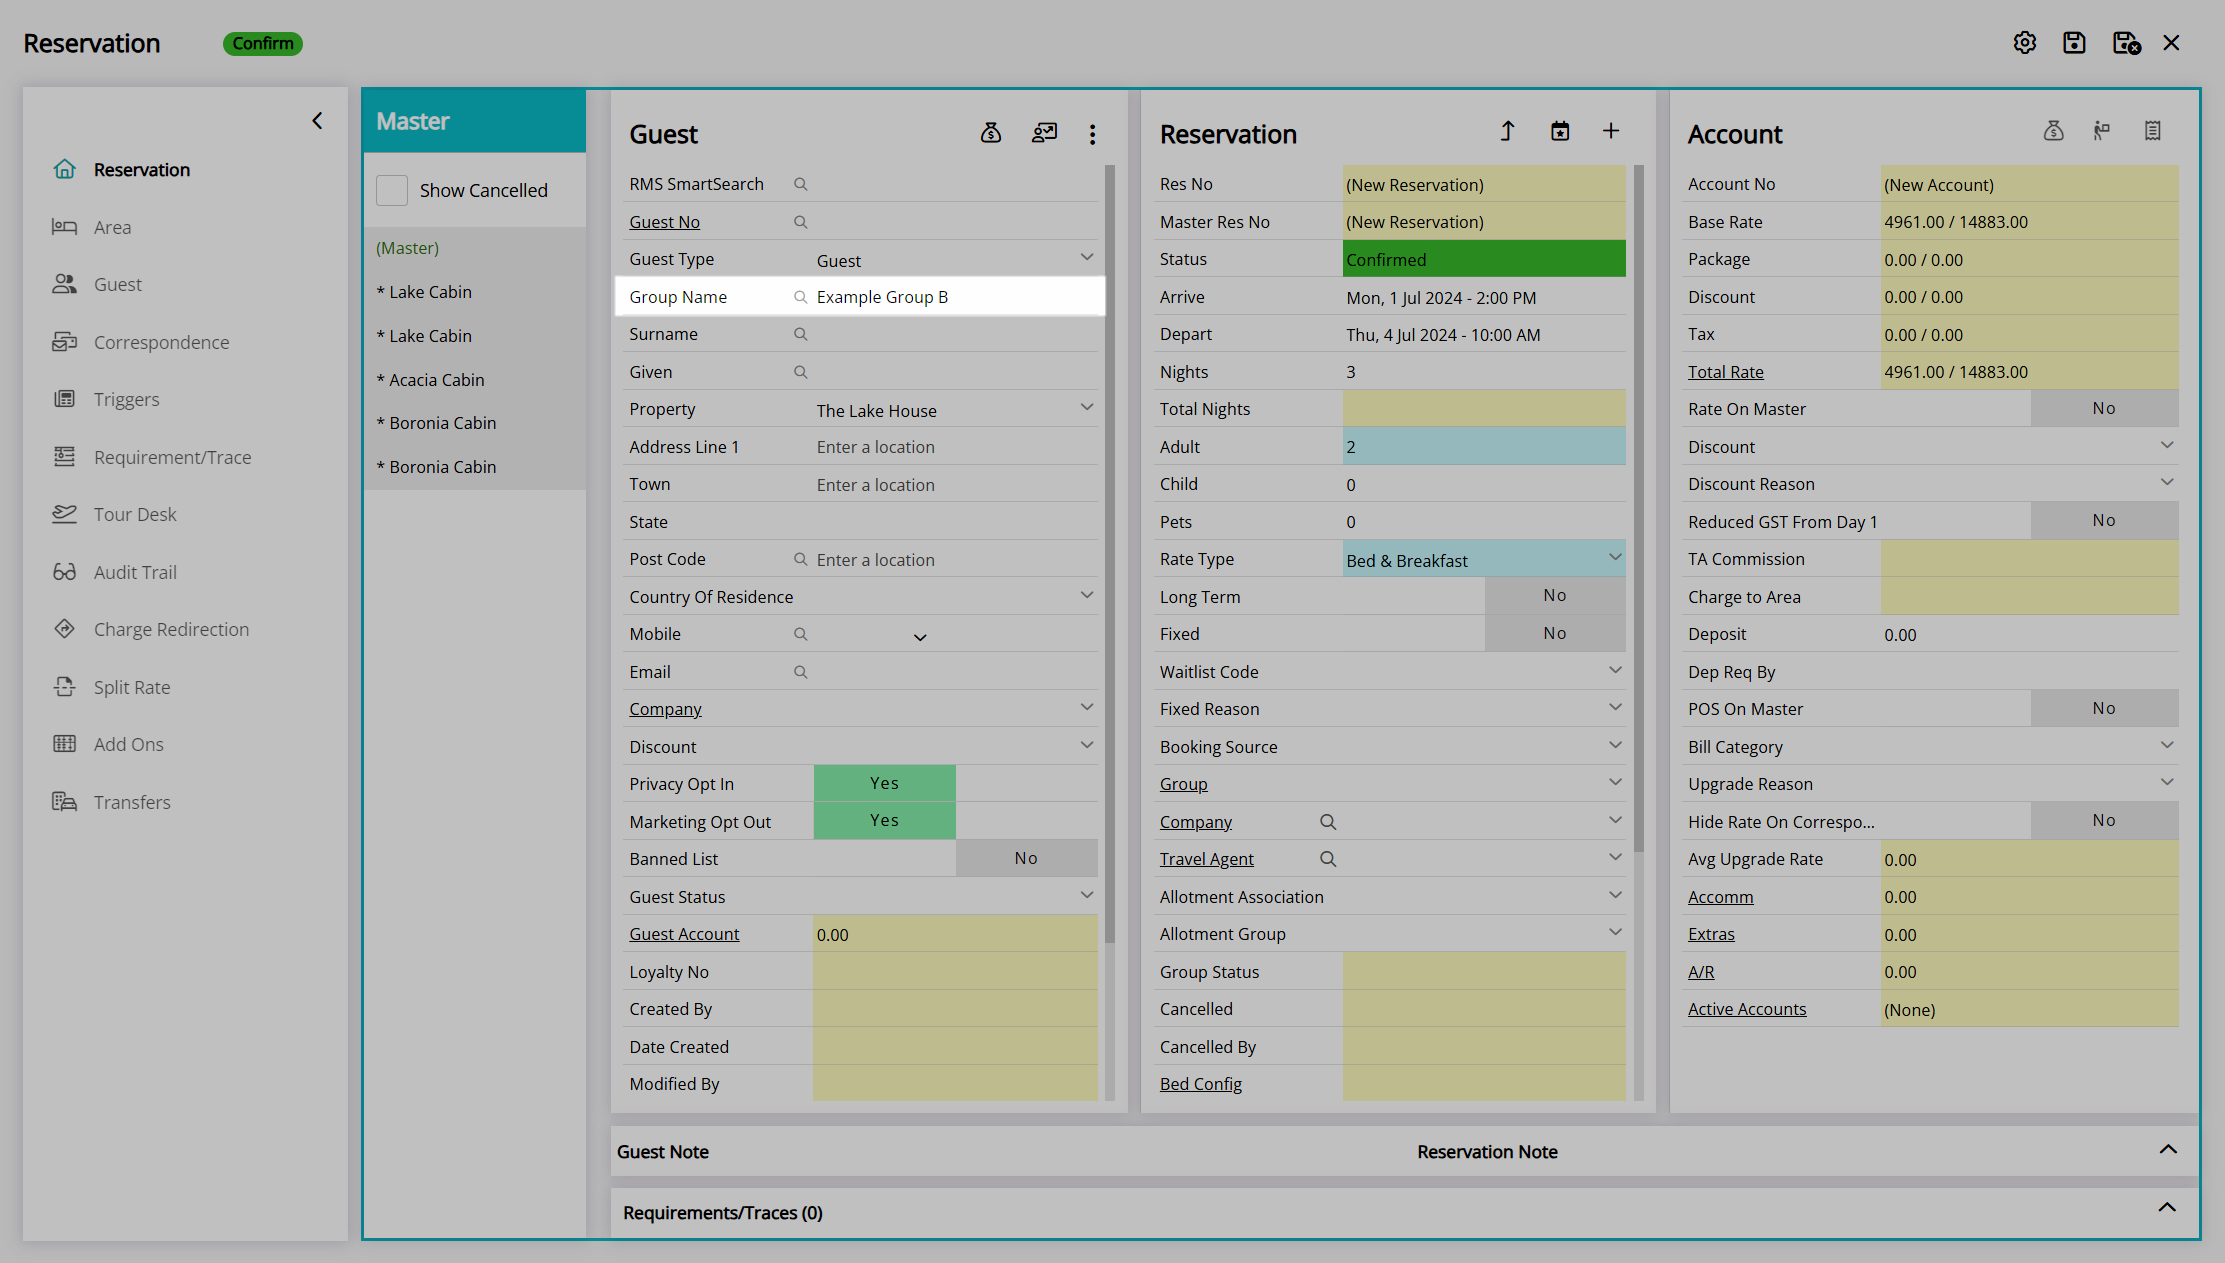
Enter a Group Name.
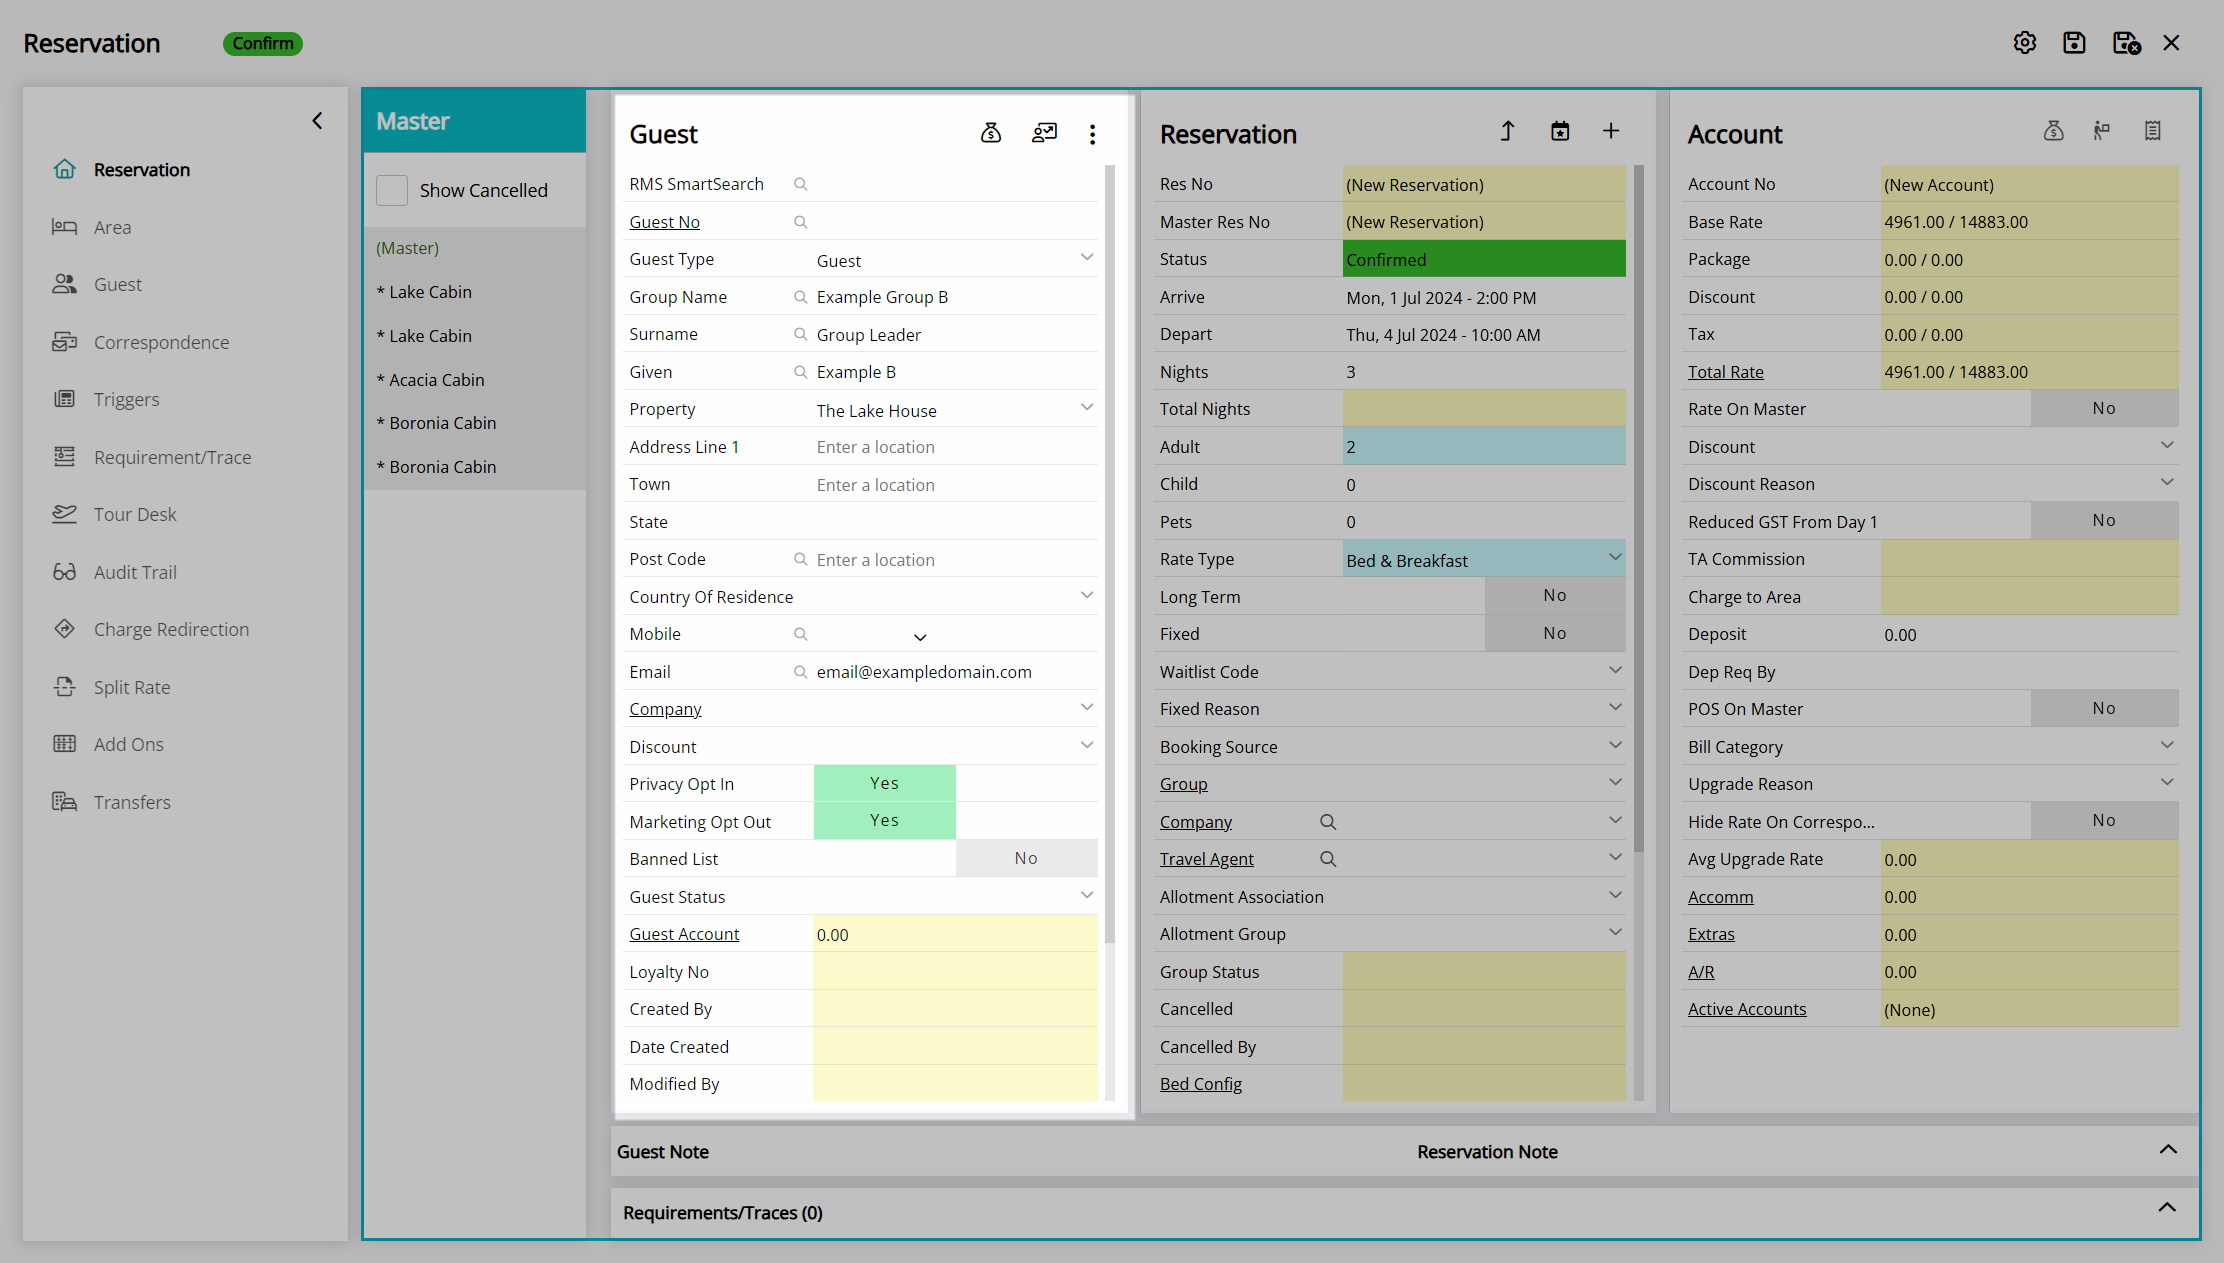
Enter the Group Leader Guest Details.
Select an Arrive and Depart Date.
Select the ![]() 'Add Area' icon.
'Add Area' icon.
Perform a Quick Quote Search.
Select a Category or Rate Type.
Select the checkbox for an Area or enter the Number of Areas to Book.
Select the ![]() 'Add to Reservation' icon.
'Add to Reservation' icon.
Select 'Proceed'.
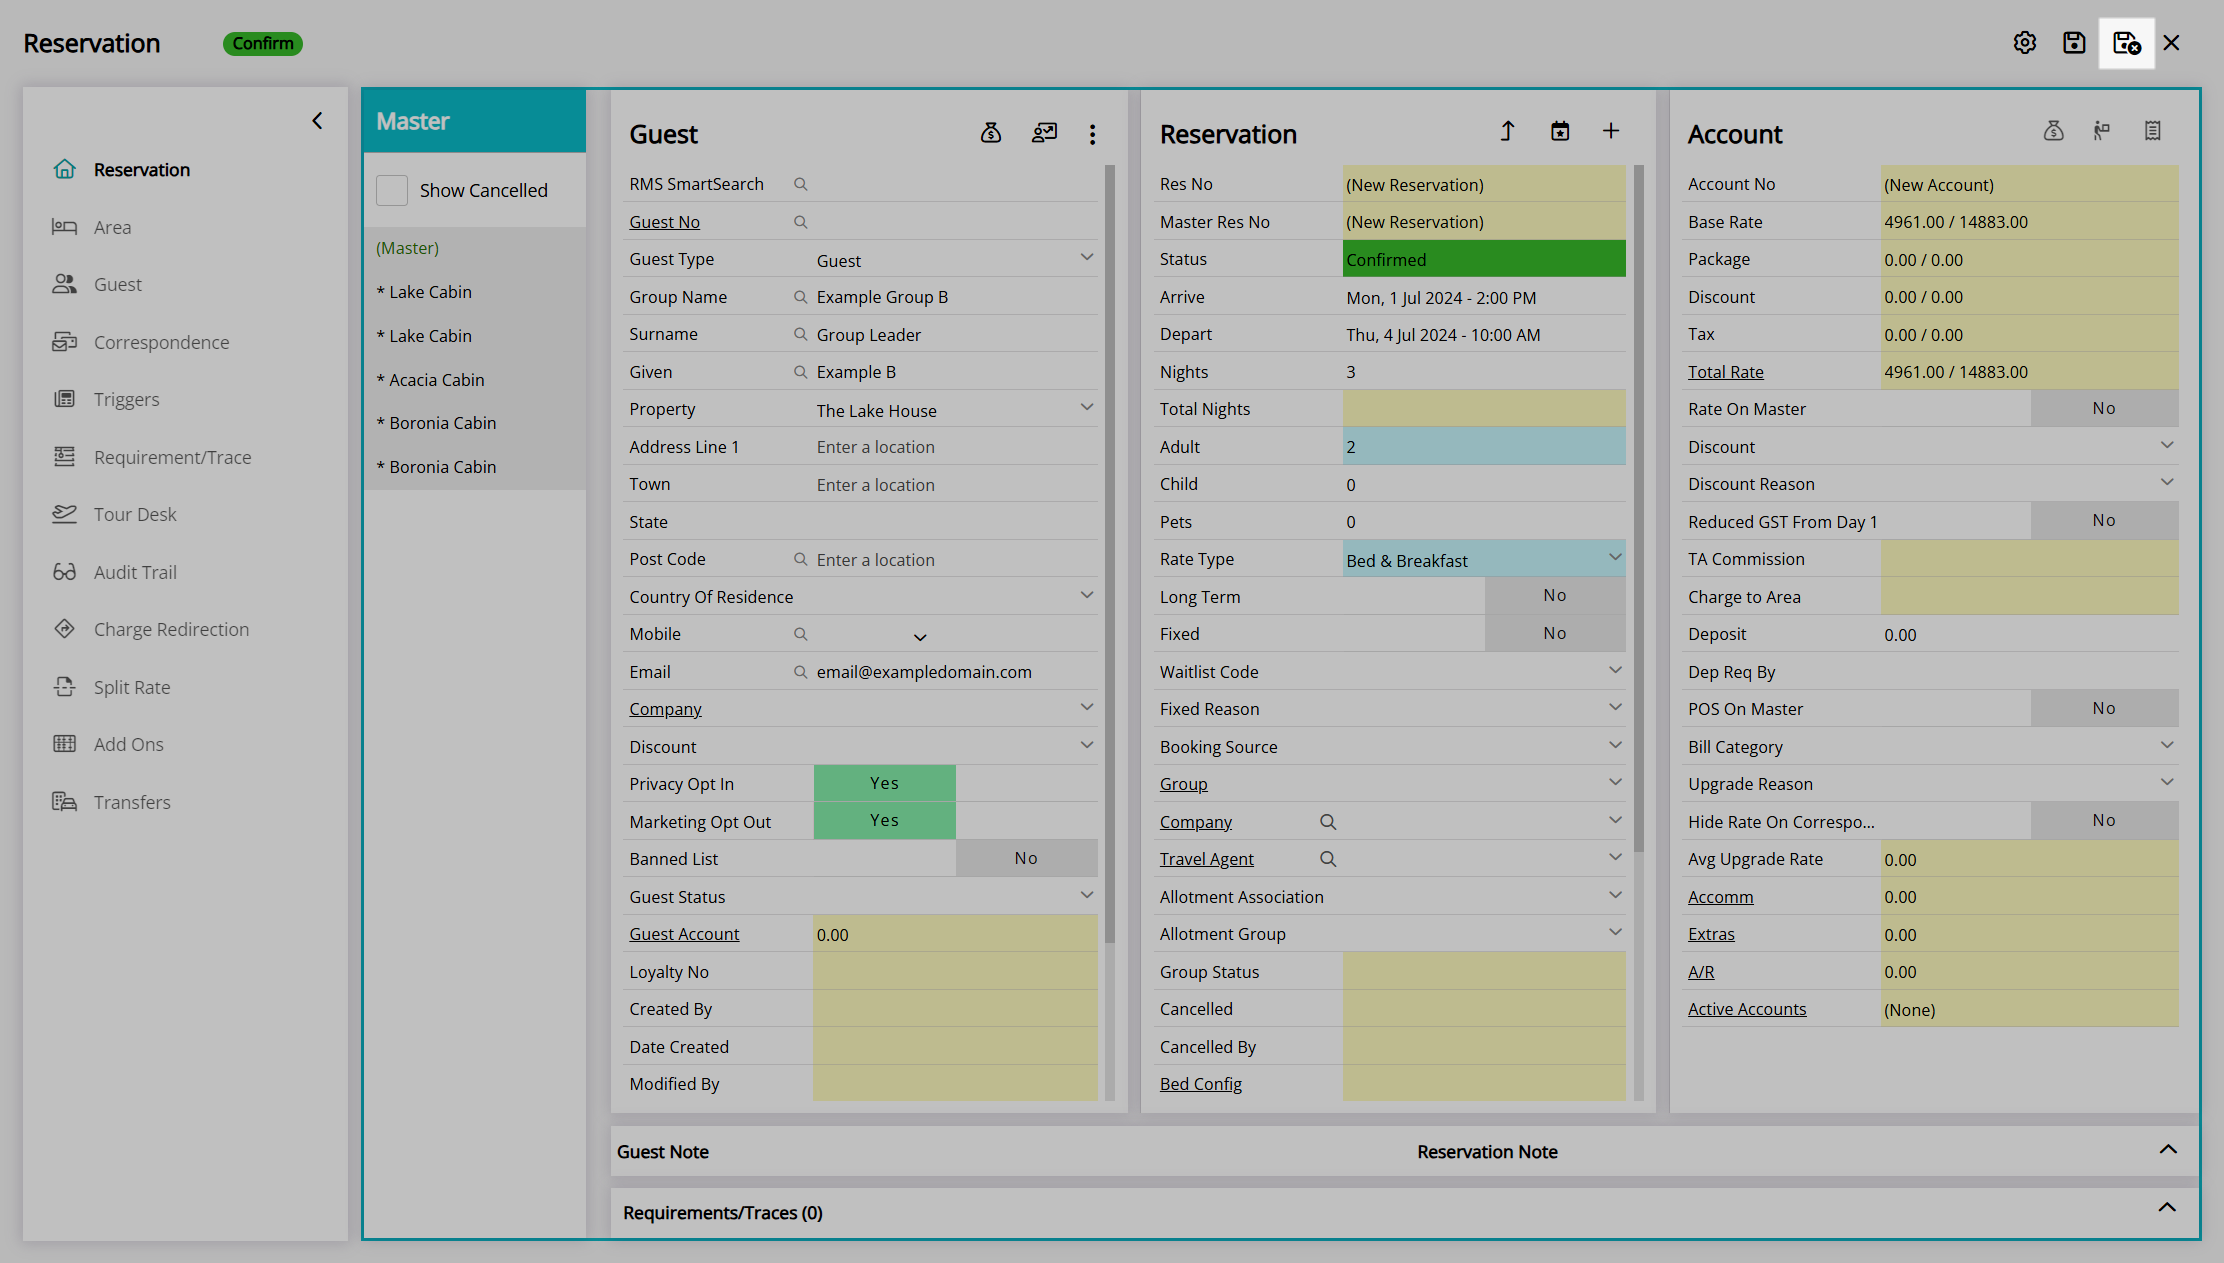
Select the  'Save/Exit' icon to store the changes made and create a new Master Reservation.
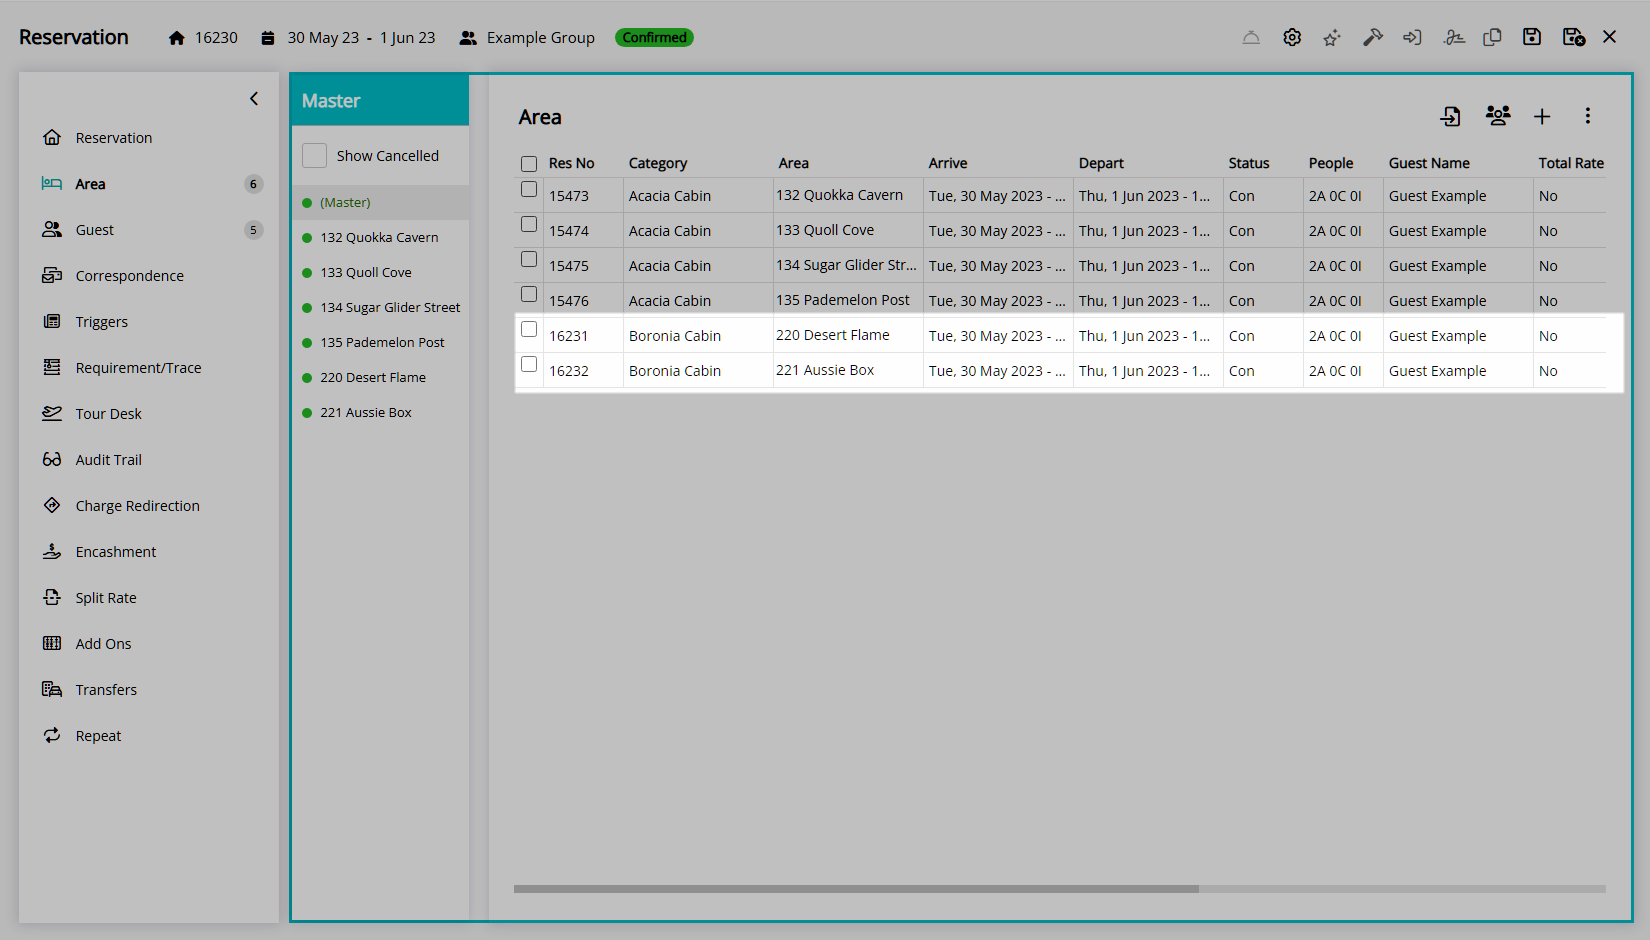
The Master Reservation will be created with a group reservation number, a group master cover page, a group account, and an individual reservation for each area added.
Add Area to an Existing Reservation
- Go to the Toolbar Menu Reservation Search in RMS.
- Enter the Group Name, Guest Name or Reservation Number and press 'Enter'.
- Select the (Master) in the Navigator Pane.
- Select the
 'Add Area' icon or navigate to the 'Area' tab and select the
  'Add Area' icon.
 - Perform a Quick Quote Search.
- Select a Category or Rate Type.
- Select the checkbox for an Area or enter the Number of Areas to Book.
- Select the 'Add to Reservation' icon.
- Select 'Proceed'.
- Save/Exit.

Select the Master in the Navigator Pane.
Select the ![]() 'Add Area' icon or navigate to the
'Add Area' icon or navigate to the ![]() 'Area' tab and select the 'Add Area' icon.
'Area' tab and select the 'Add Area' icon.
Perform a Quick Quote Search.
Select a Category or Rate Type.
Select the checkbox for an Area or enter the Number of Areas to Book.
Select the  'Add to Reservation' icon.
Select 'Proceed'.
The selected Areas will be added to the Reservation or Master Reservation as part of the group.
Select the  'Save/Exit' icon to store the changes made and leave the Master Reservation.
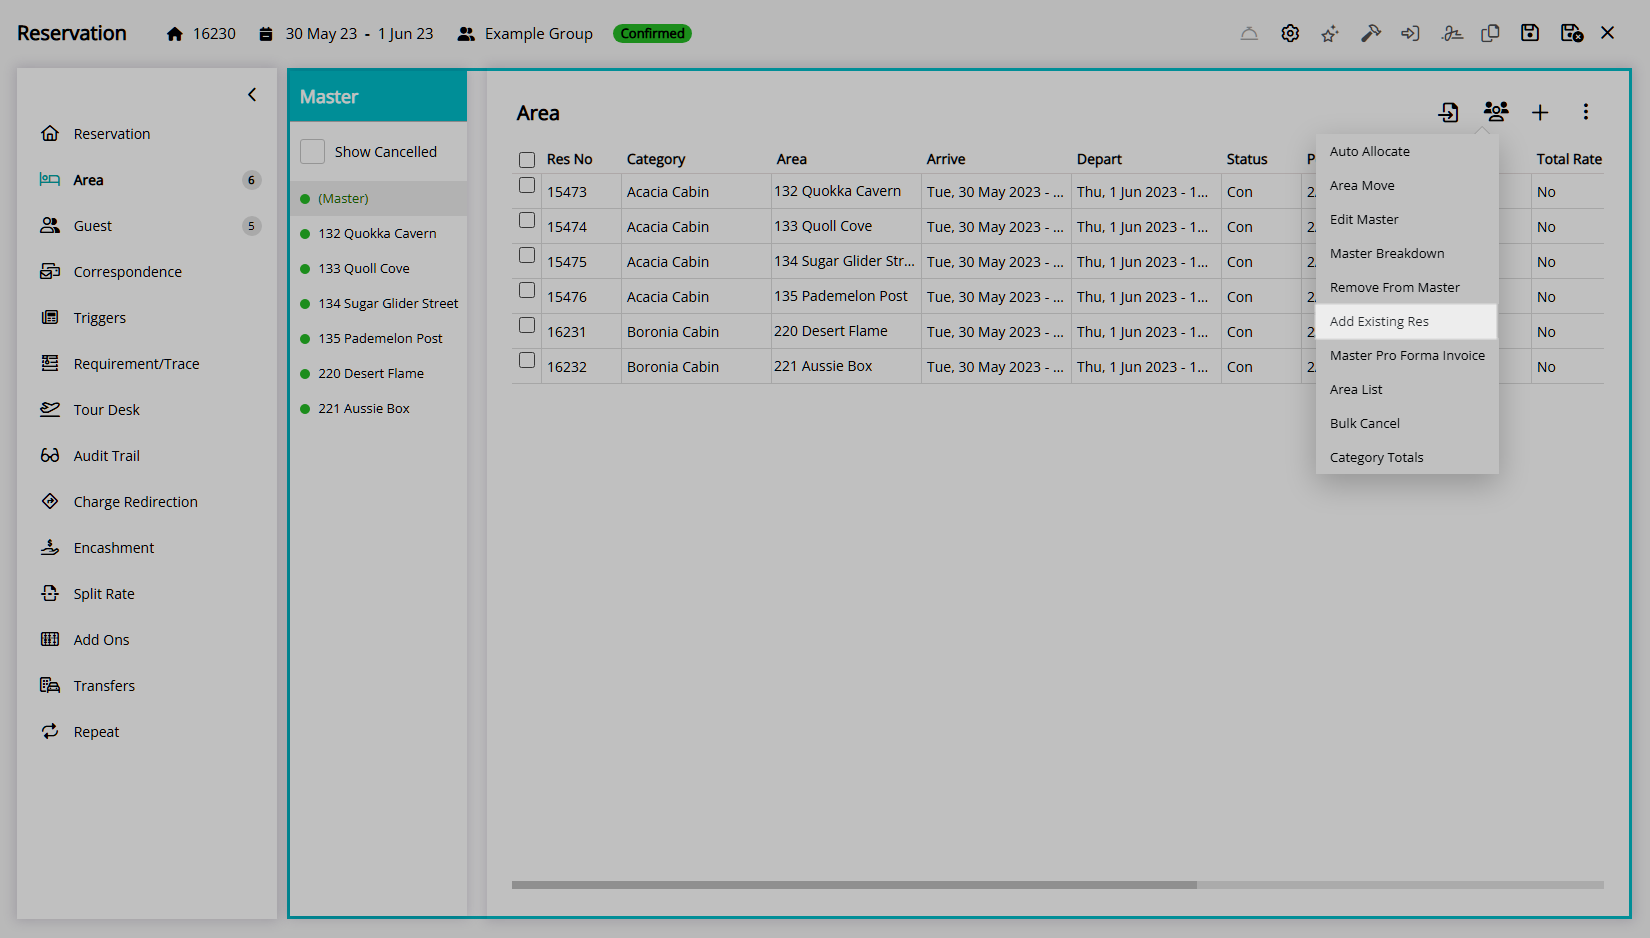
Combine Existing Reservations
- Go to the Toolbar Menu Reservation Search in RMS.
- Enter the Group Name, Guest Name or Reservation Number and press 'Enter'.
- Select the (Master) in the Navigator Pane.
- Navigate to the
 'Area' tab.
 - Select the
 'Options' icon.
 - Select 'Add Existing Reservation'.
- Select a Search By option.
- Optional: Select the 'Reservation Between' checkbox and choose a Date Range.
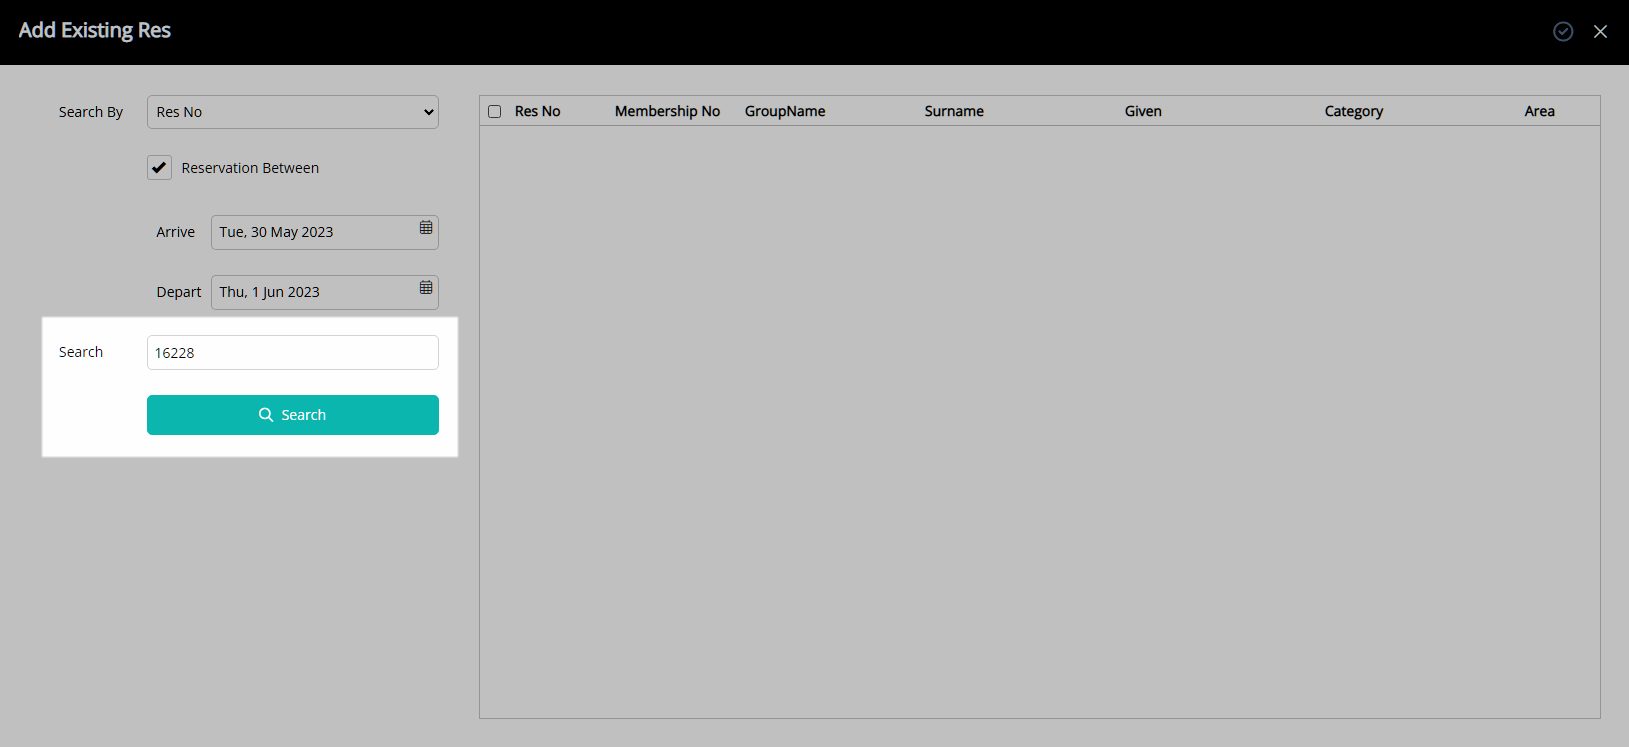
- Enter the Search Criteria and select 'Search'.
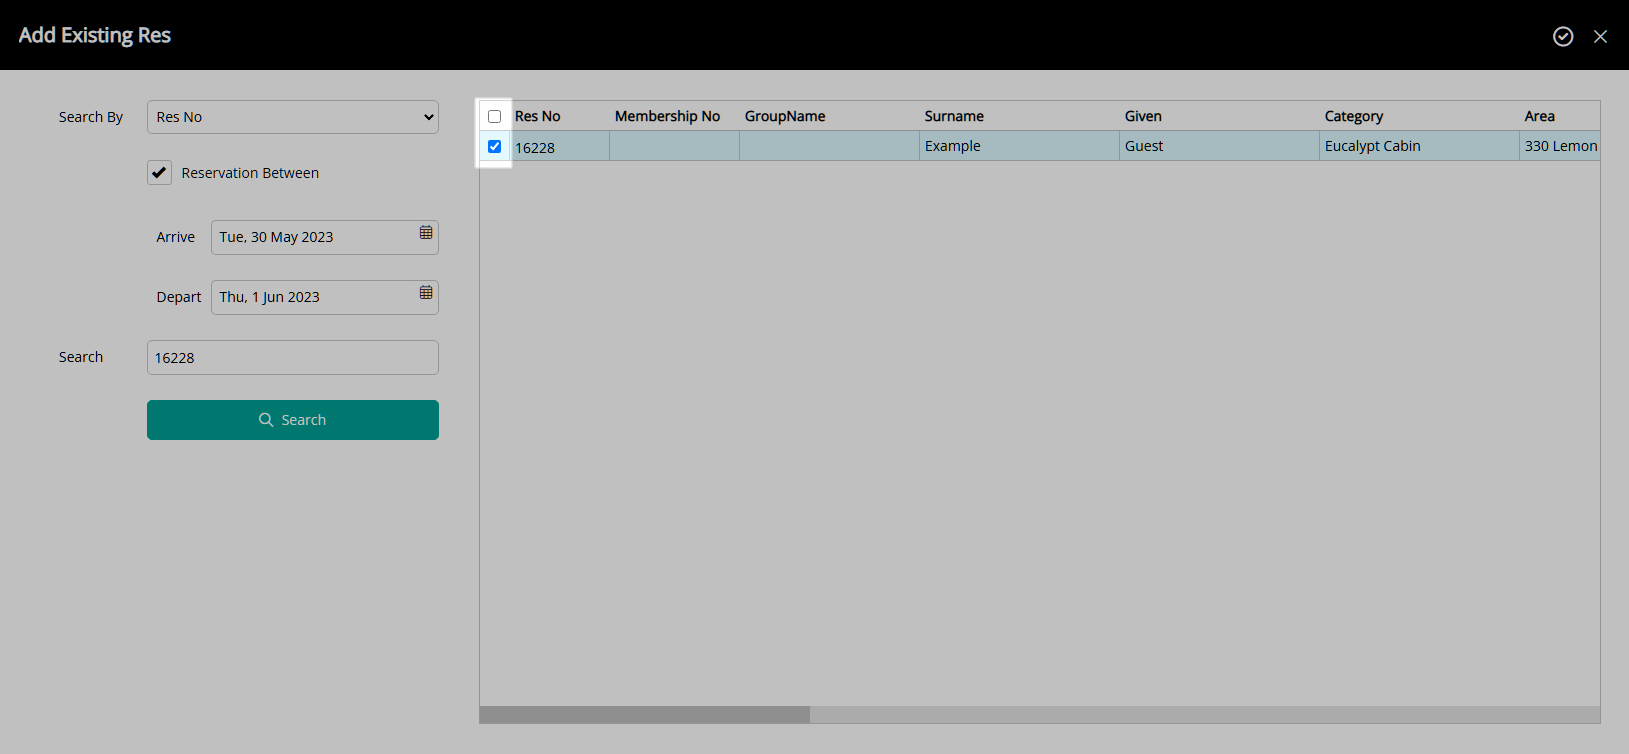
- Select the checkbox for an existing Reservation.
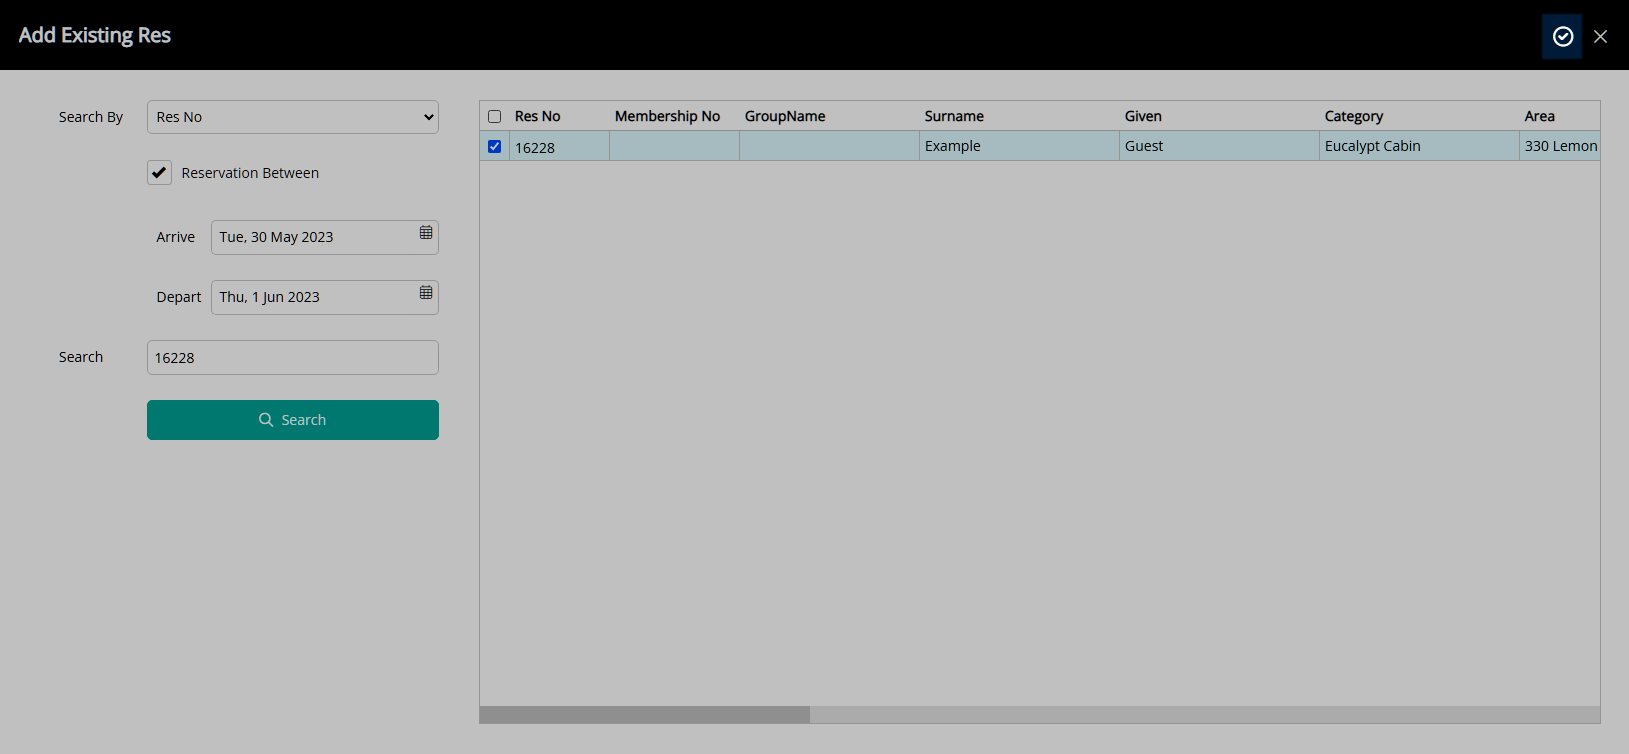
- Select the
 'Apply/Exit' icon.
 - Save/Exit.
Go to the Toolbar Menu Reservation Search in RMS, enter the Group Name, Guest Name or Reservation Number, and press 'Enter'.
Select the Master in the Navigator Pane.
Navigate to the  'Area' tab.
Select the ![]() 'Options' icon.
'Options' icon.

Select 'Add Existing Reservation'.
Select a Search By option.
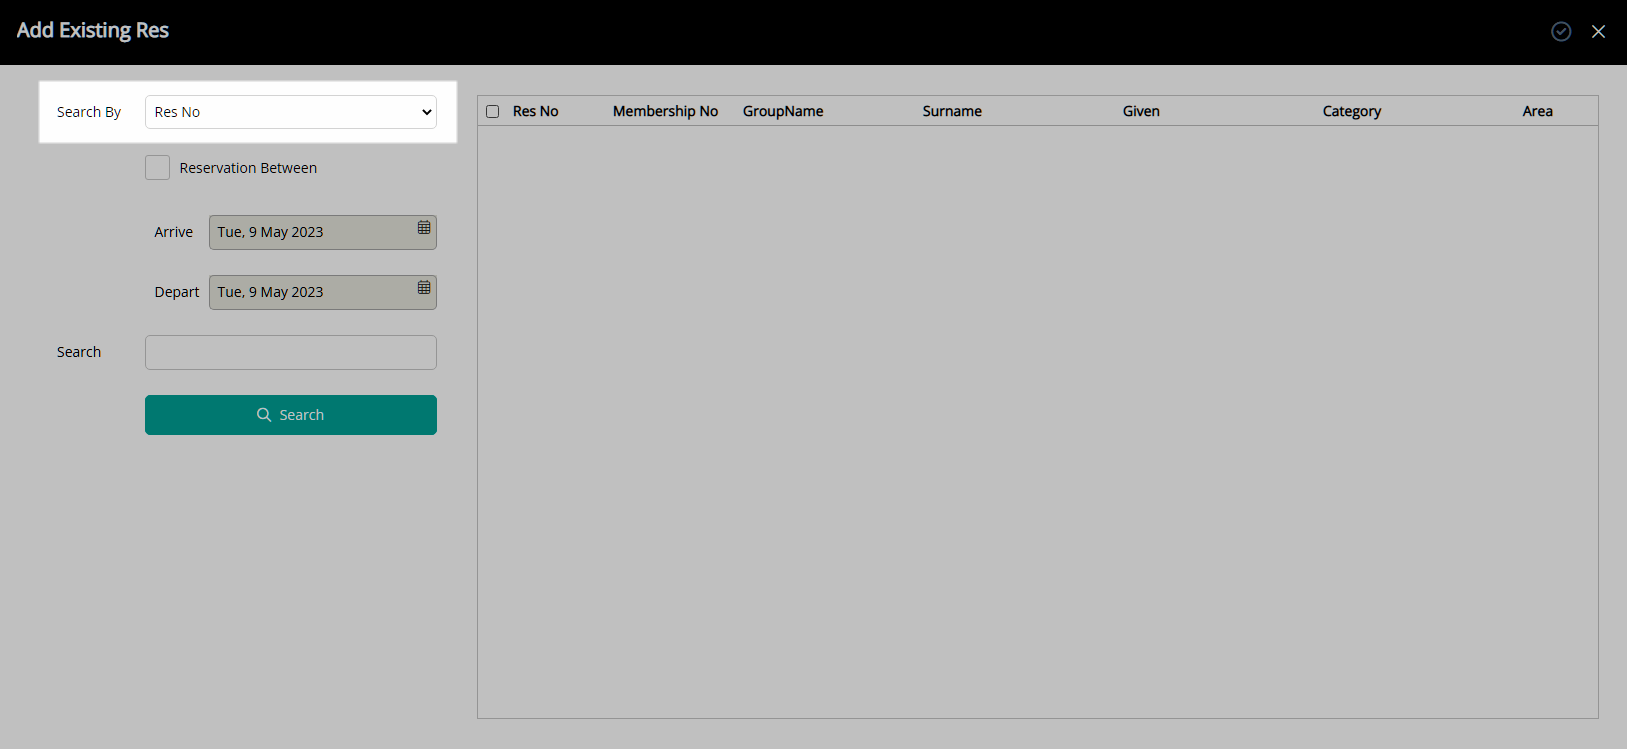
Optional: Select the checkbox 'Reservation Between' and choose a Date Range.
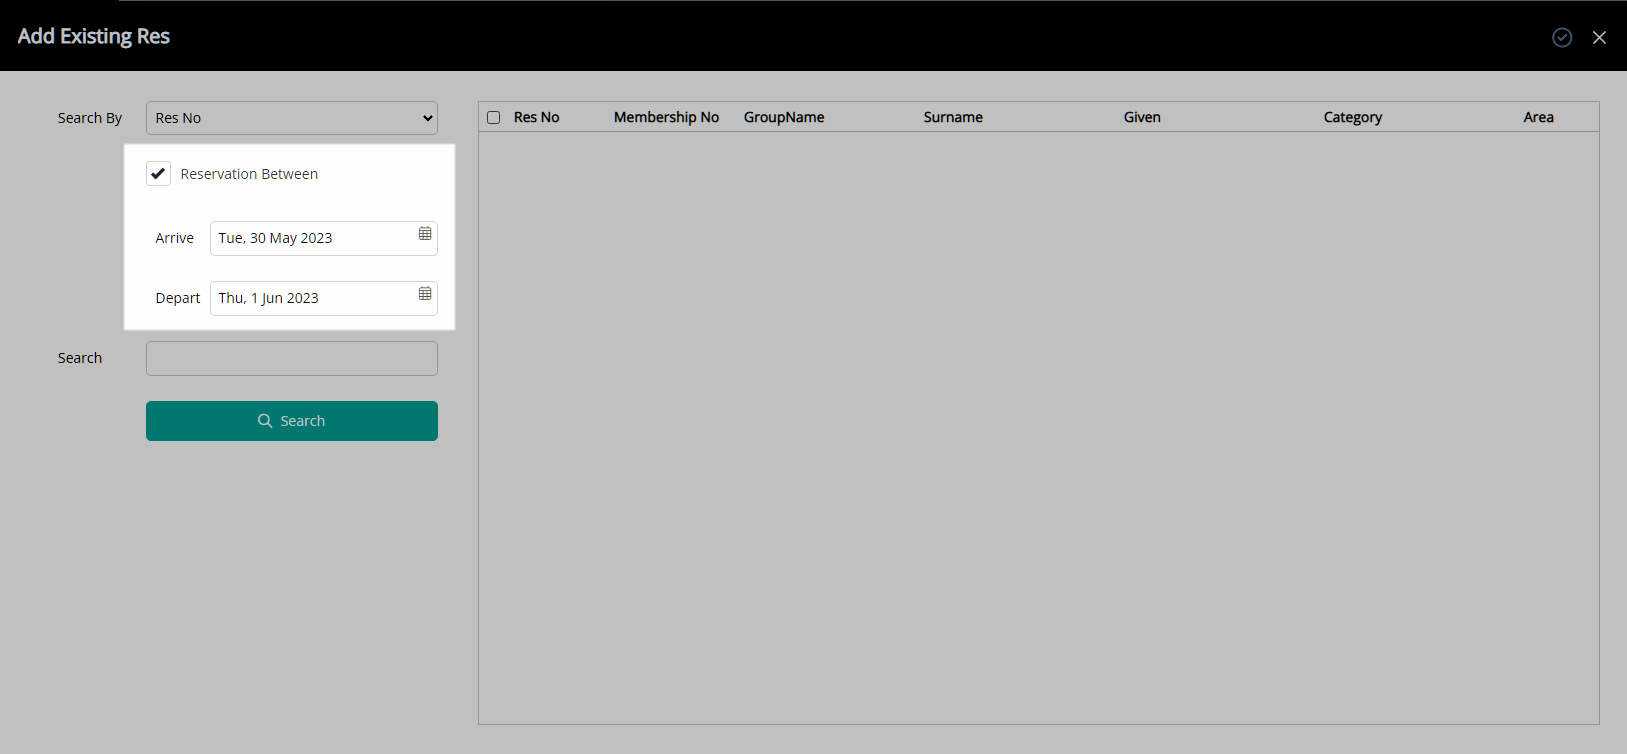
Enter the Search Criteria and select 'Search'.
Select the checkbox for an existing Reservation.
Select the  'Apply/Exit' icon.
The selected Reservation will be added to the group.
Select the 'Save/Exit' icon to store the changes made and leave the Master Reservation.
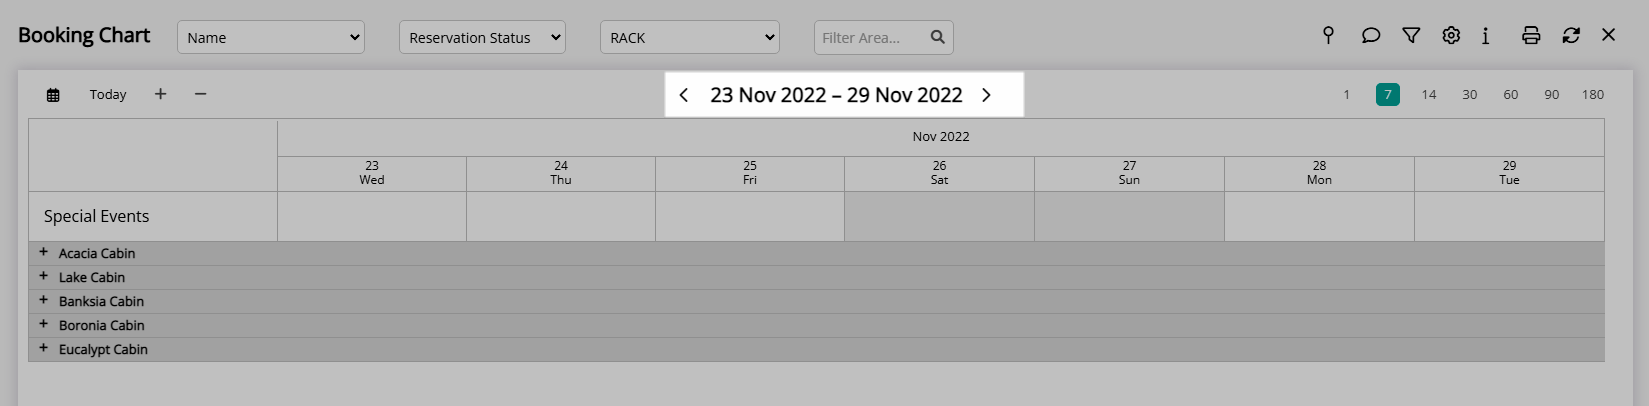
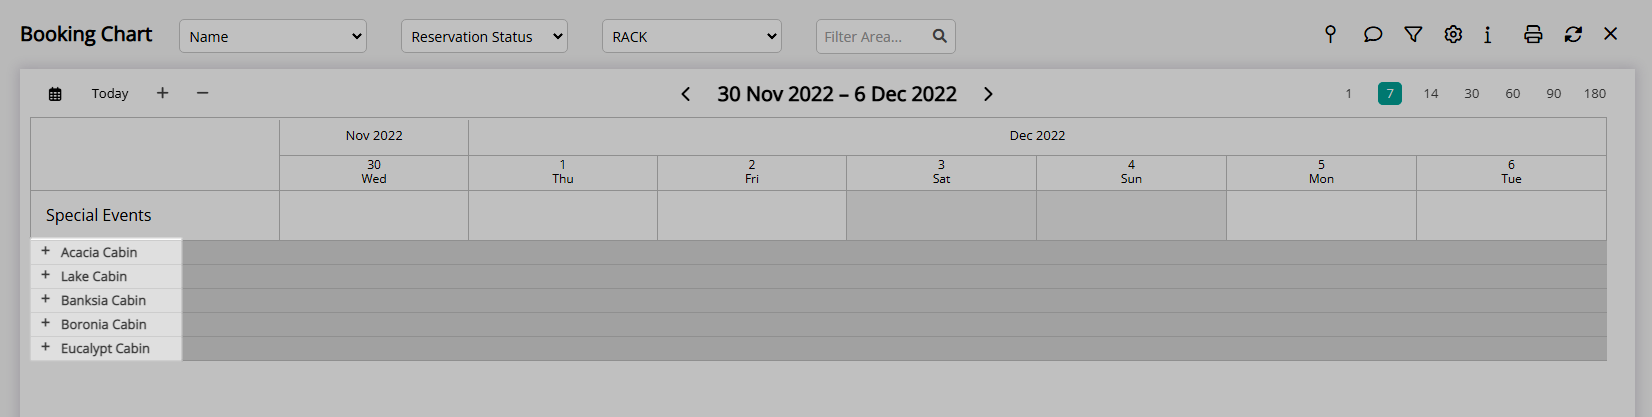
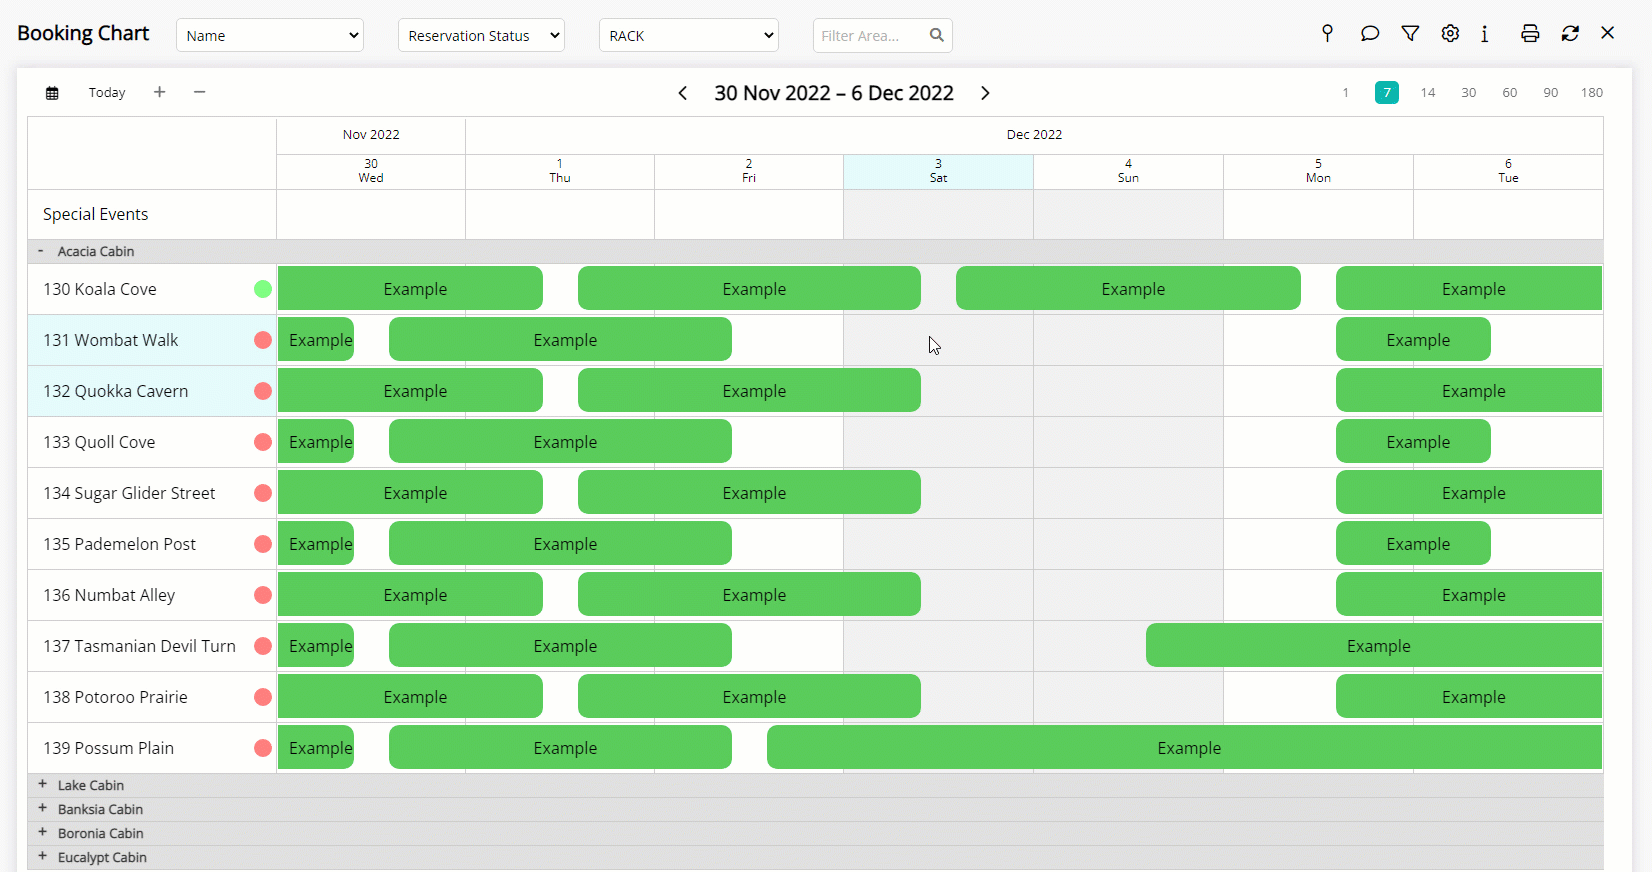
Add Master Reservation on the Booking Chart
- Go to Charts > Booking Chart in the Side Menu of RMS.
- Navigate to the Date Range.
- Expand a Category.
- Hold the CTRL or ⌘ key on the keyboard.
- Draw a Reservation in each Area for the Master Reservation.
- Release the CTRL or ⌘ key & Mouse Button.
- Select 'Add Master Reservation'.
- Enter a Master Name.
- Enter the Guest Details.
- Select a Rate Type.
- Enter additional Reservation Details.
- Optional: Select the 'Rate on Master' Toggle.
- Save/Exit.
Go to Charts > Booking Chart in the Side Menu of RMS.
Navigate to the Date Range.
Expand a Category.
Hold the CTRL or ⌘ key on the keyboard and draw a Reservation in each Area for the Master Reservation then release the CTRL or ⌘ key & Mouse Button and select 'Add Master Reservation'.
Enter a Master Name.
Enter the Guest Details.
Select a Rate Type.

Enter additional Reservation Details.
Optional: Select the 'Rate on Master' Toggle.
Select the  'Save/Exit' icon to create the Master Reservation and return to the Booking Chart.
The Master Reservation will be assigned a Master Reservation Number and each Sibling Reservation will have an individual Reservation Number linked to the Master Reservation Number.
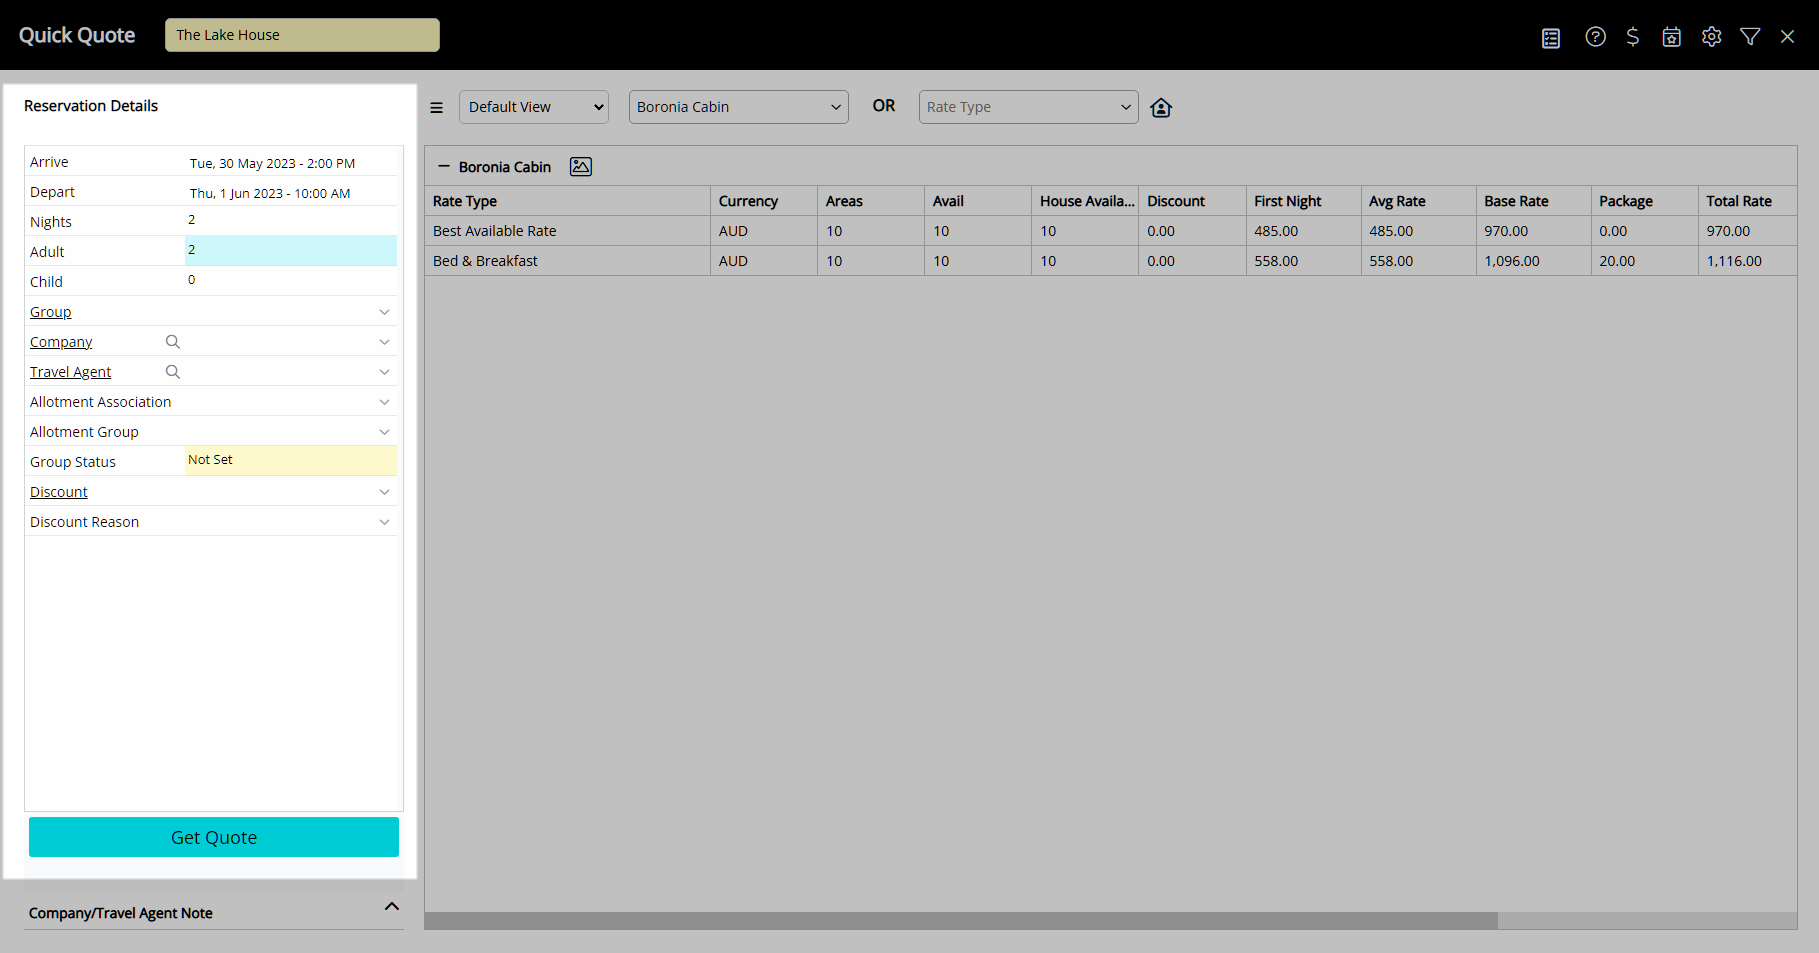
Add Master Reservation on Quick Quote
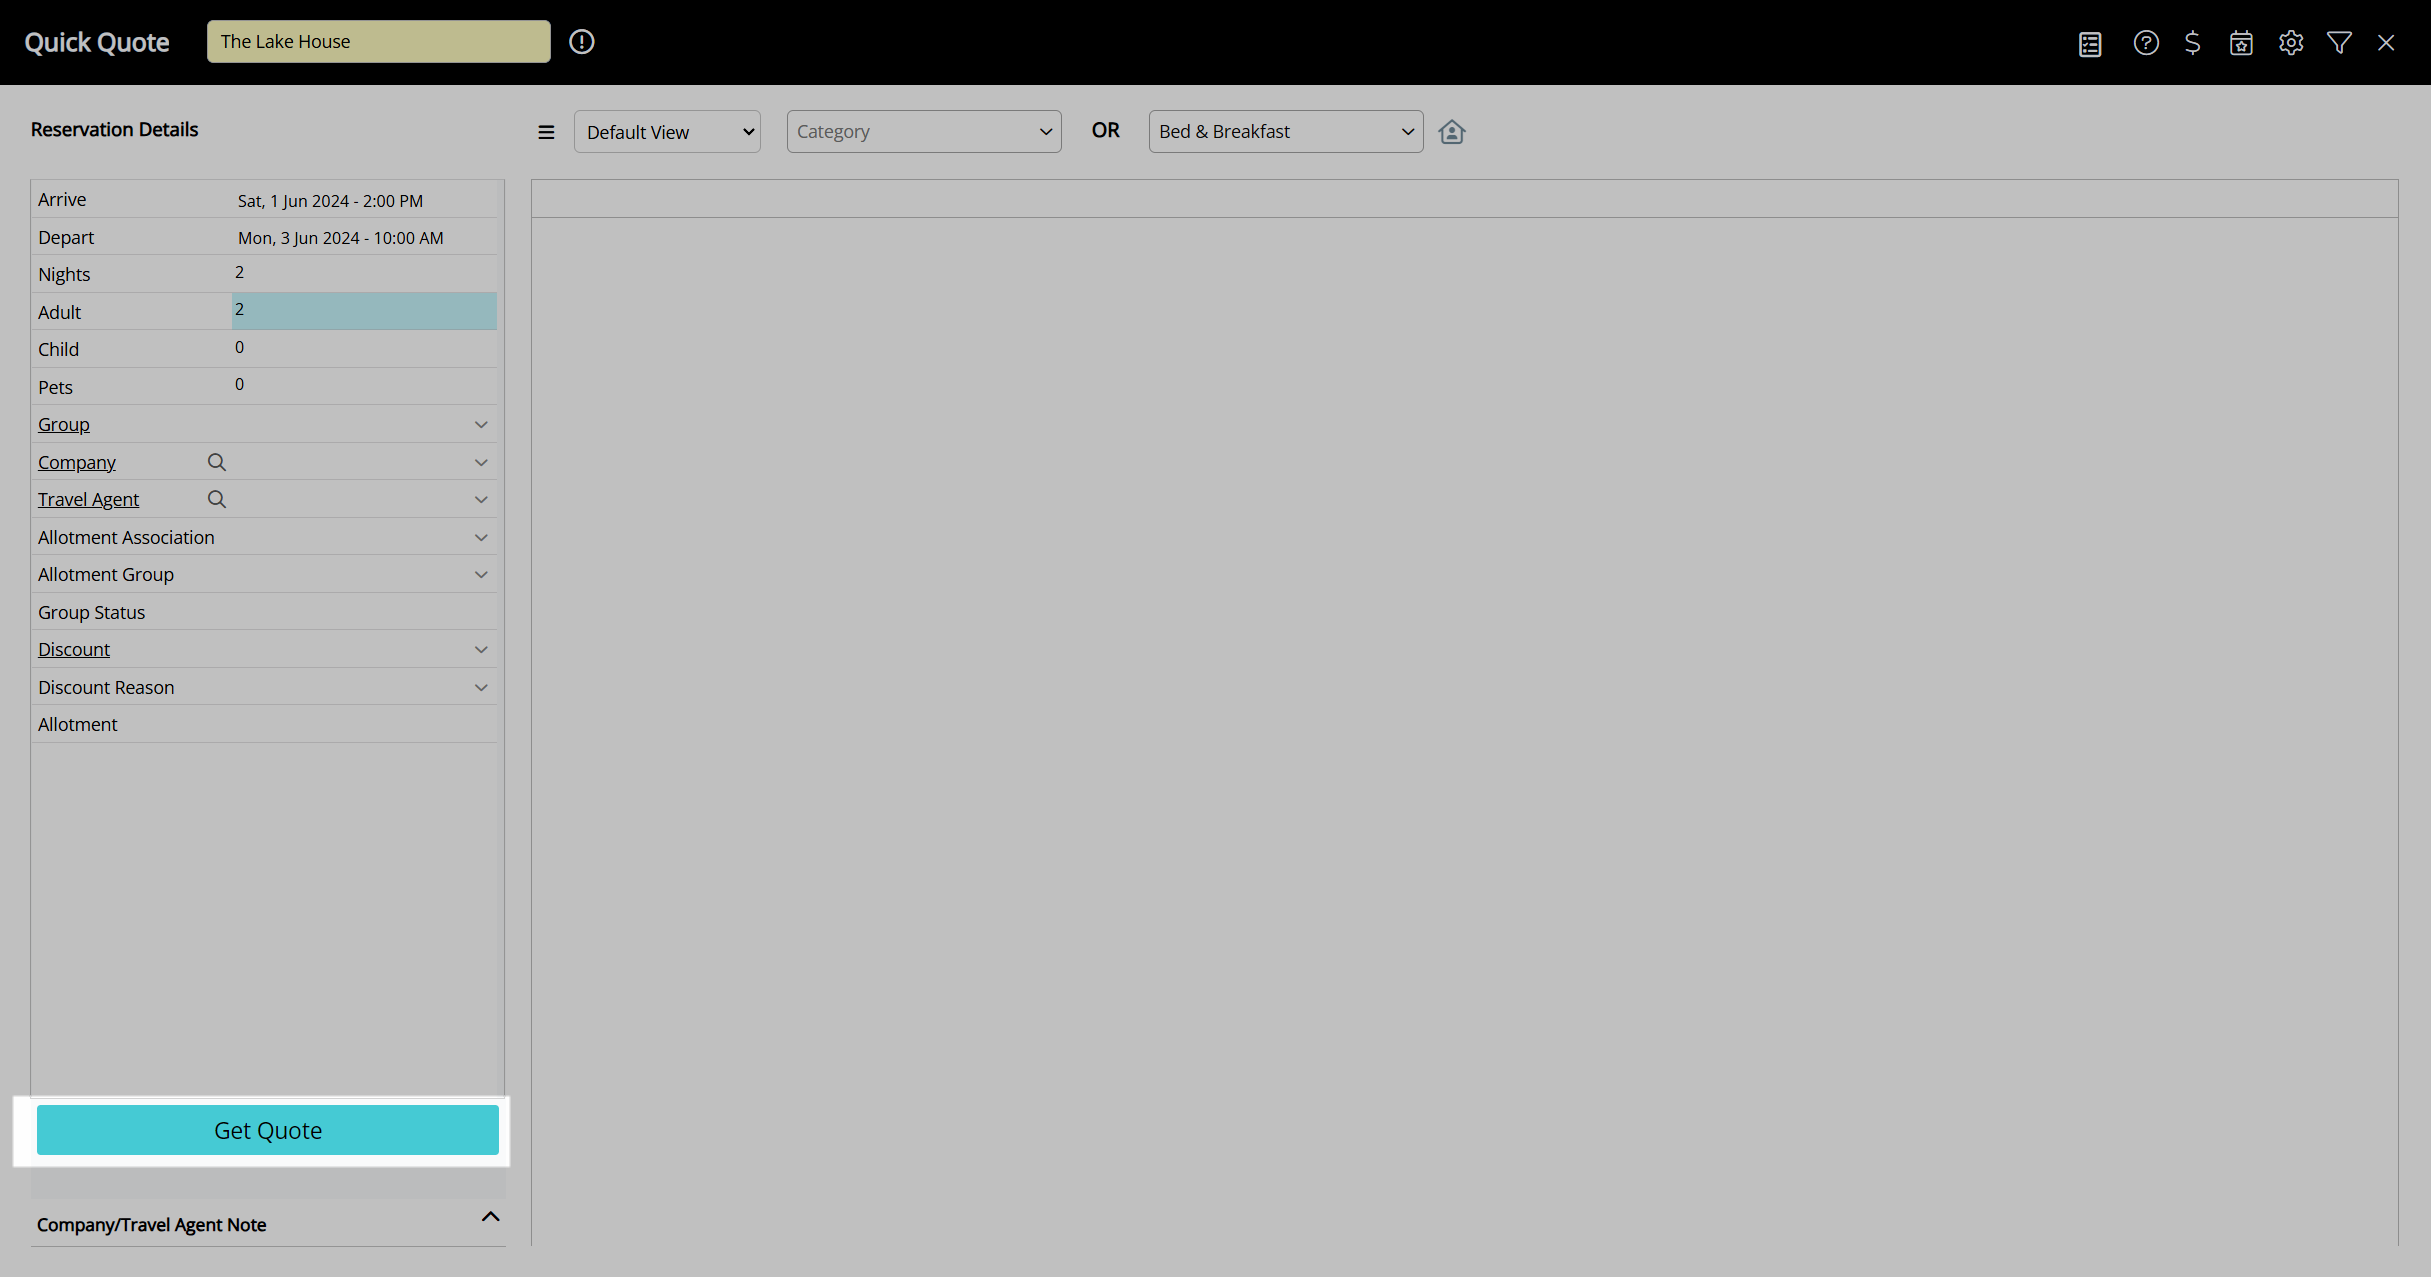
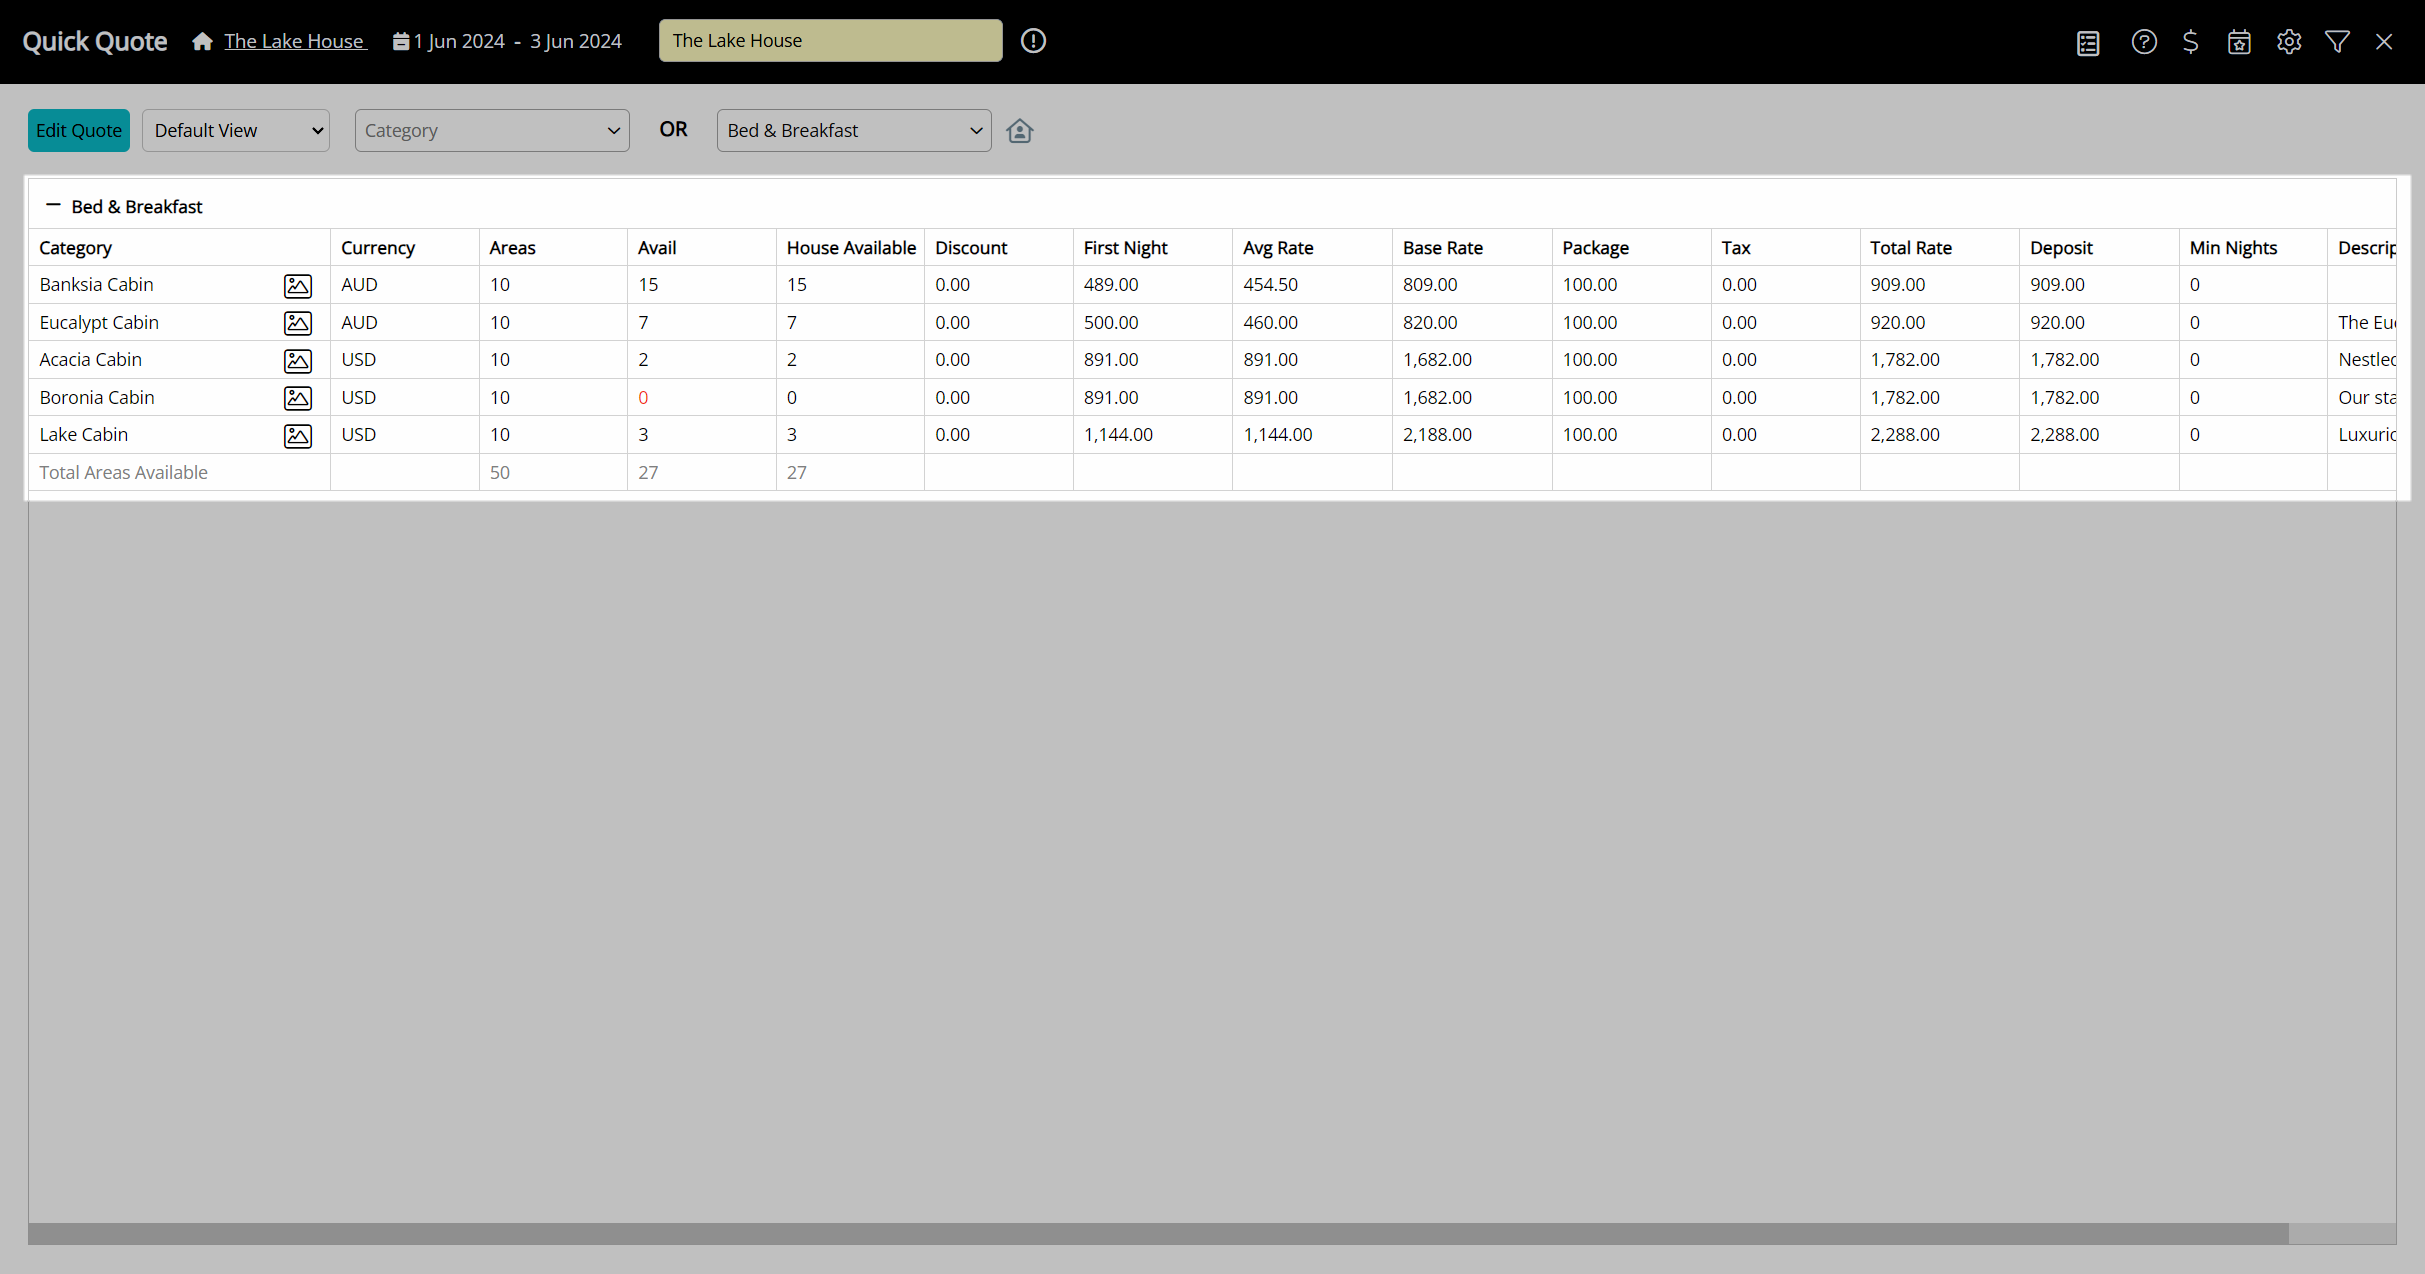
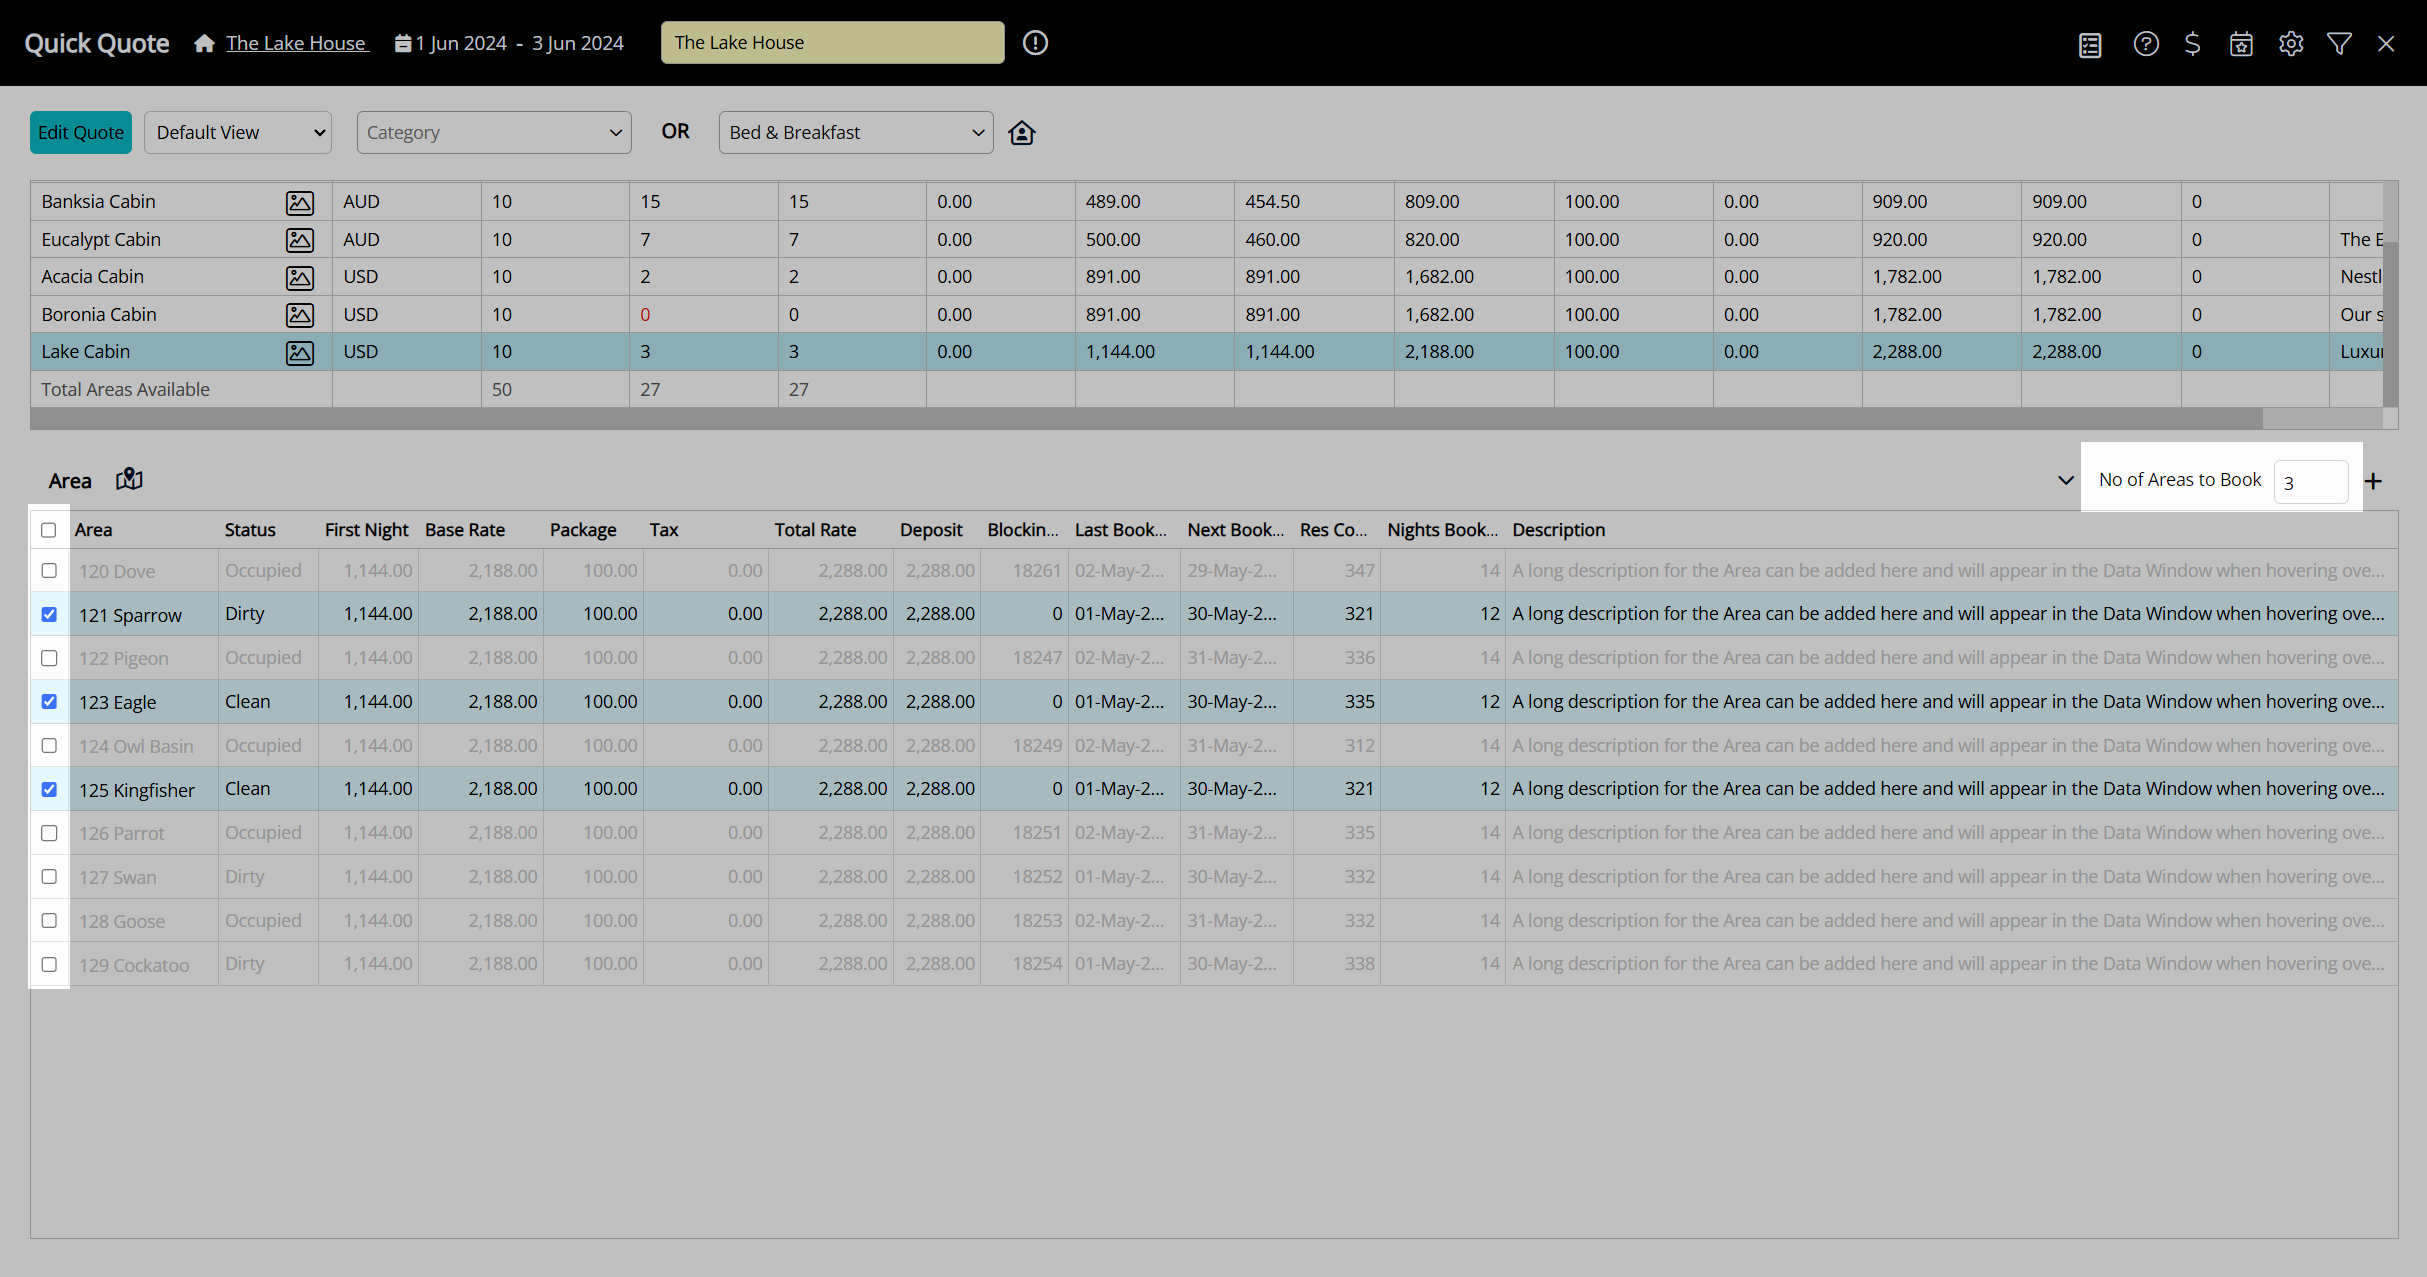
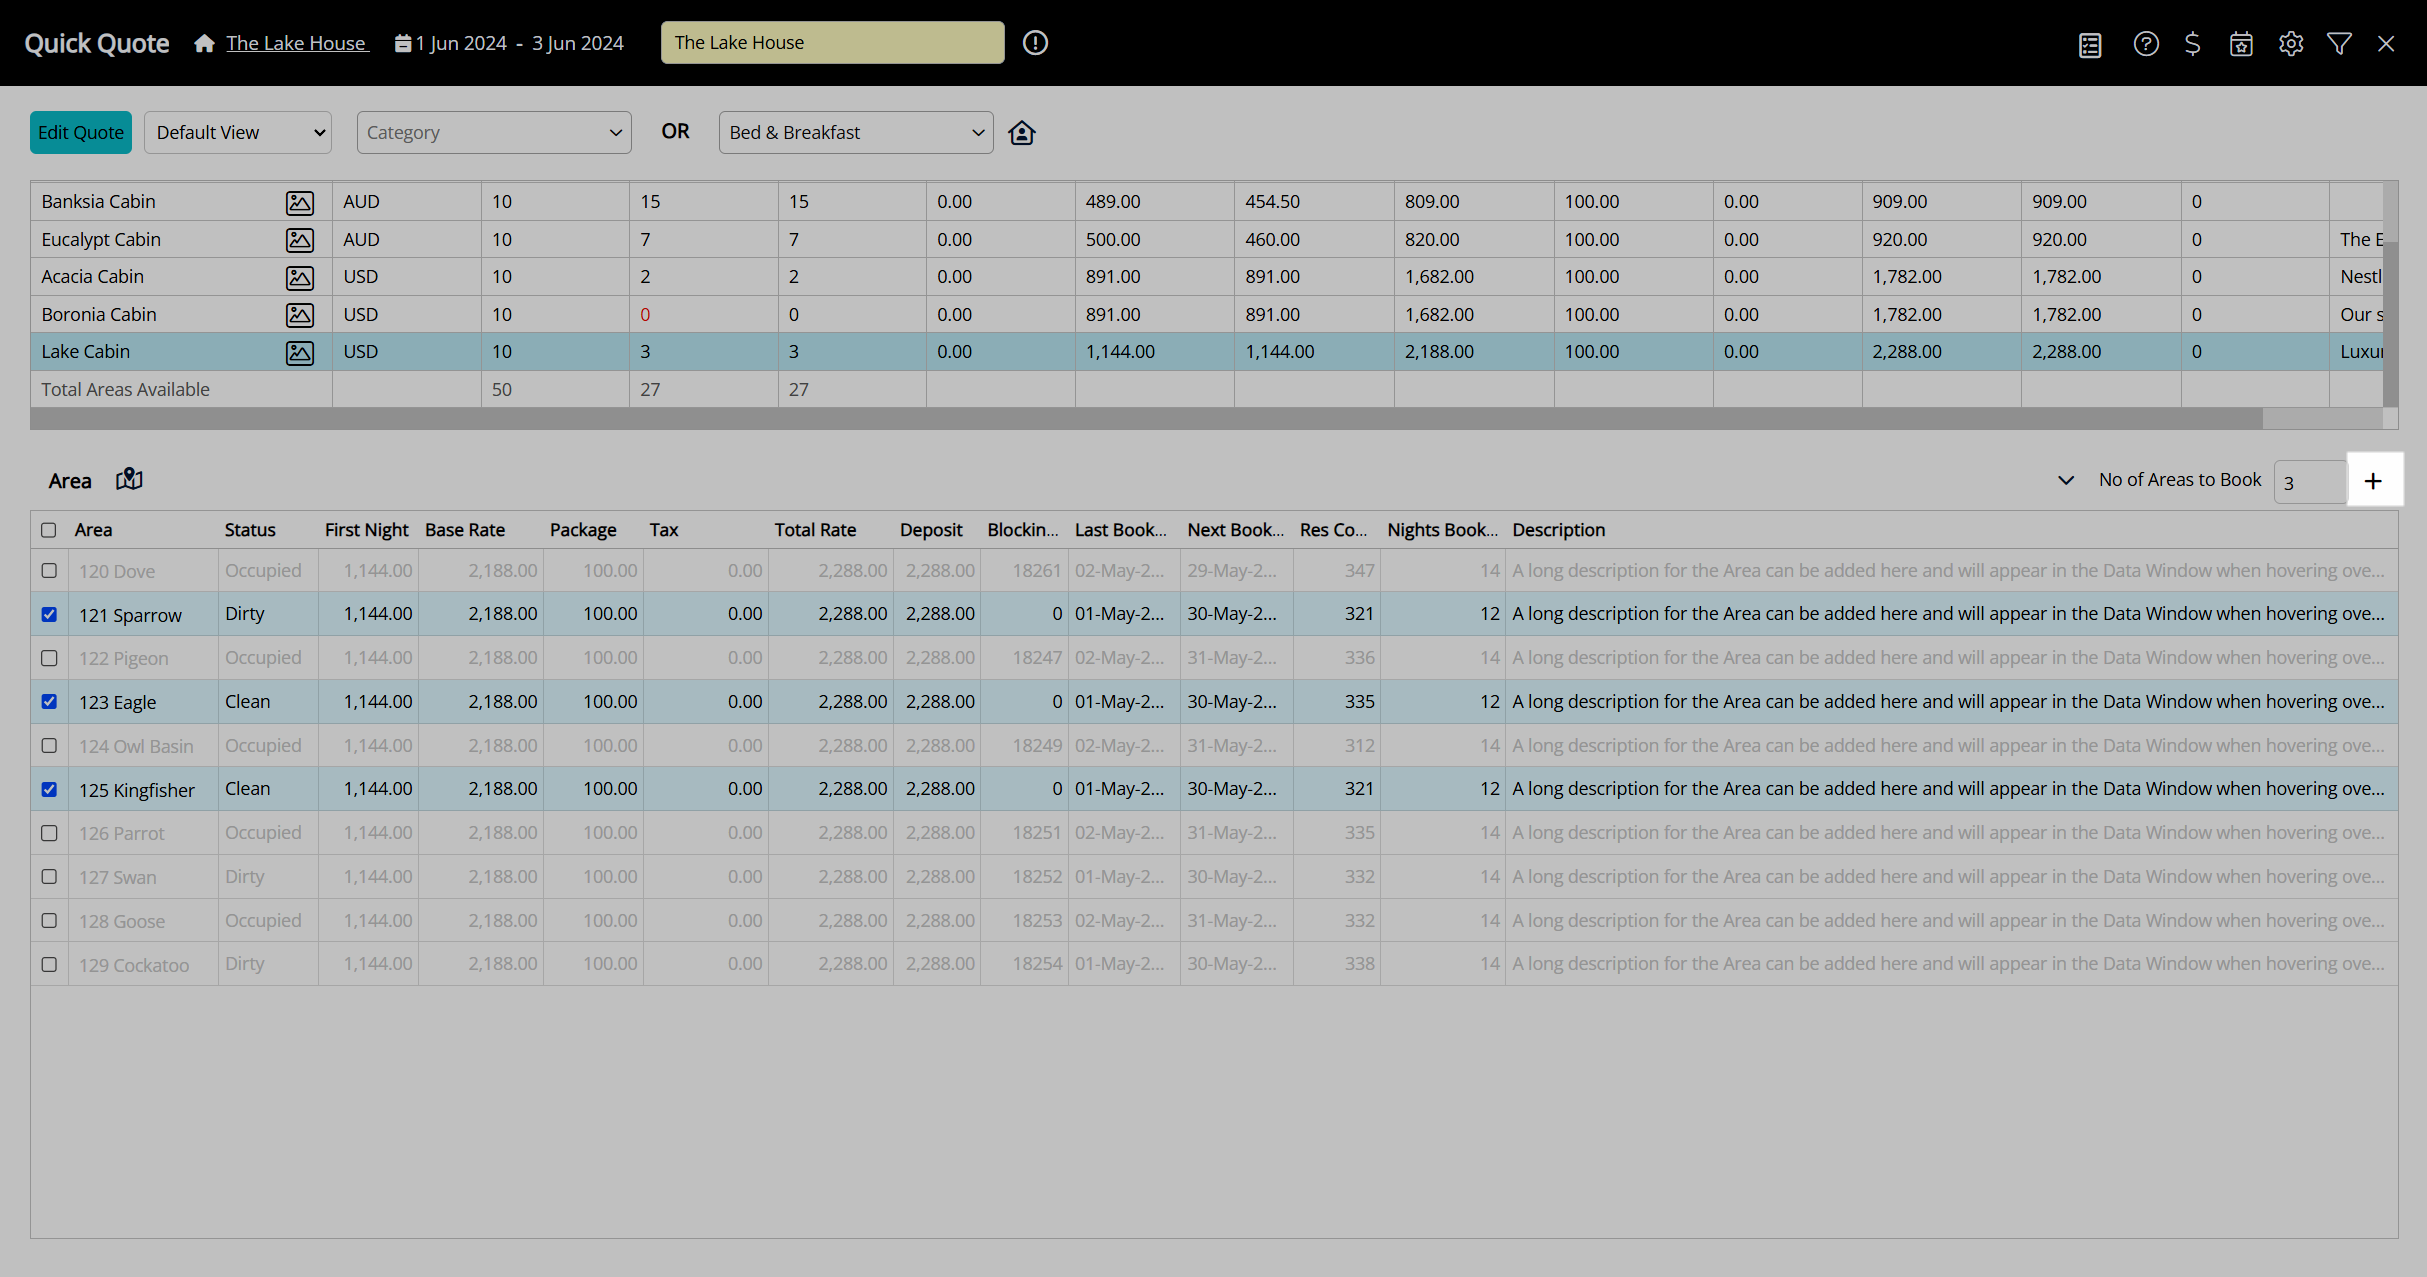
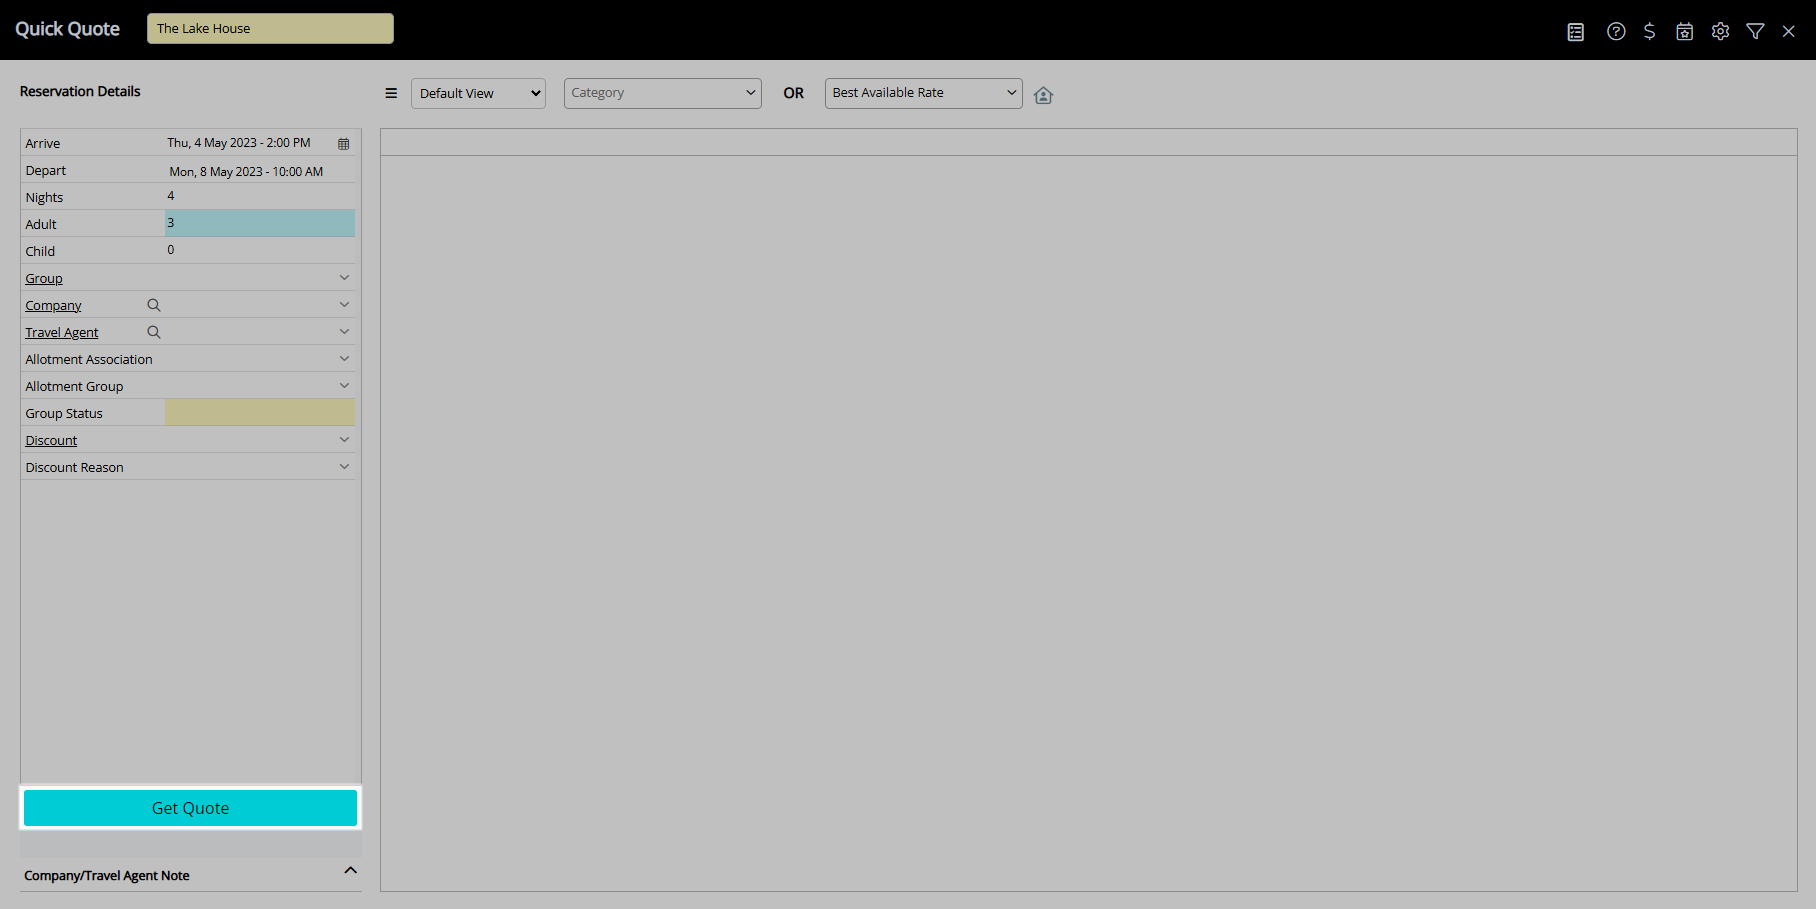
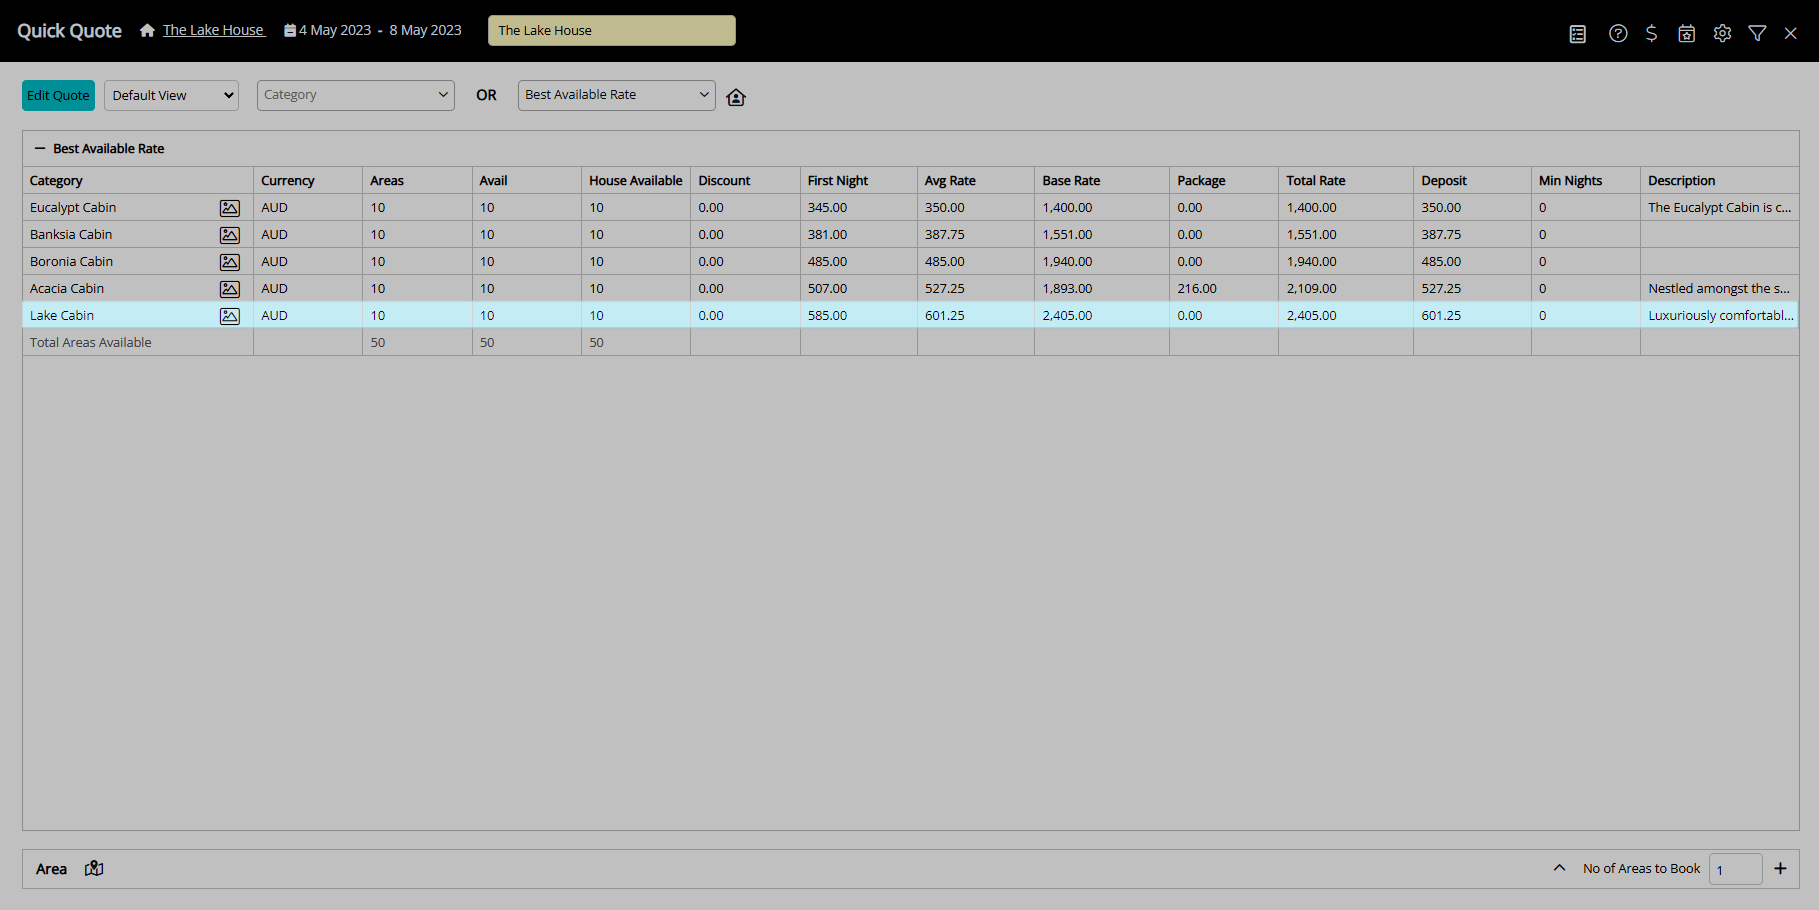
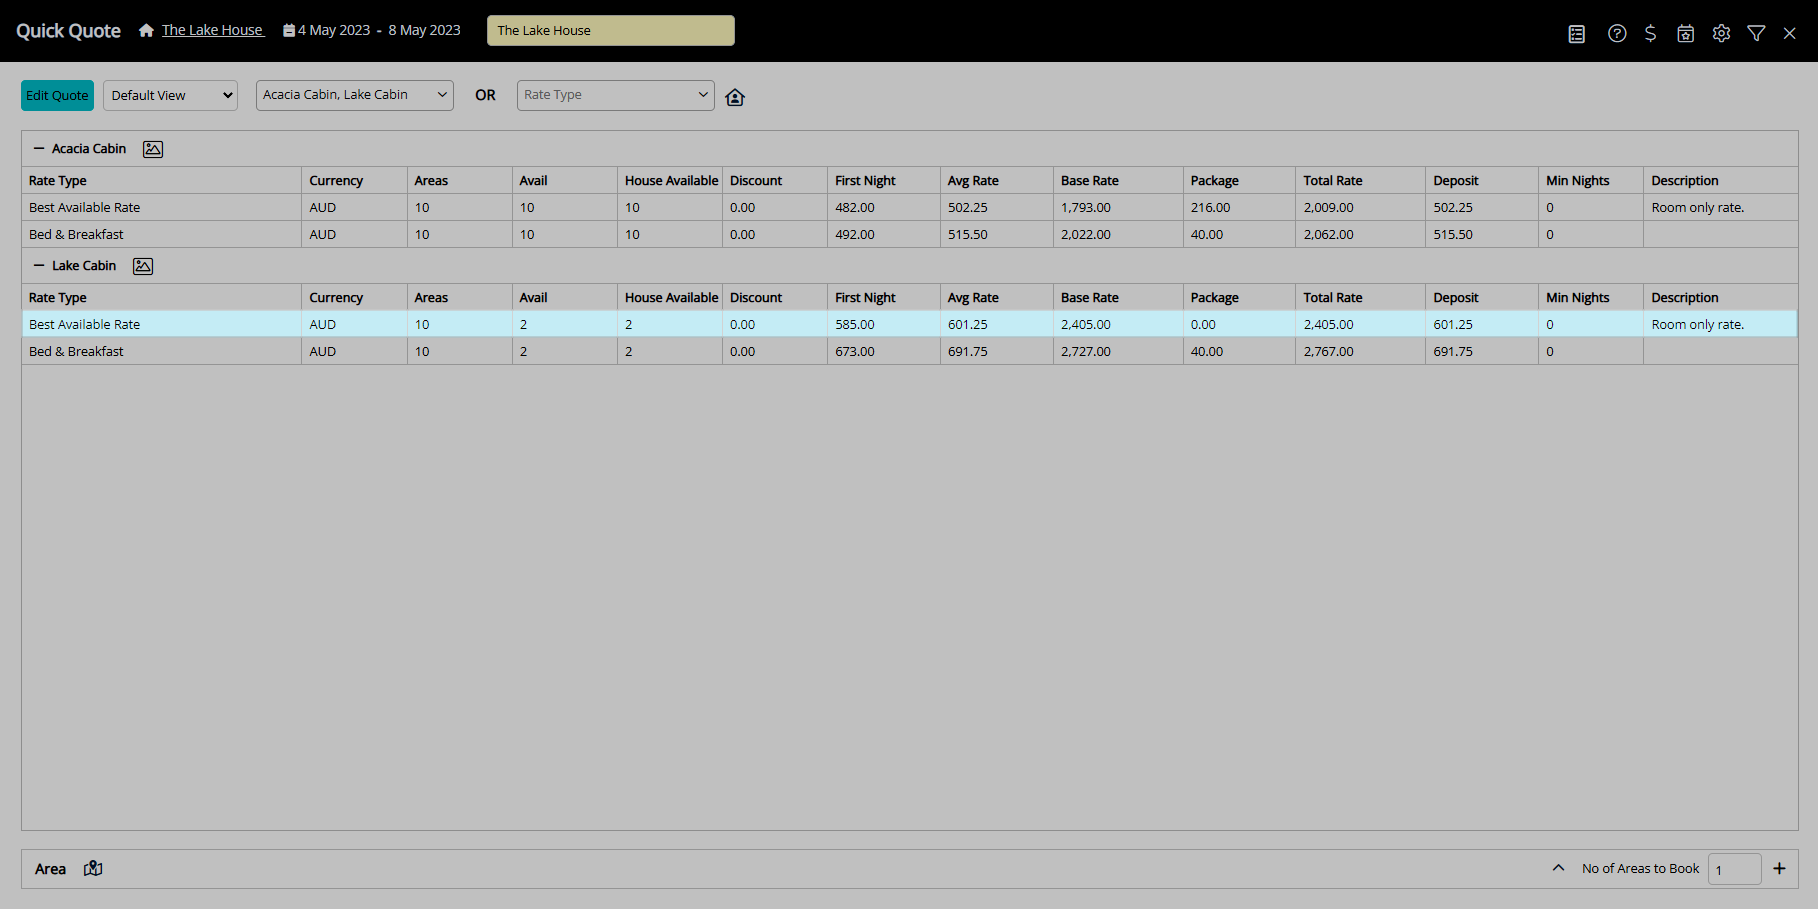
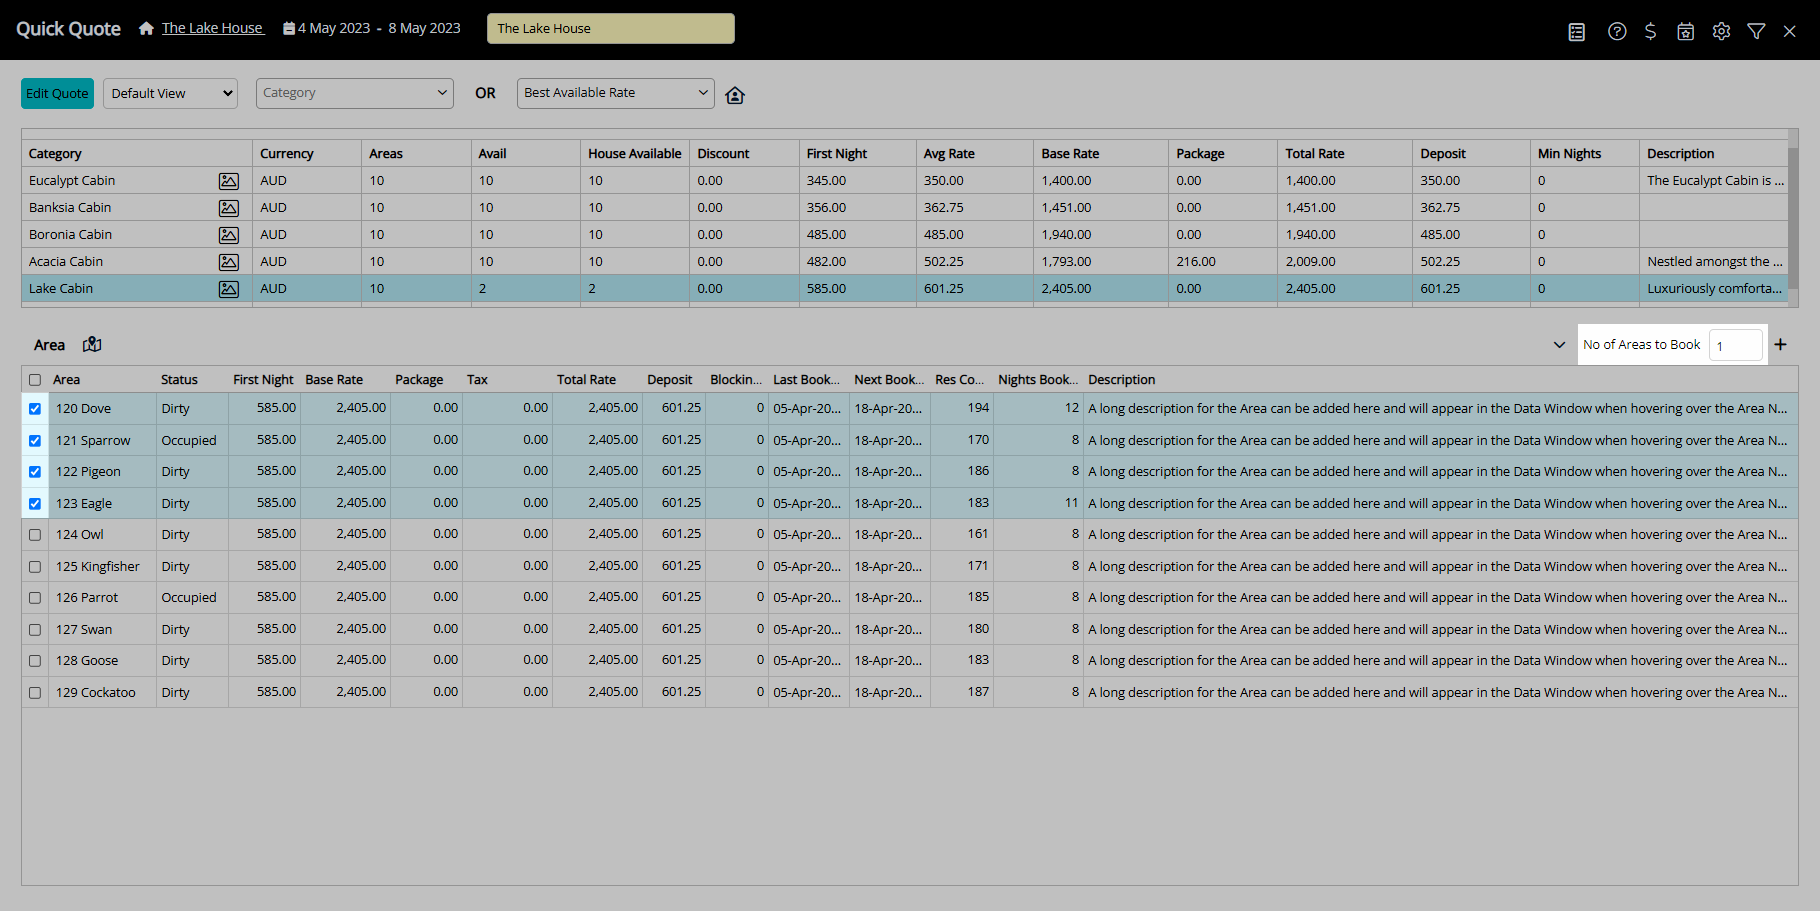
- Go to Reservations > Quick Quote in the Side Menu of RMS.
- Perform a Quick Quote Search and select 'Get Quote'.
- Select a Category or Rate Type.
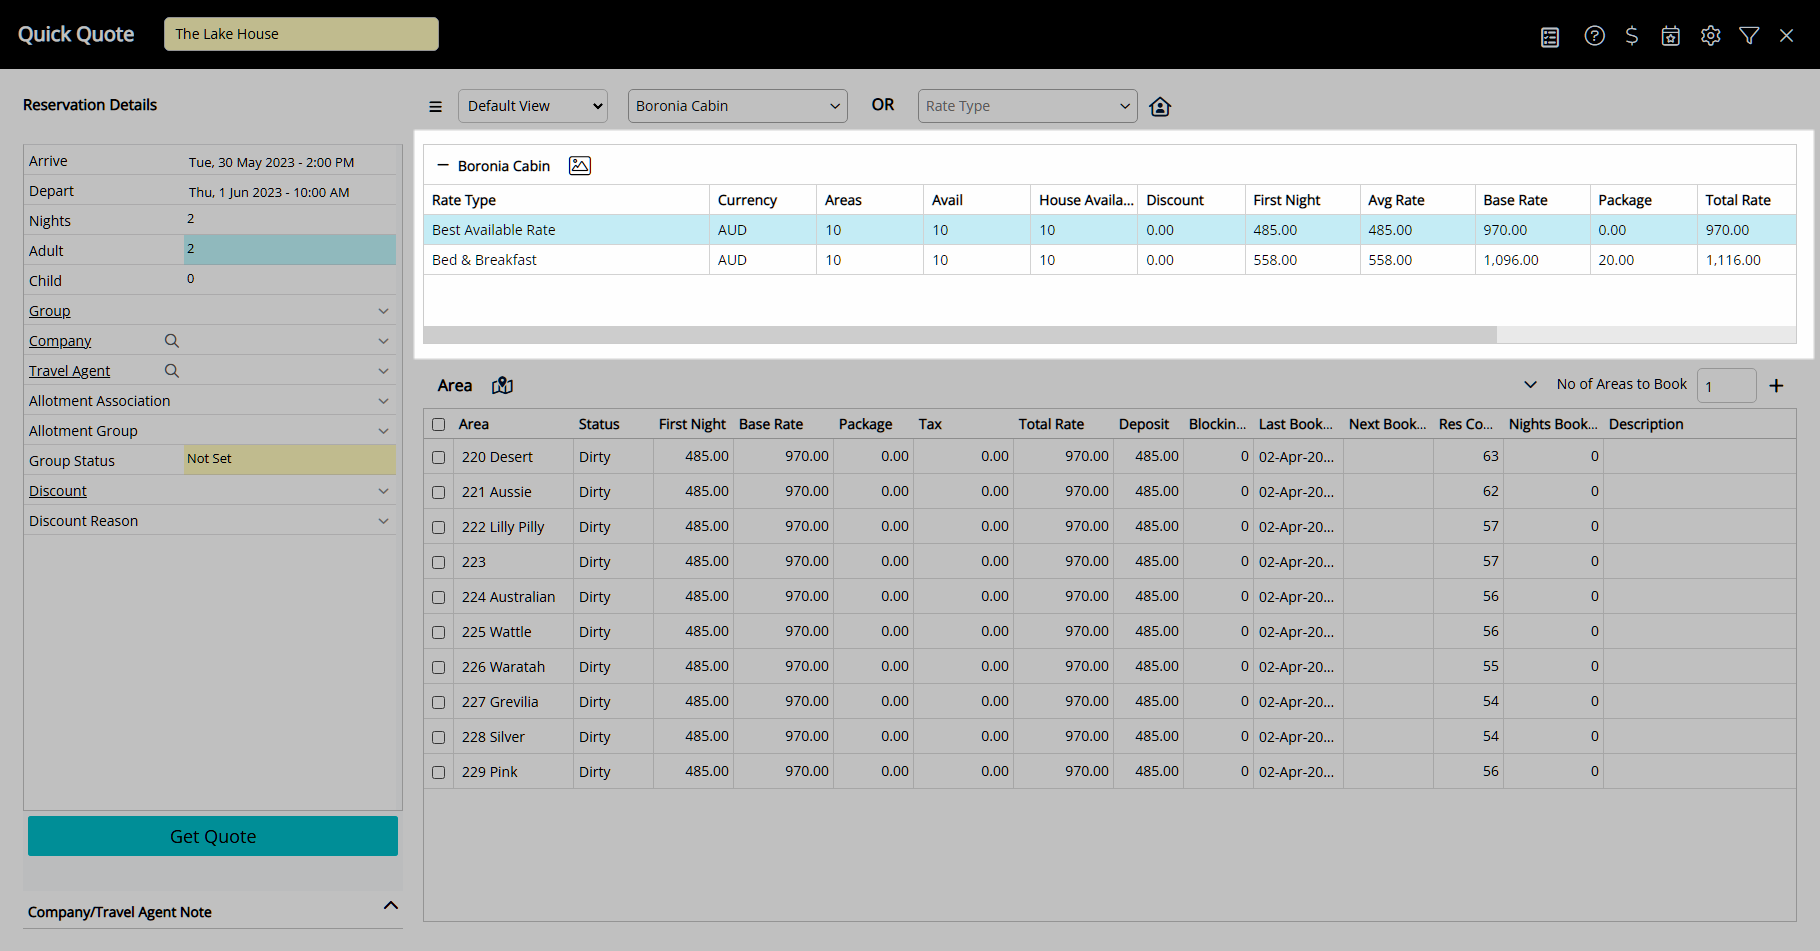
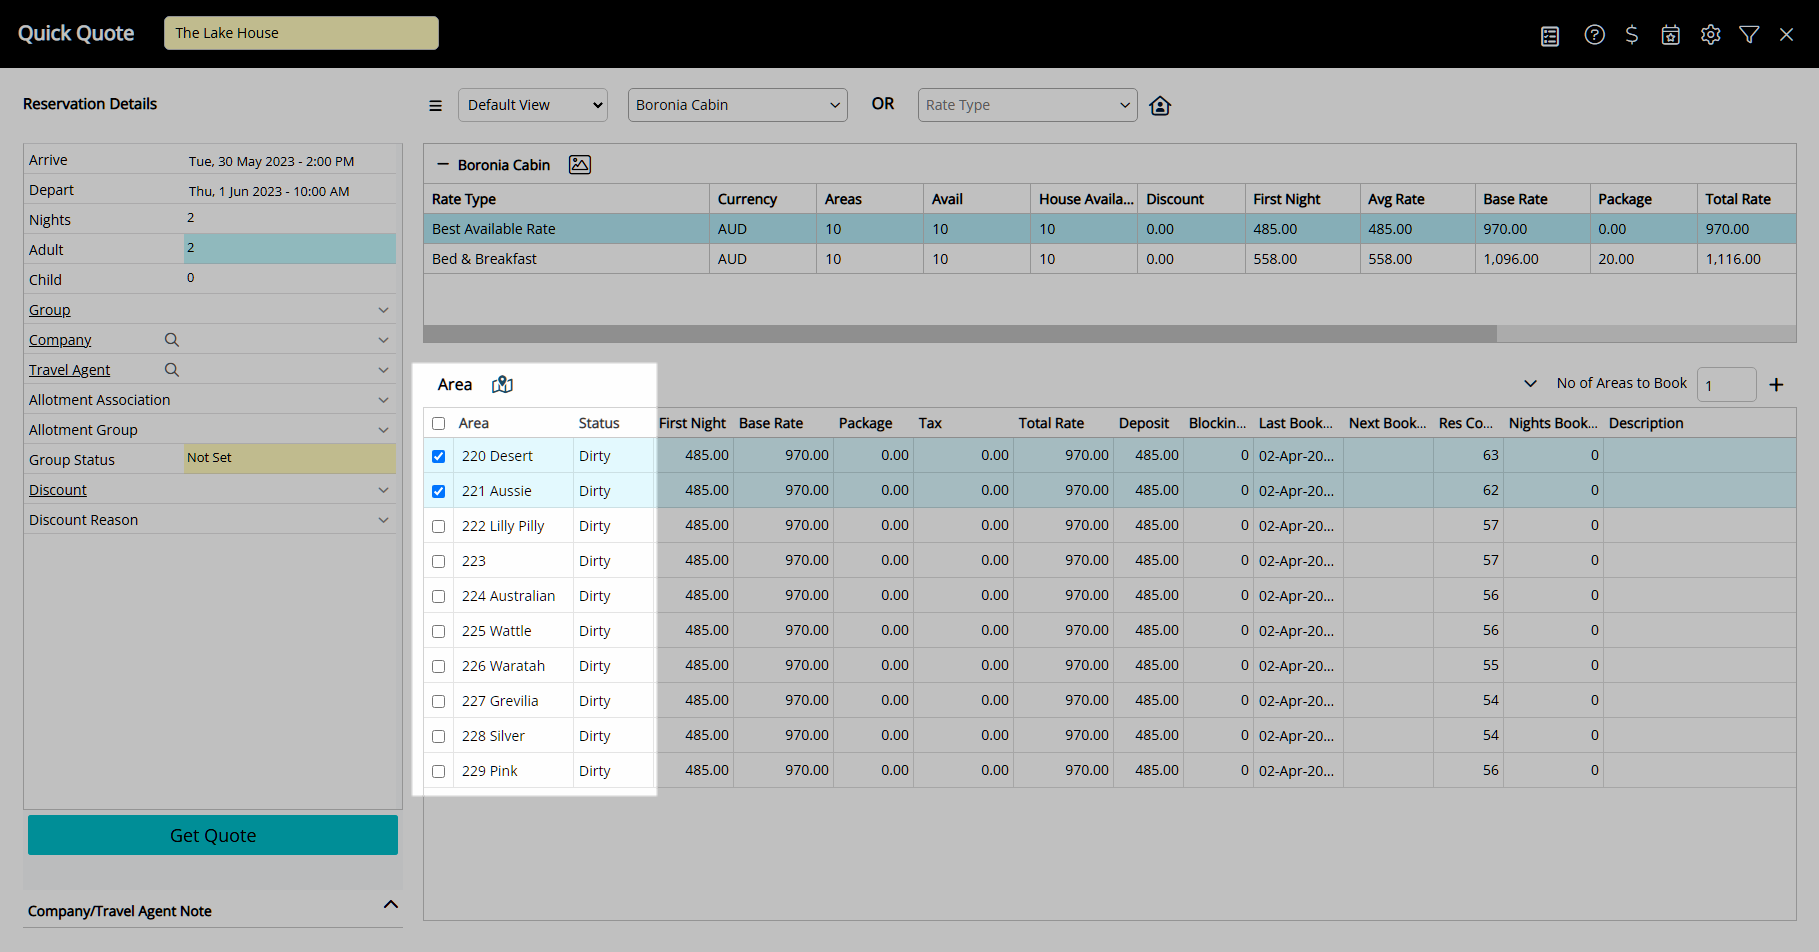
- Select the checkbox for the Areas to Book or enter the Number of Areas to Book.
- Select the
 'Add to Reservation' icon.
 - Select 'Proceed'.
- Enter the Group Name.
- Enter the Guest Details.
- Save/Exit.
Go to Reservations > Quick Quote in the Side Menu of RMS.
Perform a Quick Quote Search and select 'Get Quote'.
Select a Category or Rate Type.
Select the checkbox for the Areas to Book or enter the Number of Areas to Book.
Select the ![]() 'Add to Reservation' icon.
'Add to Reservation' icon.
Select 'Proceed'.
Enter a Group Name.
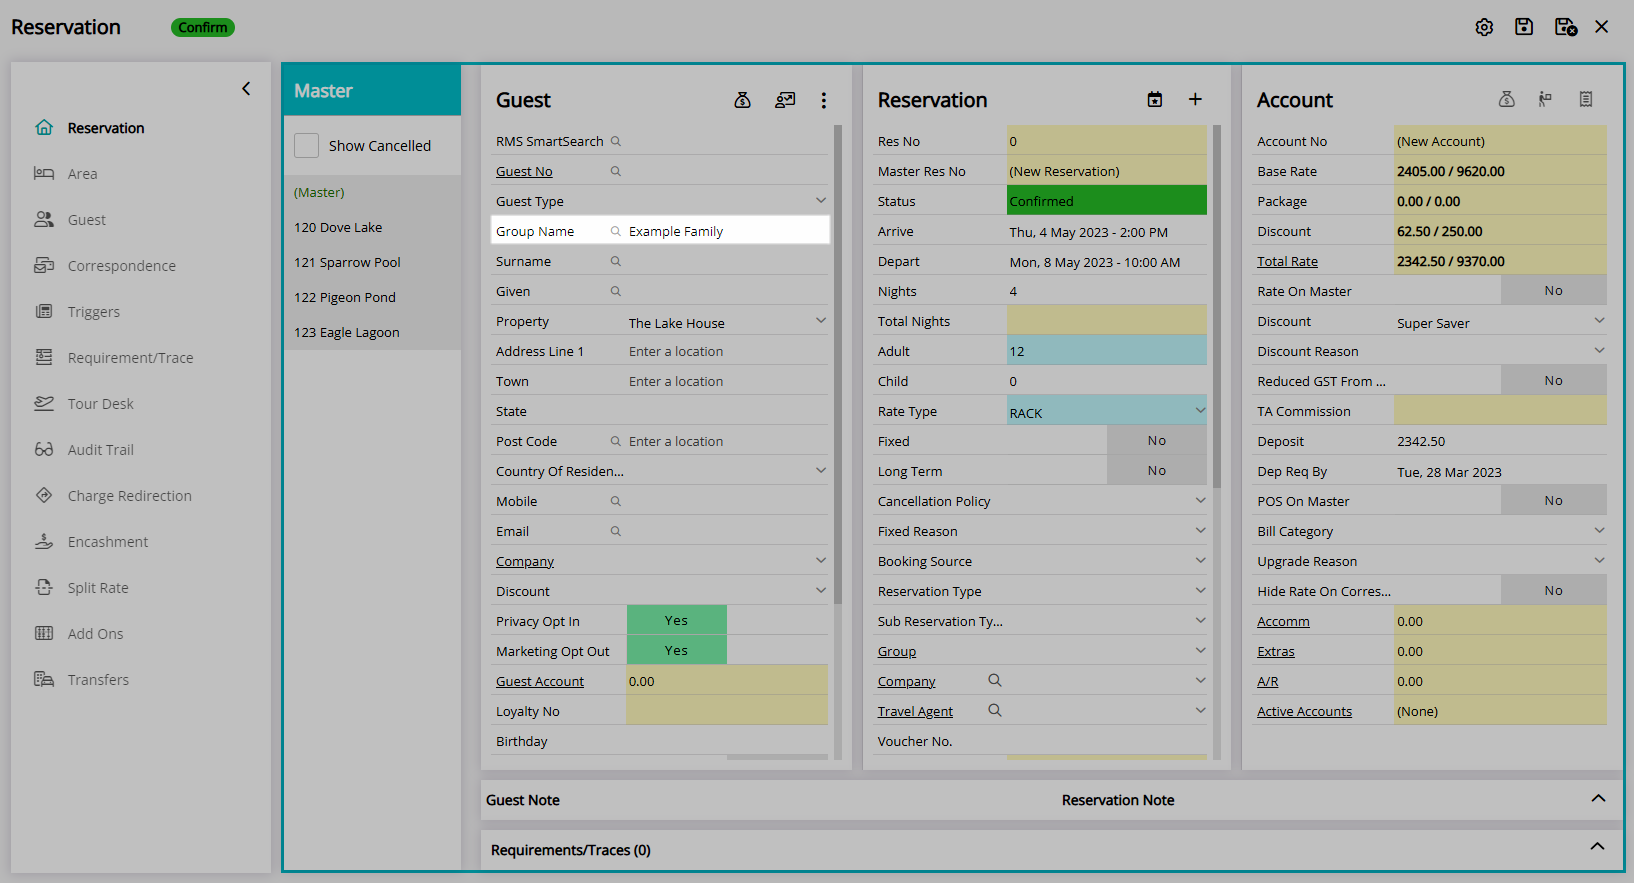
Enter the Guest Details.

Select 'Save/Exit' to store the changes made and leave the Master Reservation.
Add Master Reservation - Book by Category Only
- Go to Reservations > Master Reservation in the side menu of RMS.
- Select an Arrive and Depart Date.
- Select the Reservation Details and Rate Type.
- Enter the Number to Book for each date.
- Save.
- Enter a Group Name.
- Enter the Group Leader Guest Details.
- Save/Exit.
Go to Reservations > Master Reservation in the side menu of RMS.
Select an Arrive and Depart Date.

Select the Reservation Details and Rate Type.
Enter the Number to Book for each date.
Select the  'Save' icon to continue to the reservation screen.
Enter a Group Name.
Enter the Group Leader Guest Details.
Select the  'Save/Exit' icon to store the changes made and create the Master Reservation.
The group reservation will be created with a group reservation number, cover page, and group account.
Managing Group Reservations
A Master Reservation is a group of reservations for guests travelling together, linked by a group name and reservation number. A group reservation can be created using the ‘Master Reservation’ option on the Booking Chart, by adding areas to a new or existing reservation, combining existing reservations, on Quick Quote, or with the Master Reservation tool when set up as Book by Category.
An existing group reservation can be managed using the group management tools available on the group cover page of a Master Reservation, which includes a group account, charge routing, an area list, and other group management tools.
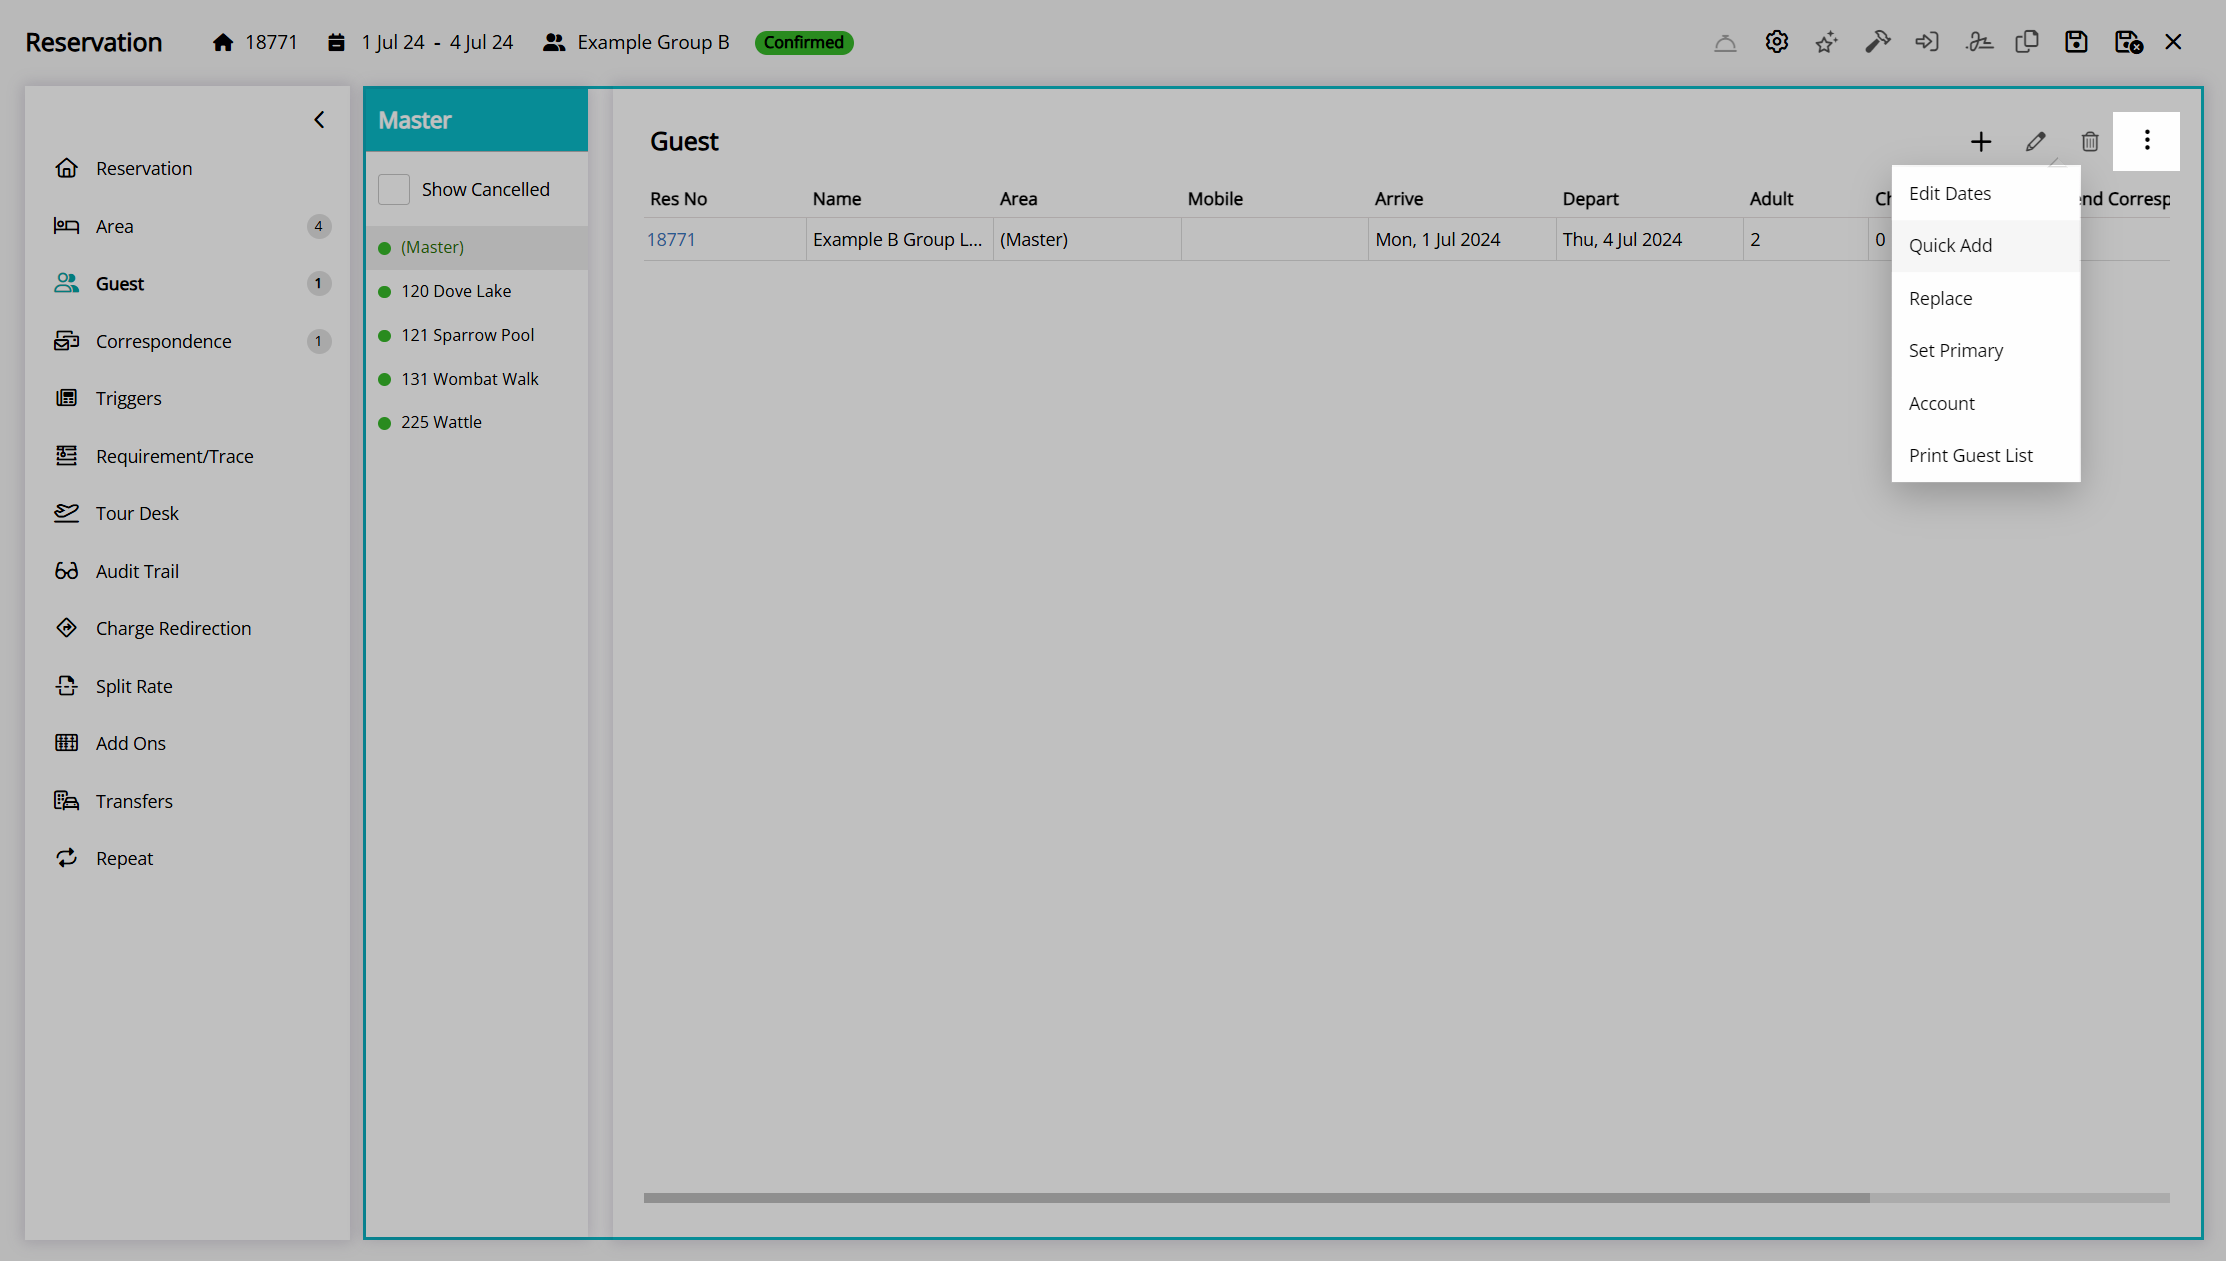
The group cover page—shown as (Master) in the navigator pane—includes group management tools under the  'Options' menu on both the 'Area' and 'Guest' tabs.
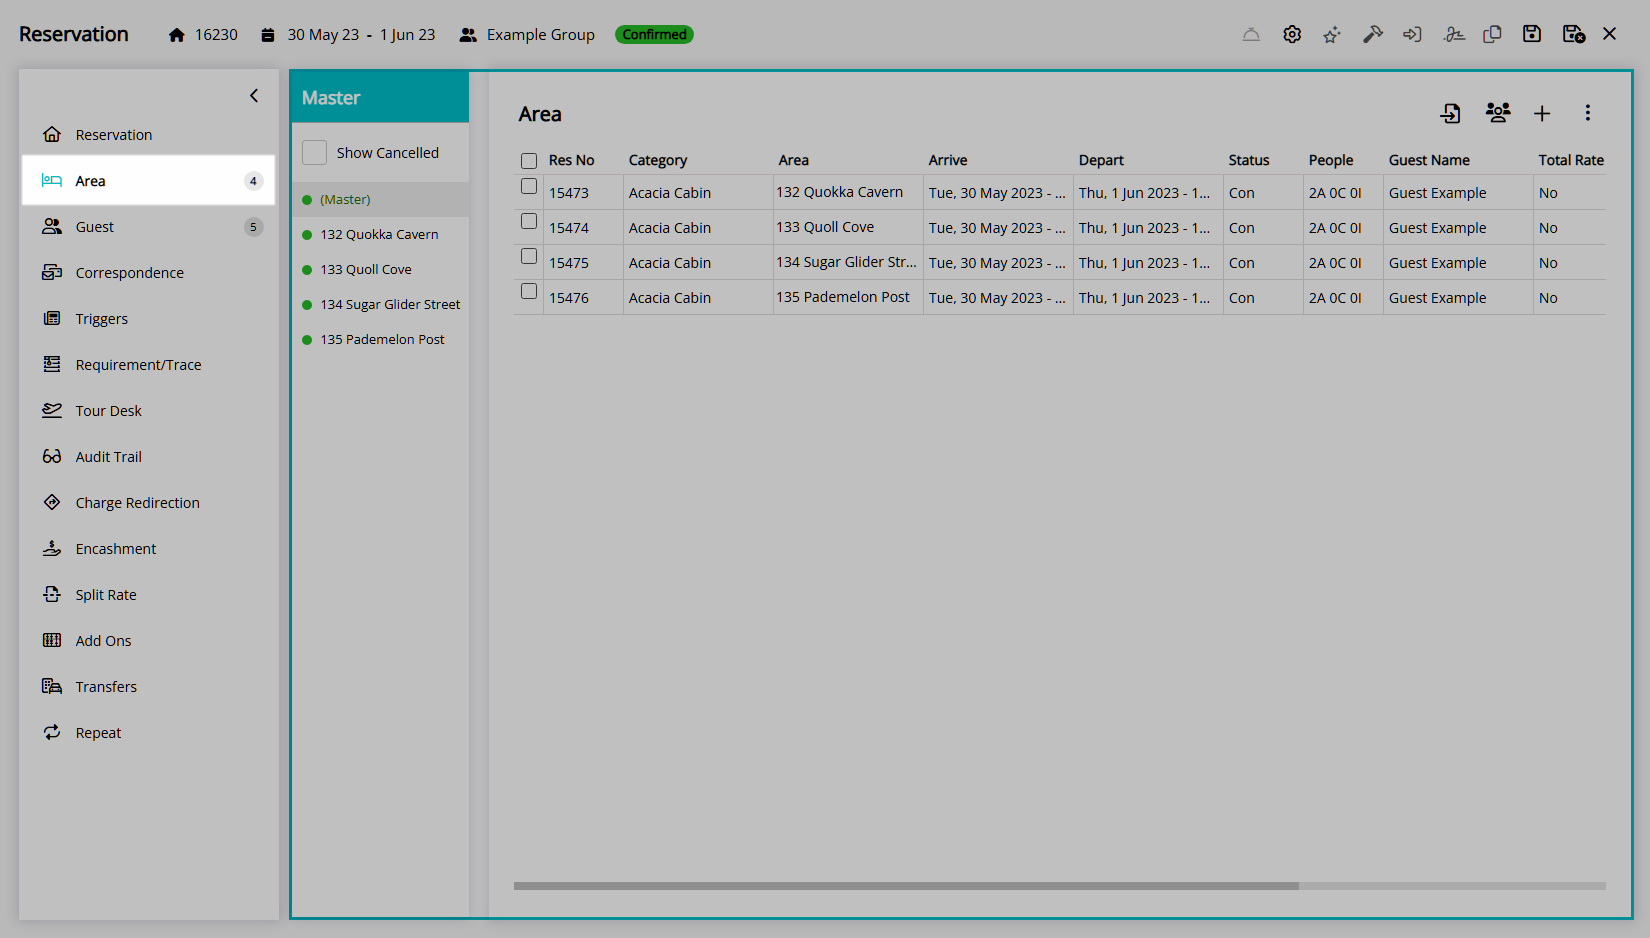
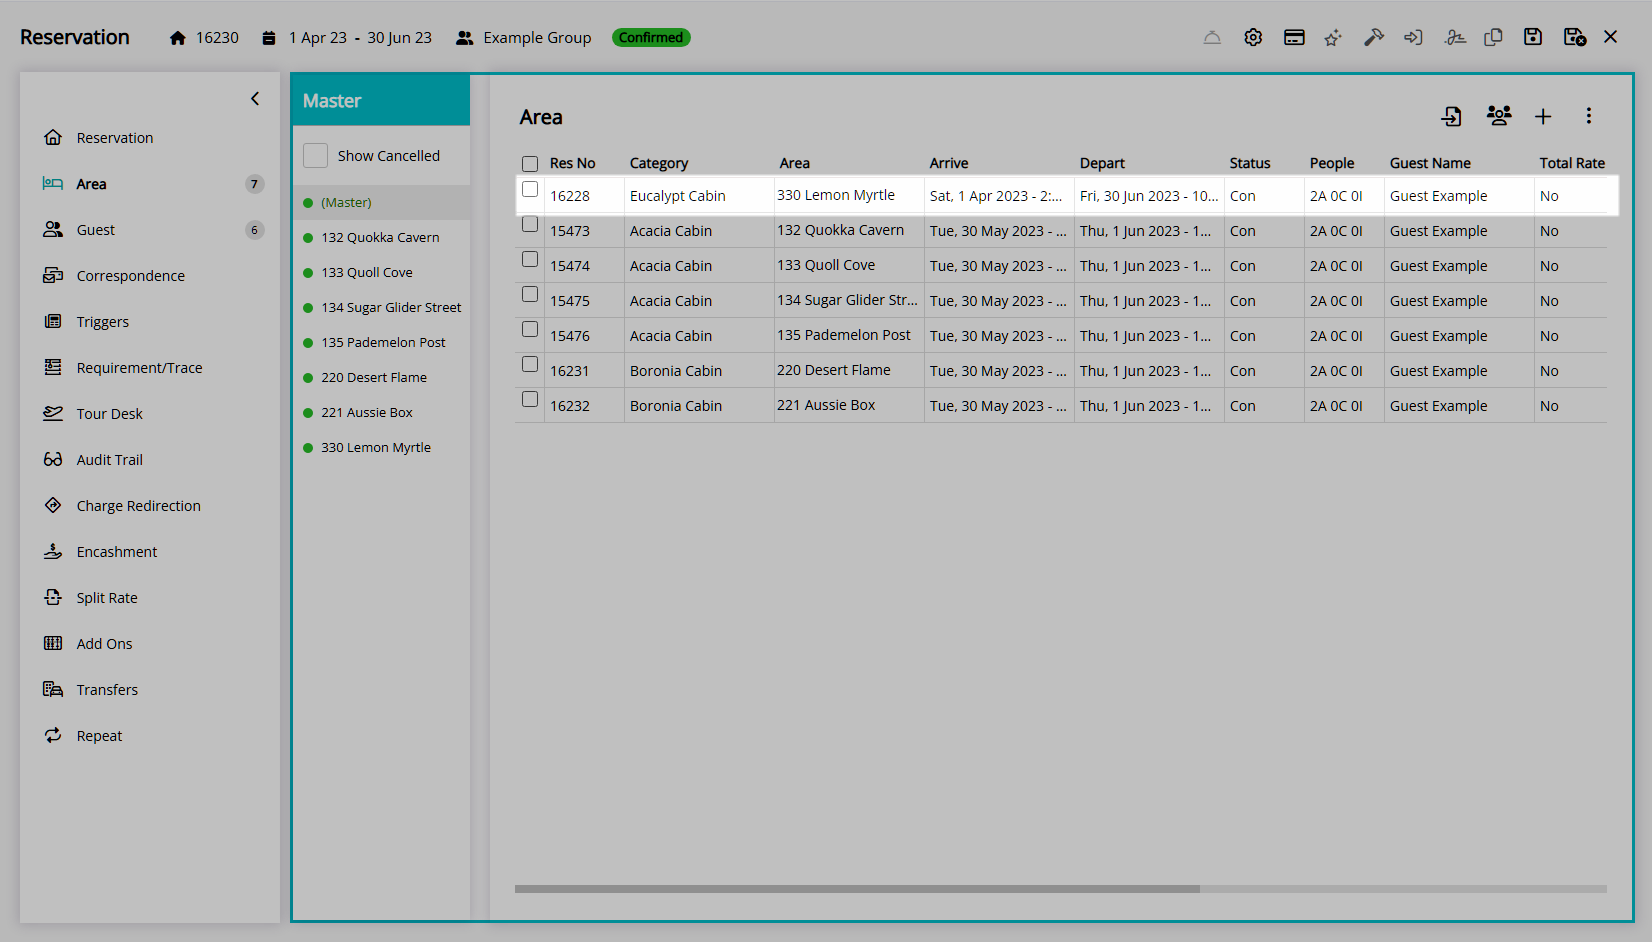
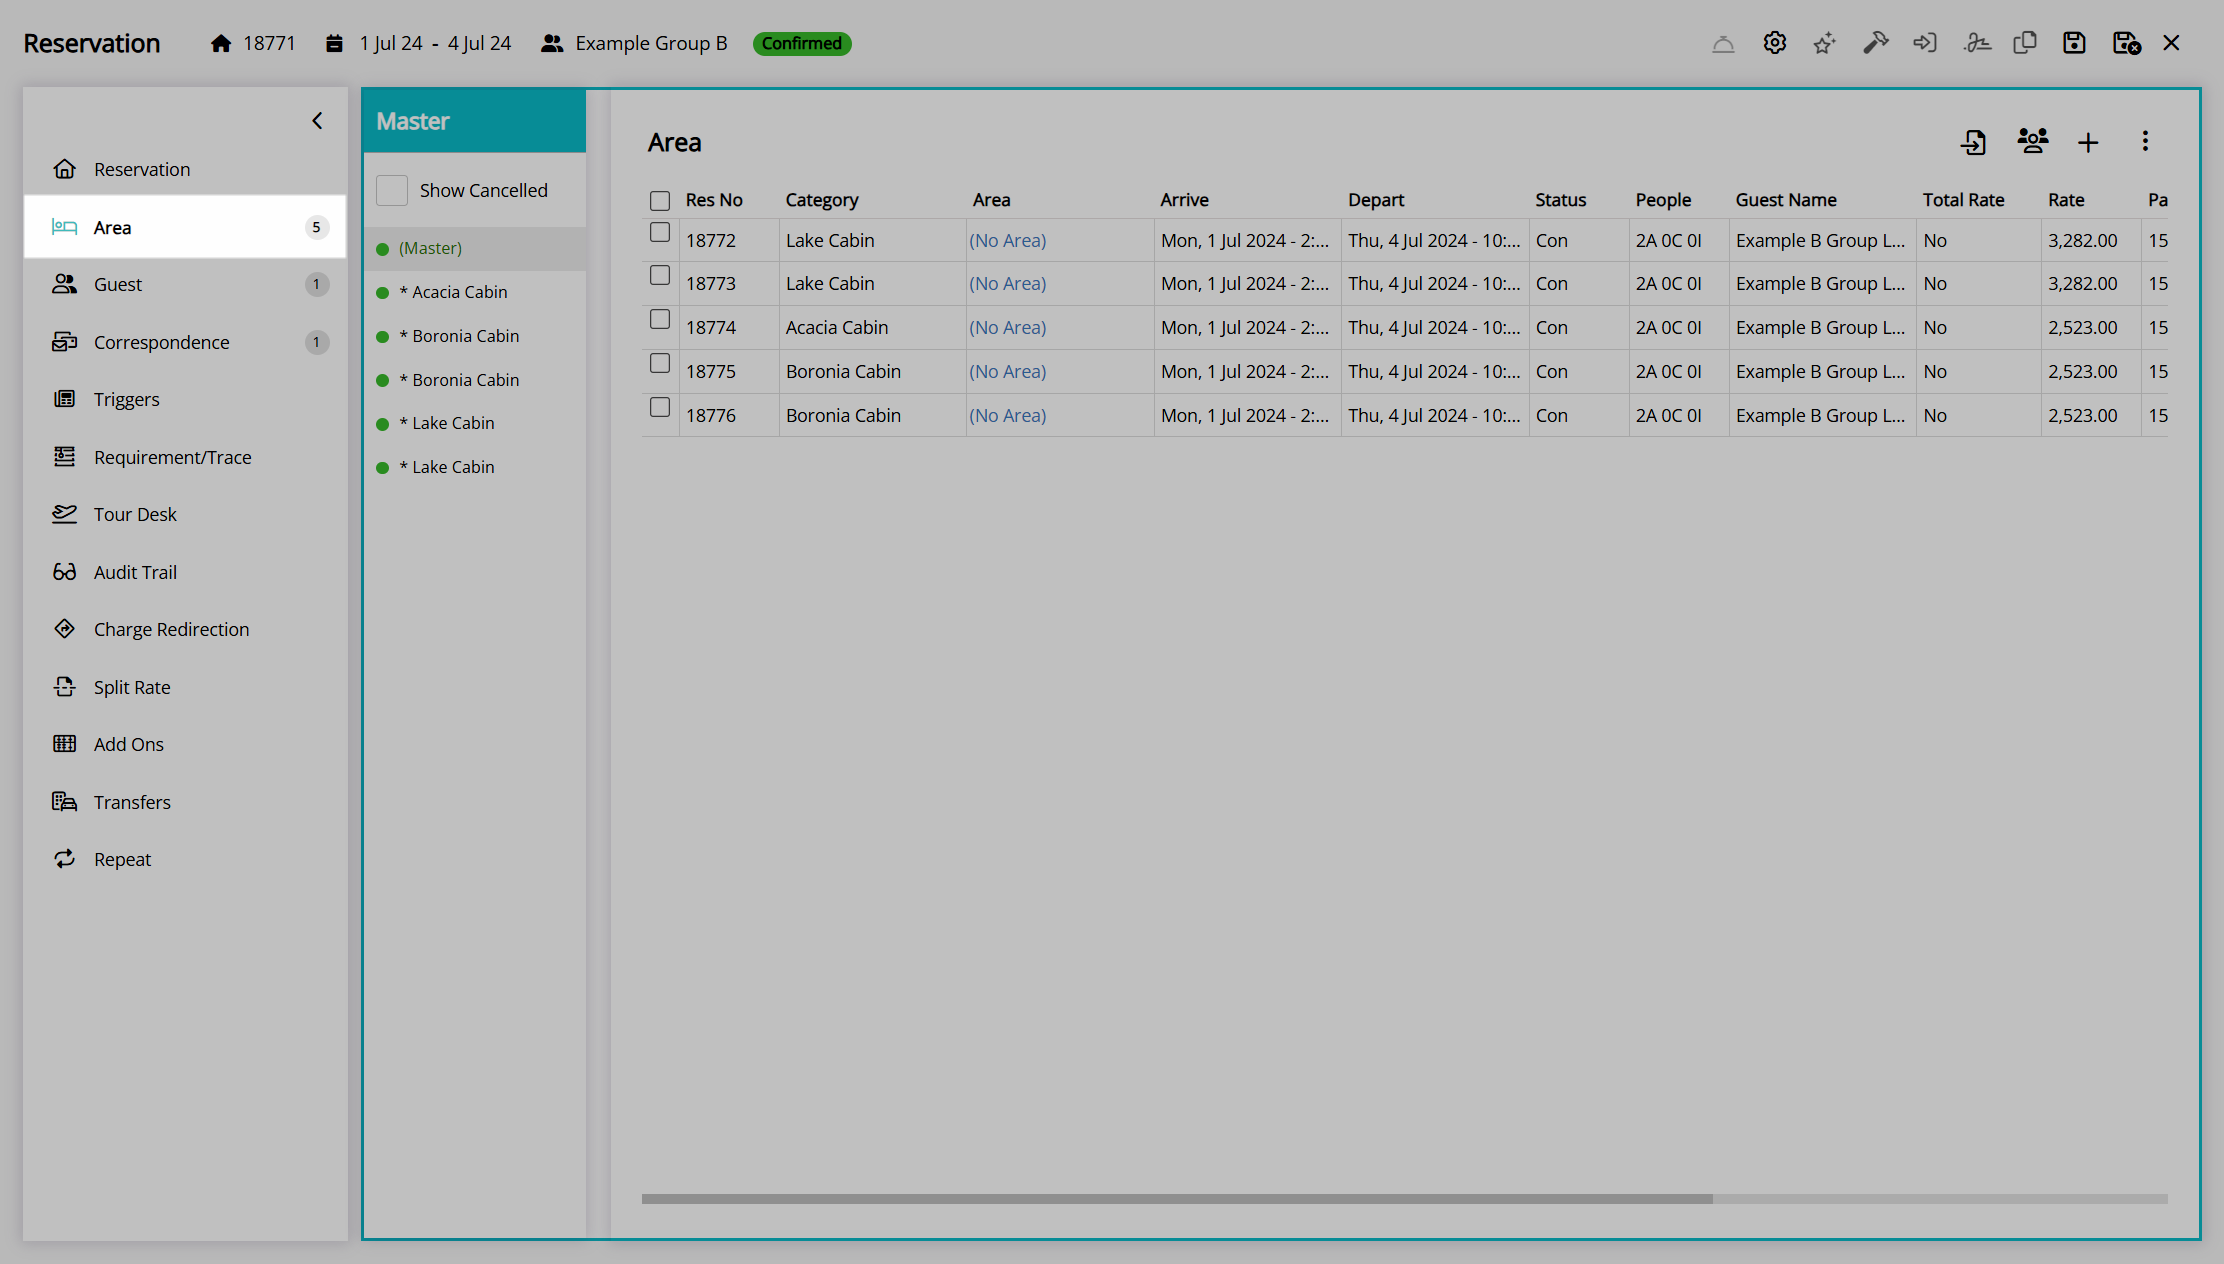
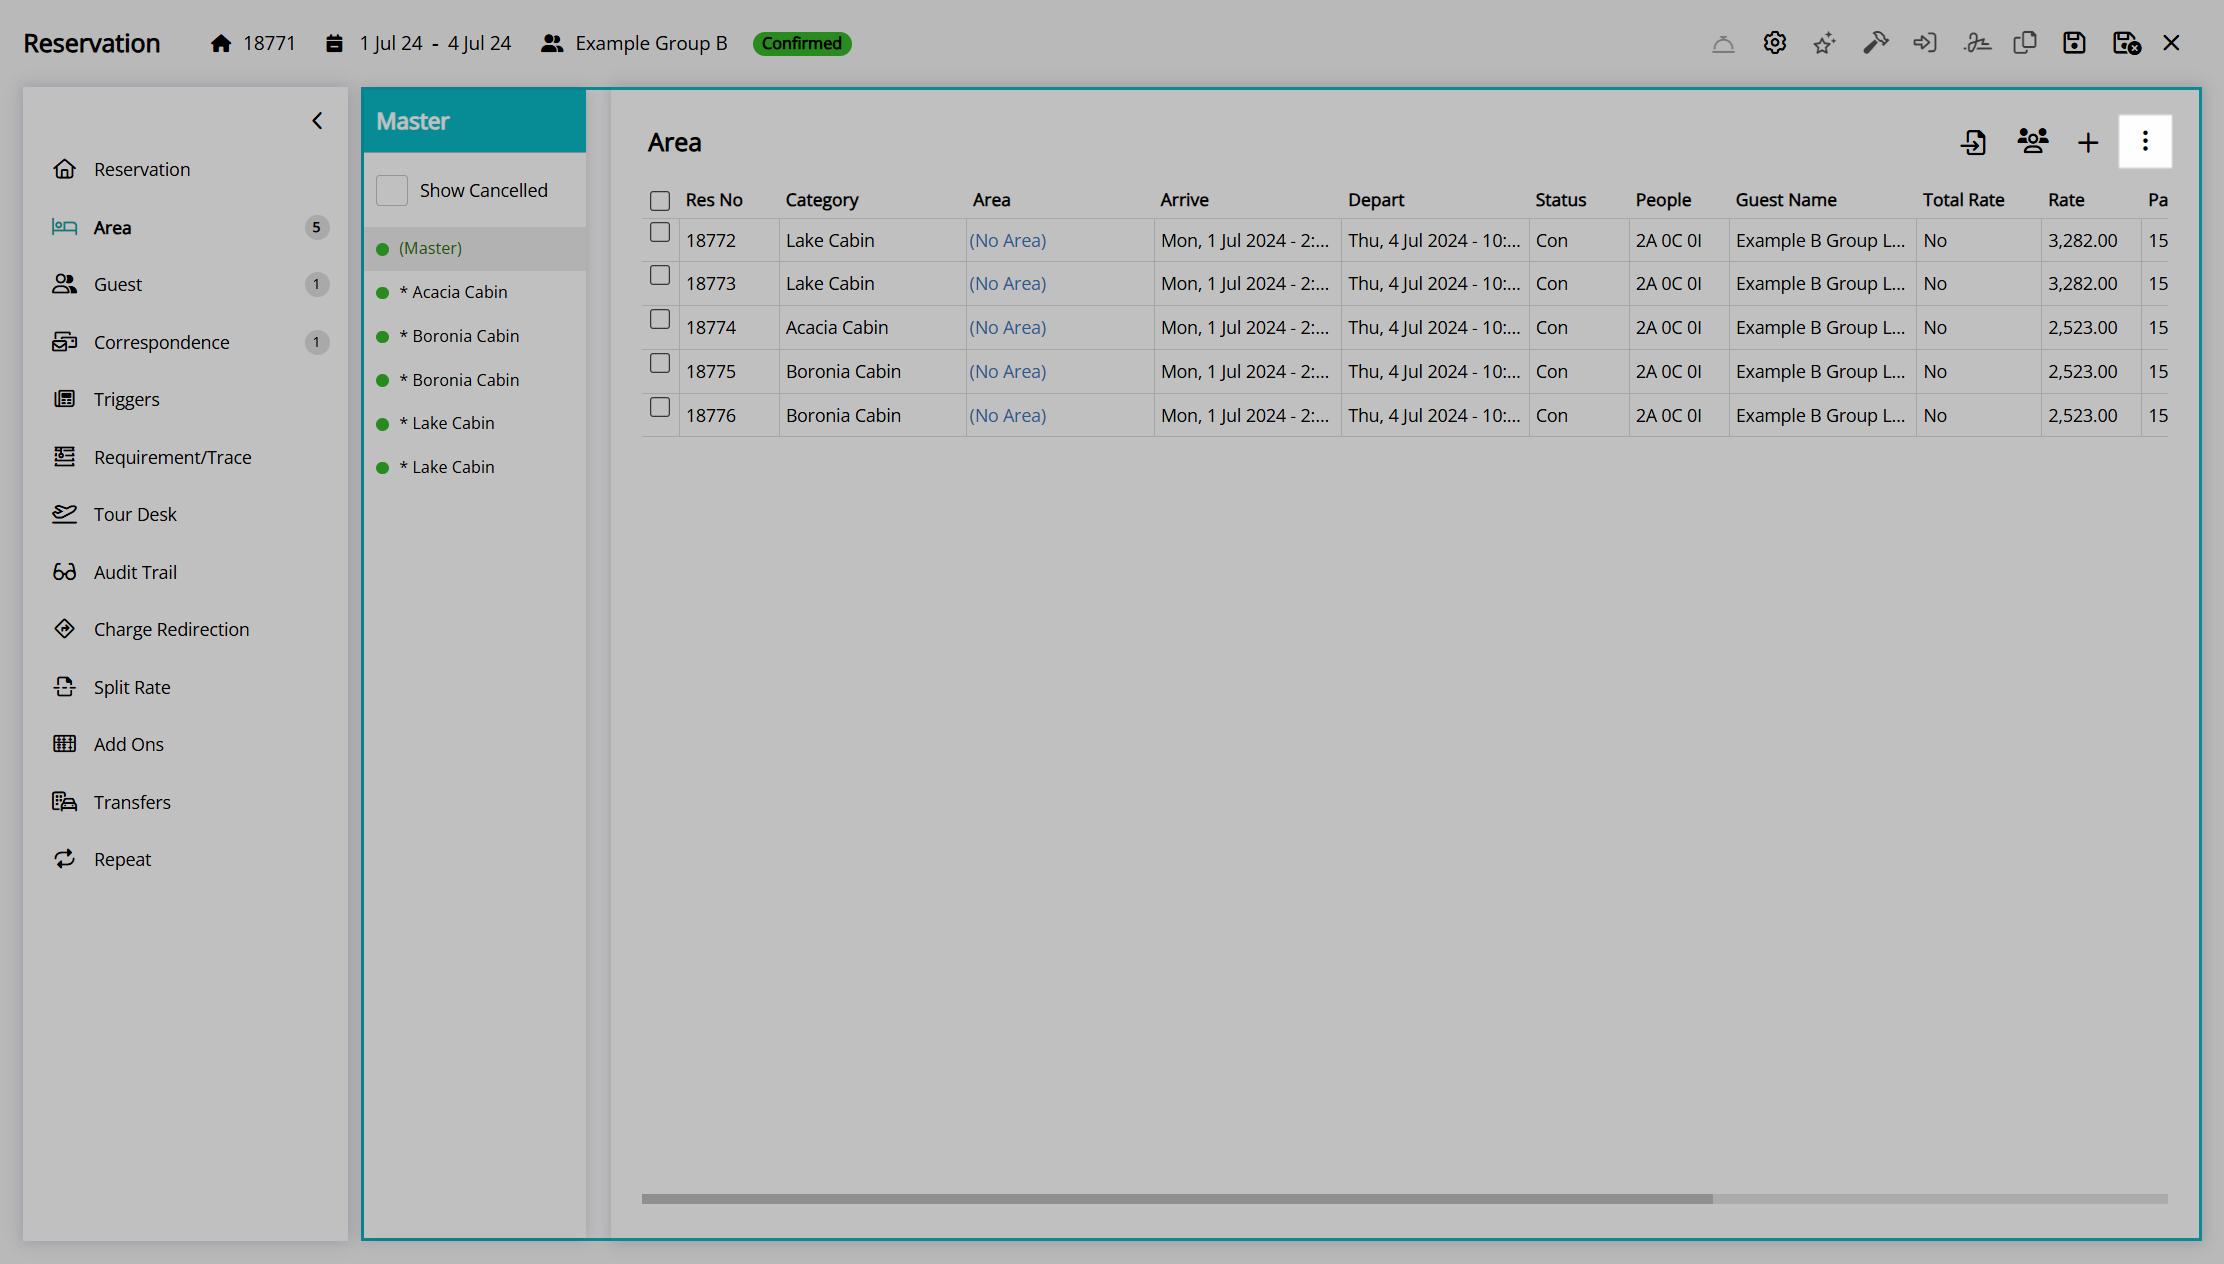
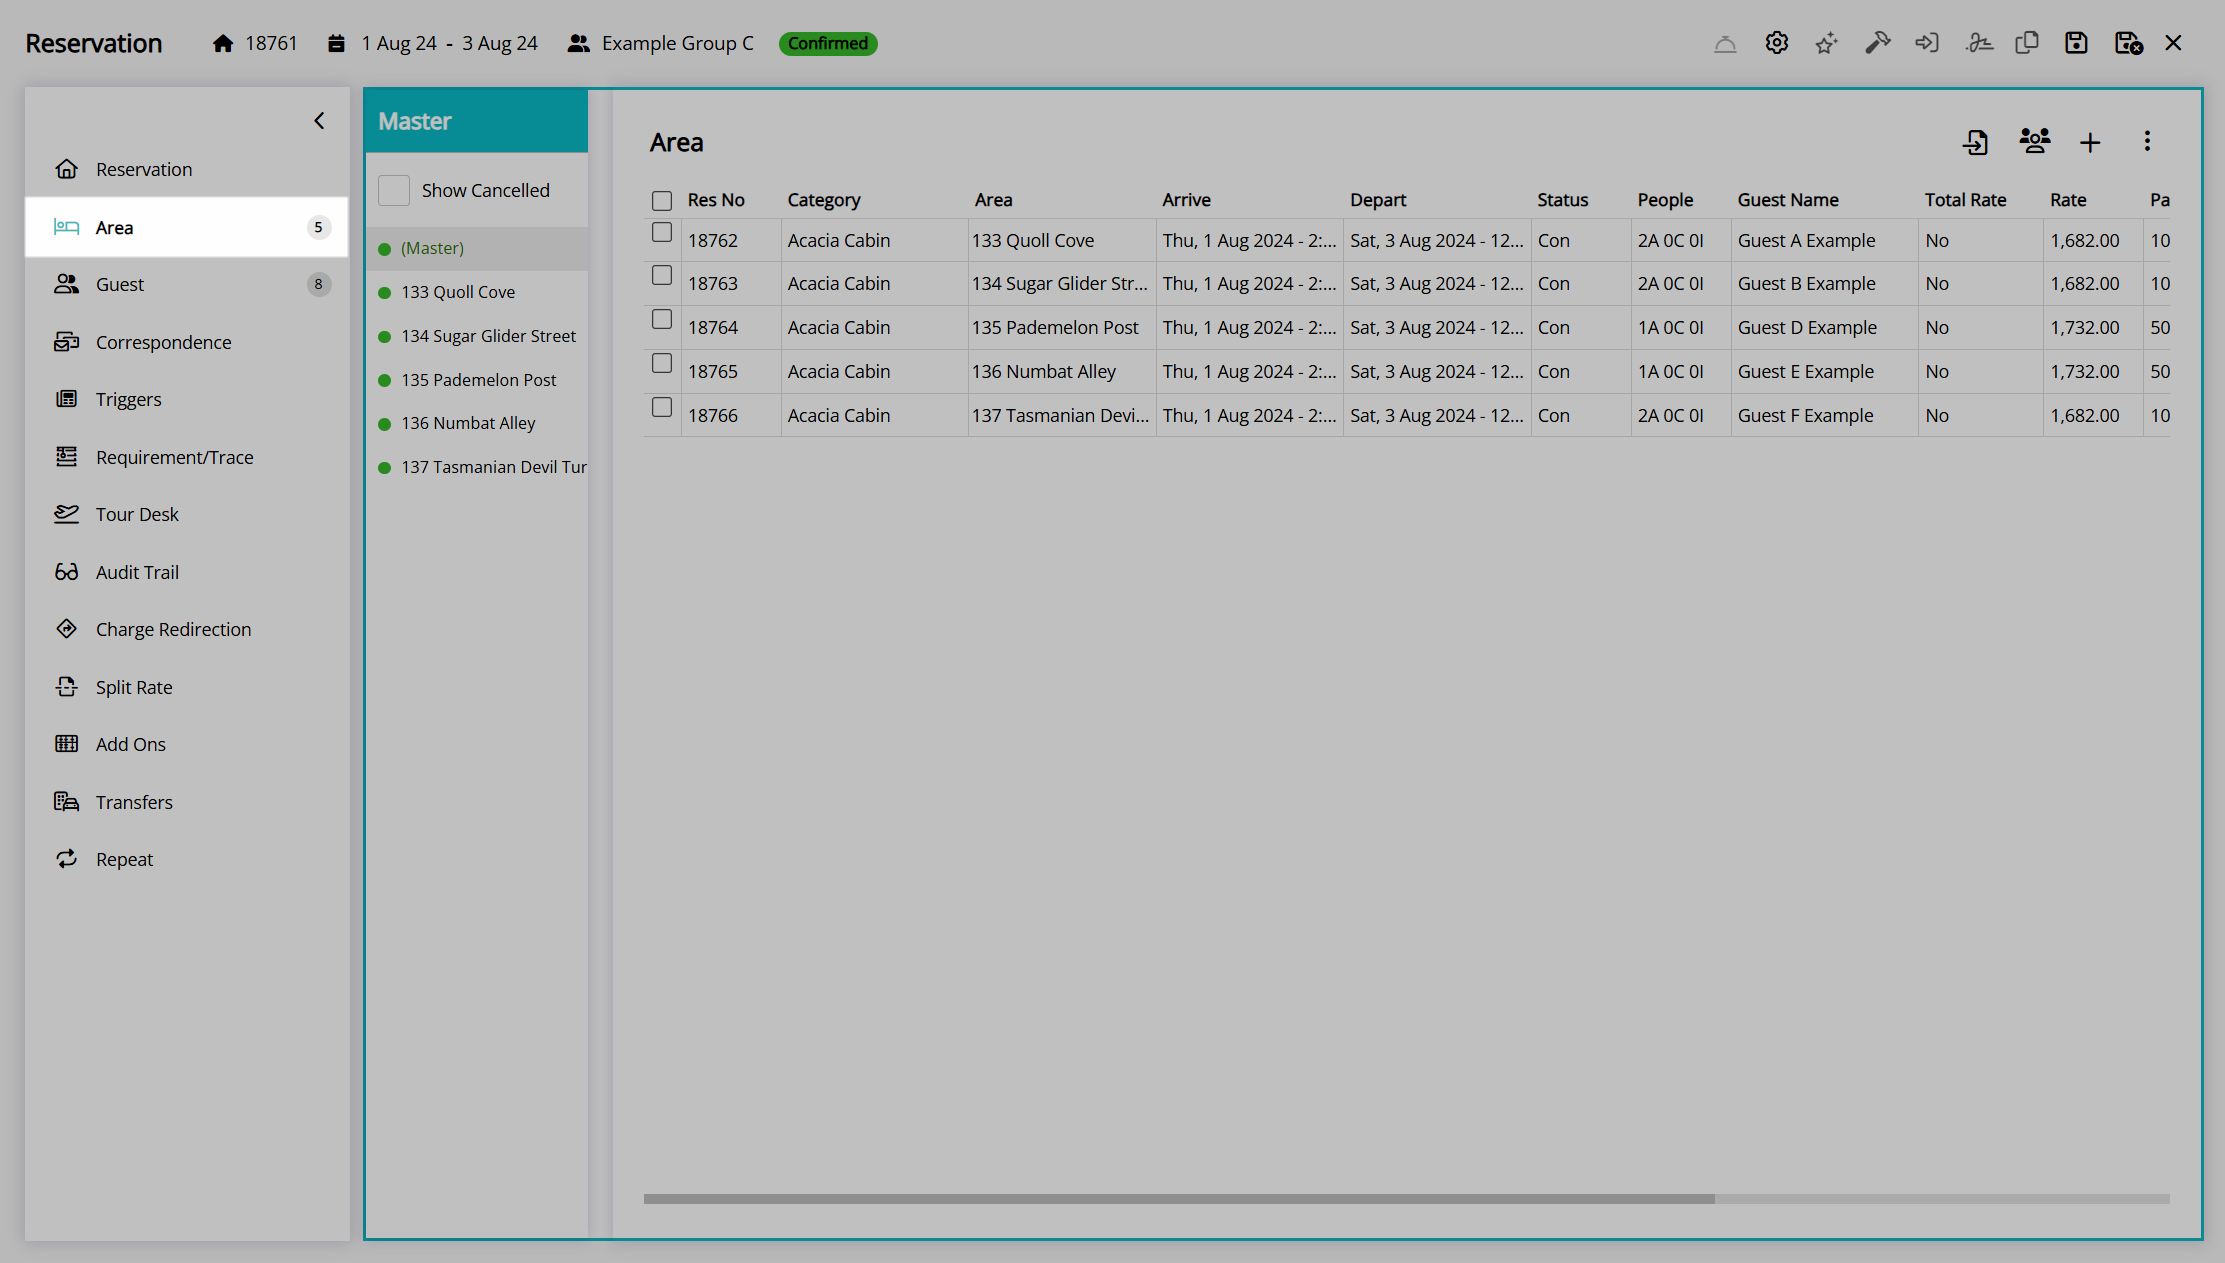
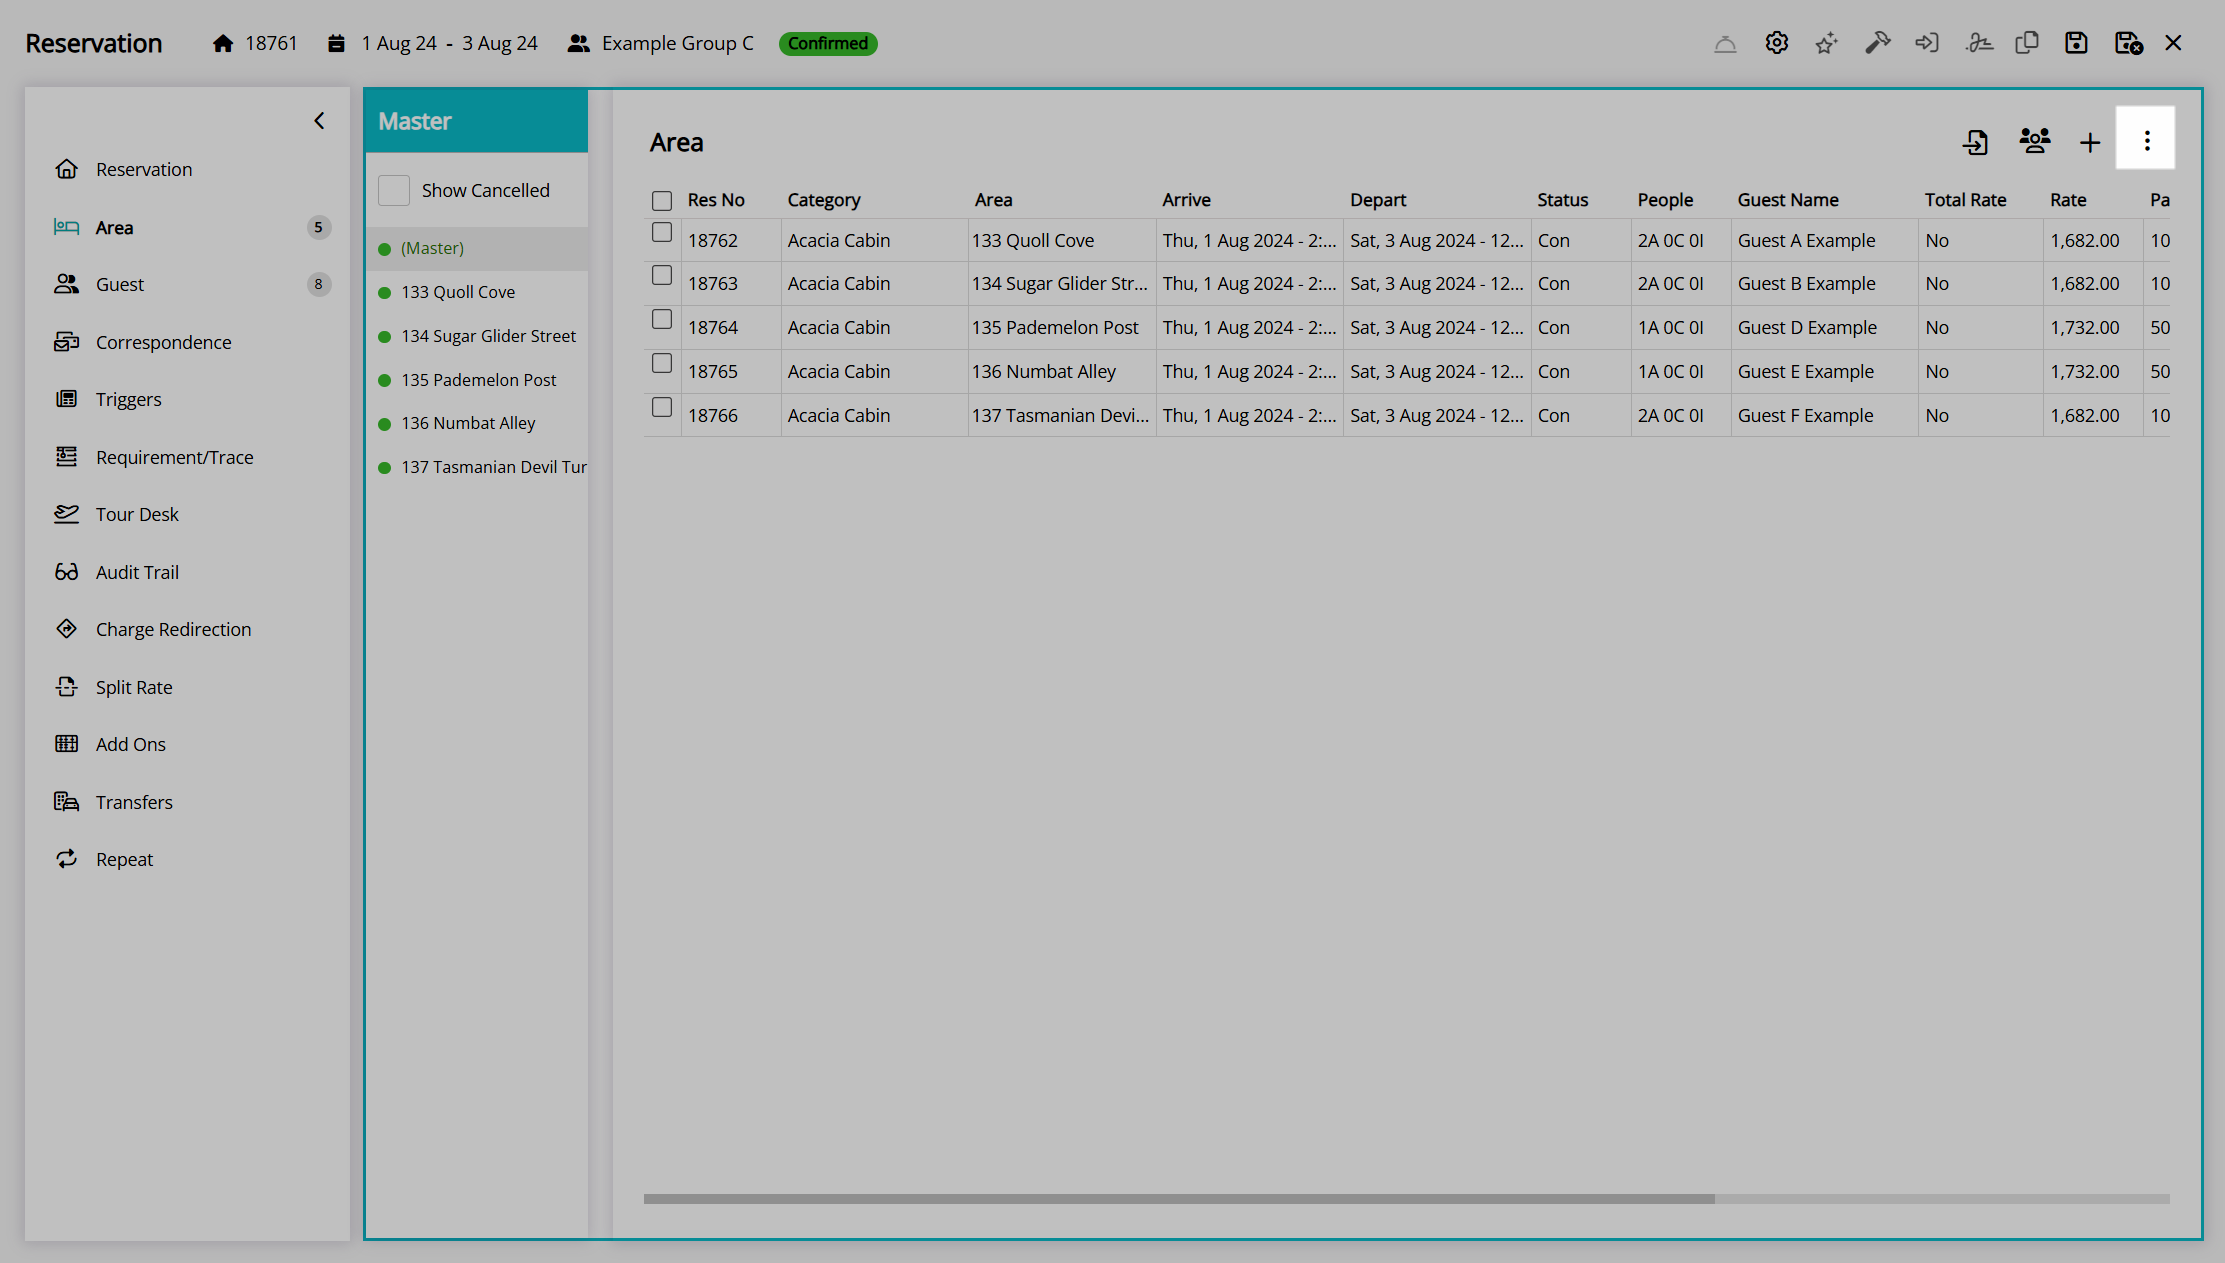
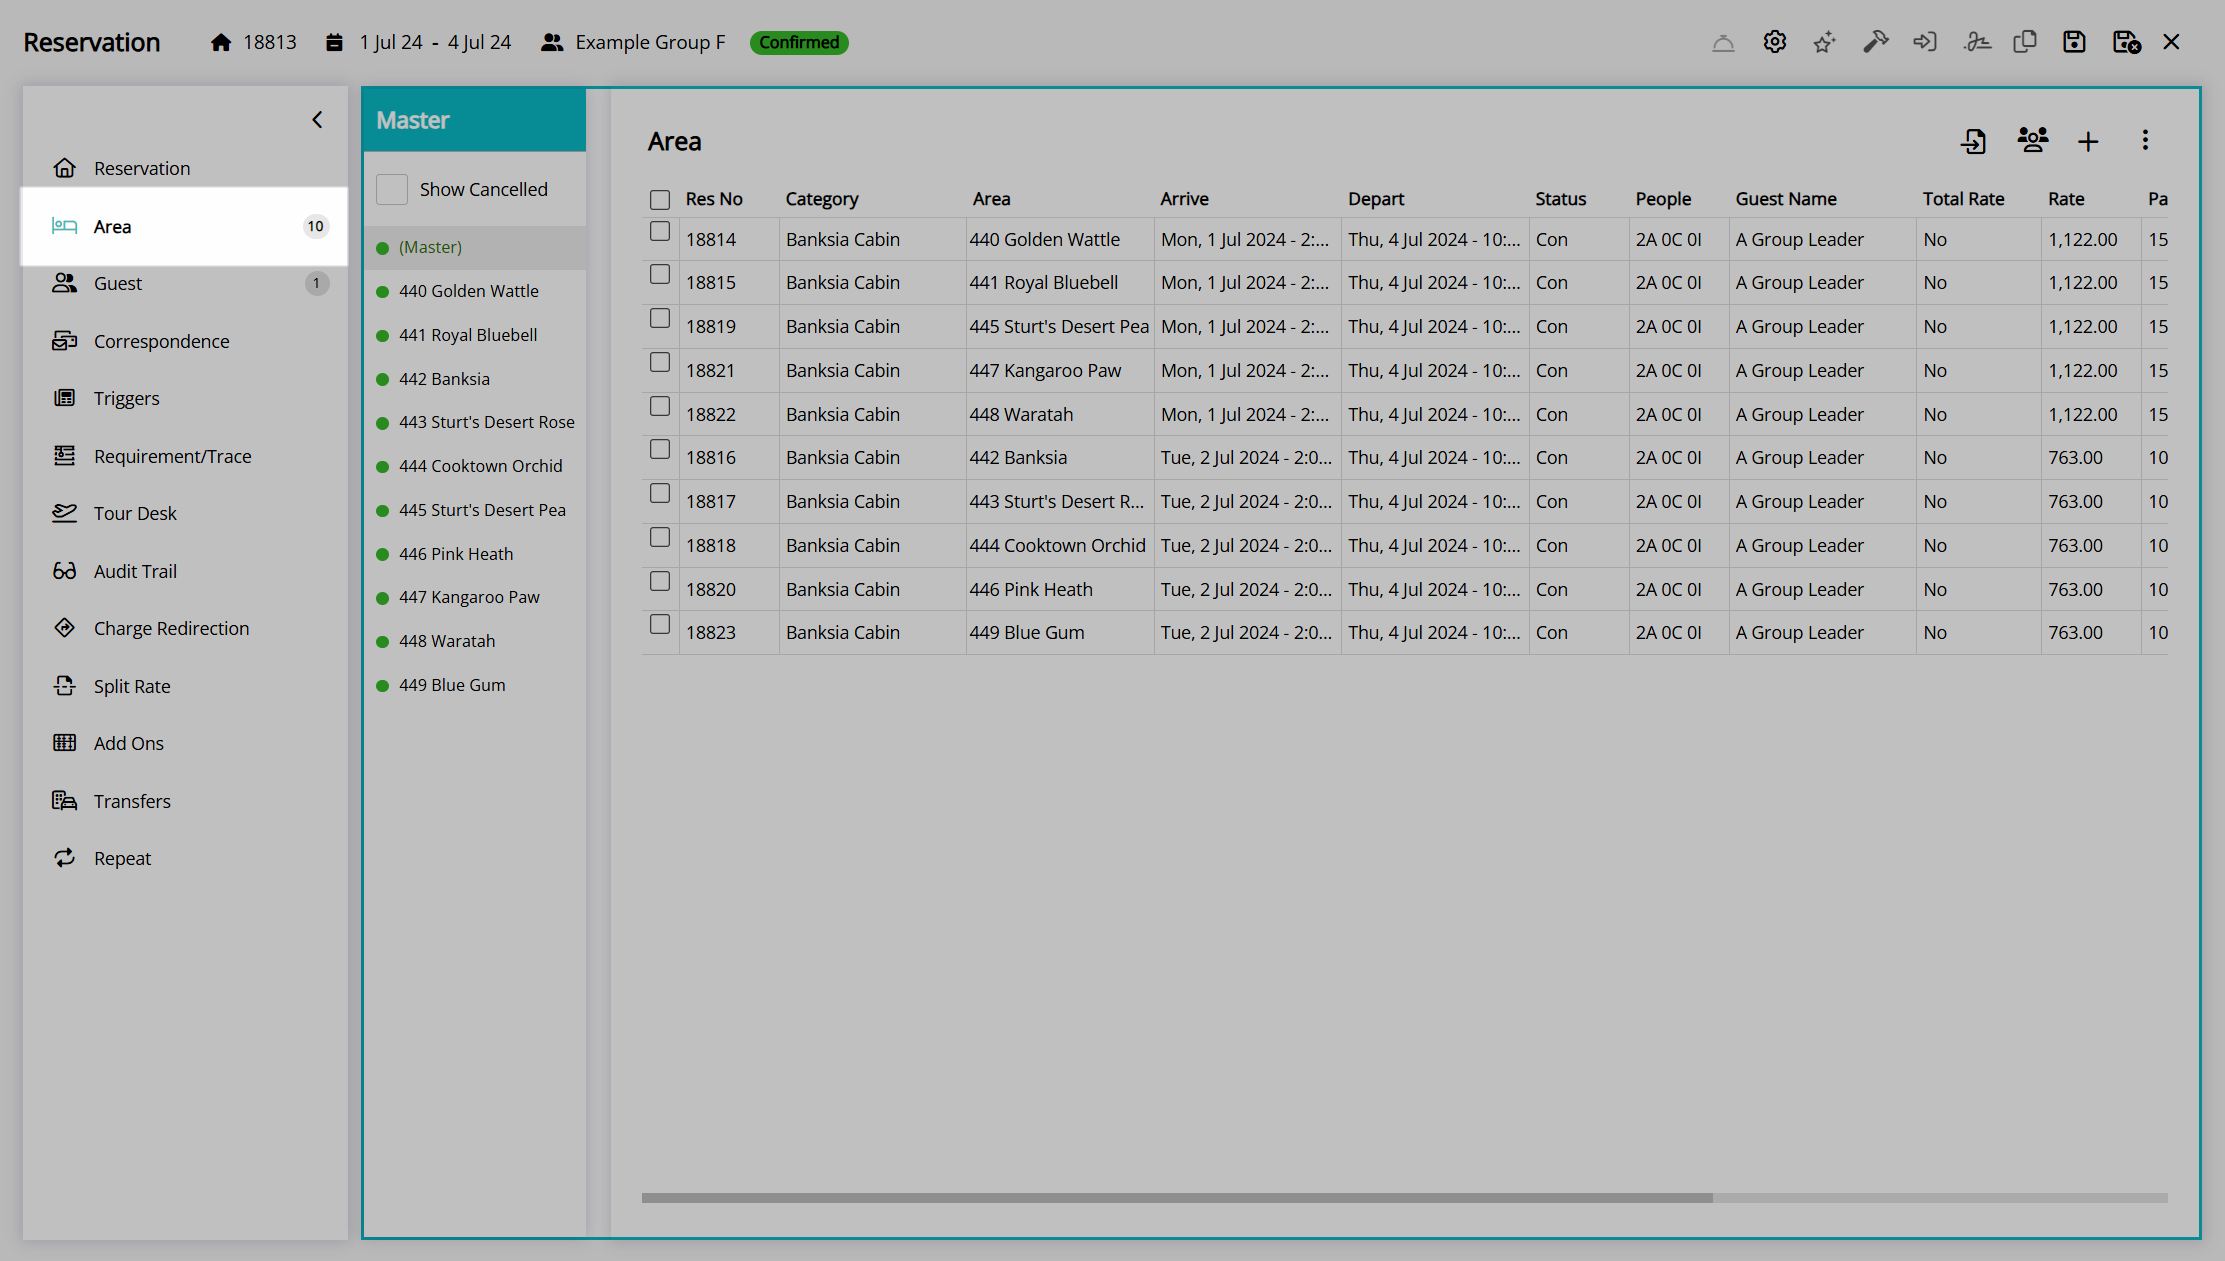
Area
The 'Area' tab on the group cover page includes the full list of areas or categories for all reservations within the group and the following group management tools under the  'Options' menu:
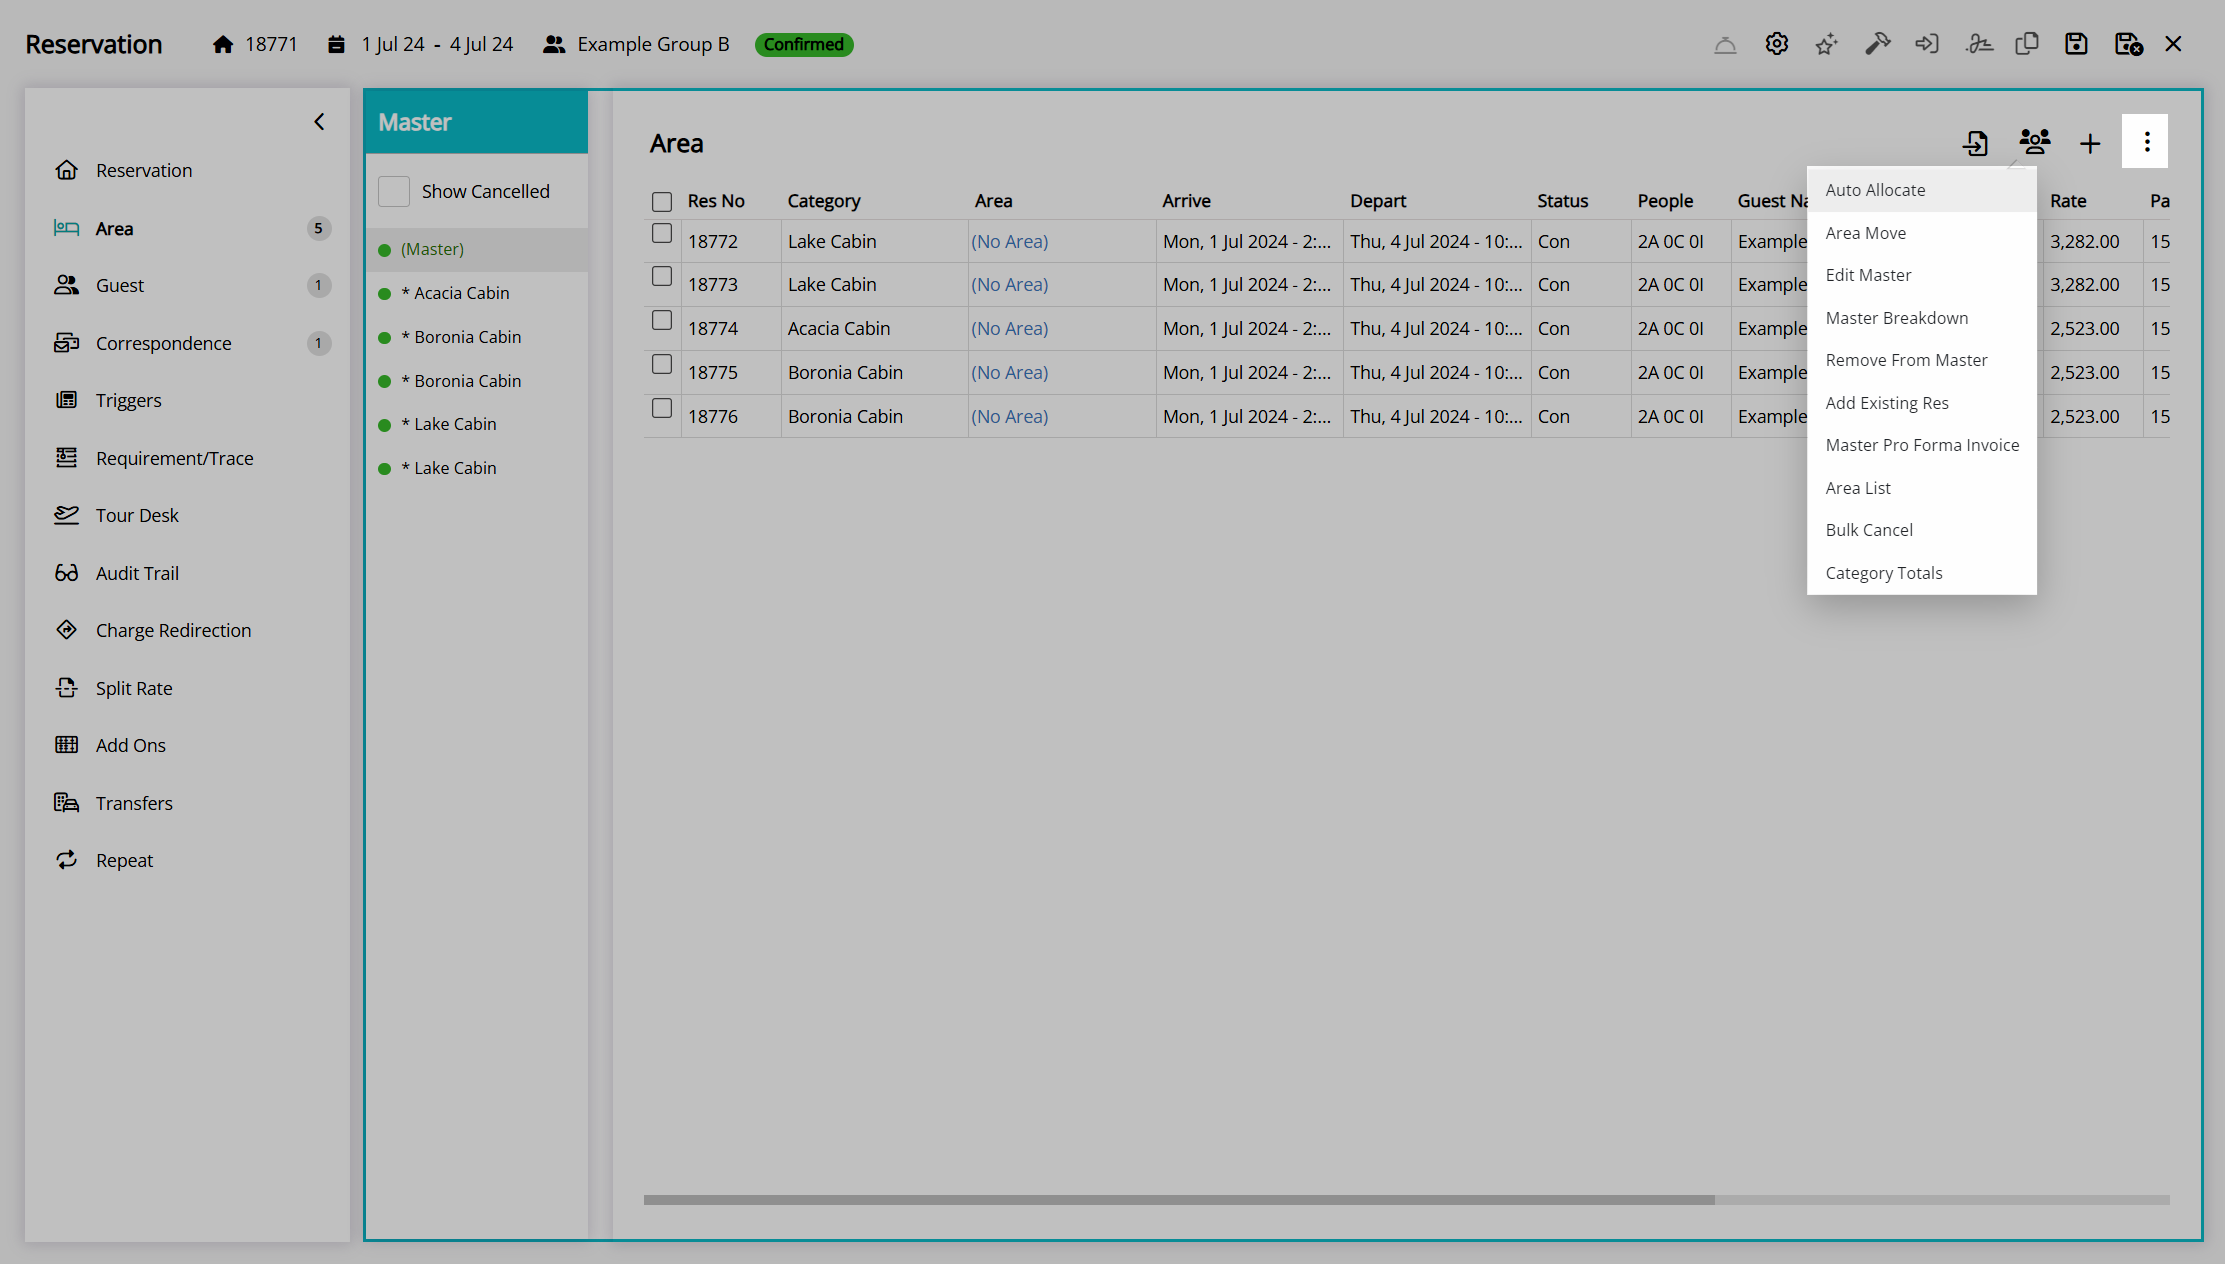
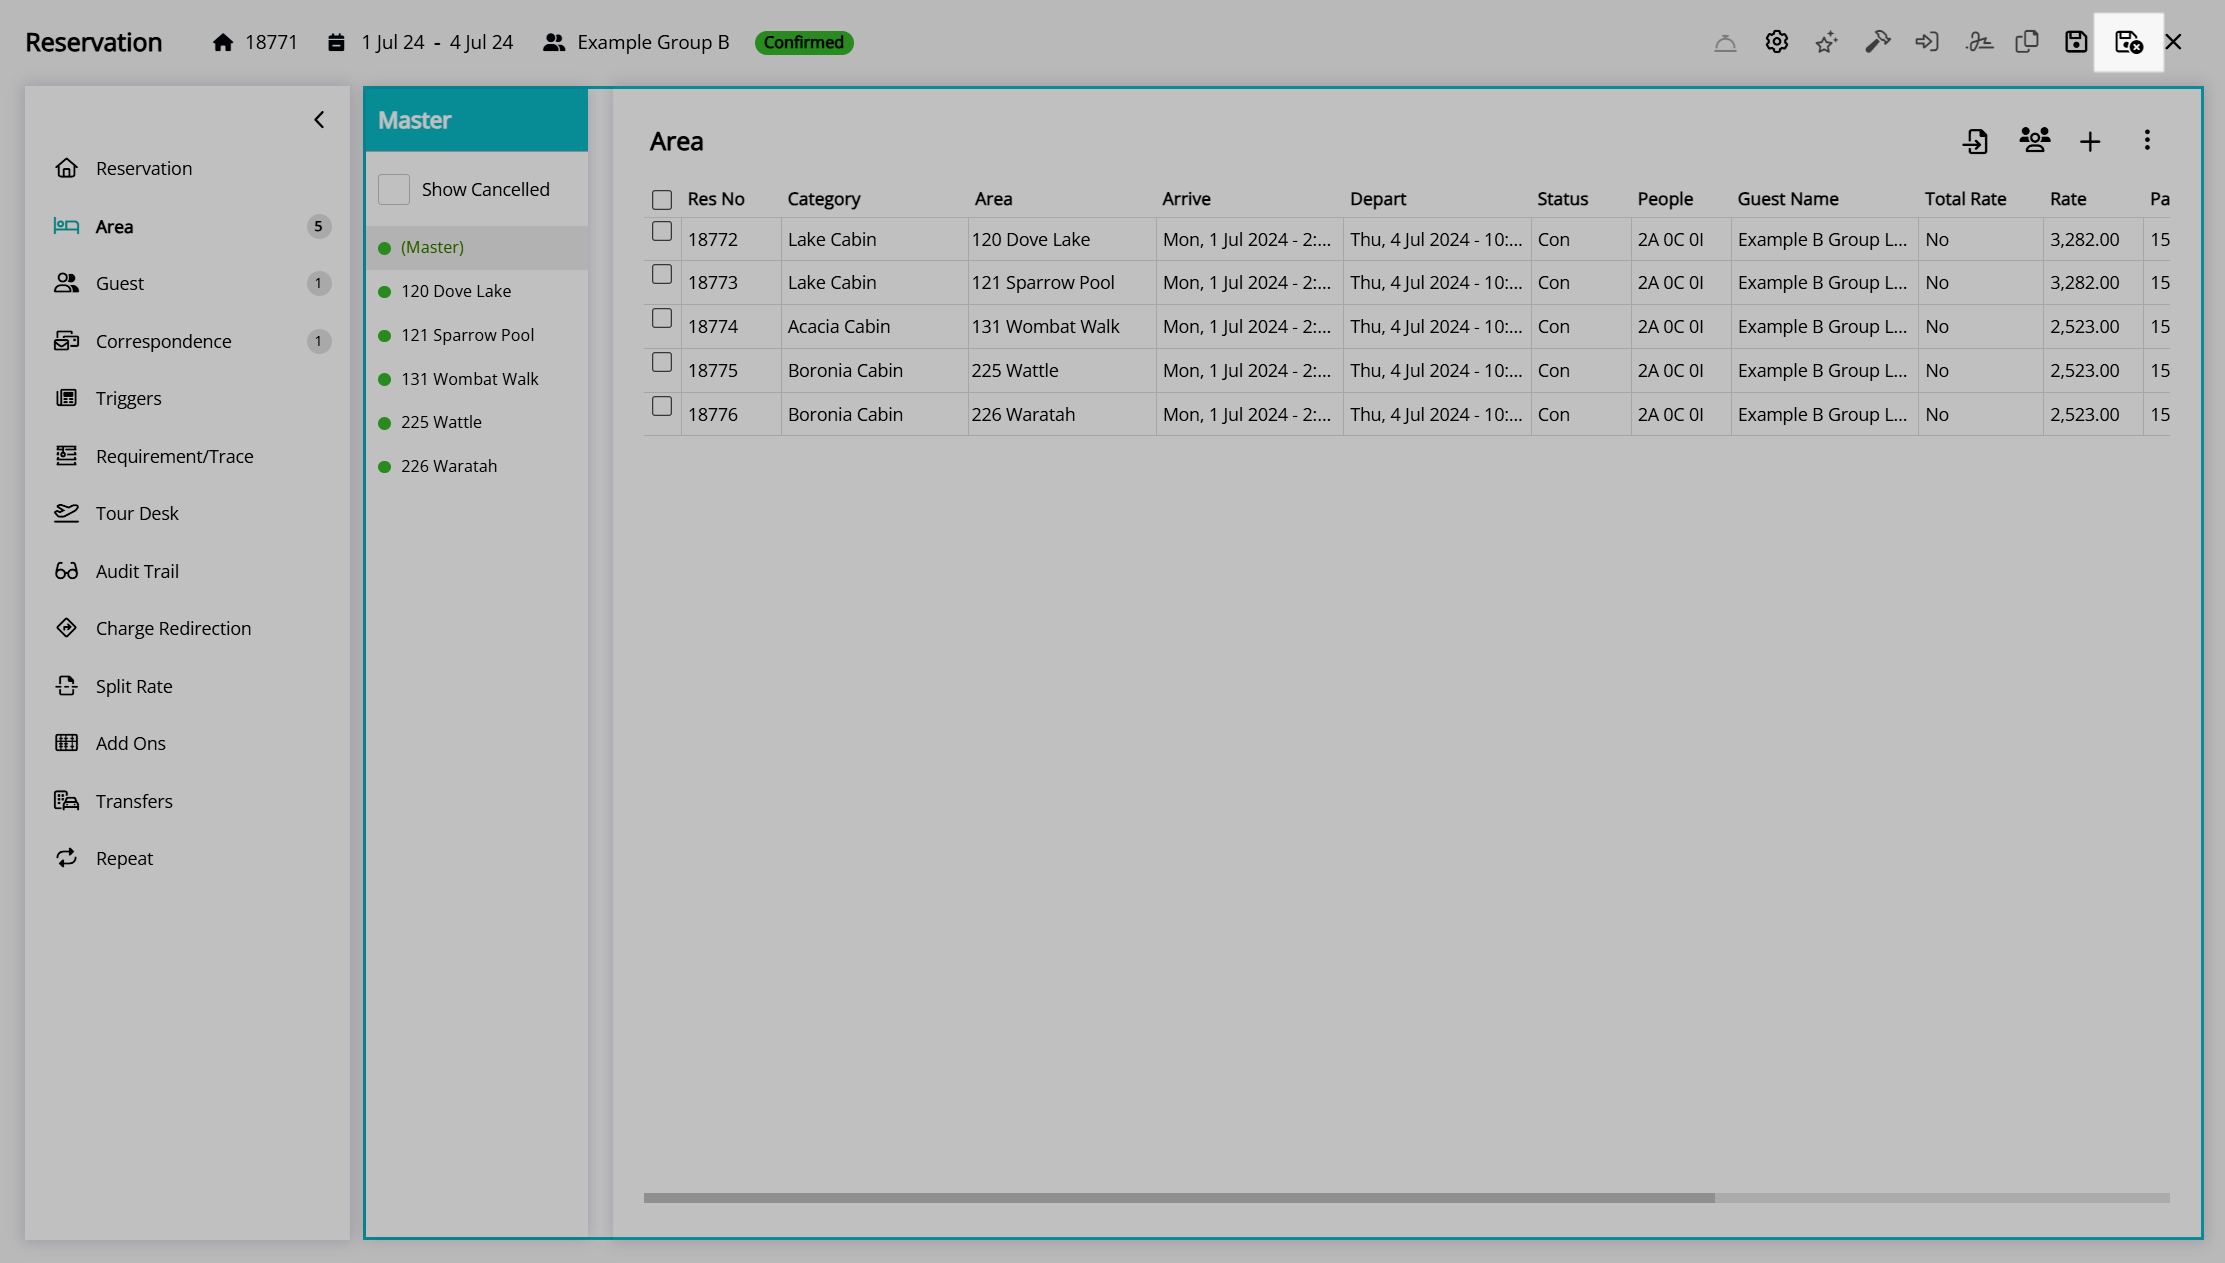
Auto Allocate
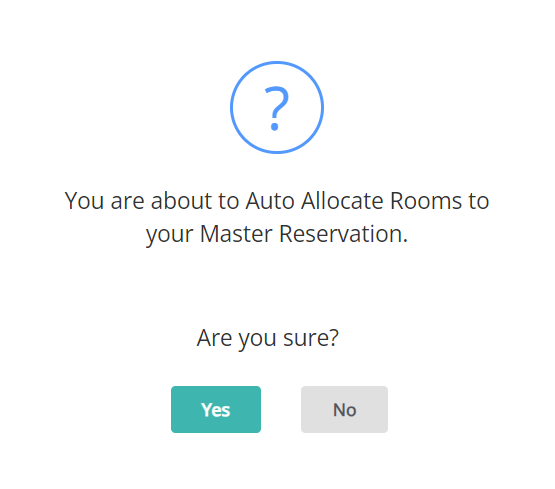
The 'Auto Allocate' option on the 'Area' tab of the group cover page can be used by properties set up as Book by Category to bulk allocate areas to all reservations within the group.
- Go to the Toolbar Menu Reservation Search in RMS.
- Enter the Group Name or Reservation Number and press 'Enter'.
- Select '(Master)' in the Navigator Pane.
- Navigate to the 'Area' tab.
- Select the
 'Options' icon.
 - Select the option 'Auto Allocate'.
- Select 'Yes' to confirm.
- Save/Exit.
Go to the Toolbar Menu Reservation Search in RMS, enter the Group Name or Reservation Number and press 'Enter'.

Select '(Master)' in the Navigator Pane to open the group cover page.
Navigate to the 'Area' tab.
Select the  'Options' icon.
Select the option 'Auto Allocate'.
Select 'Yes' to confirm.
Select the  'Save/Exit' icon to store the changes made and leave the group reservation.
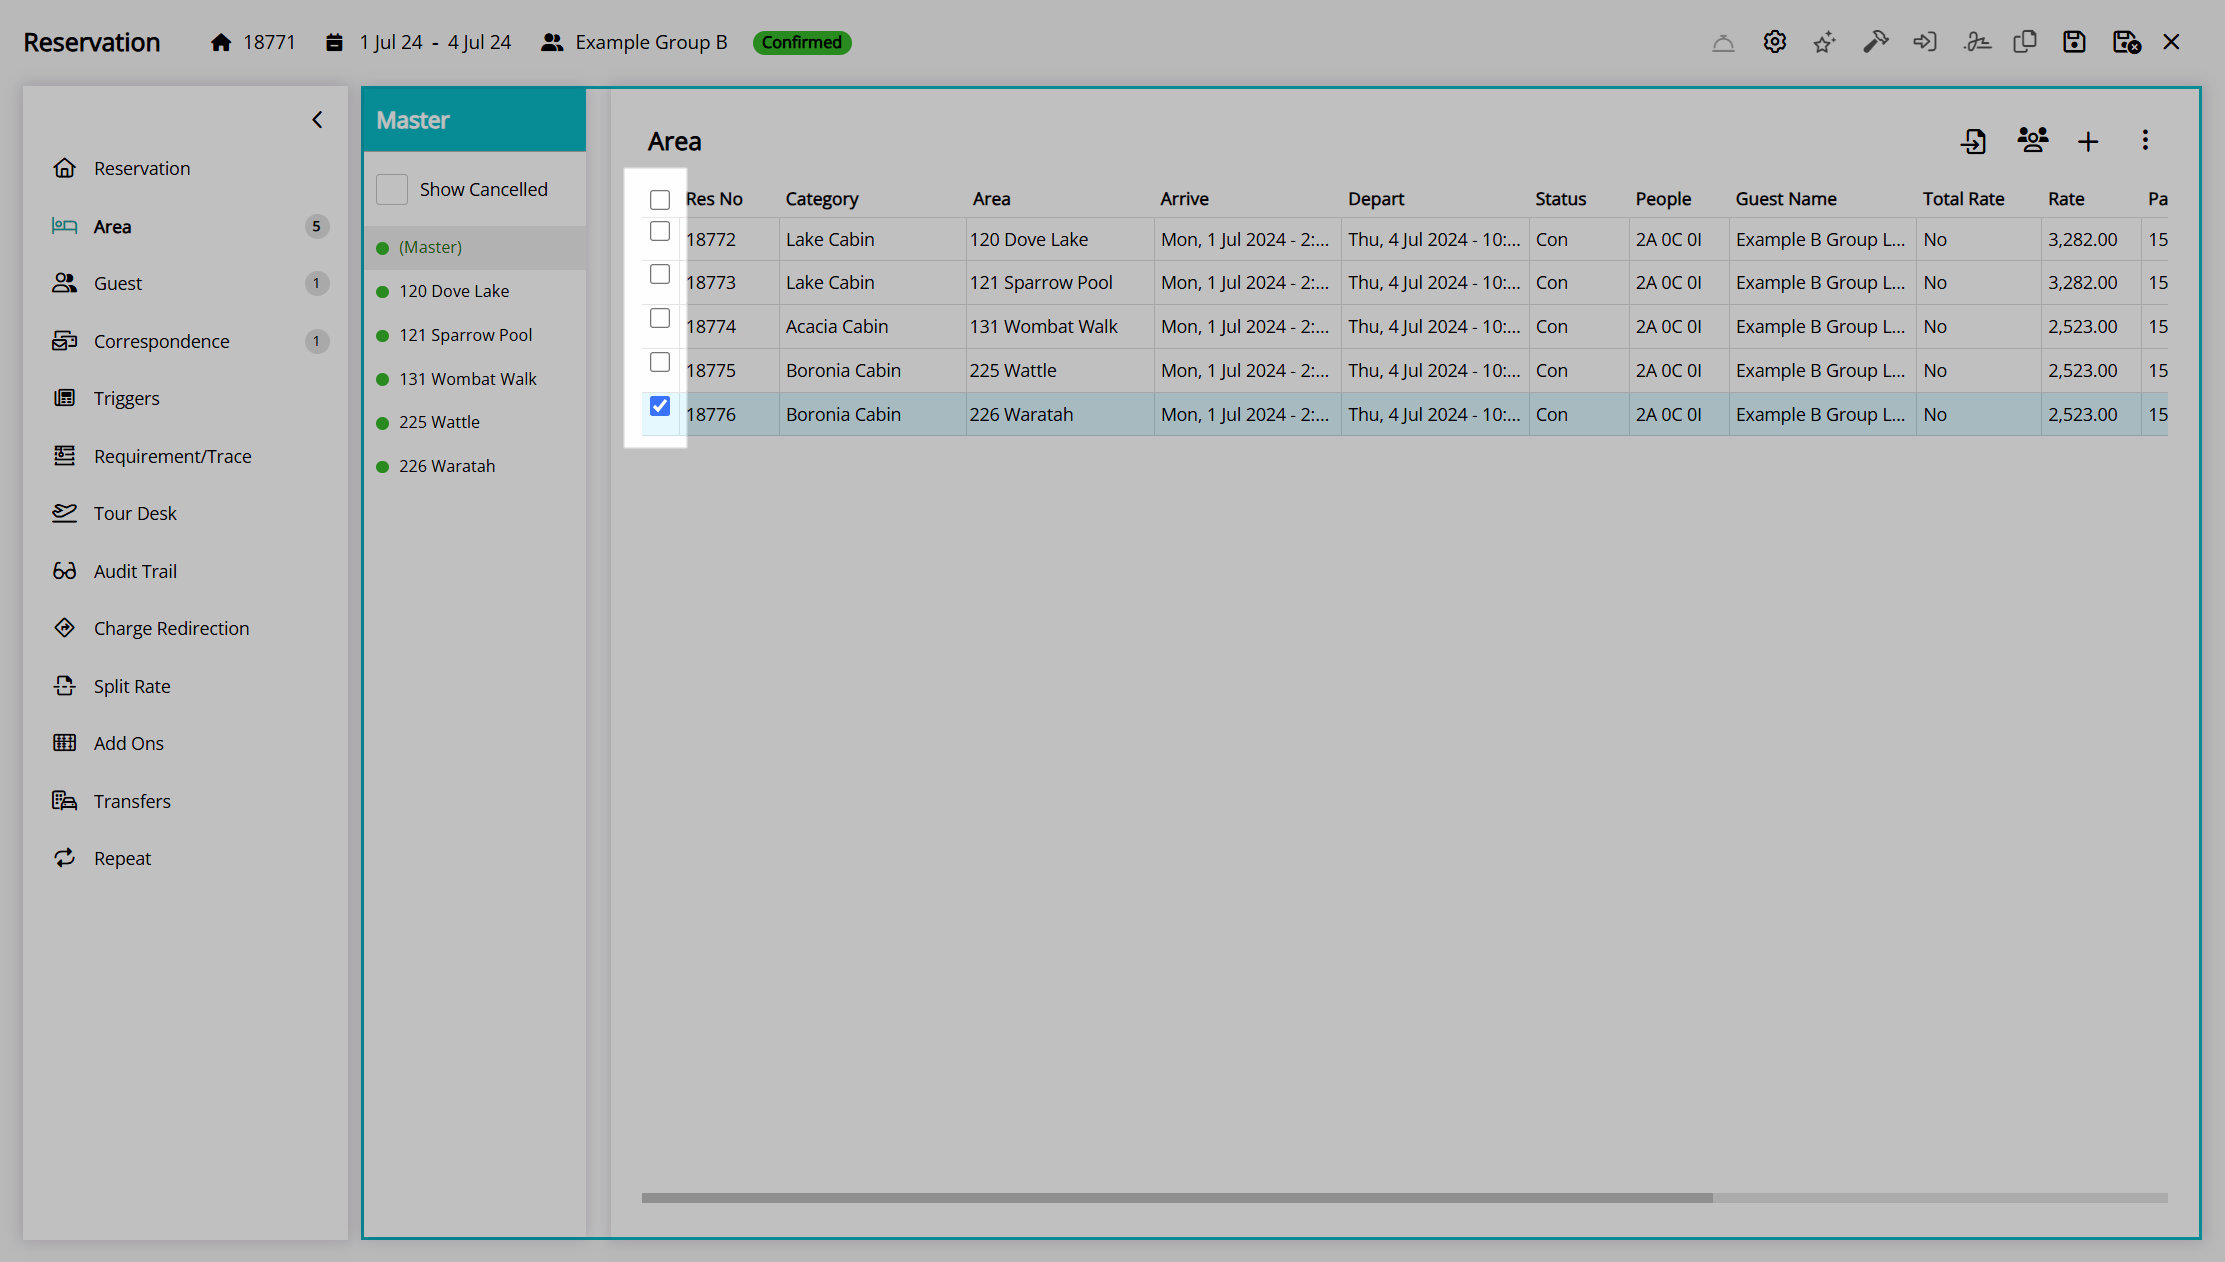
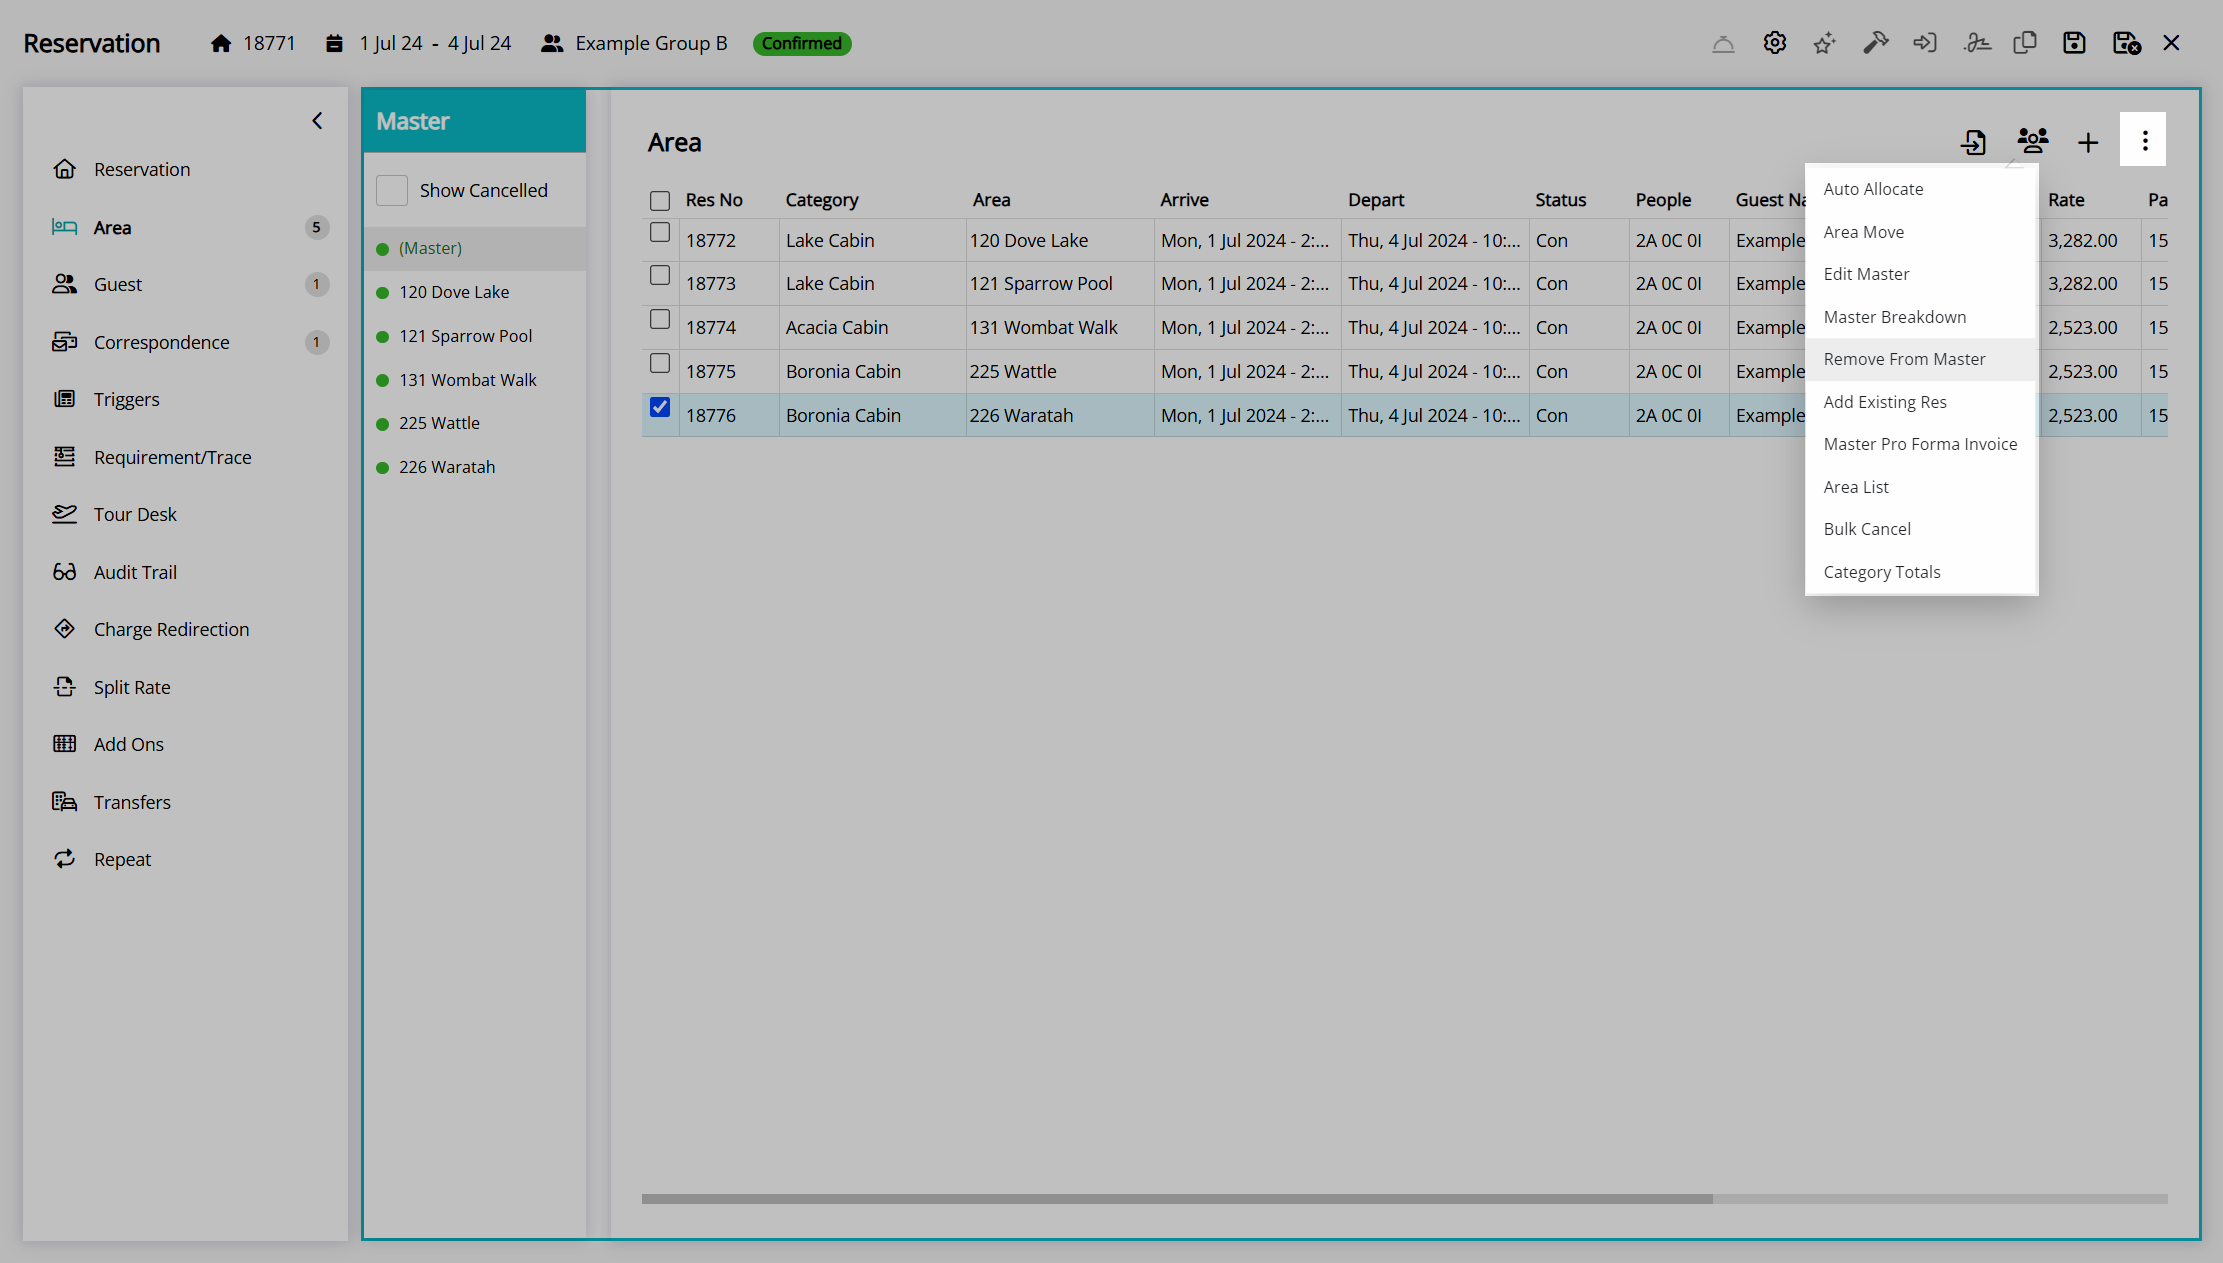
Remove from Master
The 'Remove from Master' option on the 'Area' tab of the group cover page will remove the selected reservation from the group, converting it to a standalone, individual reservation.
- Go to the Toolbar Menu Reservation Search in RMS.
- Enter the Group Name or Reservation Number and press 'Enter'.
- Select '(Master)' in the Navigator Pane.
- Navigate to the 'Area' tab.
- Select the checkbox for a Reservation.
- Select the
 'Options' icon.
 - Select the option 'Remove from Master'.
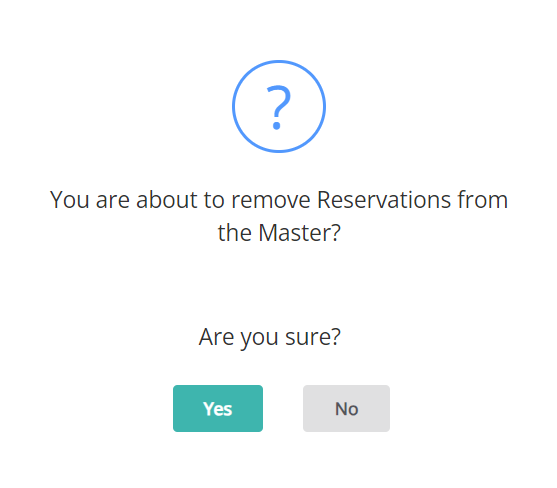
- Select 'Yes' to confirm.
- Save/Exit.
Go to the Toolbar Menu Reservation Search in RMS, enter the Group Name or Reservation Number and press 'Enter'.
Select '(Master)' in the Navigator Pane to open the group cover page.

Navigate to the 'Area' tab.
Select the checkbox for a reservation.
Select the 'Options' icon.

Select the option 'Remove from Master'.
Select 'Yes' to confirm separating the reservation.
The selected reservations will be removed from the group and converted to individual reservations.
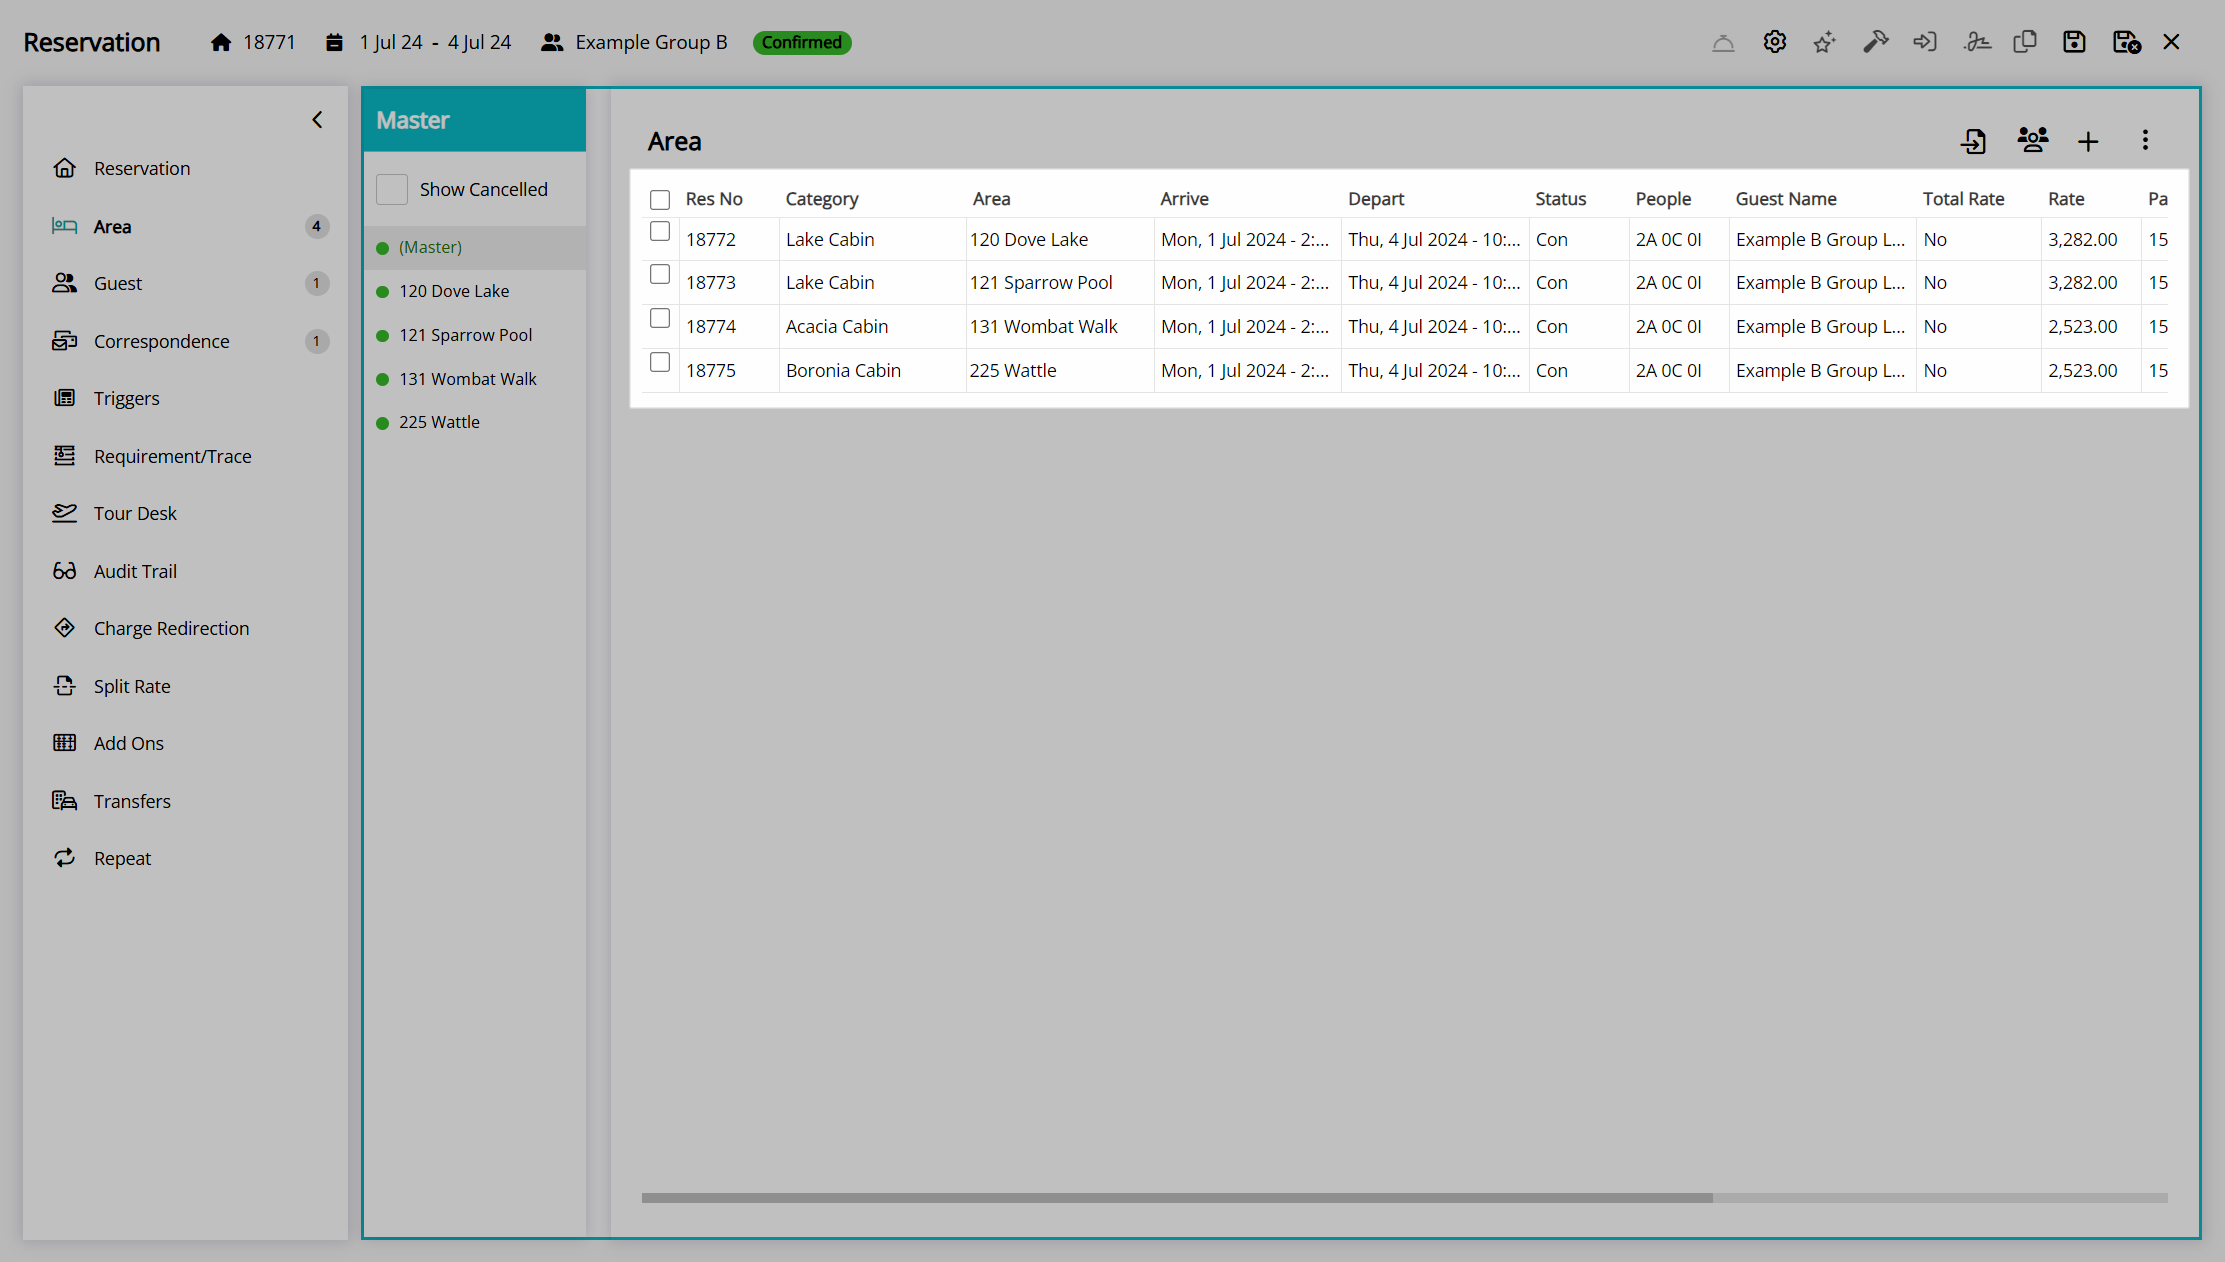
The Guest Profile on the reservation removed from the group will remain associated with the individual reservation and will need to have any group name manually removed.
 'Save/Exit' icon to store the changes made and leave the reservation.
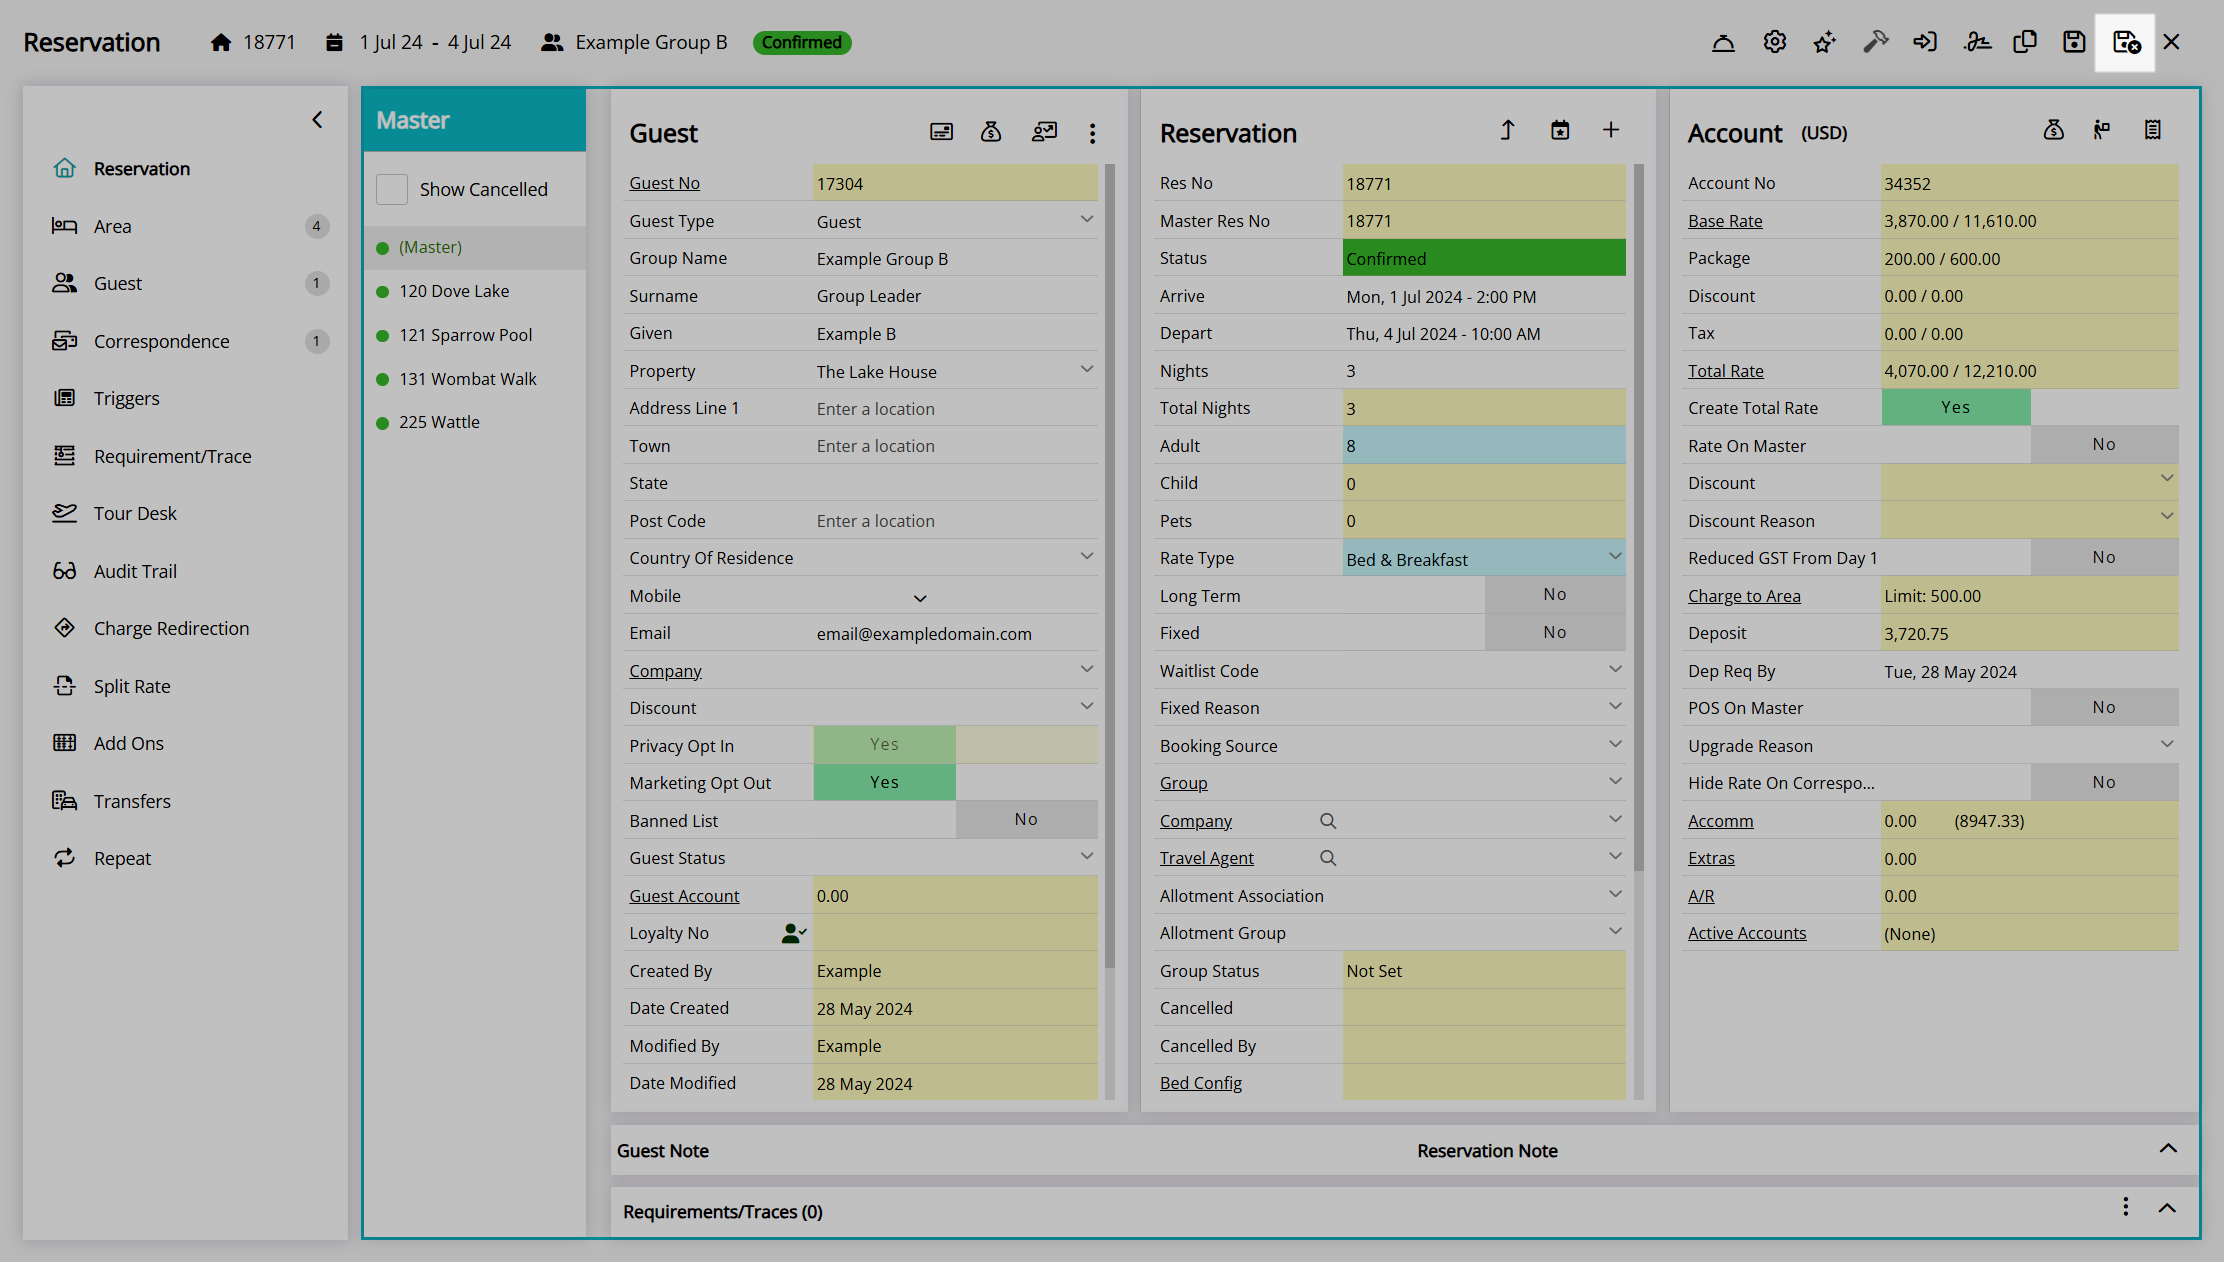
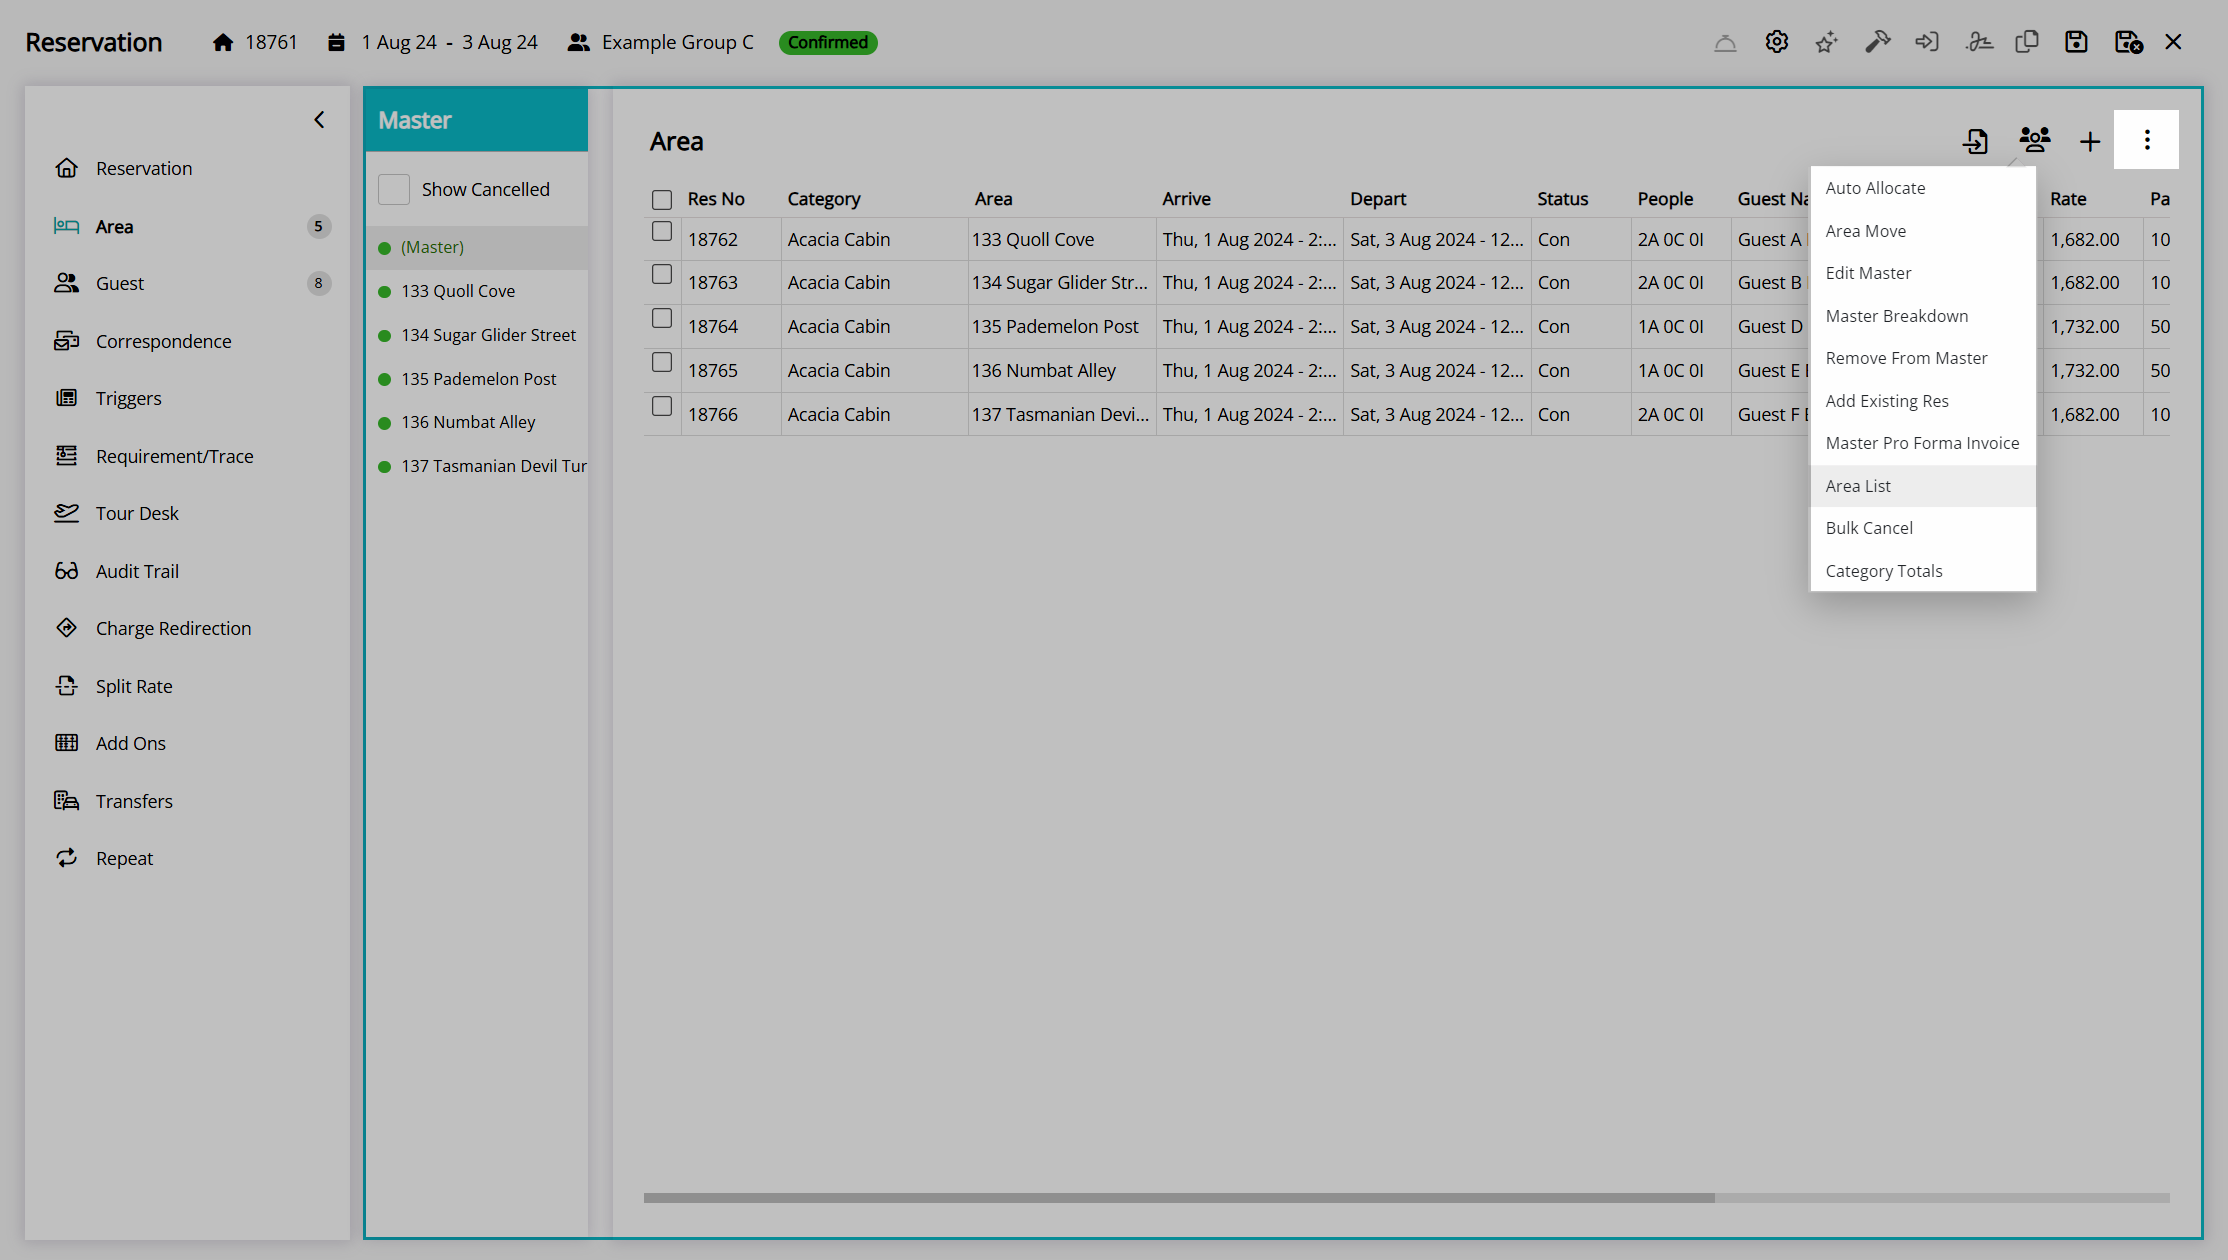
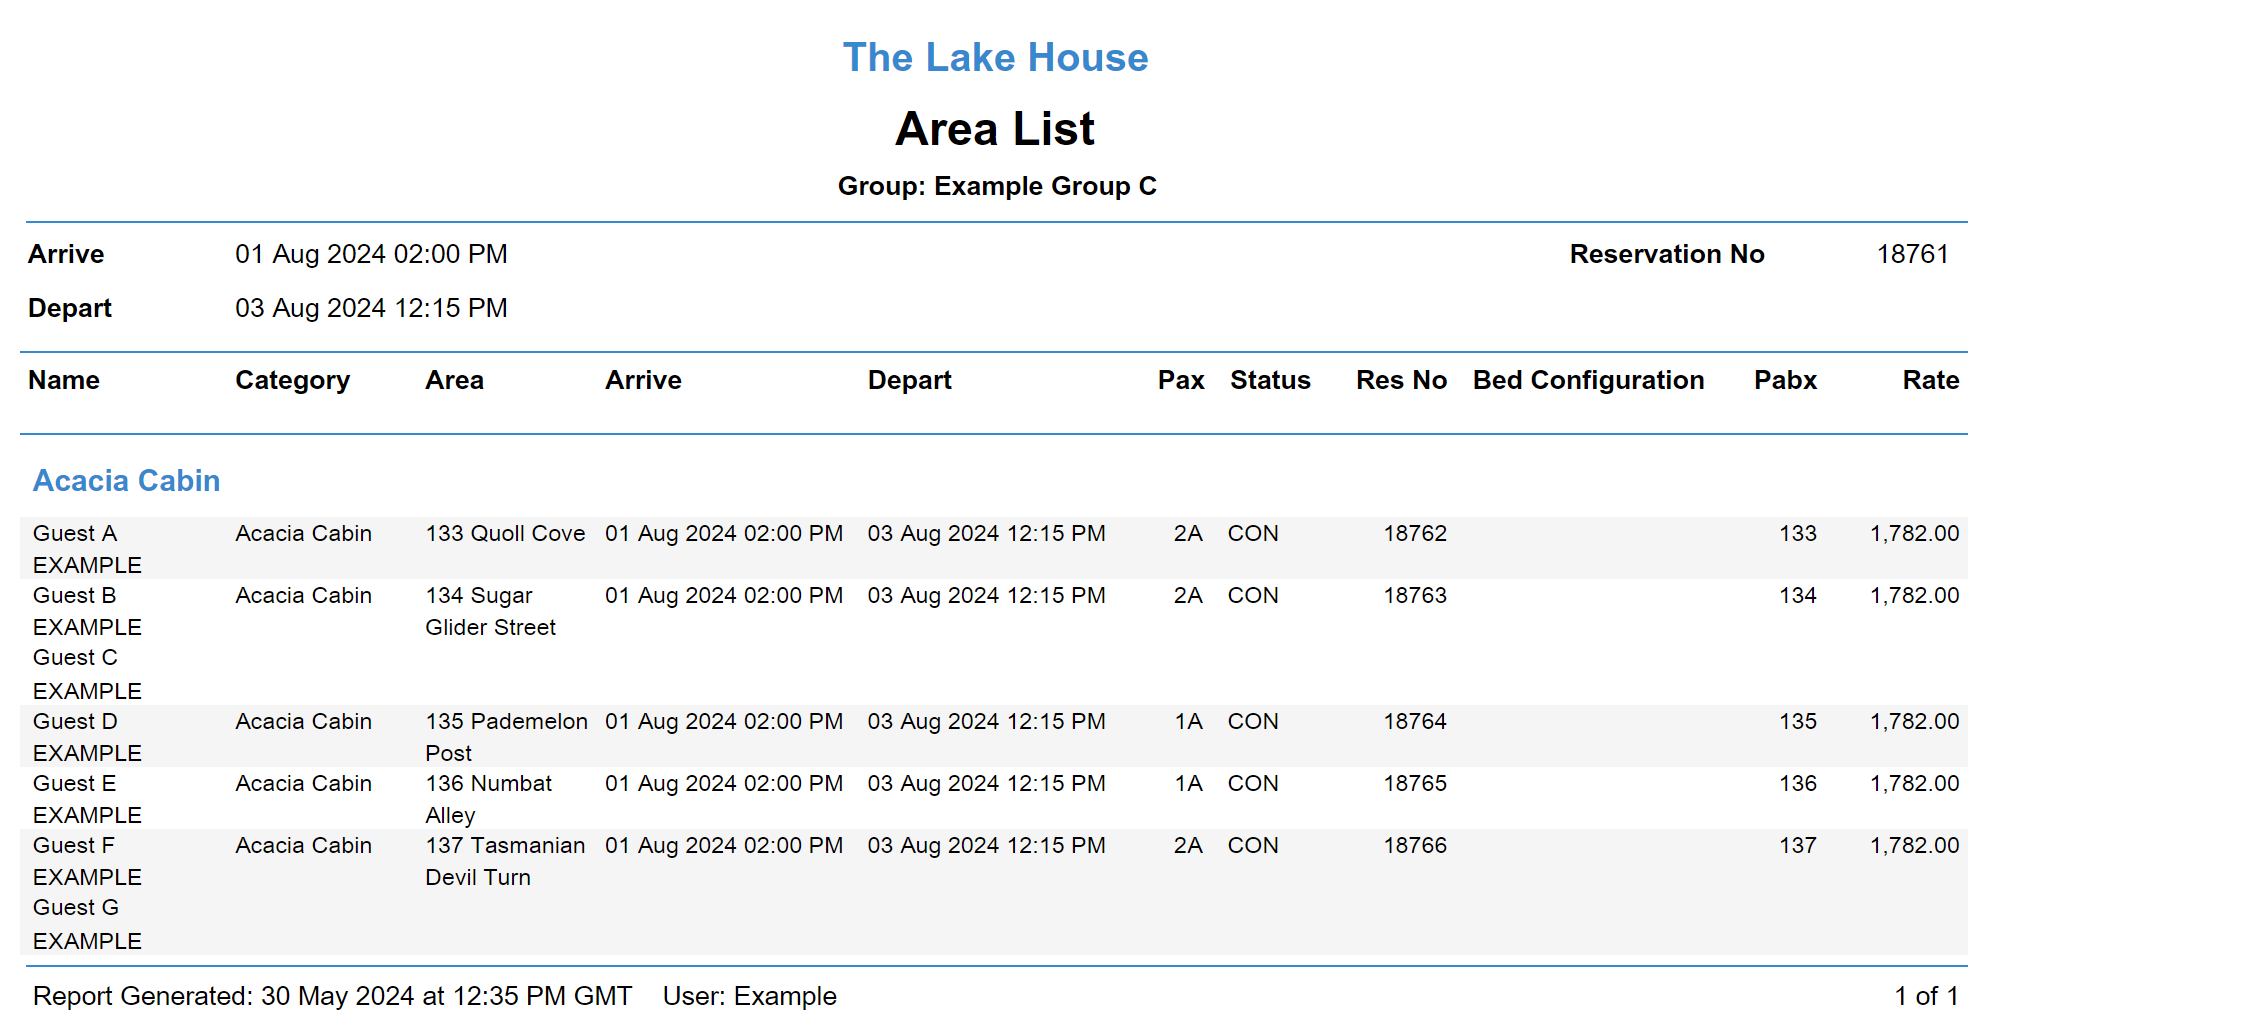
Area List
The 'Area List' option on the 'Area' tab of the group cover page will generate a printable Area List report for the group that can be provided to the group leader, tour leader, or other staff to provide key reservation information for this group.
- Go to the Toolbar Menu Reservation Search in RMS.
- Enter the Group Name or Reservation Number and press 'Enter'.
- Select '(Master)' in the Navigator Pane.
- Navigate to the 'Area' tab.
- Select the
 'Options' icon.
 - Select the 'Area List' option.
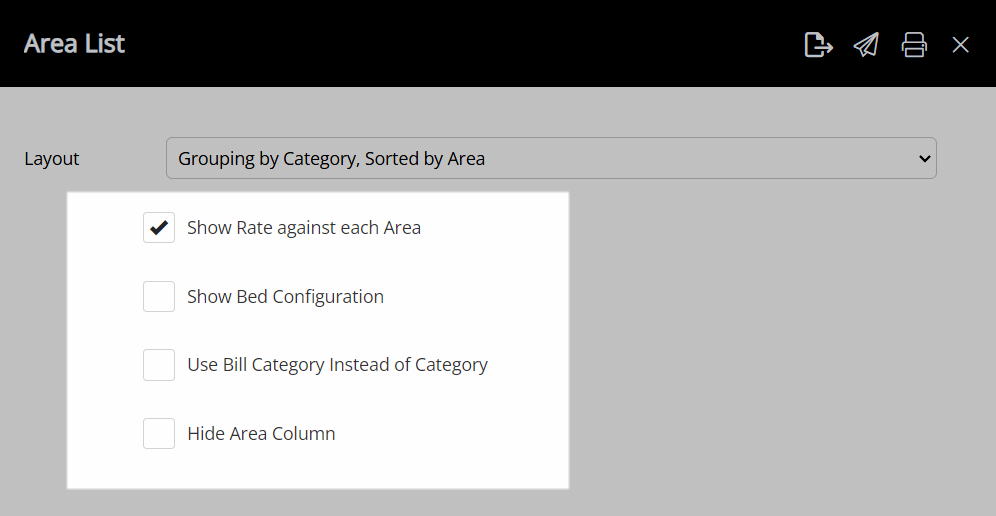
- Select an Area List Layout.
- Select the Area List Options.
- Select the
 'Print' icon.
 'Email' icon to send the Area List instead of printing.
Go to the Toolbar Menu Reservation Search in RMS, enter the Group Name or Reservation Number and press 'Enter'.
Select '(Master)' in the Navigator Pane to open the group cover page.

Navigate to the 'Area' tab.
Select the 'Options' icon.
Select the 'Area List' option.
Select an Area List Layout.
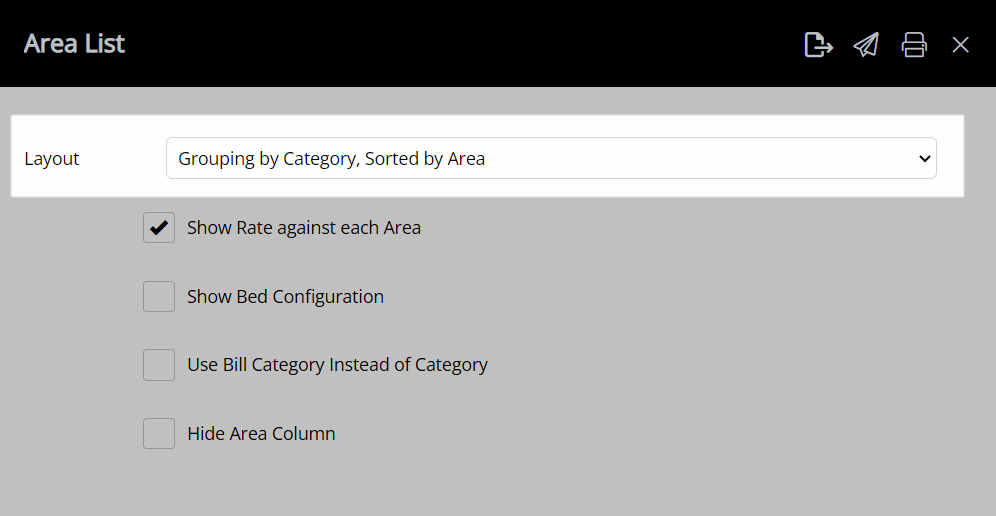
Select the Area List Options.
Select the  'Print' icon.
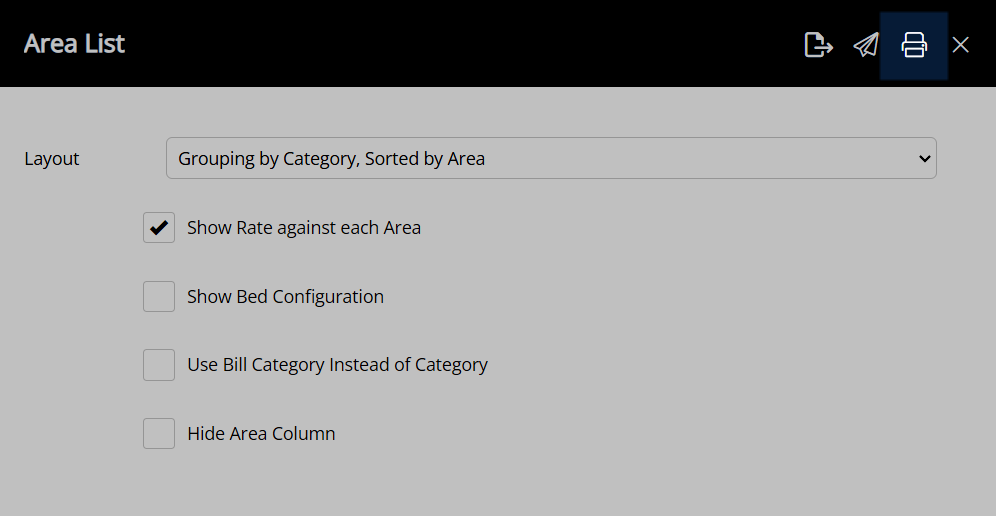
An Area List will be generated using the selected options to display the areas for all reservations within the group.
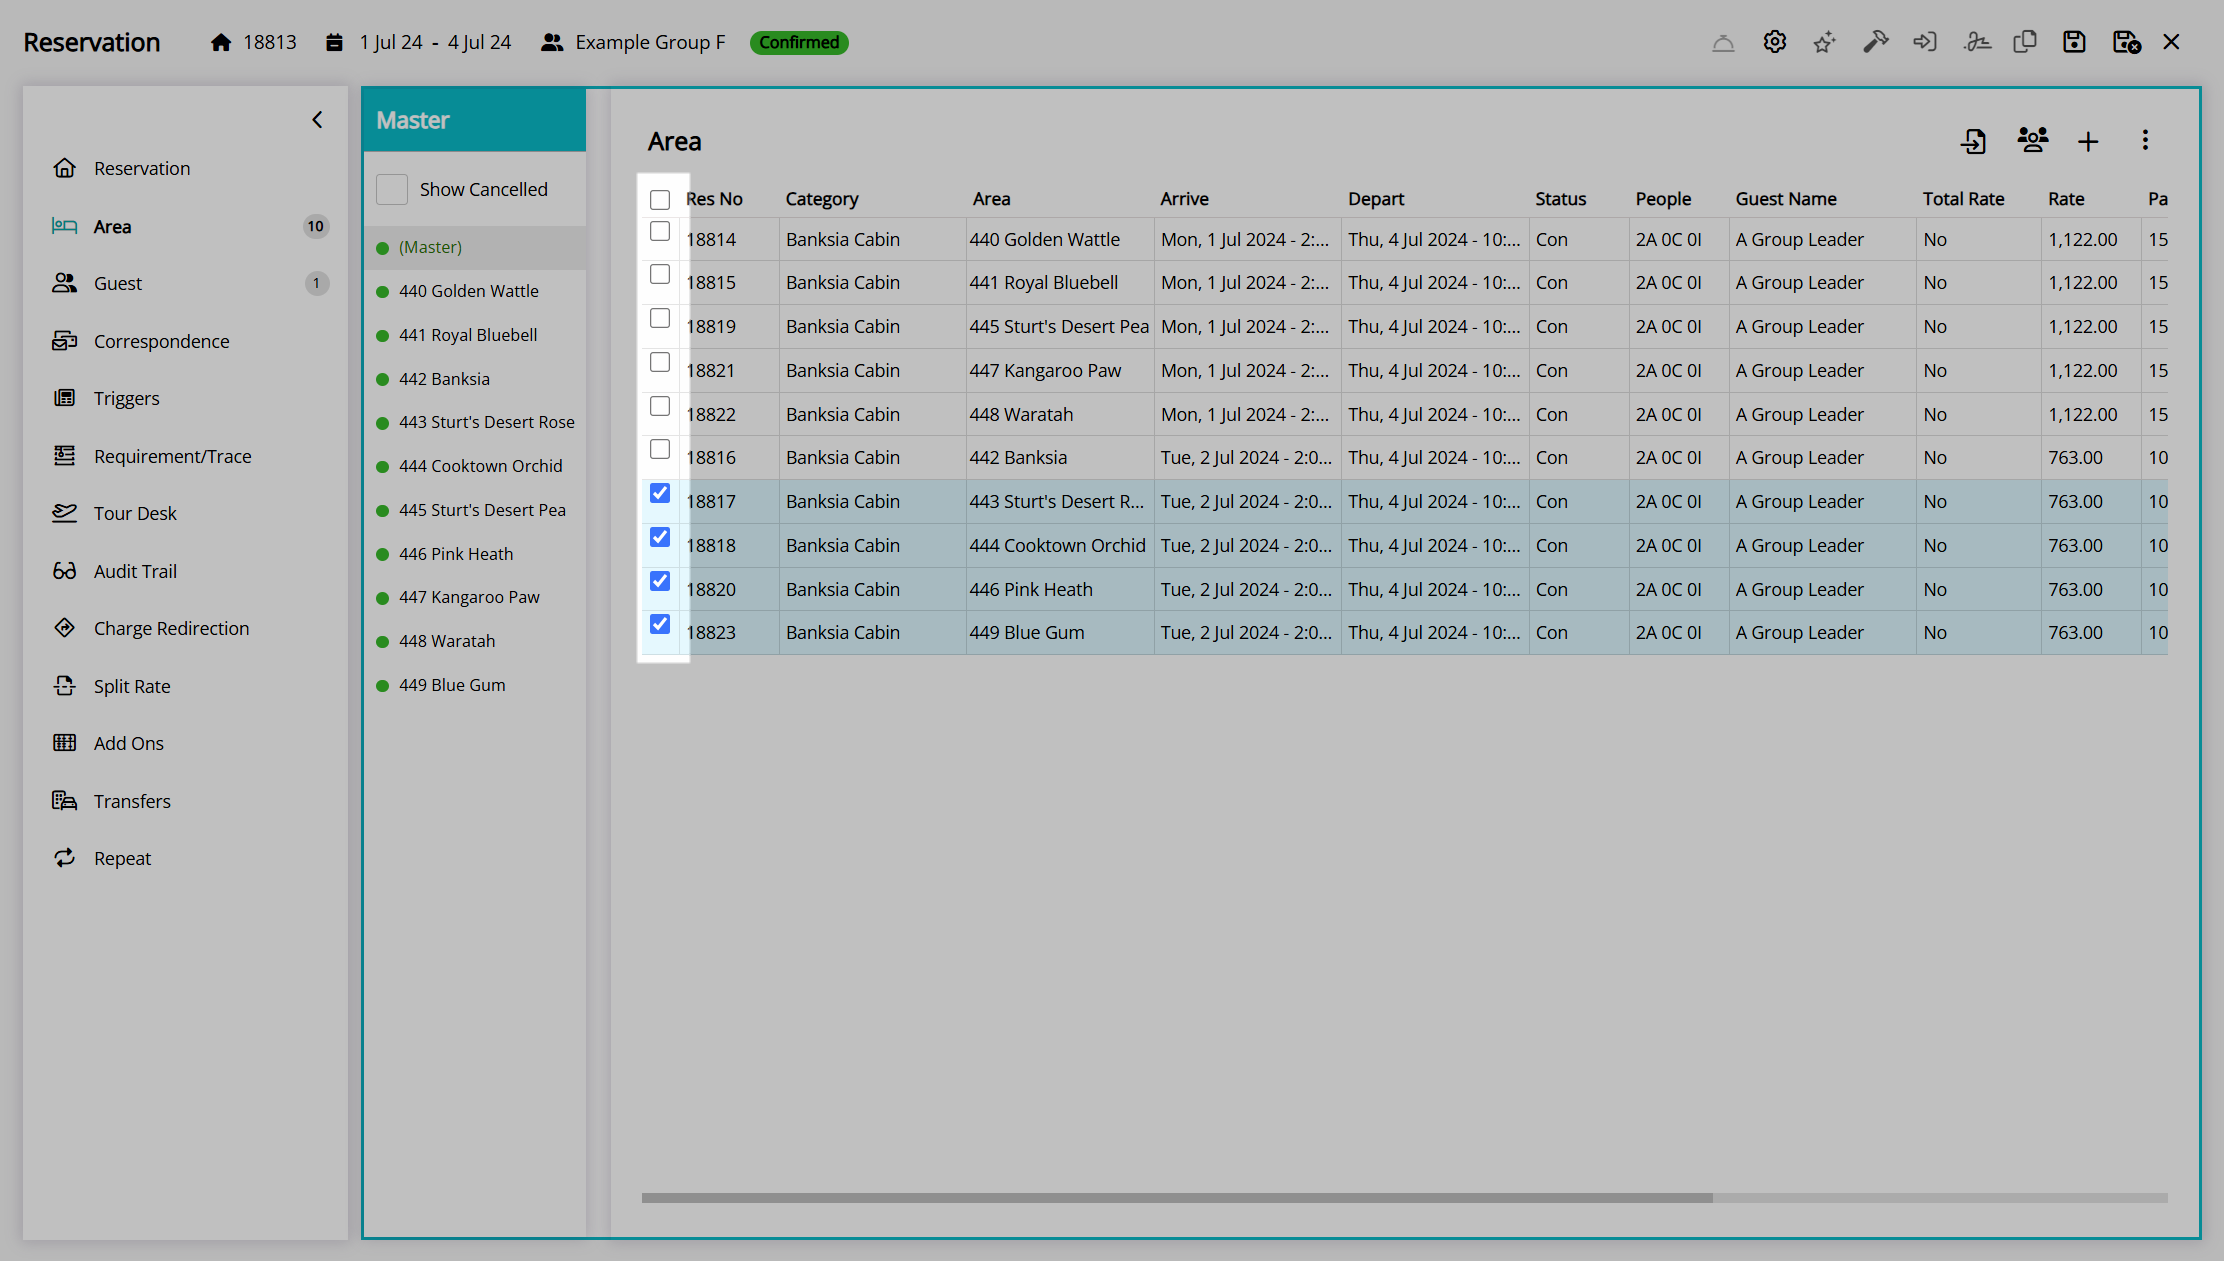
Bulk Cancel
The 'Bulk Cancel' option on the 'Area' tab of the group cover page will quickly cancel multiple reservations within the group without cancelling the entire group.
Changing the reservation status on the group cover page will change the reservation status for all reservations in the group, whilst changing the reservation status on a single reservation within the group will only apply to that reservation.
Use the 'Bulk Cancel' option to cancel multiple reservations within the group simultaneously without cancelling the entire group.
- Go to the Toolbar Menu Reservation Search in RMS.
- Enter the Group Name or Reservation Number and press 'Enter'.
- Select '(Master)' in the Navigator Pane.
- Navigate to the 'Area' tab.
- Select the checkbox for multiple Reservations.
- Select the
 'Options' icon.
 - Select the option 'Bulk Cancel'.
- Select 'Yes' to confirm.
Go to the Toolbar Menu Reservation Search in RMS, enter the Group Name or Reservation Number and press 'Enter'.
Select '(Master)' in the Navigator Pane to open the group cover page.

Navigate to the 'Area' tab.
Select the checkbox for multiple Reservations.
Select the  'Options' icon.
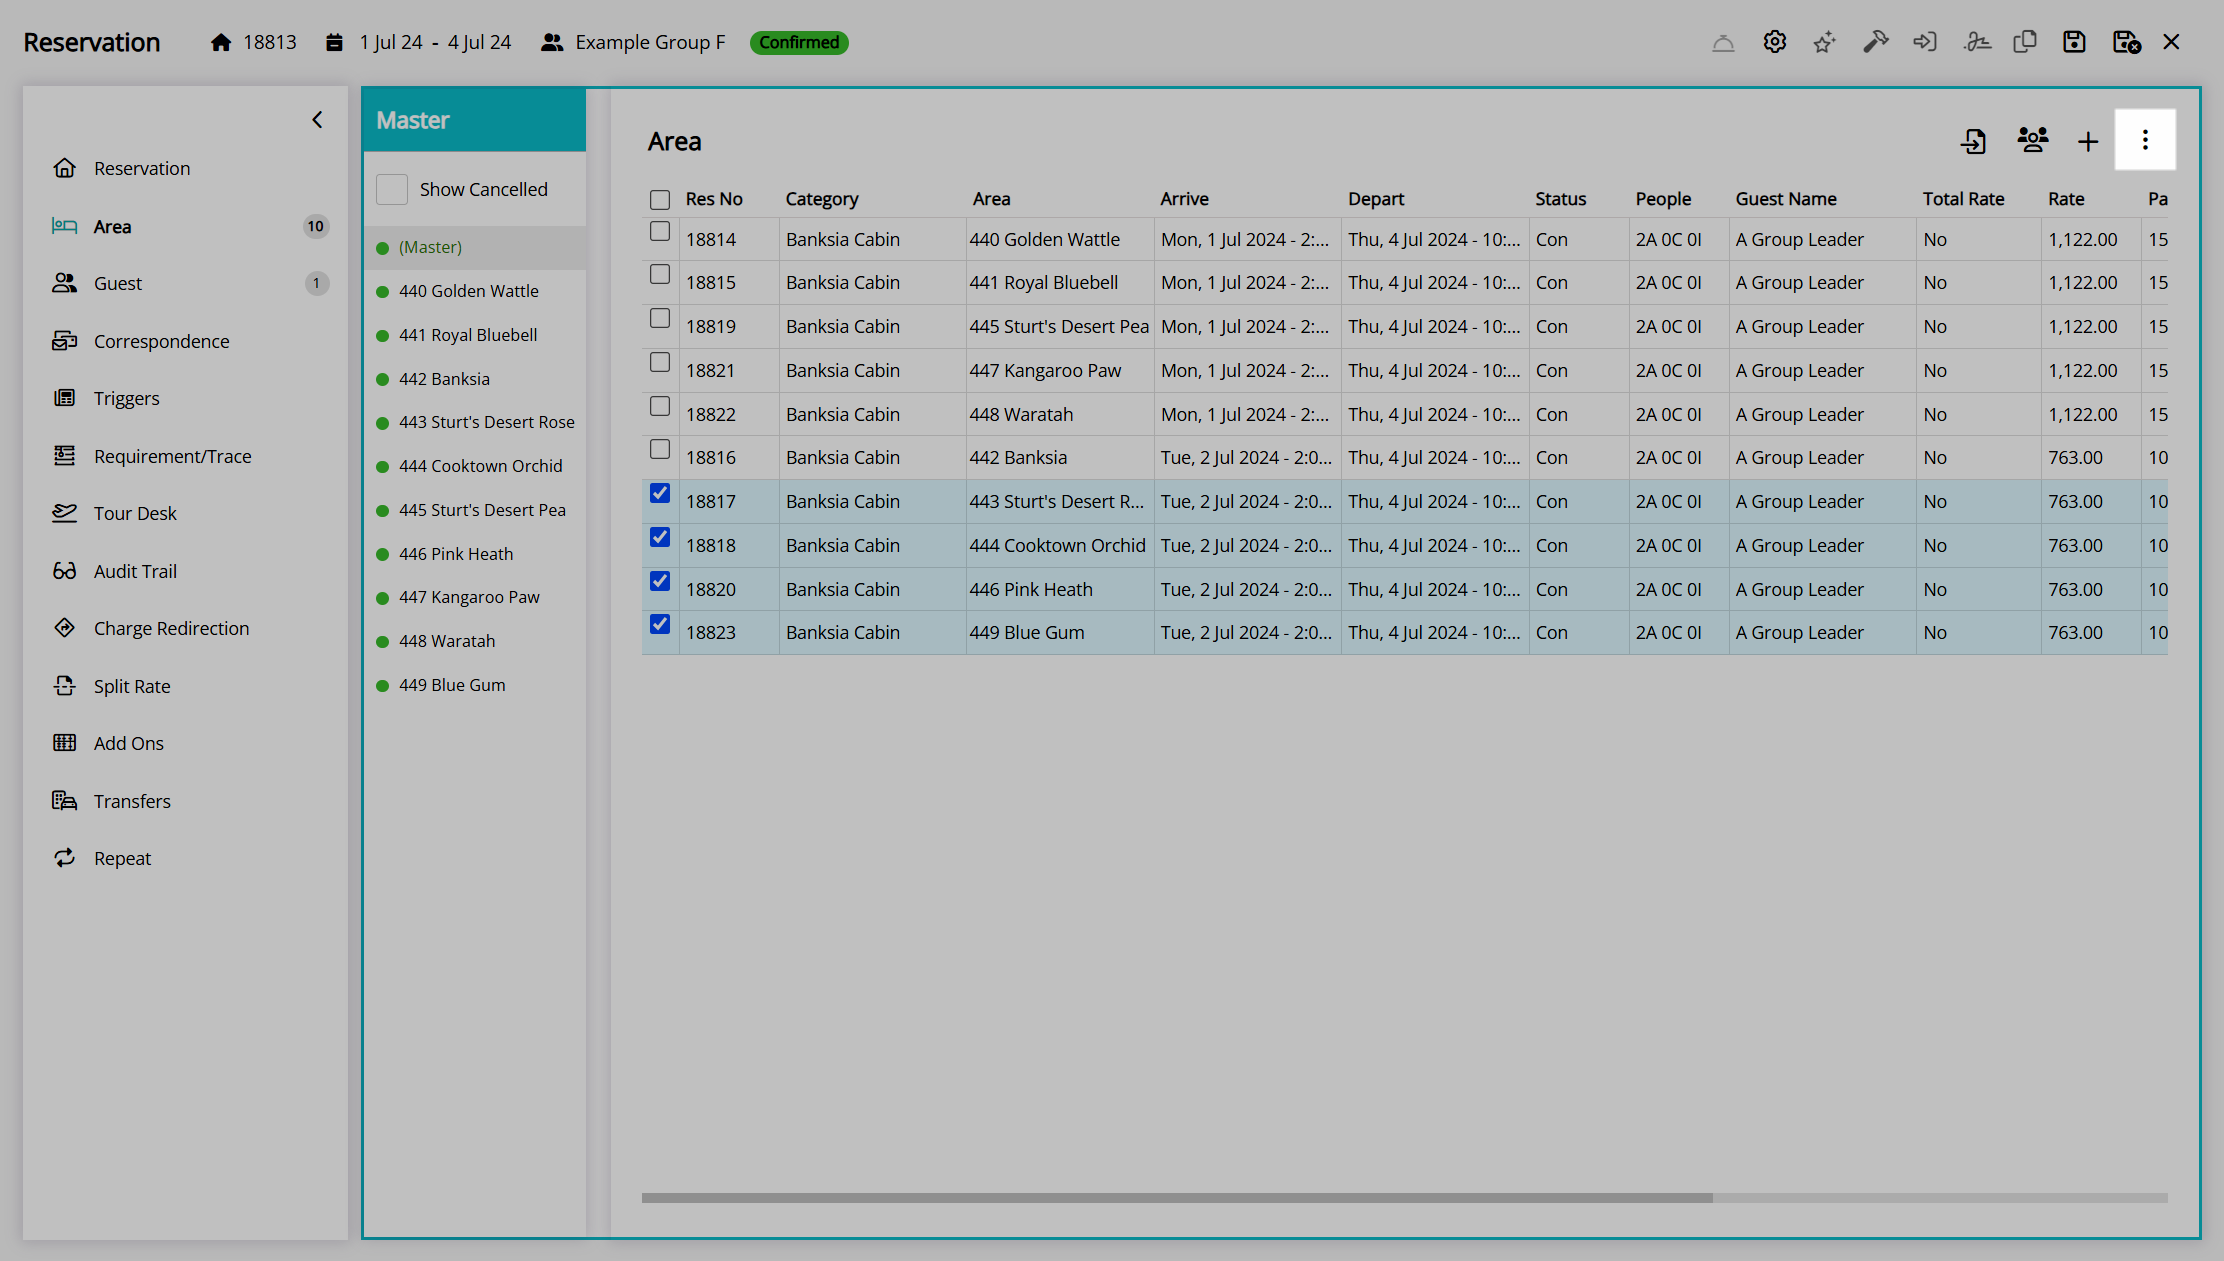
Select the option 'Bulk Cancel'.
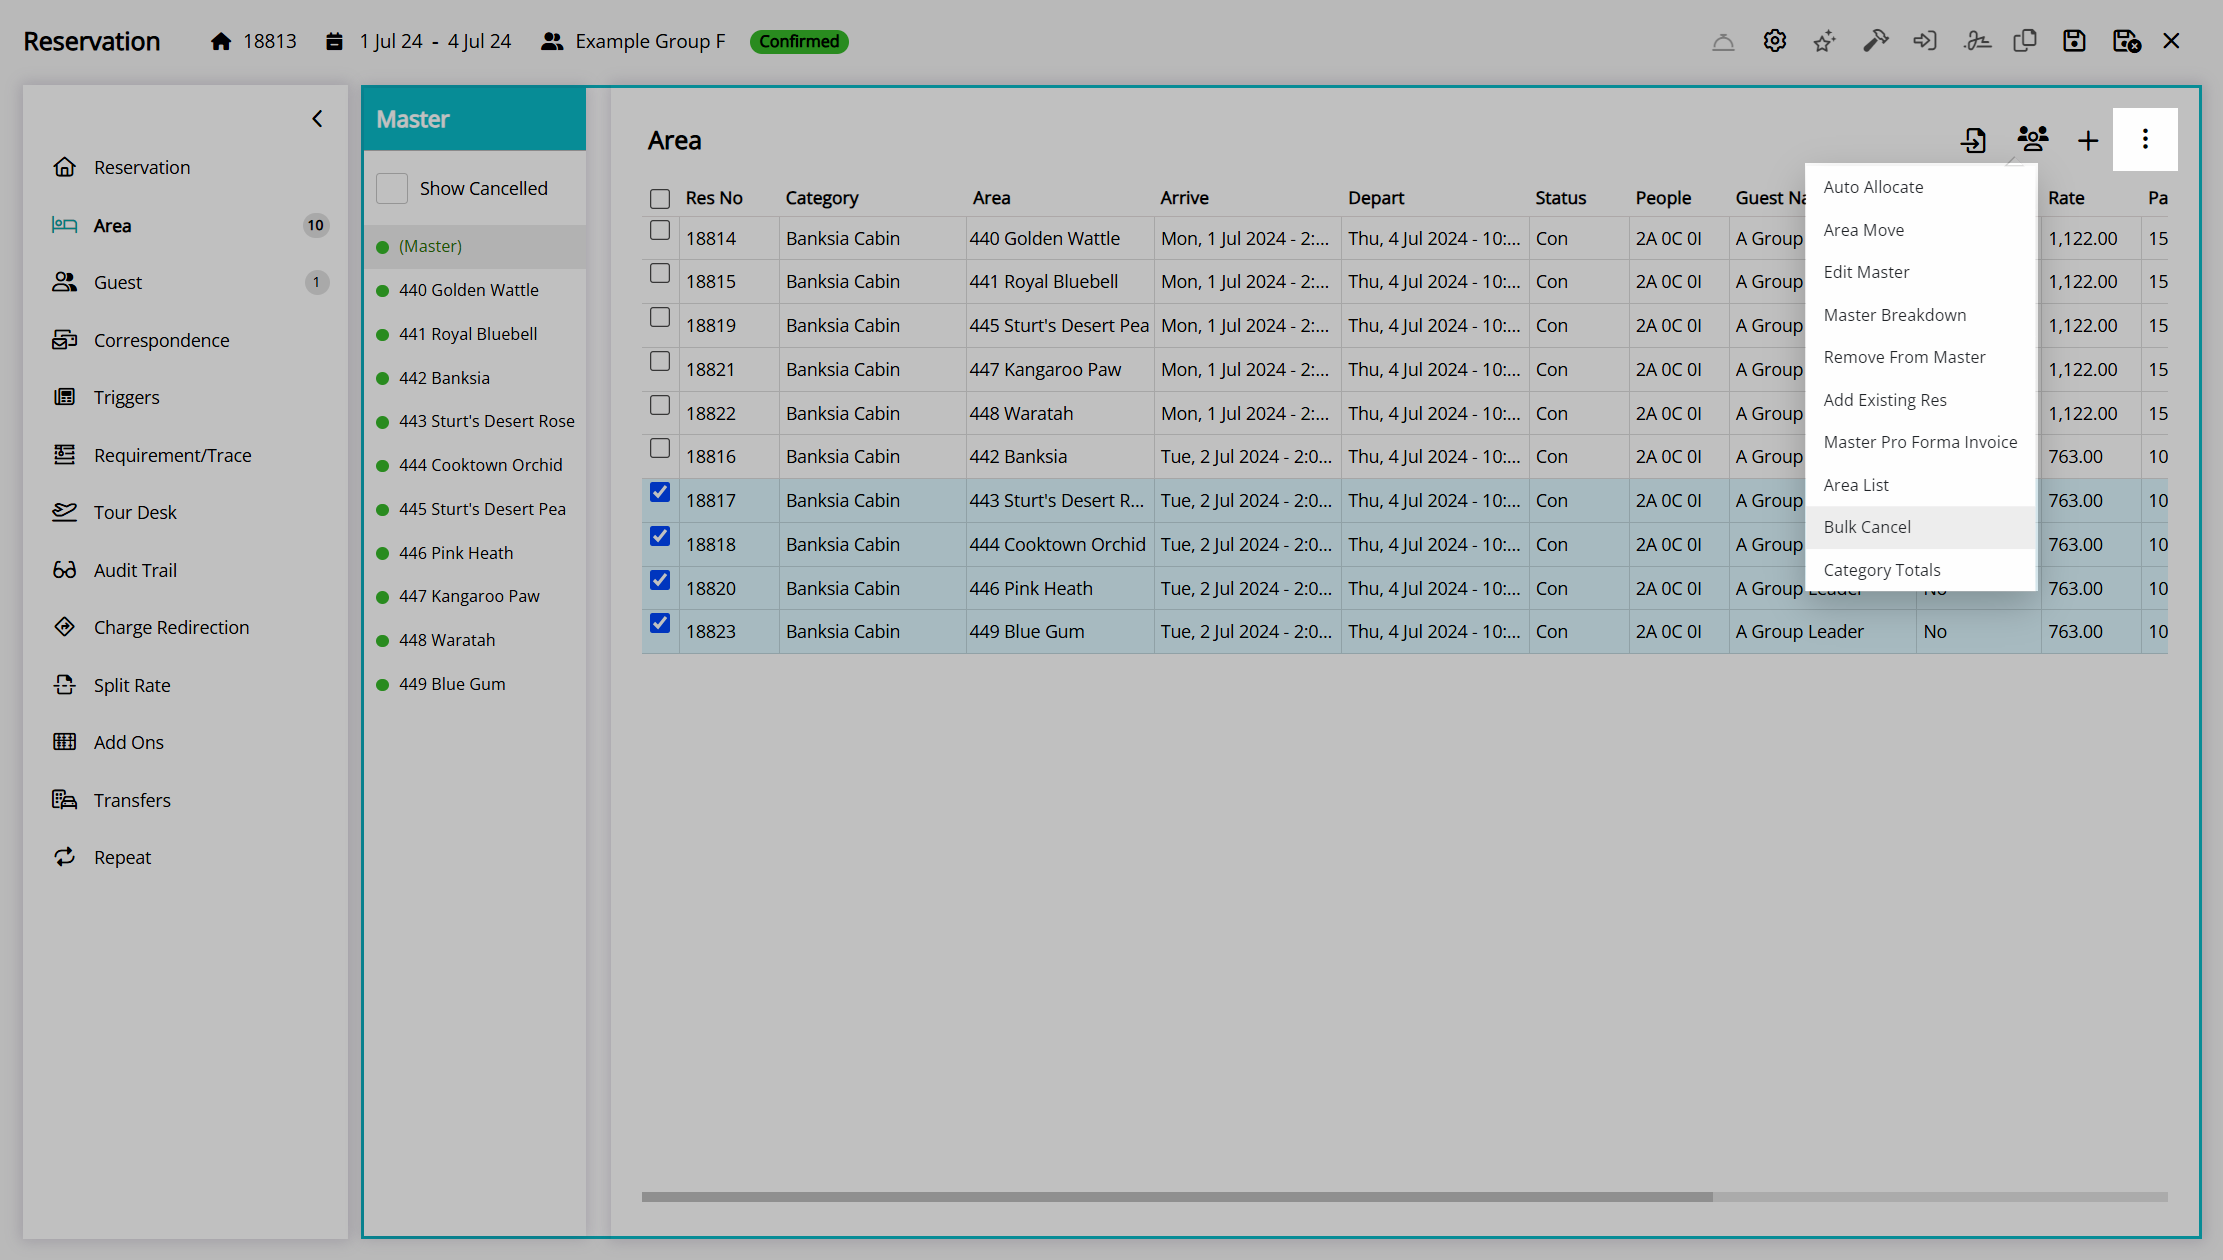
Select 'Yes' to confirm cancelling the selected reservations.
The selected reservations will be cancelled and can still be viewed in the group by selecting the 'Show Cancelled' checkbox in the navigator pane.

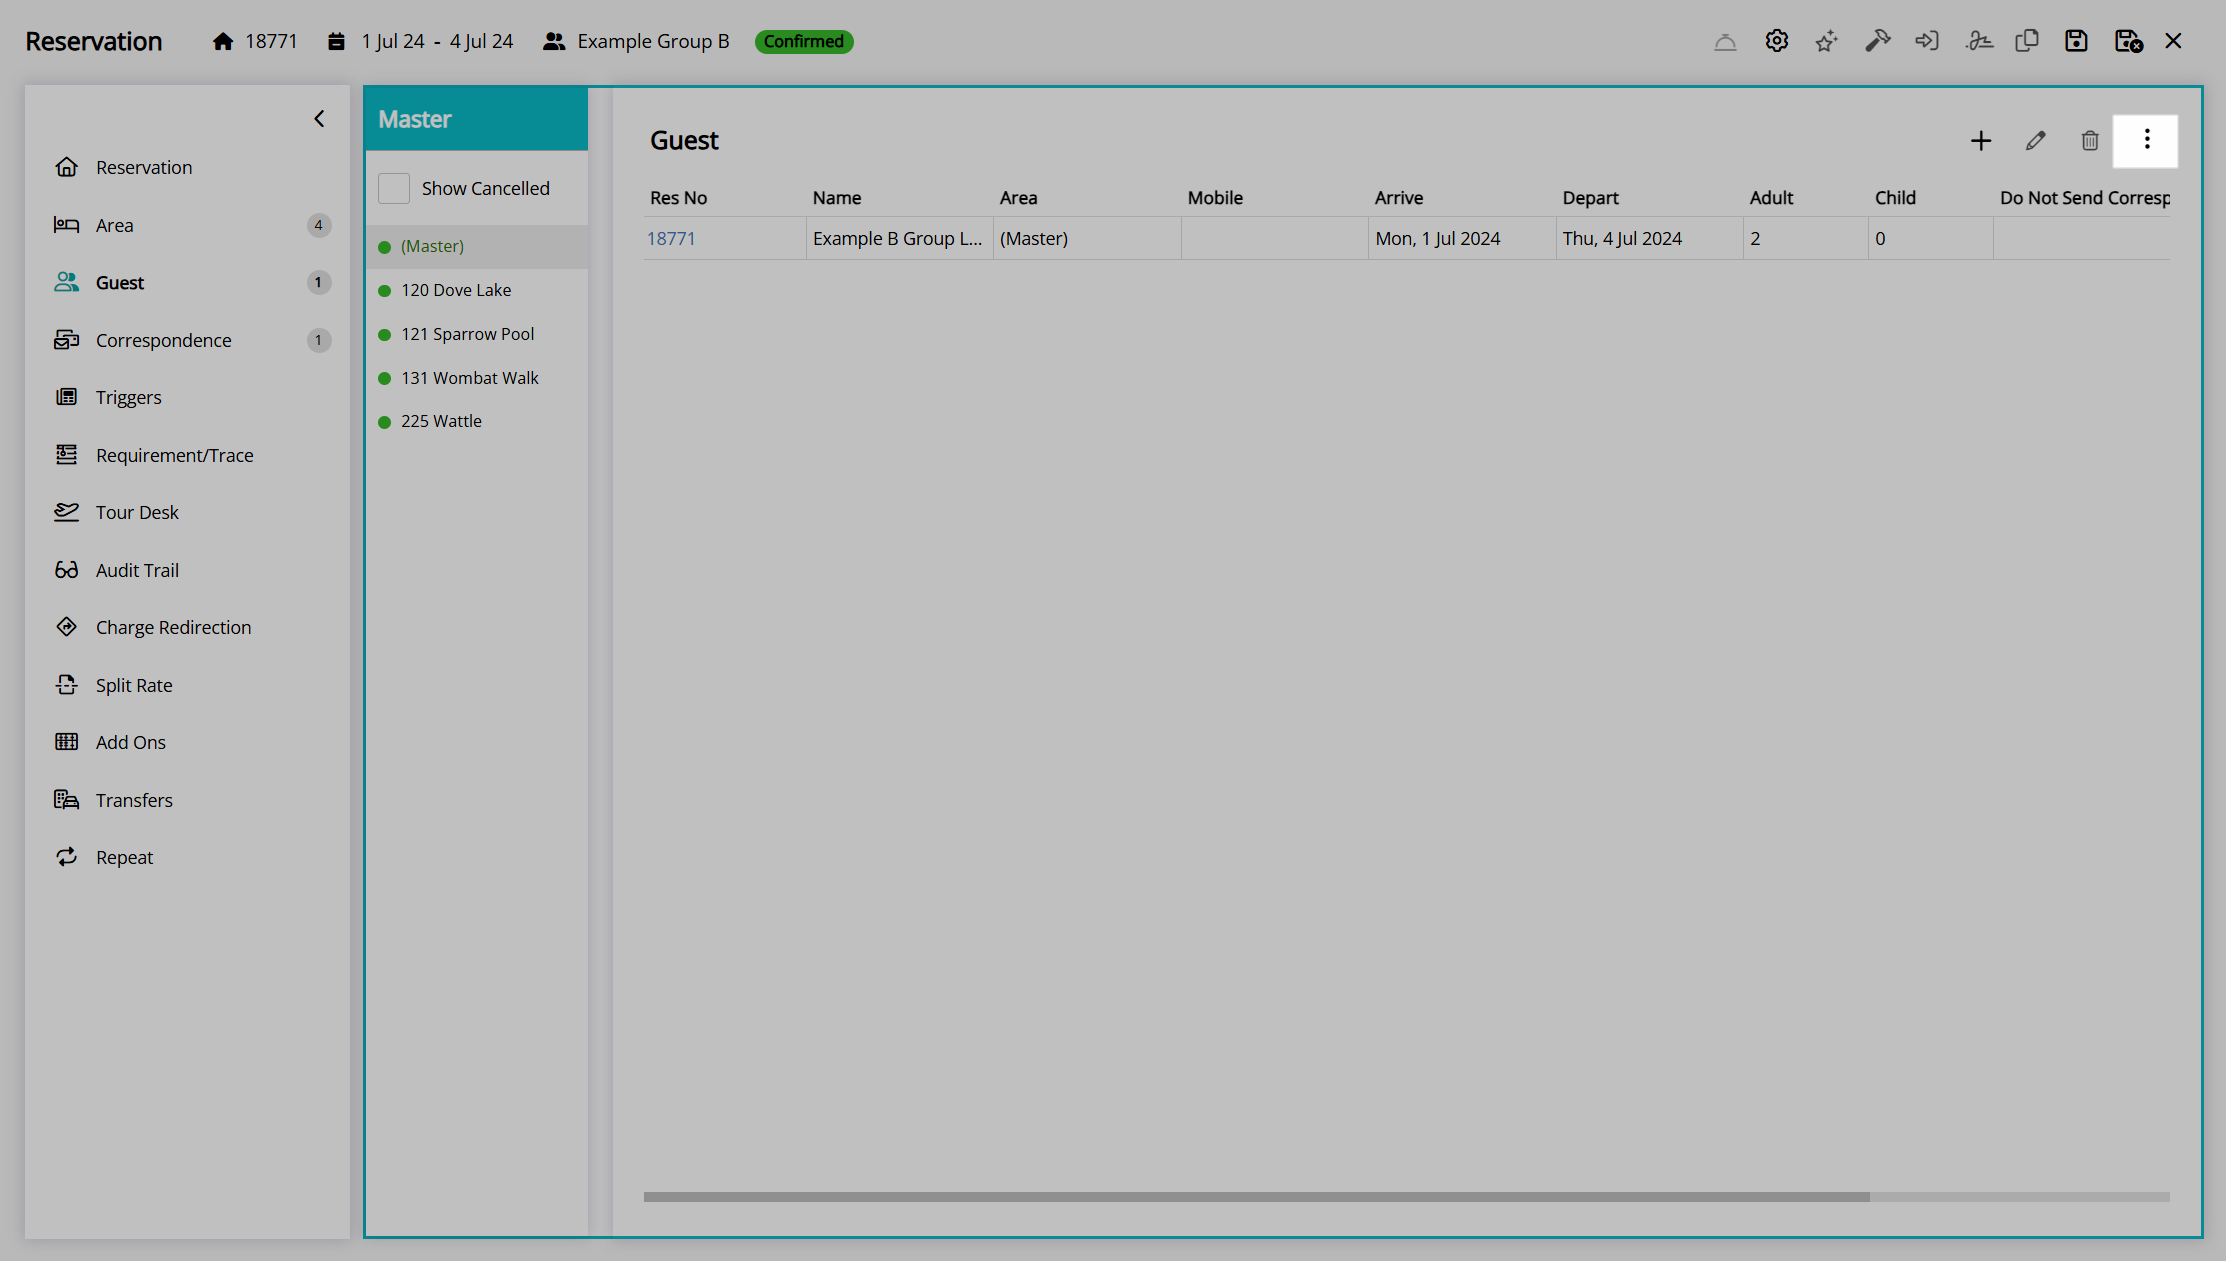
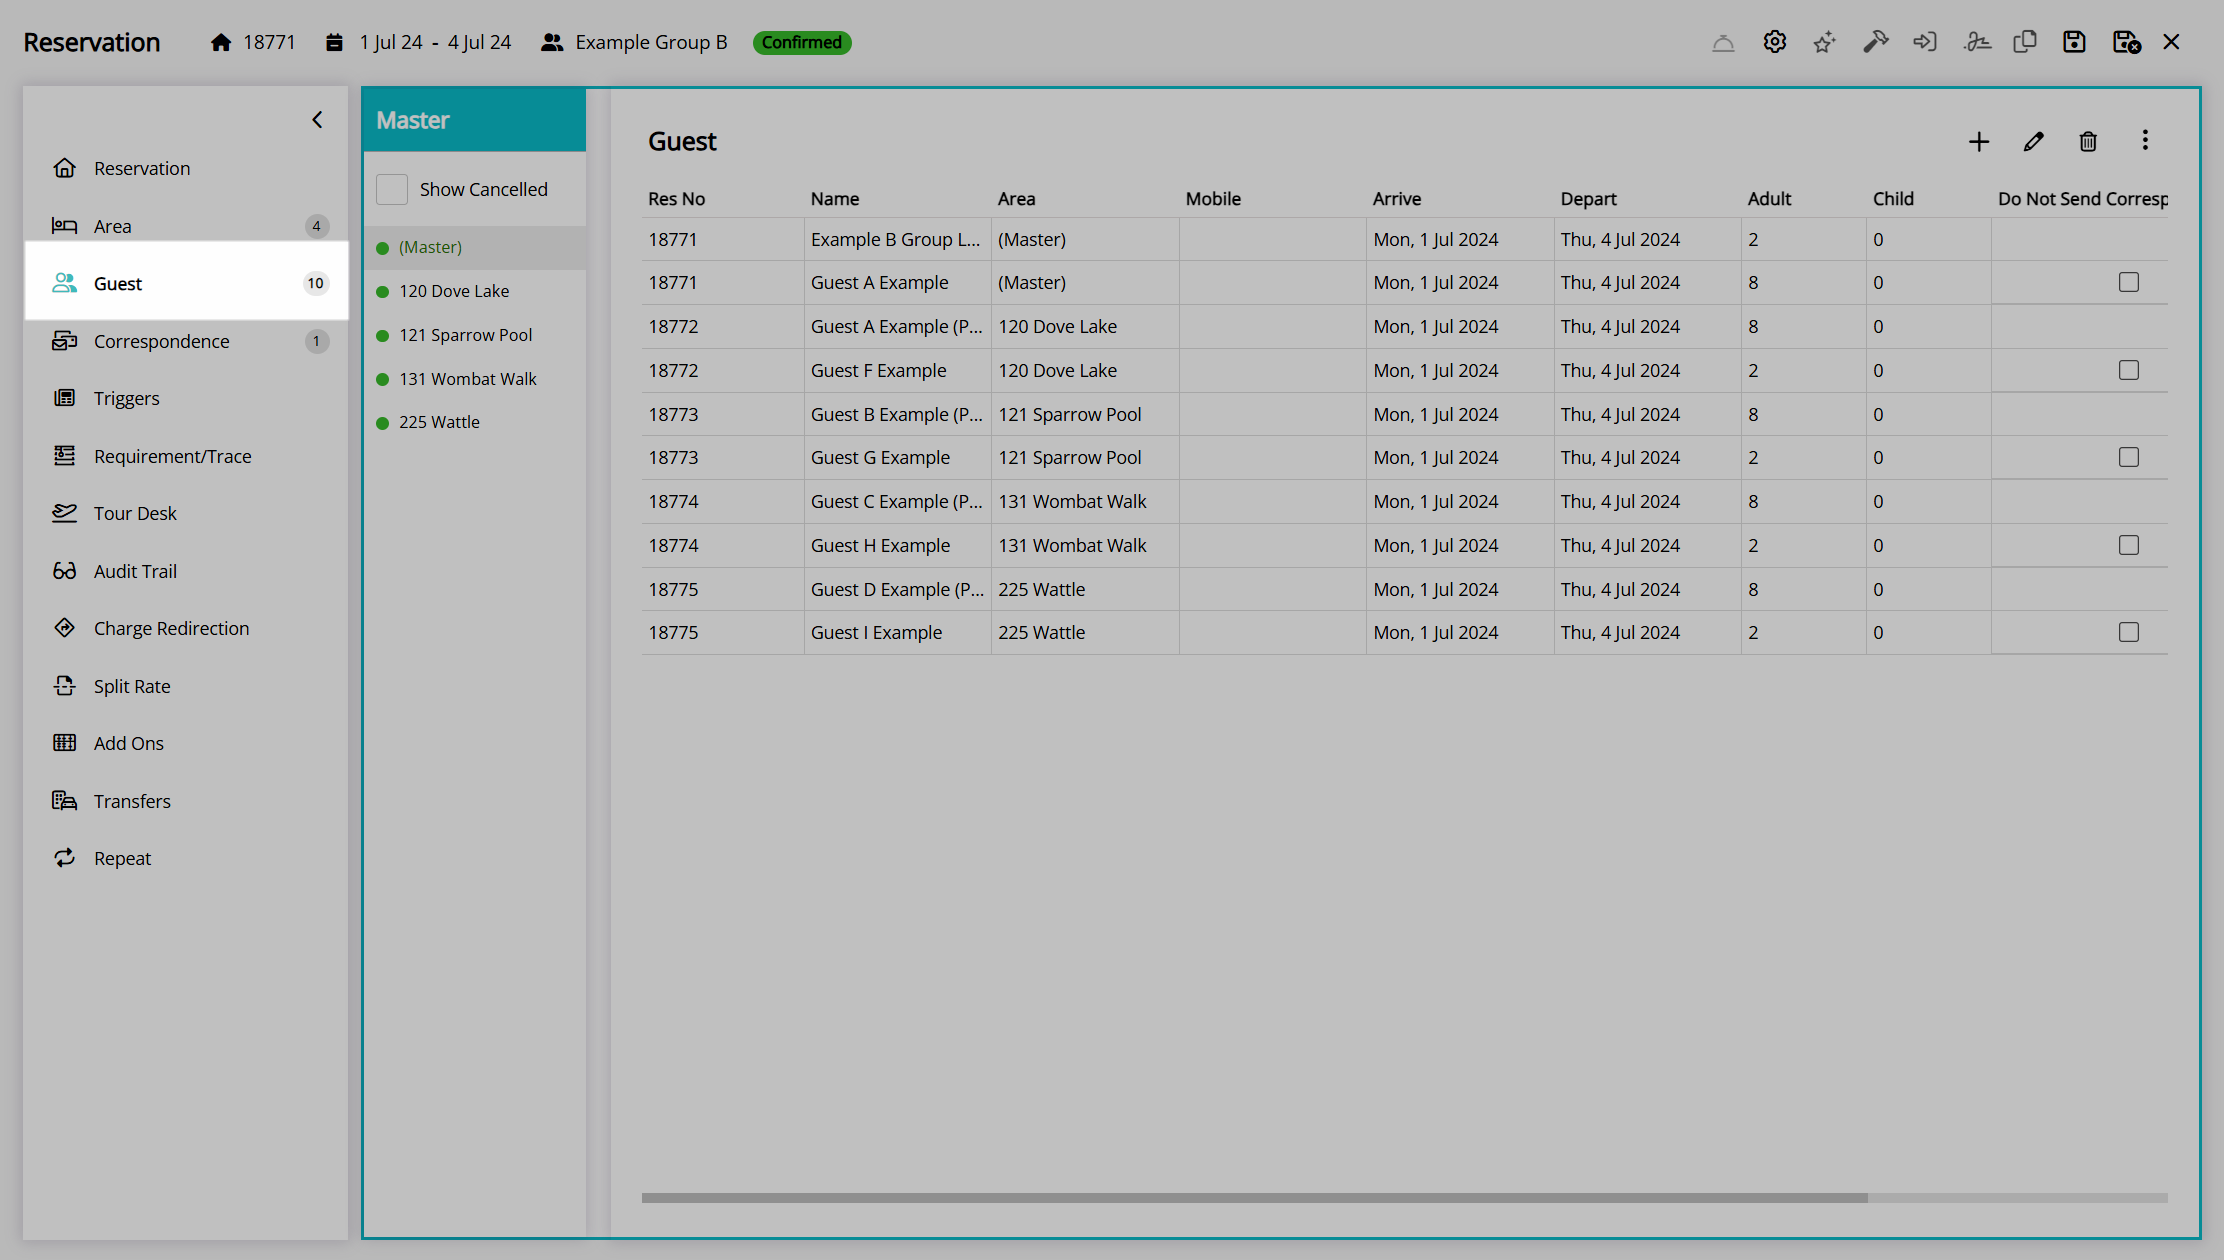
Guest
The 'Guest' tab on the group cover page includes the full guest list for all reservations within the group and the following group management tools under the 'Options' menu:
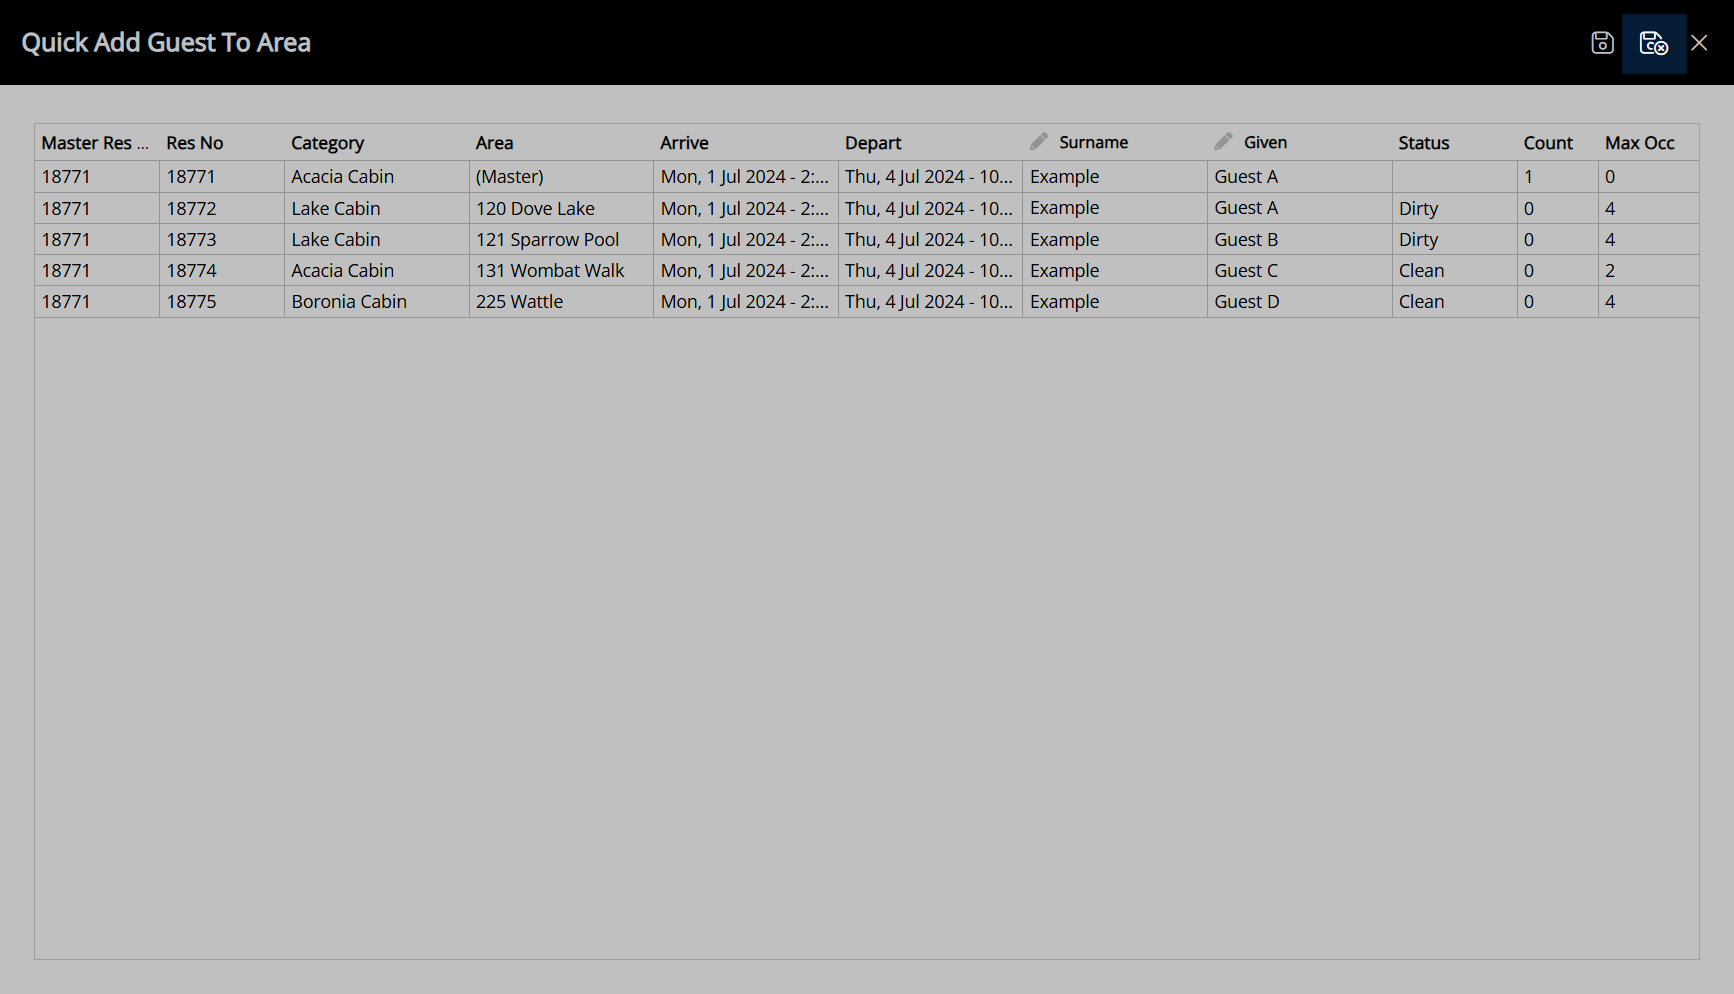
Quick Add
The 'Quick Add' option on the 'Guest' tab of the group cover page opens a simplified guest list that can be used to enter basic guest information for each reservation in the group.
- Go to the Toolbar Menu Reservation Search in RMS.
- Enter the Group Name or Reservation Number and press 'Enter'.
- Select the '(Master)' in the Navigator Pane.
- Navigate to the 'Guest' tab.
- Select the
 'Options' icon.
 - Select the option 'Quick Add'.
- Enter the Guest Given and Guest Surname for each reservation.
- Save/Exit.
Go to the Toolbar Menu Reservation Search in RMS, enter the Group Name or Reservation Number and press 'Enter'.

Select the '(Master)' in the Navigator Pane.
Navigate to the 'Guest' tab.
Select the  'Options' icon.
Select the option 'Quick Add'.
Enter the Guest Given and Guest Surname for each reservation.
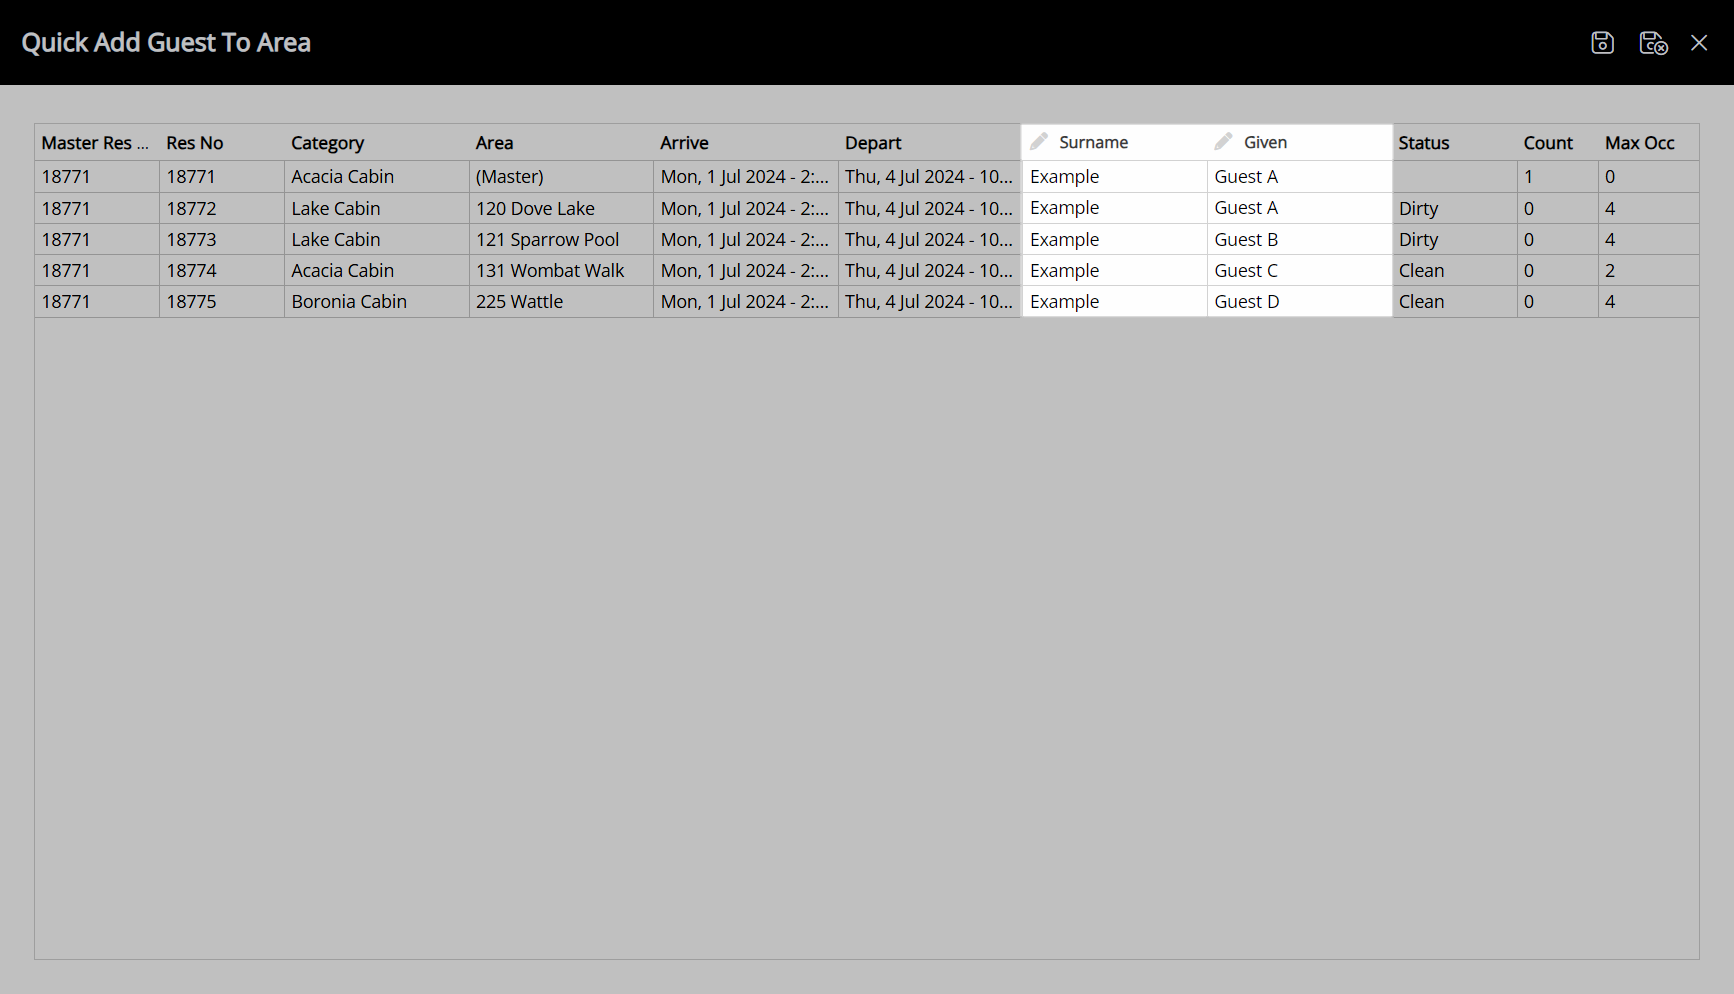
Select the  'Save/Exit' icon to update the guest details on all reservations in the group using the information entered.
A new Guest Profile will be created using the given name and surname entered for each reservation, and they will be set as the primary guest if they are the first guest added to the reservation or a secondary guest if a primary guest already exists.
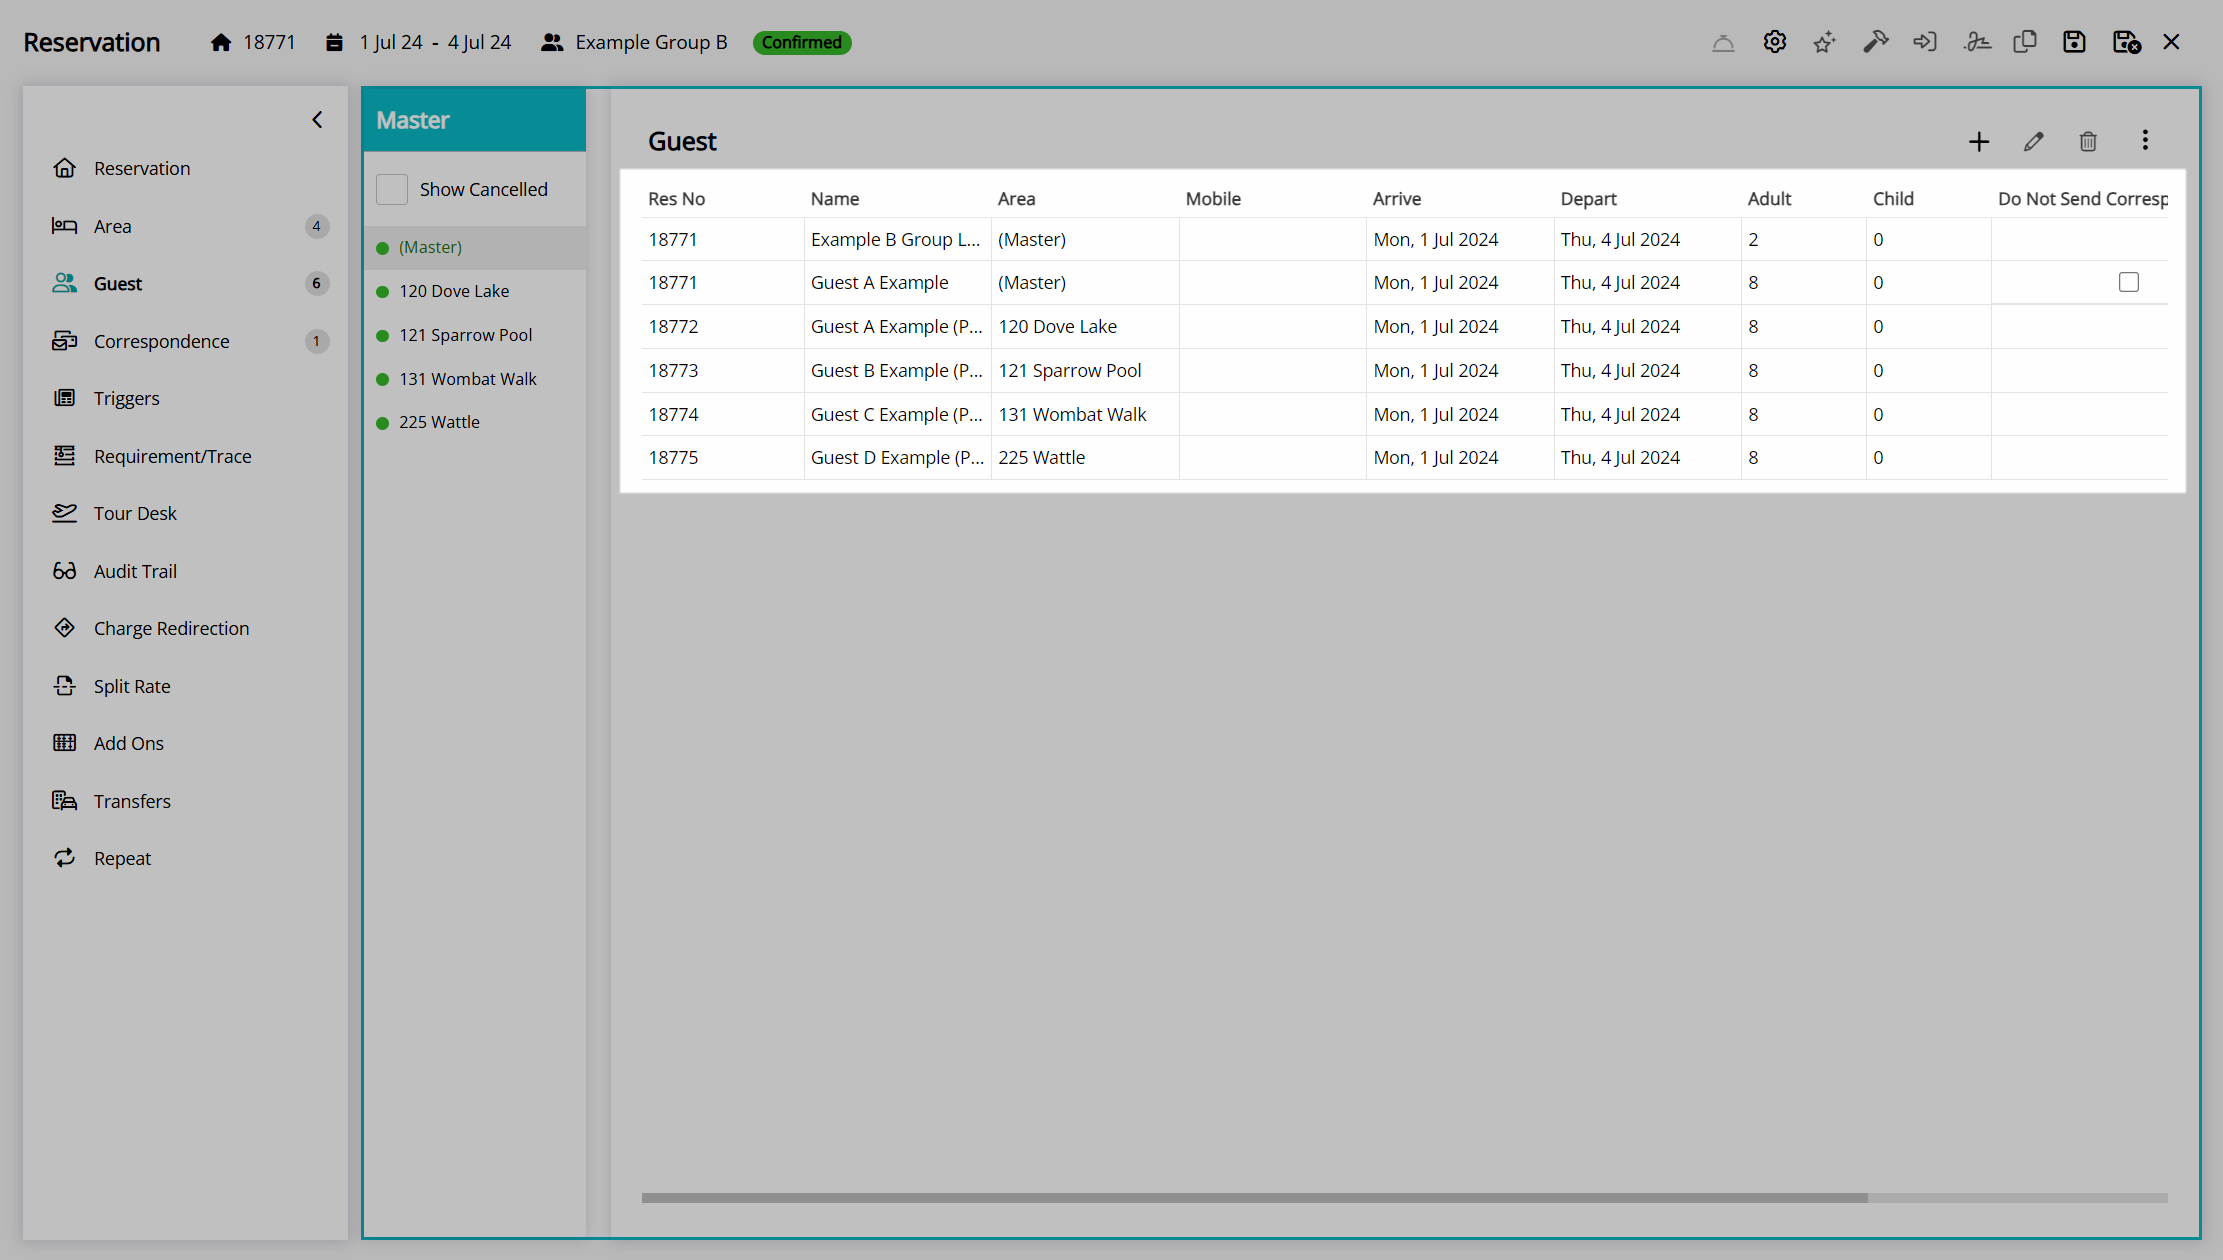
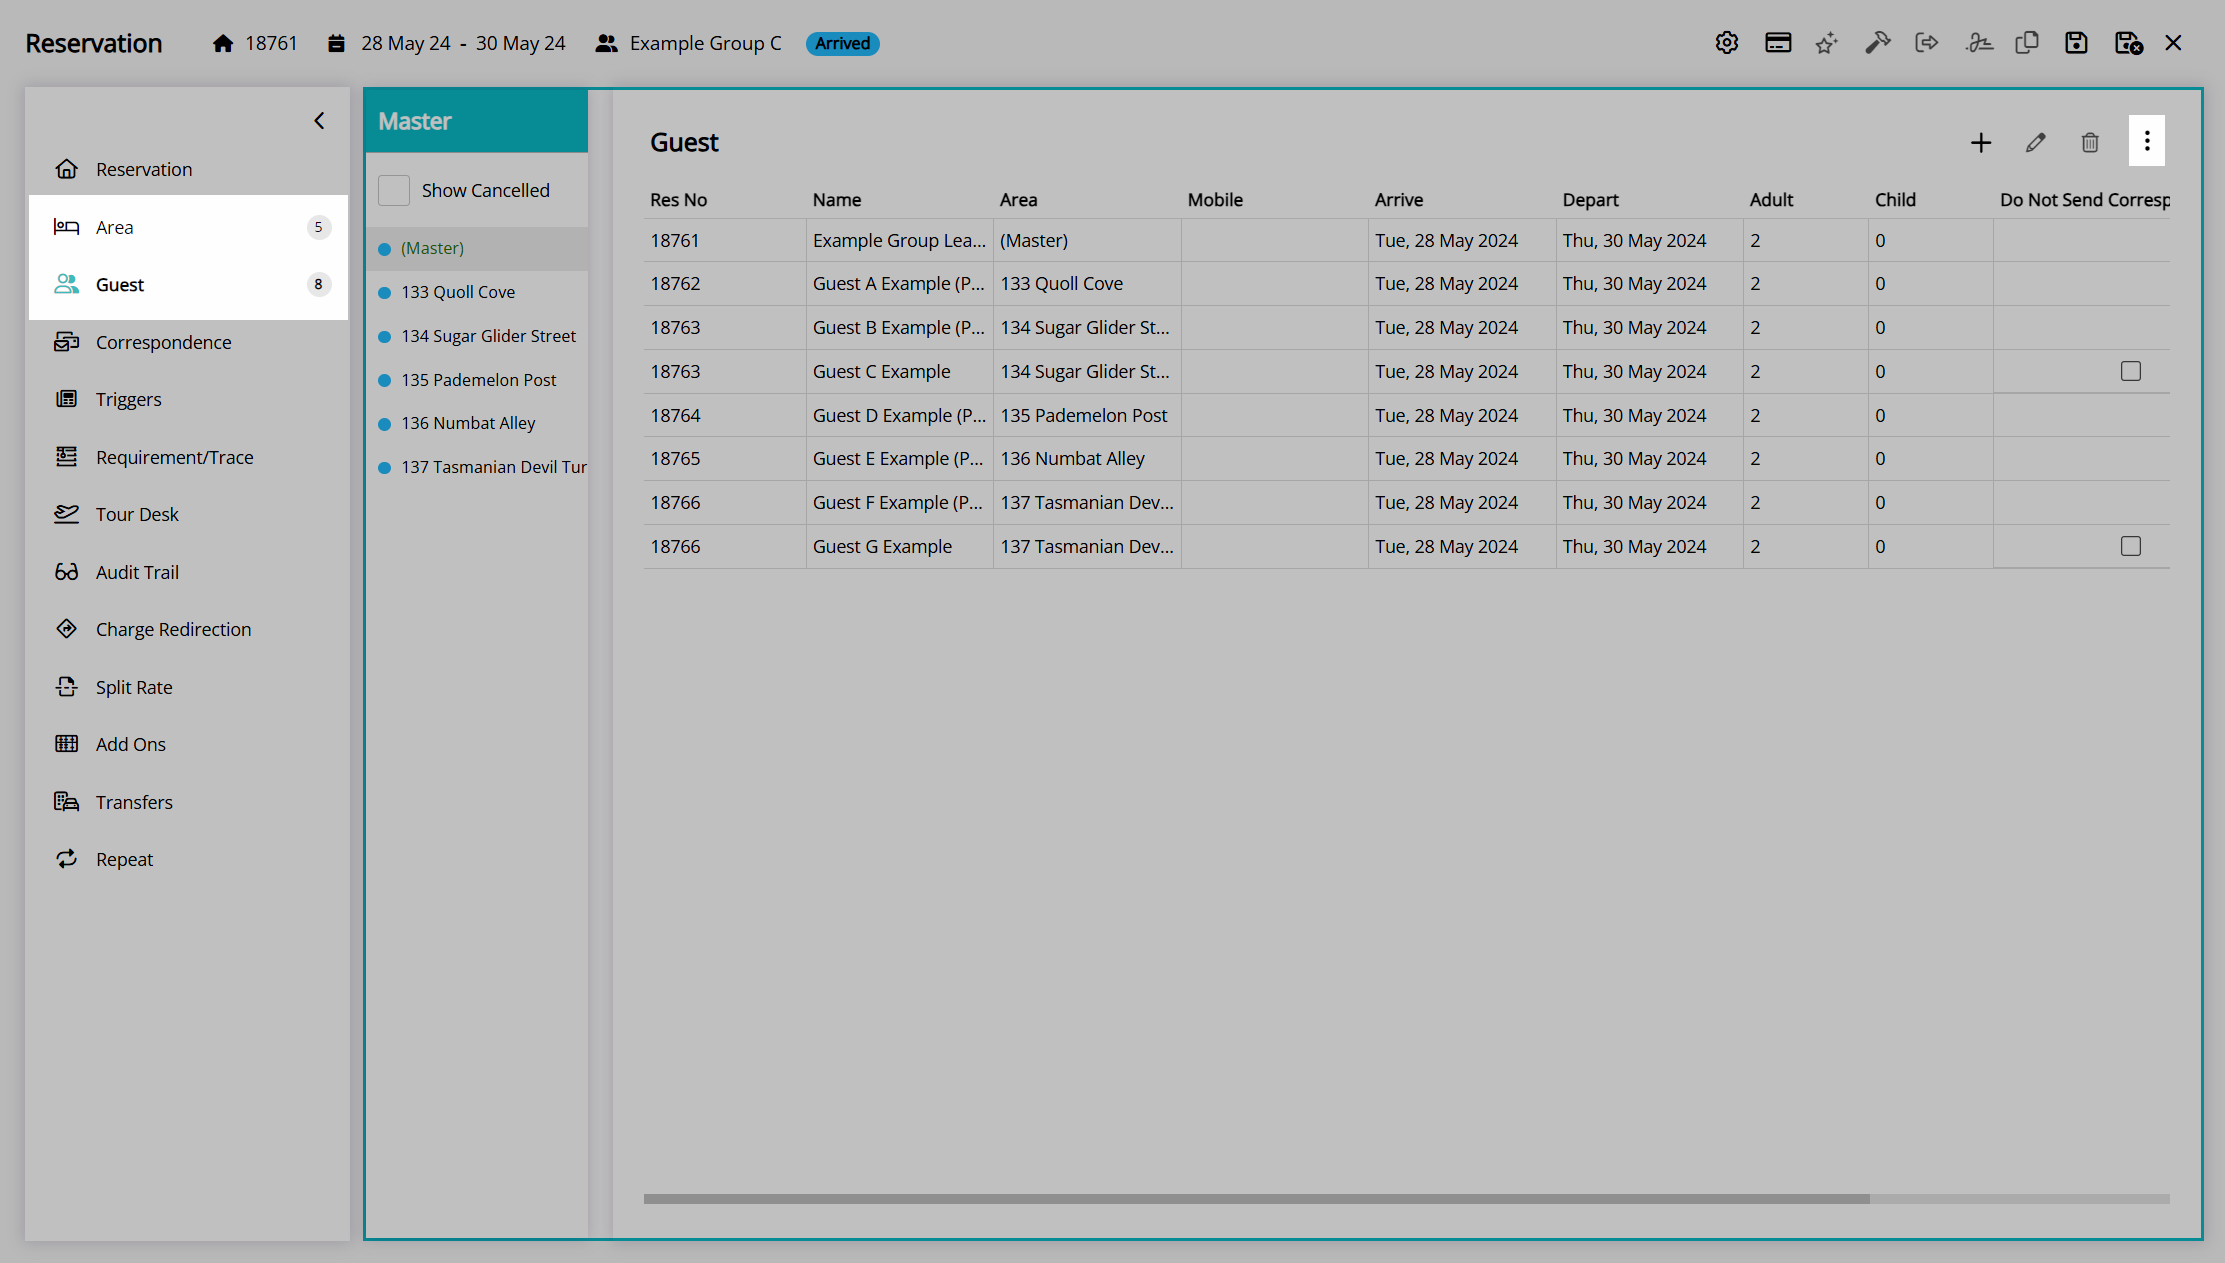
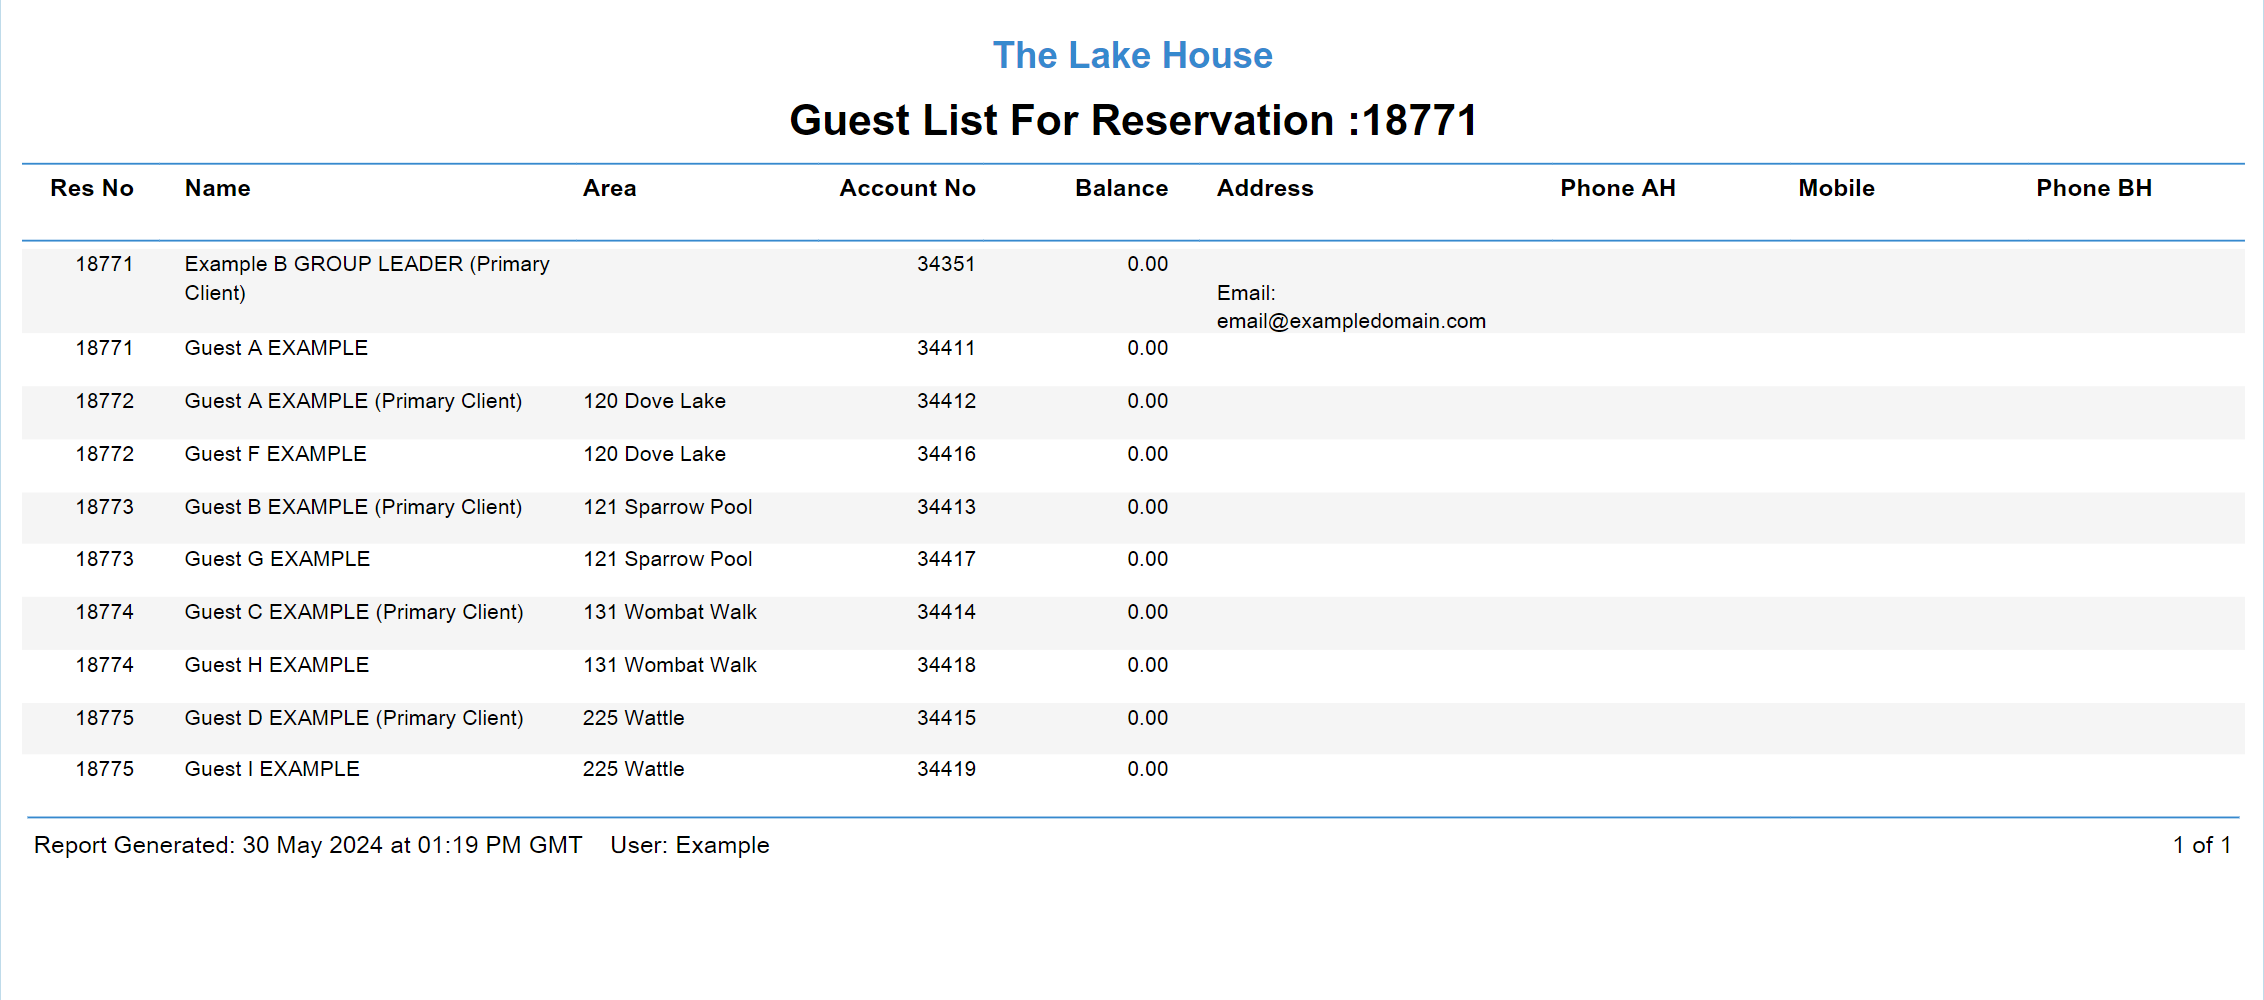
Print Guest List
The 'Print Guest List' option on the 'Guest' tab of the group cover page will generate a printable Guest List report for the group that can be provided to the group leader, tour leader, or other staff to provide key guest and reservation information for this group.
- Go to the Toolbar Menu Reservation Search in RMS.
- Enter the Group Name or Reservation Number and press 'Enter'.
- Select the '(Master)' in the Navigator Pane.
- Navigate to the 'Guest' tab.
- Select the
 'Options' icon.
 - Select the option 'Print Guest List'.
Go to the Toolbar Menu Reservation Search in RMS, enter the Group Name or Reservation Number, and press 'Enter'.

Select the '(Master)' in the Navigator Pane.

Navigate to the 'Guest' tab.
Select the  'Options' icon.
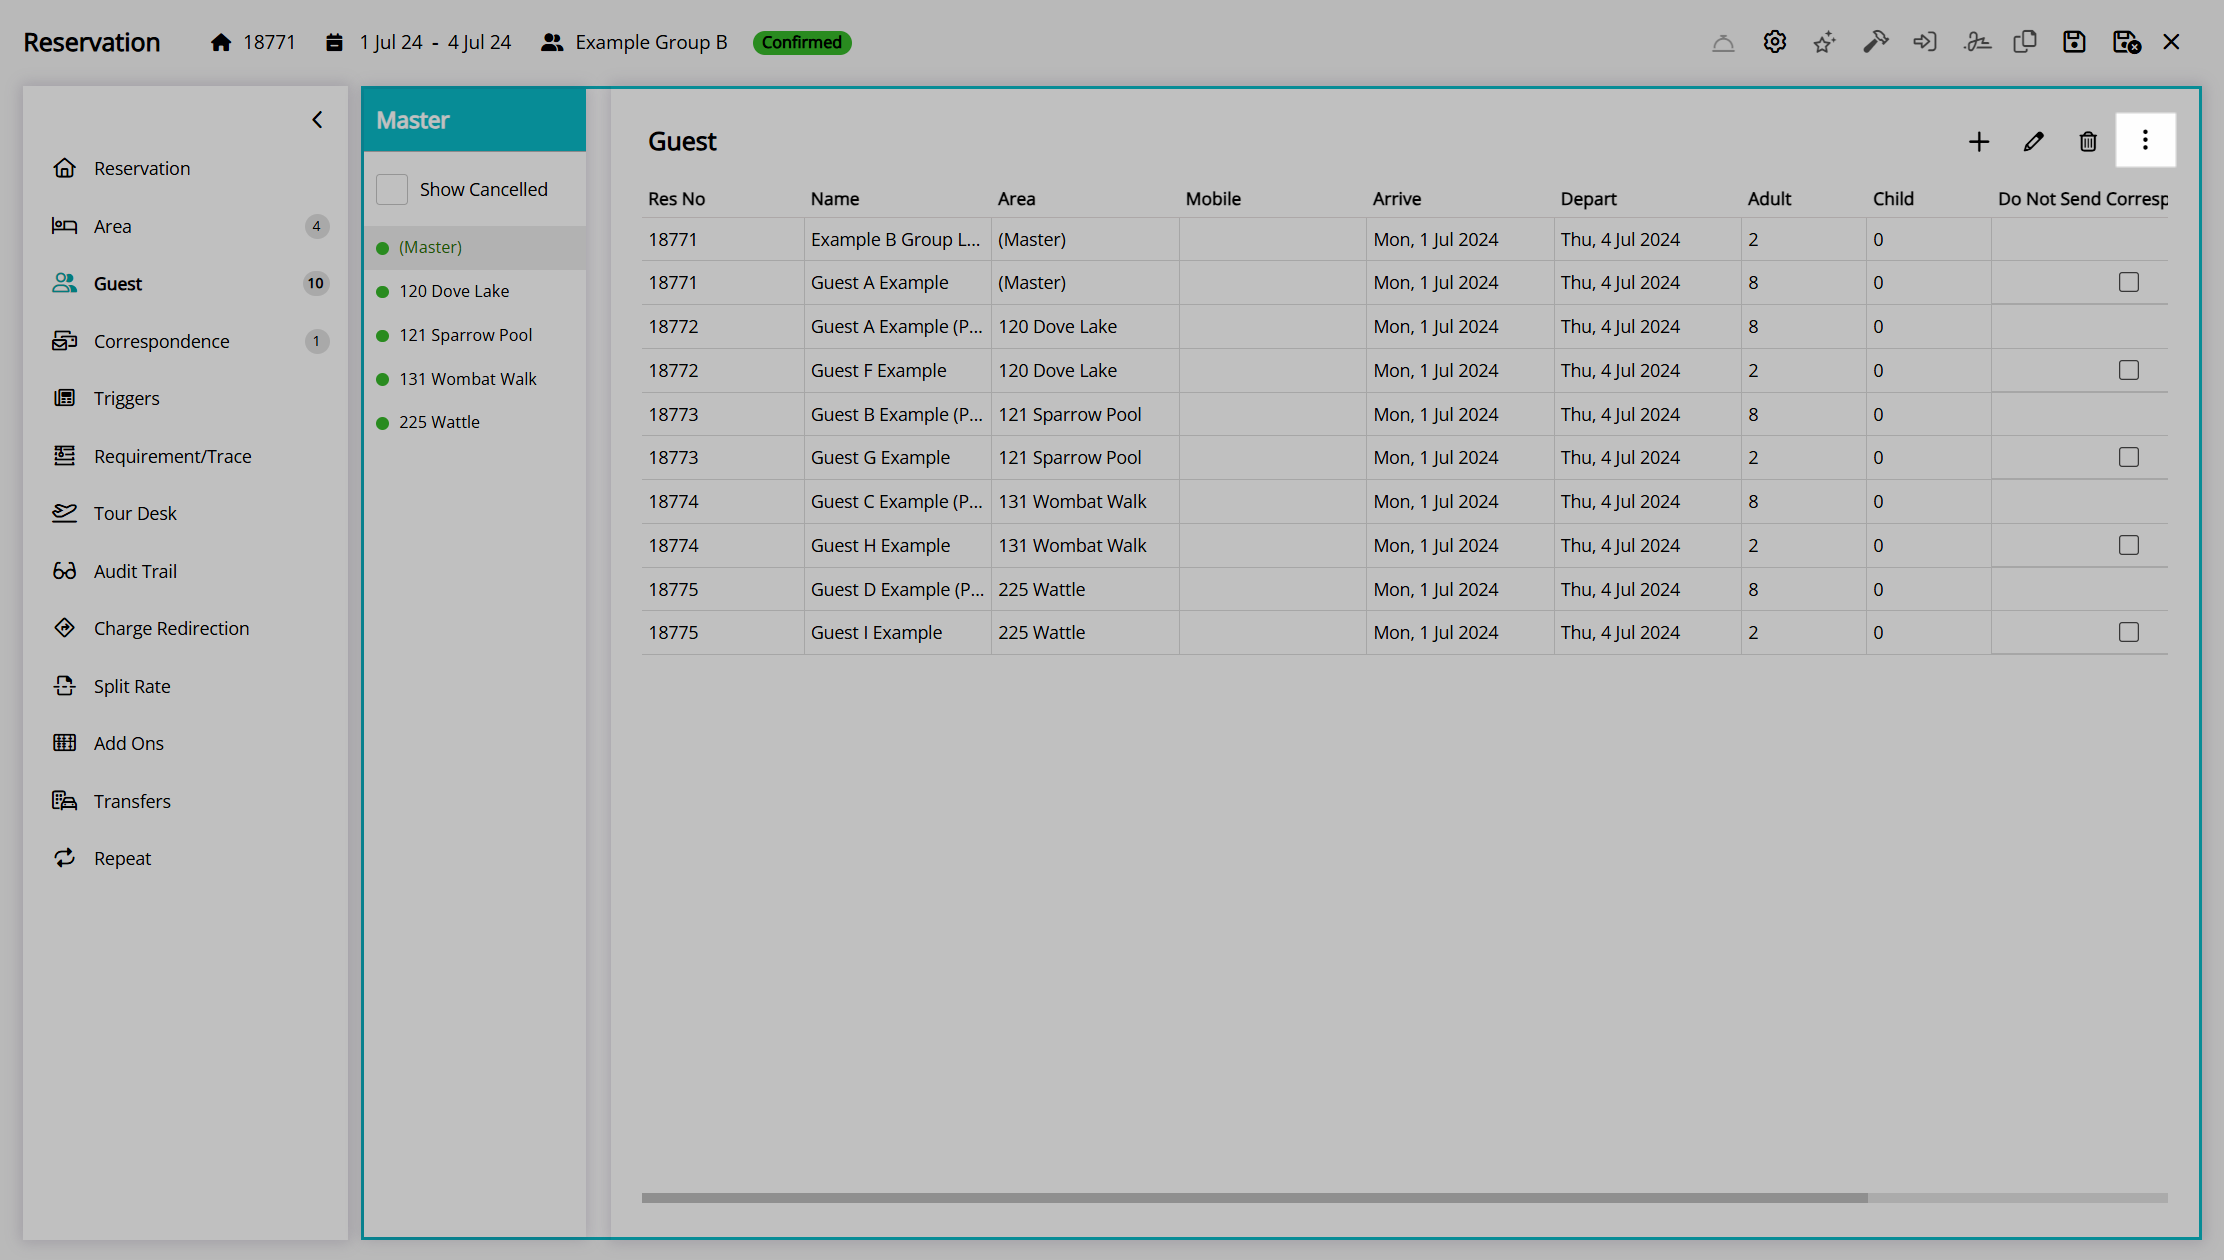
Select the option 'Print Guest List'.

A Guest List will be generated with the guest information for all guests on reservations in this group.
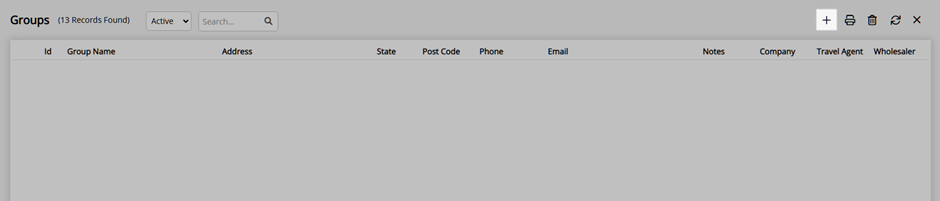
Groups (Group Allotment)
A Group is a named allotment that can be used for a company, travel agent, or party of guests travelling together on a group reservation.
The allotment of inventory can be set at a property, category, or area level with access to set rates and a unique code to enter and book on the RMS Internet Booking Engine.
Property allotments reserve inventory for the named group at the nominated property without limitations on the category or area booked. Category allotments limit the named group to a set number of inventory within the specified categories only, and an area allotment reserves specific areas that are only to be used by the named group.
Groups can be used to create and manage inventory allotments for guests travelling together as part of the same event or tour group. They can be guaranteed or non-guaranteed with access to specific rates. A guaranteed allotment will preserve the entered inventory for consumption by the named group until the prescribed release back period opens up any unused allotments to unrestricted use.
Groups include multiple features to define the entities that can consume the reserved inventory and automate specific reservation details for the named group.
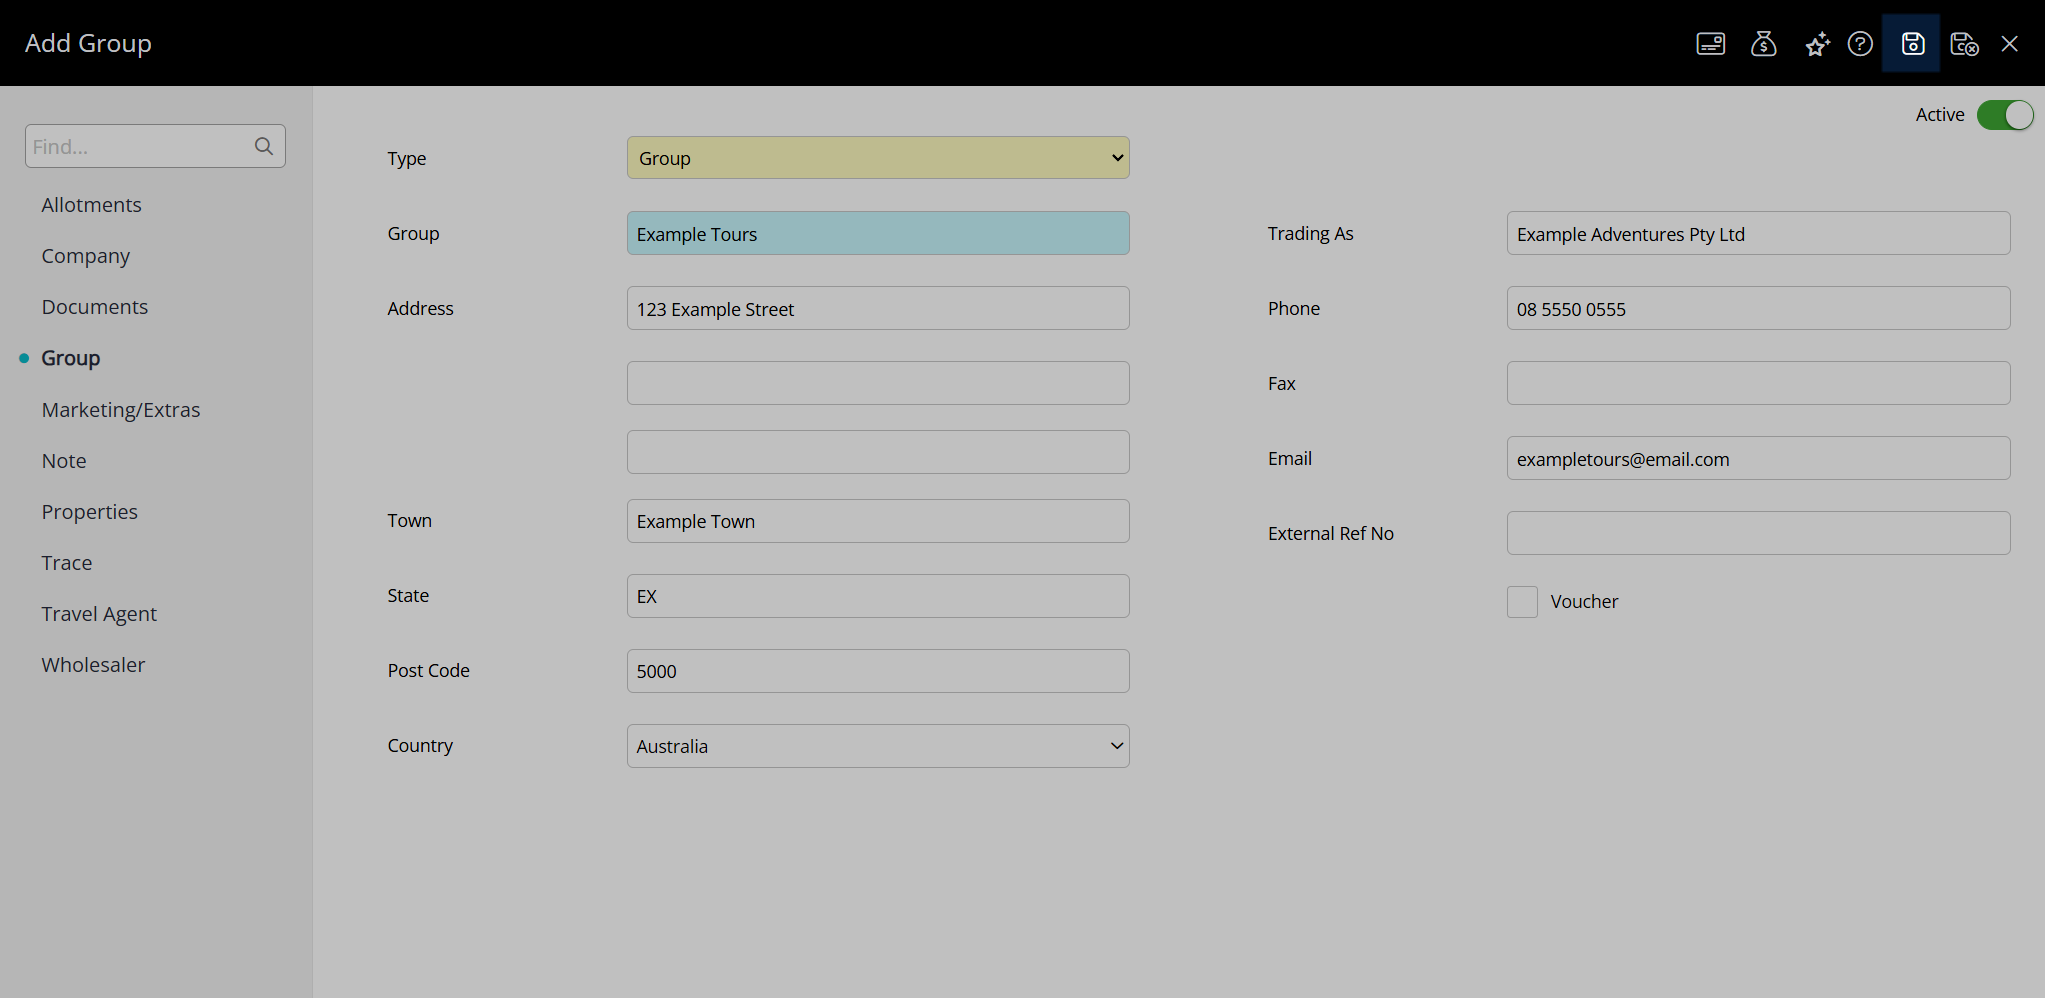
Setup Group
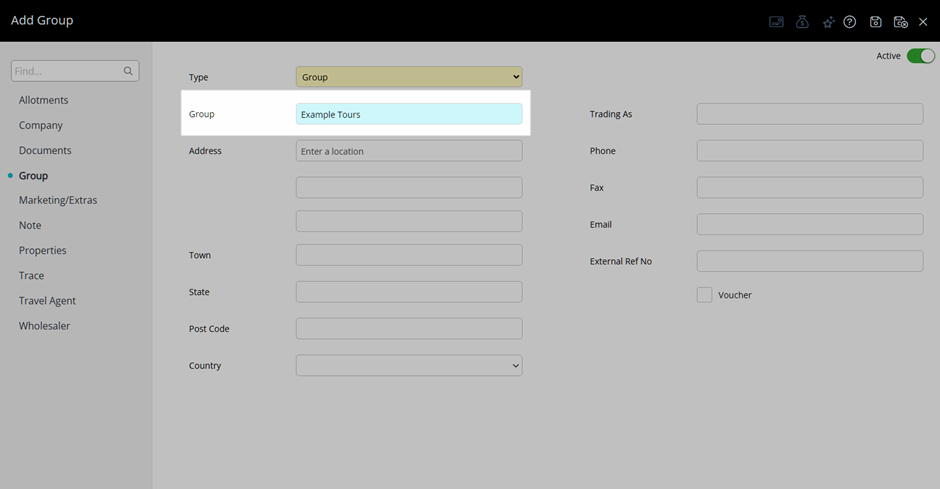
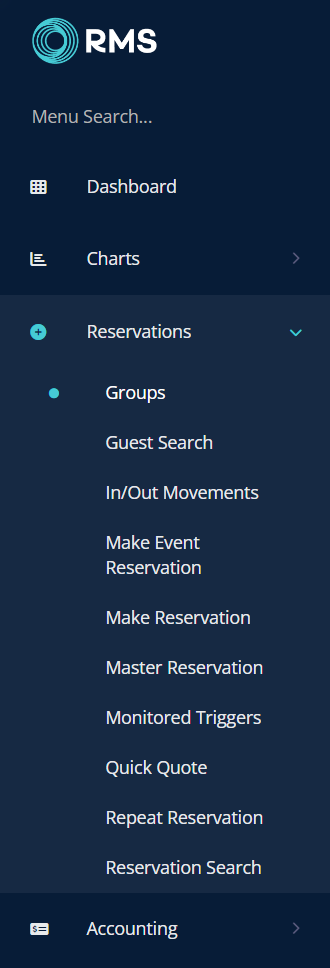
- Go to Reservations > Groups in RMS.
- Select the
 'Add' icon.
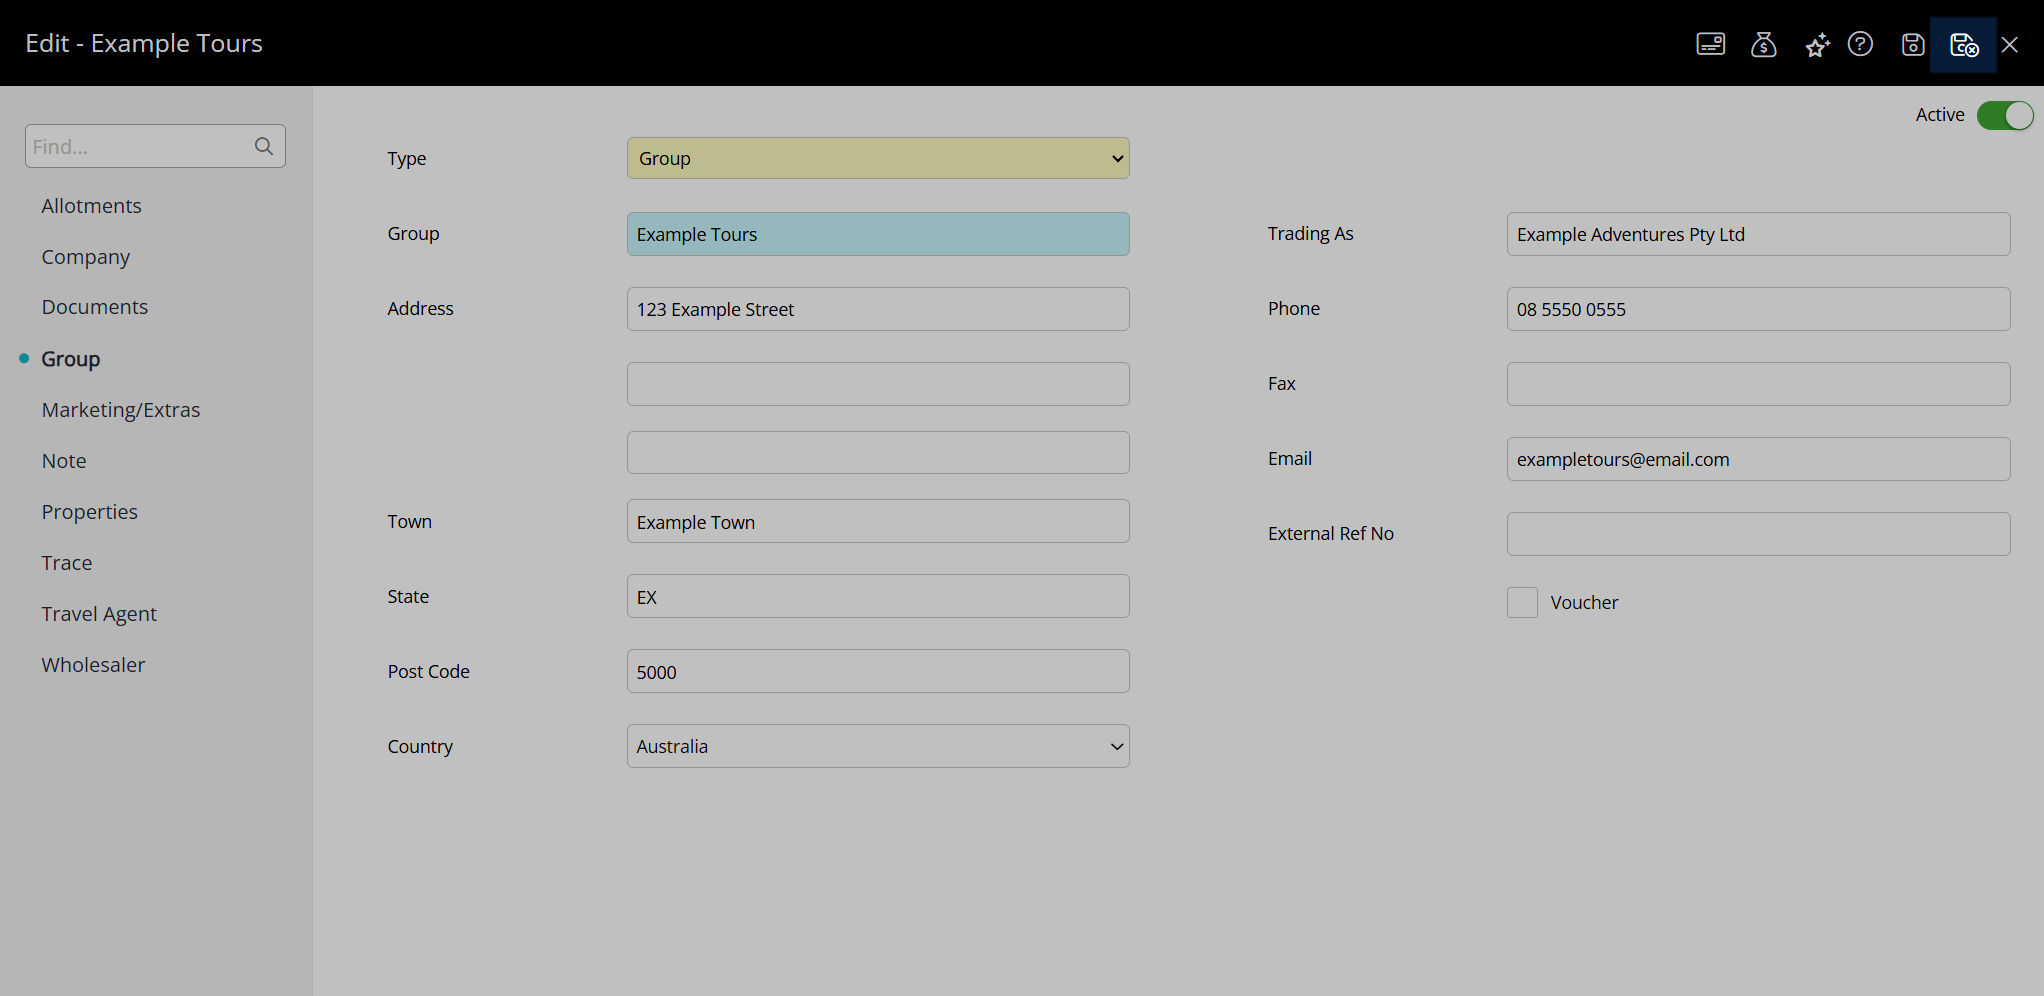
 - Enter a Group Description.
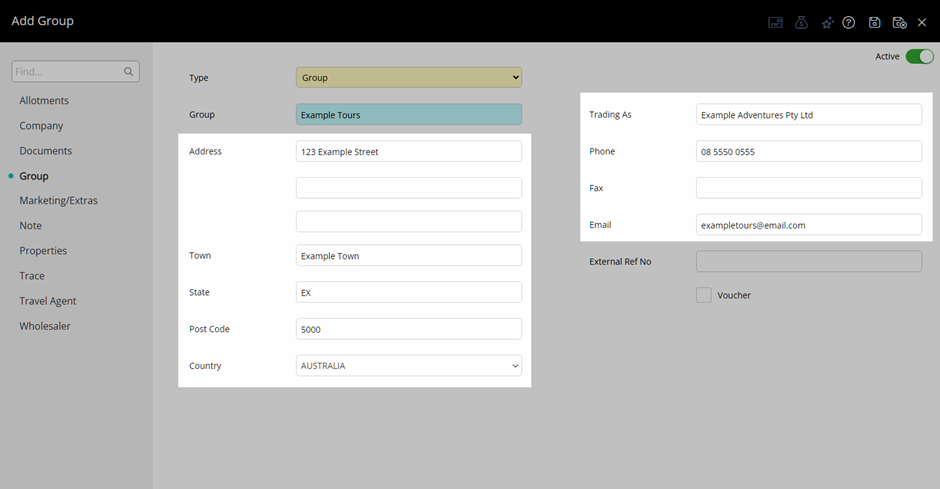
- Optional: Enter Contact Details.
- Save.
- Select the Group Access and choose the
 'Apply/Exit' icon.
 - Set up Property Access.
- Set up Group Allotments.
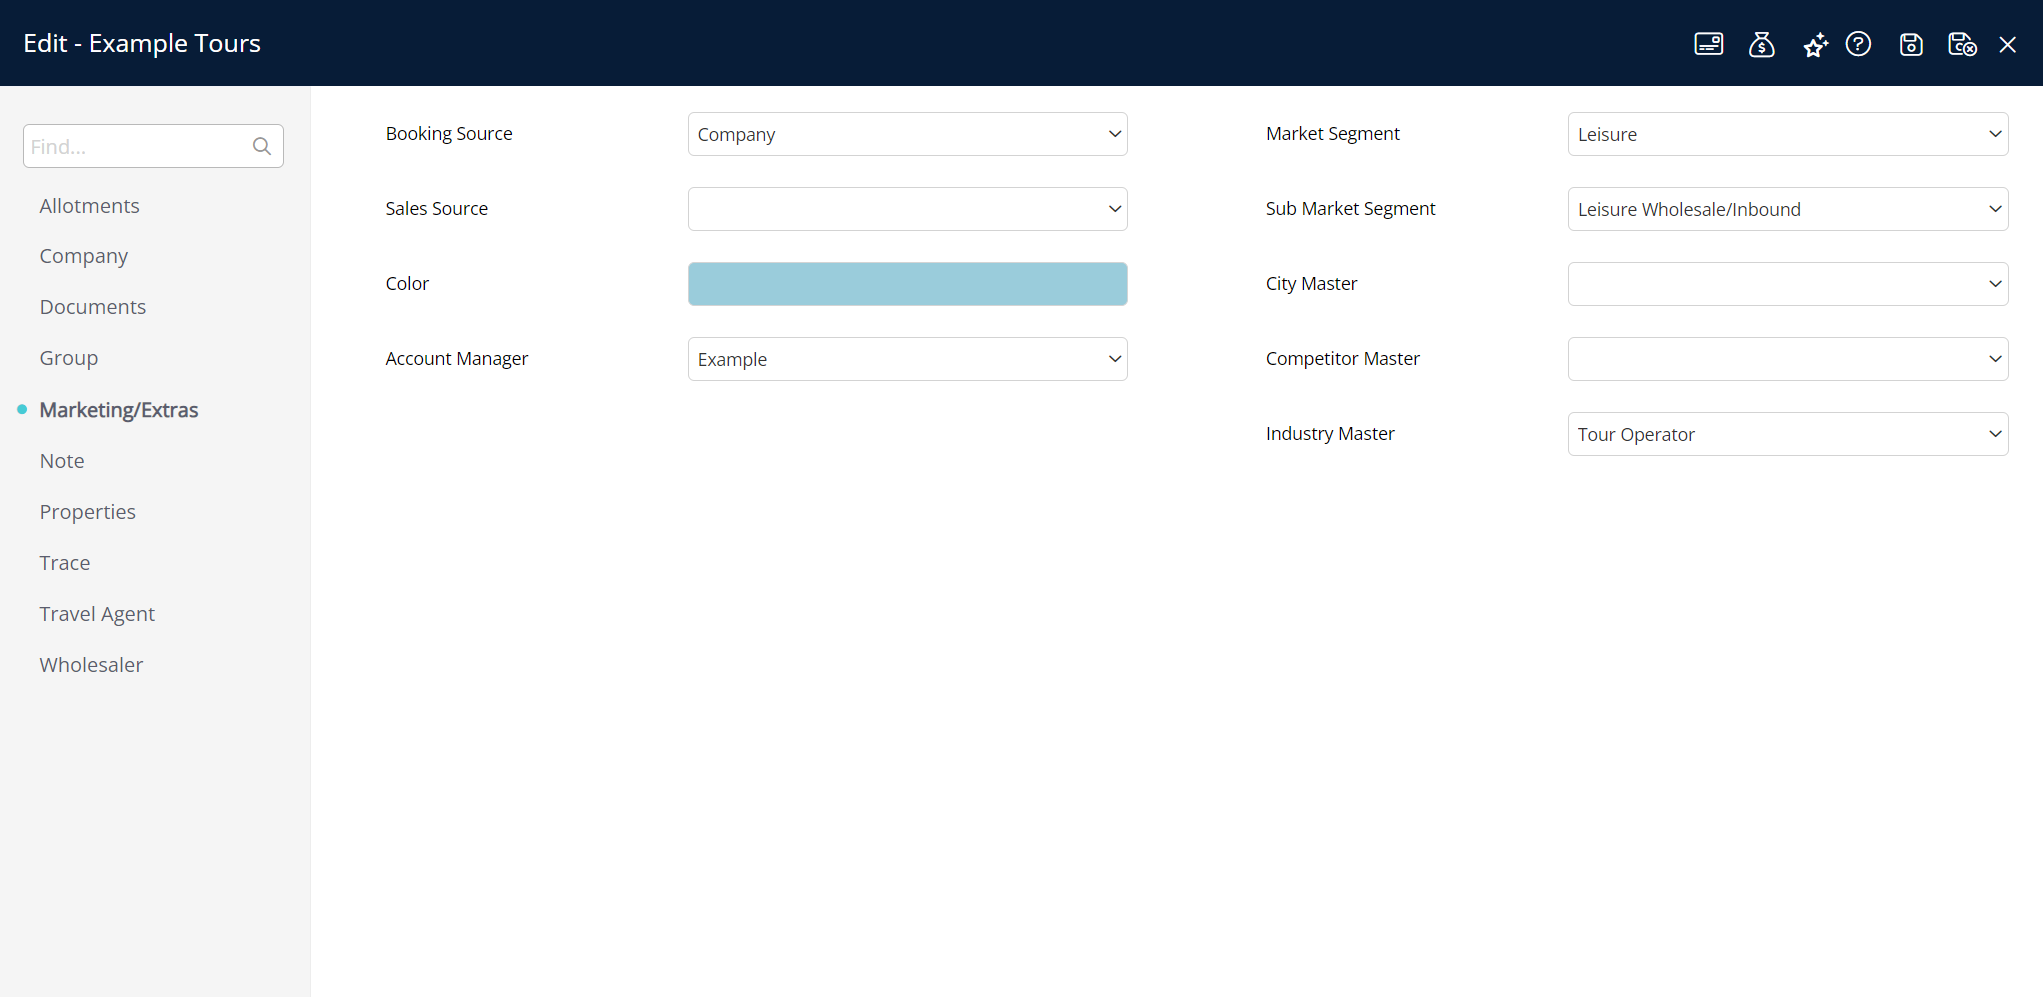
- Optional: Set up Additional Reservation Details.
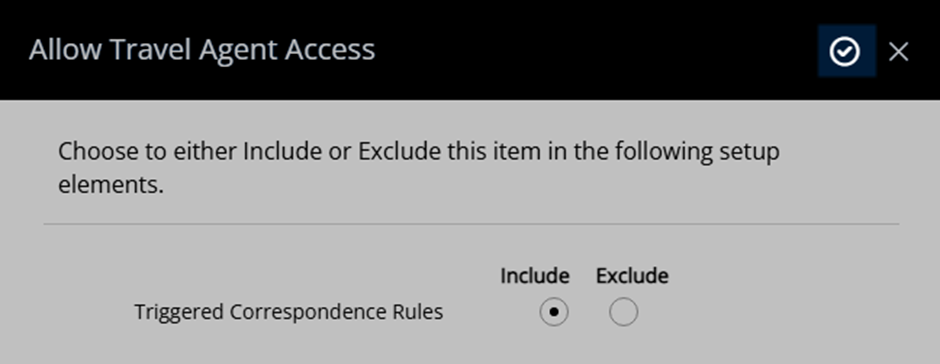
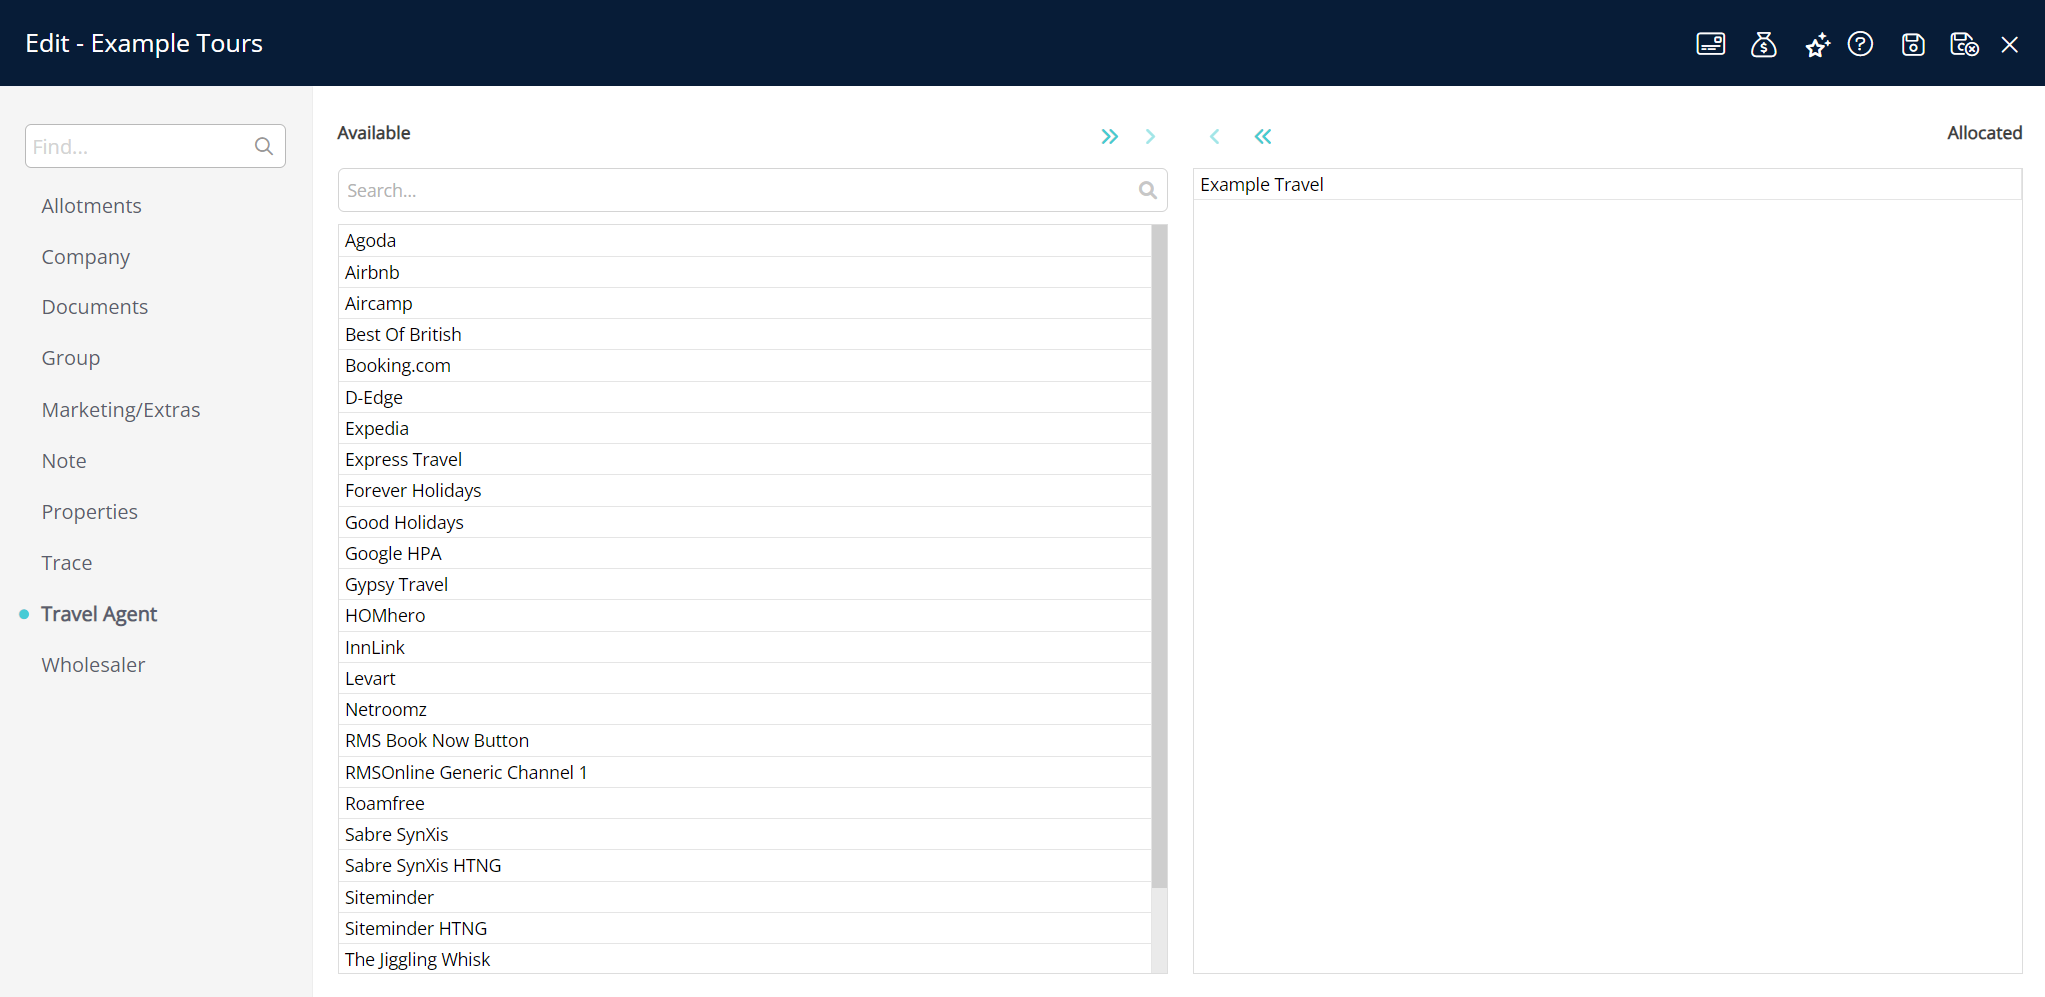
- Optional: Set up Company, Travel Agent, or Wholesaler Access.
- Save/Exit.
Go to Reservations > Group Allotments in RMS.

Select the ![]() 'Add' icon.
'Add' icon.
Enter a Group Description.
Optional: Enter Contact Details.
Select the  'Save' icon to store the changes made and create the 'Group'.
Select the Group Access and choose the ![]() 'Apply/Exit' icon.
'Apply/Exit' icon.
Set up Property Access.
Set up Group Allotments.
Optional: Set up Additional Reservation Details.
Optional: Set up Company, Travel Agent, or Wholesaler Access.
Select the  'Save/Exit' icon to store the changes made and leave the setup.
Setup Group Property Access
- Go to Reservations > Groups in the side menu of RMS.
- Select the
 'Edit' icon on an existing Group.
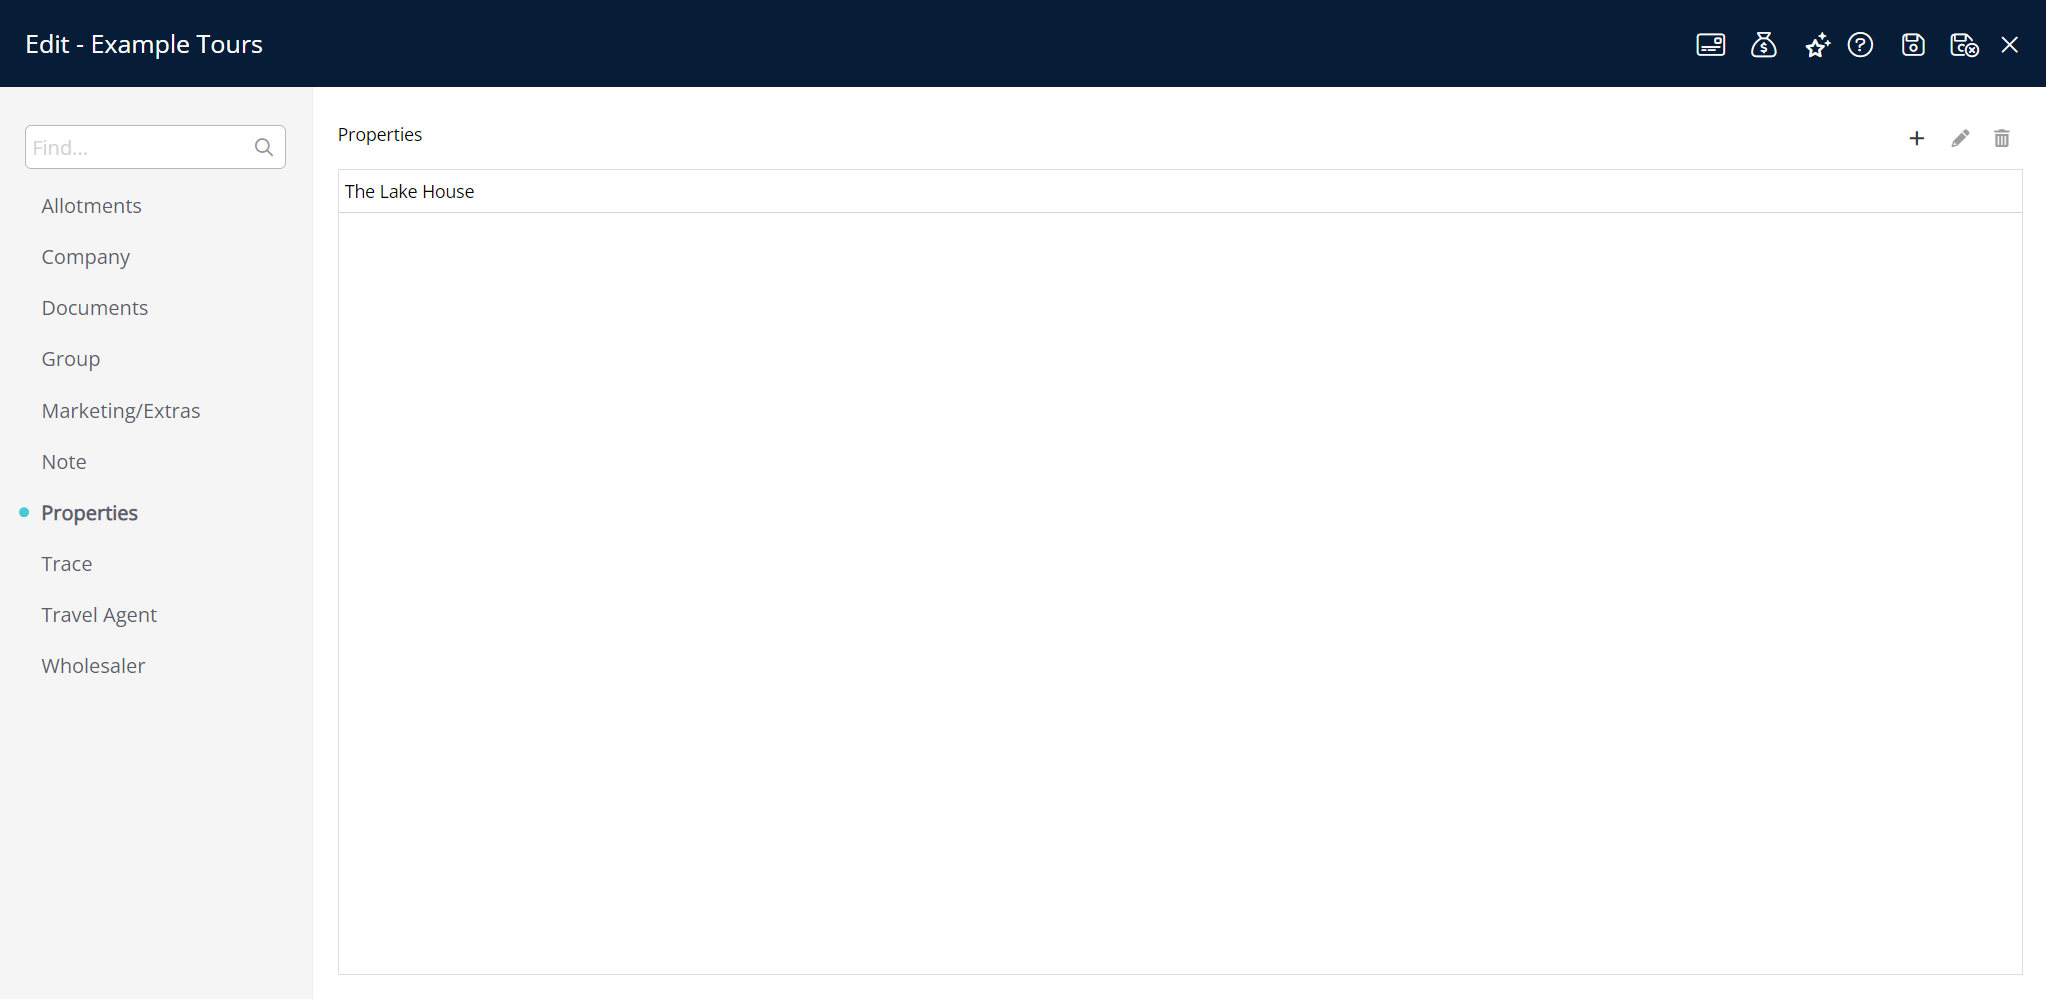
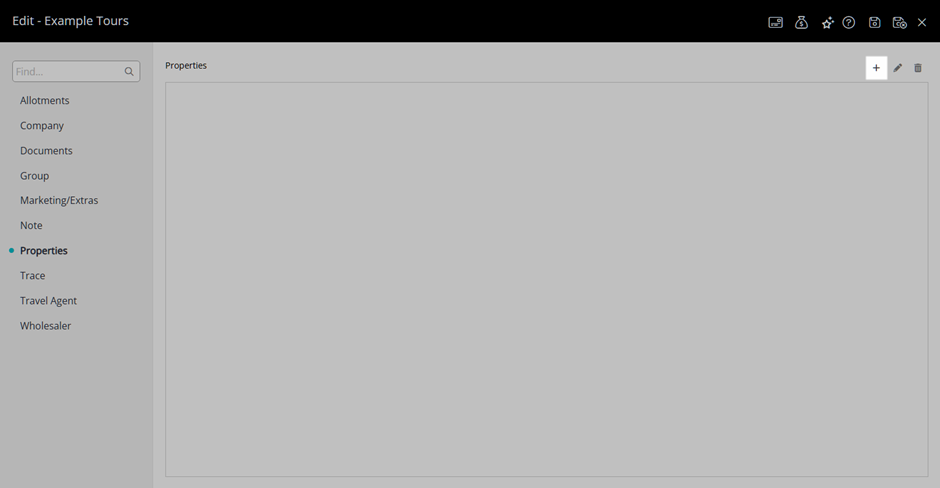
 - Navigate to the 'Properties' tab.
- Select the
 'Add' icon.
 - Select a Property and choose the
 button.
 - 'Apply/Exit'.
Go to Reservations > Groups in the side menu of RMS.
Select the ![]() 'Edit' icon on an existing Group.
'Edit' icon on an existing Group.

Navigate to the 'Properties' tab.
Select the ![]() 'Add' icon.
'Add' icon.
Select a Property and choose the  button.
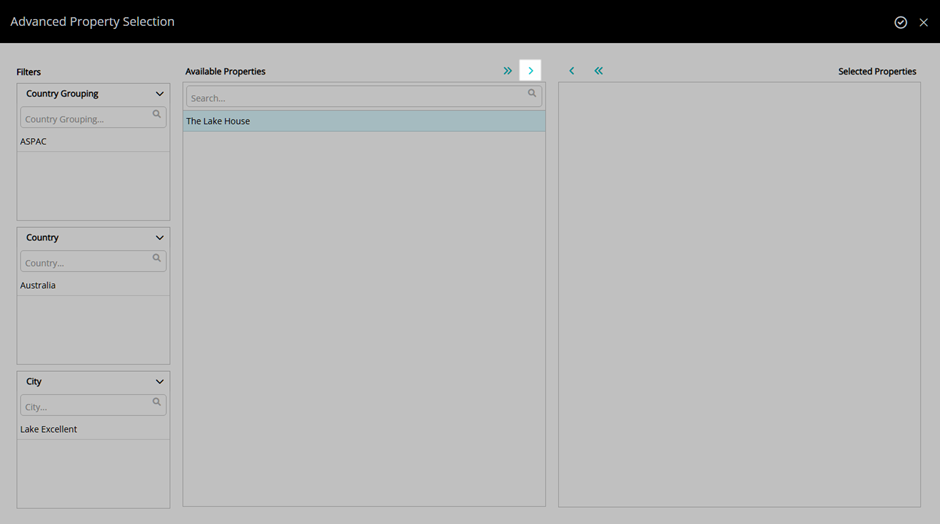
Select the  'Apply/Exit' icon to store the changes made and return to the Group.
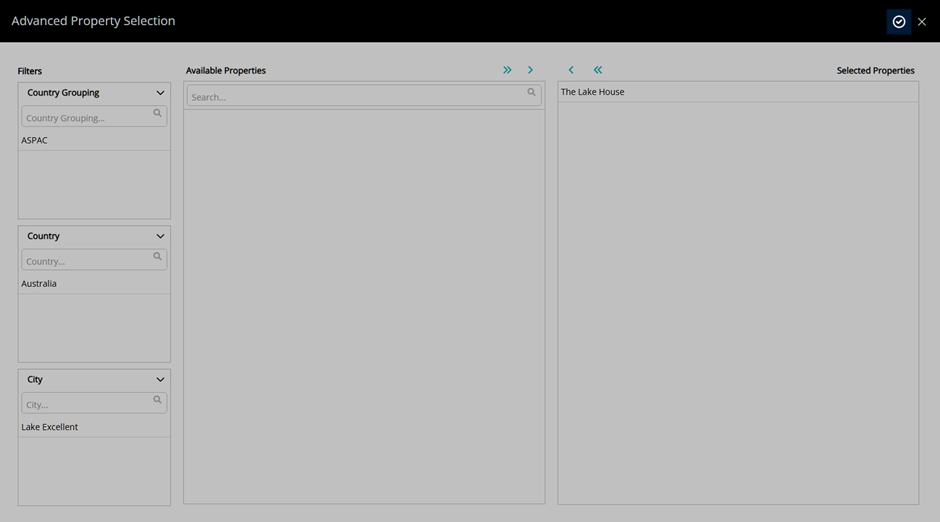
The selected properties will now be allocated to the Group and will determine the available inventory for allotments.

Setup Group Allotment
- Go to Reservations > Groups in the side menu of RMS.
- Select the
 'Edit' icon on an existing Group.
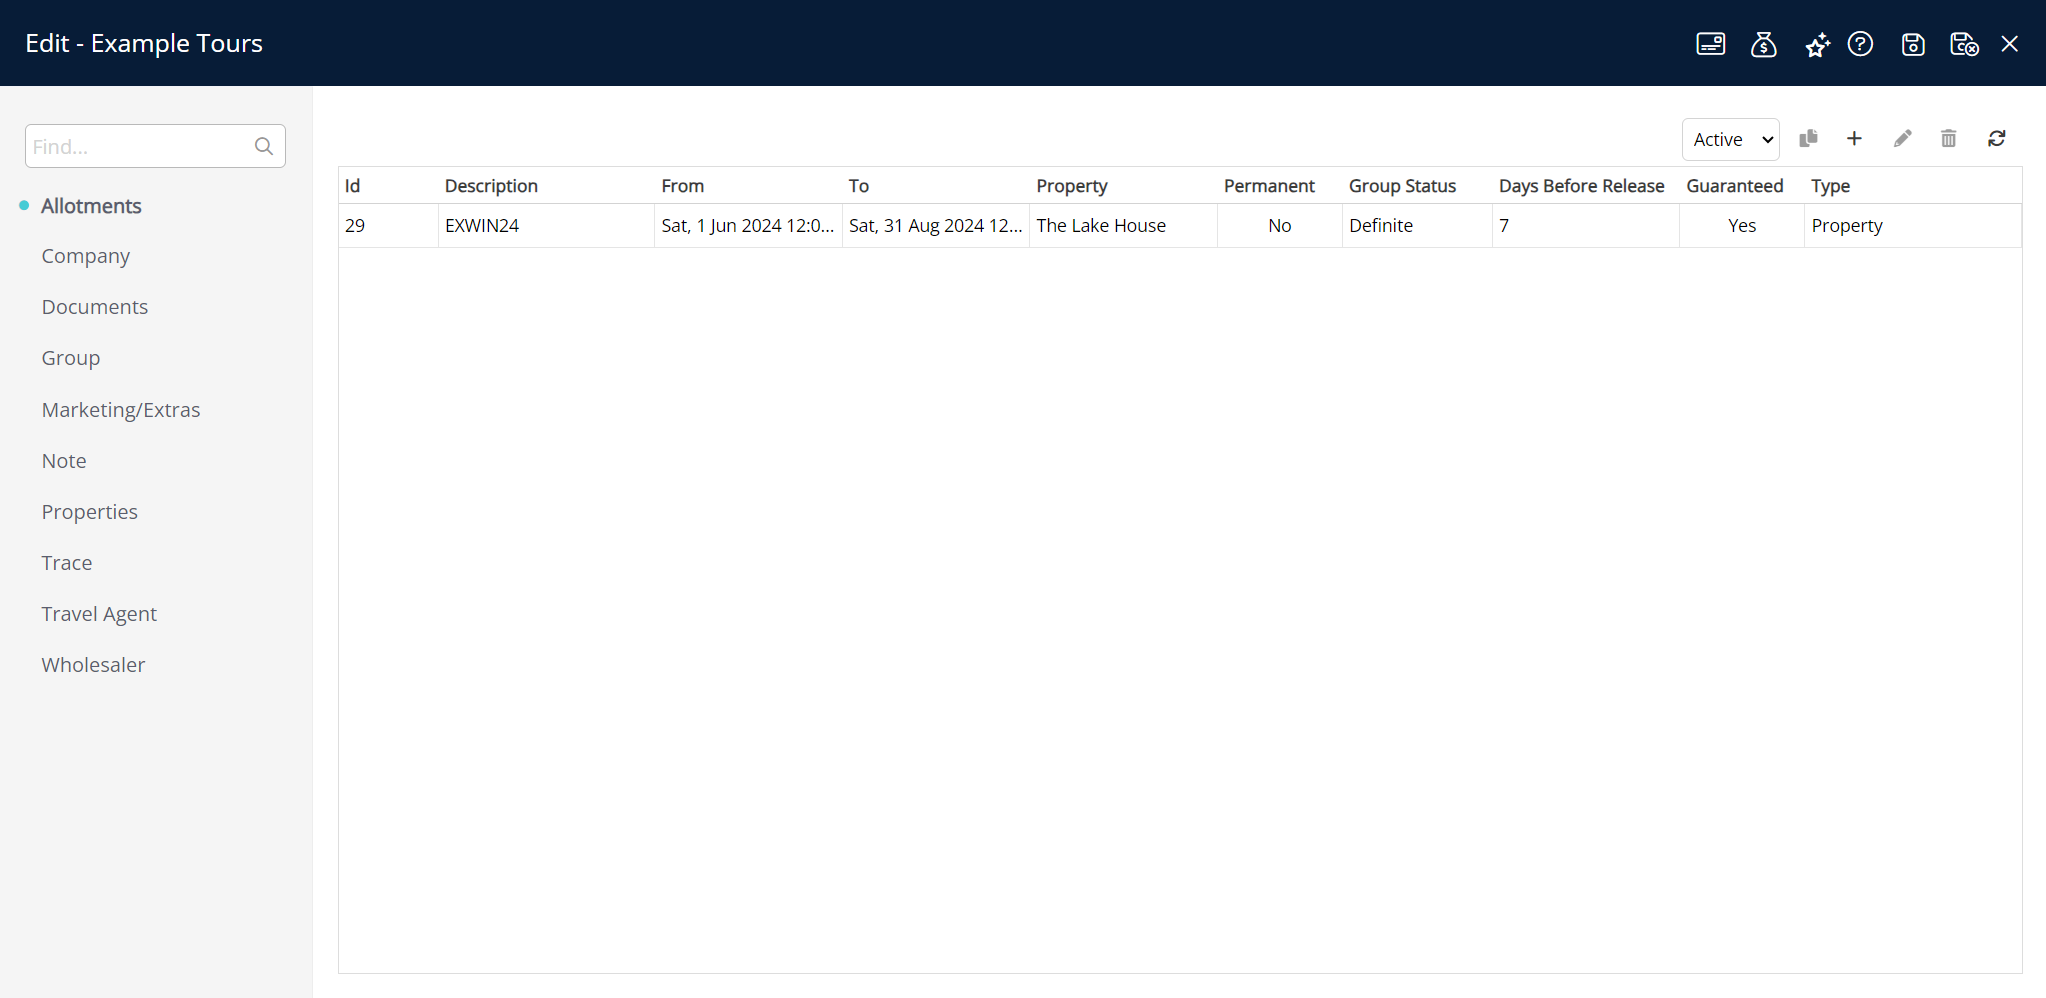
 - Navigate to the 'Allotments' tab.
- Select the
 'Add' icon.
 - Select a Date Range or the 'Set Permanently' checkbox.
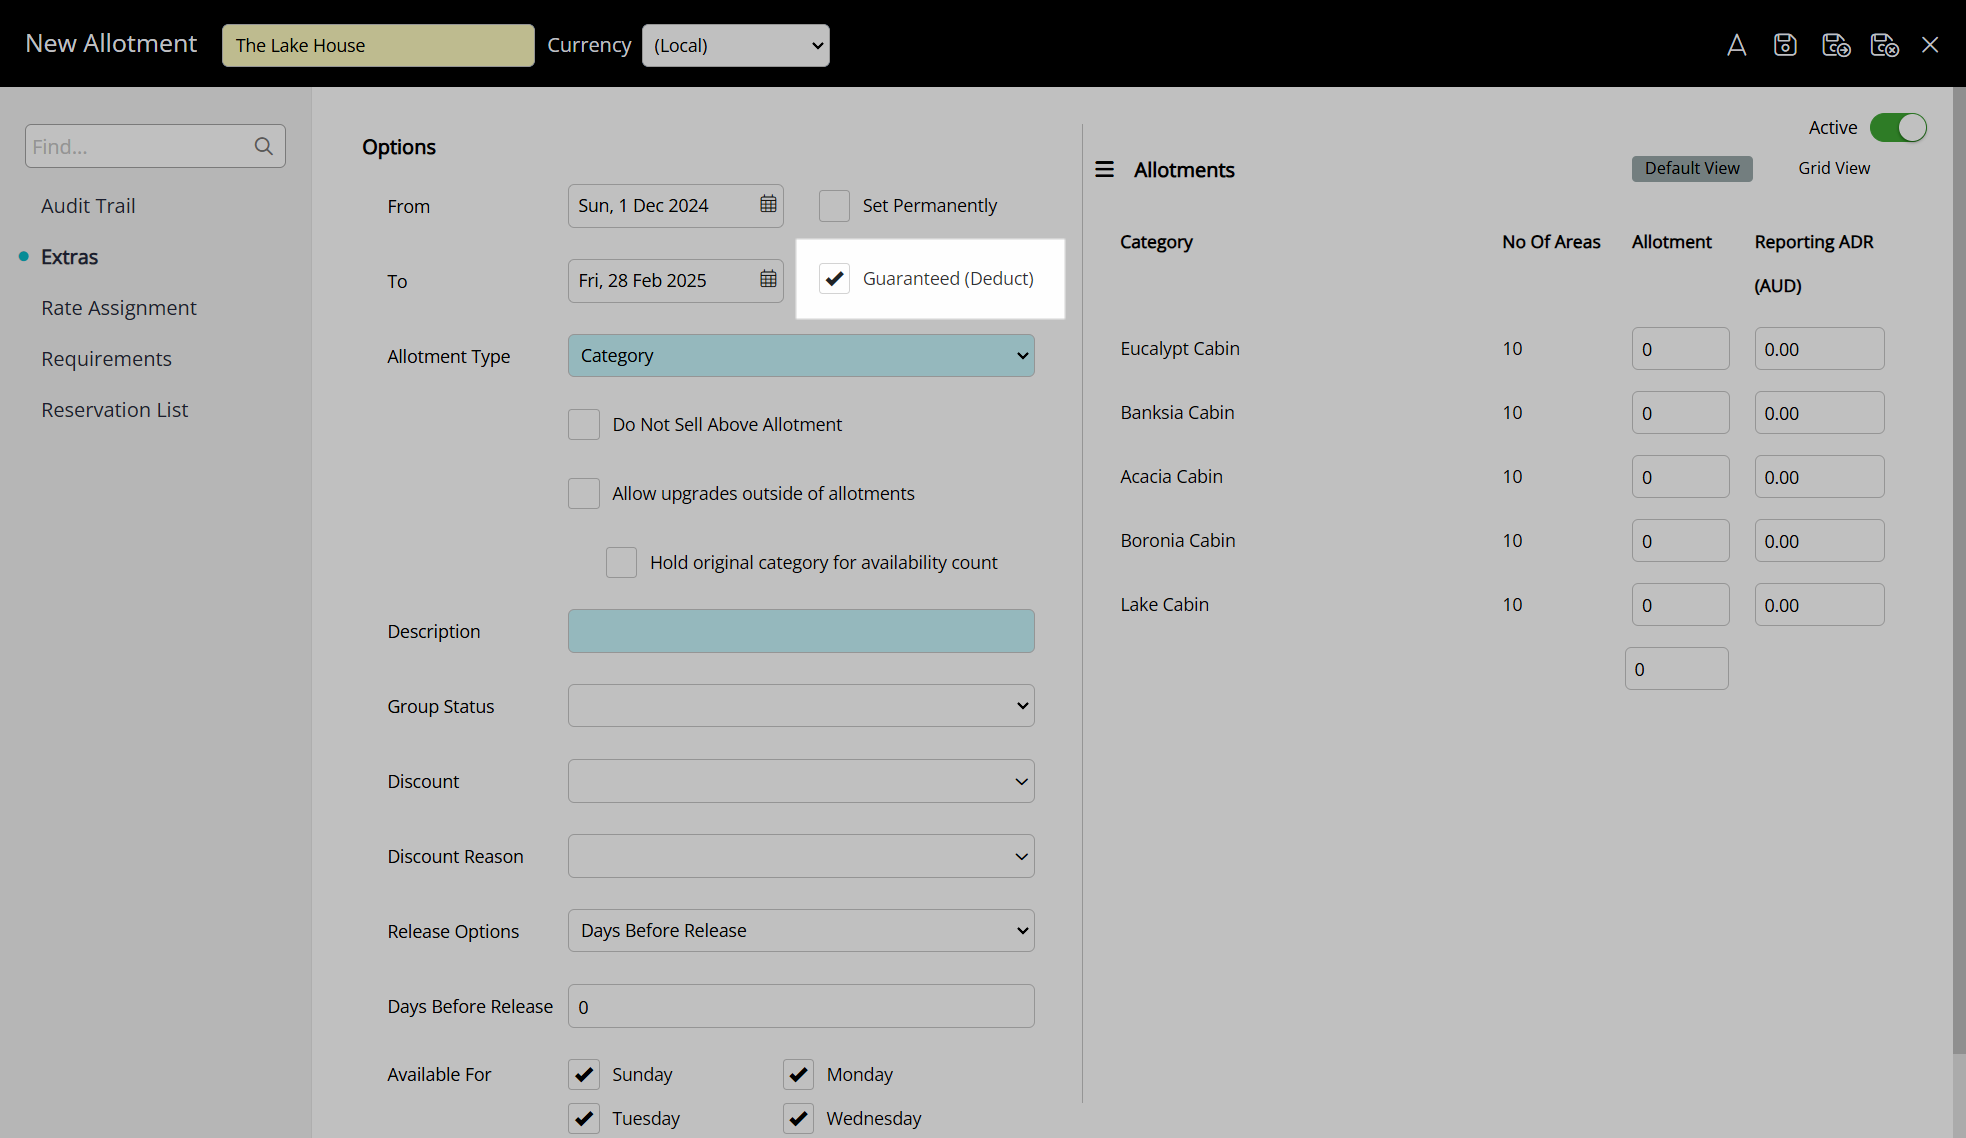
- Optional: Select the 'Guaranteed' checkbox.
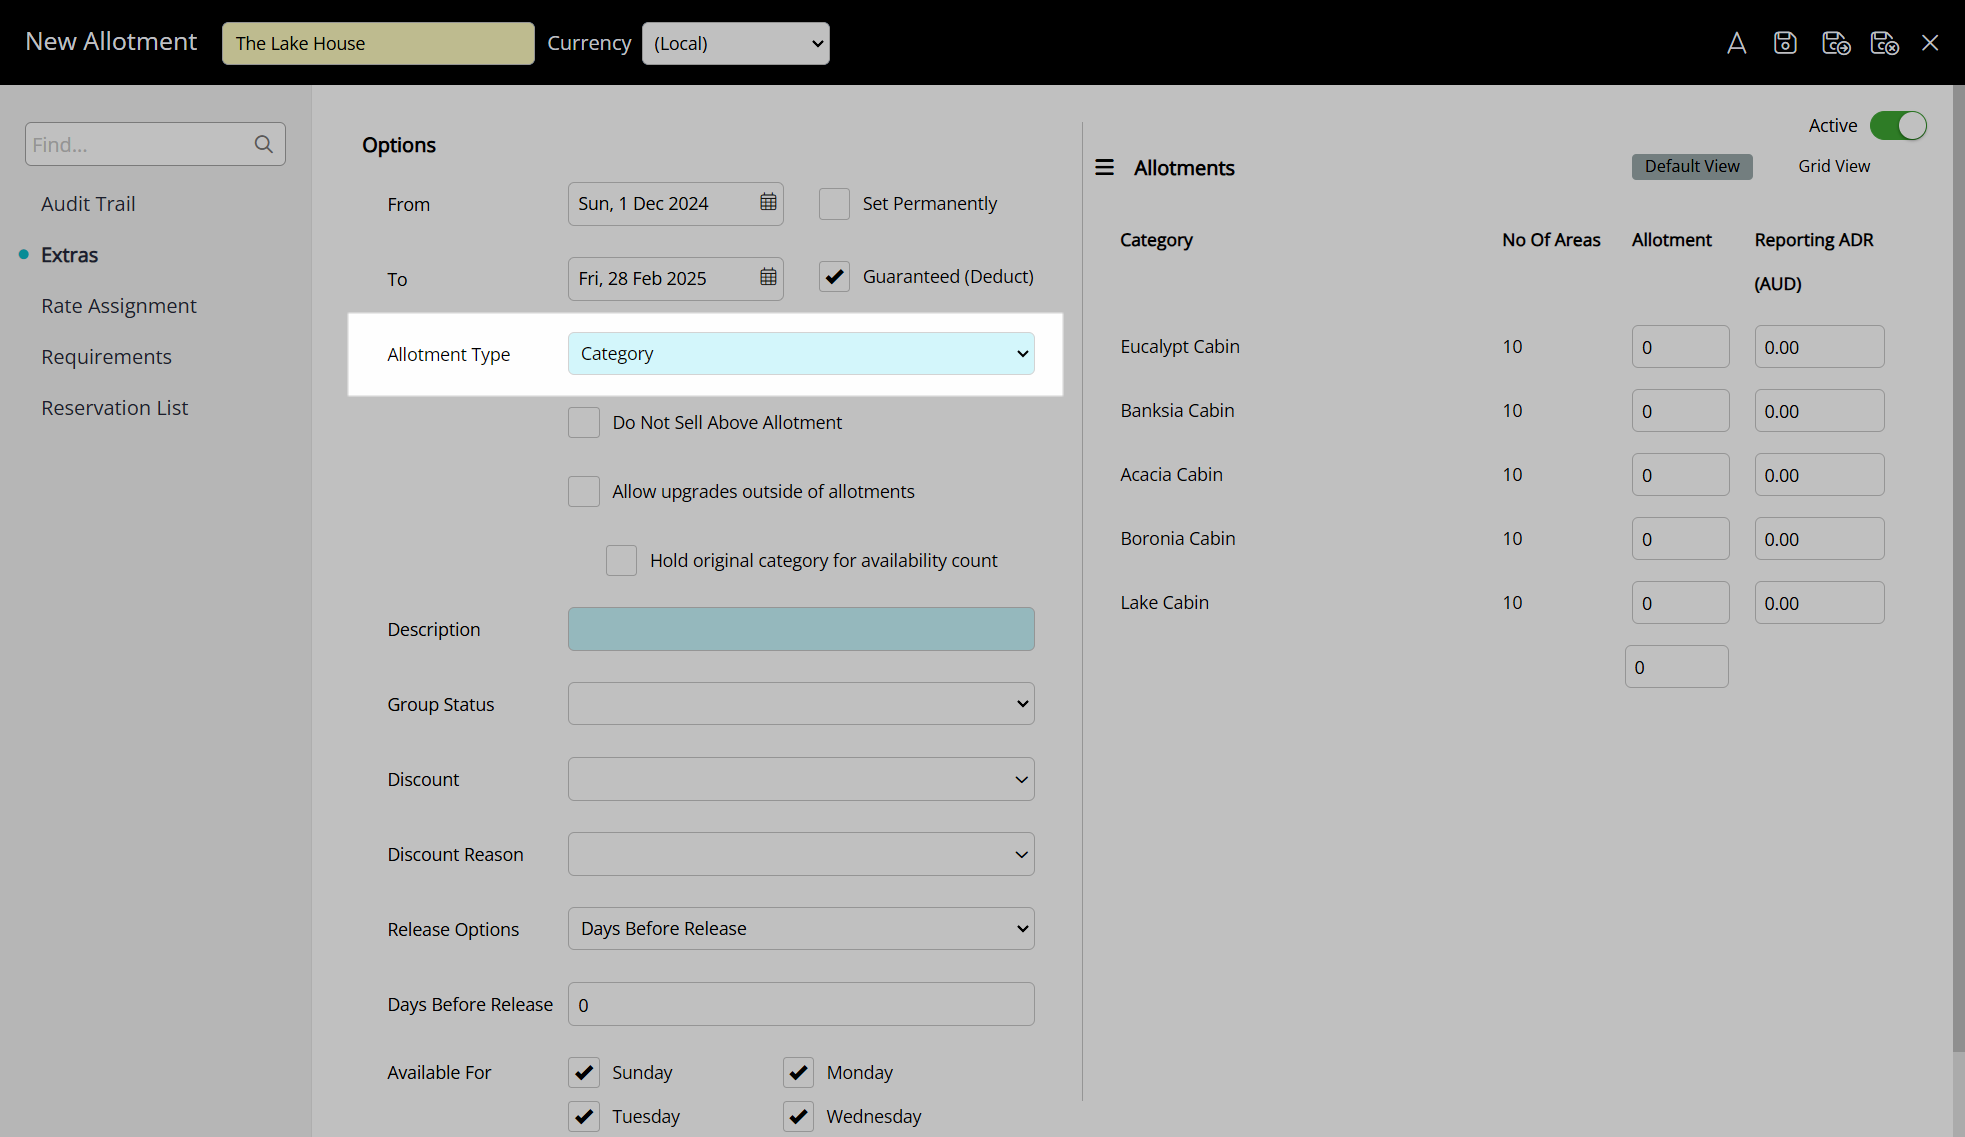
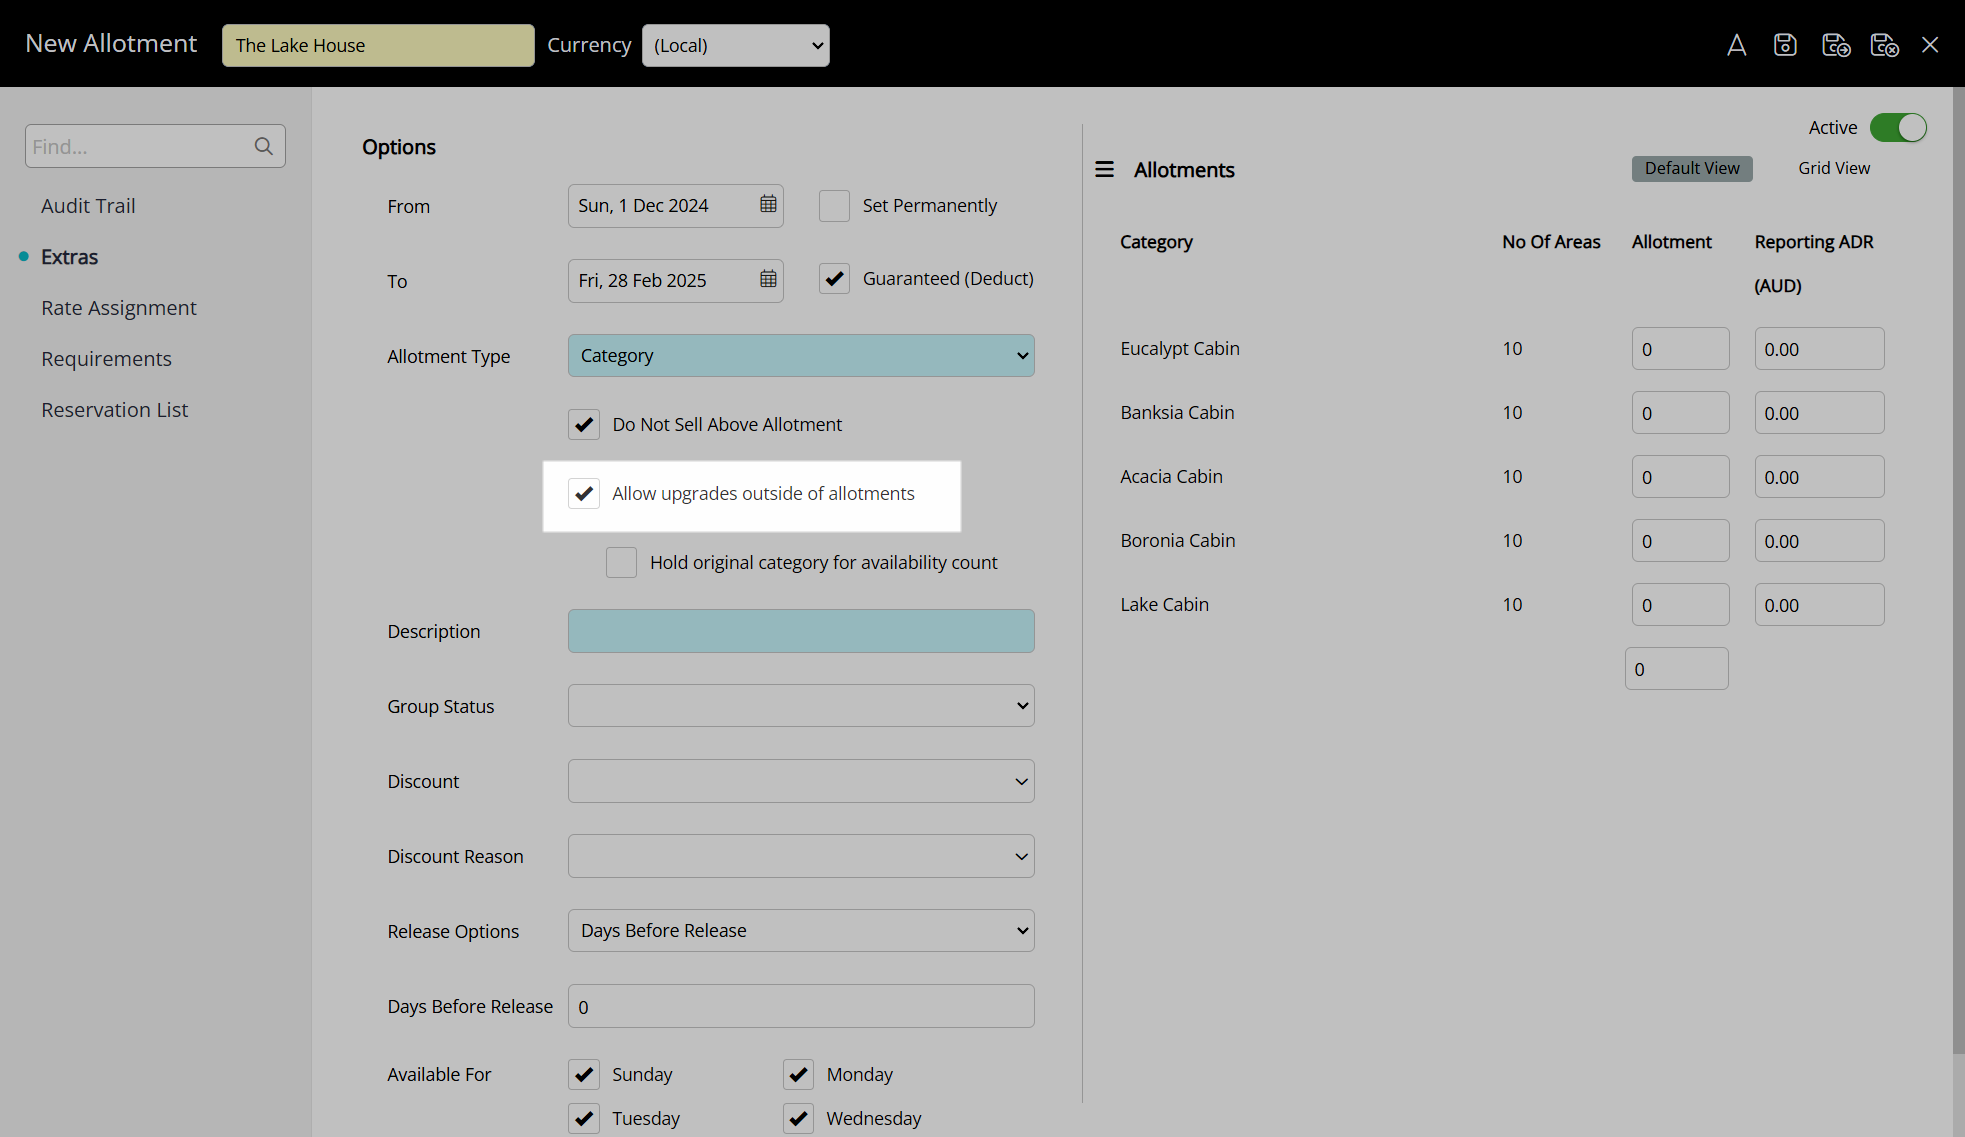
- Select an Allotment Type.
- Optional: Select the 'Do Not Sell Above Allotment' checkbox.
-
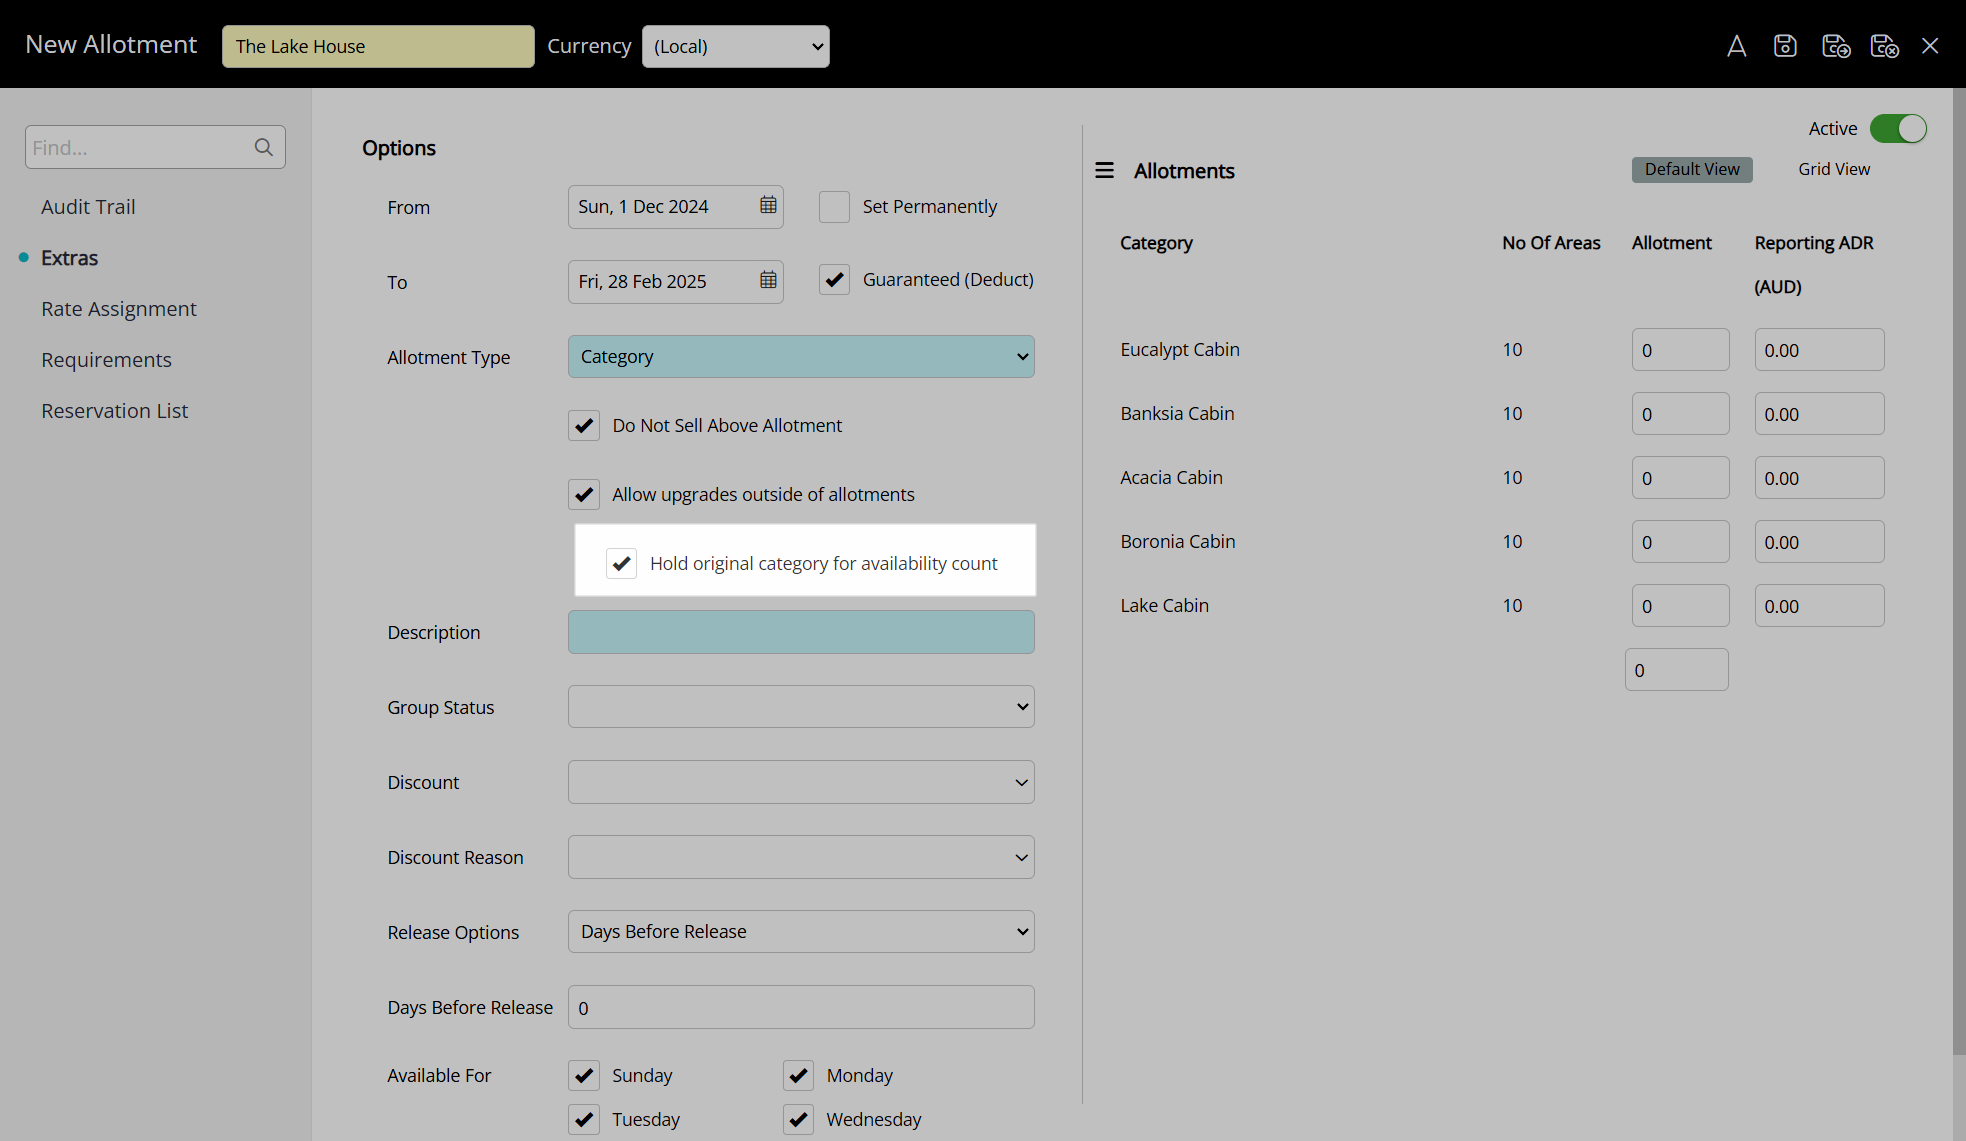
Optional: Select the 'Allow Upgrades Outside of Allotments' checkbox.
- Optional: Select the 'Hold Original Category for Availability Count' checkbox.
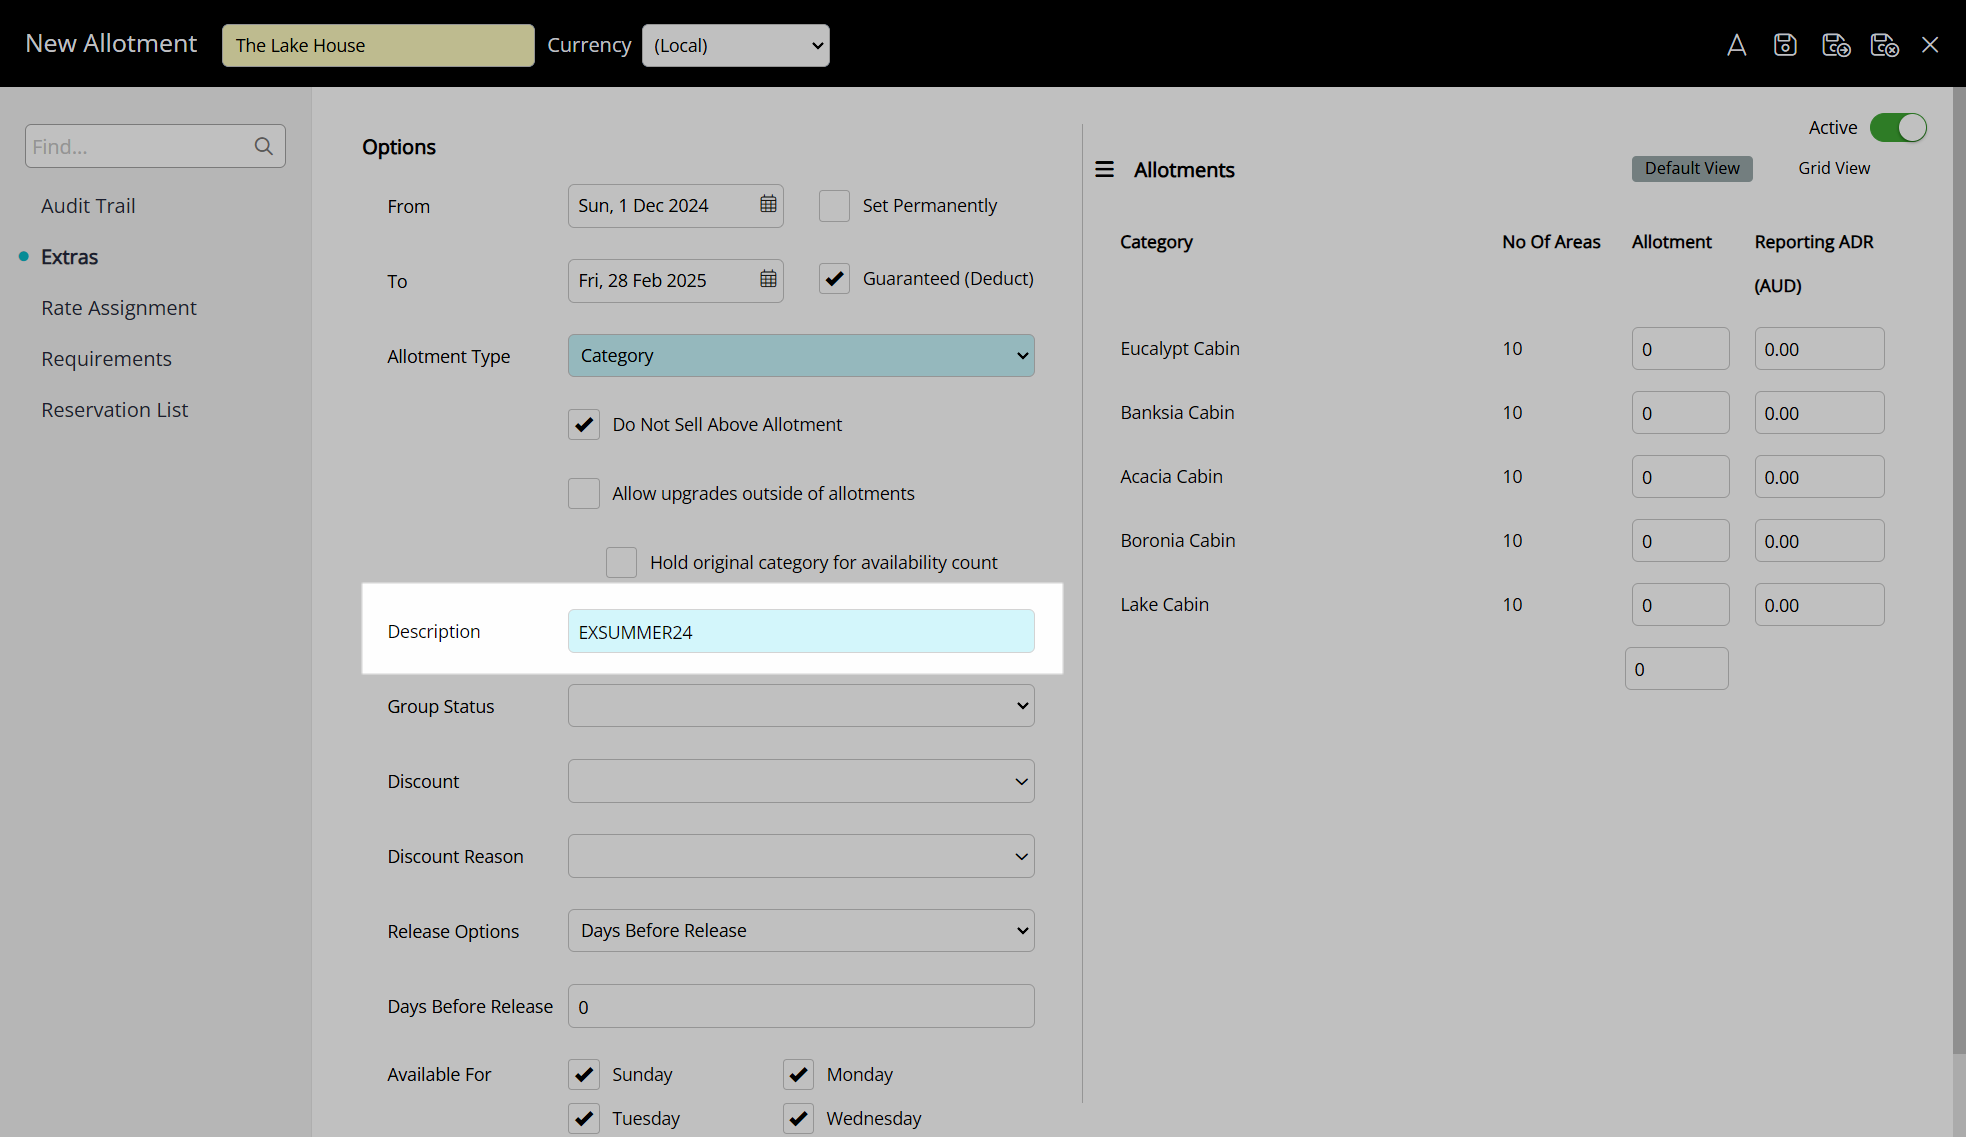
- Enter a Description.
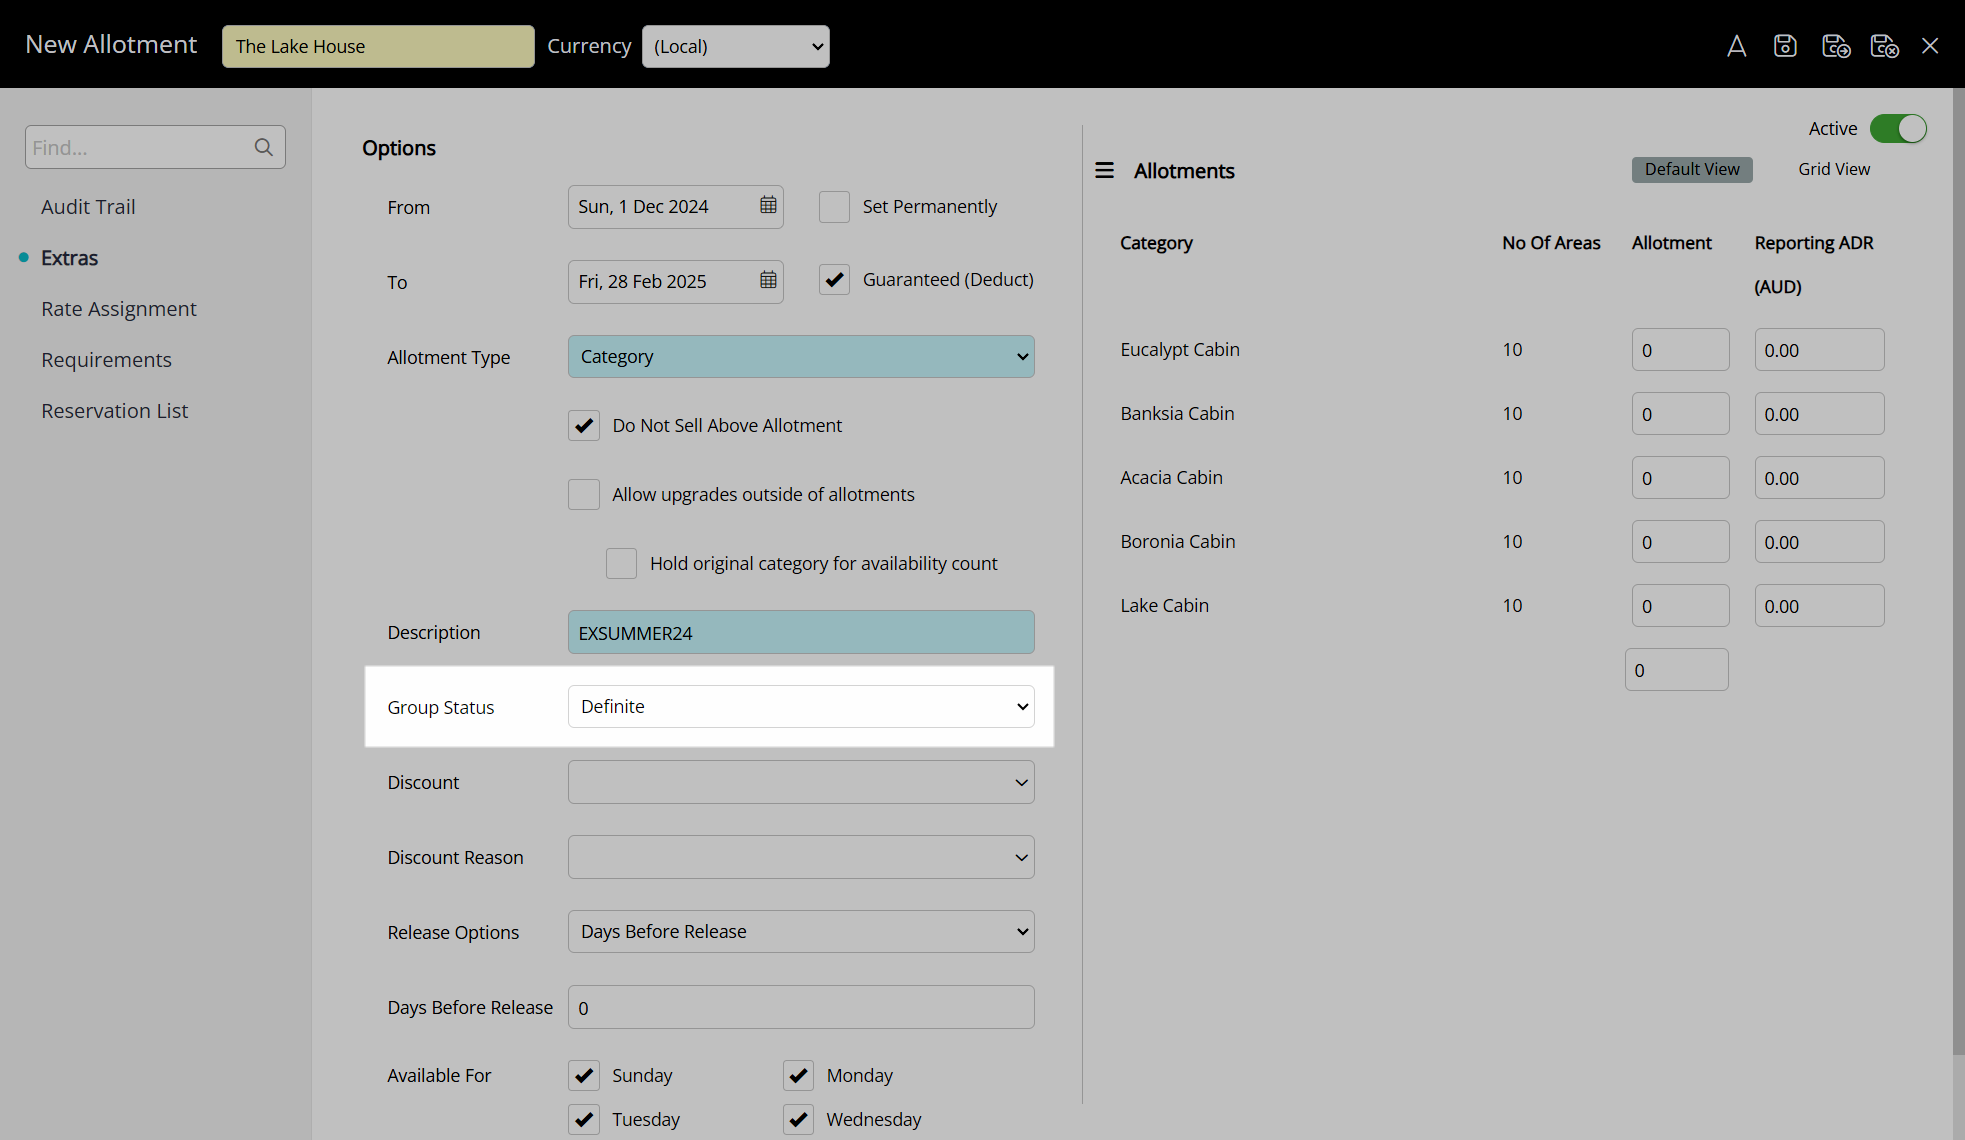
- Select a Group Status.
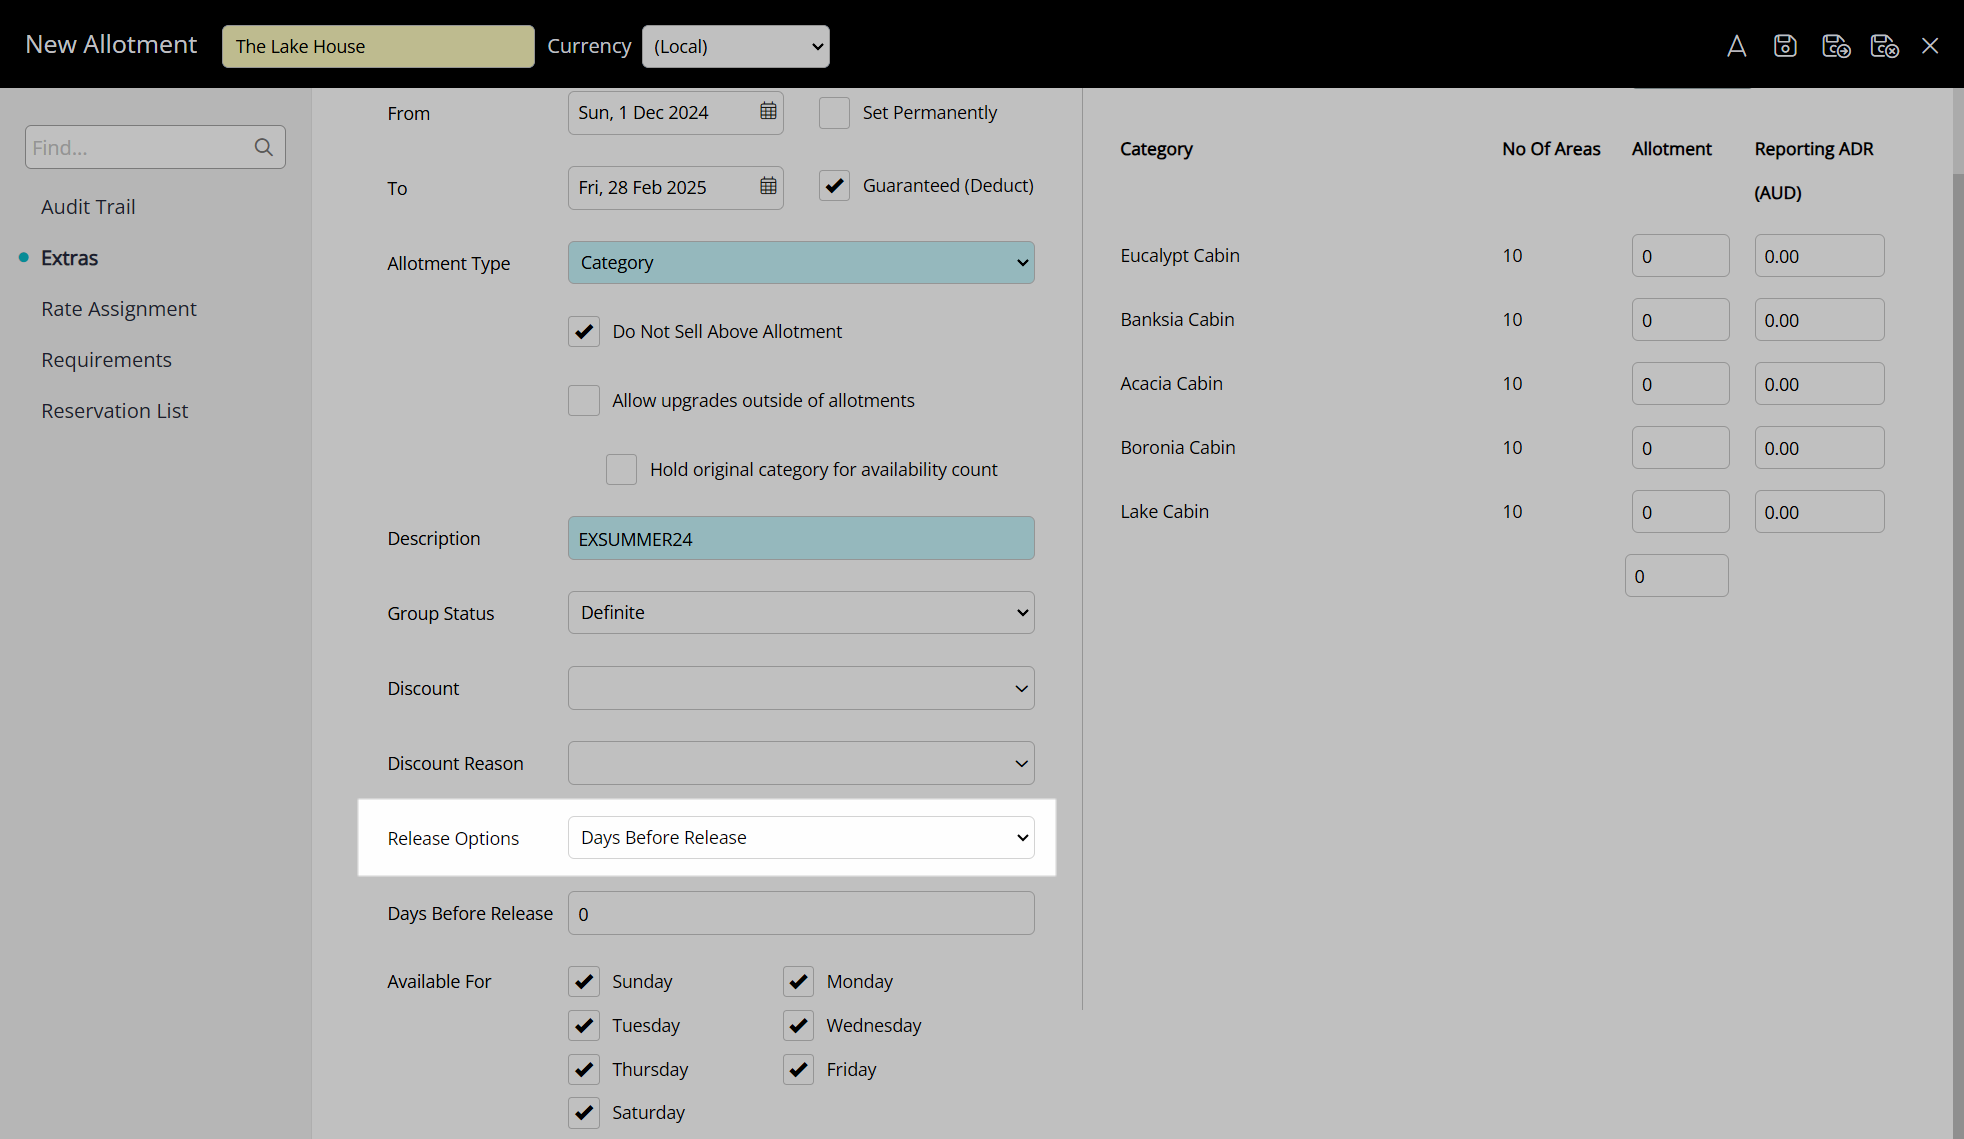
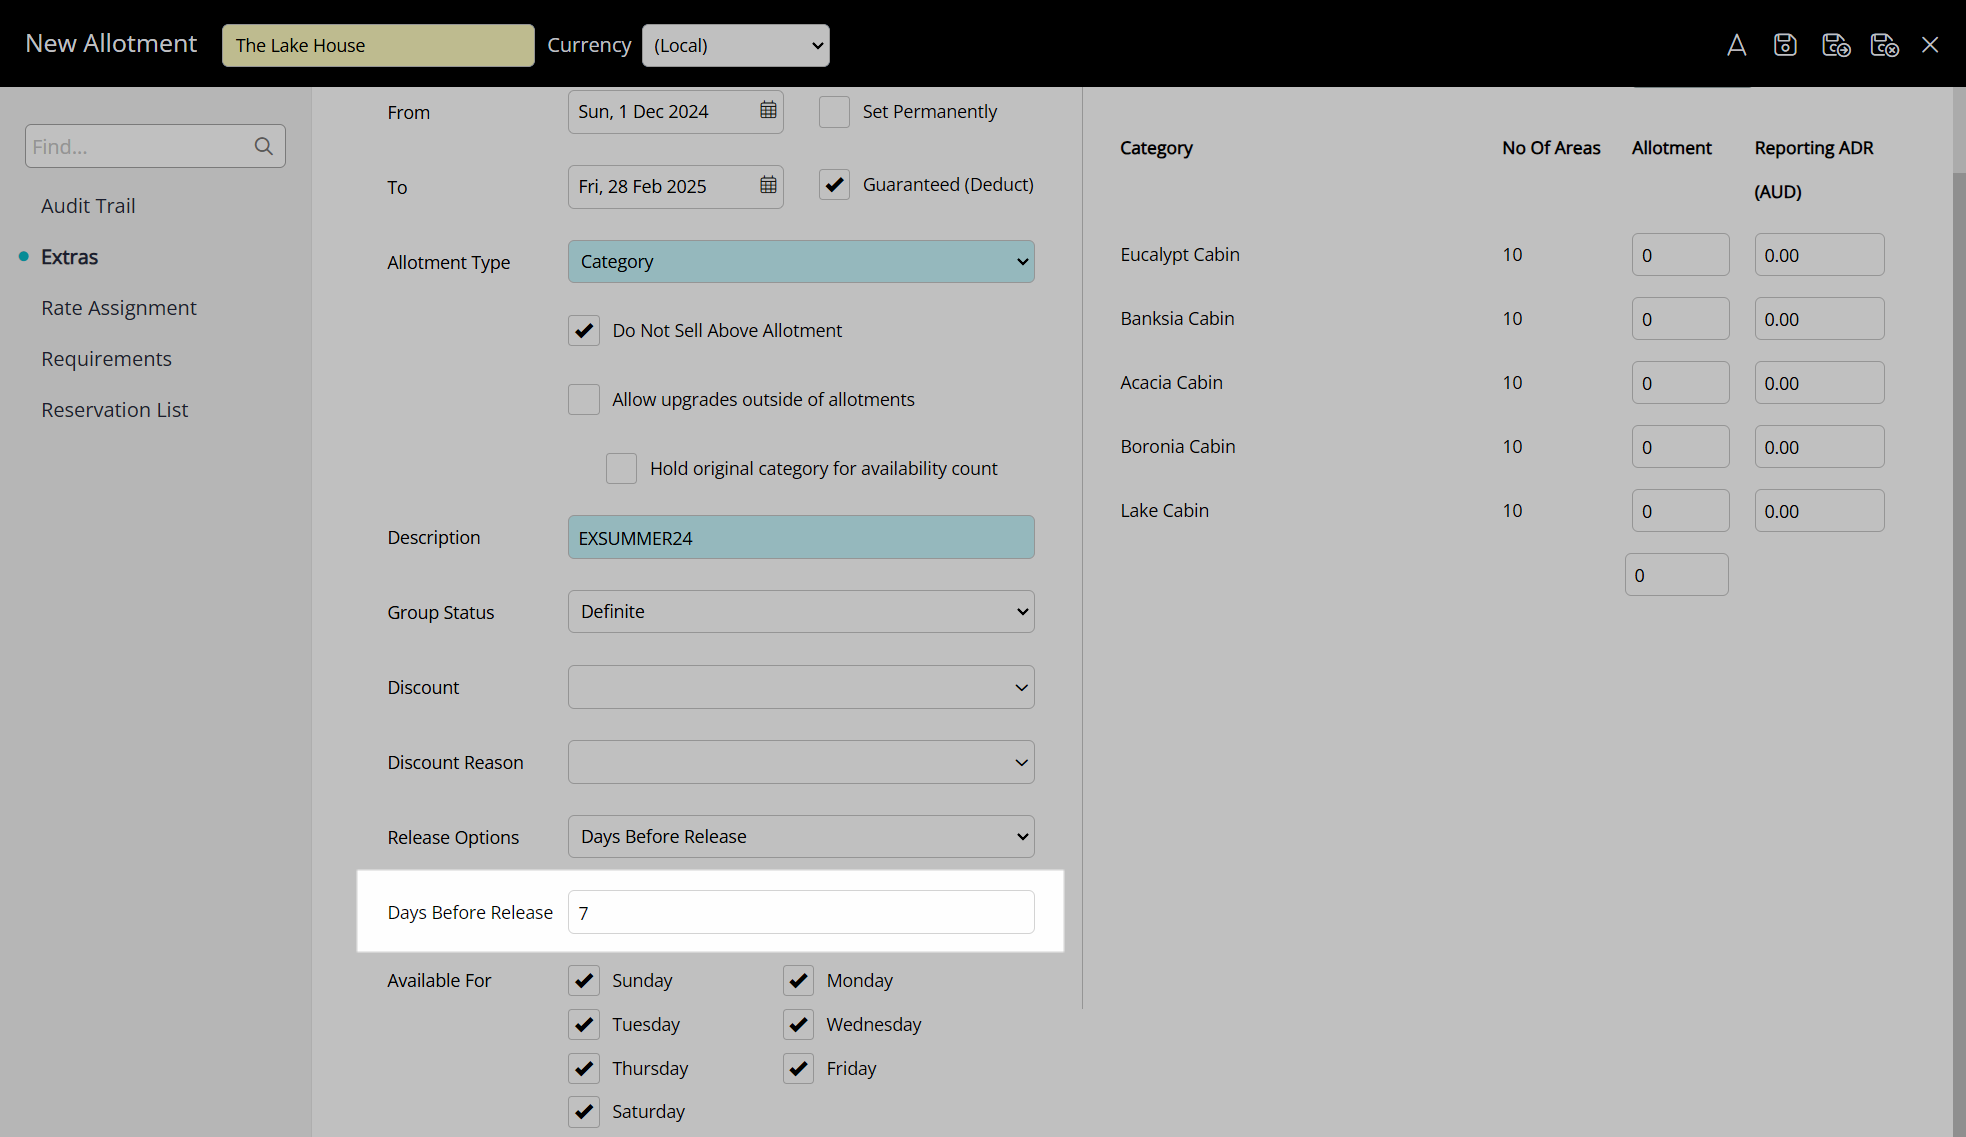
- Select a Release Option.
- Select a Release Date or enter the Days Before Release.
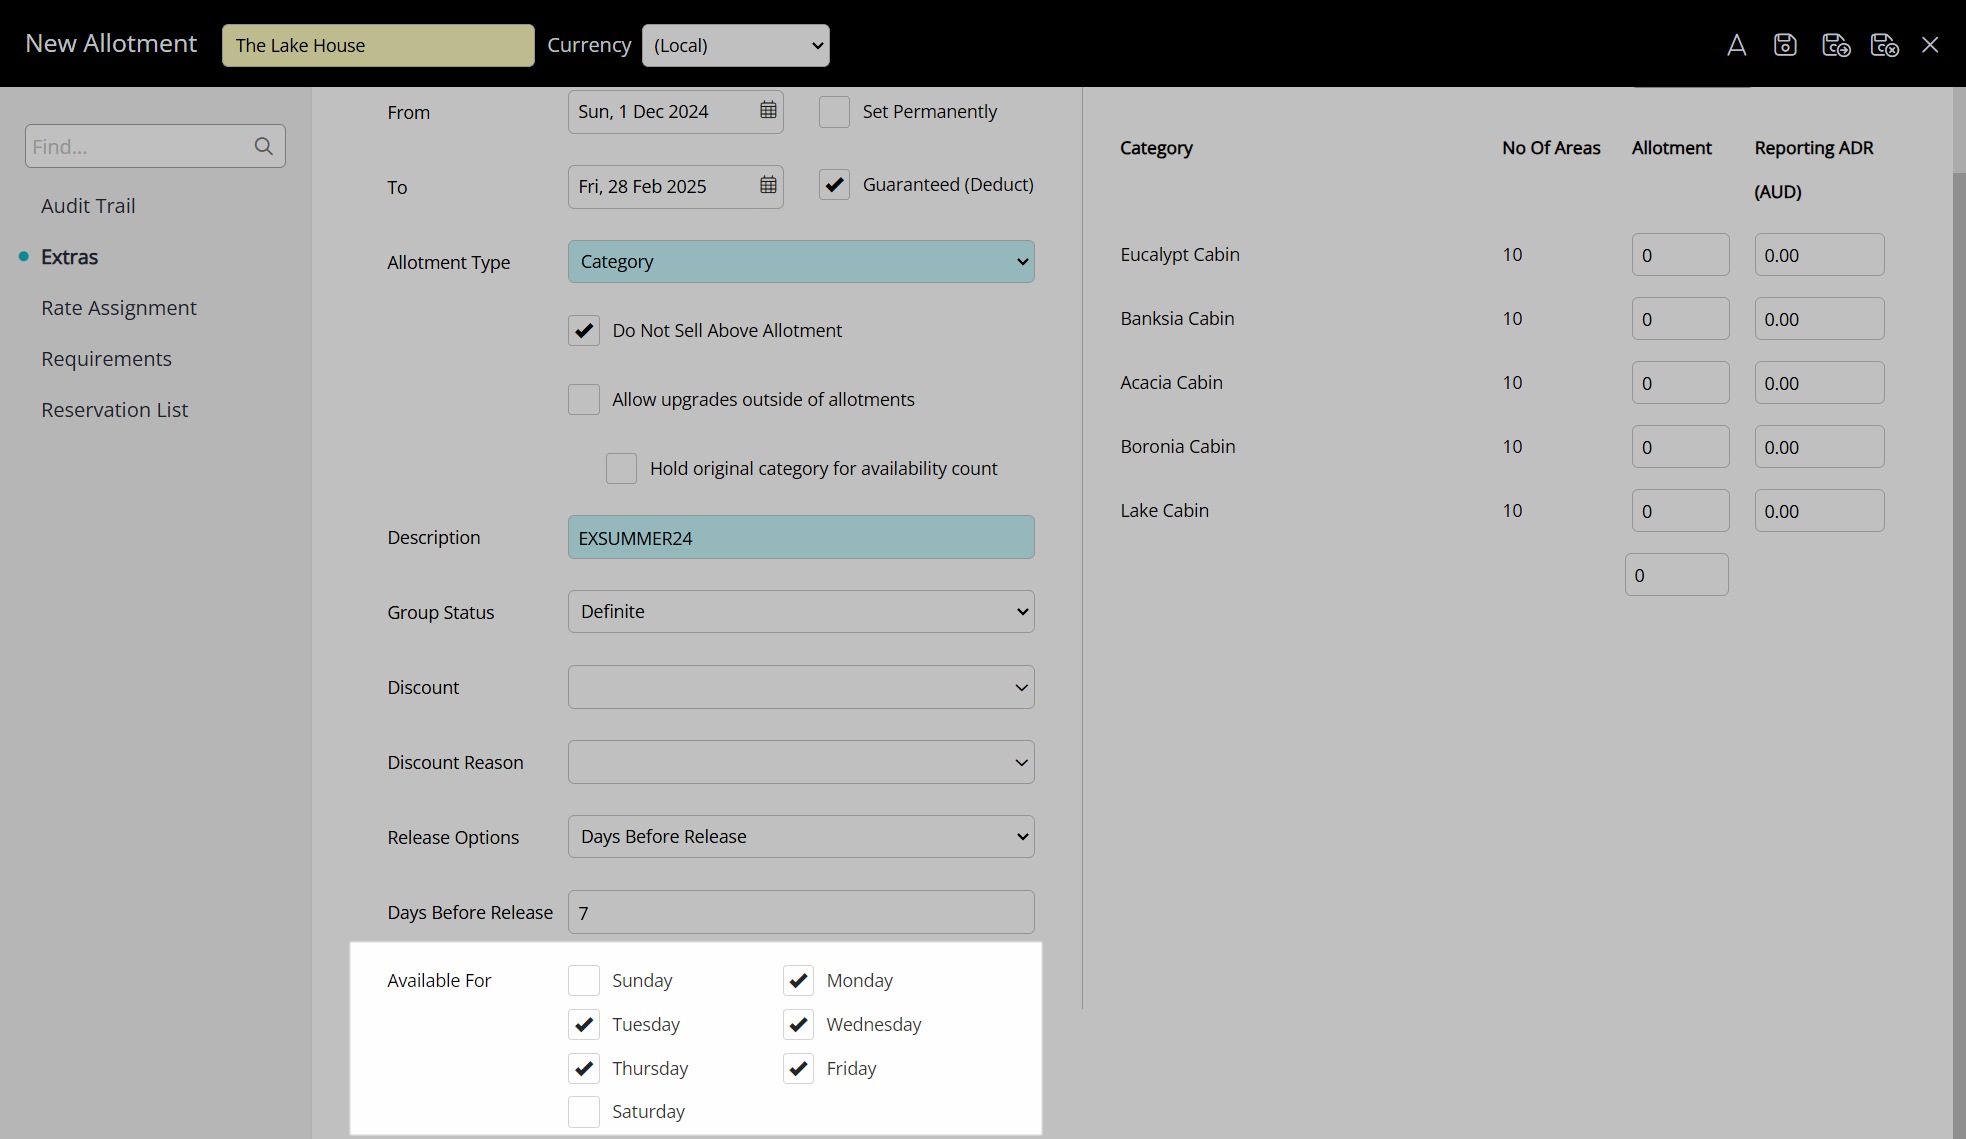
- Optional: Select the 'Days of the Week' checkboxes to exclude days.
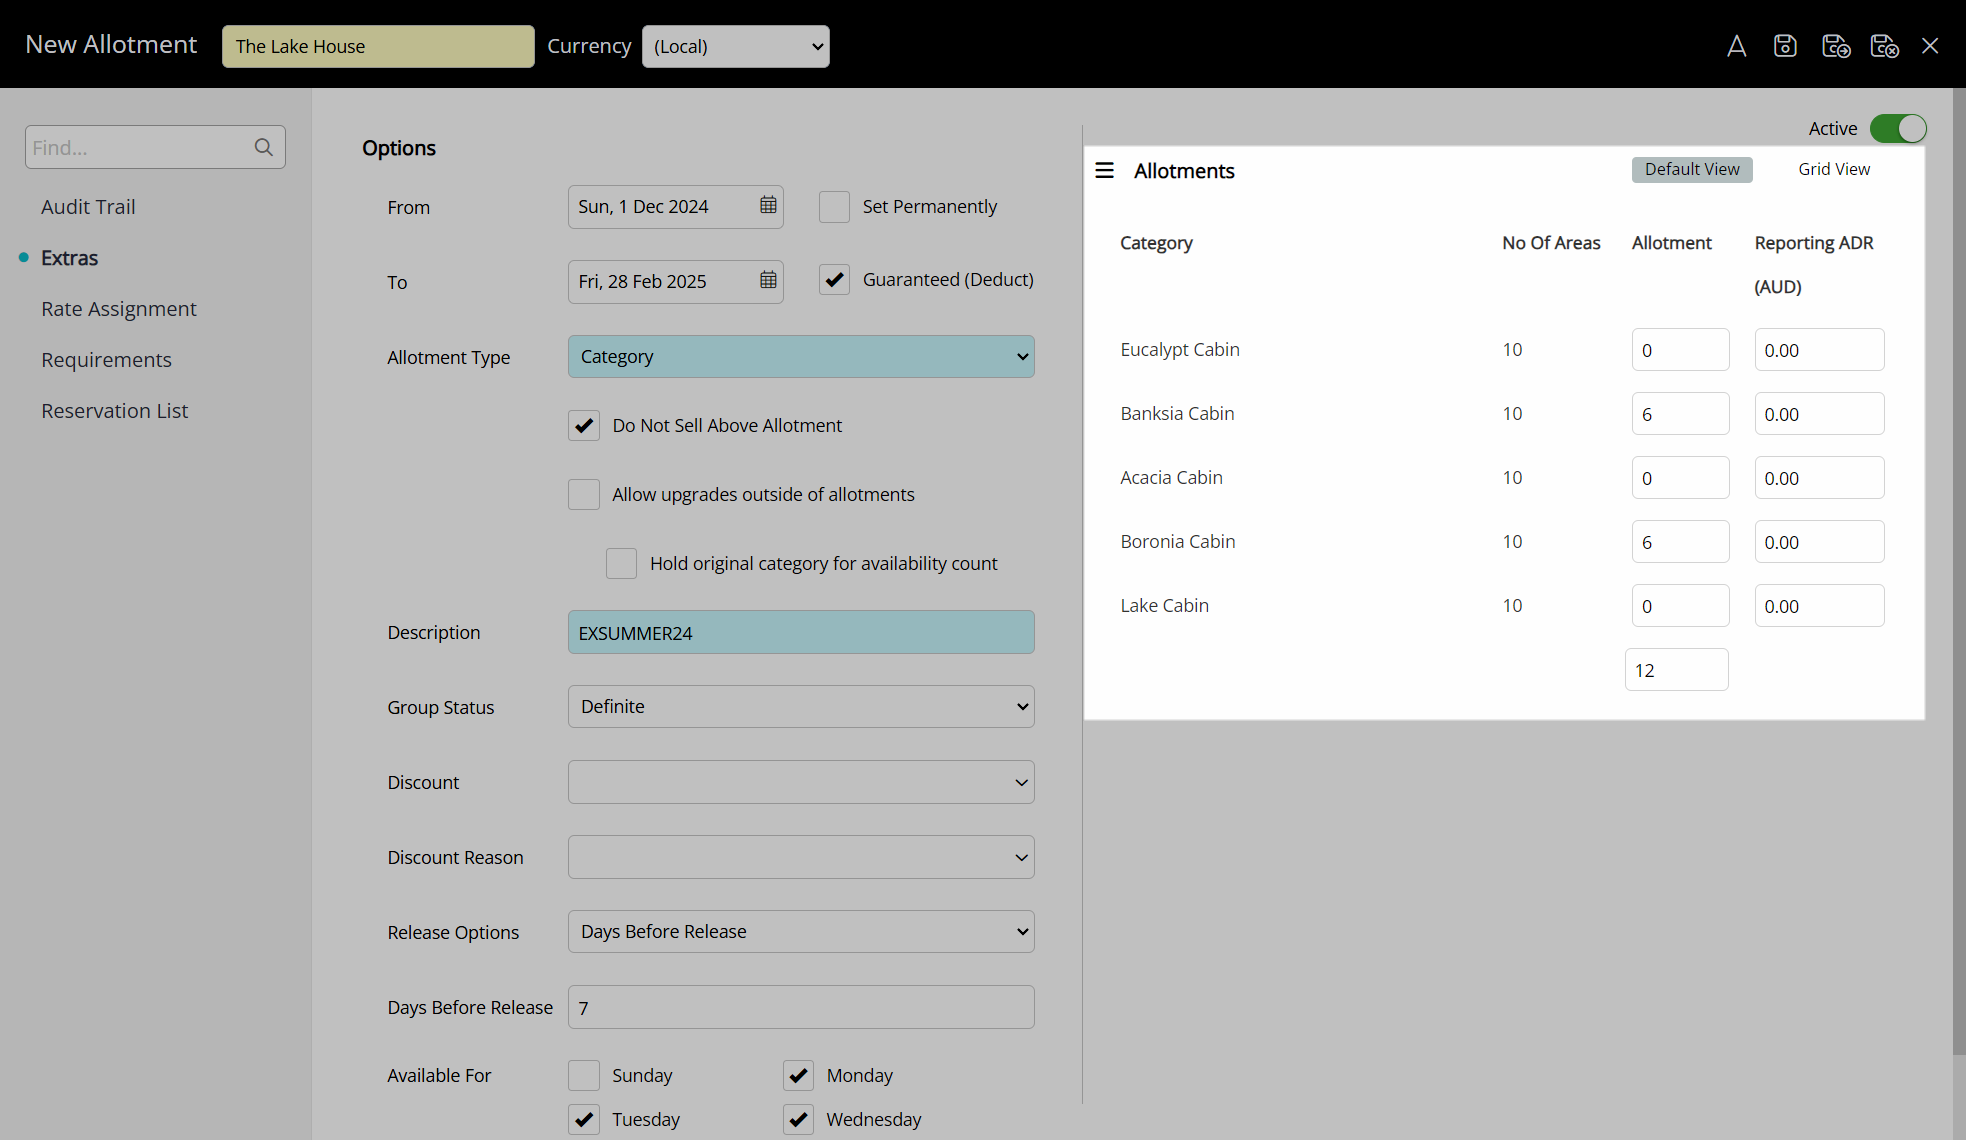
- Enter the Inventory Allotment.
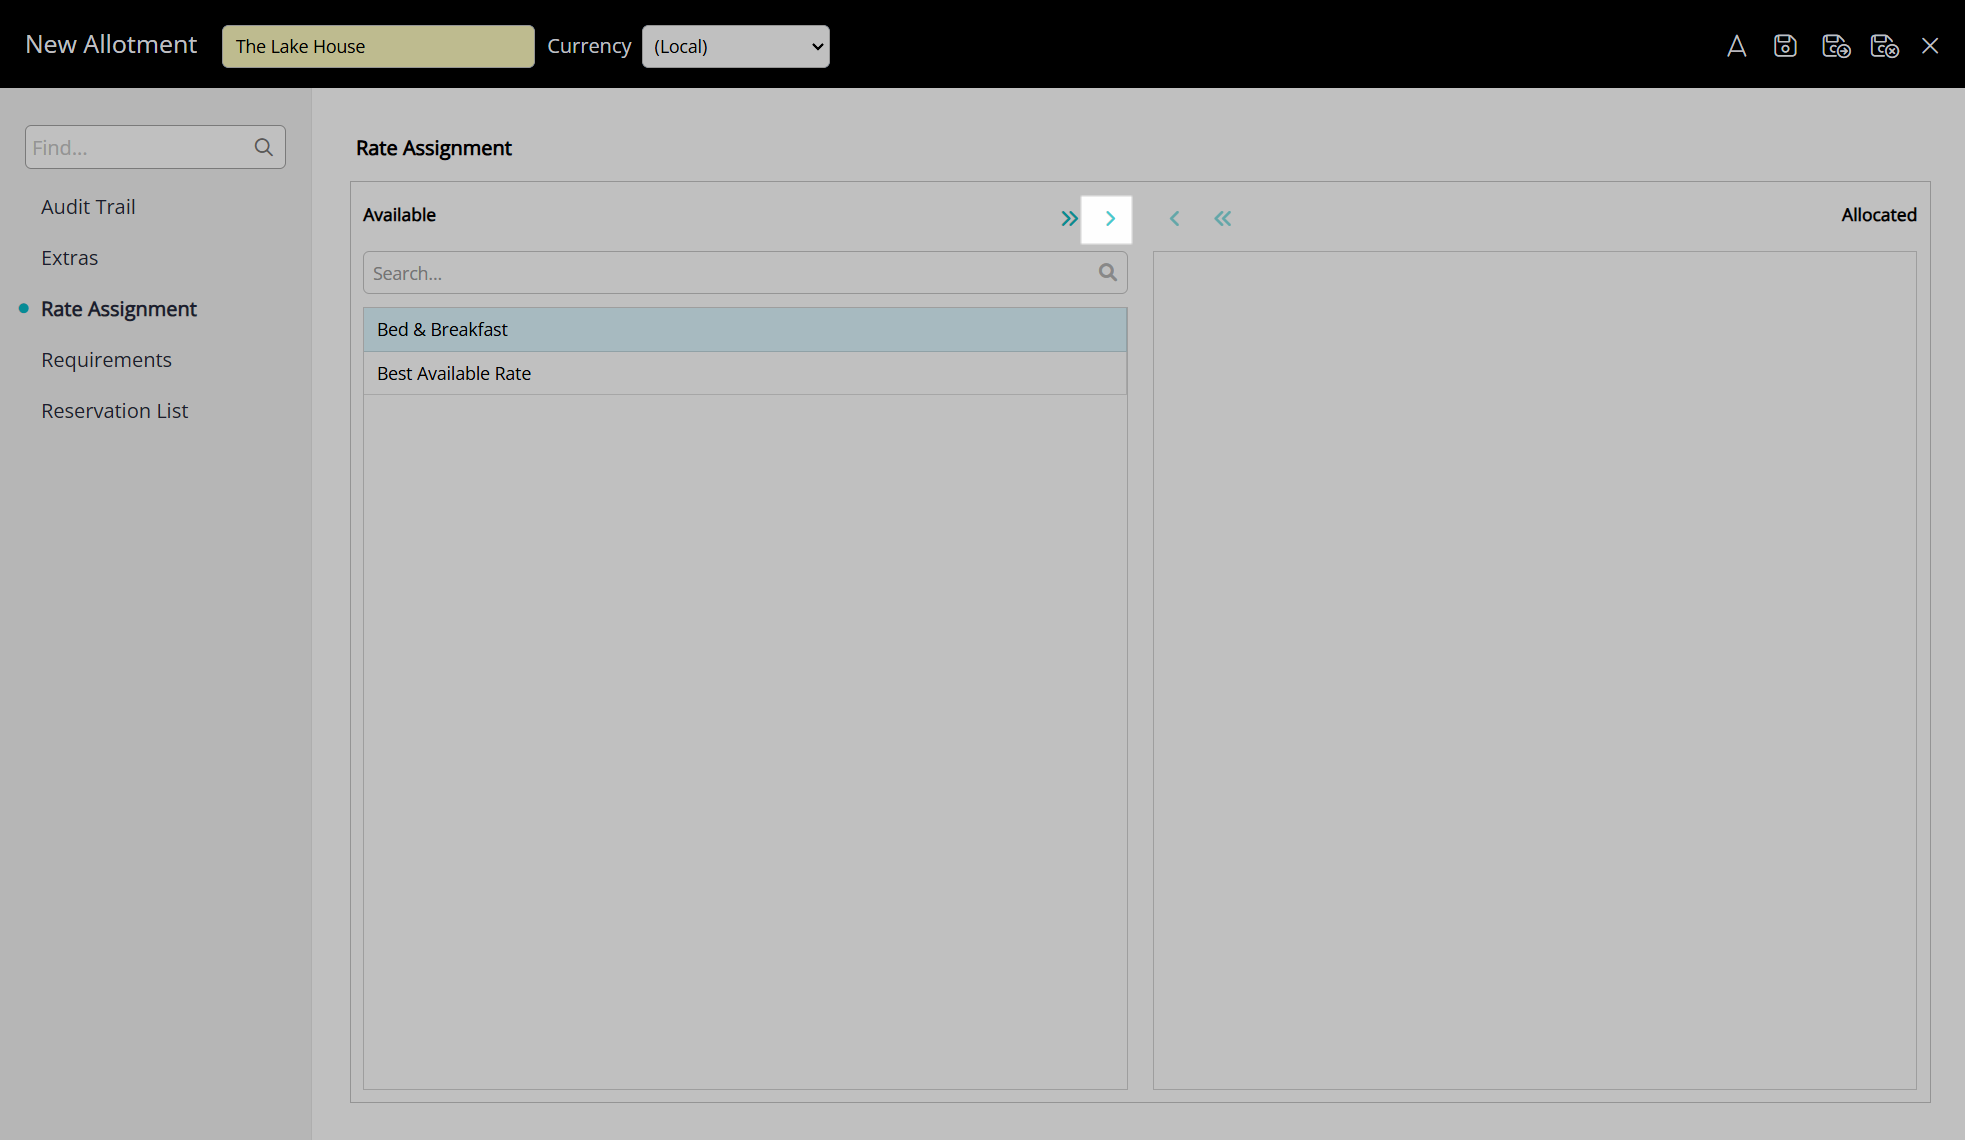
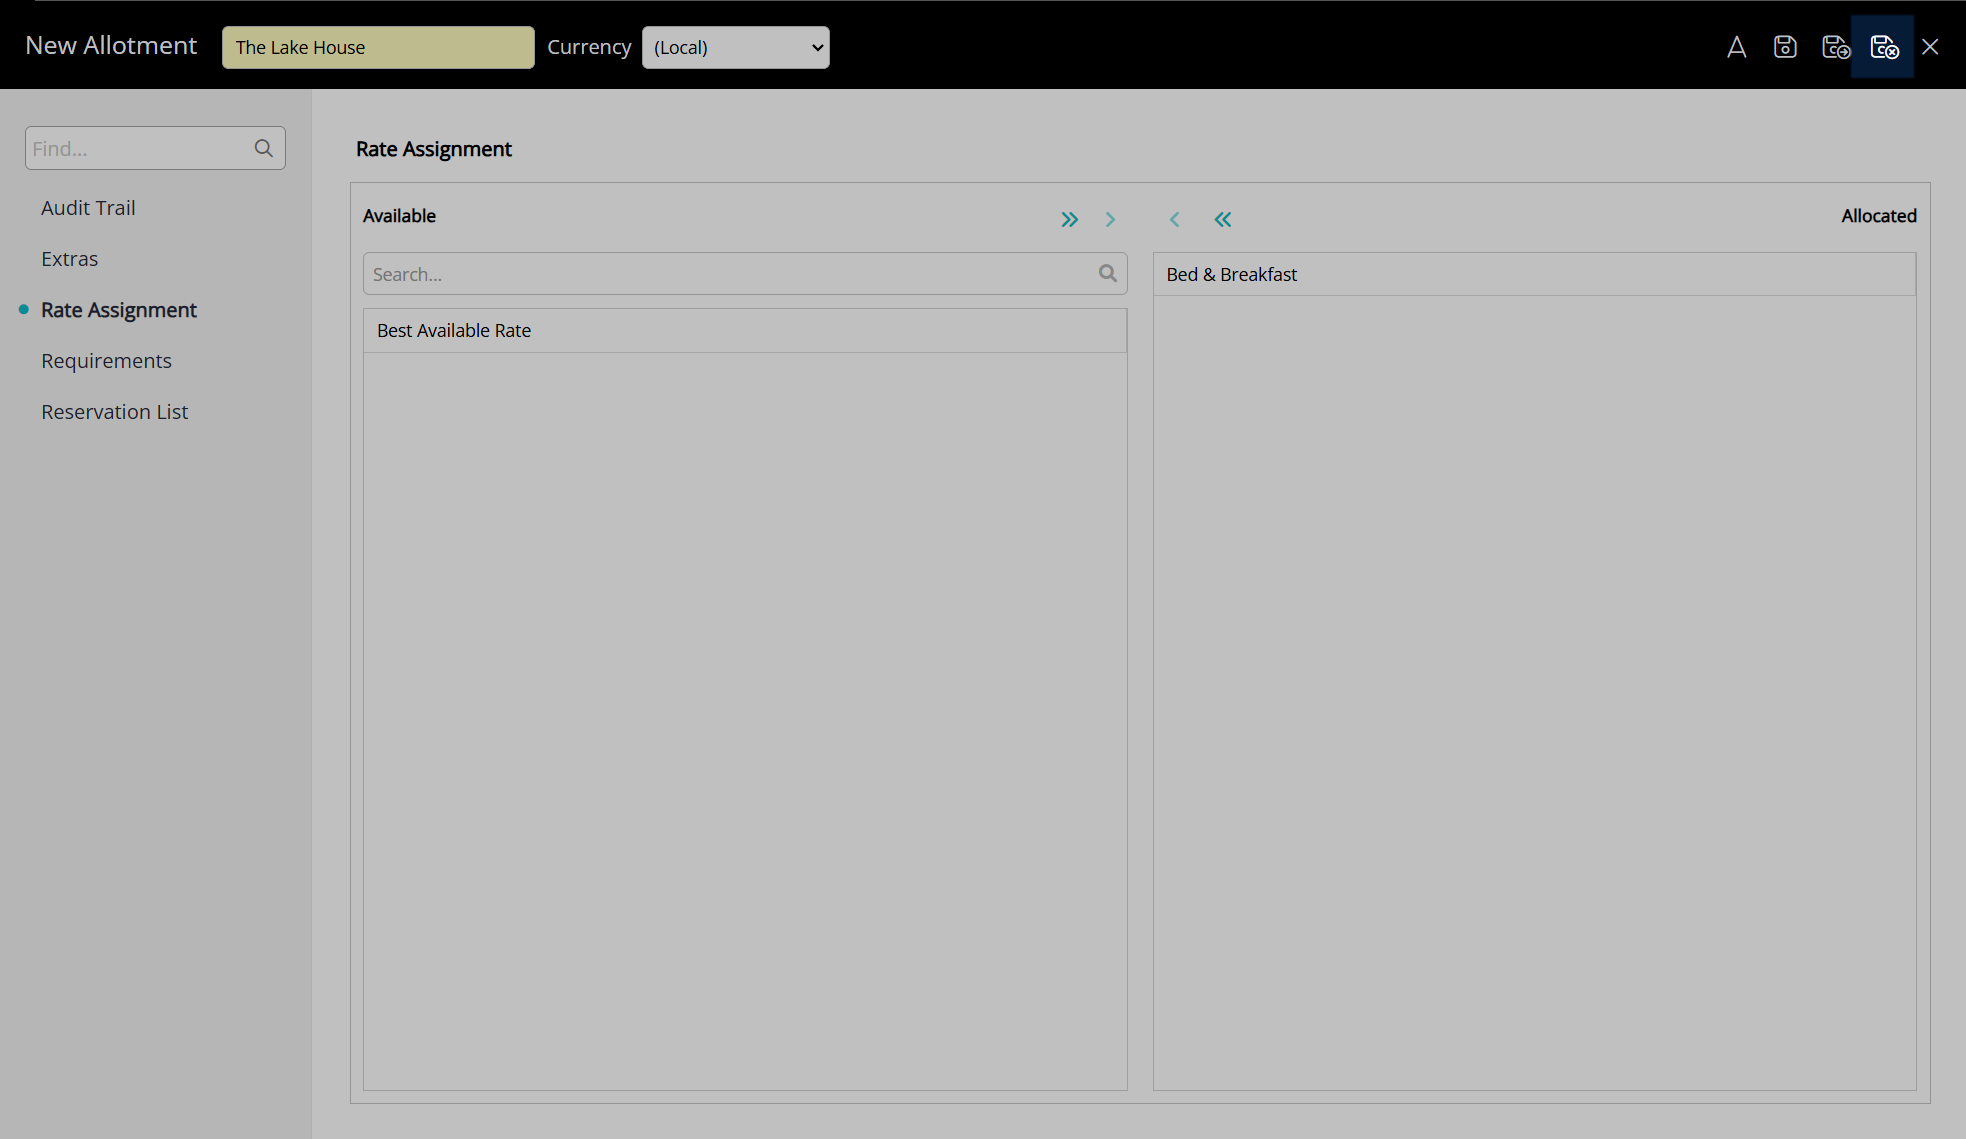
- Navigate to the 'Rate Assignment' tab.
- Select a Rate Type and choose the
 button.
 - Save/Exit.
Go to Reservations > Groups in the side menu of RMS.

Select the  'Edit' icon on an existing Group.

Navigate to the 'Allotments' tab.
Select the  'Add' icon.
Select a Date Range or select the 'Set Permanently' checkbox.
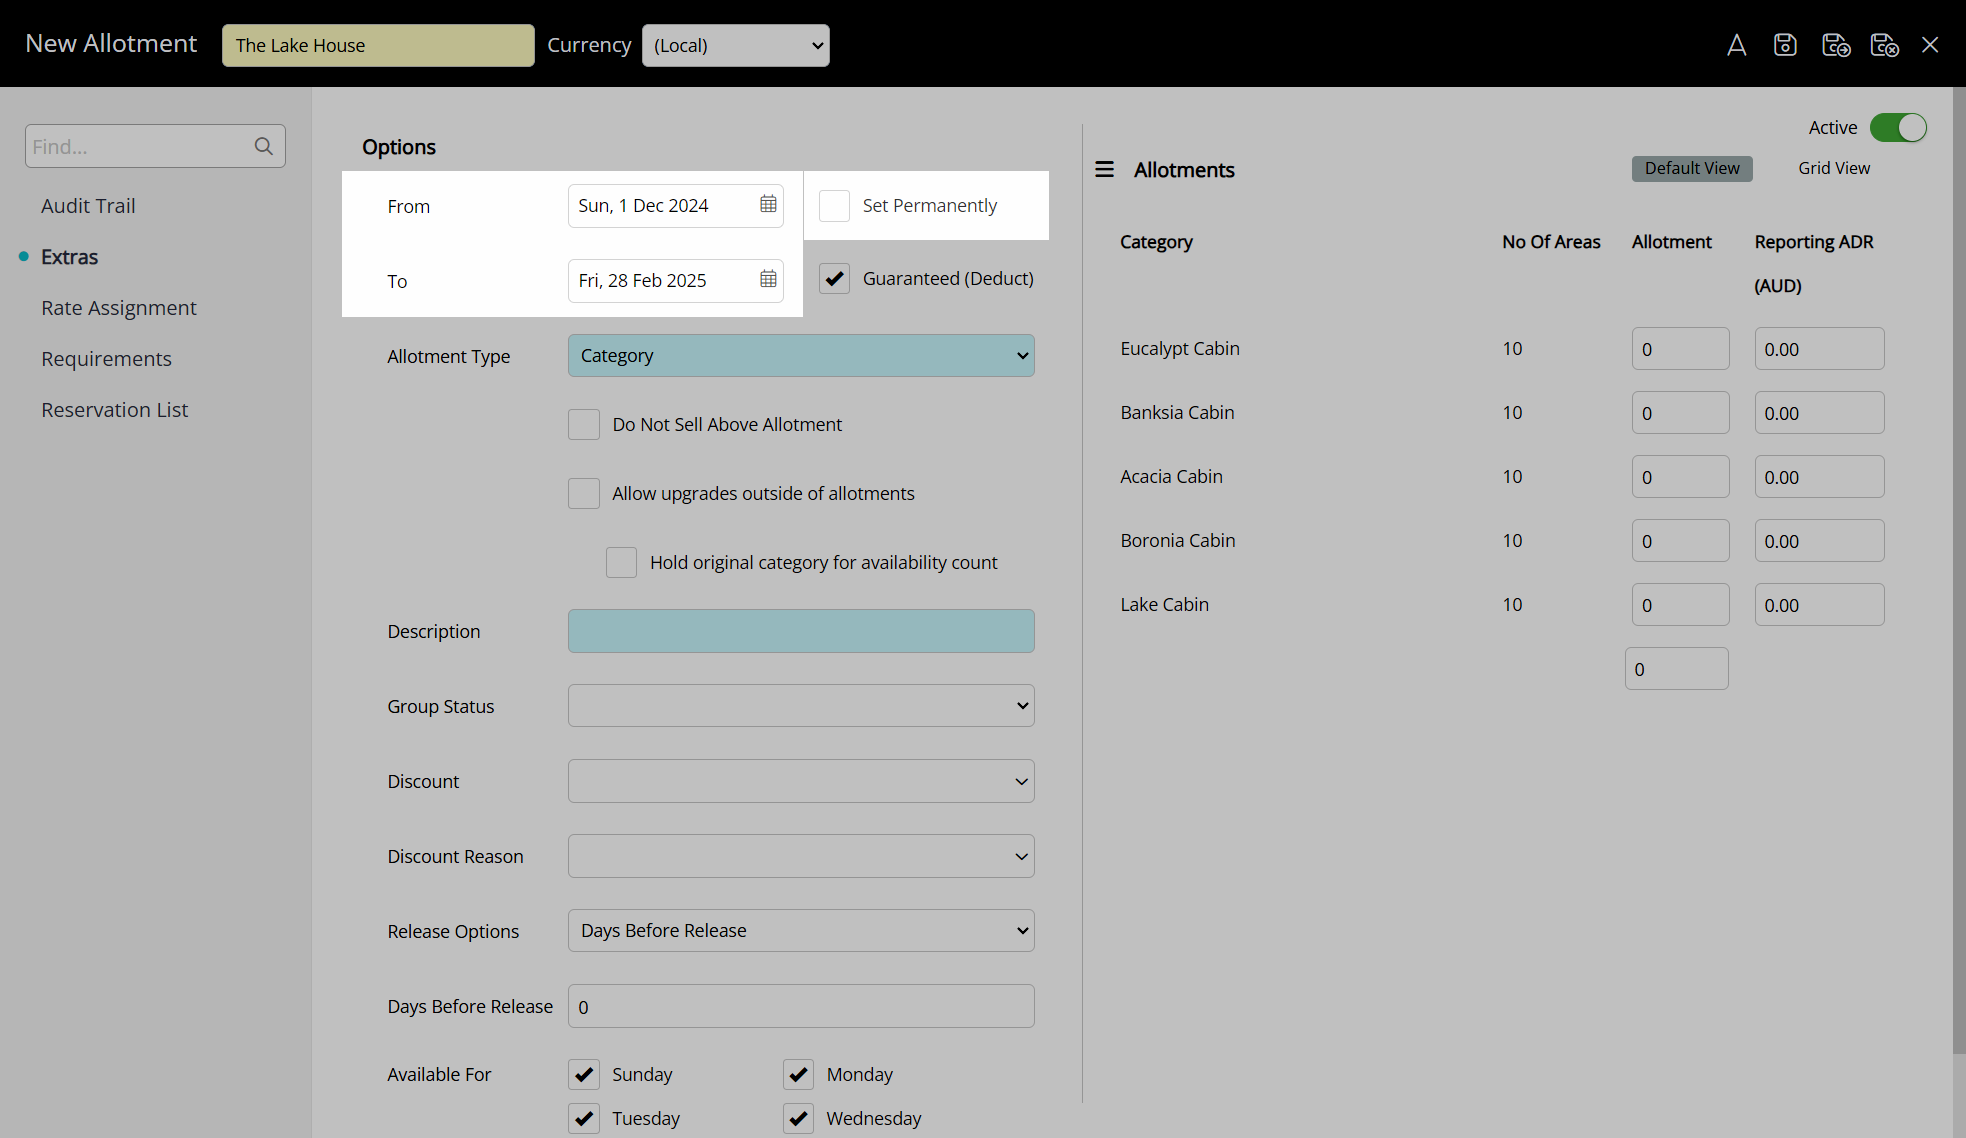
Optional: Select the 'Guaranteed' checkbox.
Select an Allotment Type.
Optional: Select the 'Do Not Sell Above Allotment' checkbox.

Optional: Select the 'Allow Upgrades Outside of Allotments' checkbox.
Optional: Select the 'Hold Original Category for Availability Count' checkbox.
Enter a Description.
Select a Group Status.
Select a Release Option.
Select a Release Date or enter the Days Before Release.
Optional: Select the 'Days of the Week' checkboxes to exclude days.
Enter the Inventory Allotment.
Navigate to the 'Rate Assignment' tab.
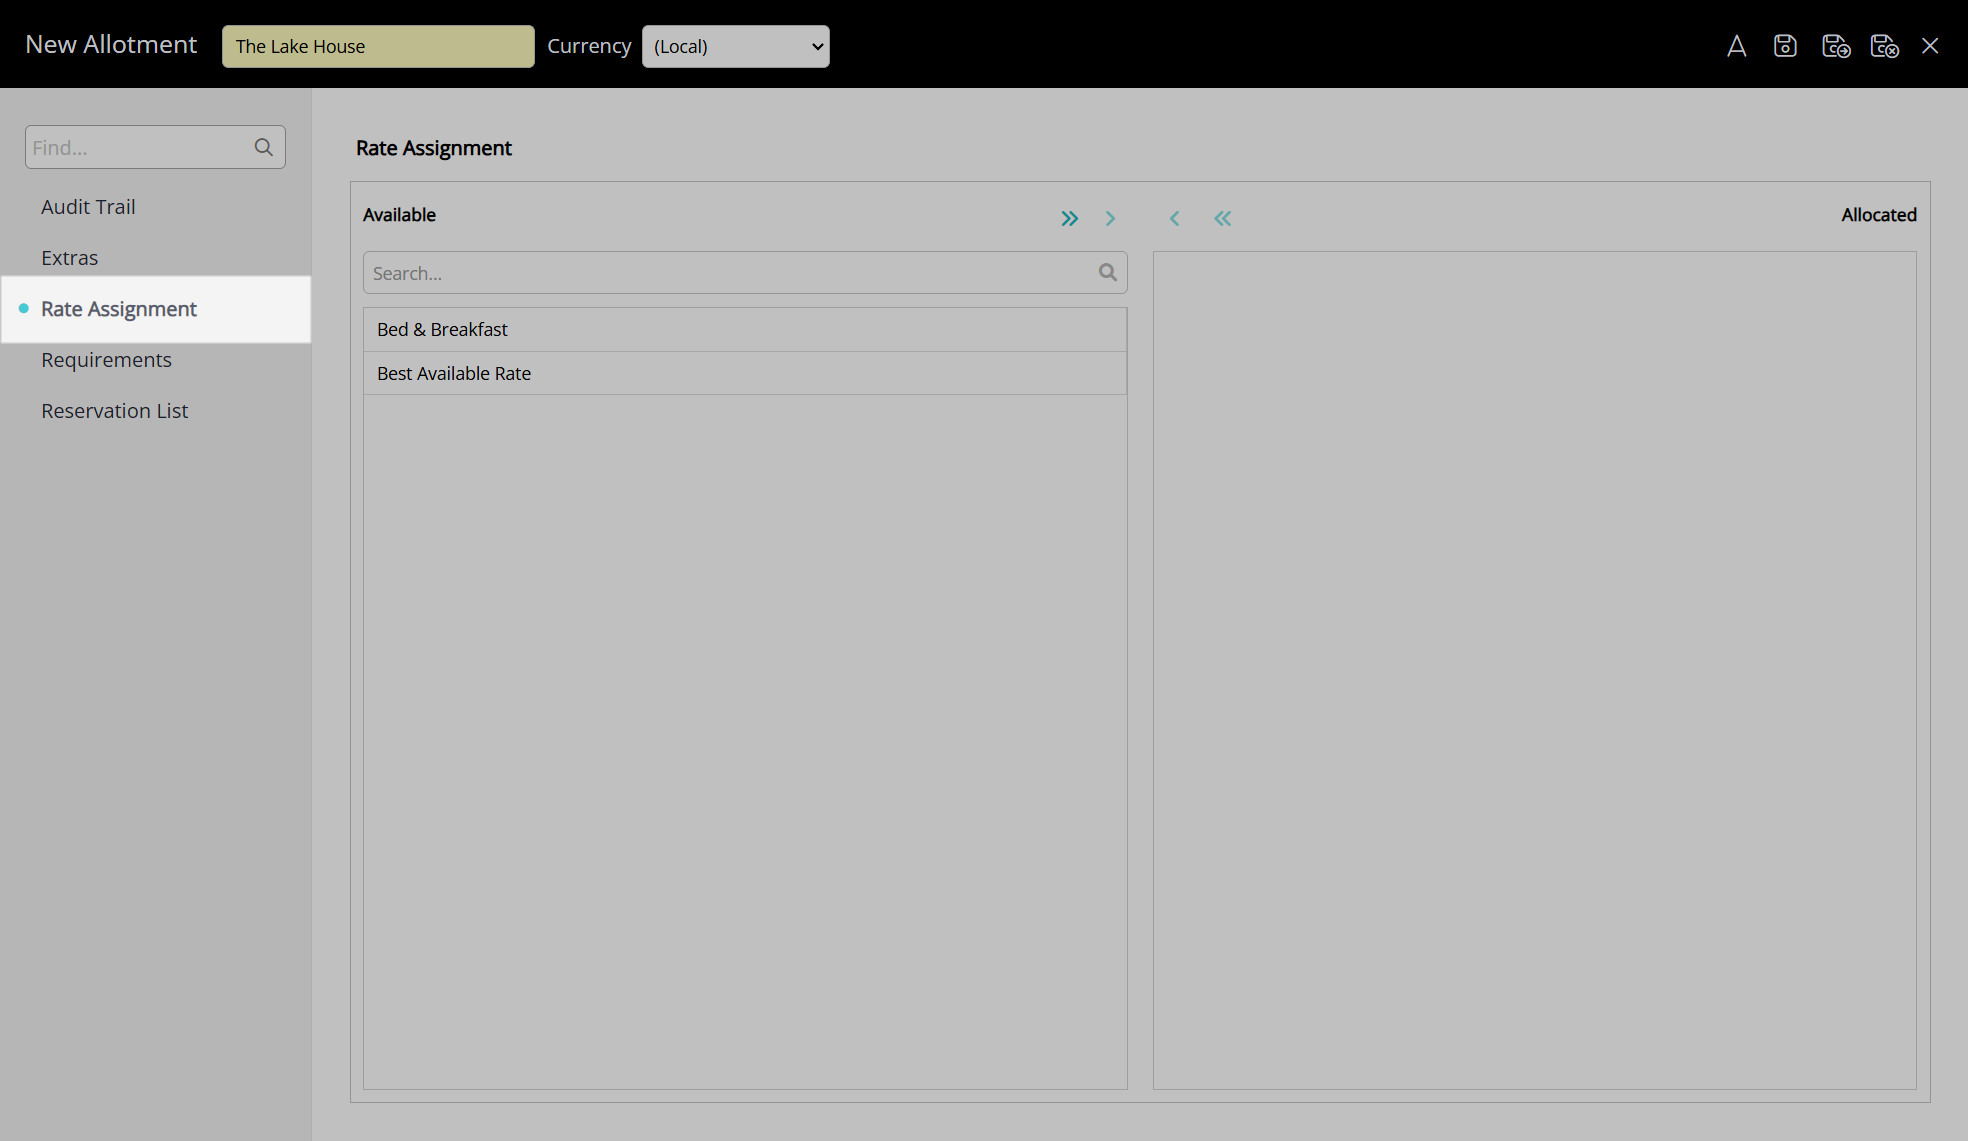
Select a Rate Type and choose the  button.
Select the  'Save/Exit' icon to store the changes made and return to the 'Group'.
This allotment will now be available for selection as the 'Allotment Association' on a reservation when this 'Group' is selected.
Delete