Master Reservation
Manage reservations for a group of guests travelling together in RMS.
Table of Contents
Create Group ReservationAdd New ReservationAdd Area to an Existing ReservationCombine Existing ReservationsAdd Master Reservation on the Booking ChartAdd Master Reservation on Quick QuoteMulti-Property StayMixed Rate GroupAdd Master Reservation - Book by Category OnlyA Master Reservation is a group of reservations for guests travelling together, linked by a group name and reservation number.
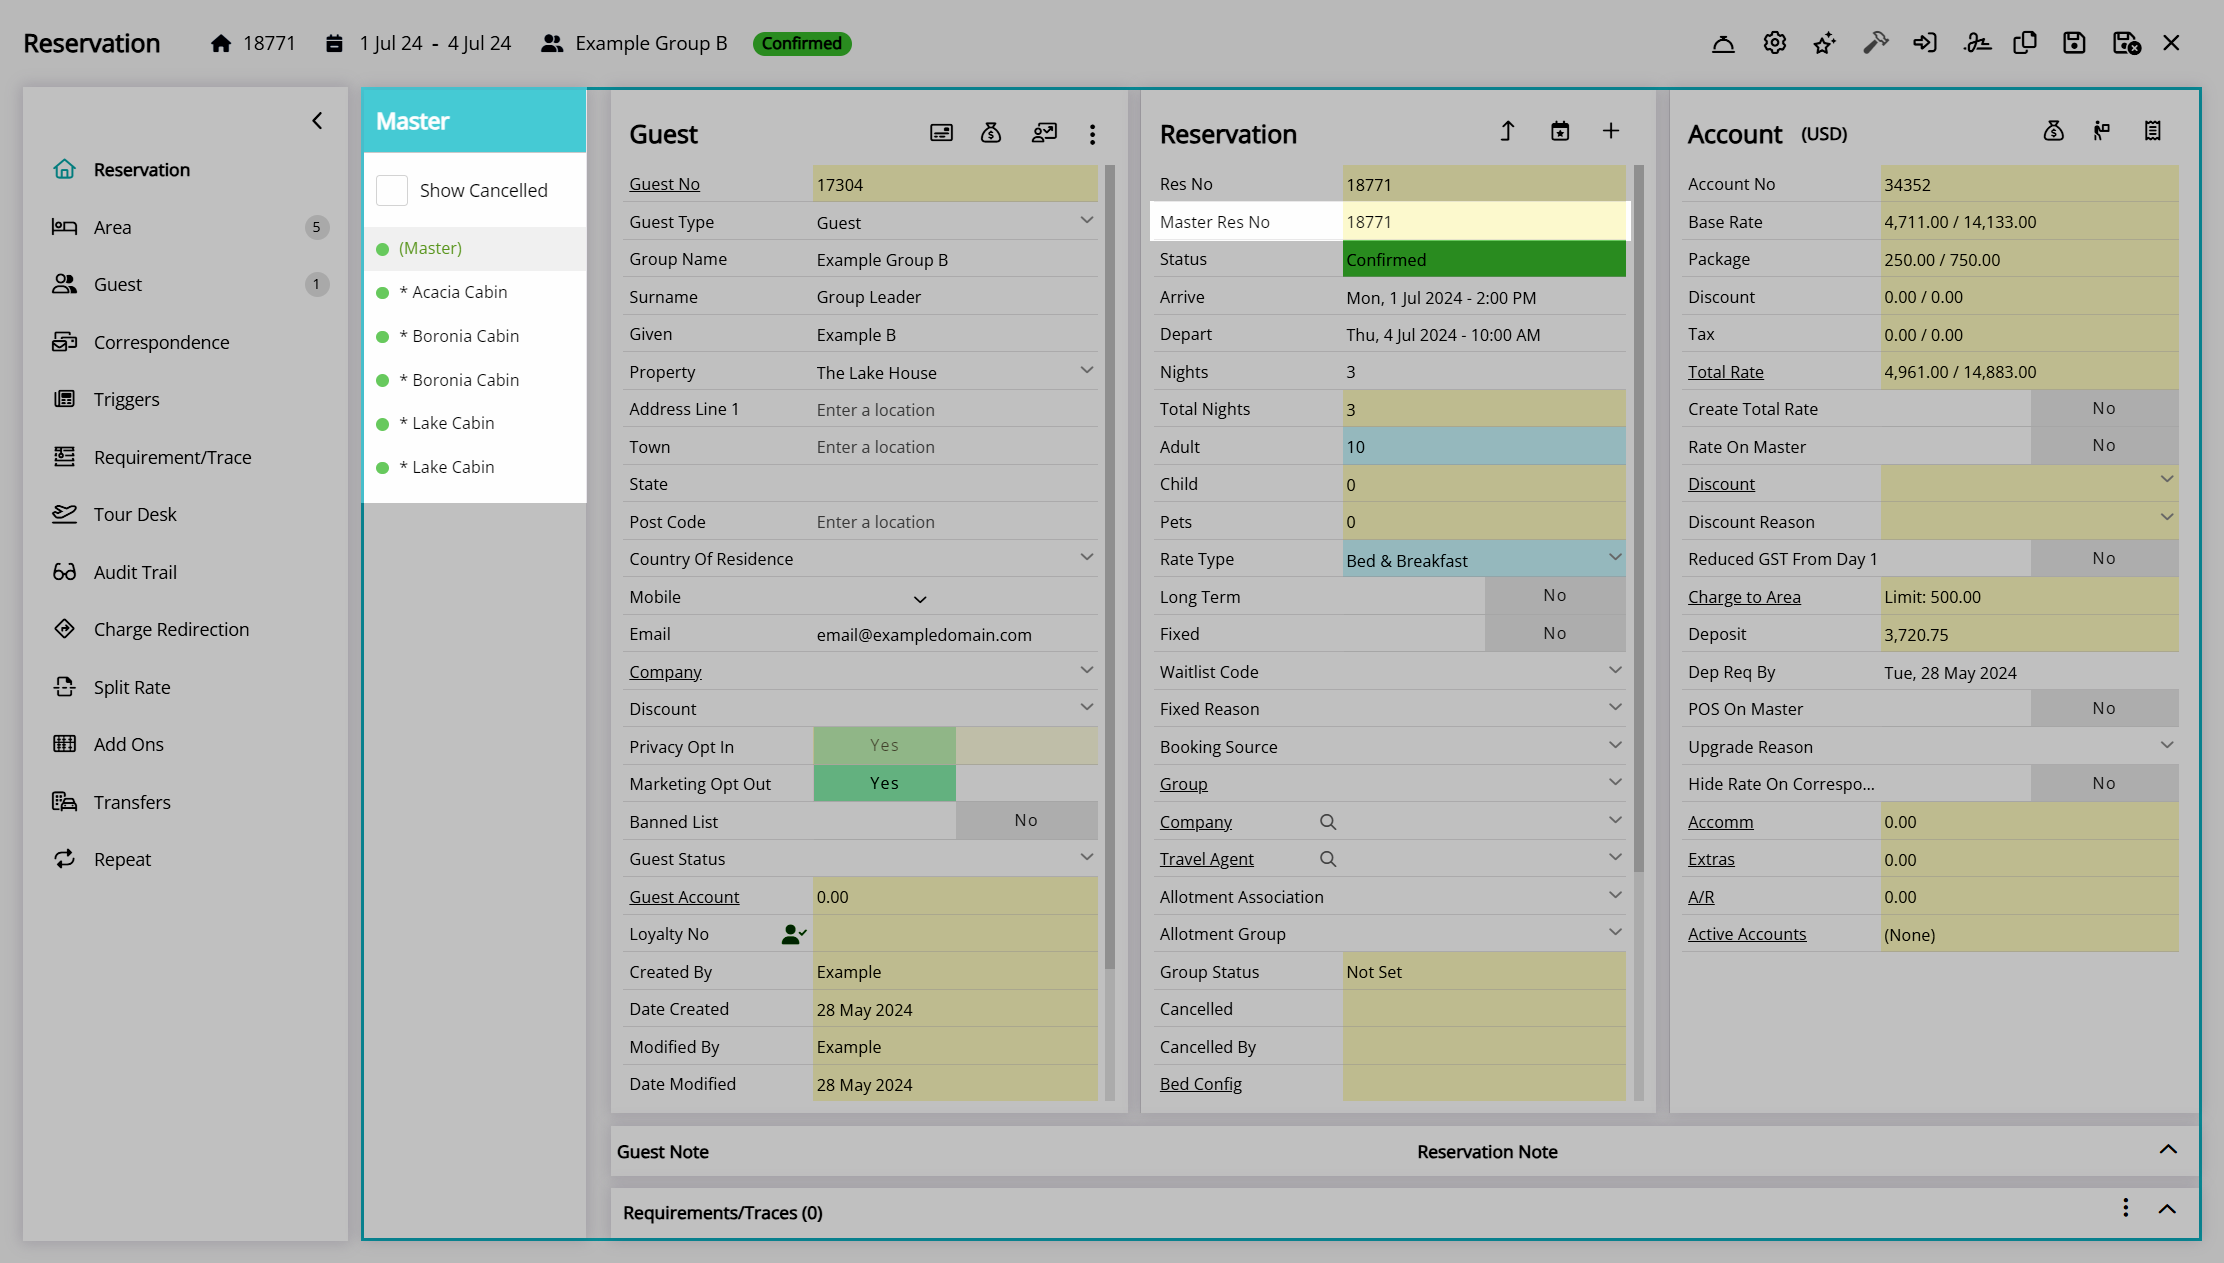
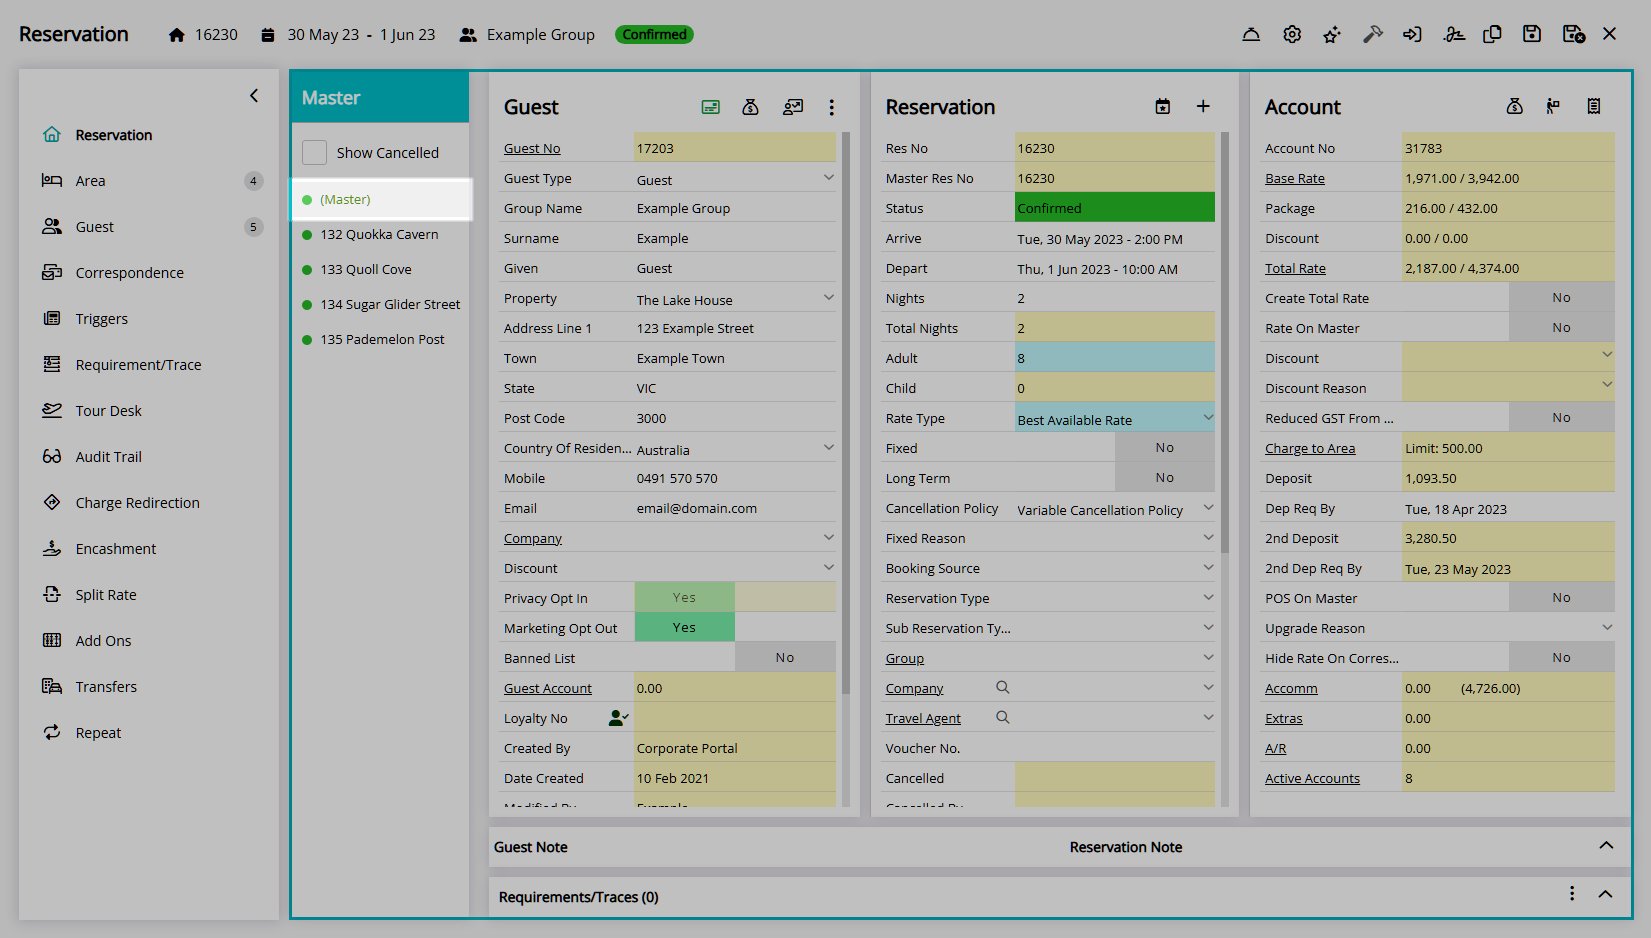
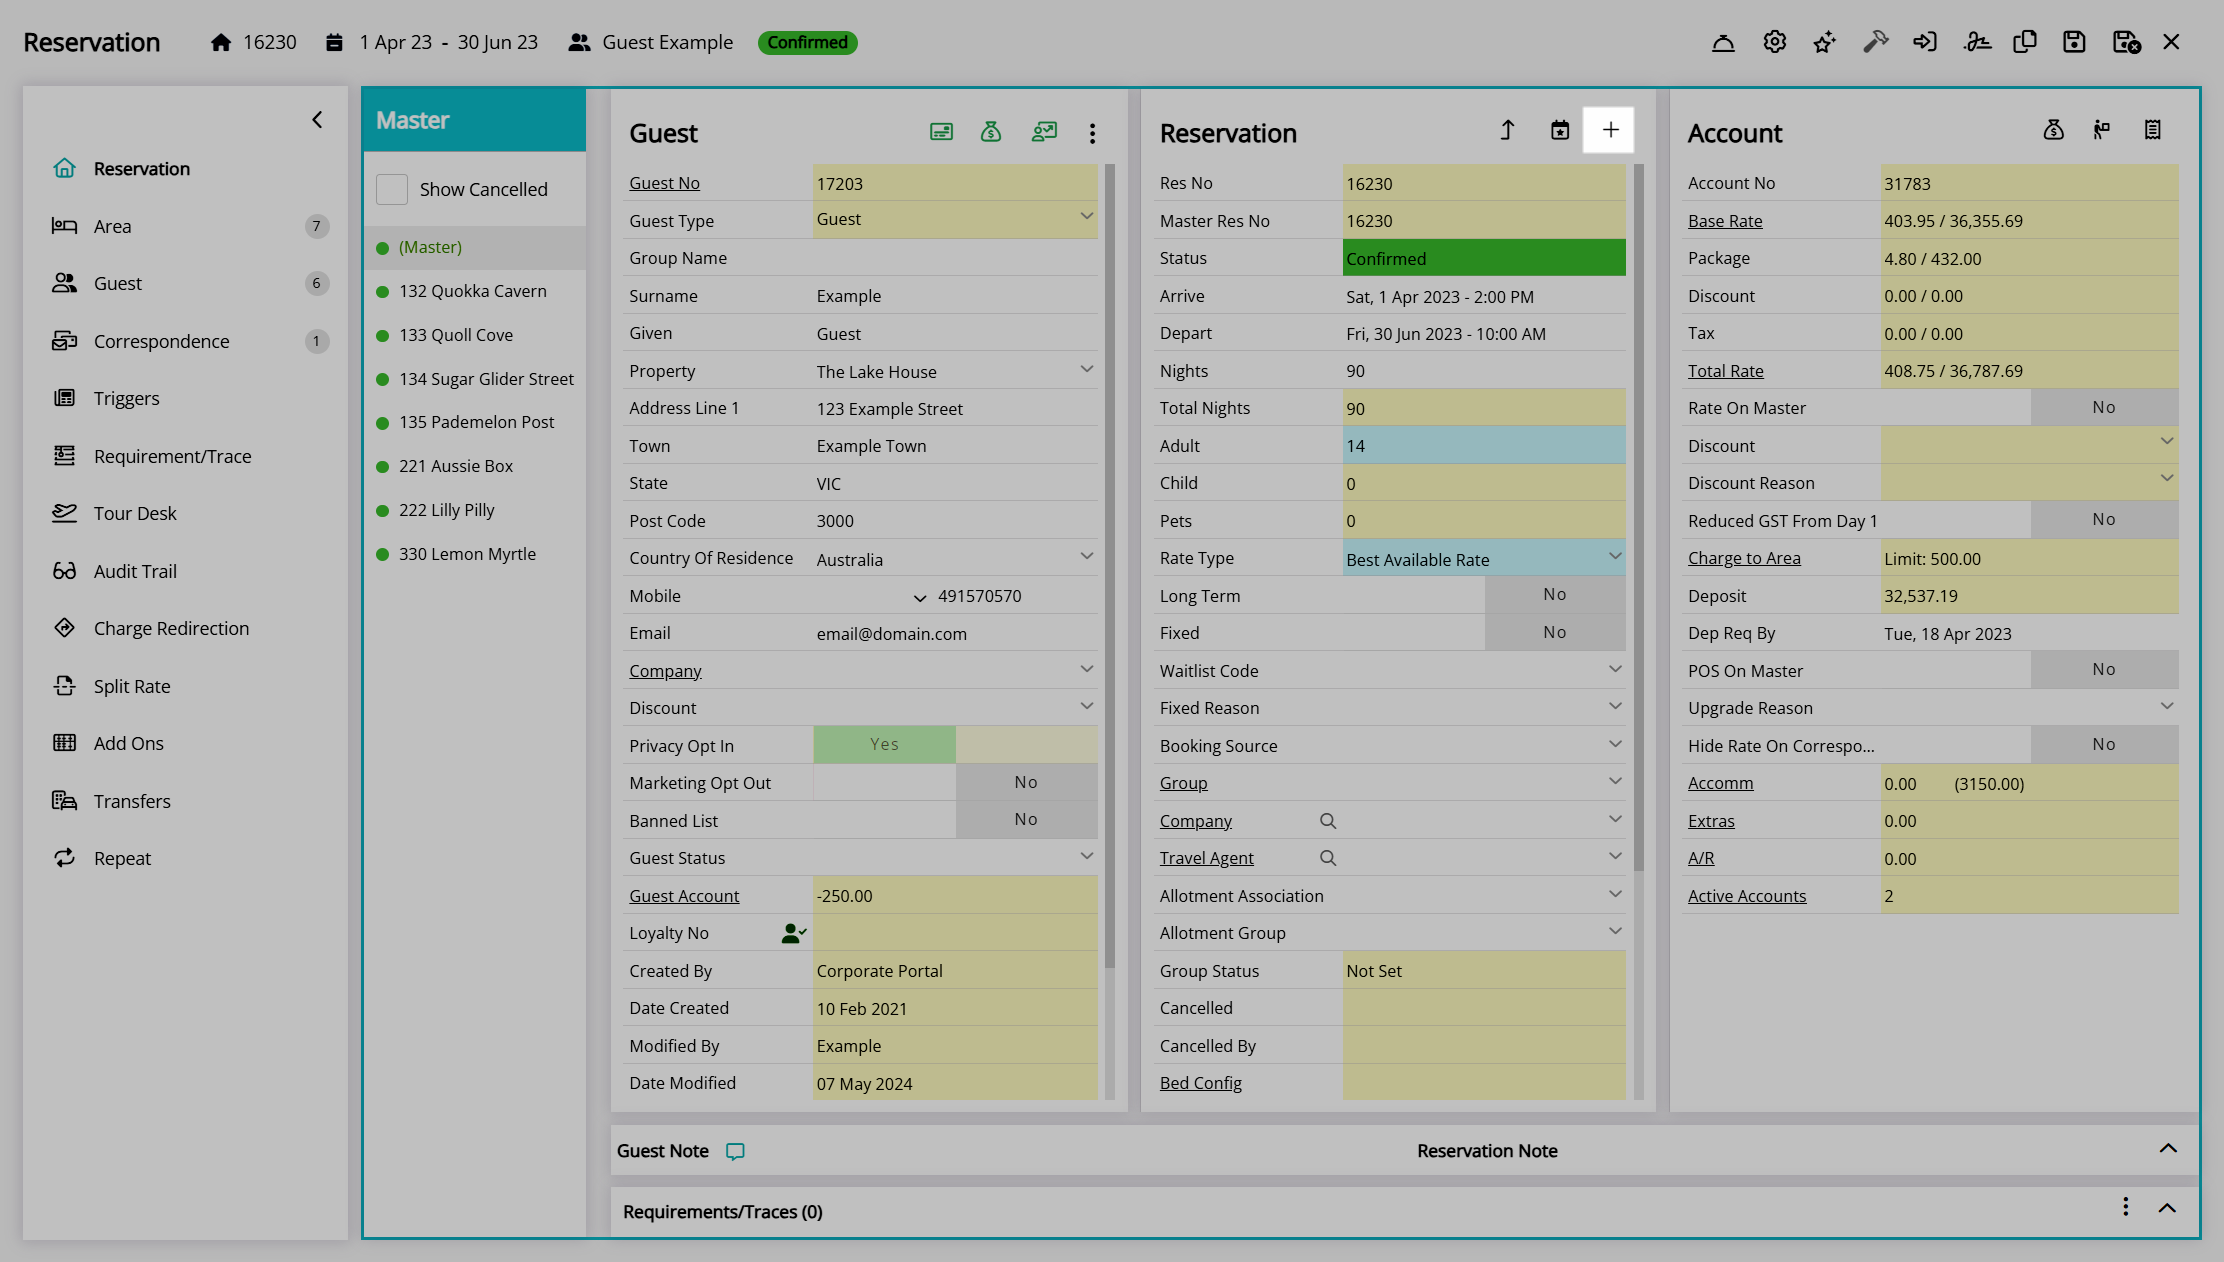
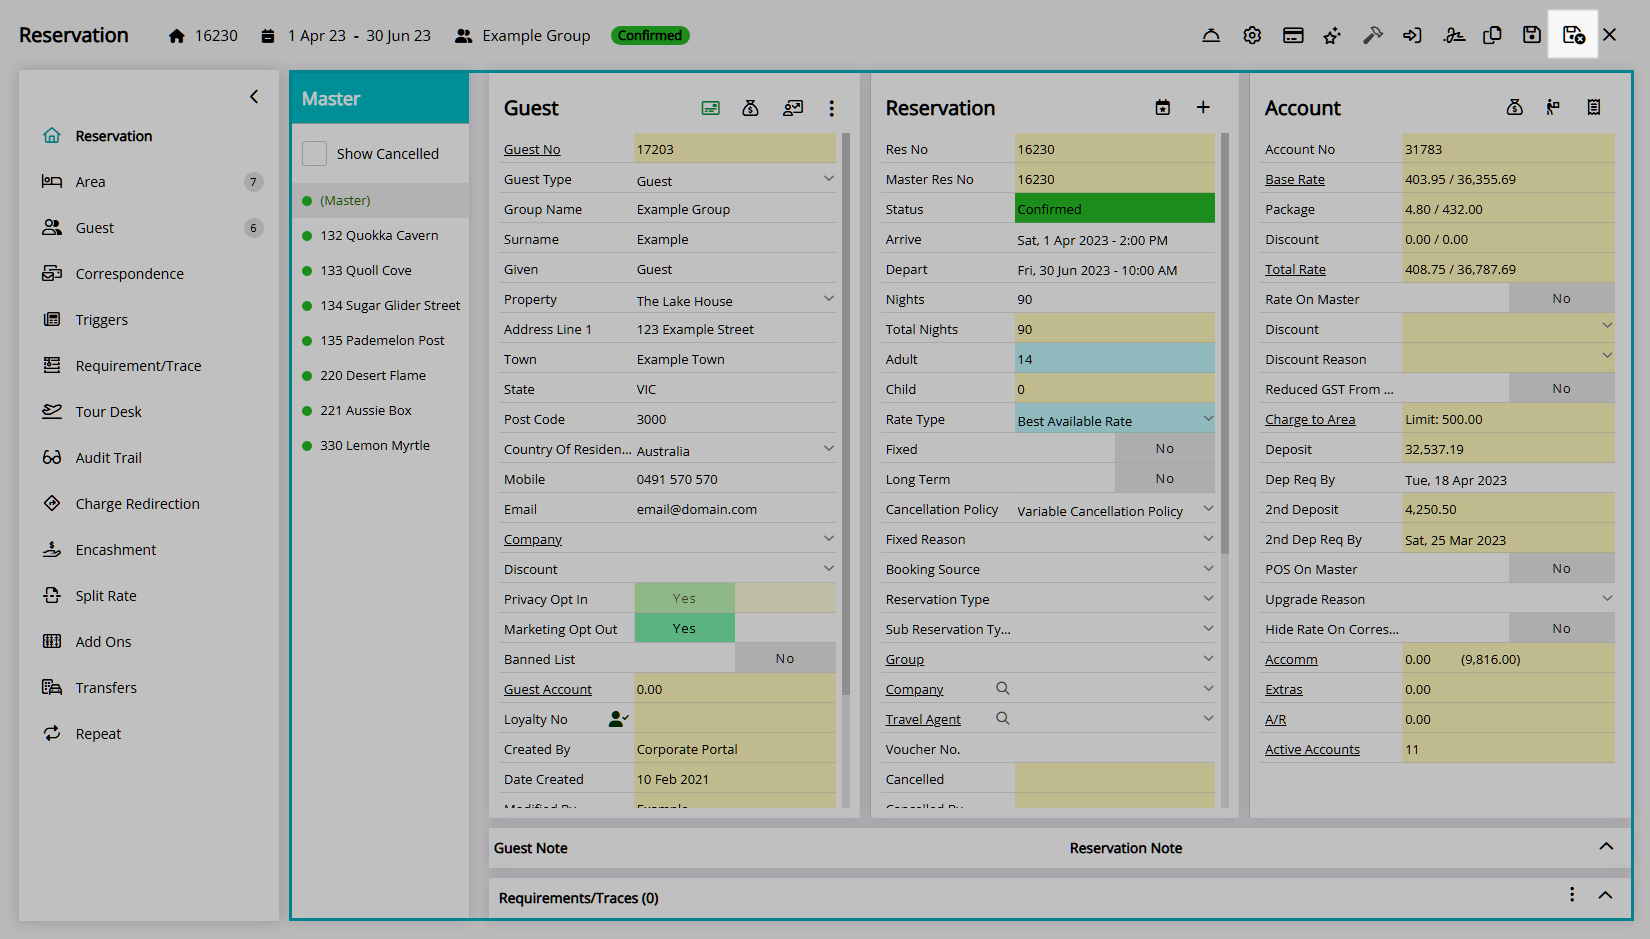
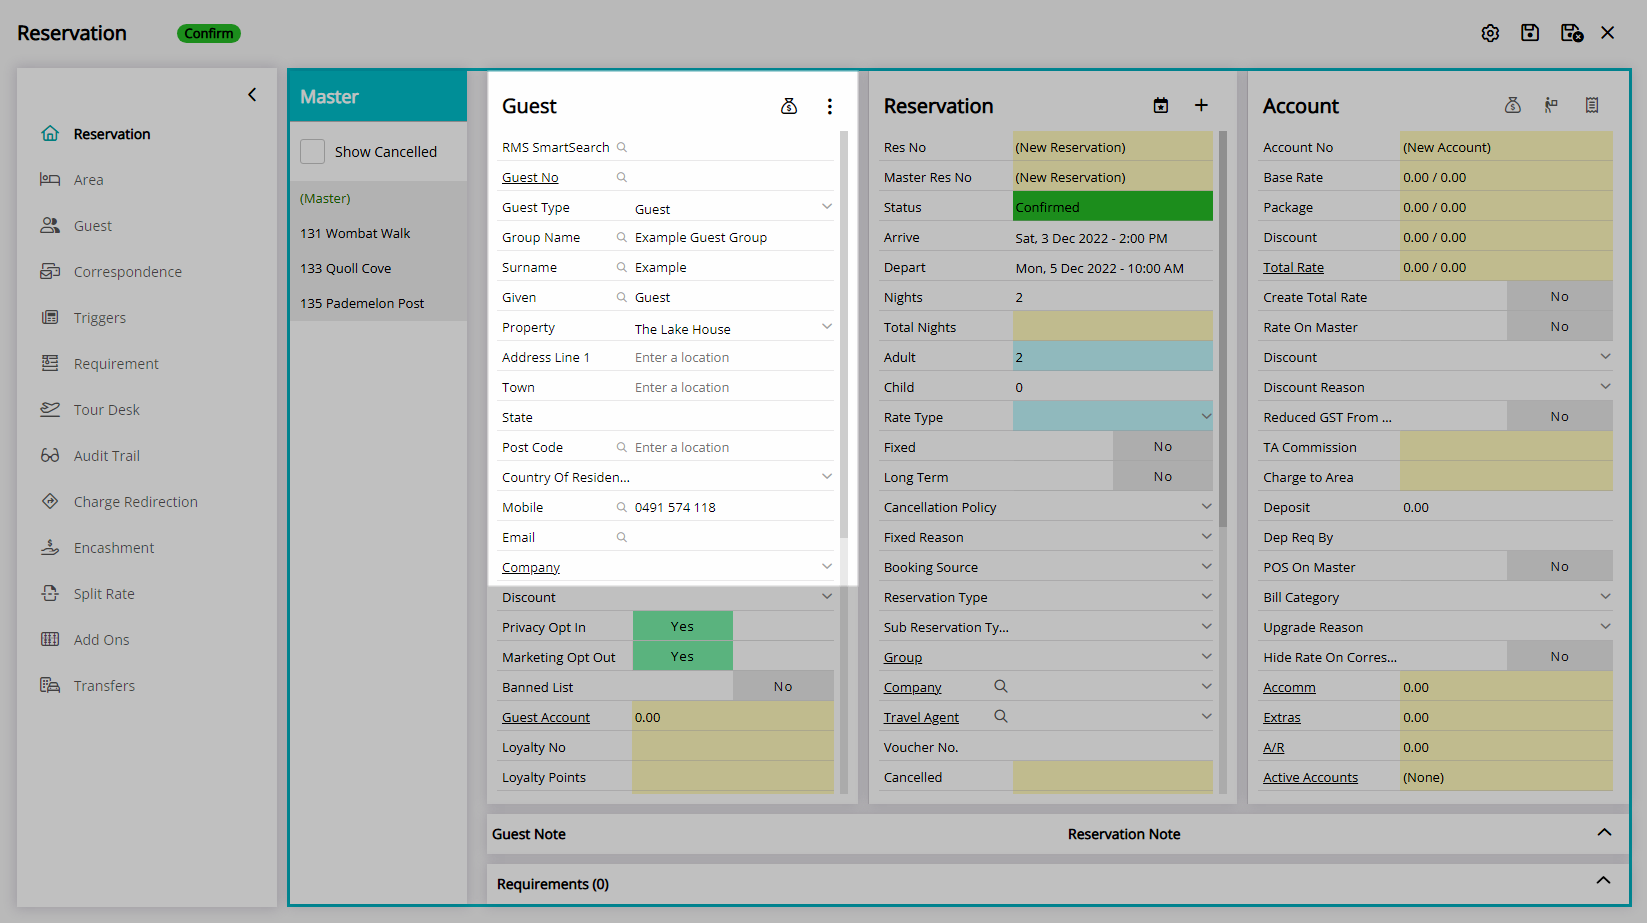
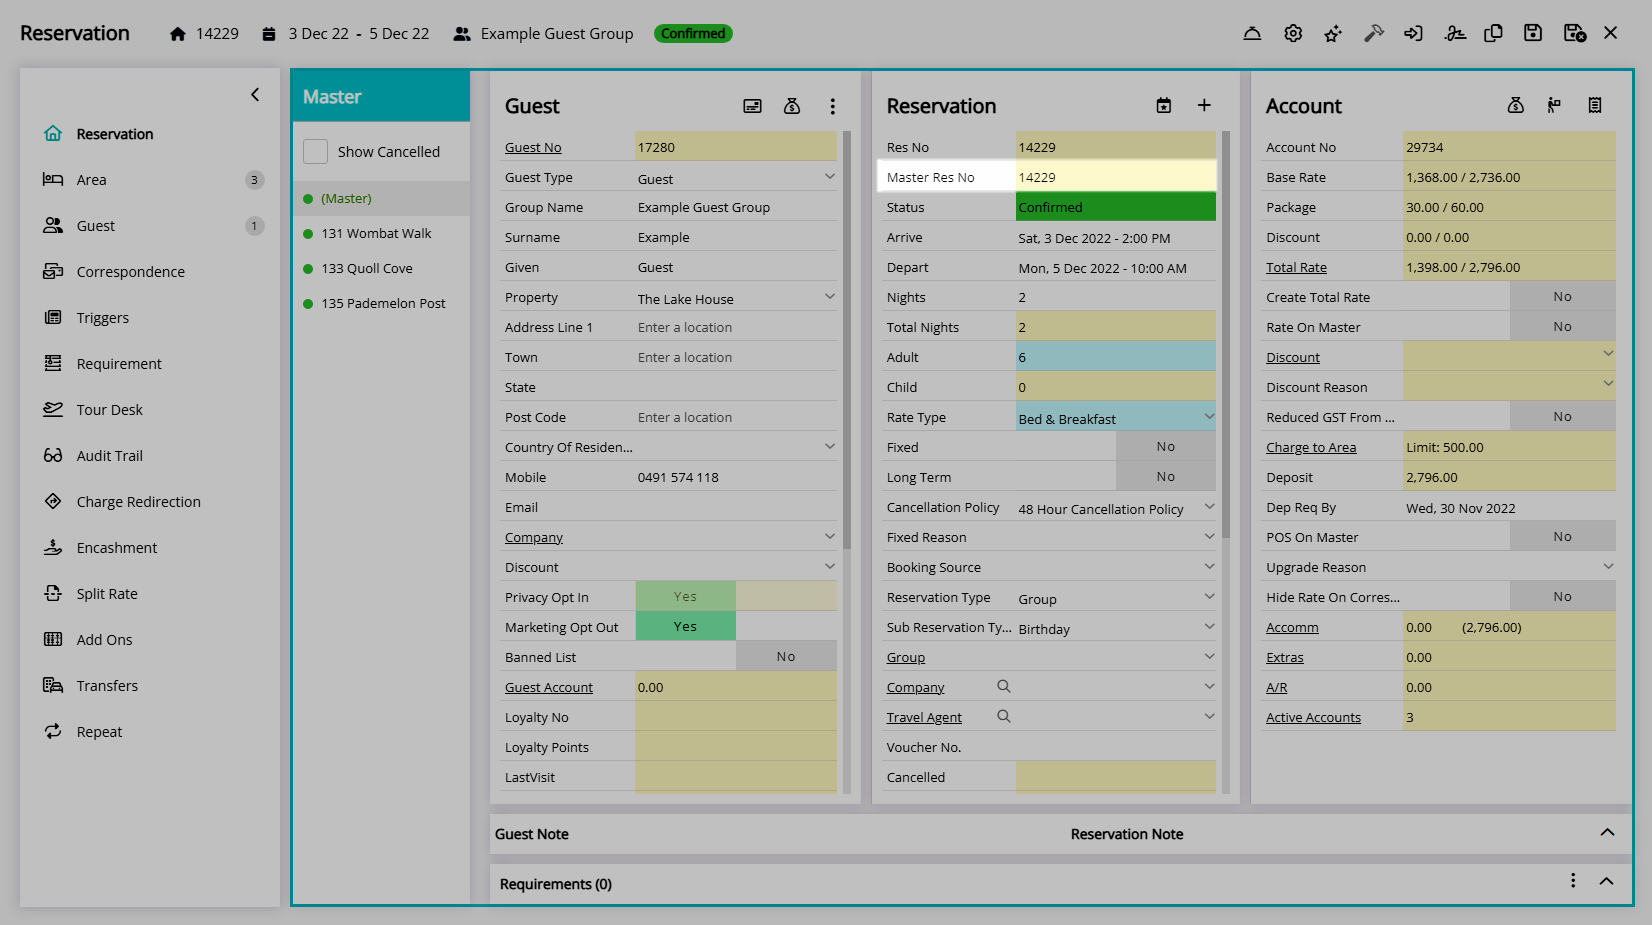
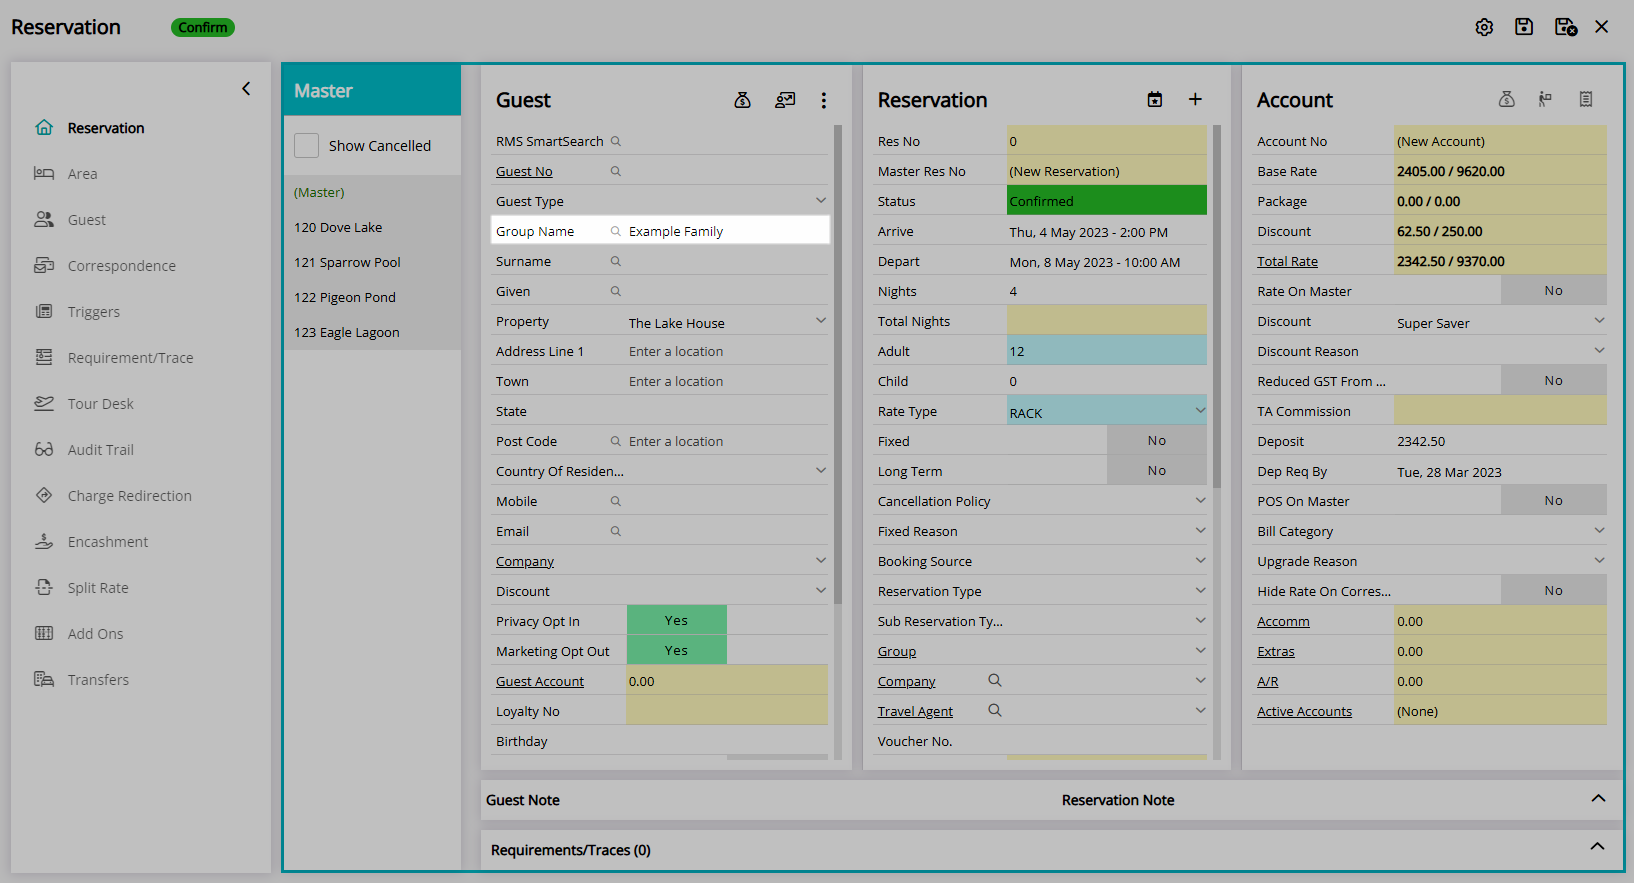
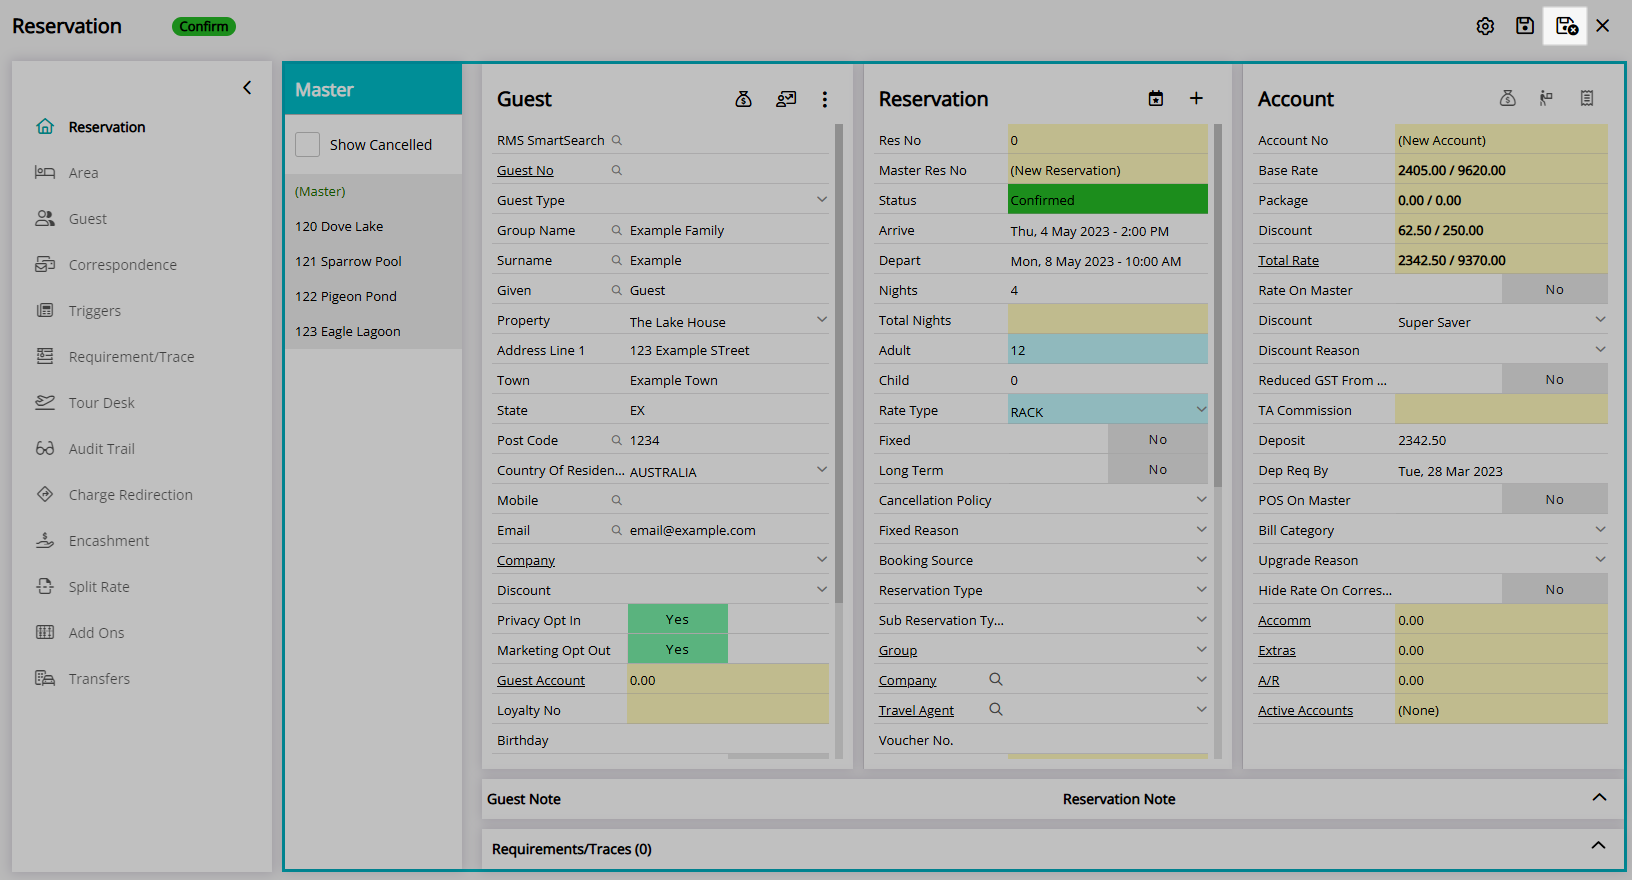
The group cover page—shown as (Master) in the navigator pane of the reservation— includes the guest details for the group leader, a summary of reservation details for all reservations in the group, and a group account. Each reservation within the group includes its guest details, reservation details, and reservation account, which contributes to the summary shown on the cover page.
A wide range of group reservation options exist on a Master Reservation, including account features that determine the routing of charges, an area list, a guest list, and group management tools.
A Master Reservation can be created on the reservation screen for a new or existing reservation or by combining existing reservations, on the Booking Chart, using Quick Quote, or with the Master Reservation utility when set up as Book by Category.
Create Group Reservation
A Master Reservation can be created in the following ways in RMS:
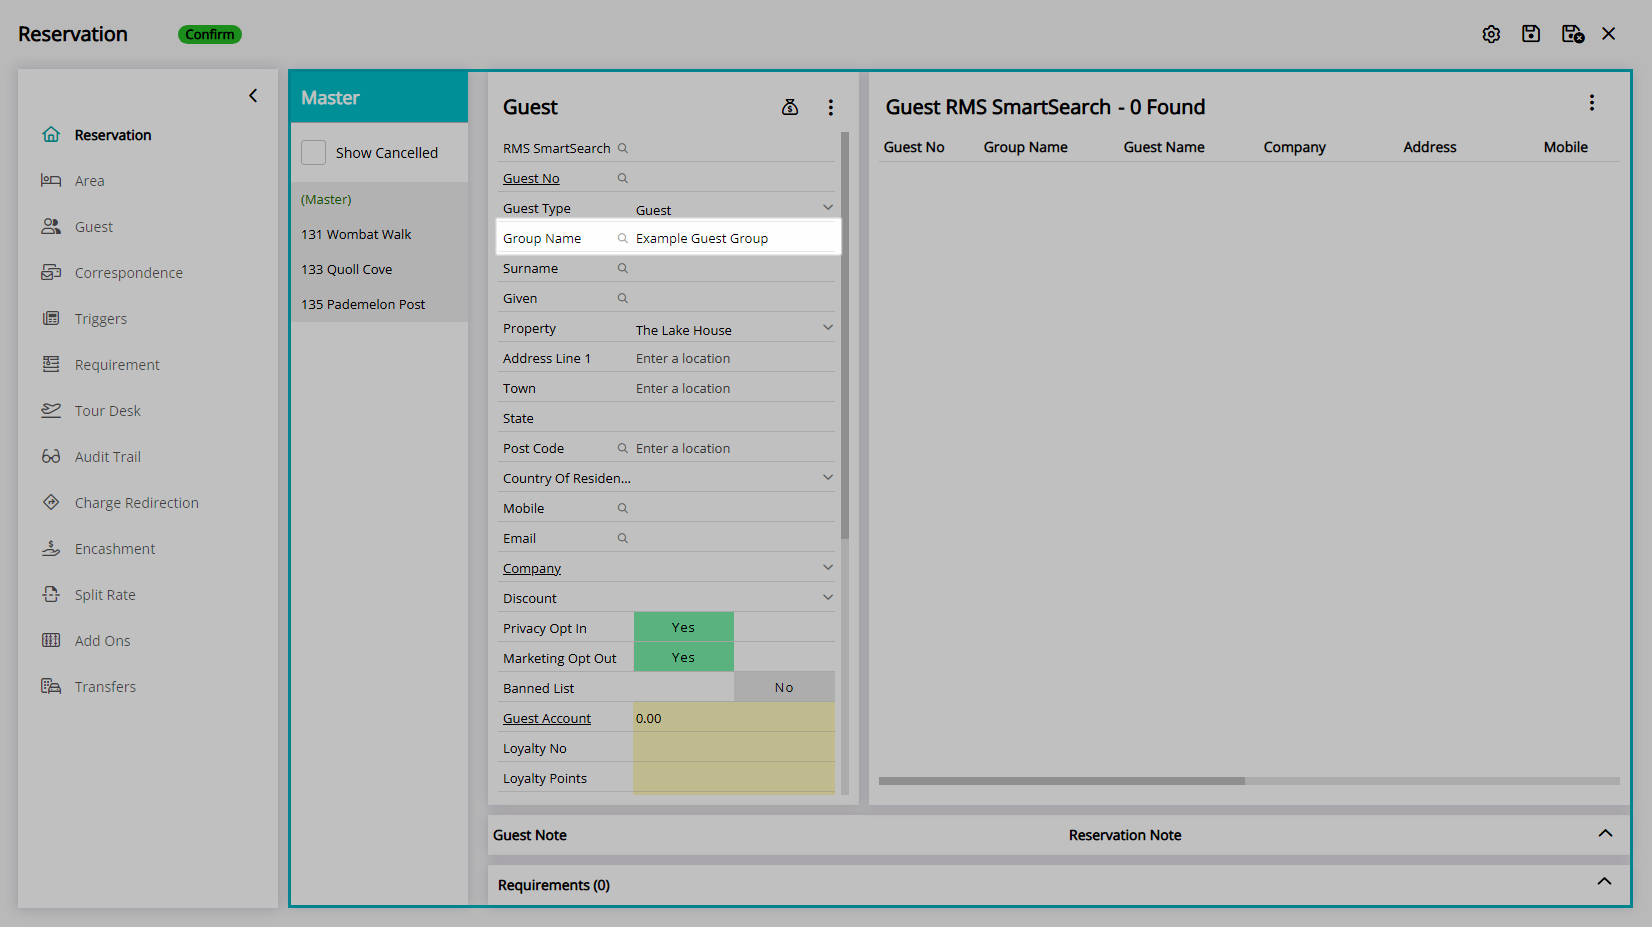
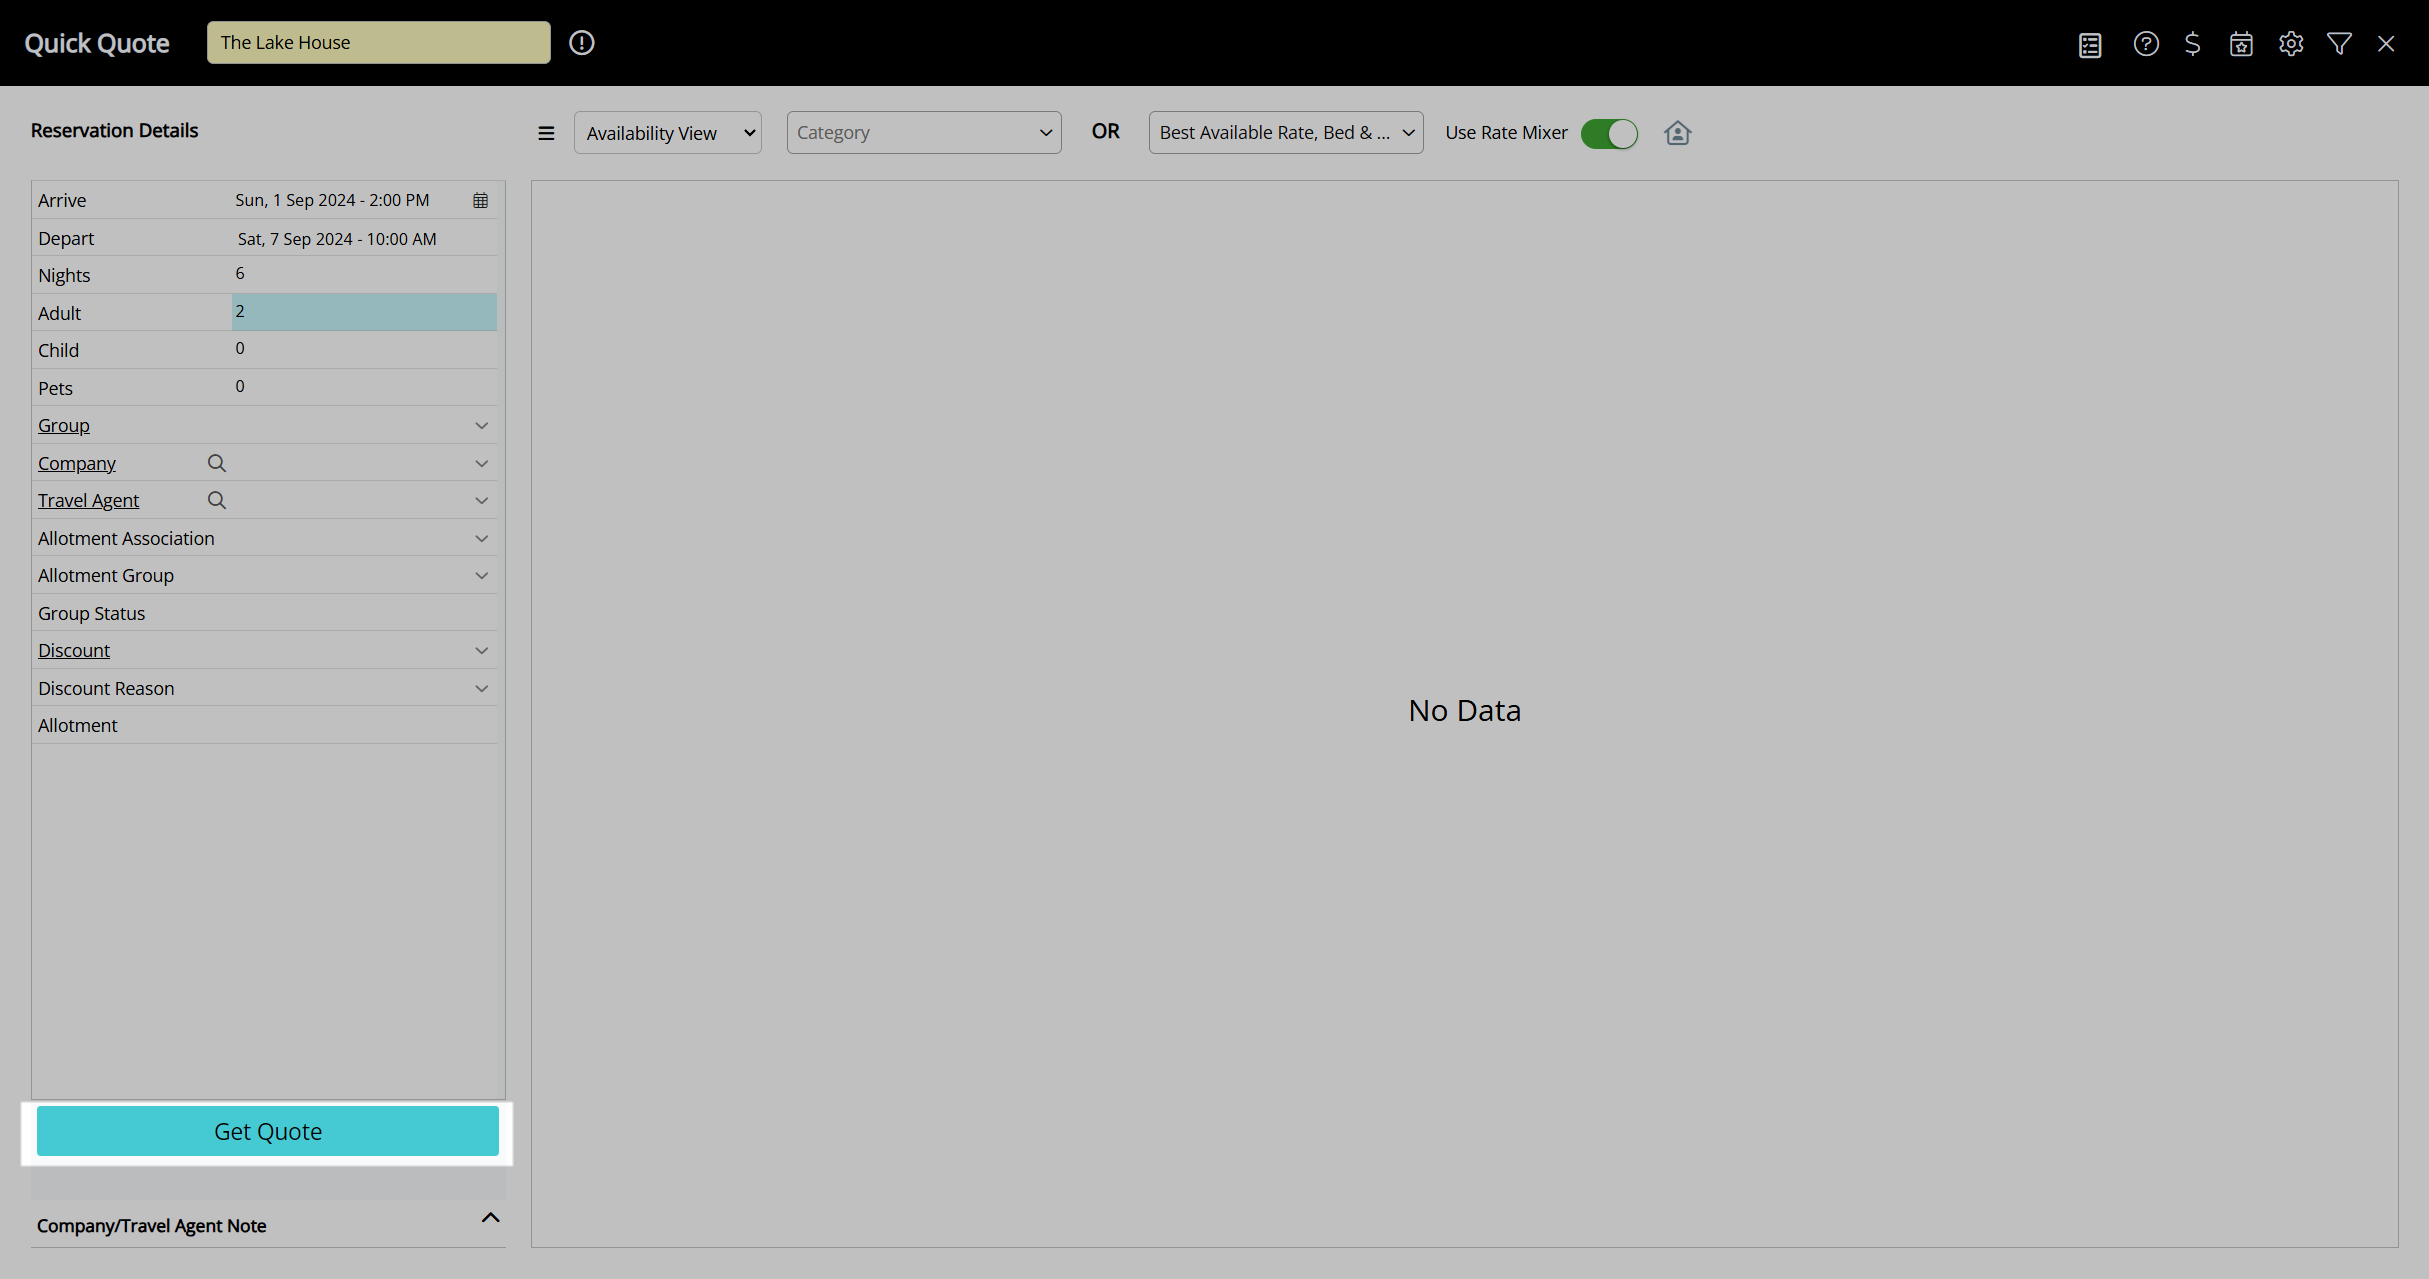
Add New Reservation
- Select the
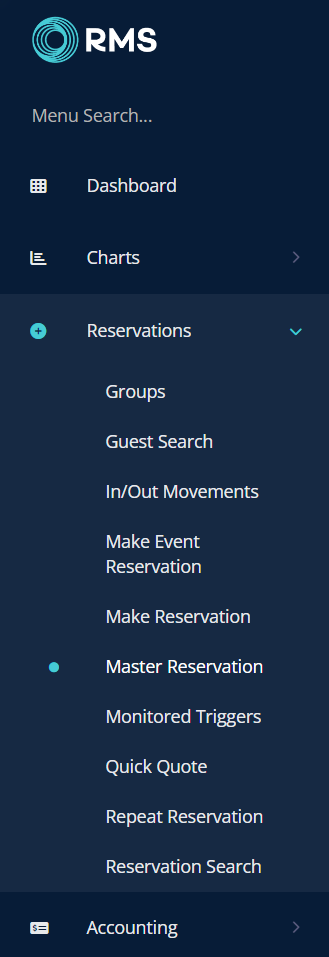
 'Add Reservation' icon in the Toolbar Menu or navigate to Reservations > Make Reservation in the side menu of RMS.
 - Enter a Group Name.
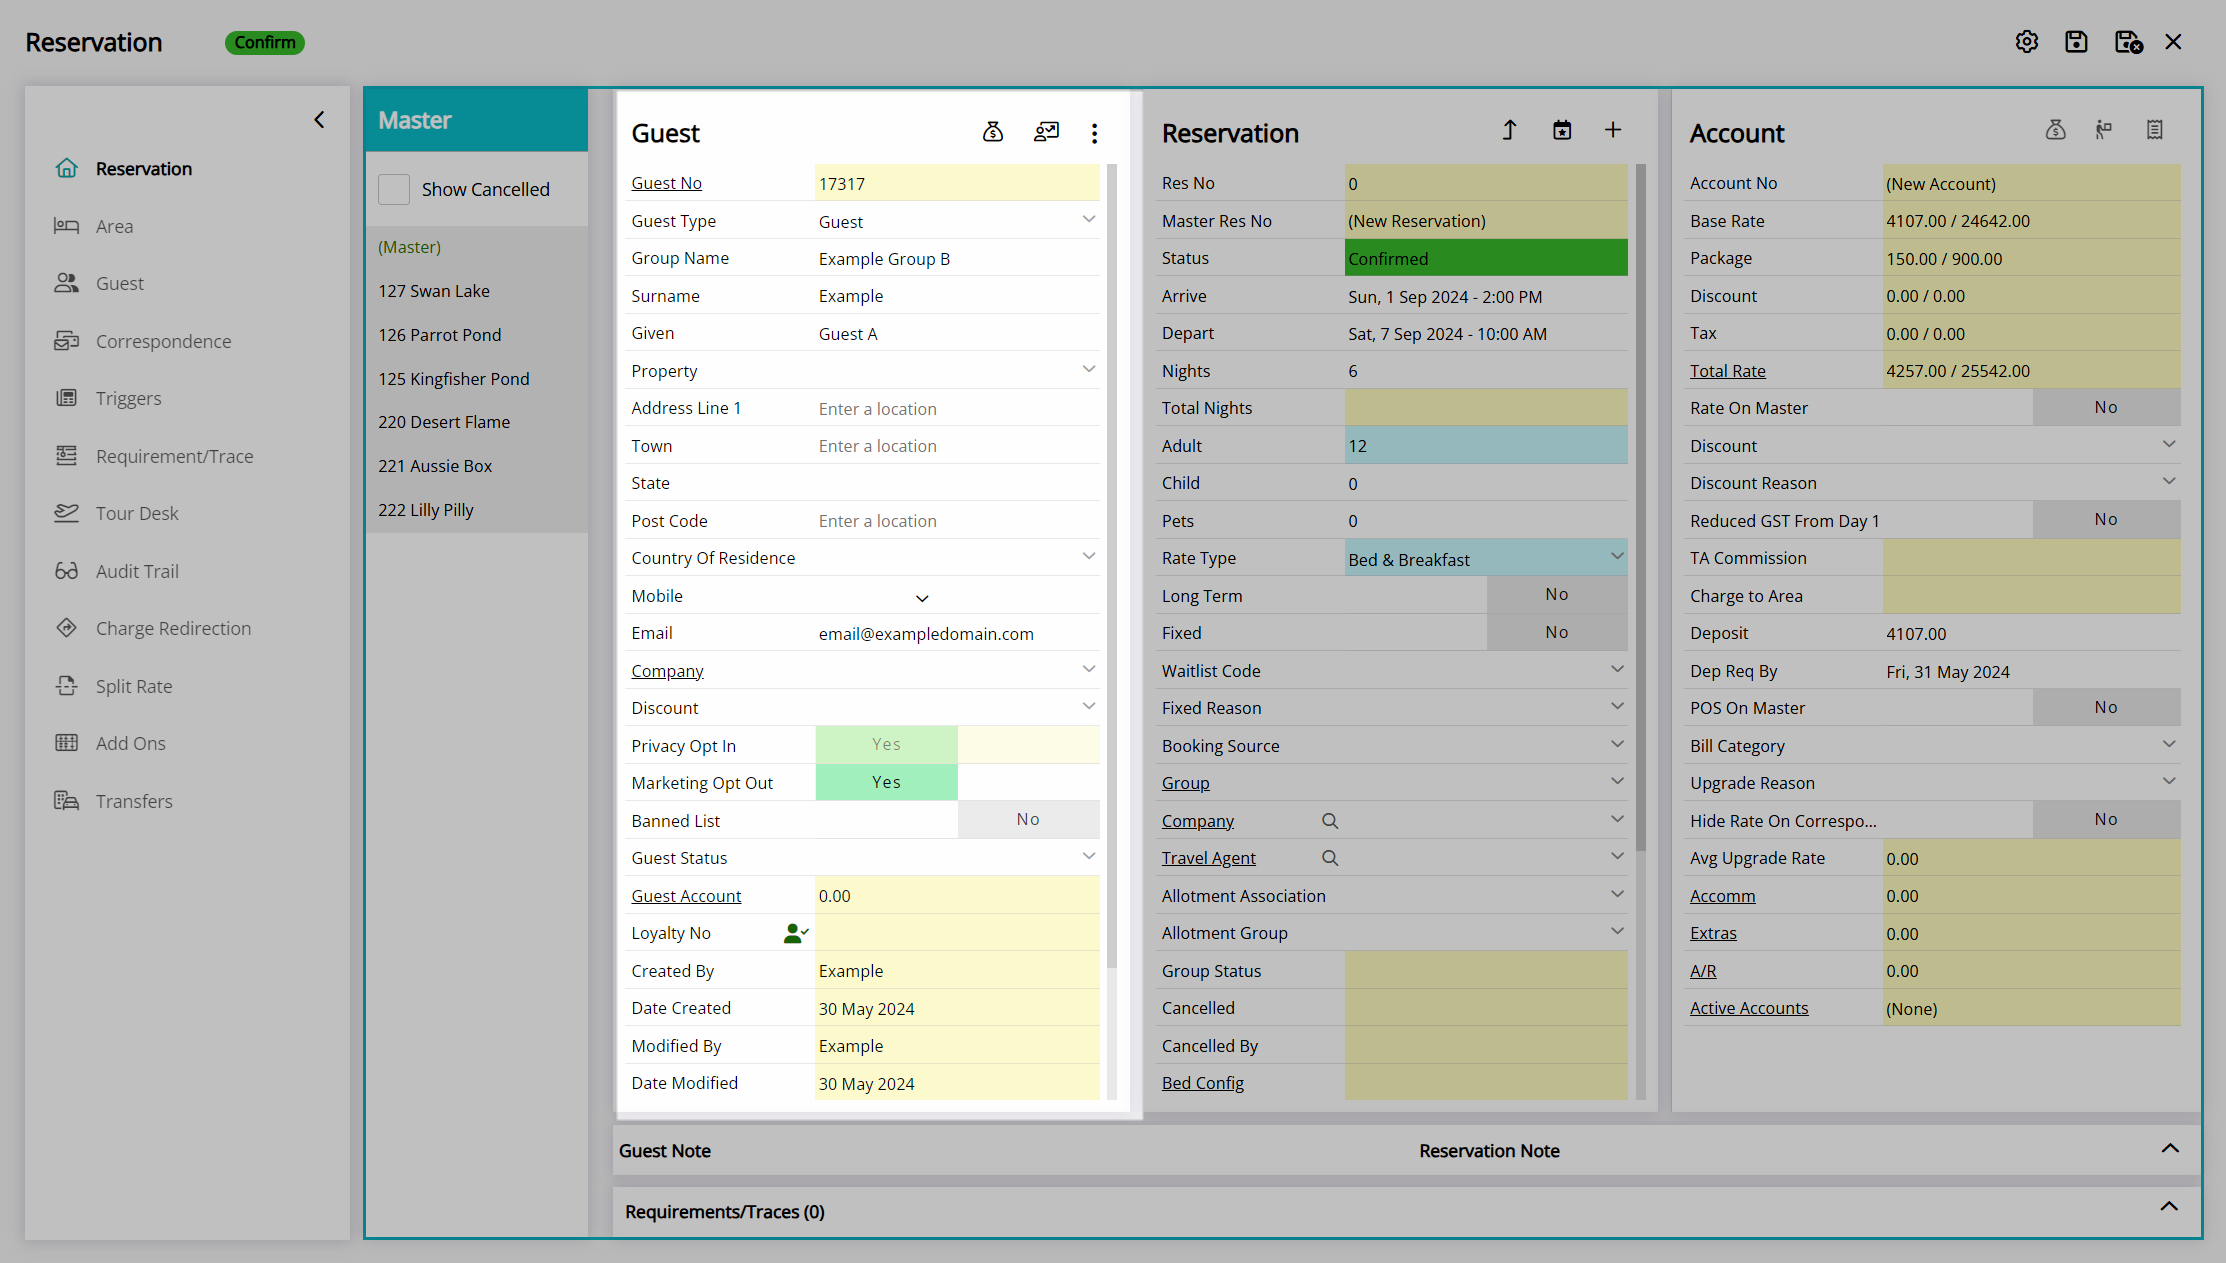
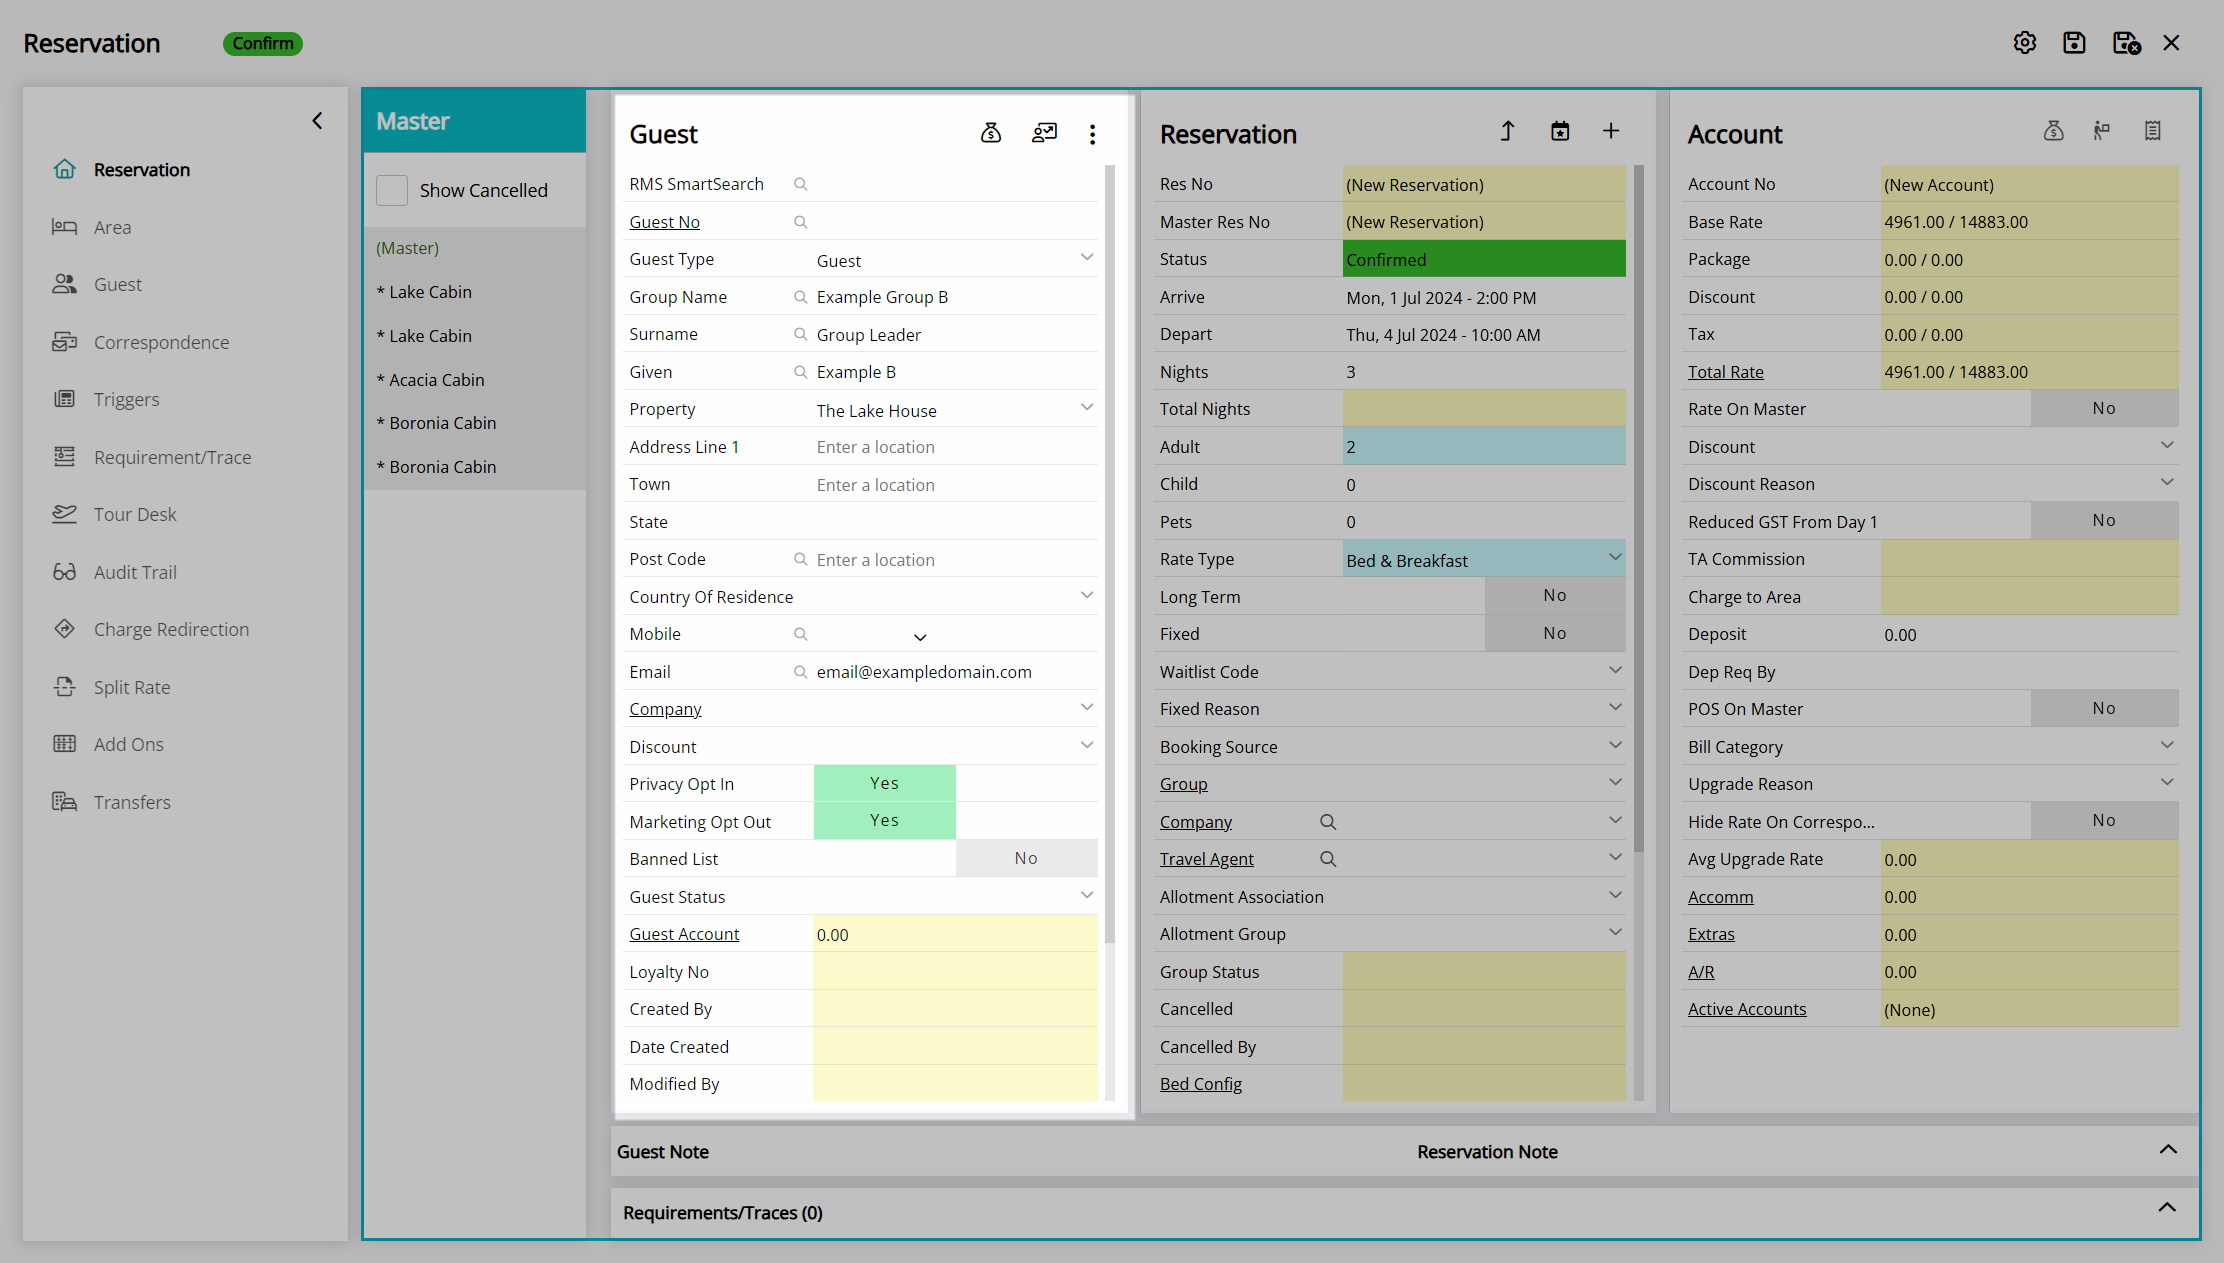
- Enter the Group Leader Guest Details.
- Select an Arrive and Depart Date.
- Select the
 'Add Area' icon.
 - Perform a Quick Quote Search.
- Select a Category or Rate Type.
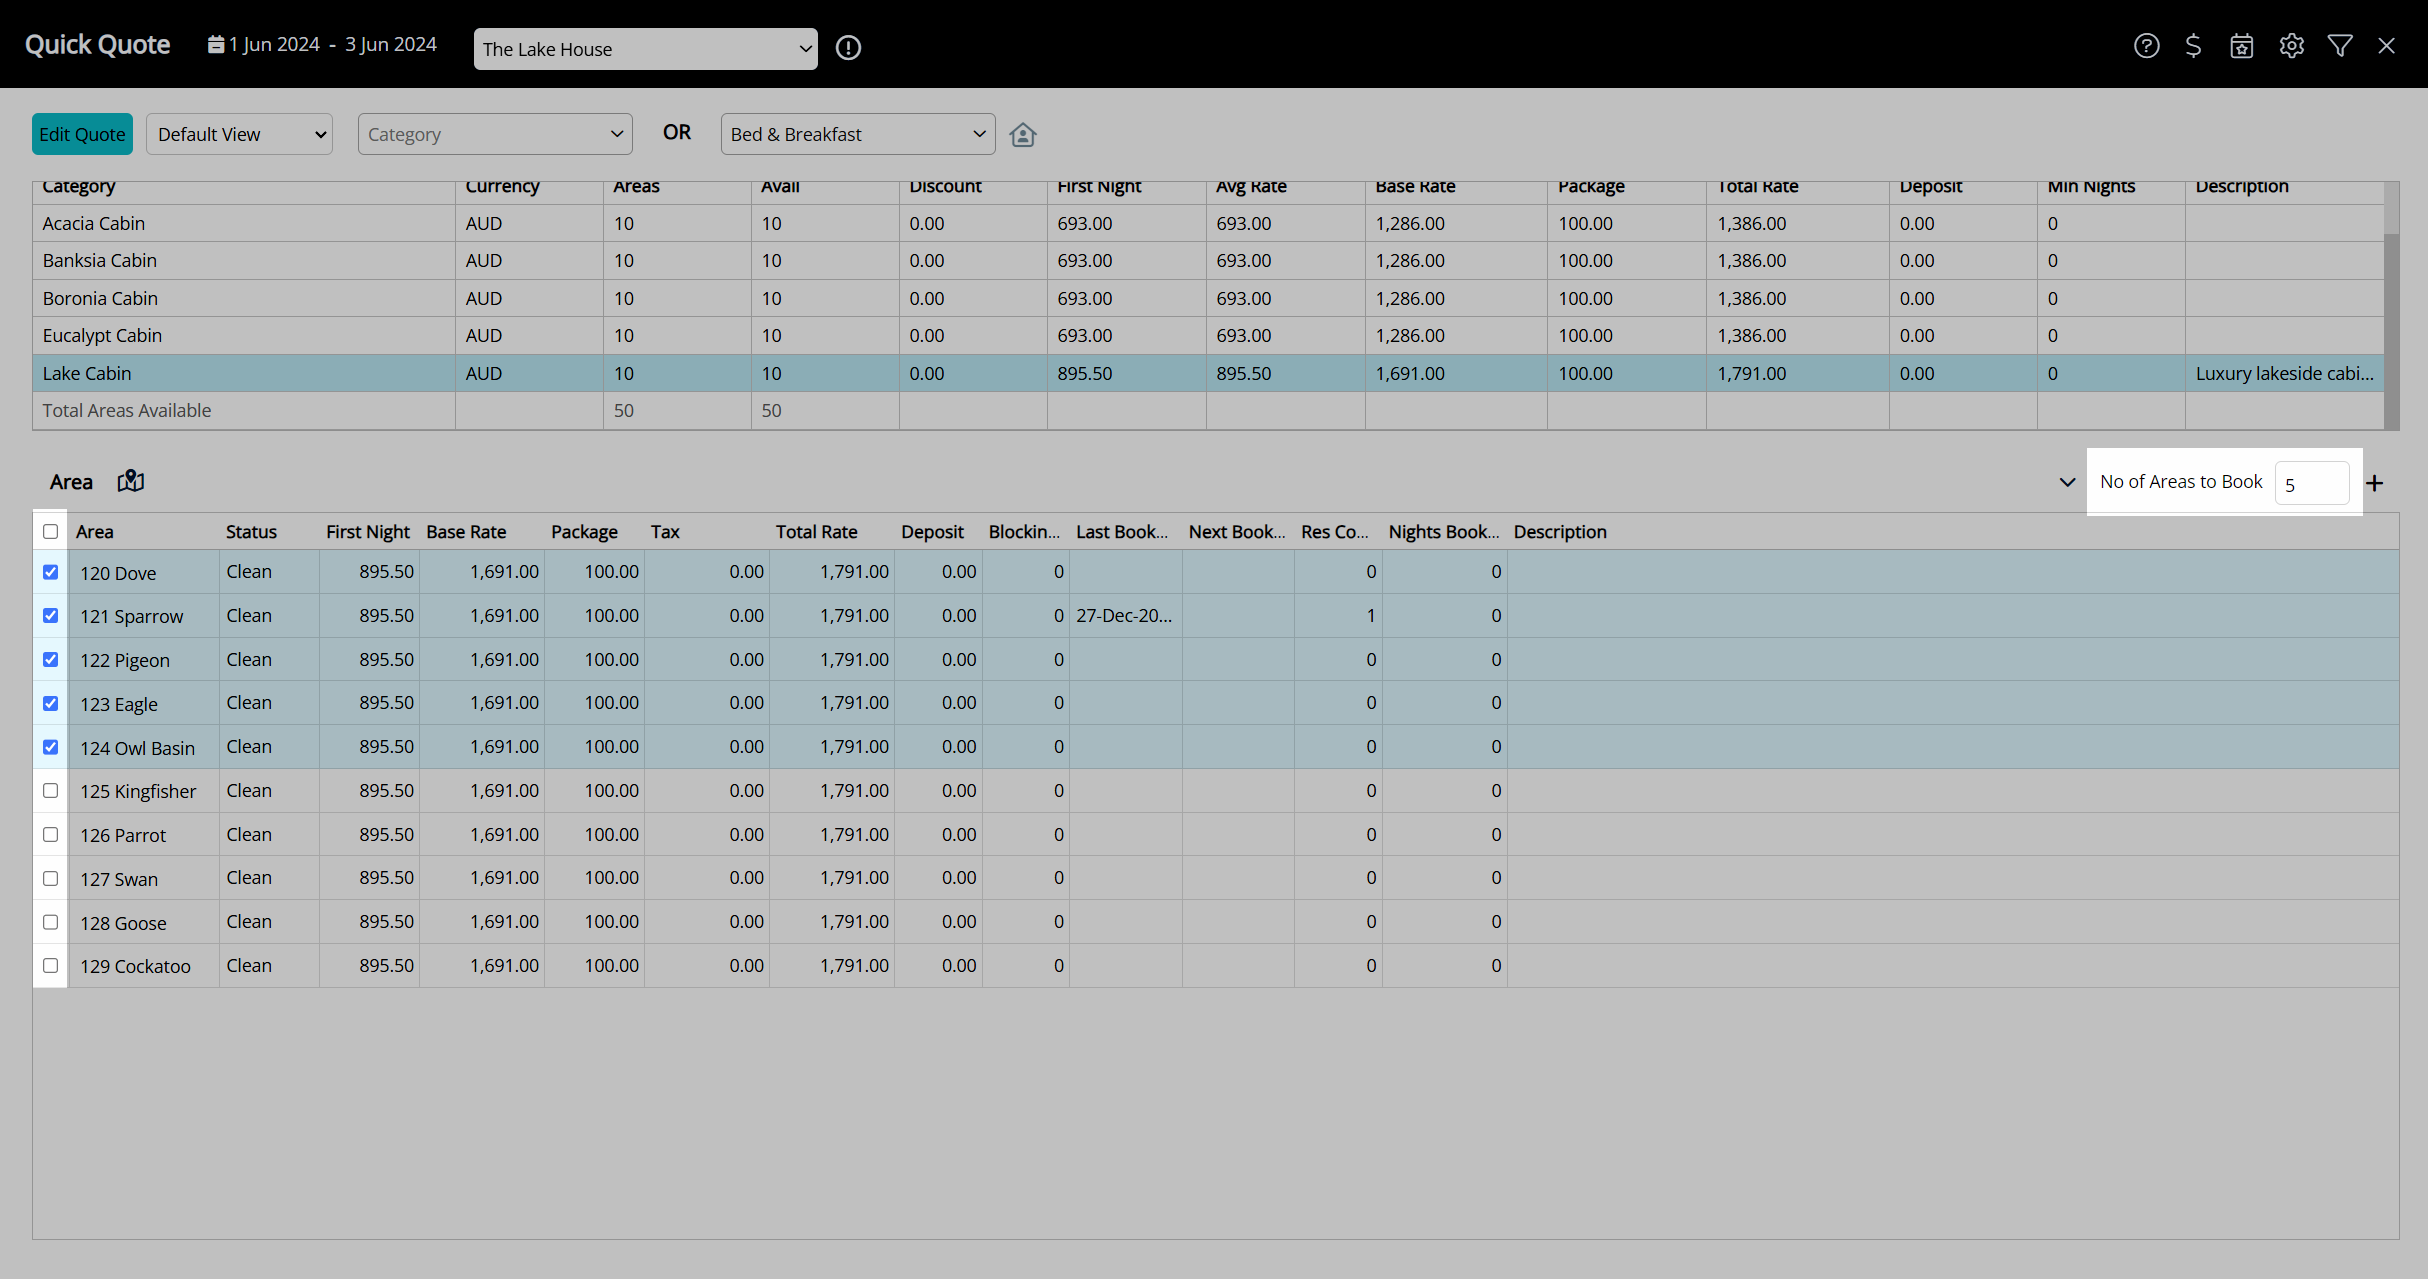
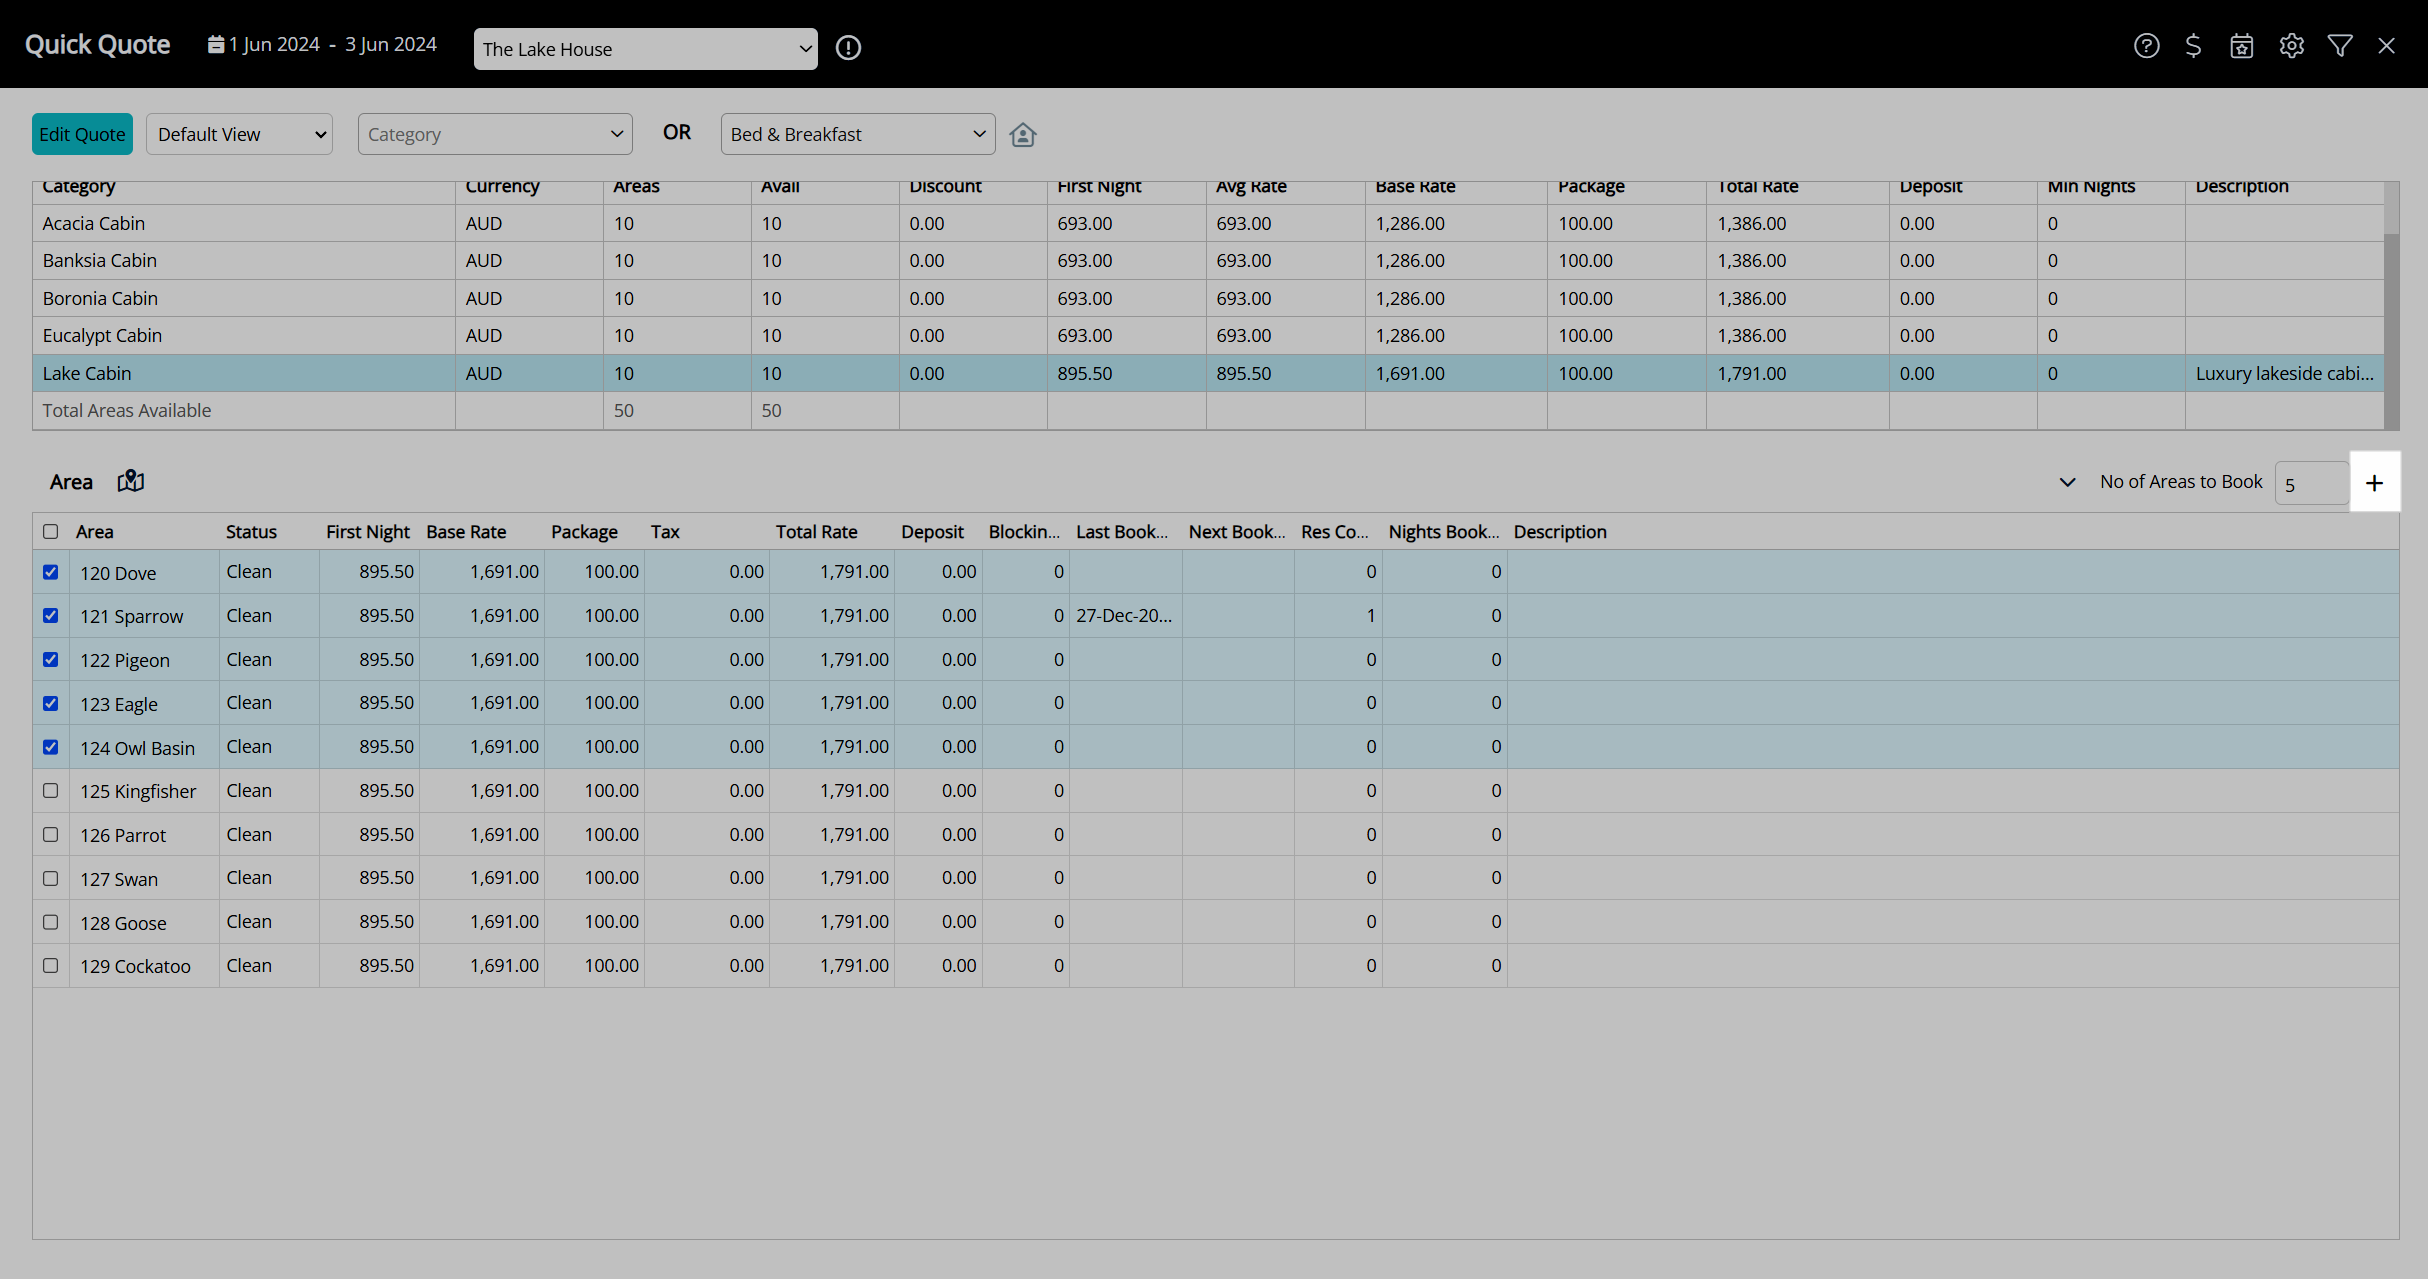
- Select the checkbox for an Area or enter the Number of Areas to Book.
- Select the
 'Add to Reservation' icon.
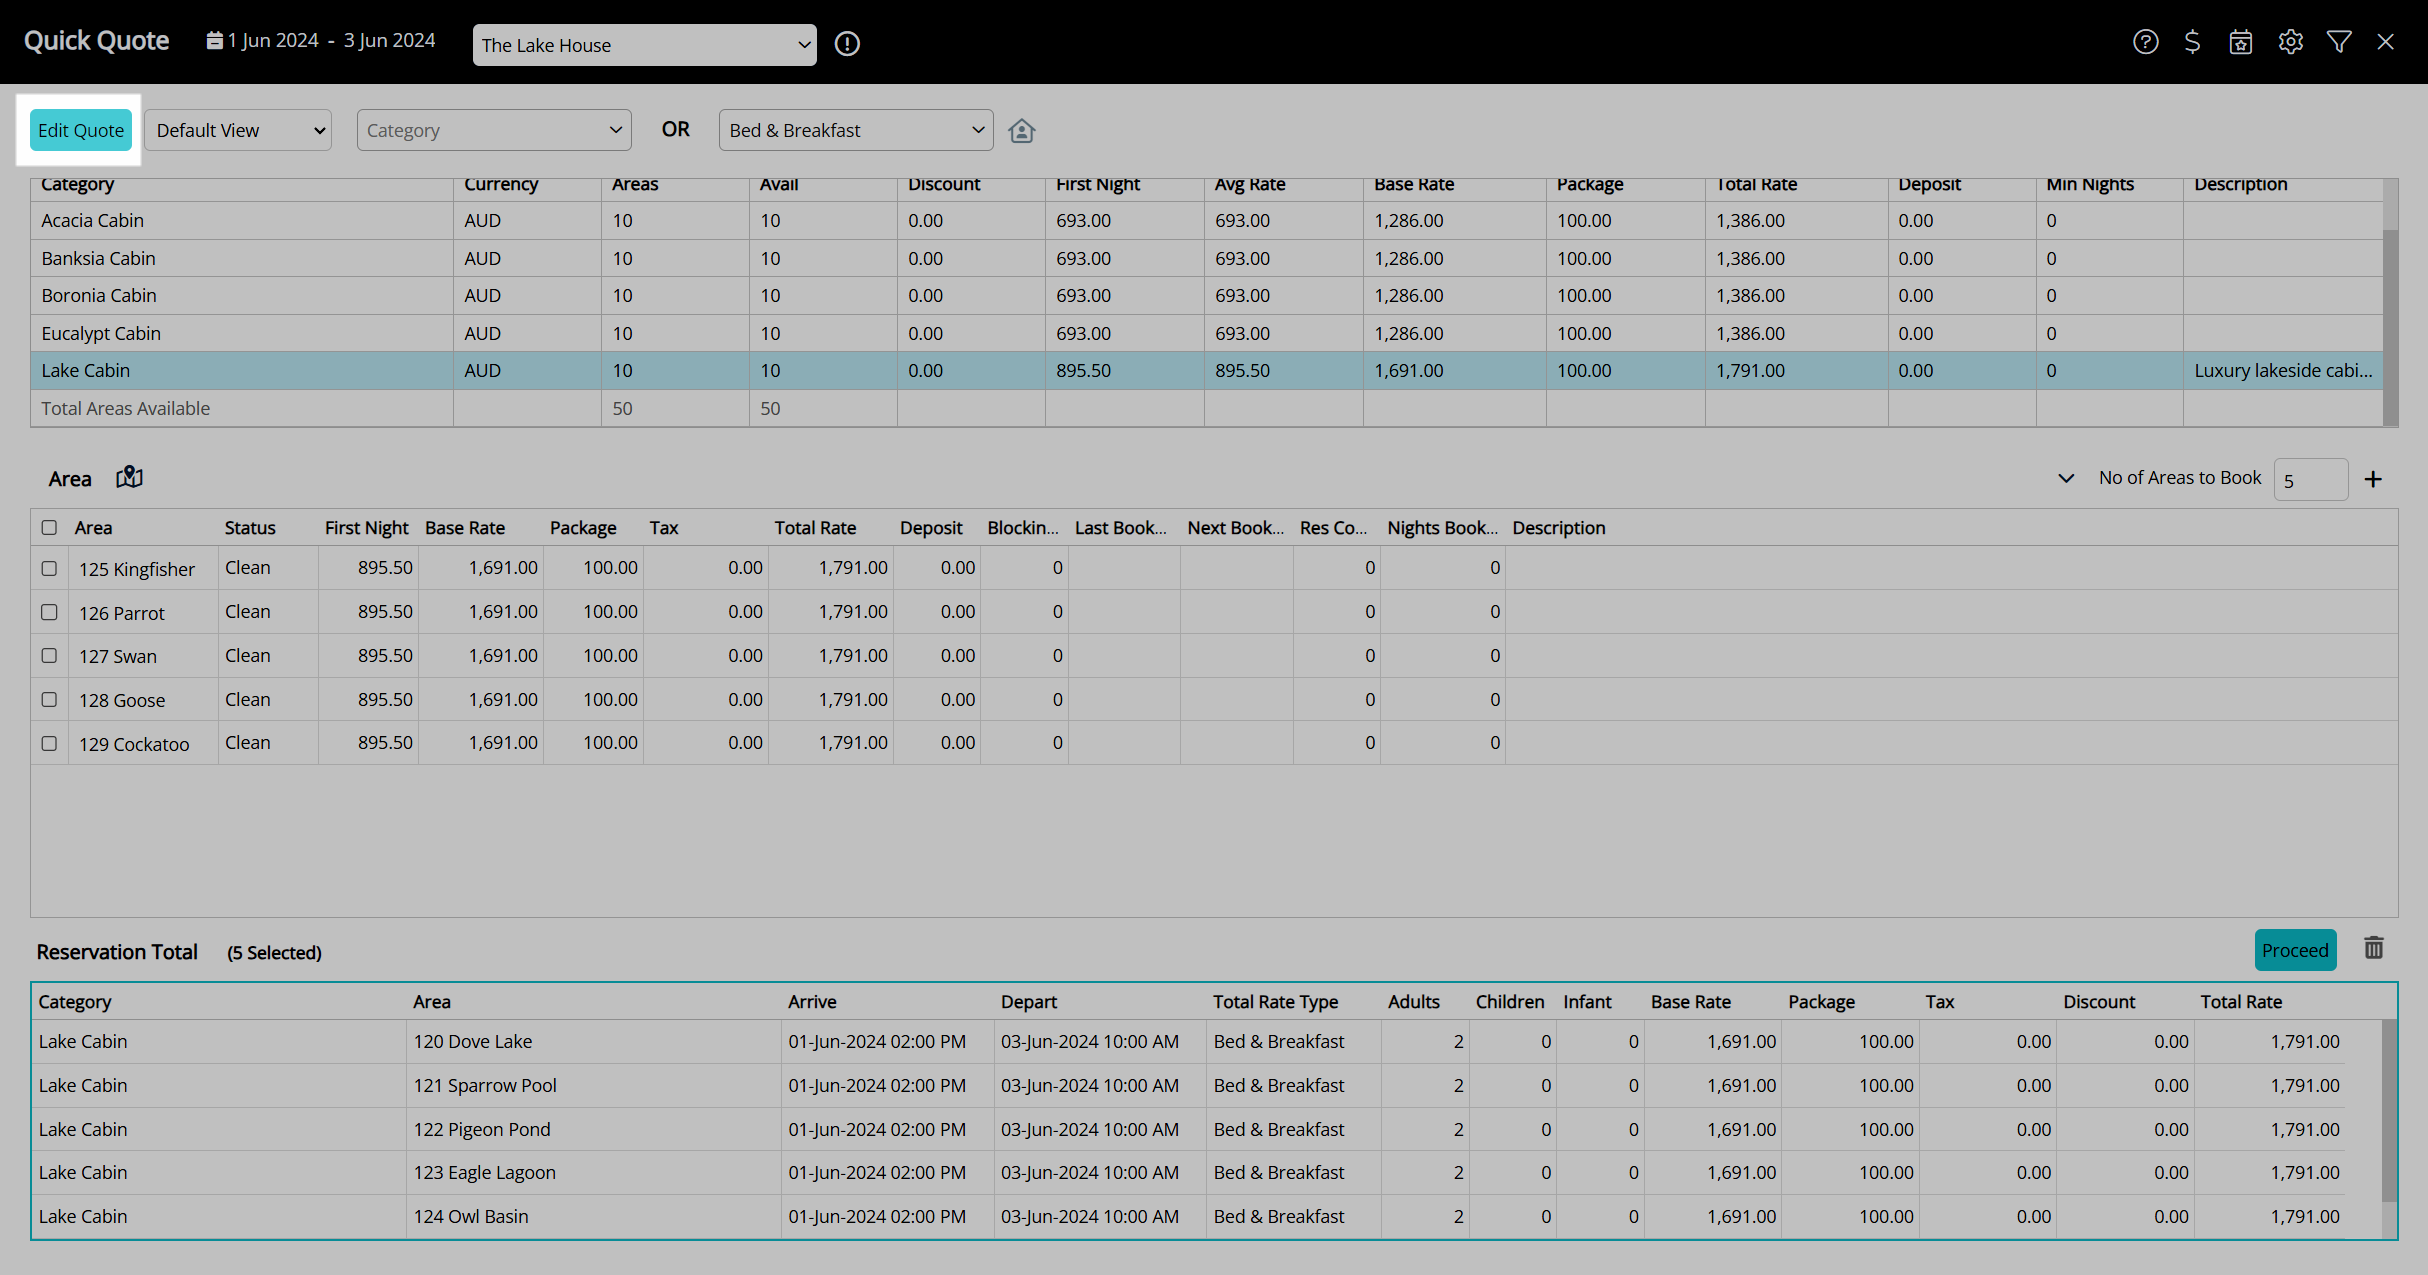
 - Select 'Proceed'.
- Save/Exit.
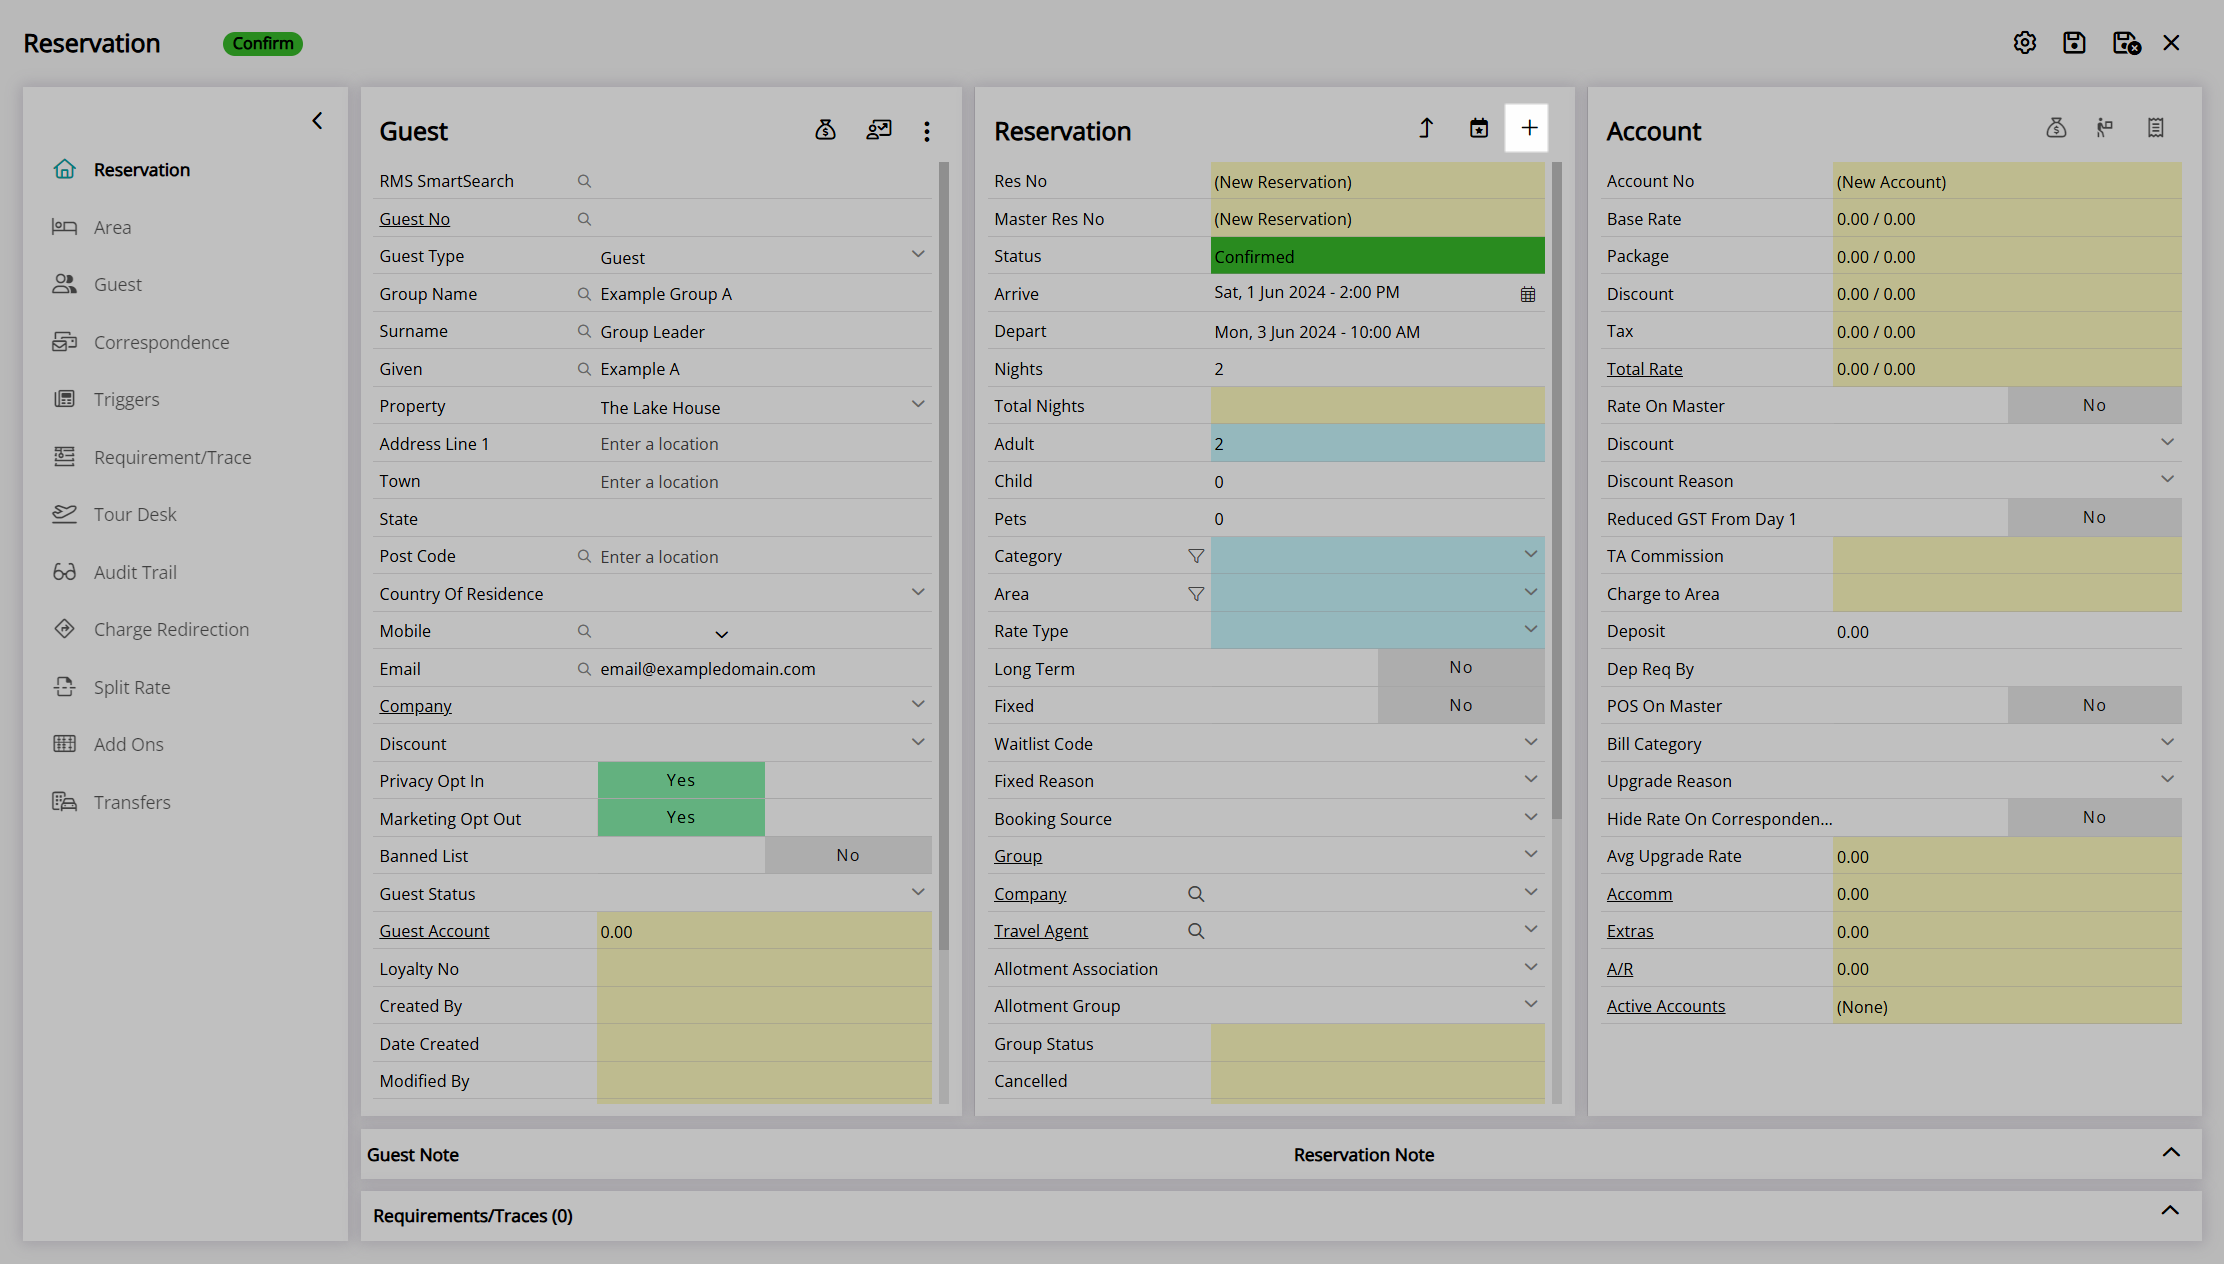
Select the ![]() 'Add Reservation' icon in the Toolbar Menu or navigate to Reservations > Make Reservation in the side menu of RMS.
'Add Reservation' icon in the Toolbar Menu or navigate to Reservations > Make Reservation in the side menu of RMS.

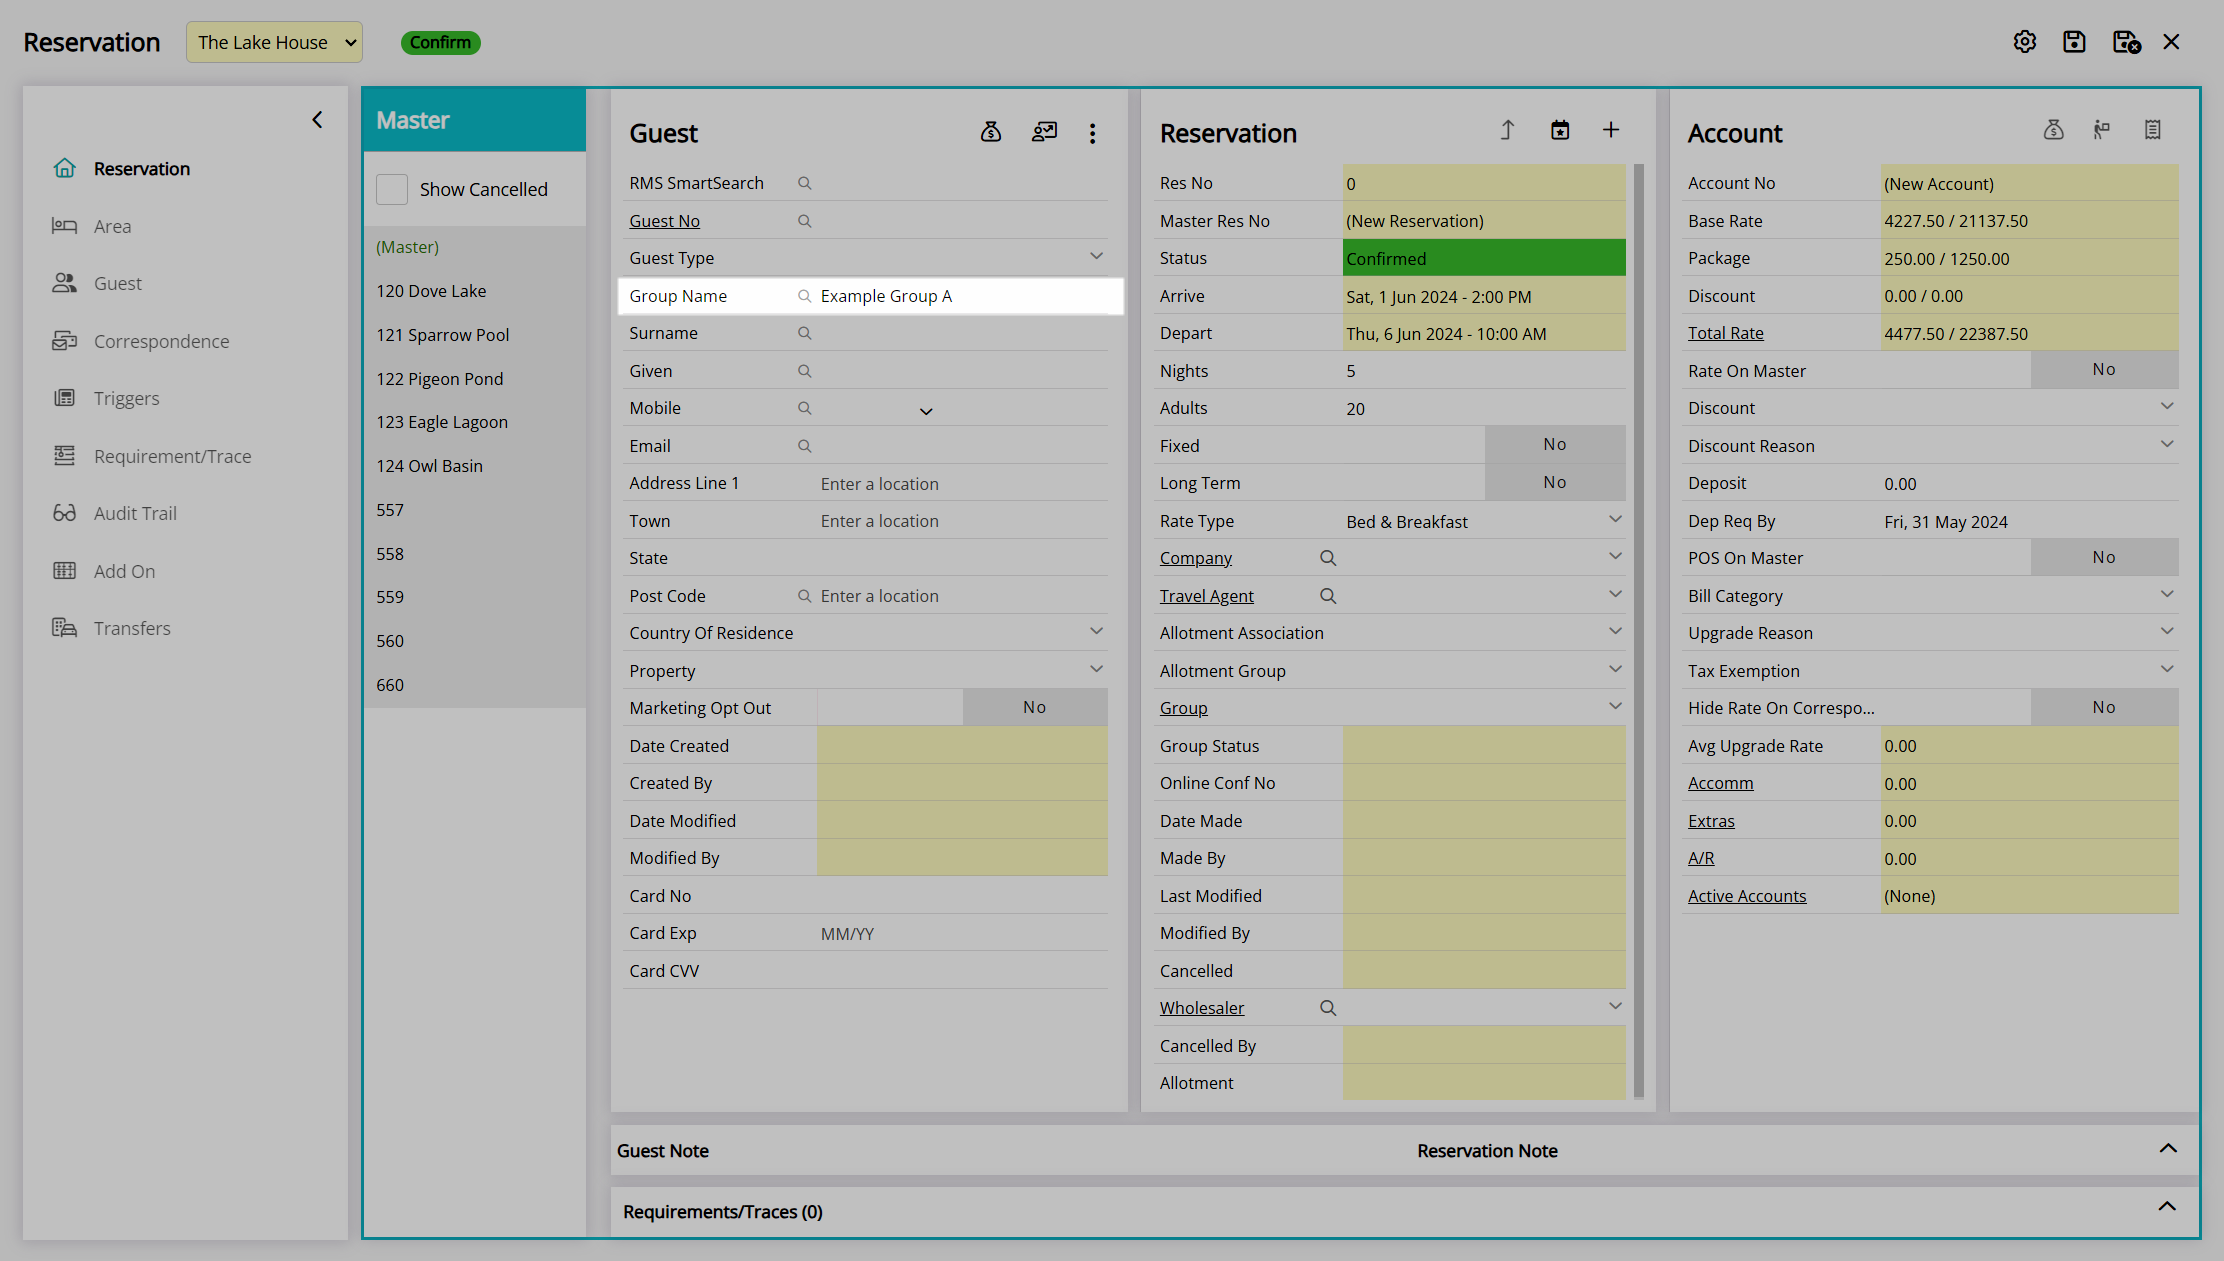
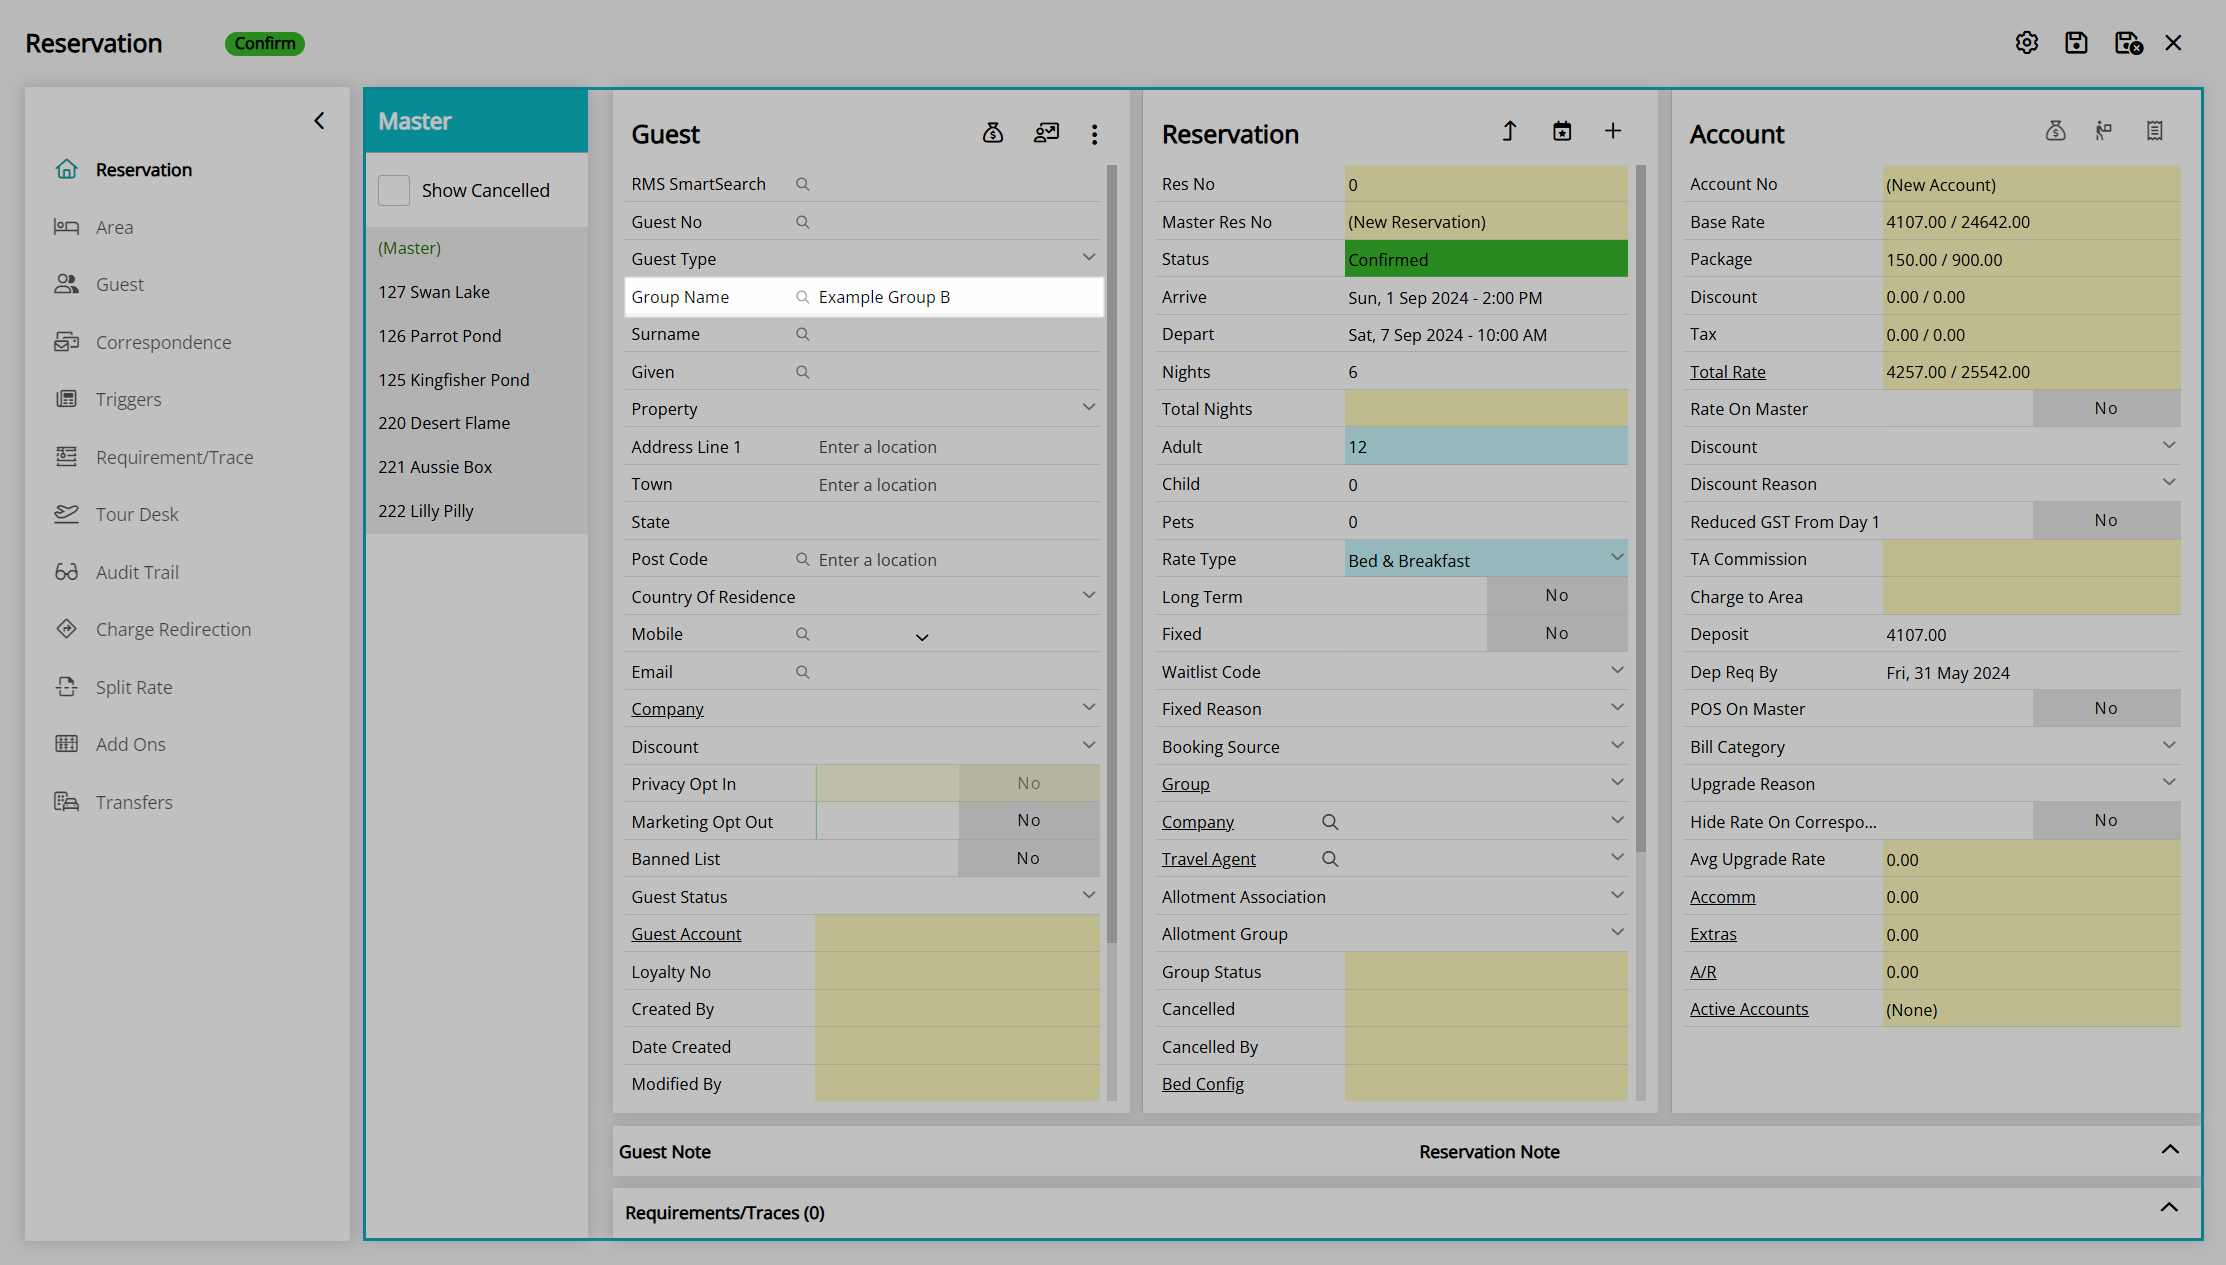
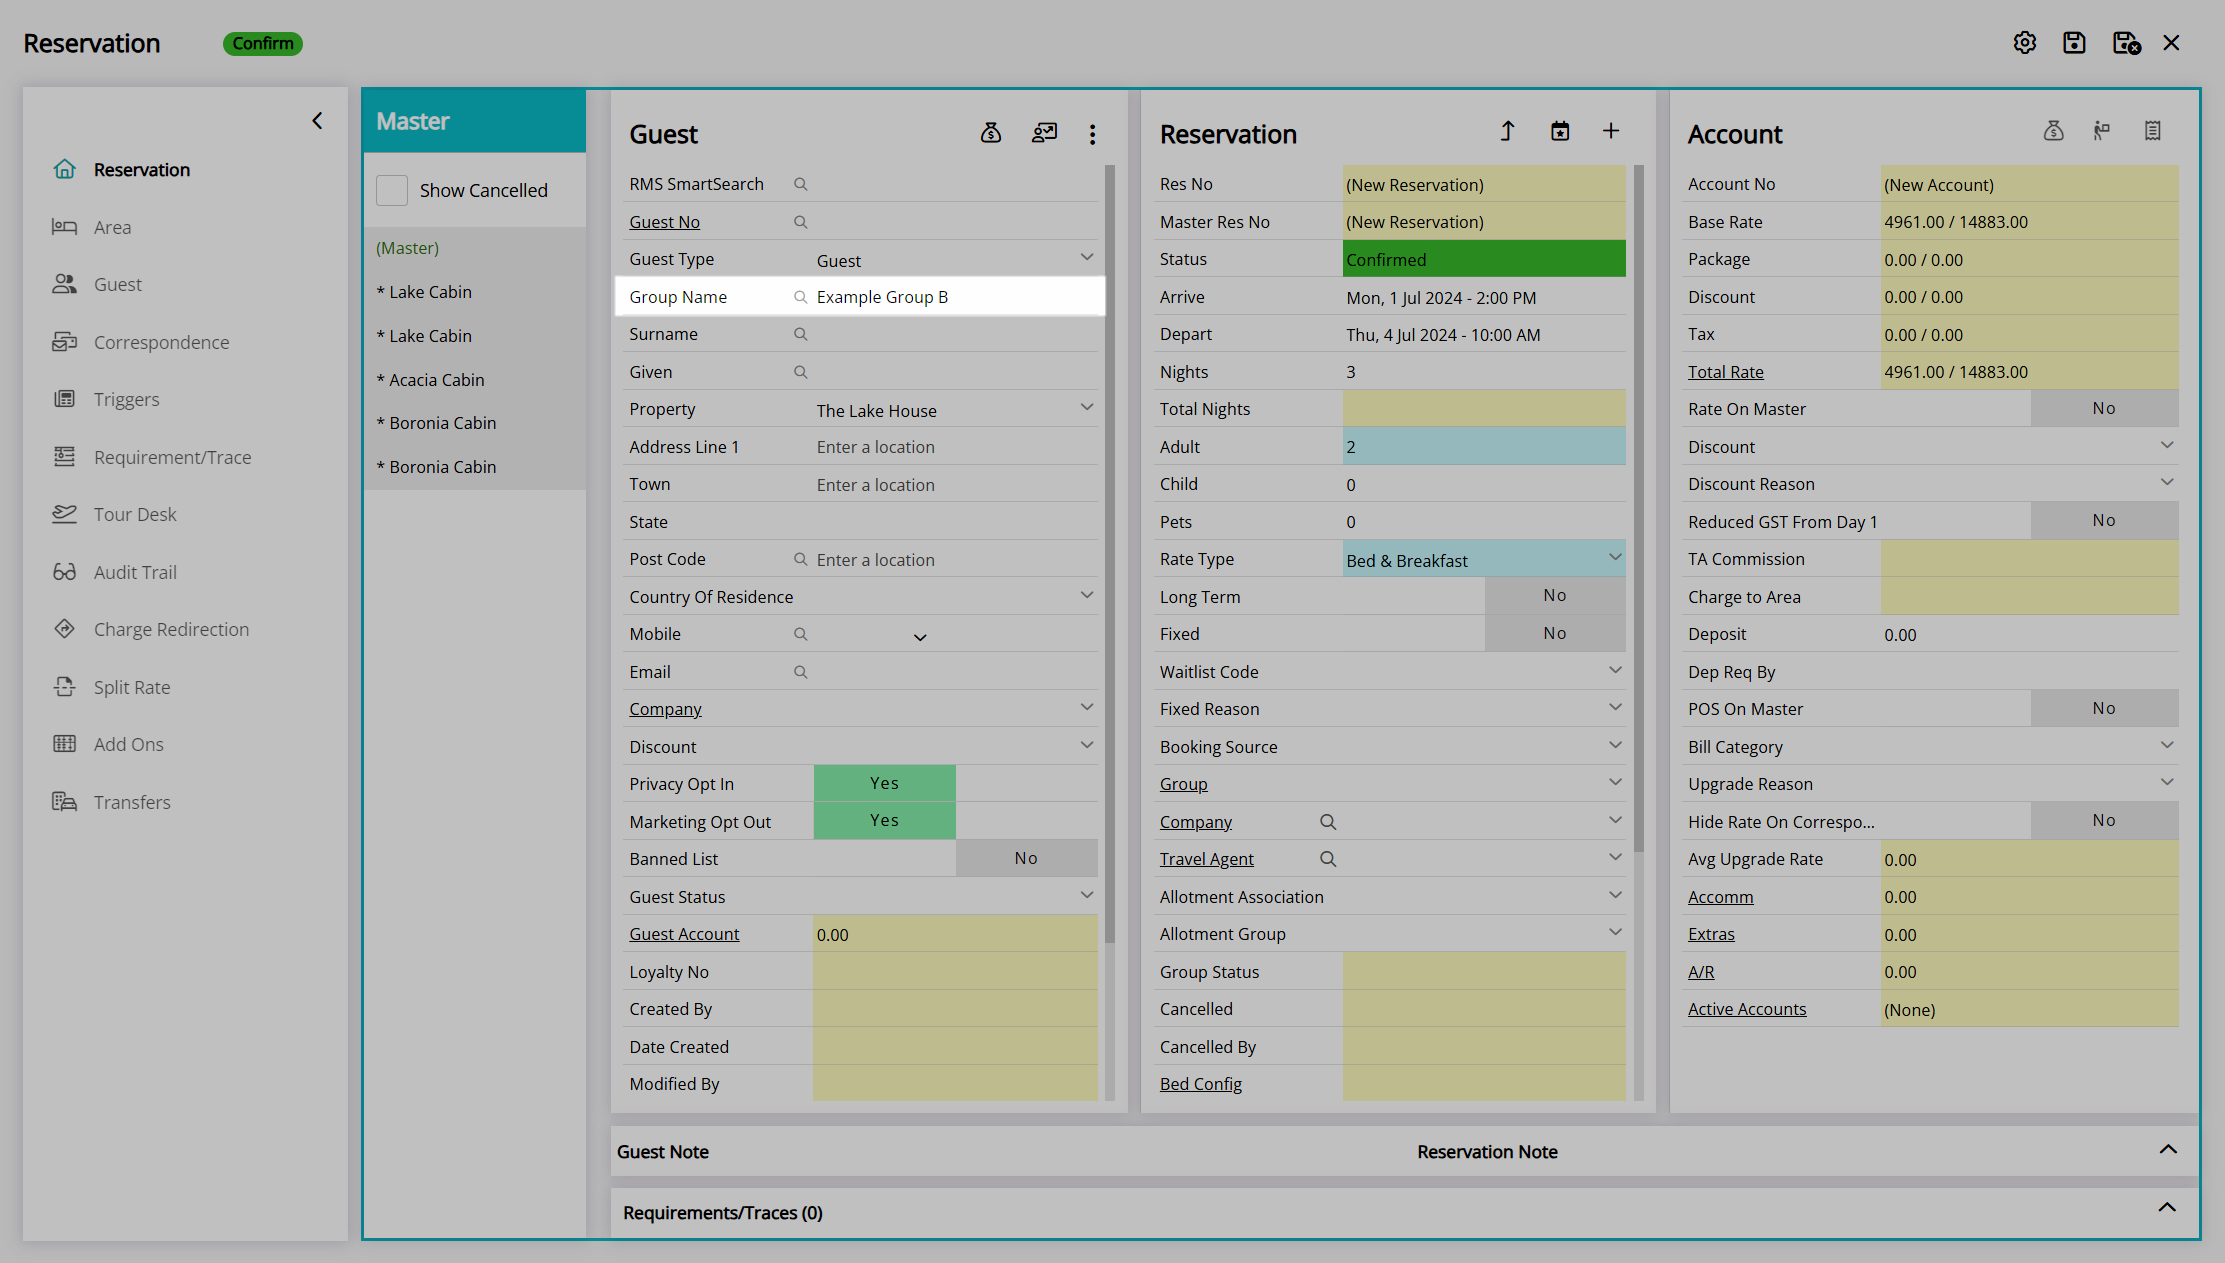
Enter a Group Name.
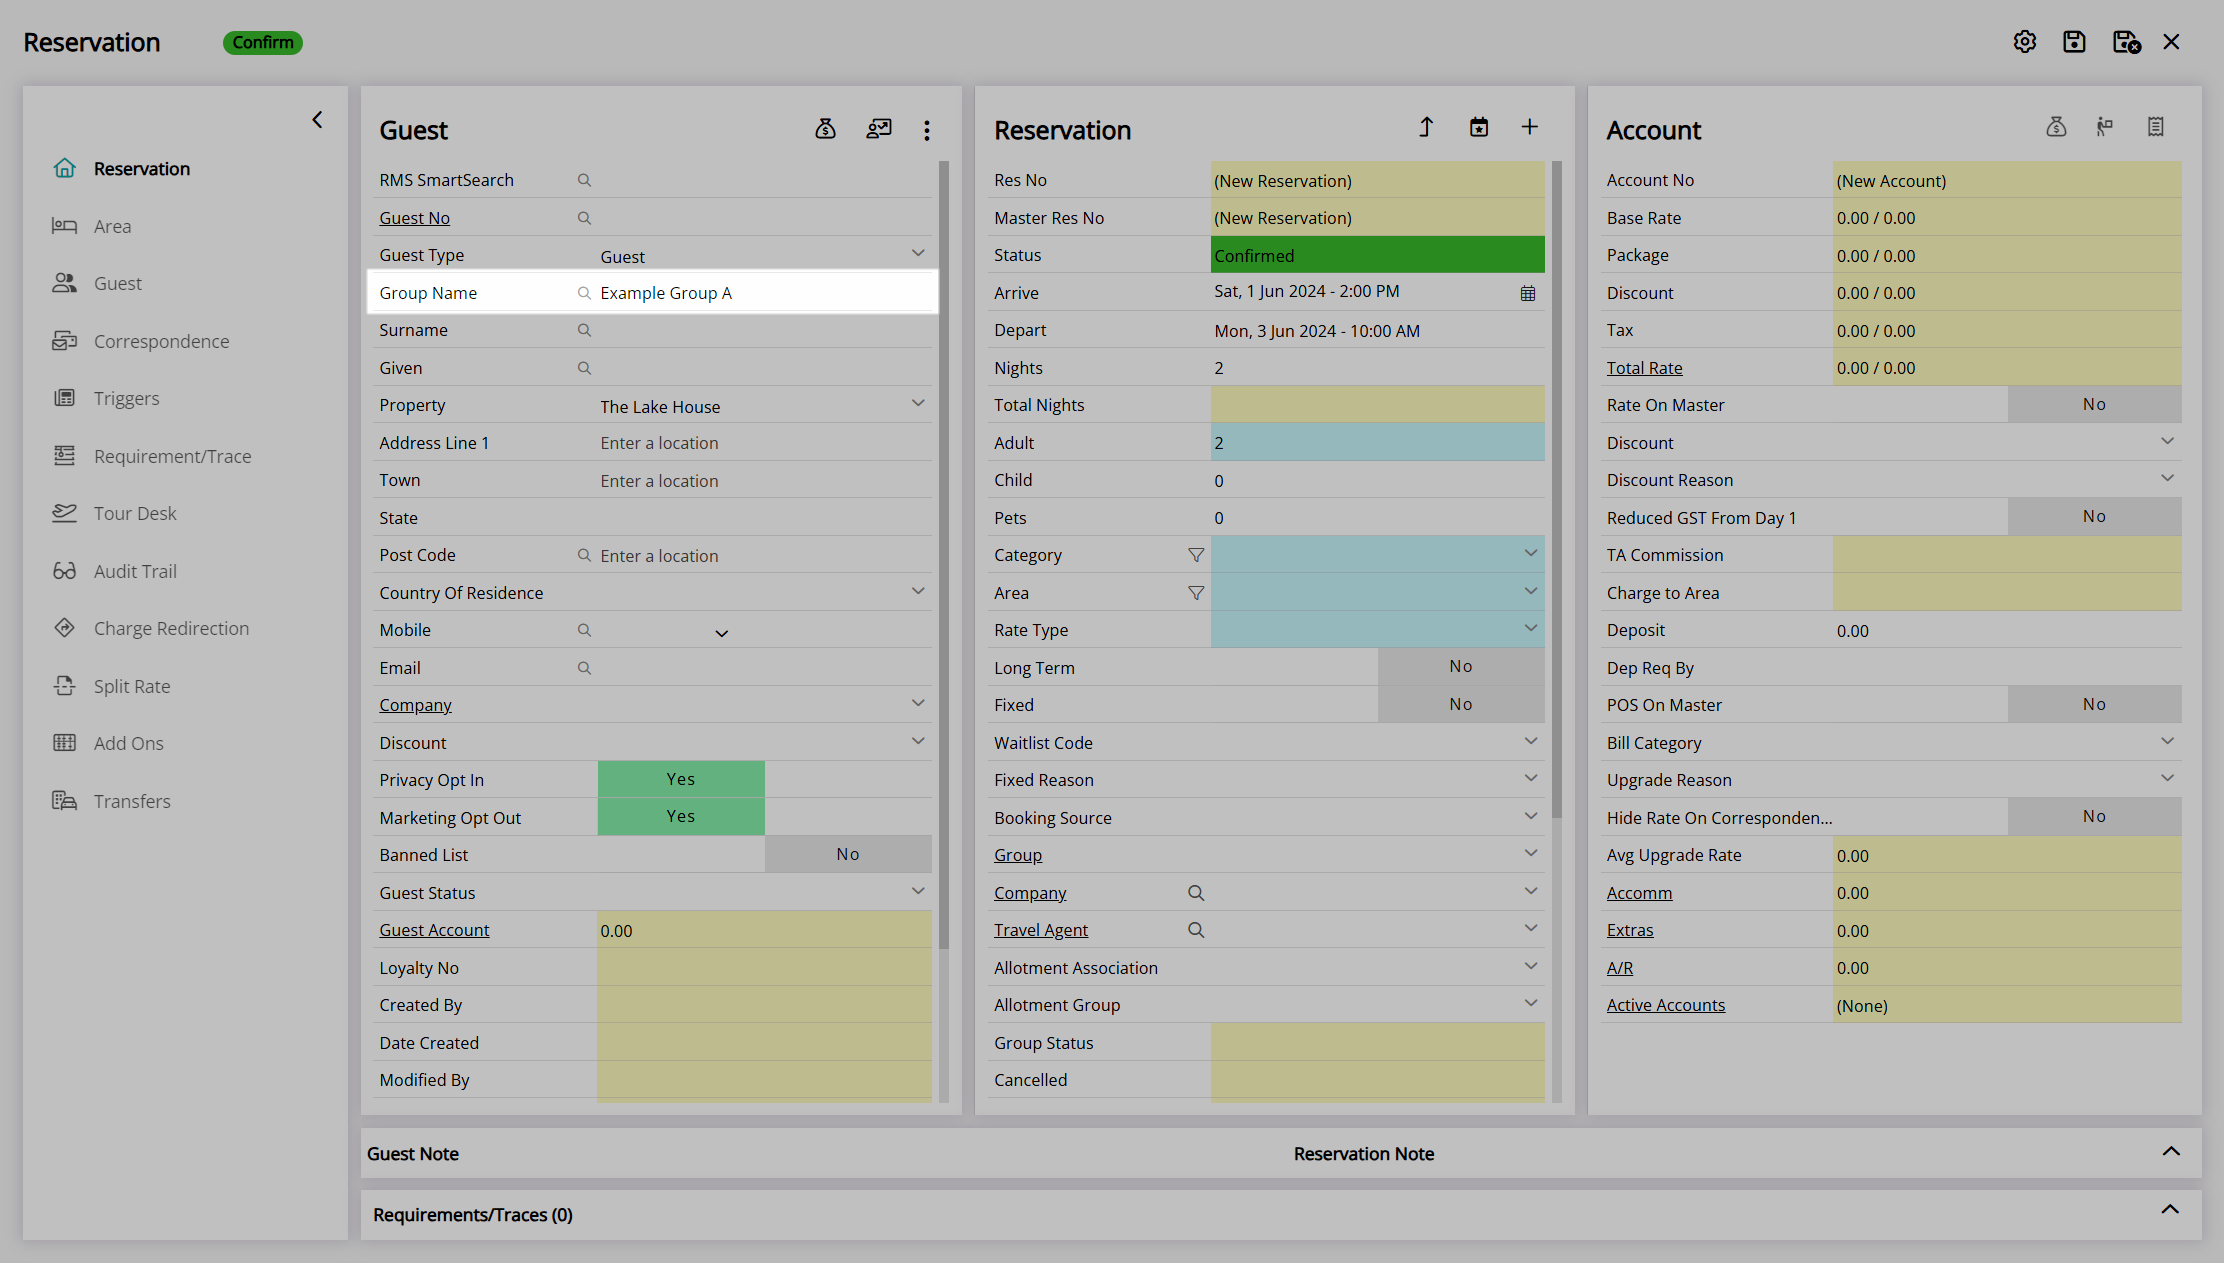
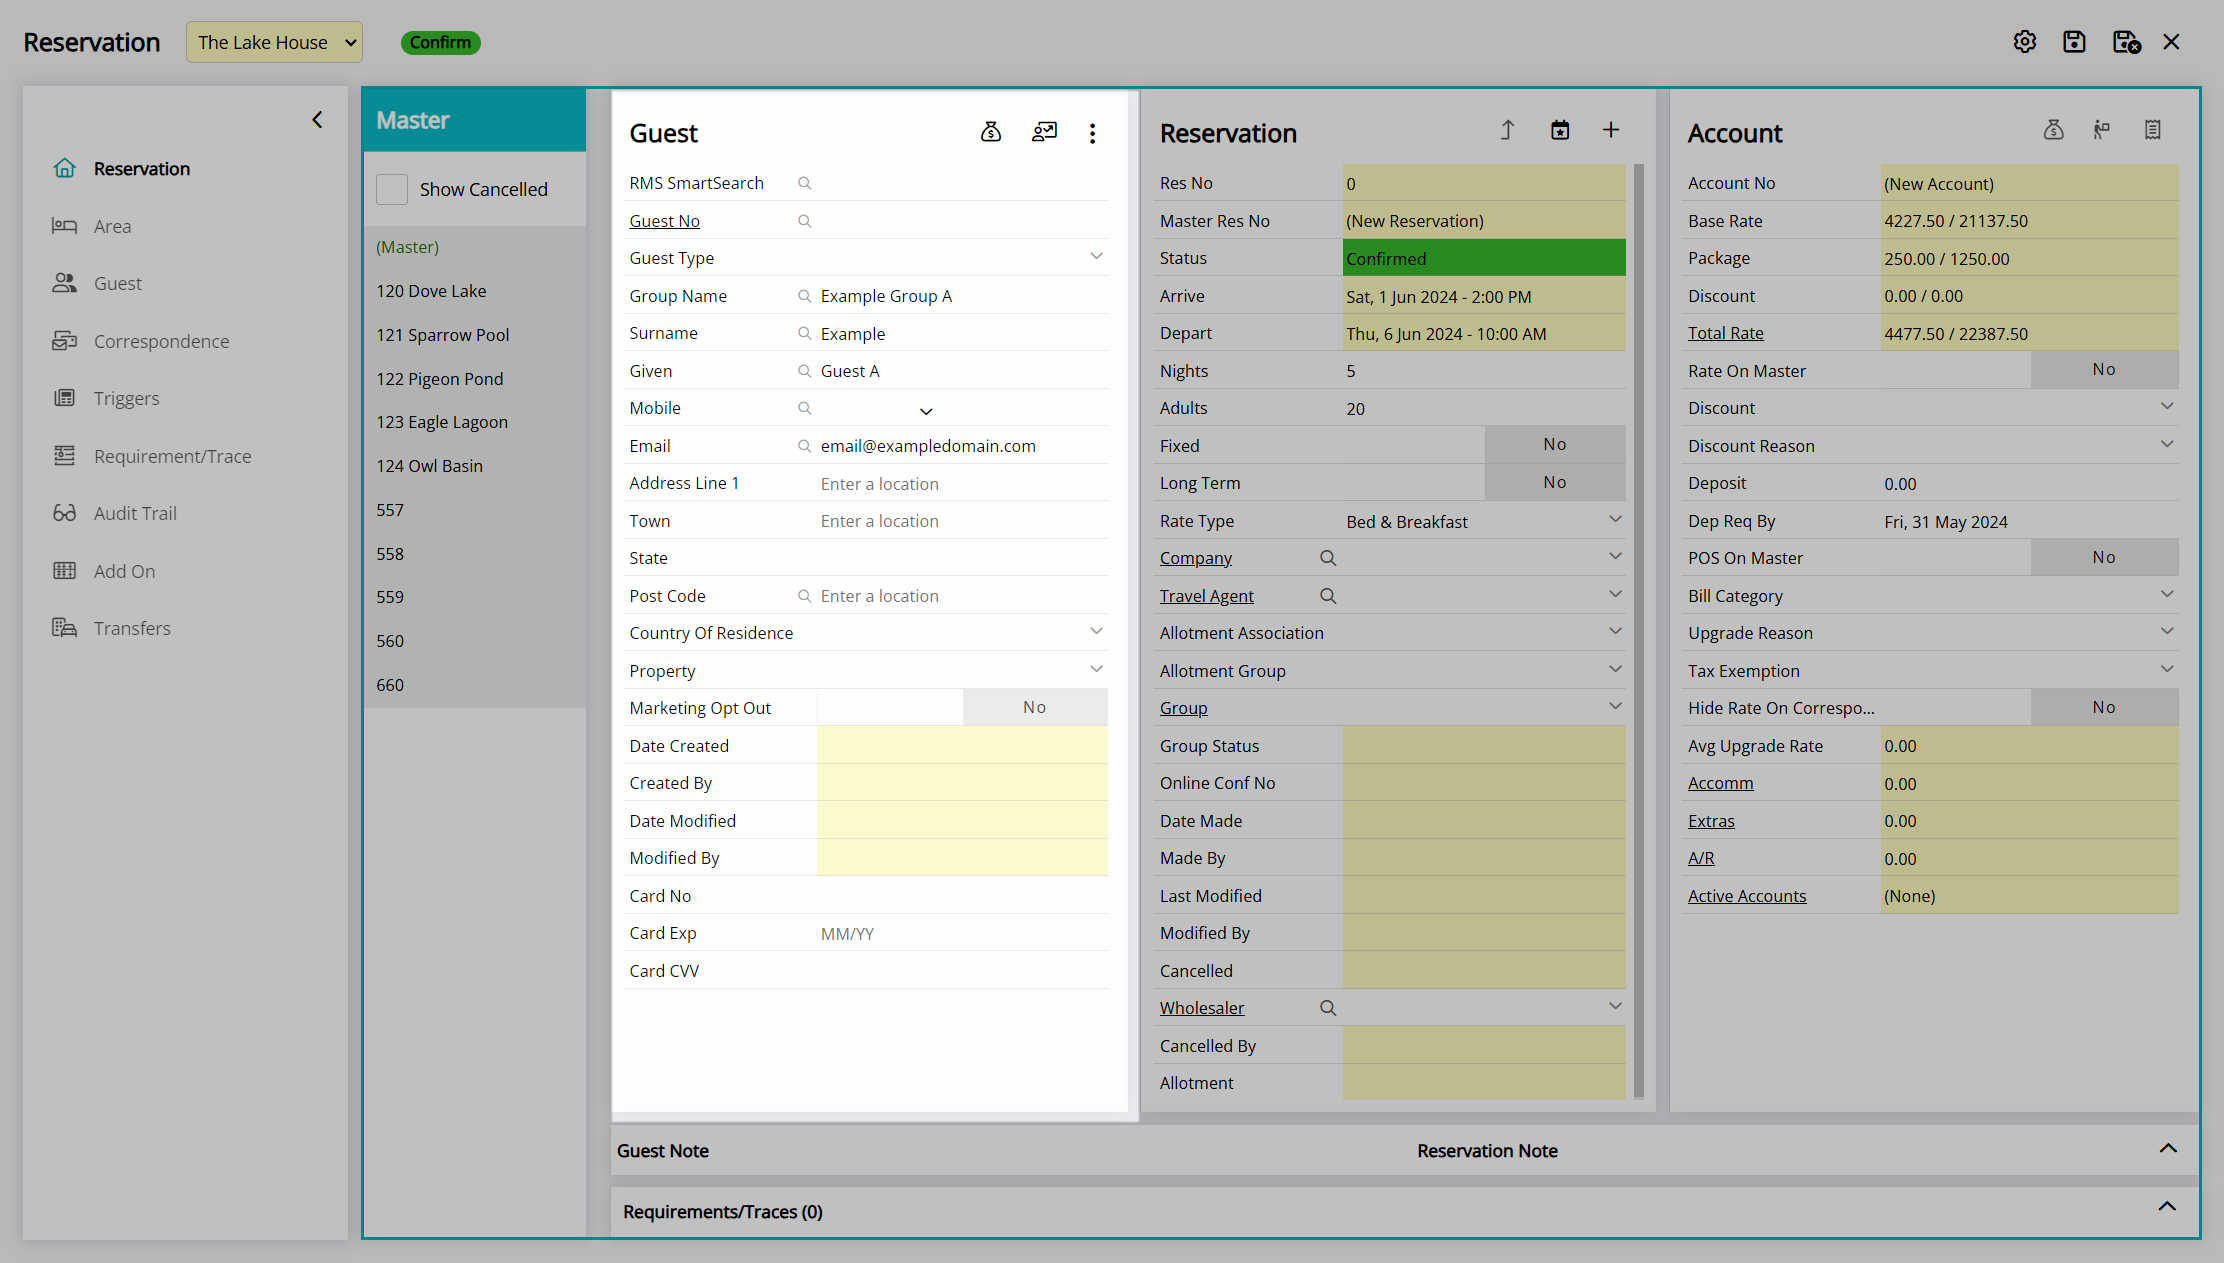
Enter the Group Leader Guest Details.
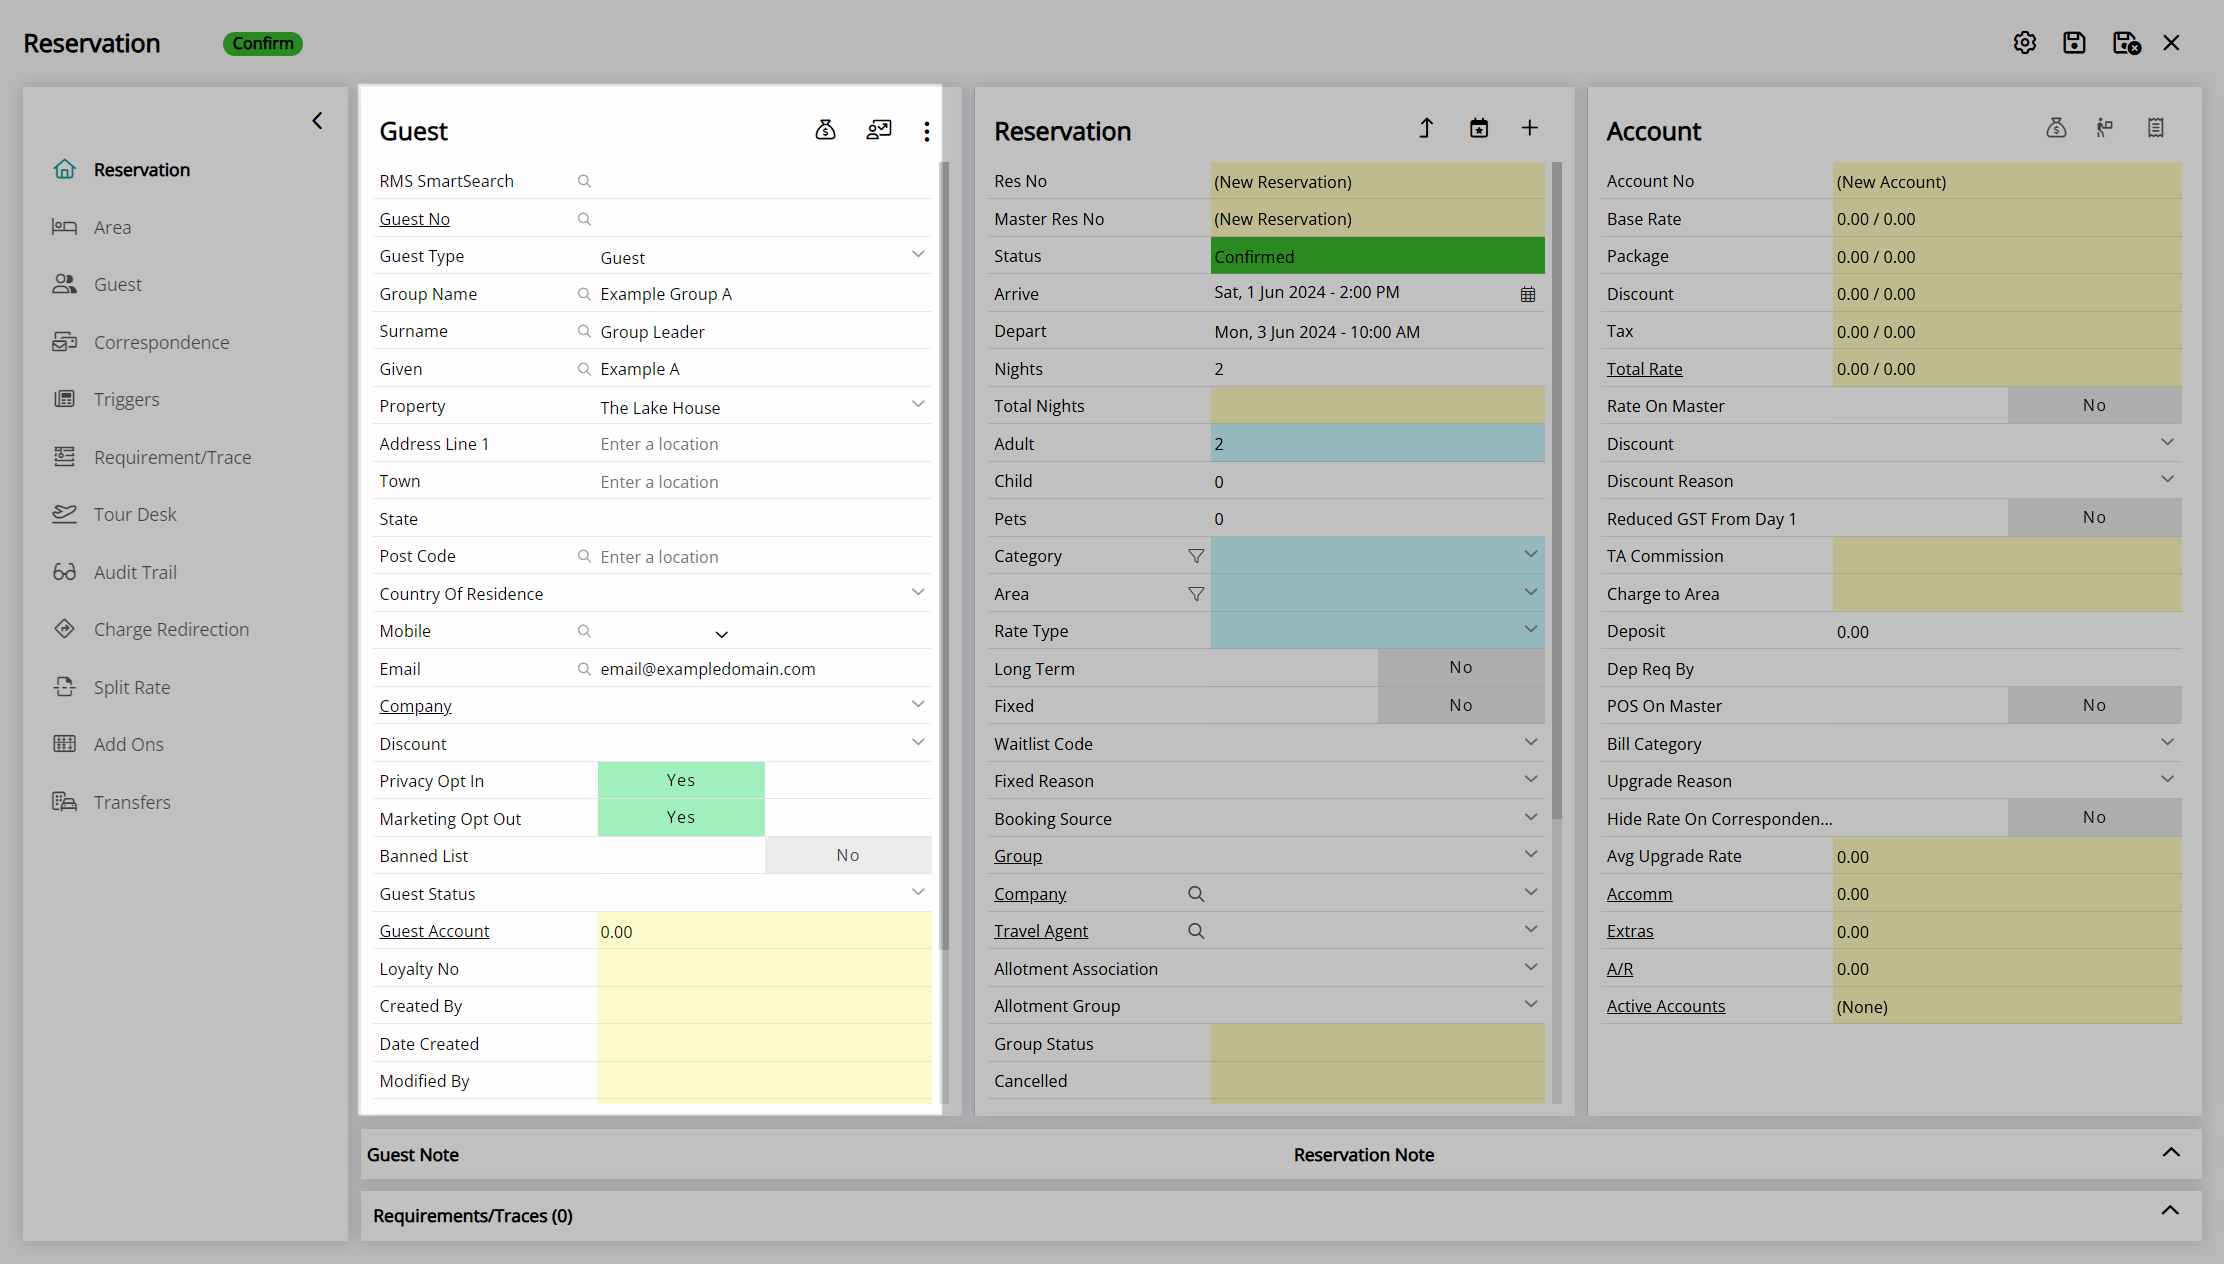
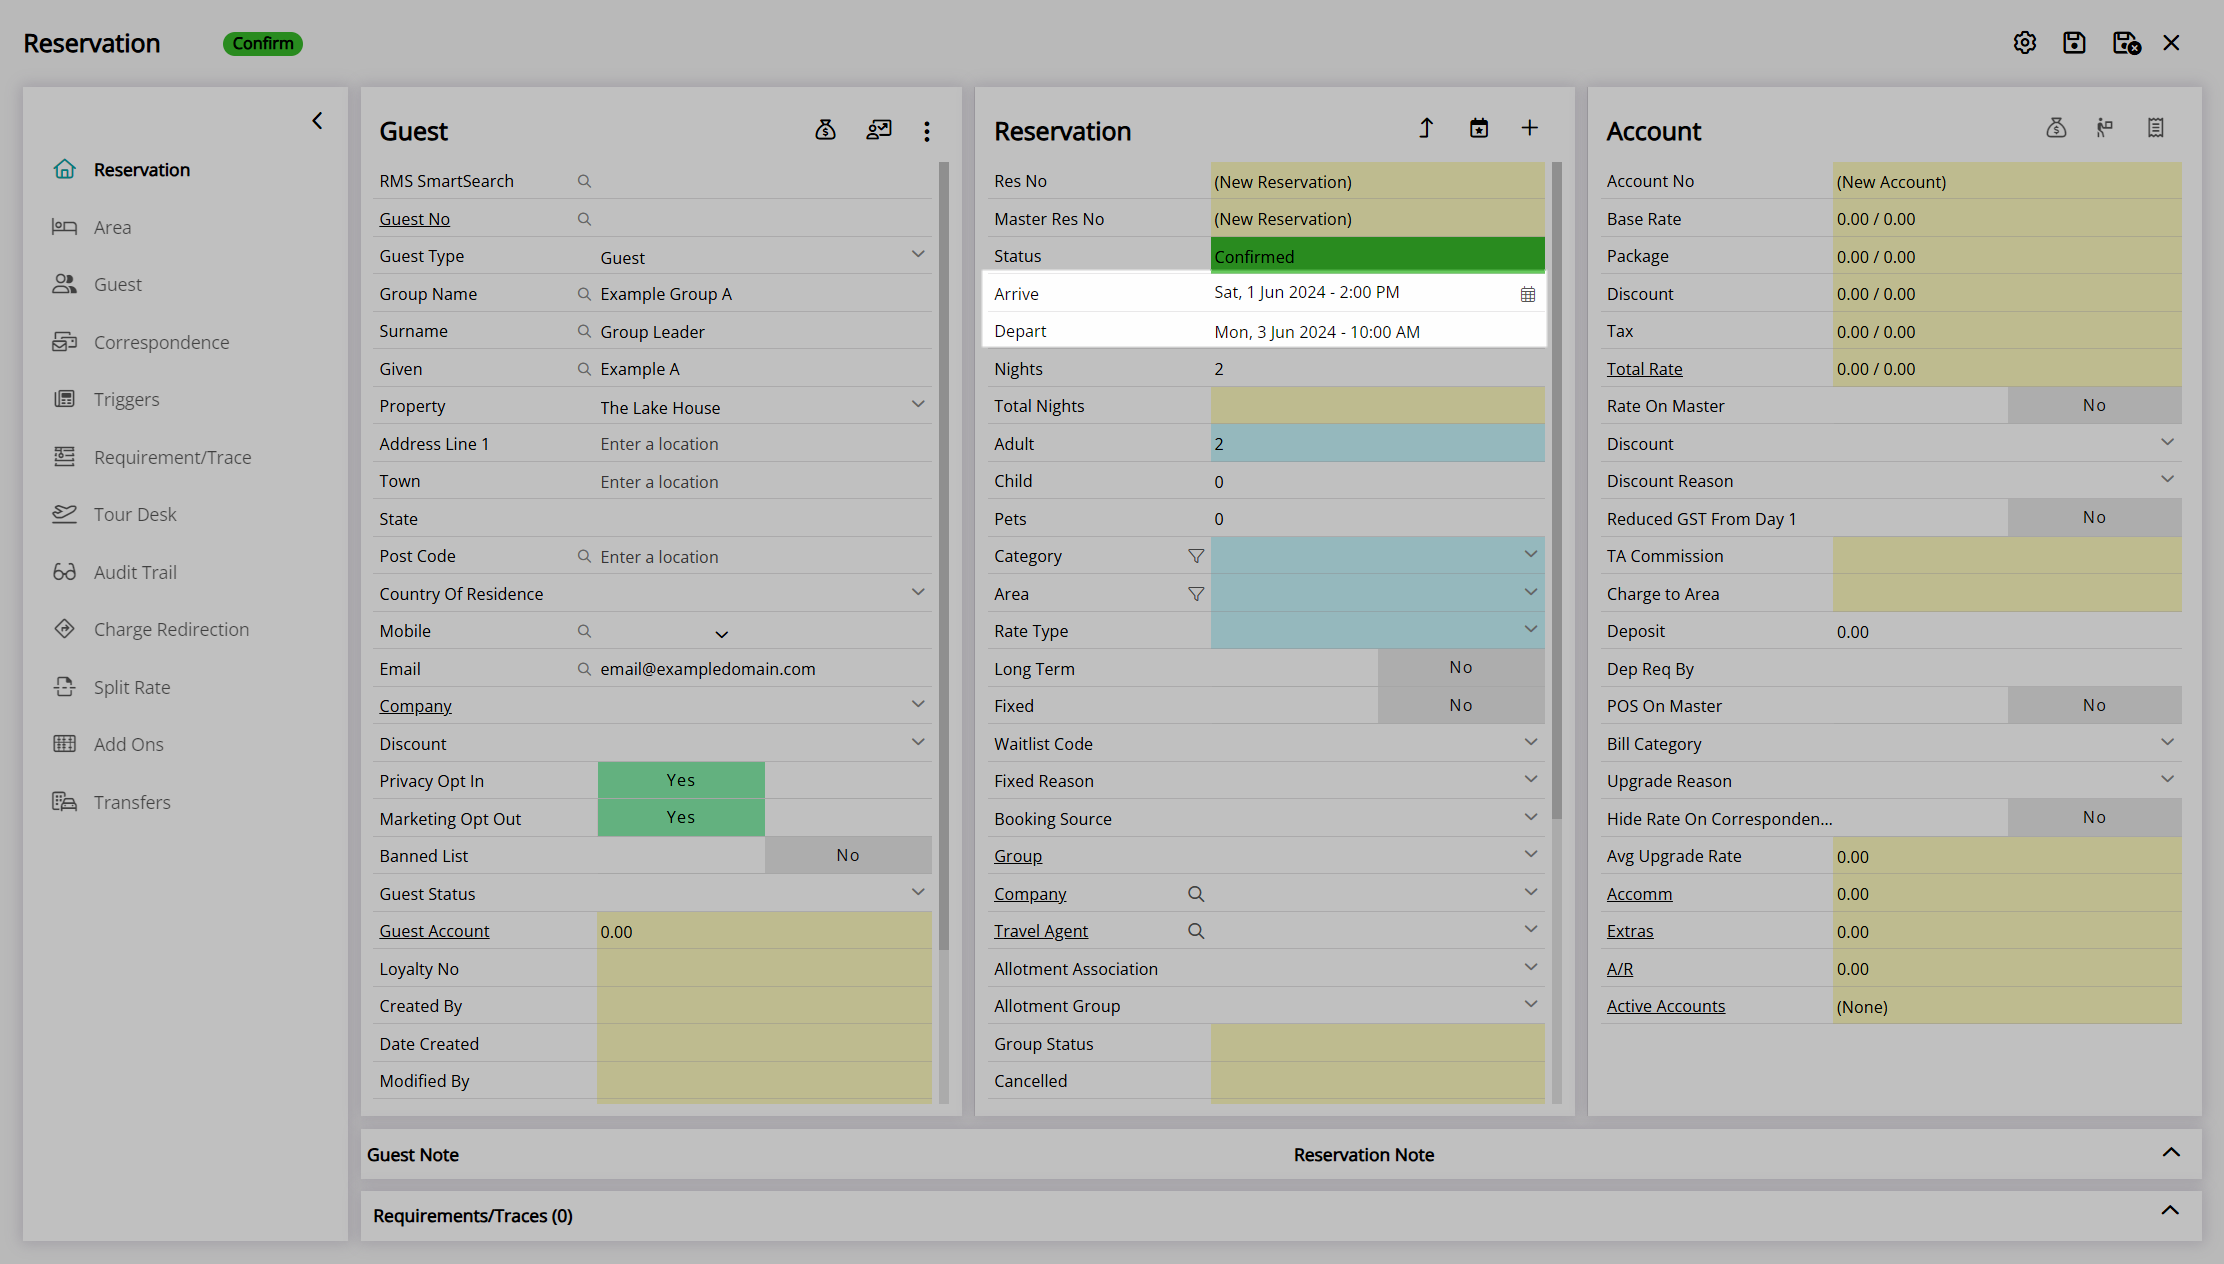
Select an Arrive and Depart Date.
Select the ![]() 'Add Area' icon.
'Add Area' icon.
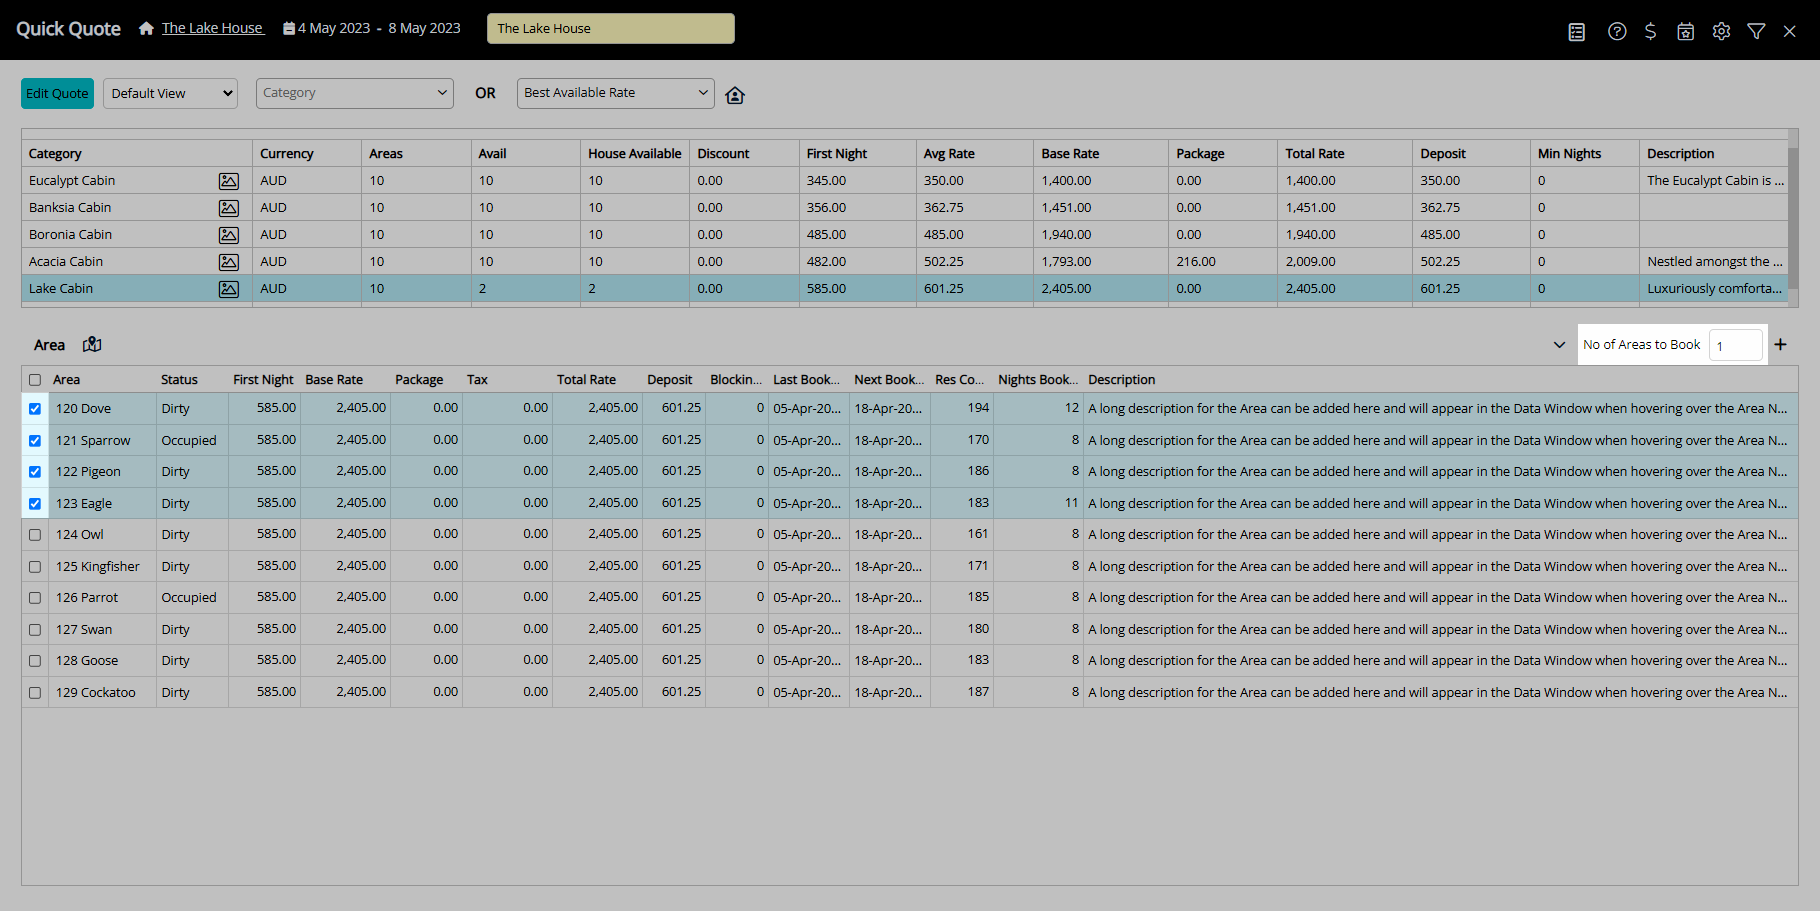
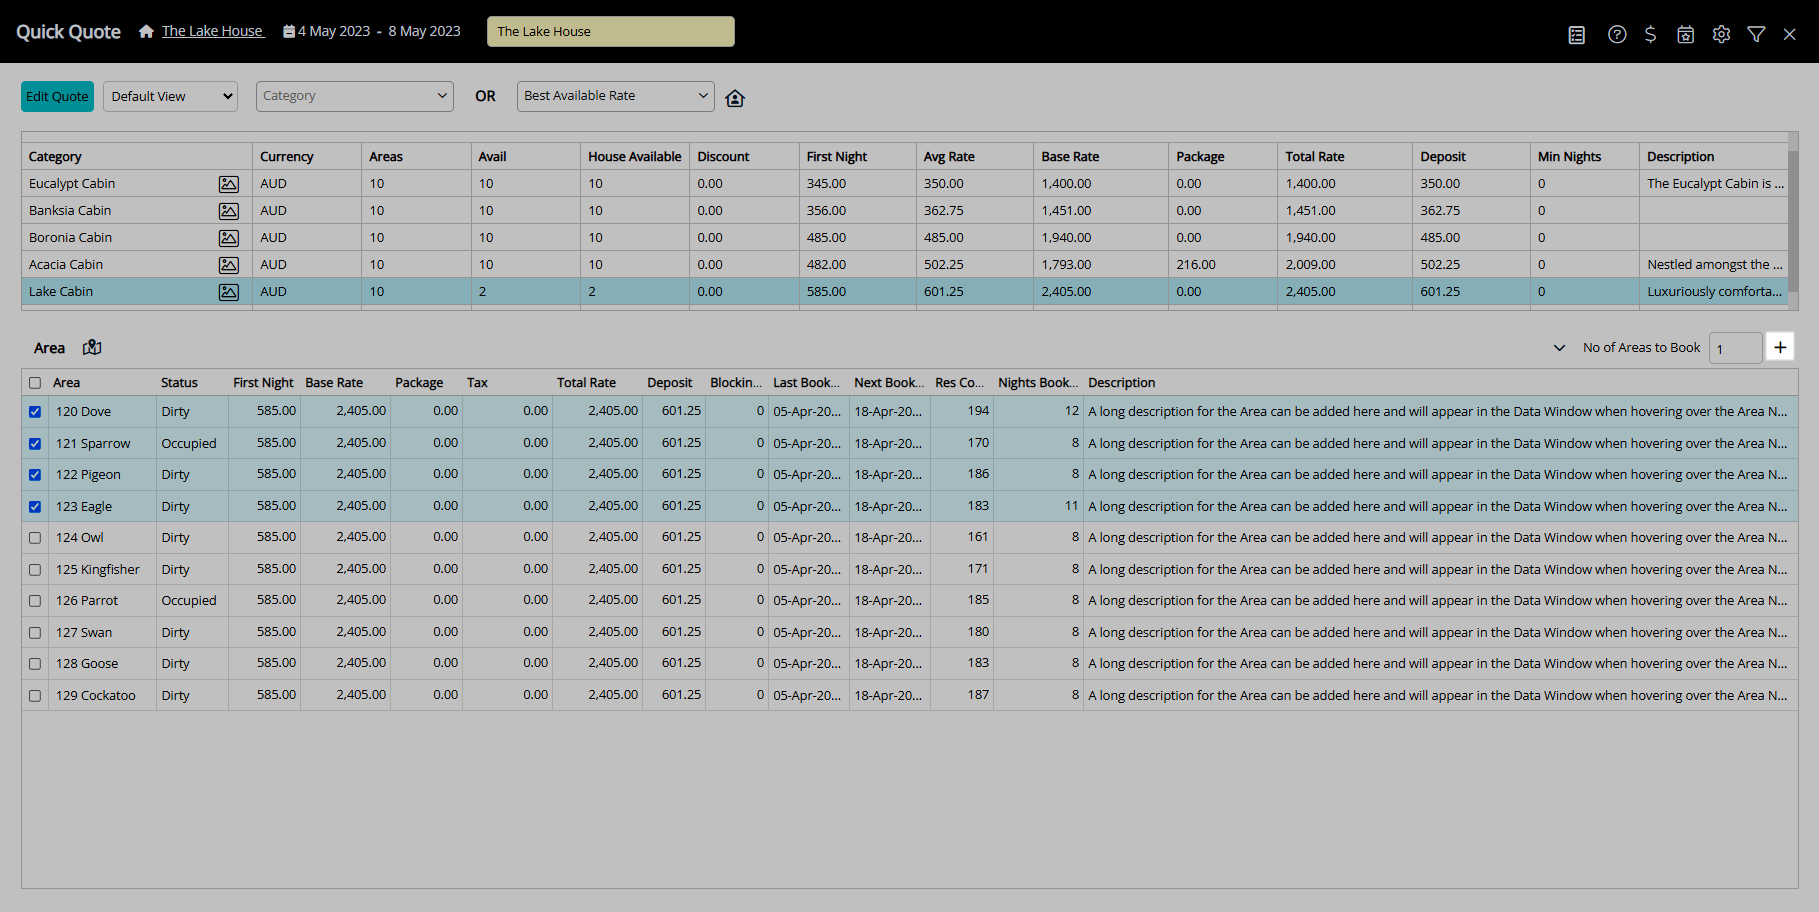
Perform a Quick Quote Search.
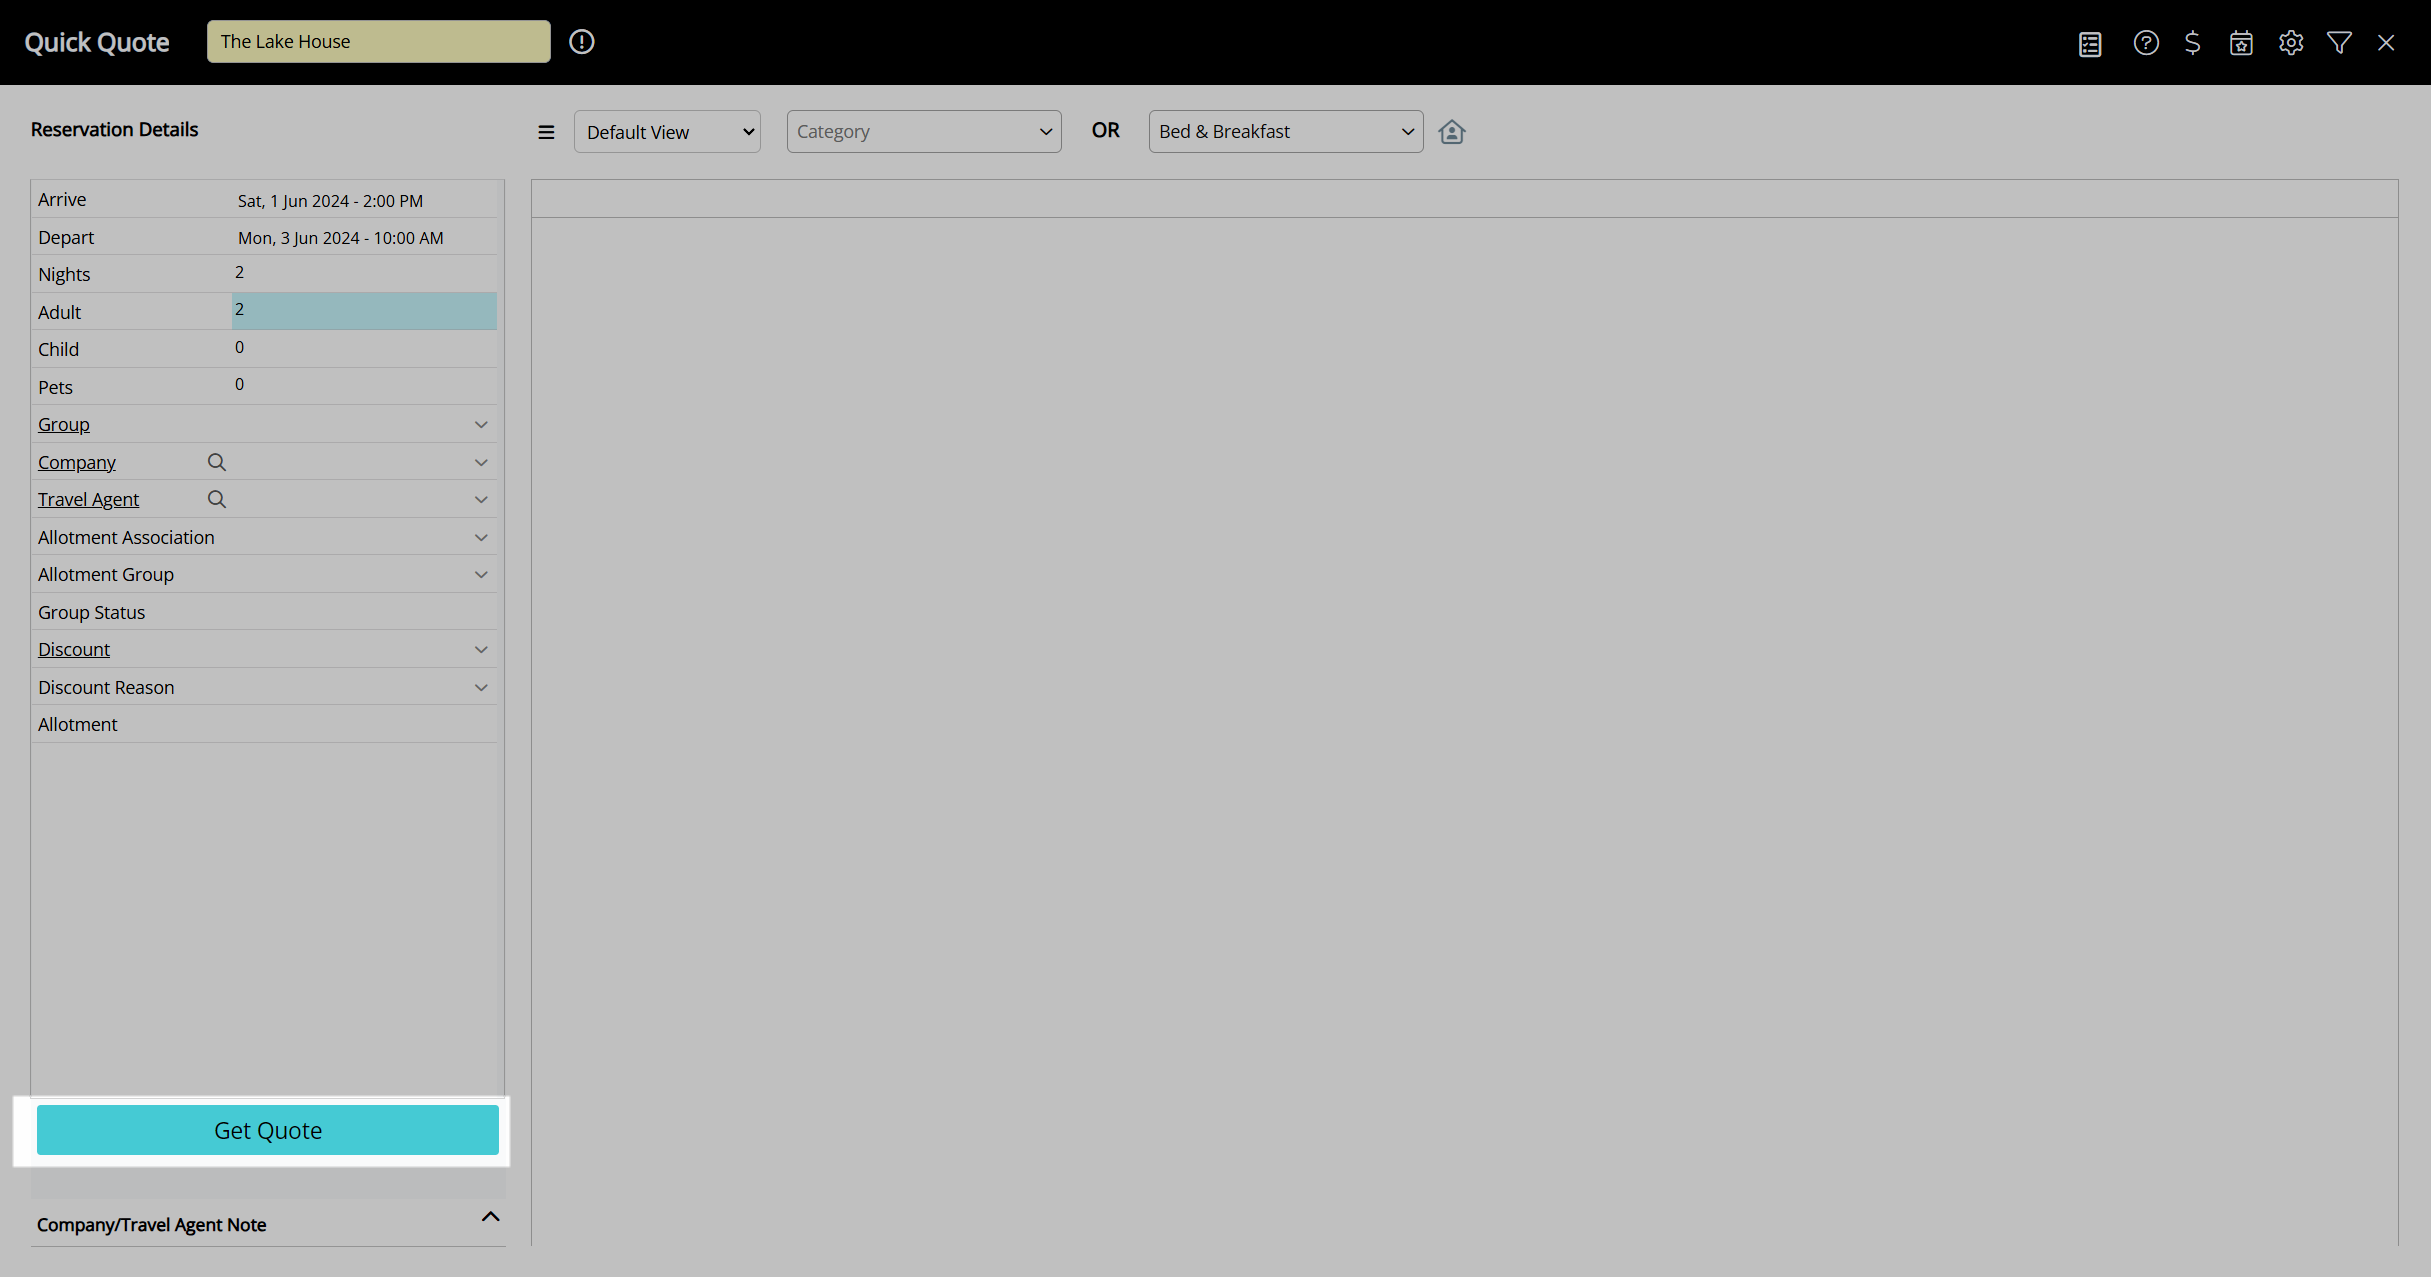
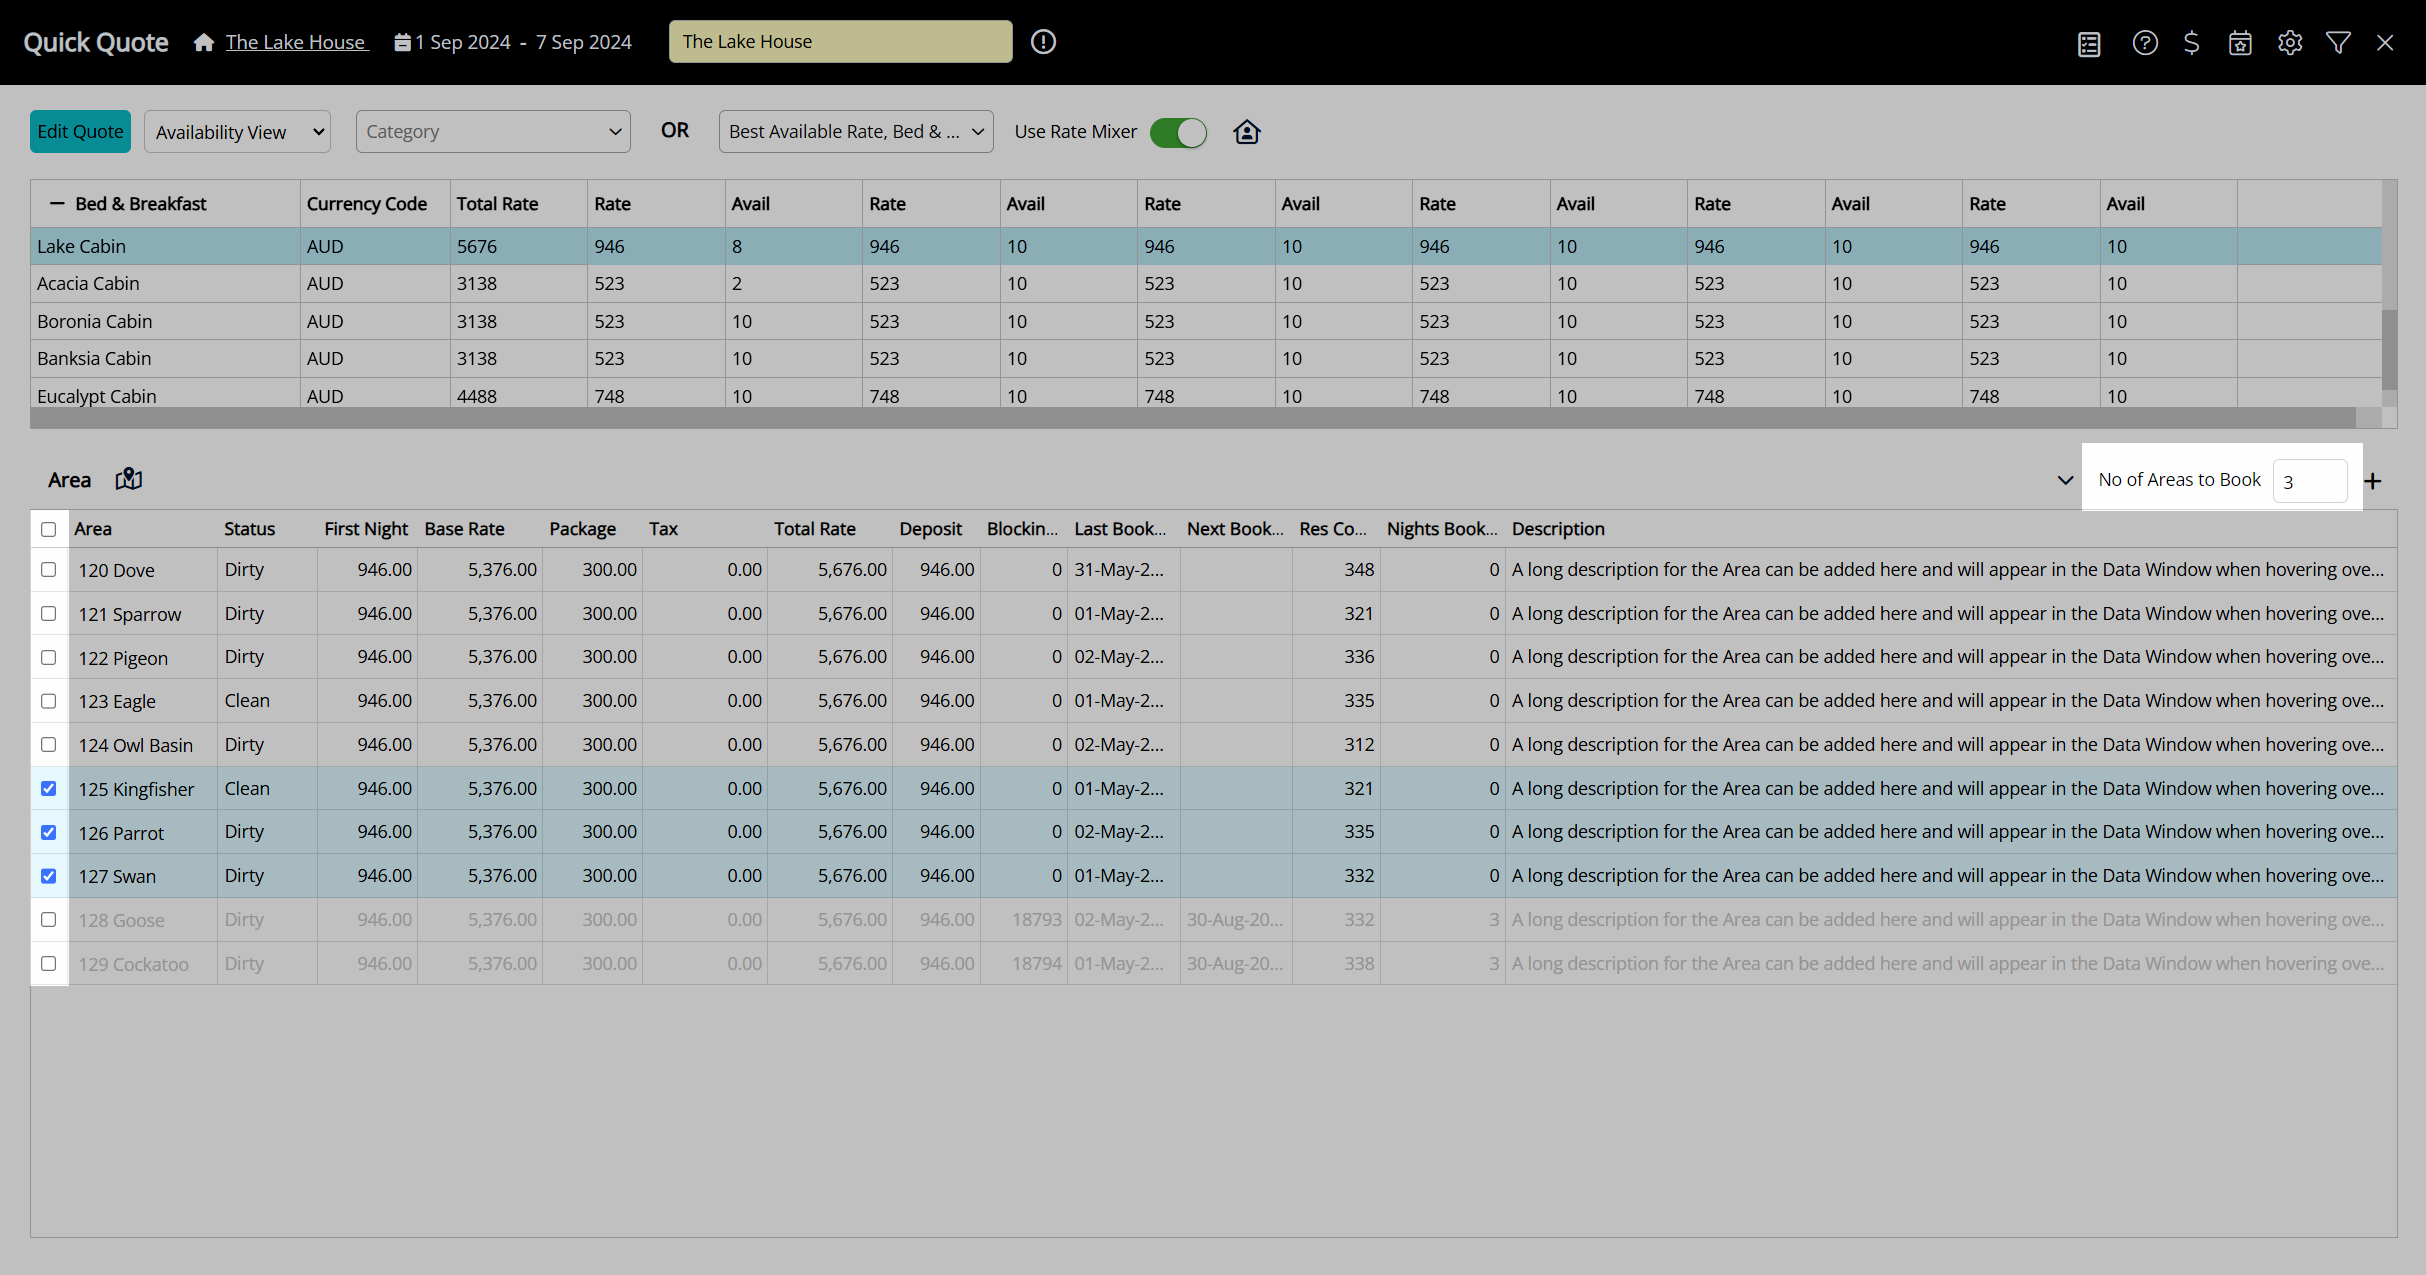
Select a Category or Rate Type.
Select the checkbox for an Area or enter the Number of Areas to Book.
Select the ![]() 'Add to Reservation' icon.
'Add to Reservation' icon.
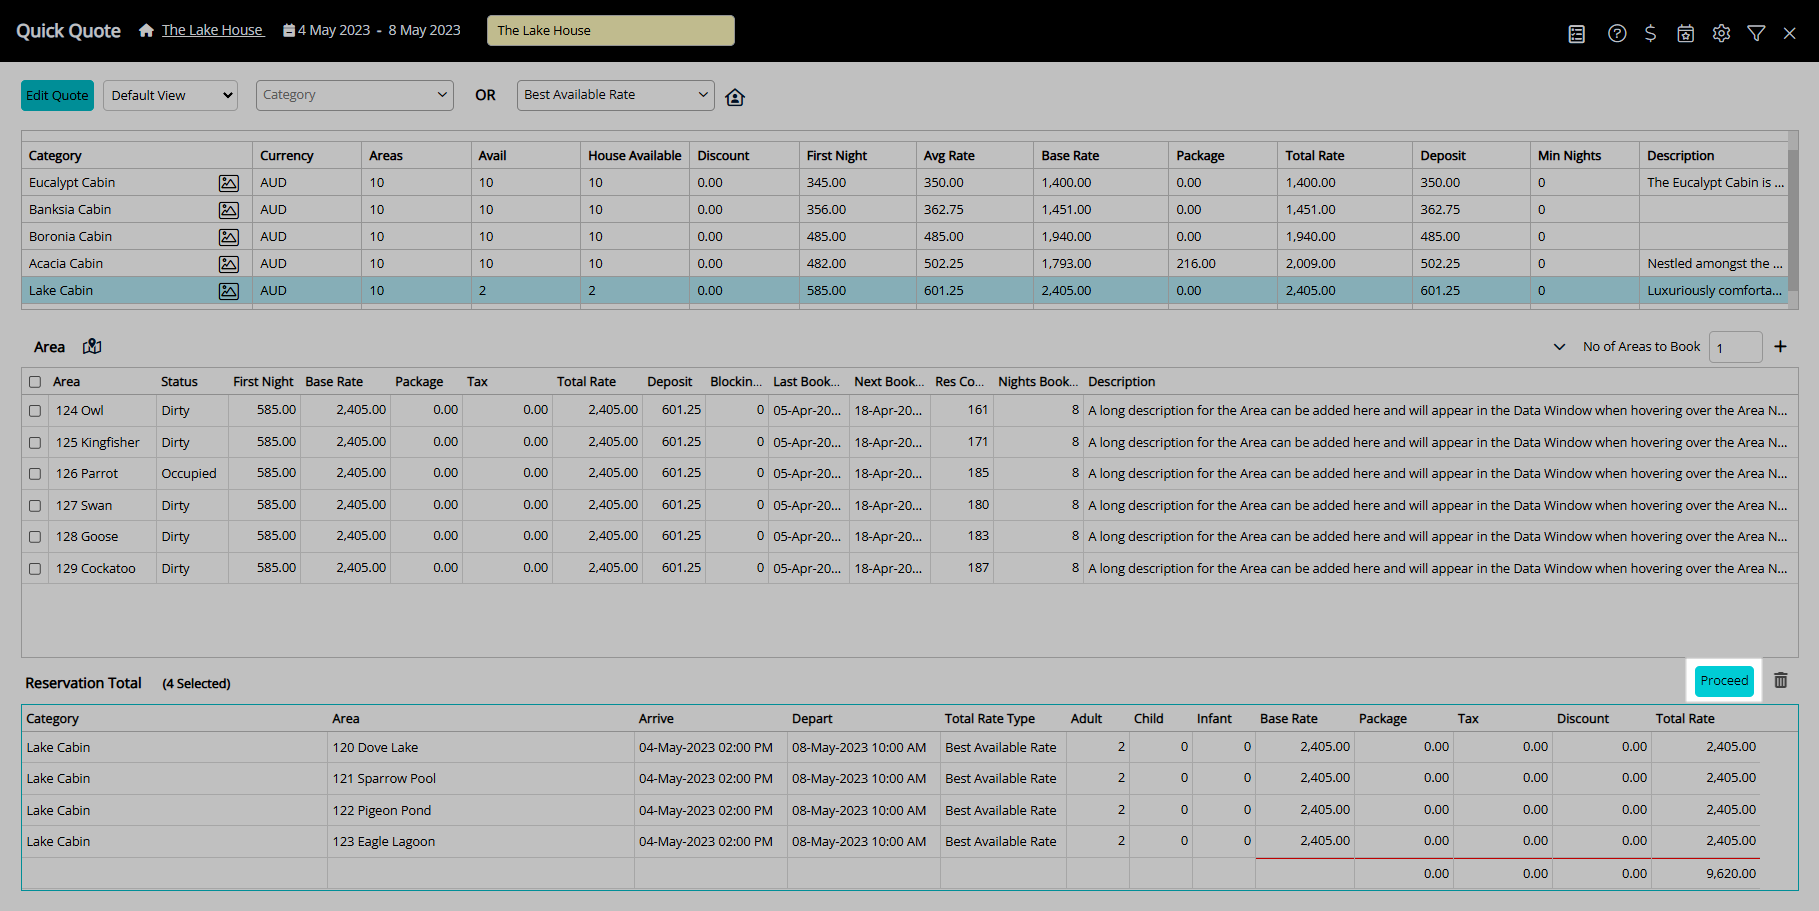
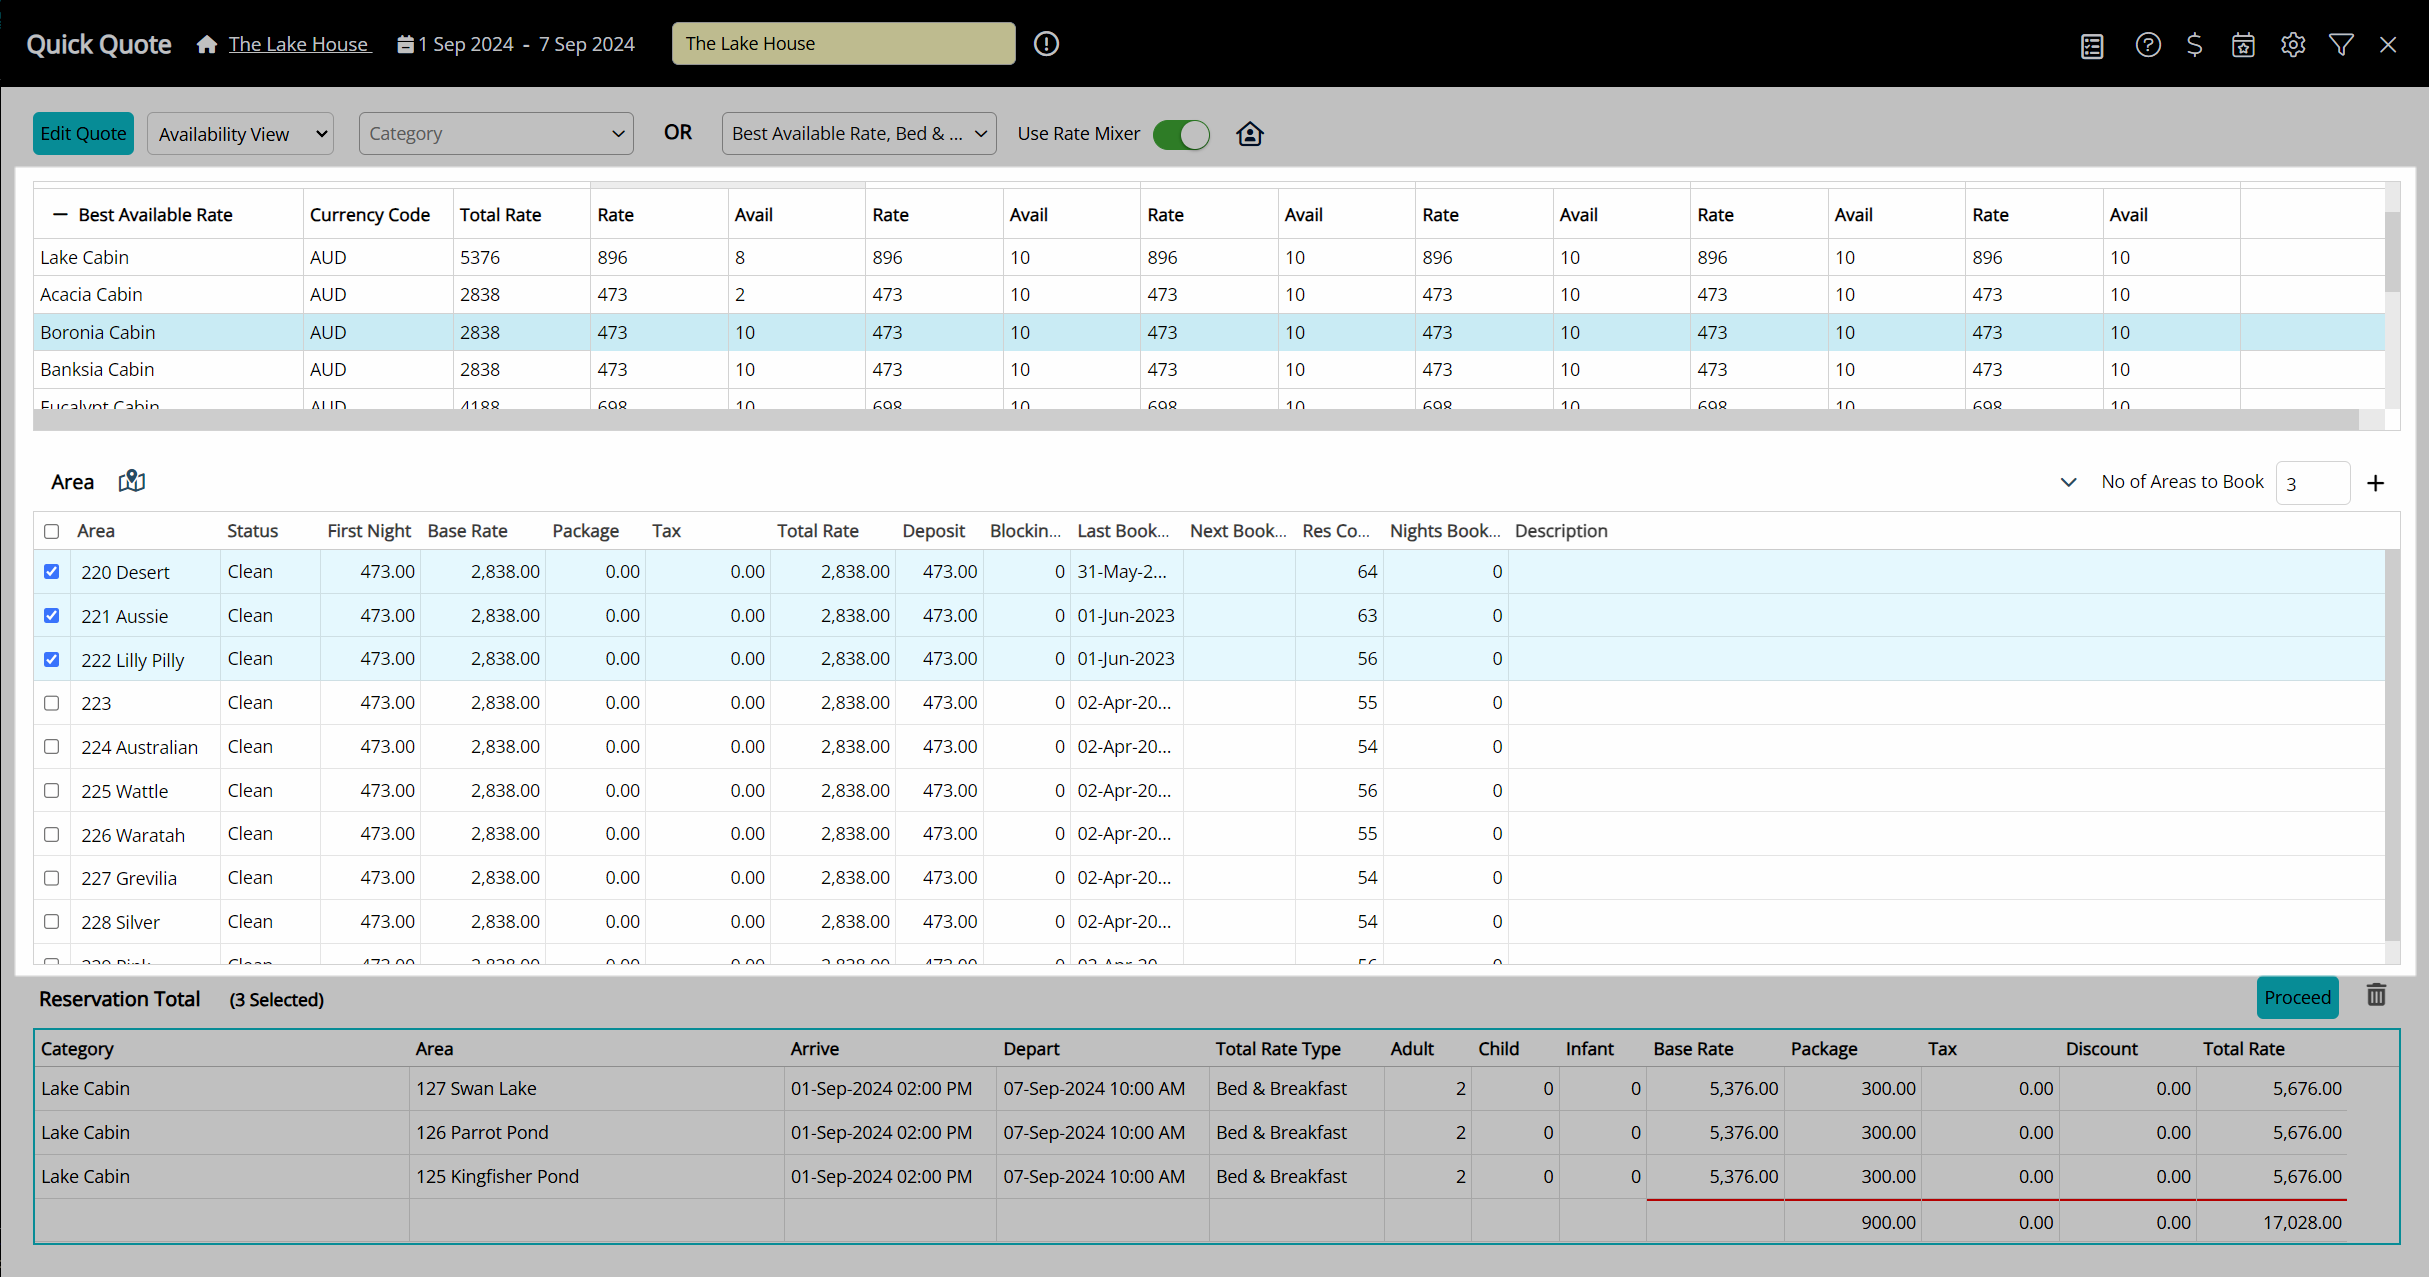
Select 'Proceed'.
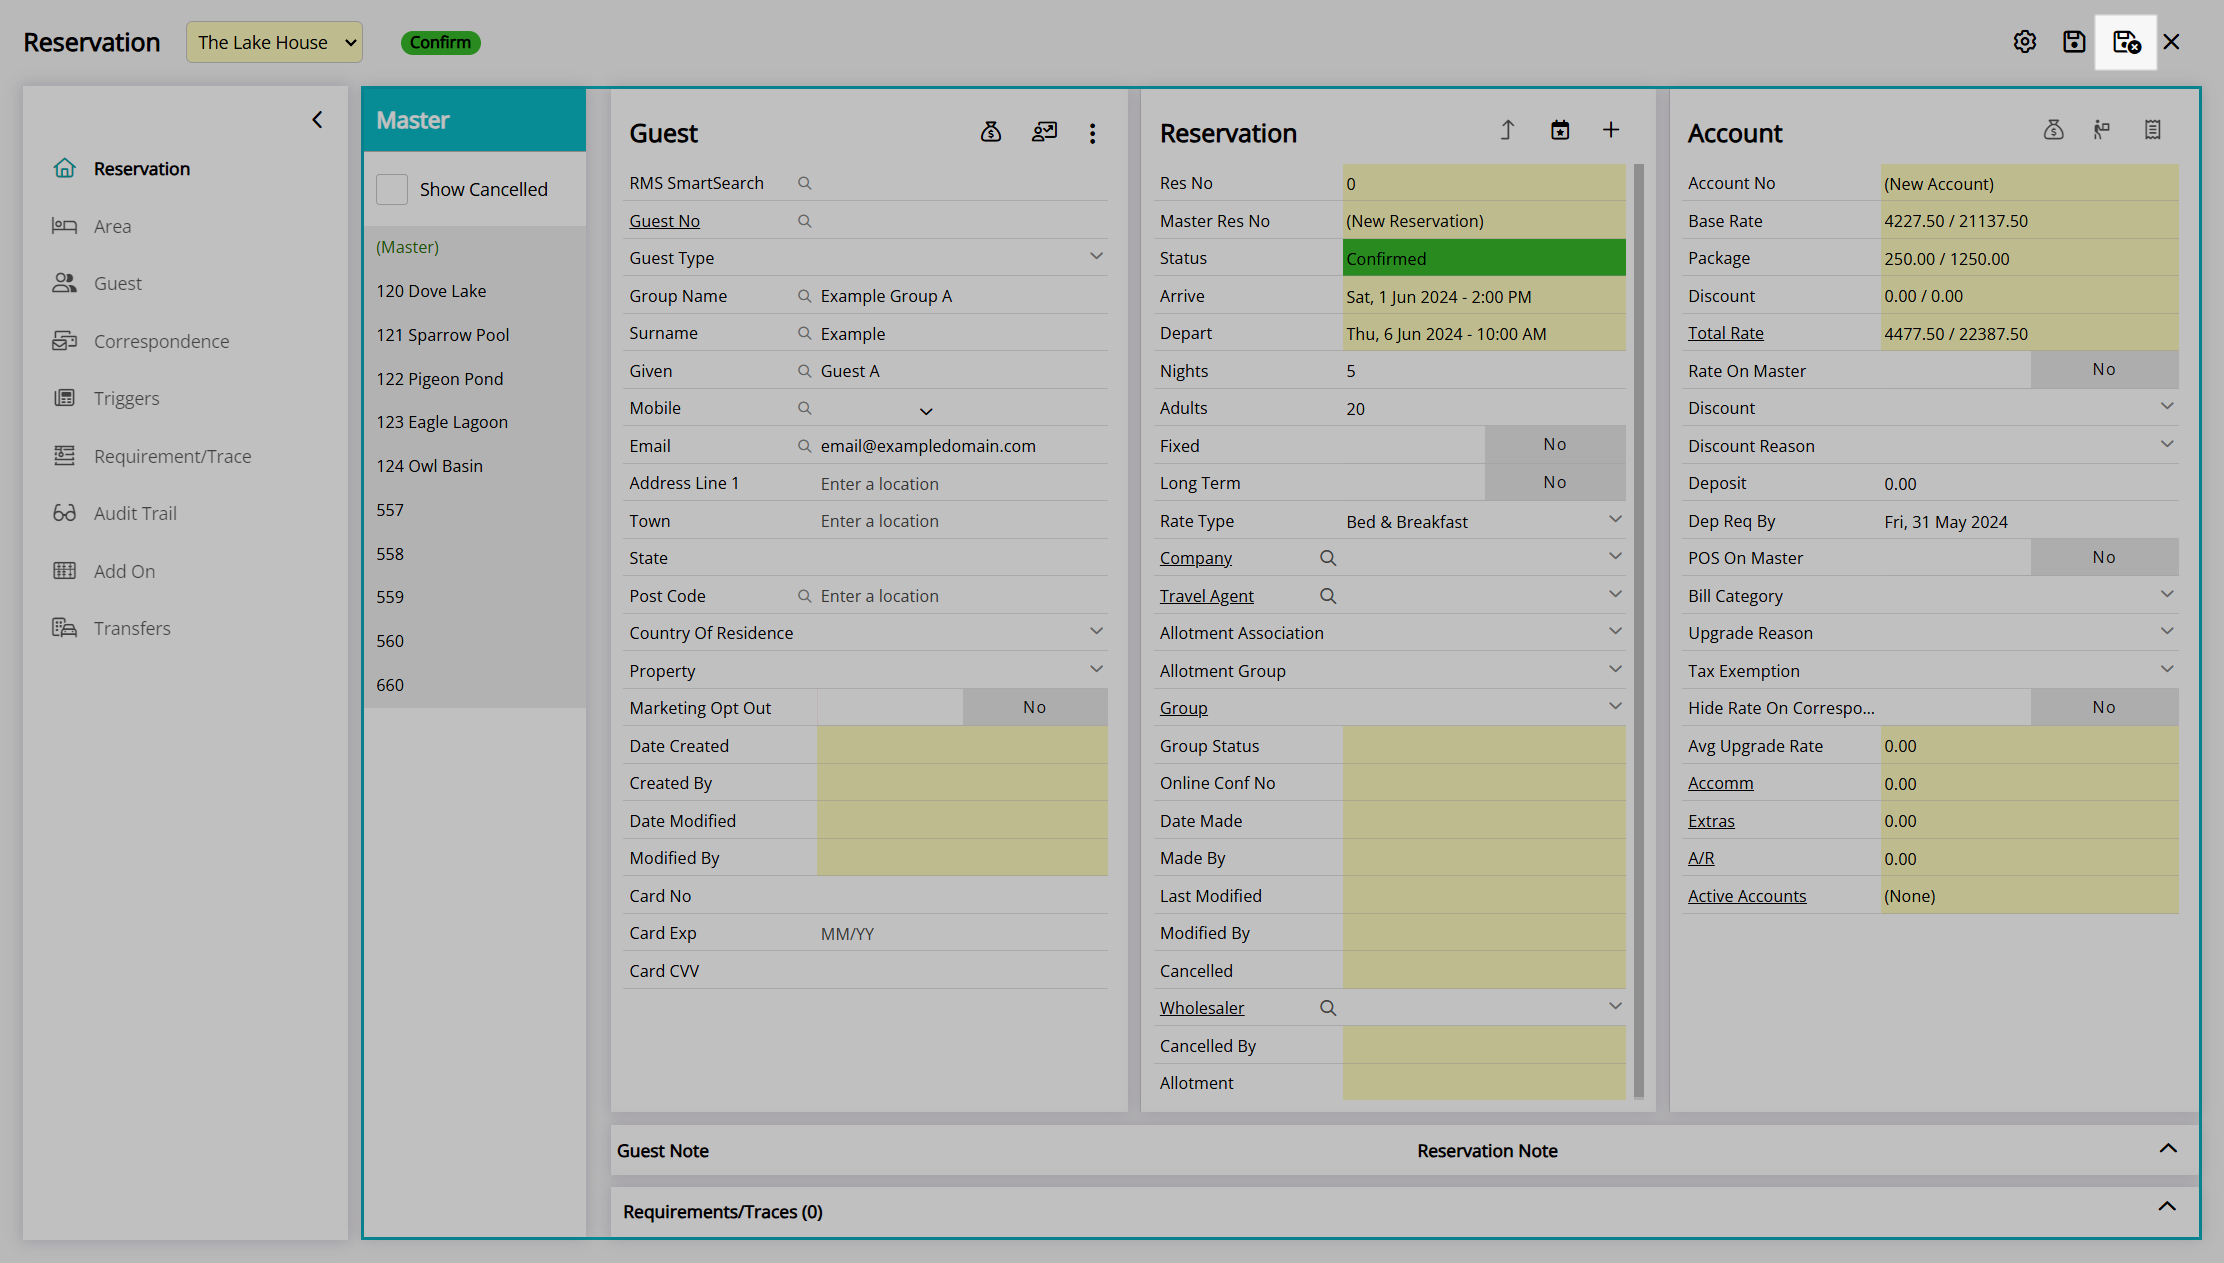
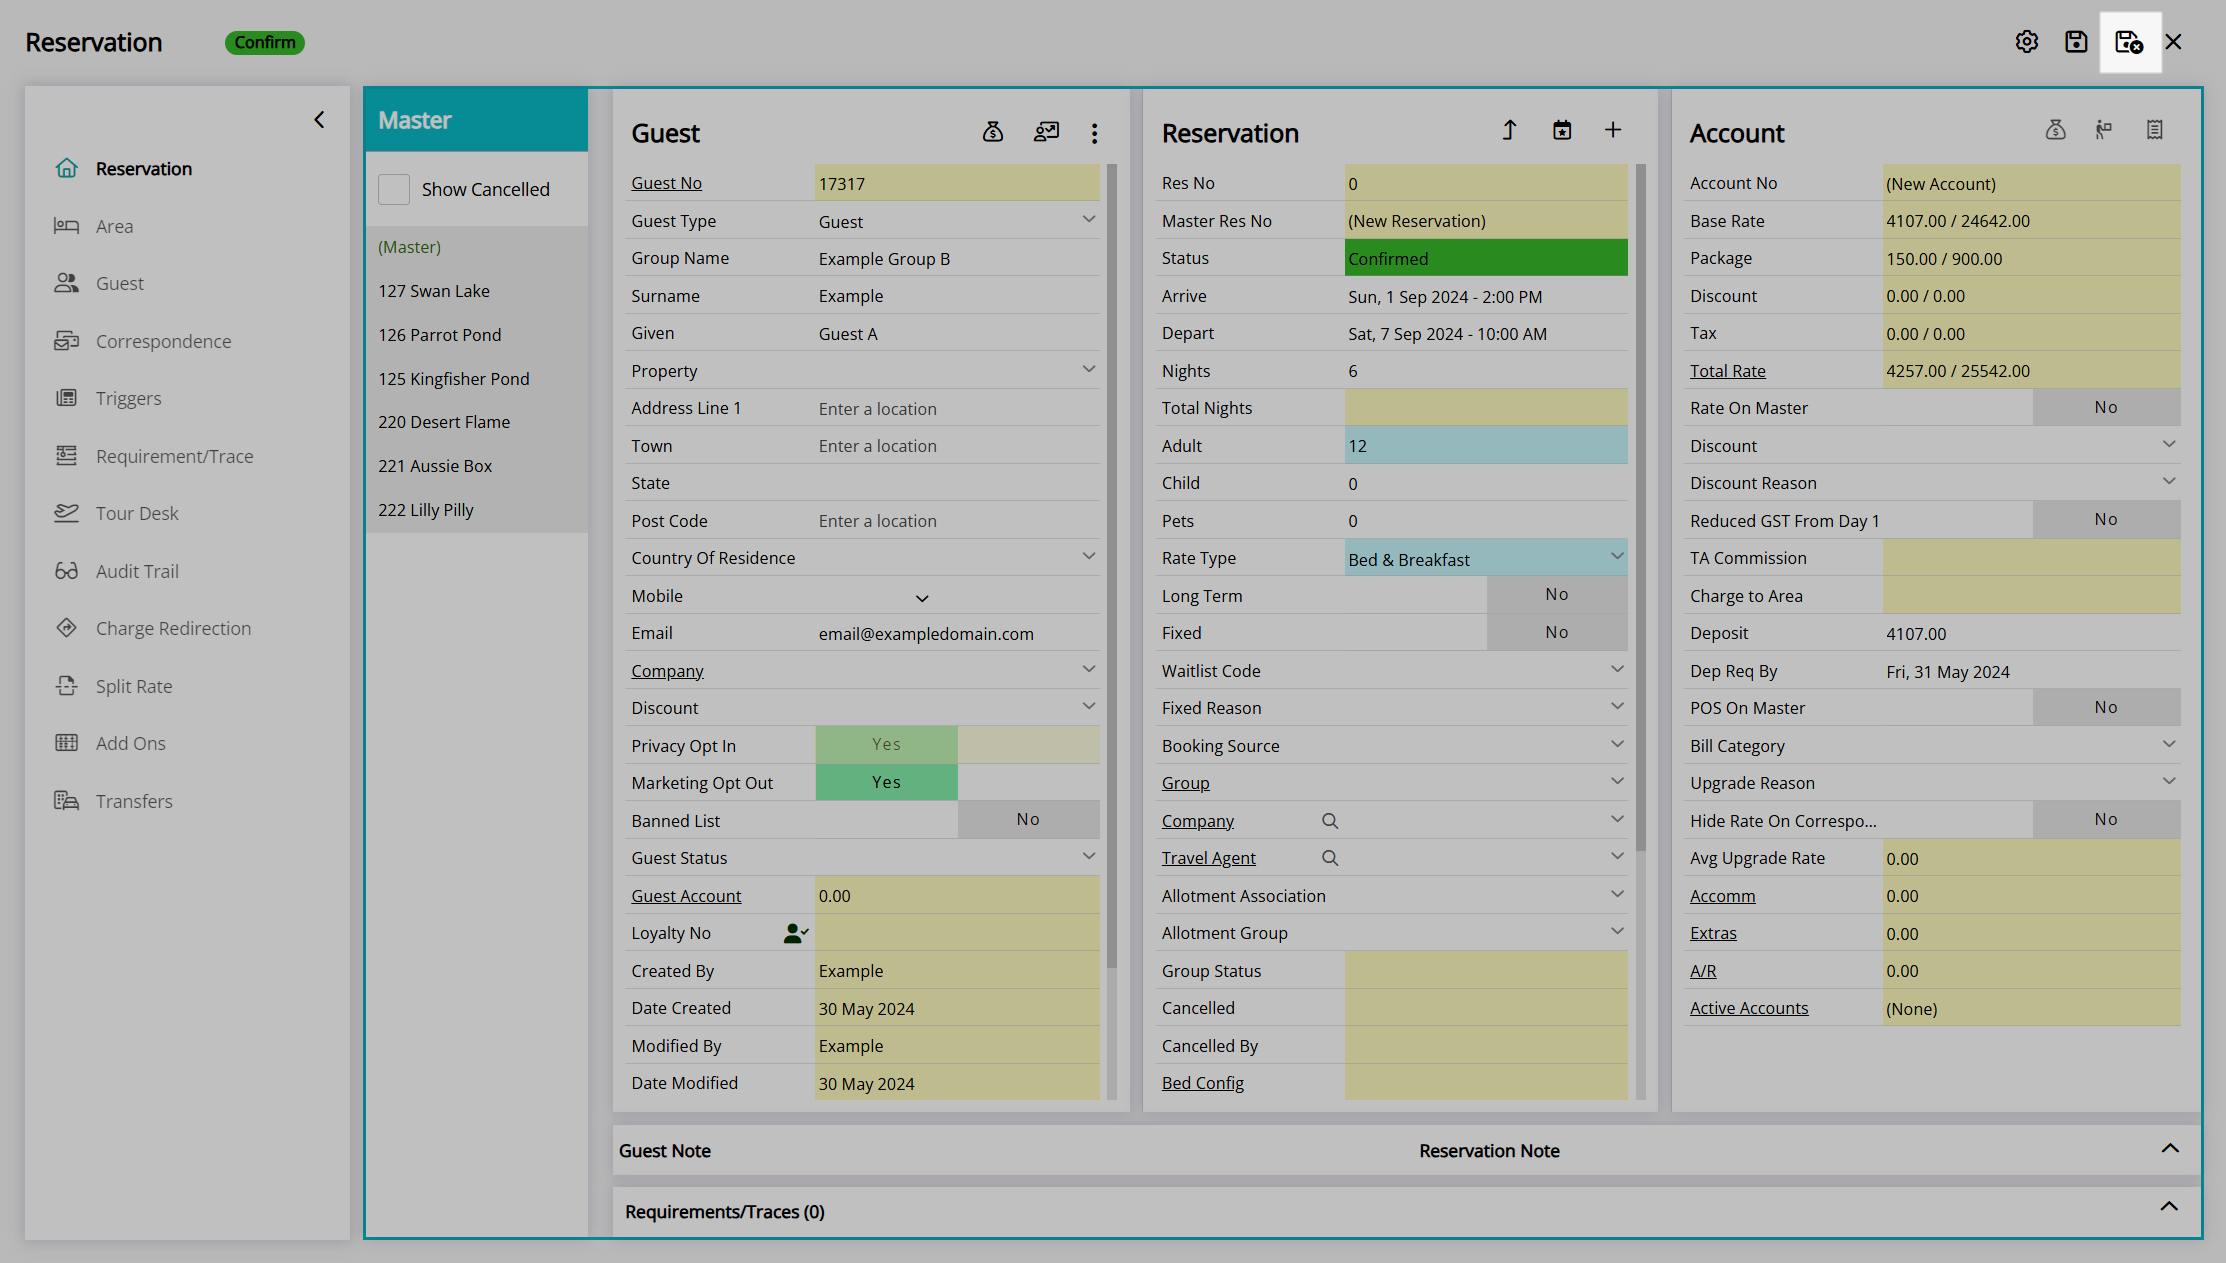
Select the  'Save/Exit' icon to store the changes made and create a new Master Reservation.
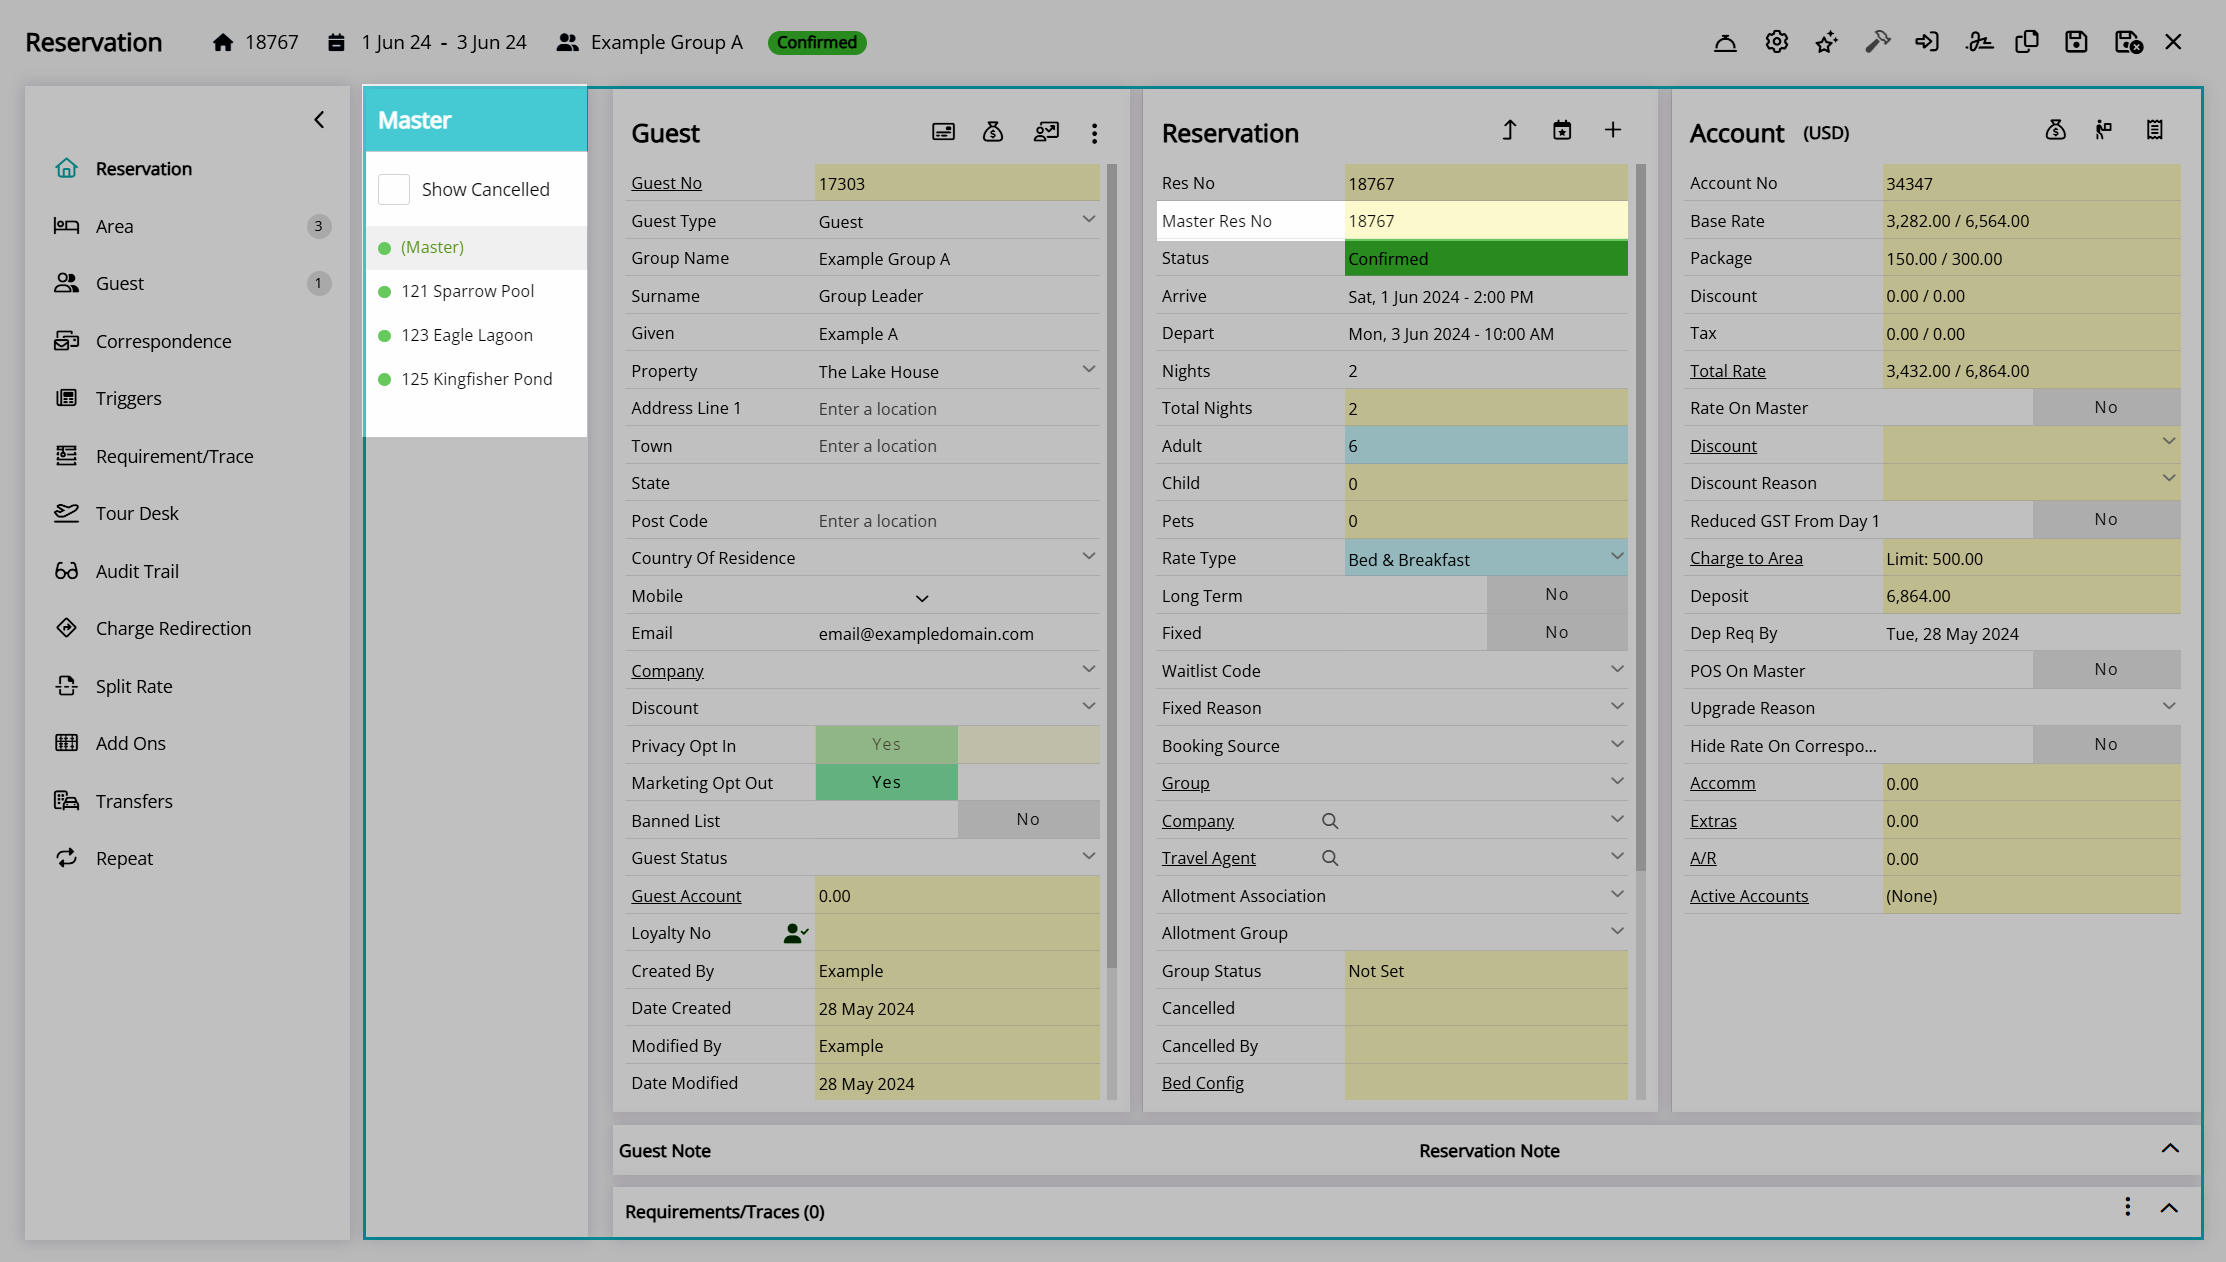
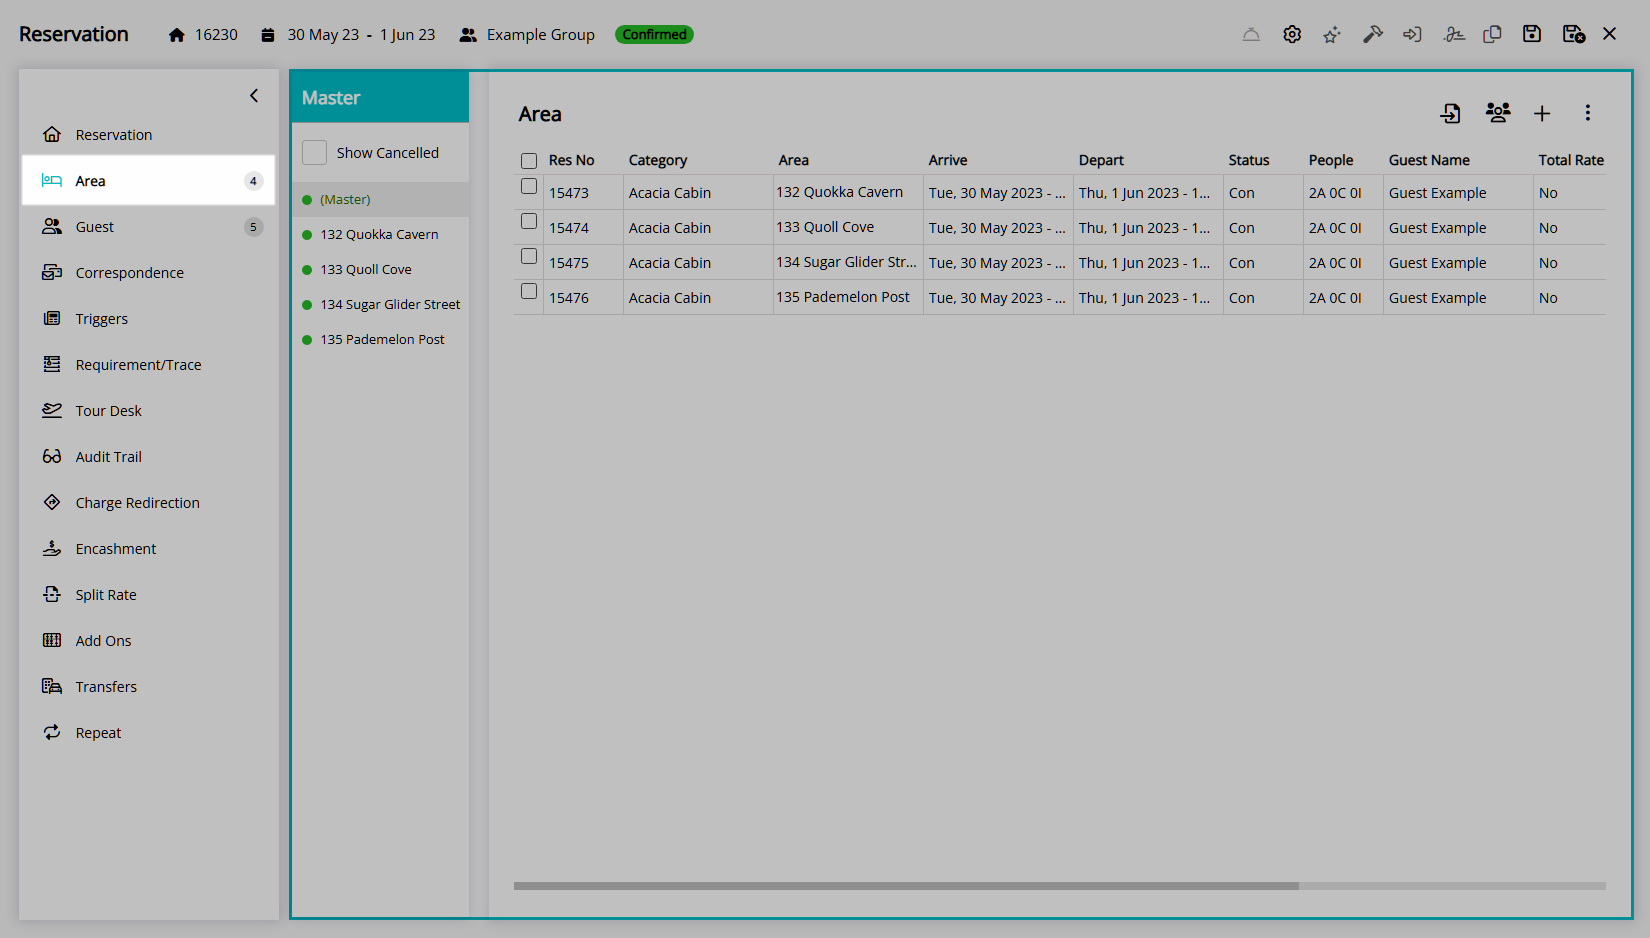
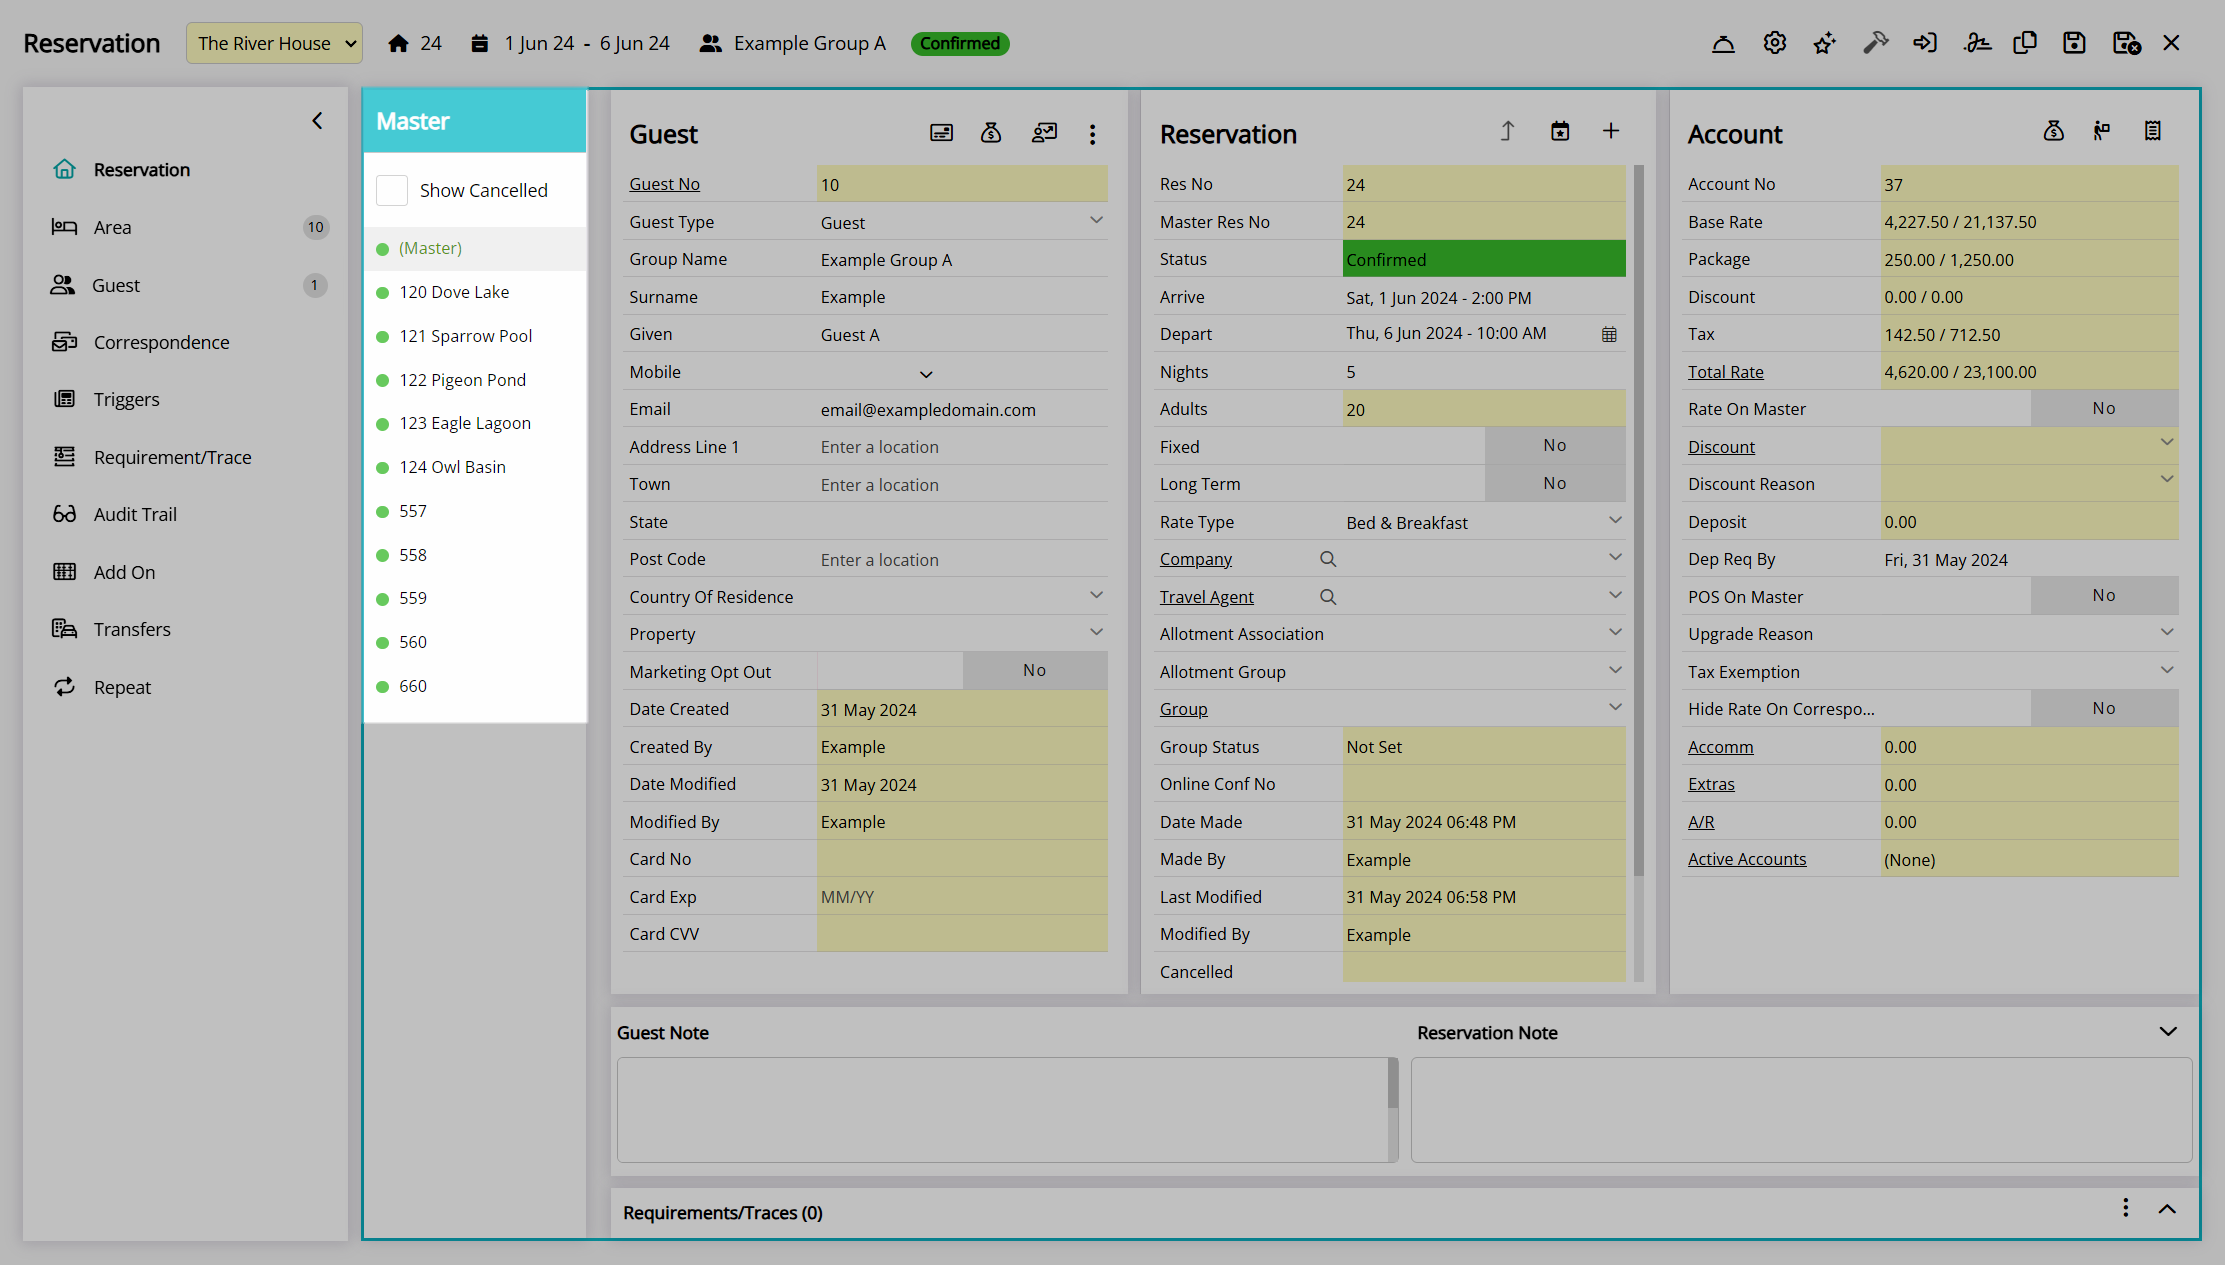
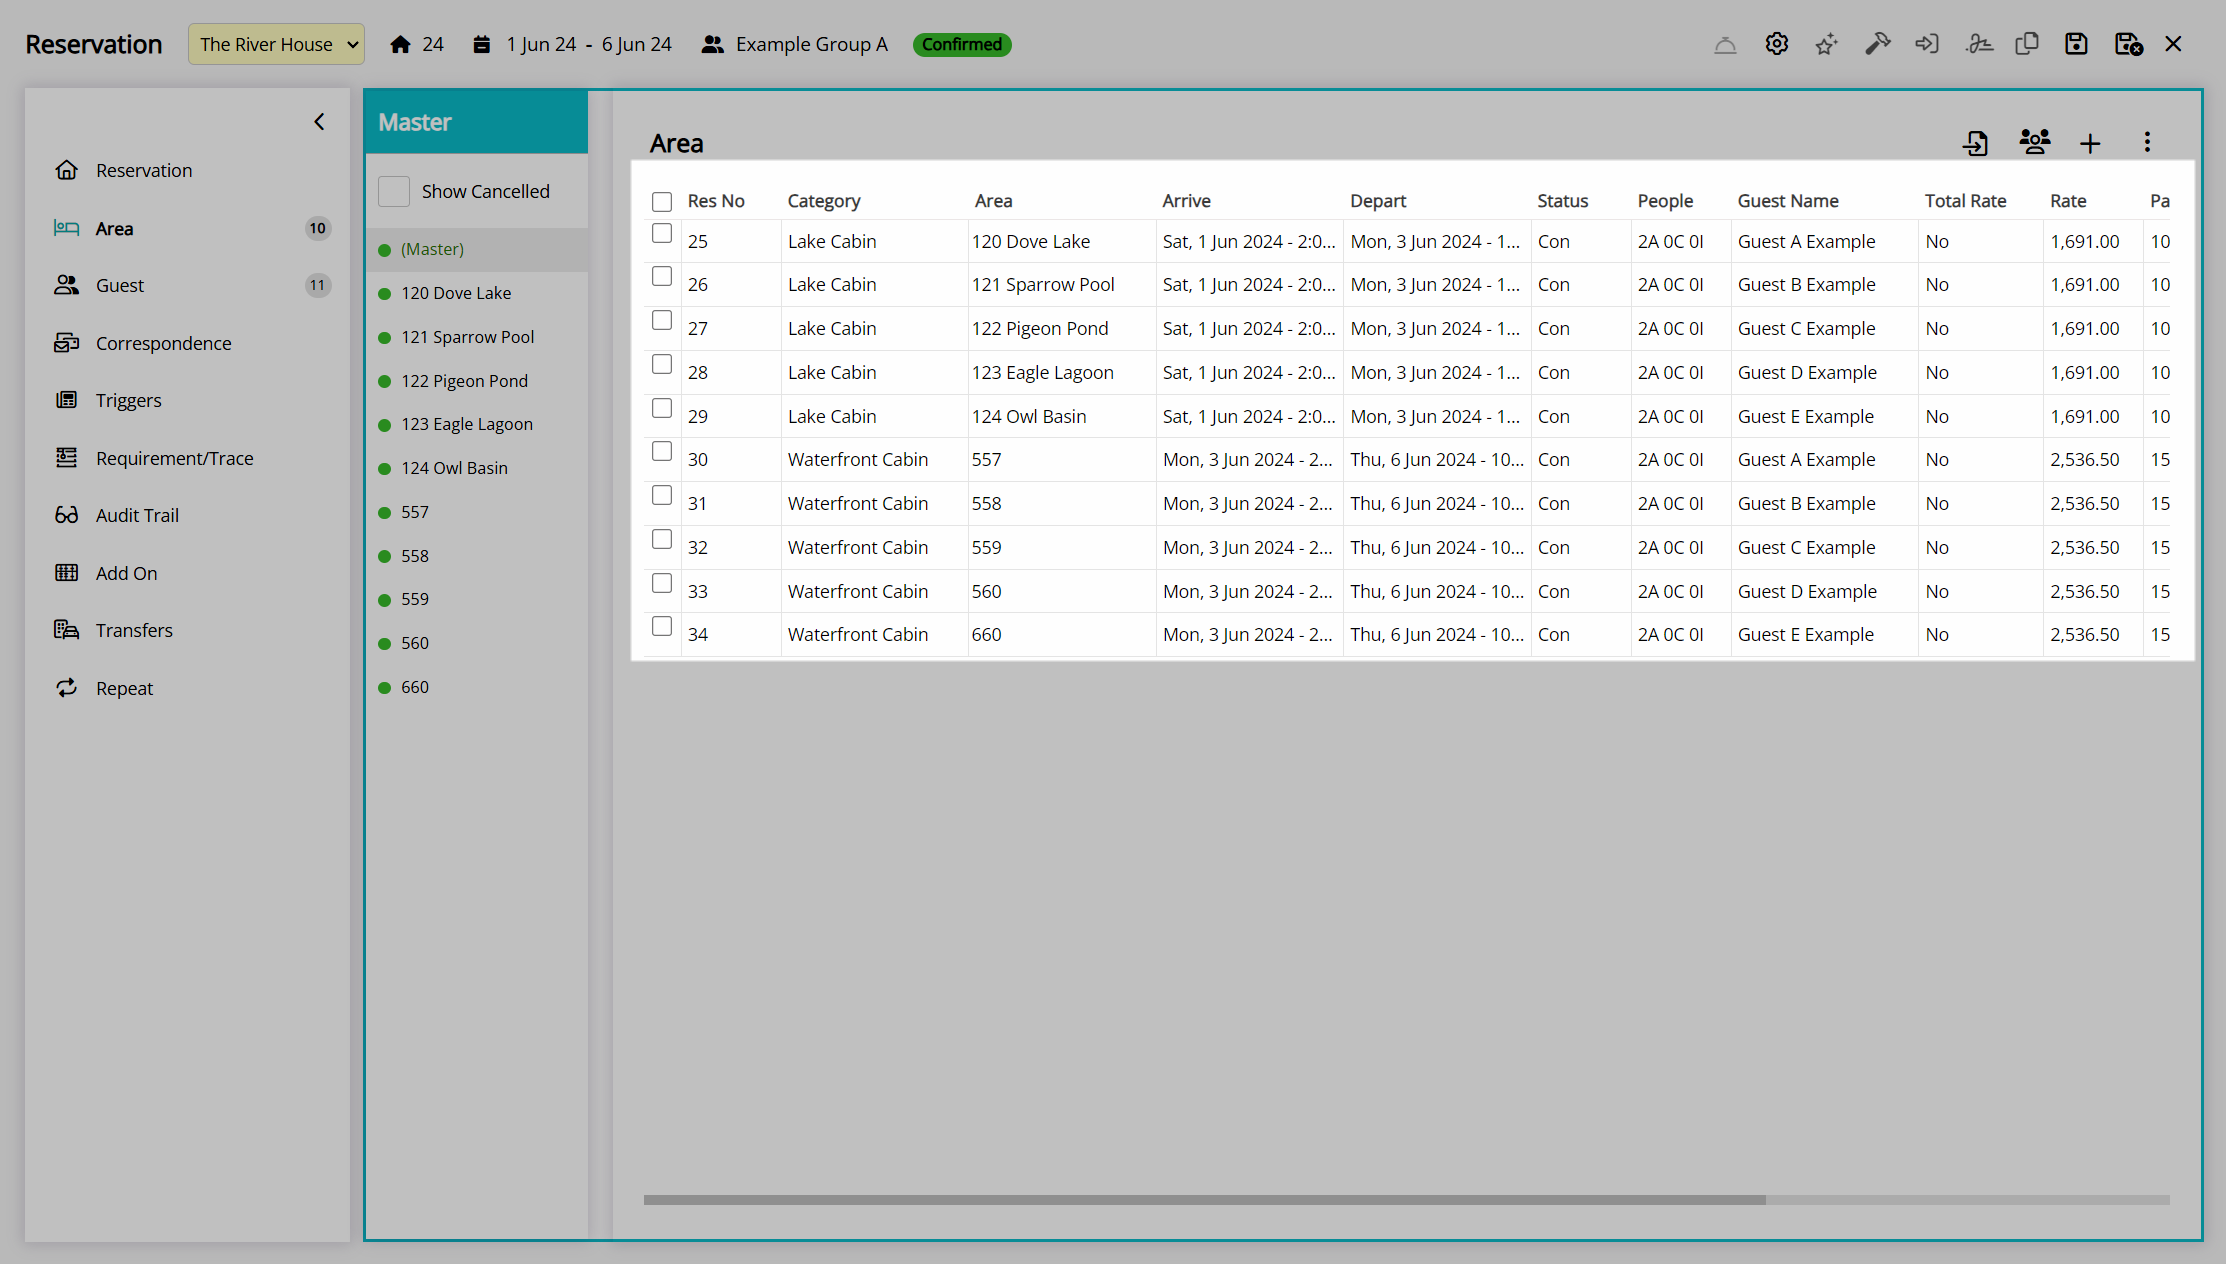
The Master Reservation will be created with a group reservation number, a group master cover page, a group account, and an individual reservation for each area added.
Add Area to an Existing Reservation
- Go to the Toolbar Menu Reservation Search in RMS.
- Enter the Group Name, Guest Name or Reservation Number and press 'Enter'.
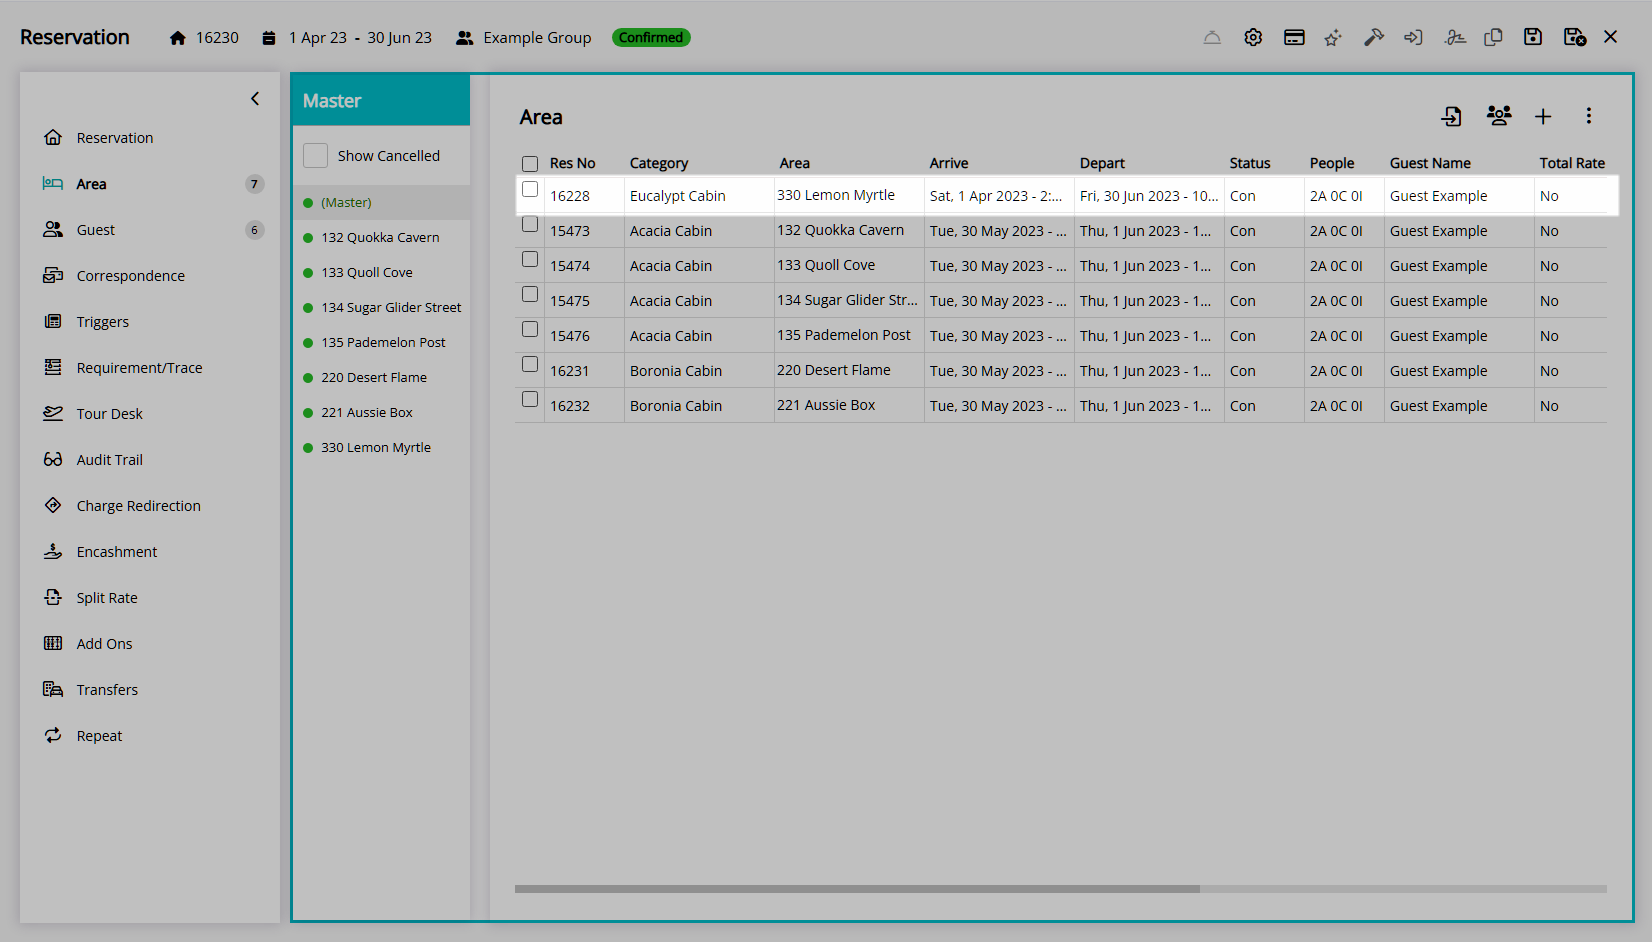
- Select the (Master) in the Navigator Pane.
- Select the
 'Add Area' icon or navigate to the 'Area' tab and select the
  'Add Area' icon.
 - Perform a Quick Quote Search.
- Select a Category or Rate Type.
- Select the checkbox for an Area or enter the Number of Areas to Book.
- Select the 'Add to Reservation' icon.
- Select 'Proceed'.
- Save/Exit.

Select the Master in the Navigator Pane.
Select the ![]() 'Add Area' icon or navigate to the
'Add Area' icon or navigate to the ![]() 'Area' tab and select the 'Add Area' icon.
'Area' tab and select the 'Add Area' icon.
Perform a Quick Quote Search.
Select a Category or Rate Type.
Select the checkbox for an Area or enter the Number of Areas to Book.
Select the  'Add to Reservation' icon.
Select 'Proceed'.
The selected Areas will be added to the Reservation or Master Reservation as part of the group.
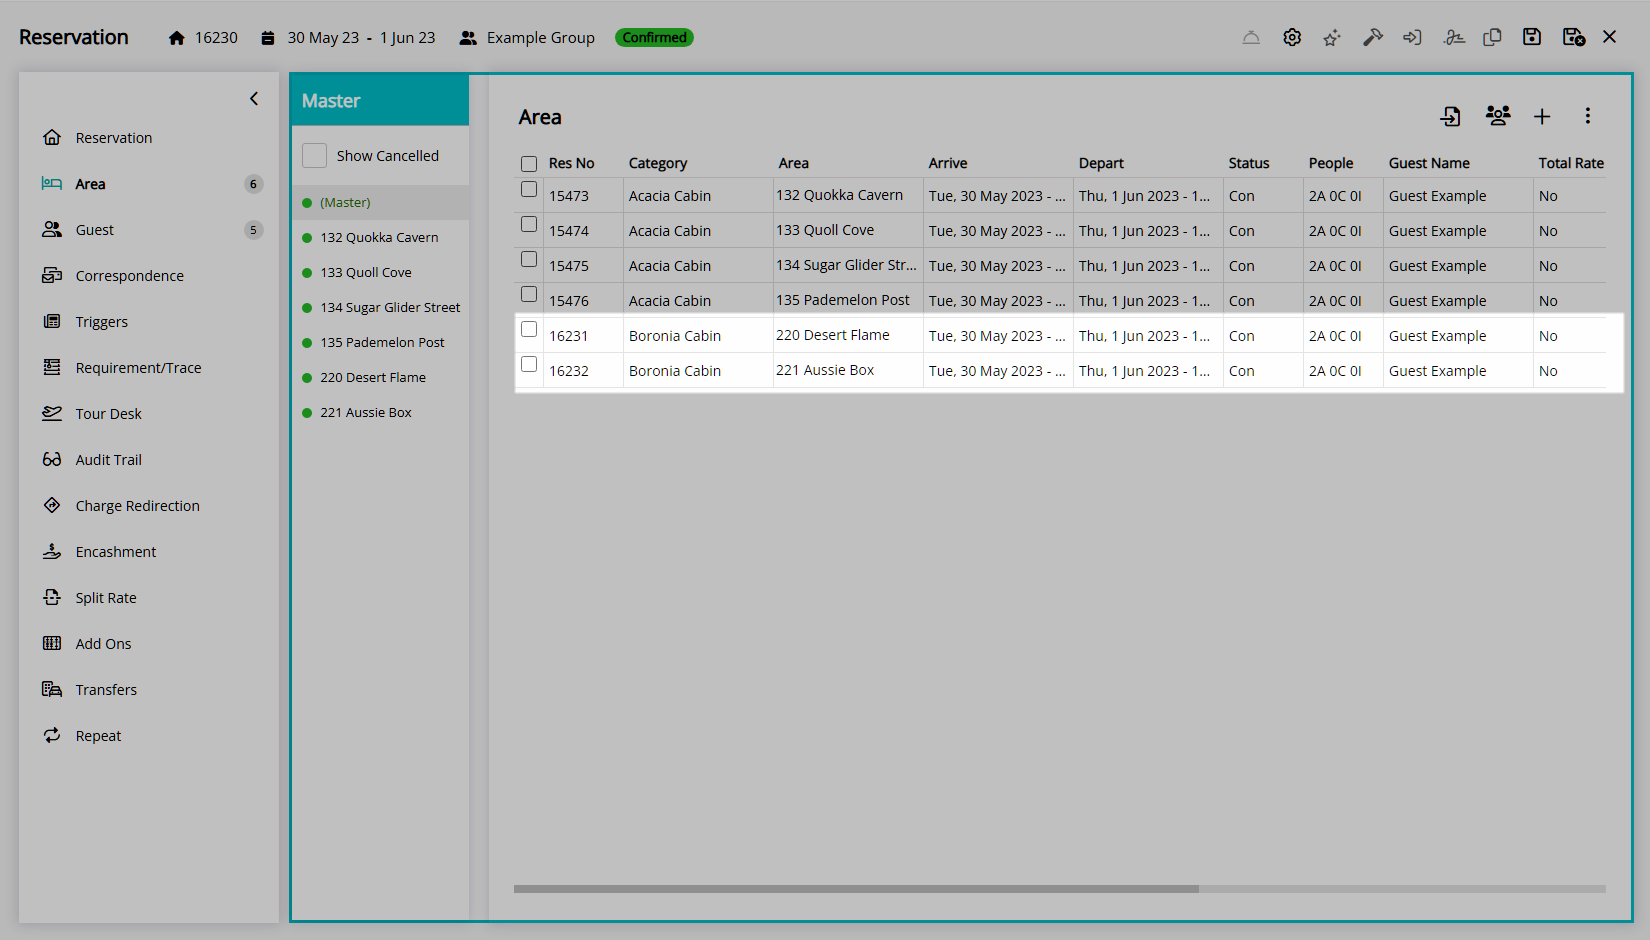
Select the  'Save/Exit' icon to store the changes made and leave the Master Reservation.
Combine Existing Reservations
- Go to the Toolbar Menu Reservation Search in RMS.
- Enter the Group Name, Guest Name or Reservation Number and press 'Enter'.
- Select the (Master) in the Navigator Pane.
- Navigate to the
 'Area' tab.
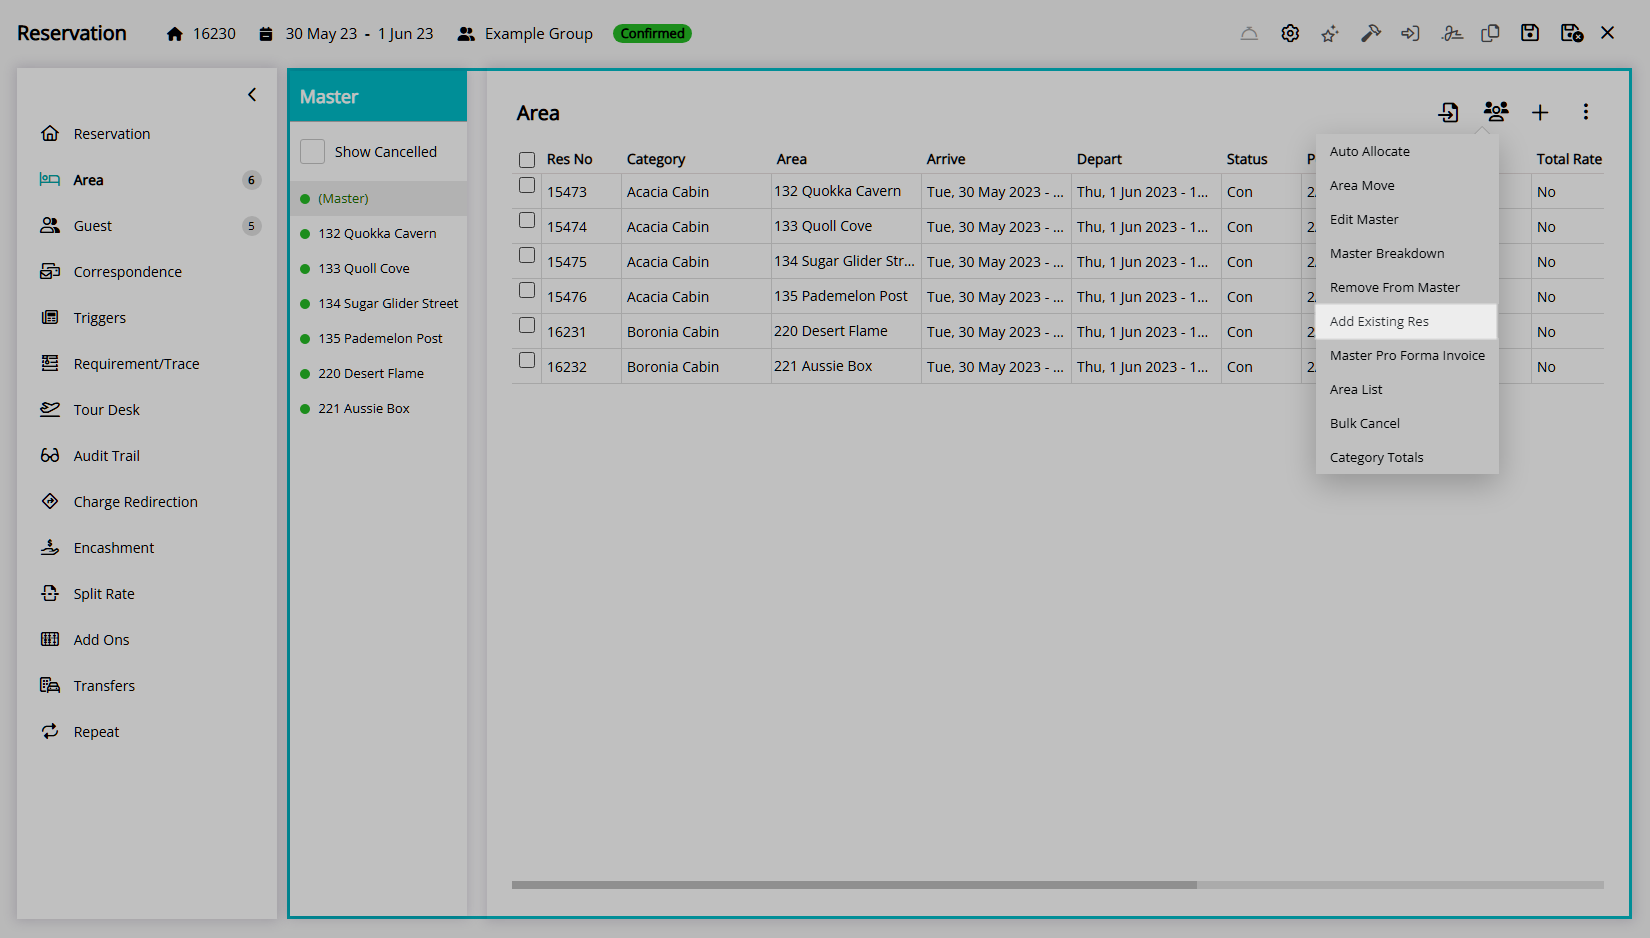
 - Select the
 'Options' icon.
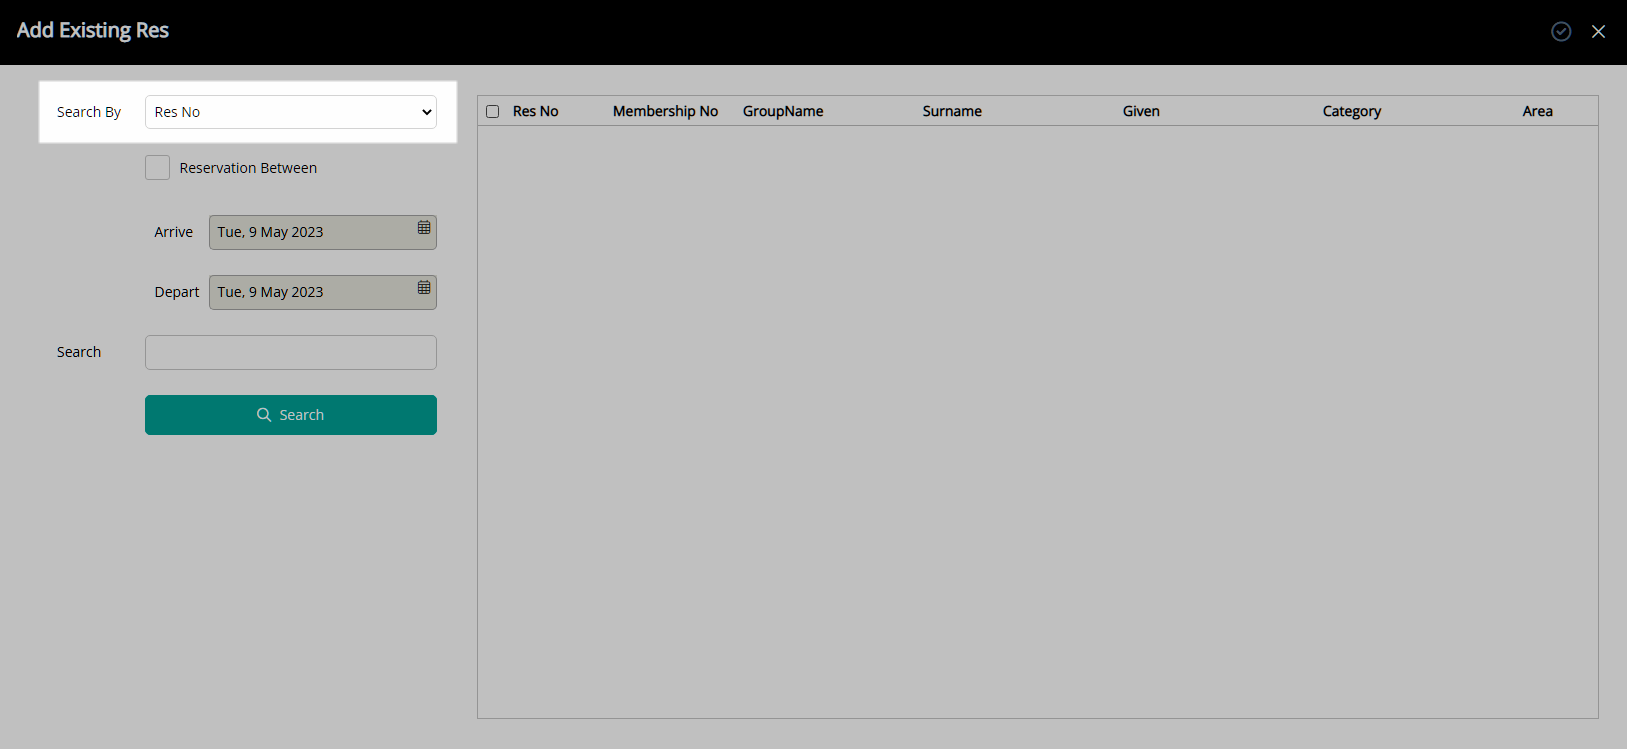
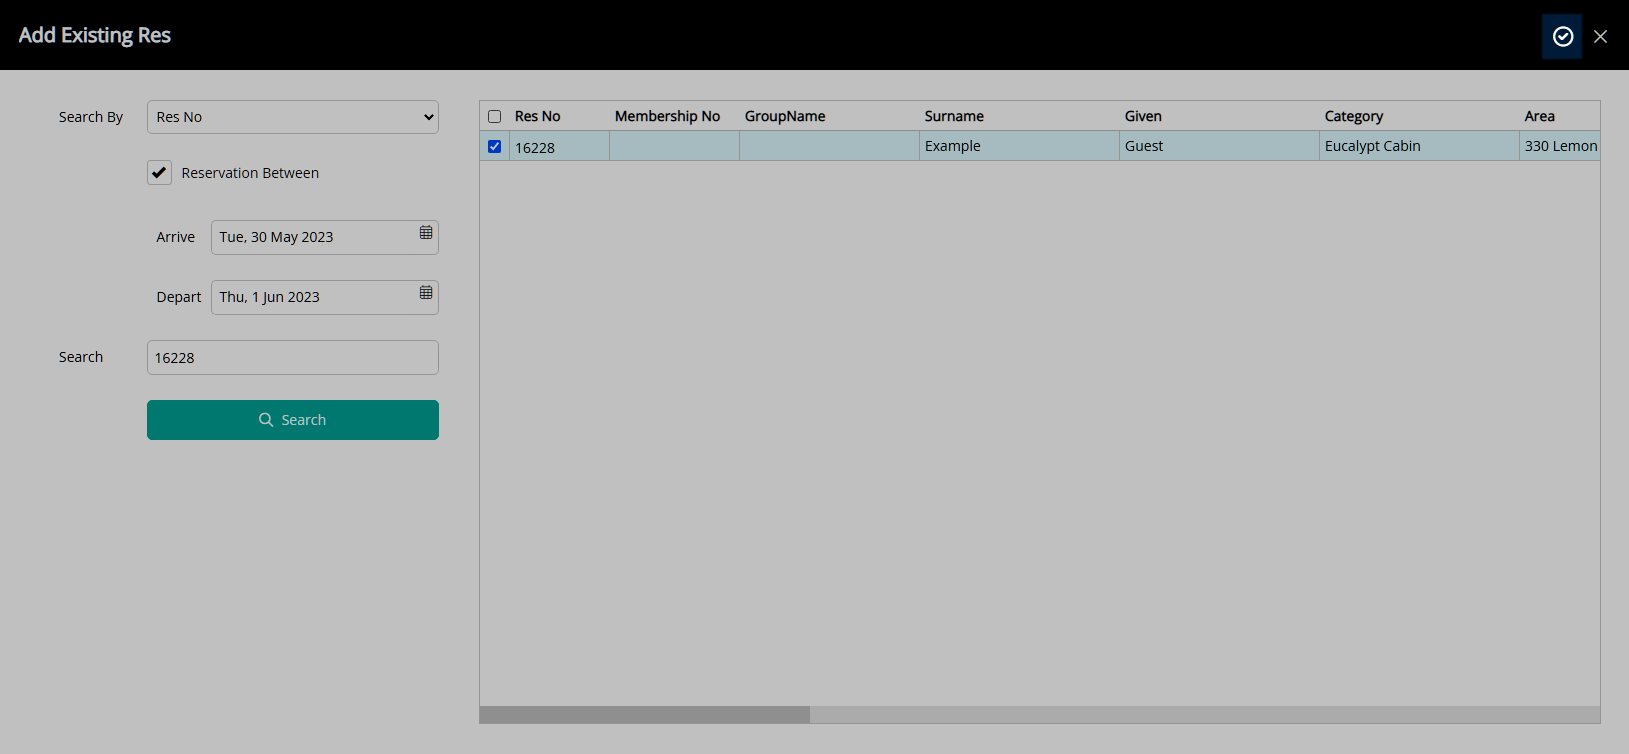
 - Select 'Add Existing Reservation'.
- Select a Search By option.
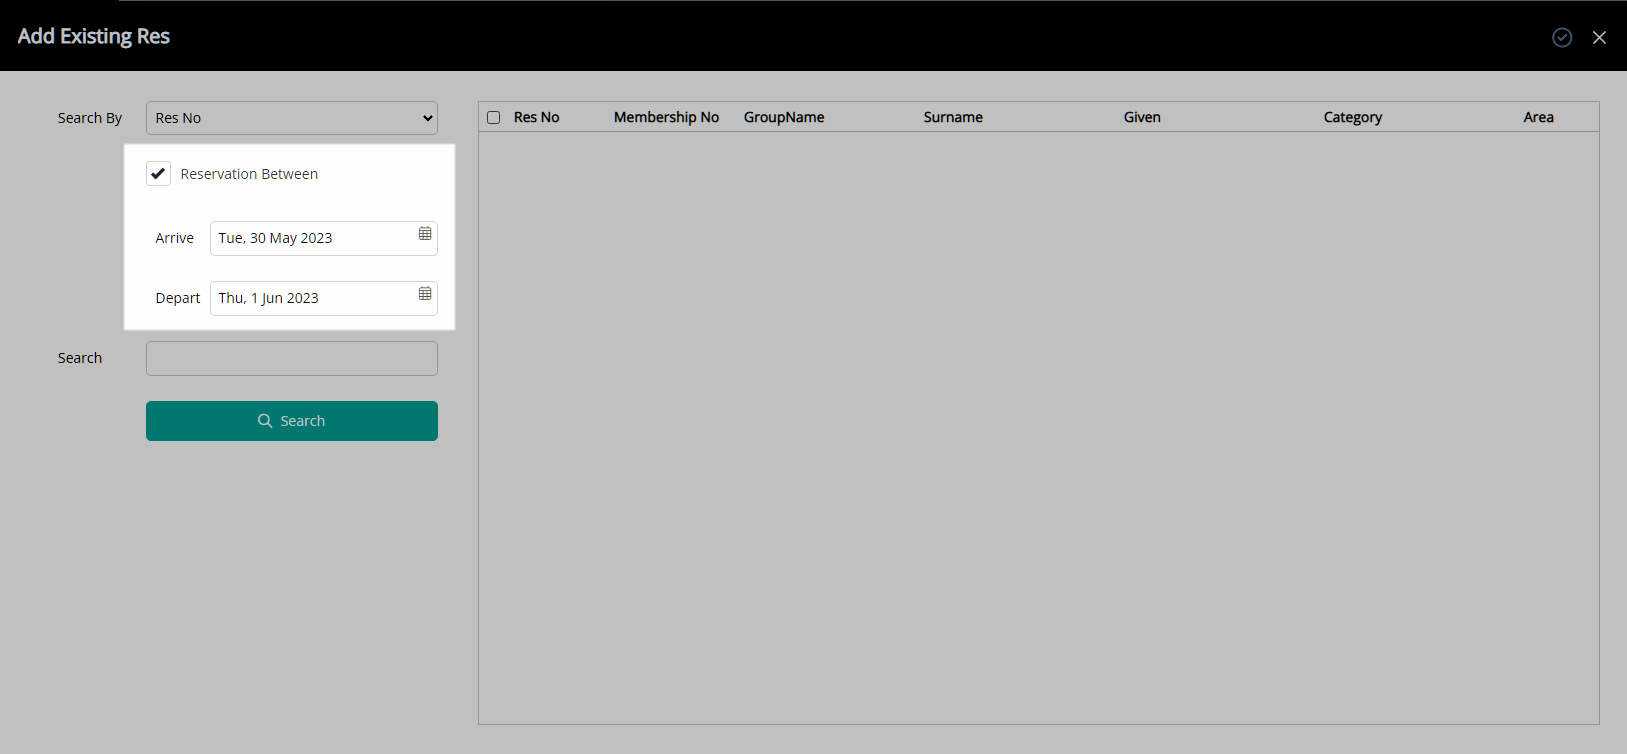
- Optional: Select the 'Reservation Between' checkbox and choose a Date Range.
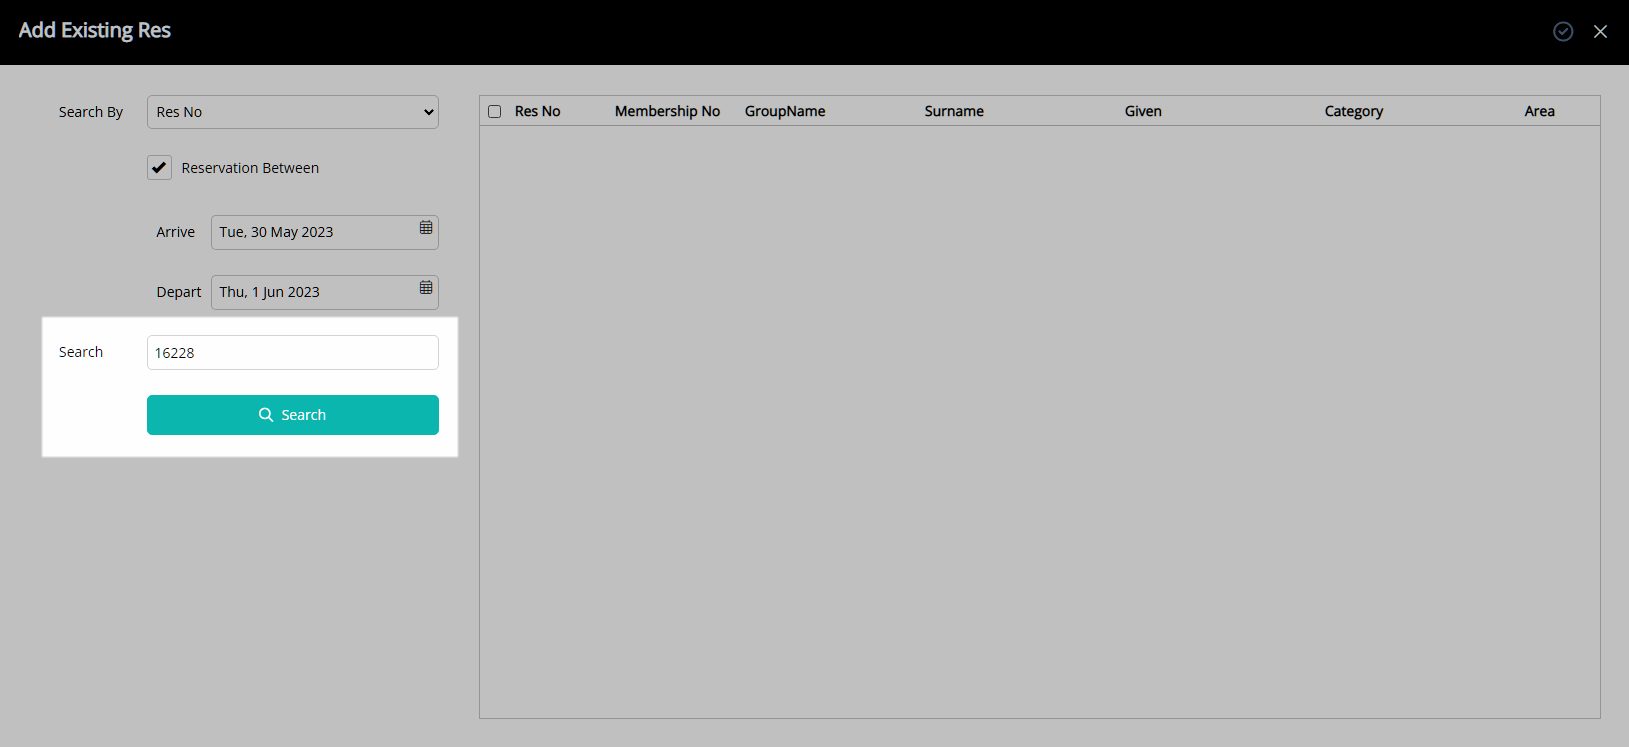
- Enter the Search Criteria and select 'Search'.
- Select the checkbox for an existing Reservation.
- Select the
 'Apply/Exit' icon.
 - Save/Exit.
Go to the Toolbar Menu Reservation Search in RMS, enter the Group Name, Guest Name or Reservation Number, and press 'Enter'.
Select the Master in the Navigator Pane.
Navigate to the  'Area' tab.
Select the ![]() 'Options' icon.
'Options' icon.

Select 'Add Existing Reservation'.
Select a Search By option.
Optional: Select the checkbox 'Reservation Between' and choose a Date Range.
Enter the Search Criteria and select 'Search'.
Select the checkbox for an existing Reservation.
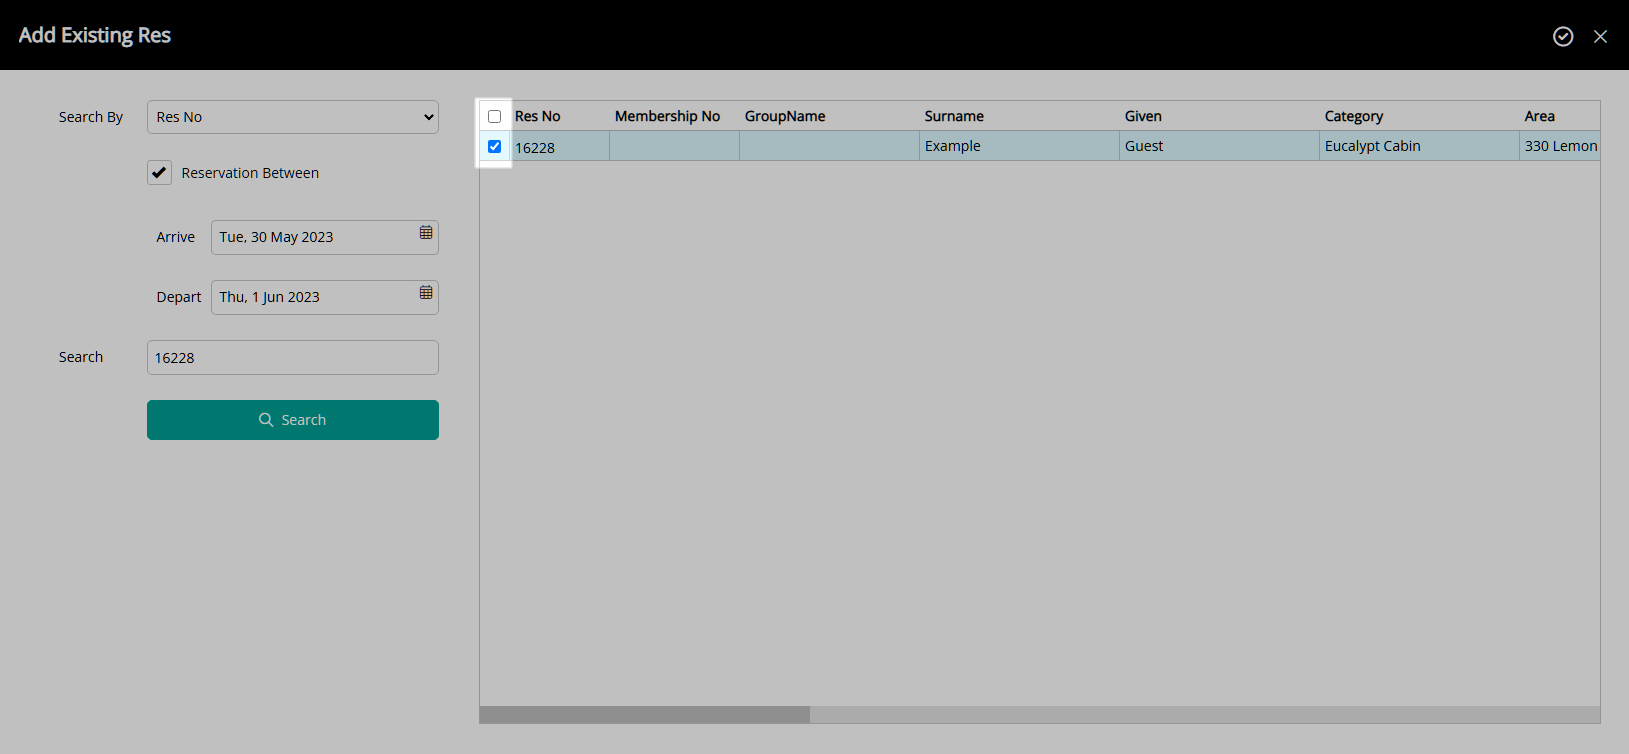
Select the  'Apply/Exit' icon.
The selected Reservation will be added to the group.
Select the 'Save/Exit' icon to store the changes made and leave the Master Reservation.
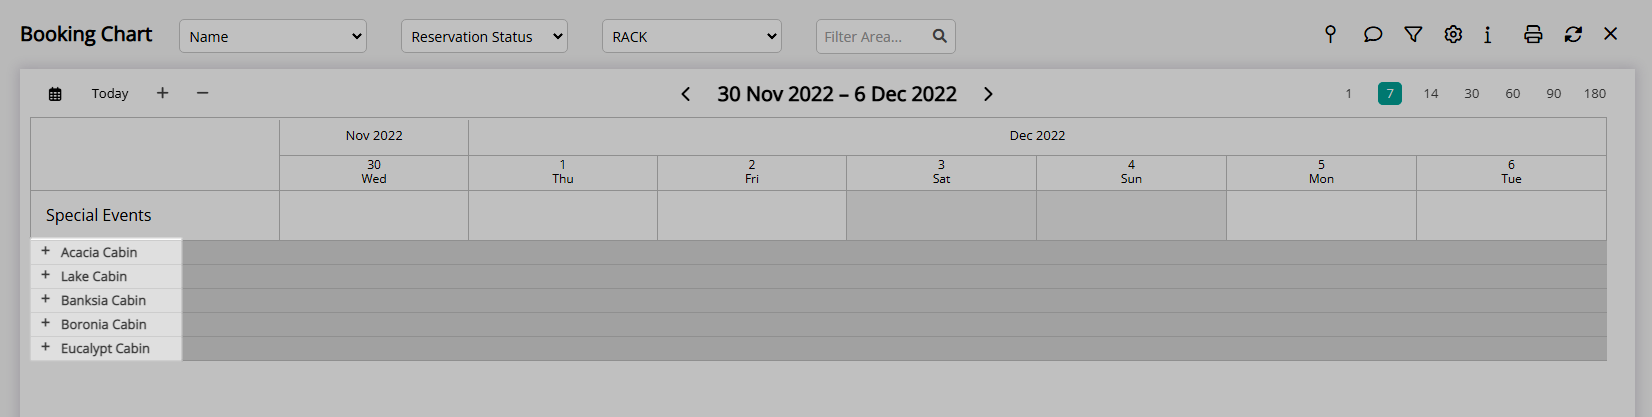
Add Master Reservation on the Booking Chart
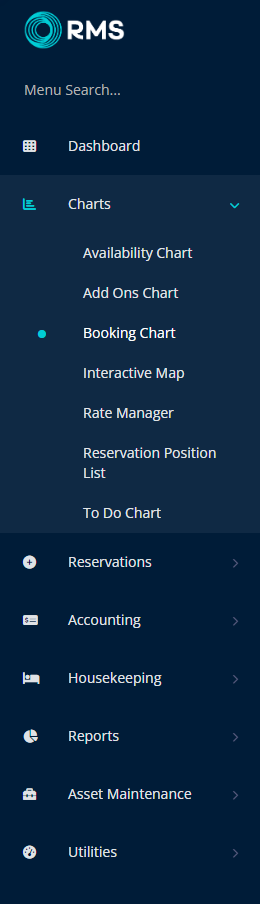
- Go to Charts > Booking Chart in the Side Menu of RMS.
- Navigate to the Date Range.
- Expand a Category.
- Hold the CTRL or ⌘ key on the keyboard.
- Draw a Reservation in each Area for the Master Reservation.
- Release the CTRL or ⌘ key & Mouse Button.
- Select 'Add Master Reservation'.
- Enter a Master Name.
- Enter the Guest Details.
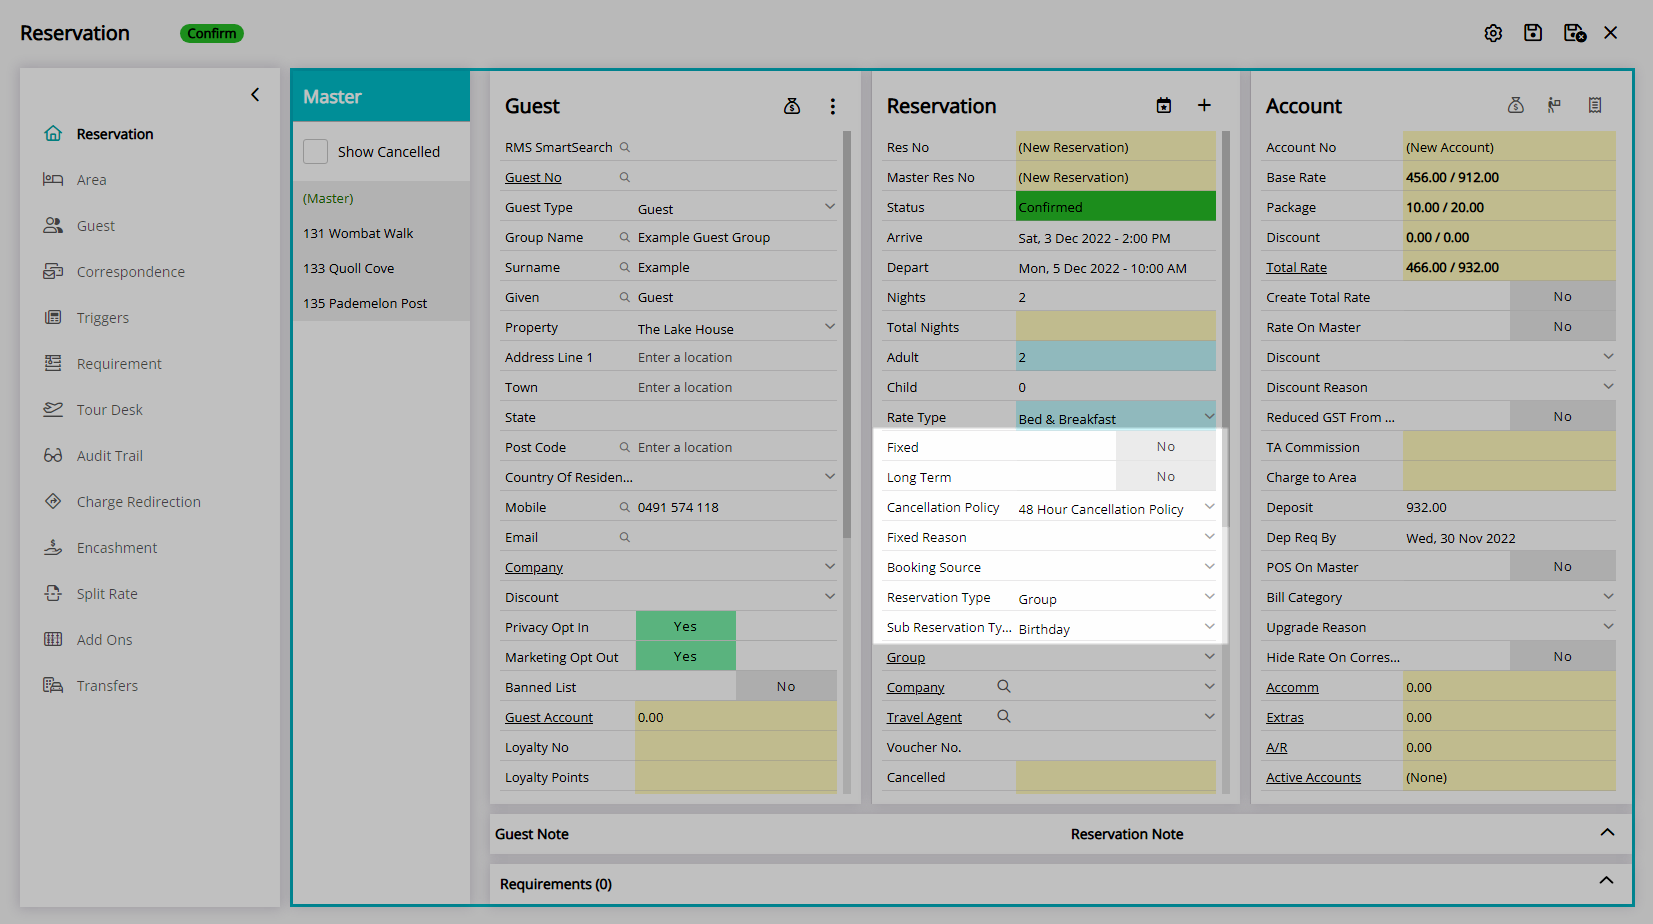
- Select a Rate Type.
- Enter additional Reservation Details.
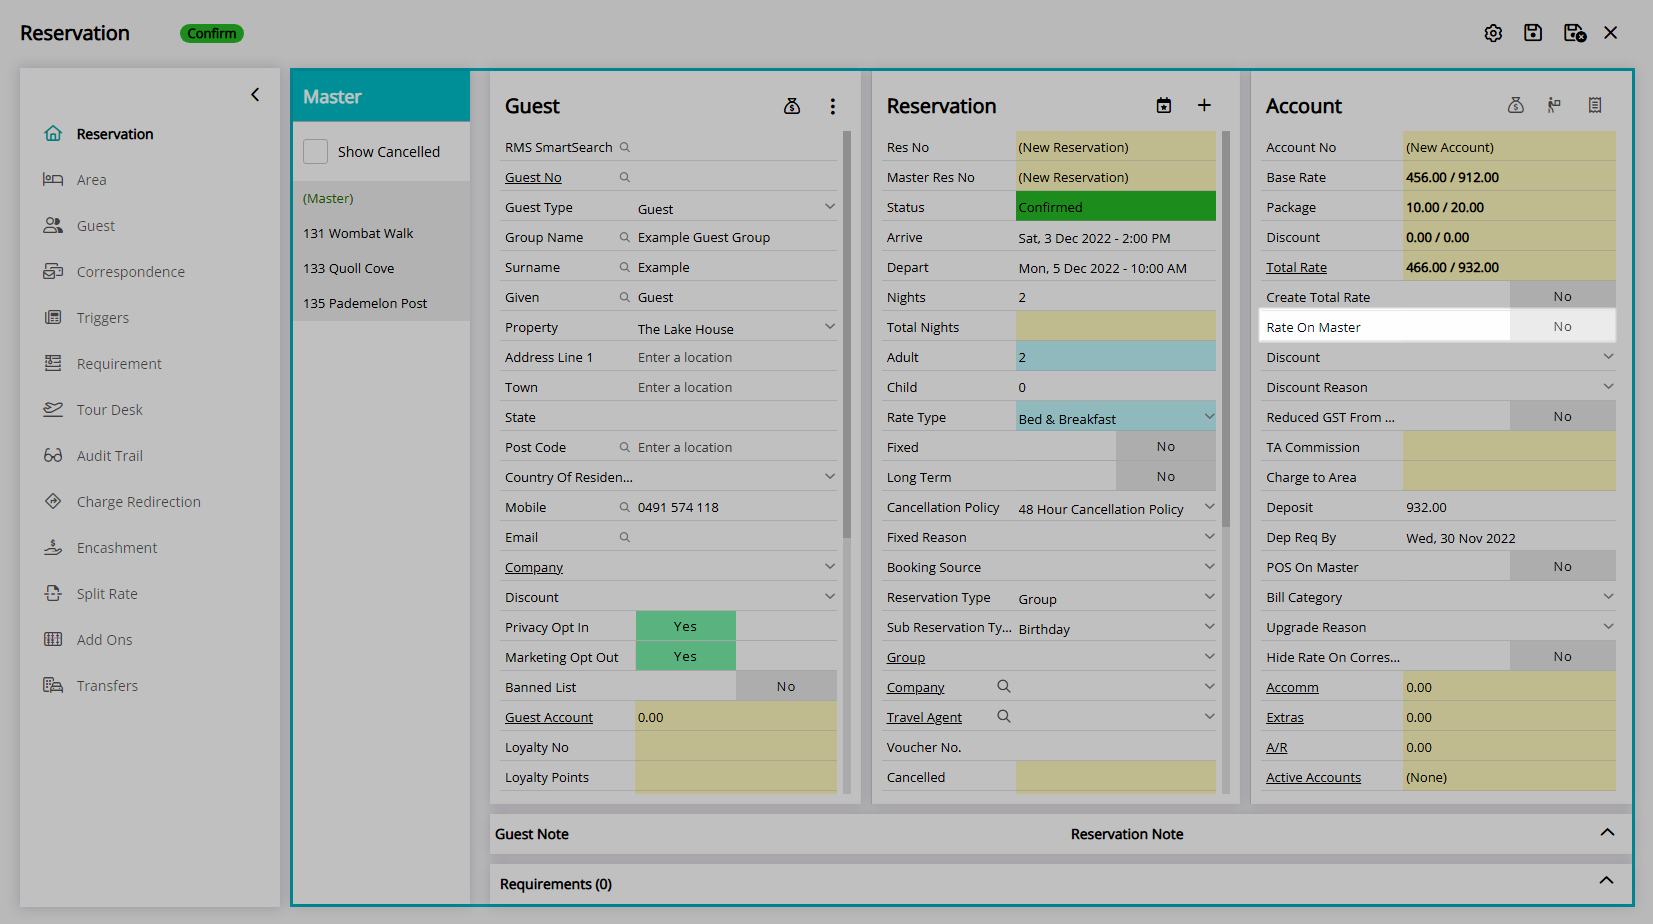
- Optional: Select the 'Rate on Master' Toggle.
- Save/Exit.
Go to Charts > Booking Chart in the Side Menu of RMS.
Navigate to the Date Range.
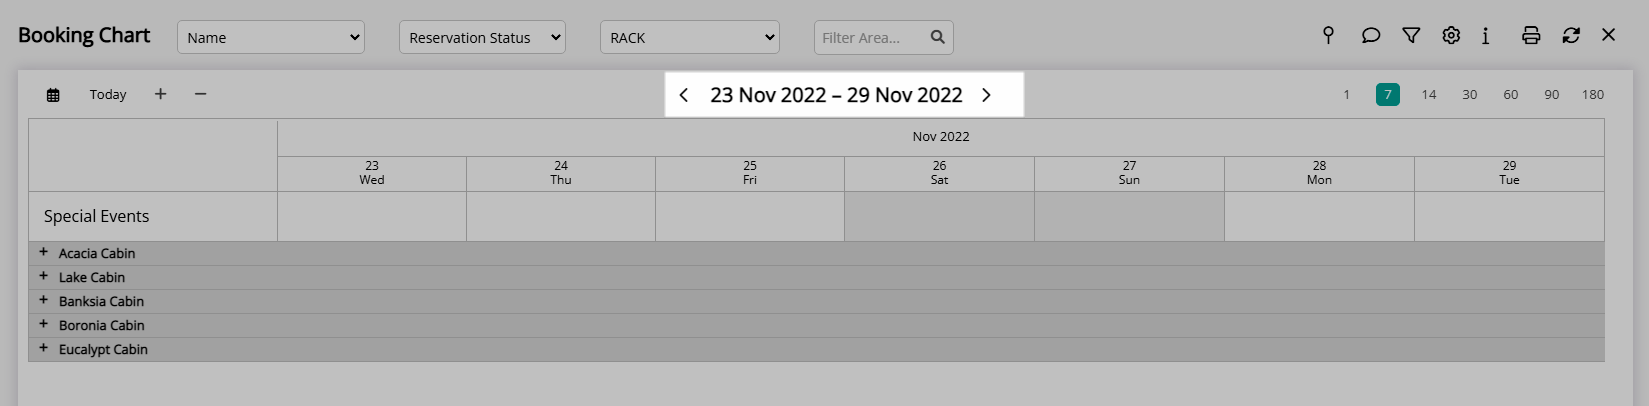
Expand a Category.
Hold the CTRL or ⌘ key on the keyboard and draw a Reservation in each Area for the Master Reservation then release the CTRL or ⌘ key & Mouse Button and select 'Add Master Reservation'.
Enter a Master Name.
Enter the Guest Details.
Select a Rate Type.

Enter additional Reservation Details.
Optional: Select the 'Rate on Master' Toggle.
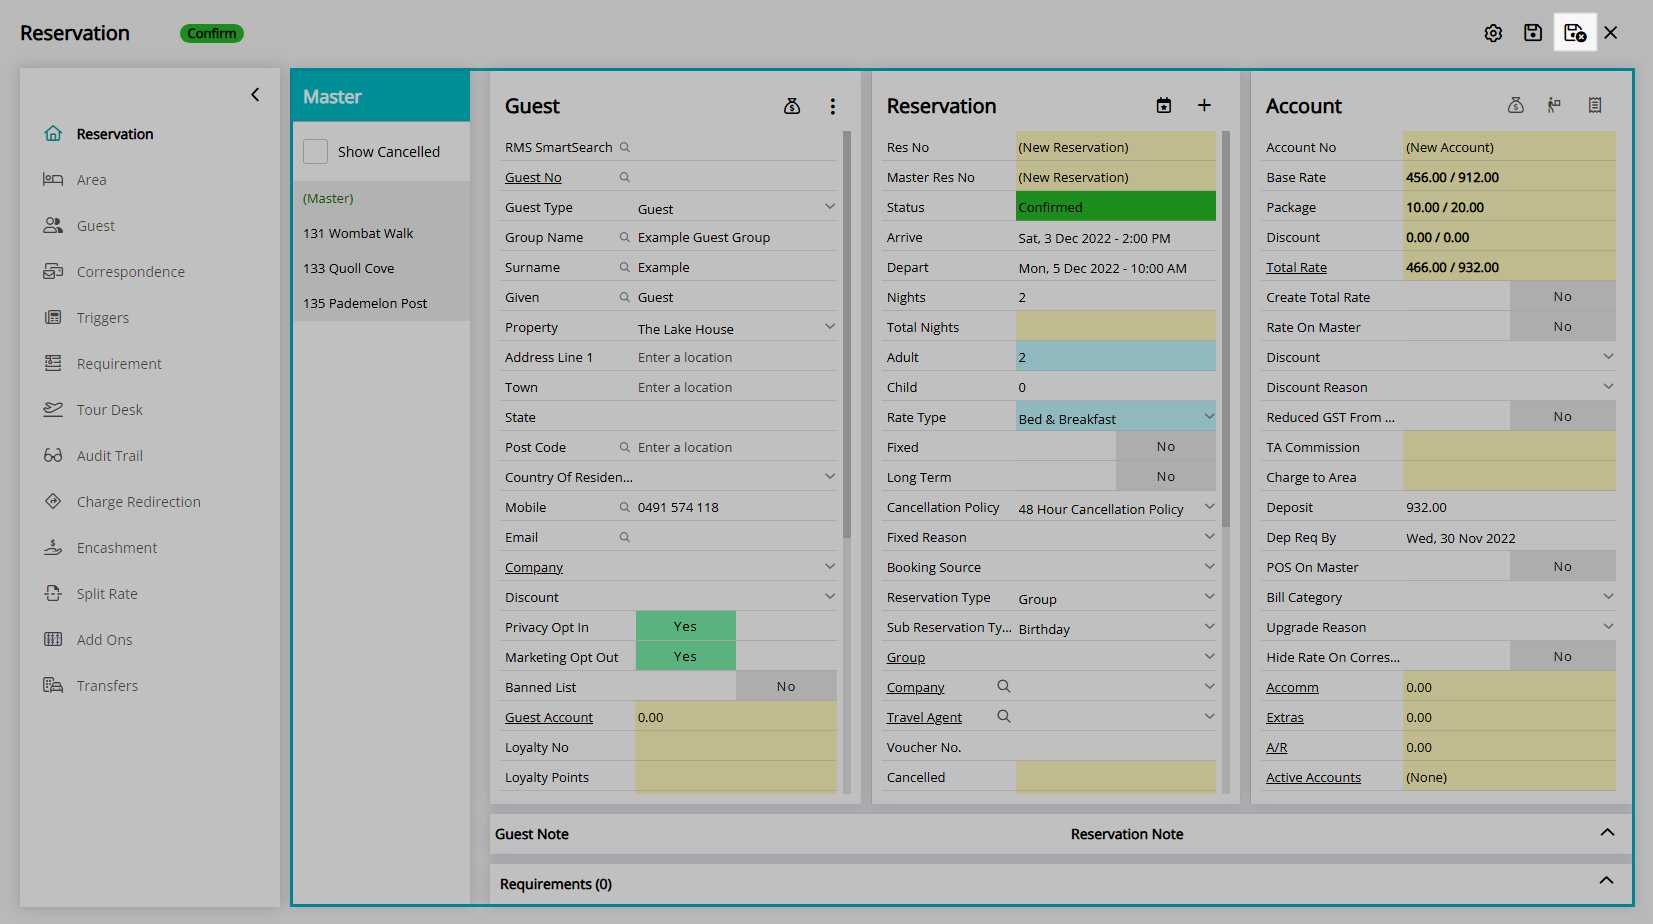
Select the  'Save/Exit' icon to create the Master Reservation and return to the Booking Chart.
The Master Reservation will be assigned a Master Reservation Number and each Sibling Reservation will have an individual Reservation Number linked to the Master Reservation Number.
Add Master Reservation on Quick Quote
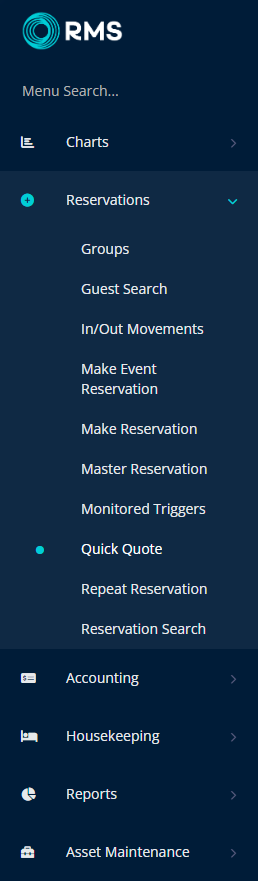
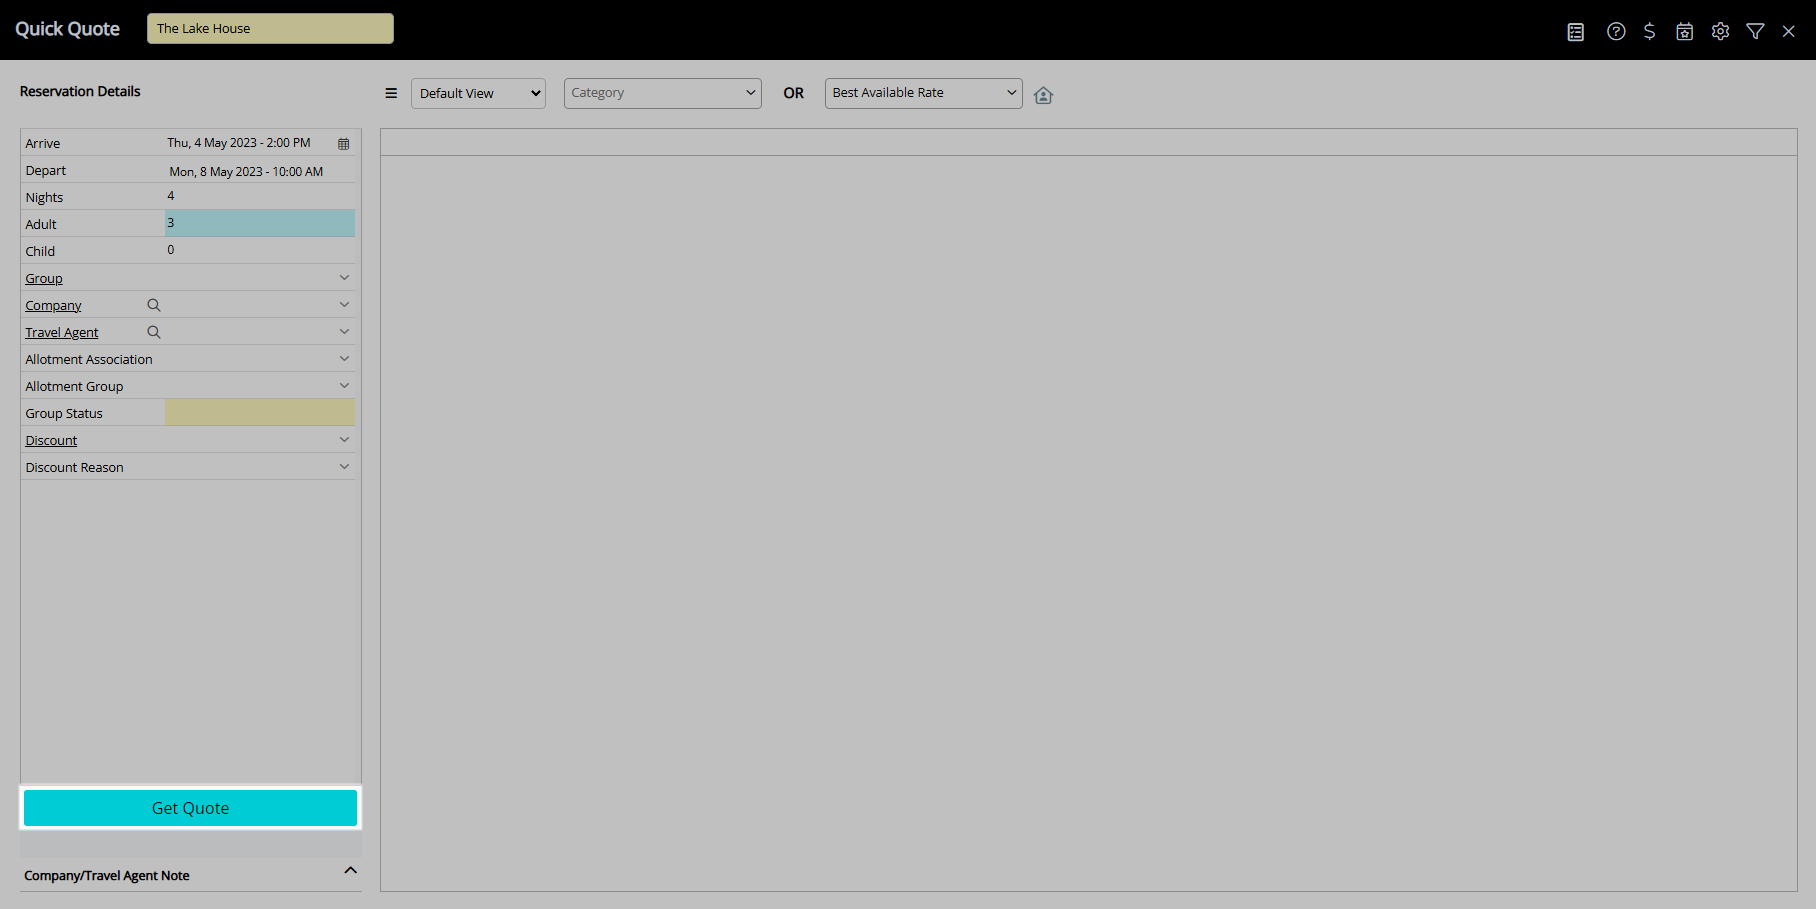
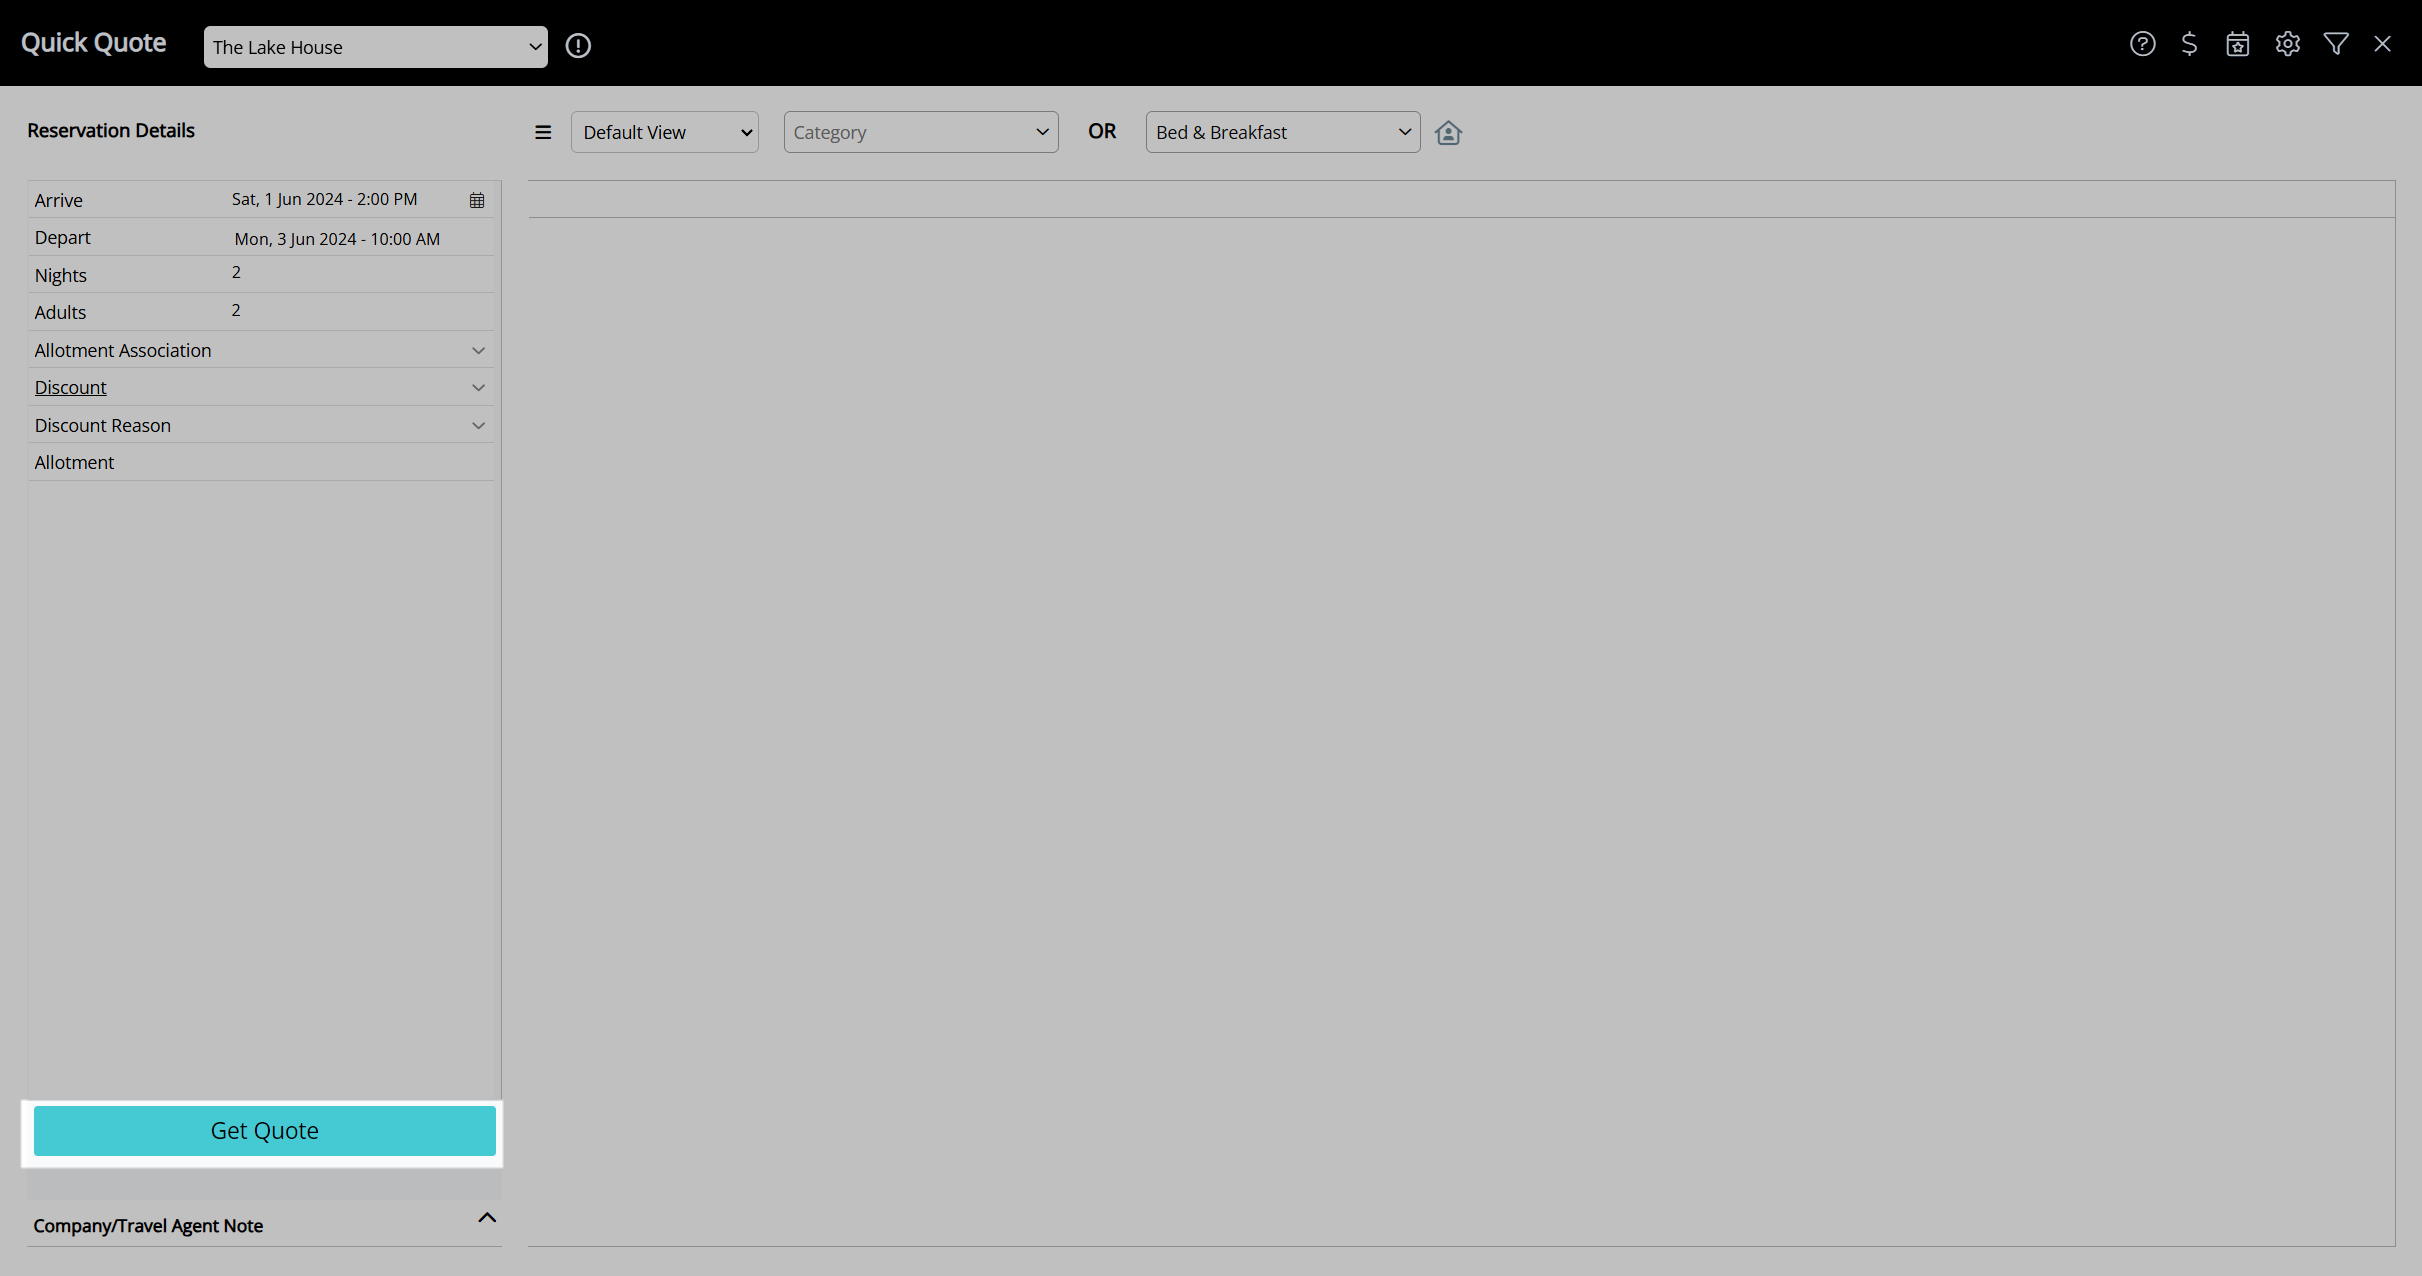
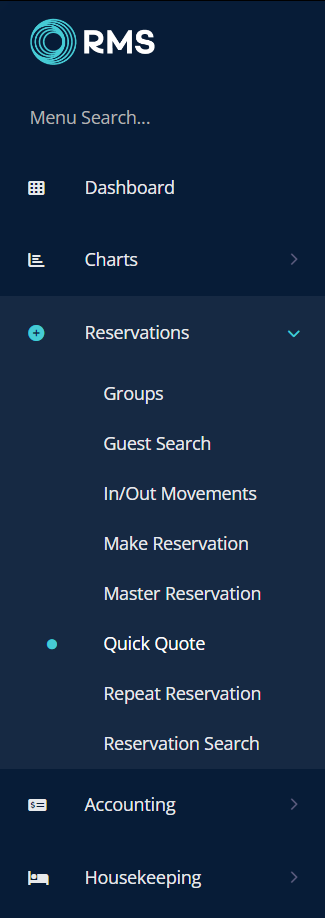
- Go to Reservations > Quick Quote in the Side Menu of RMS.
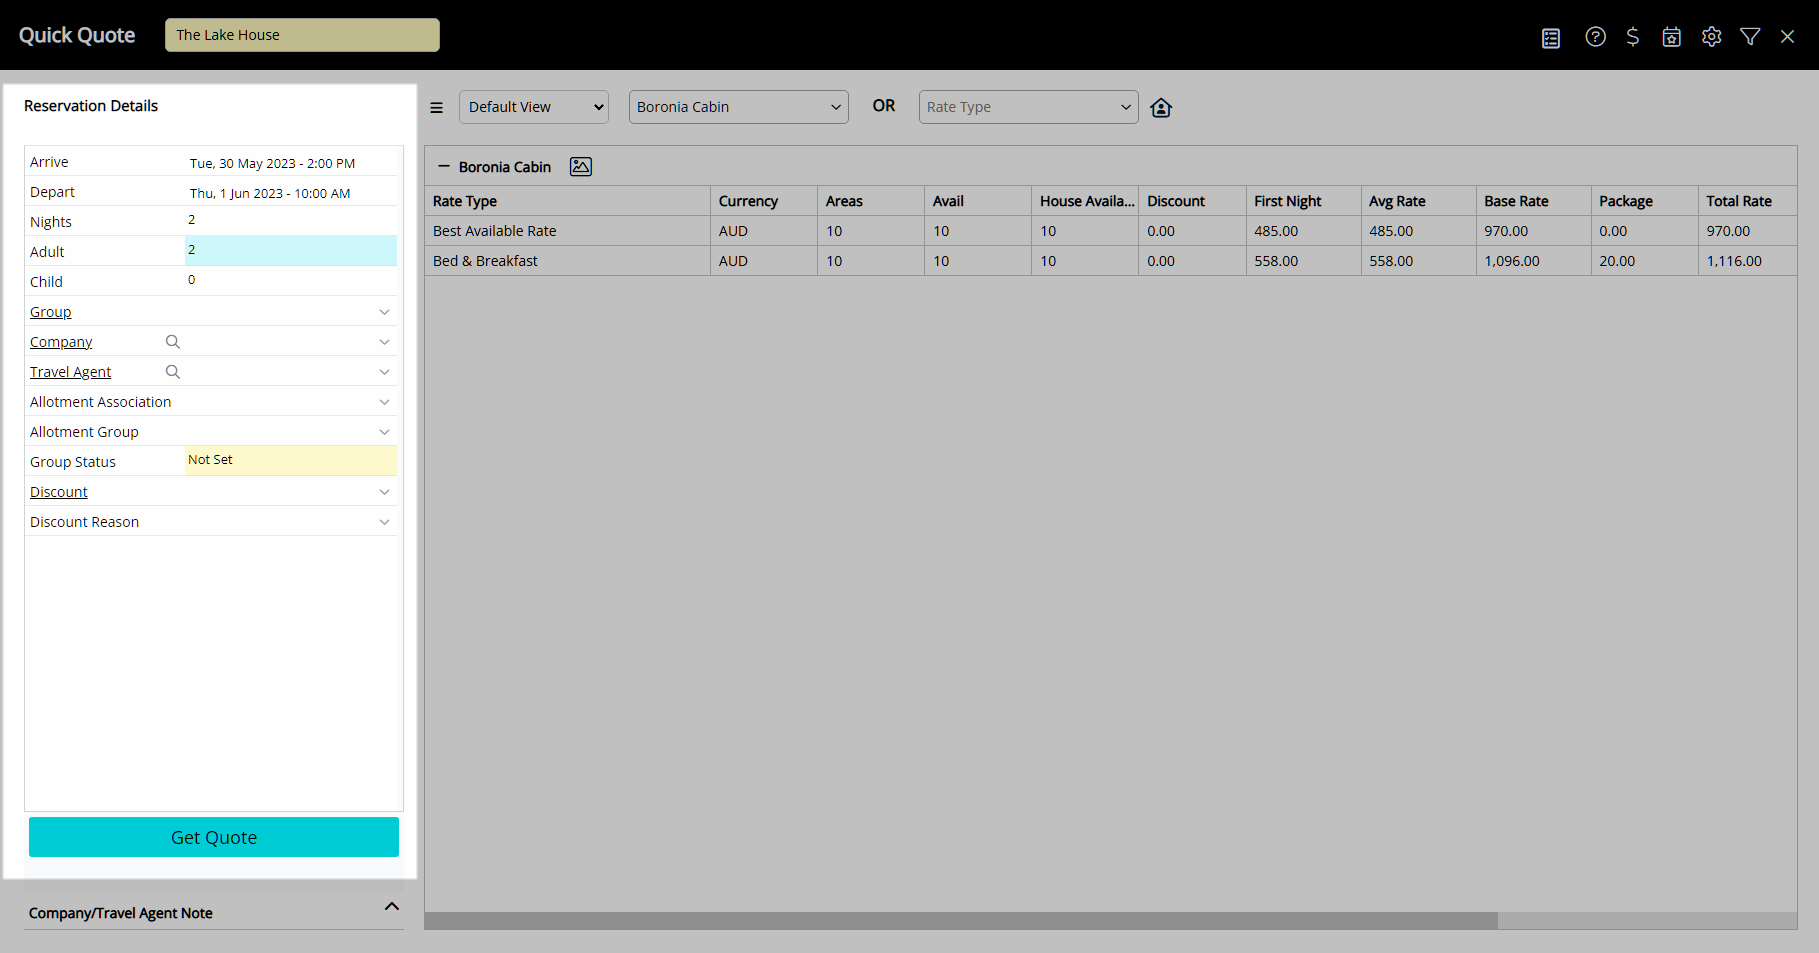
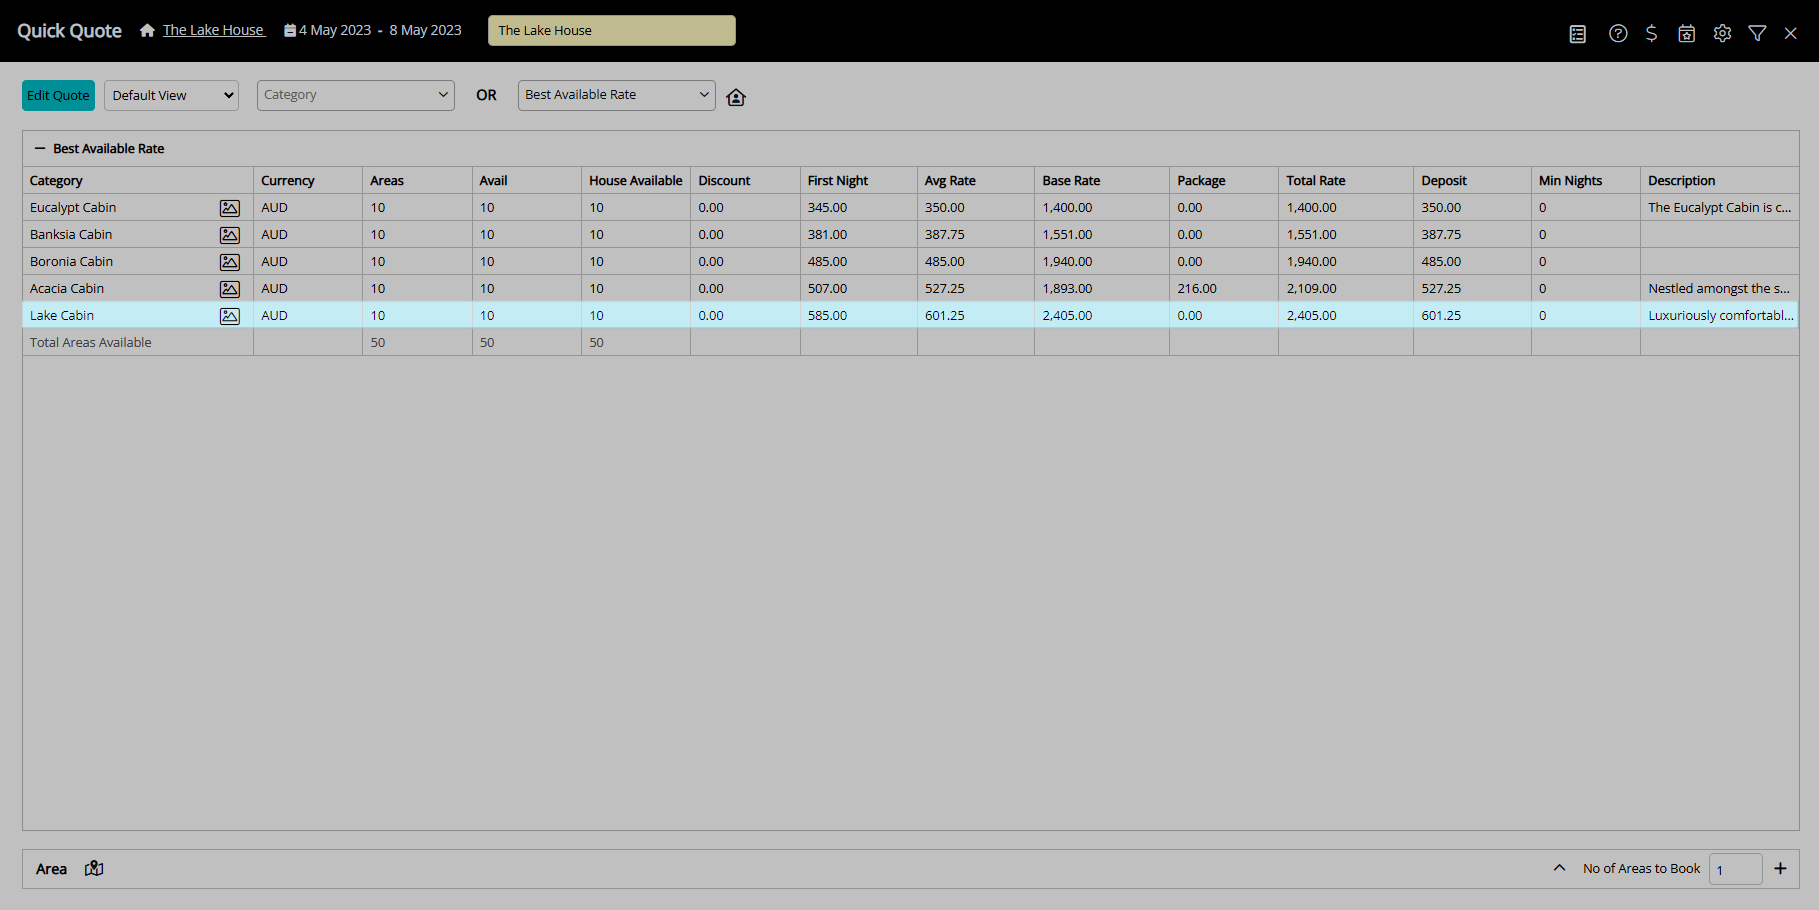
- Perform a Quick Quote Search and select 'Get Quote'.
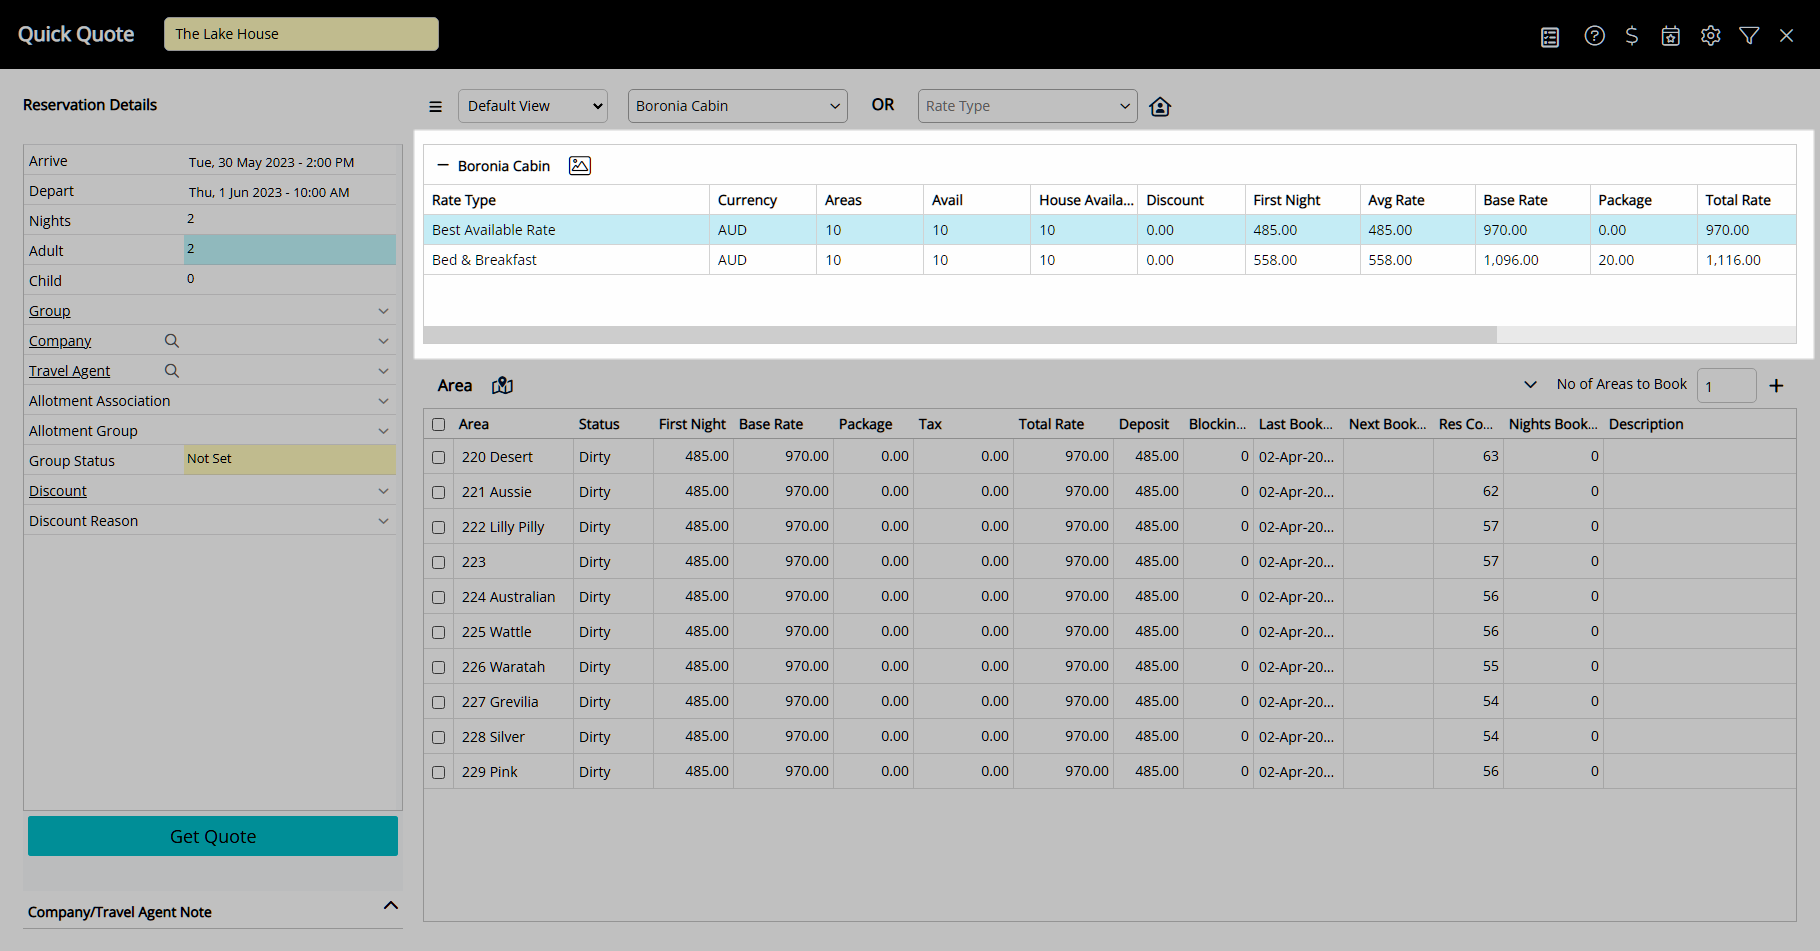
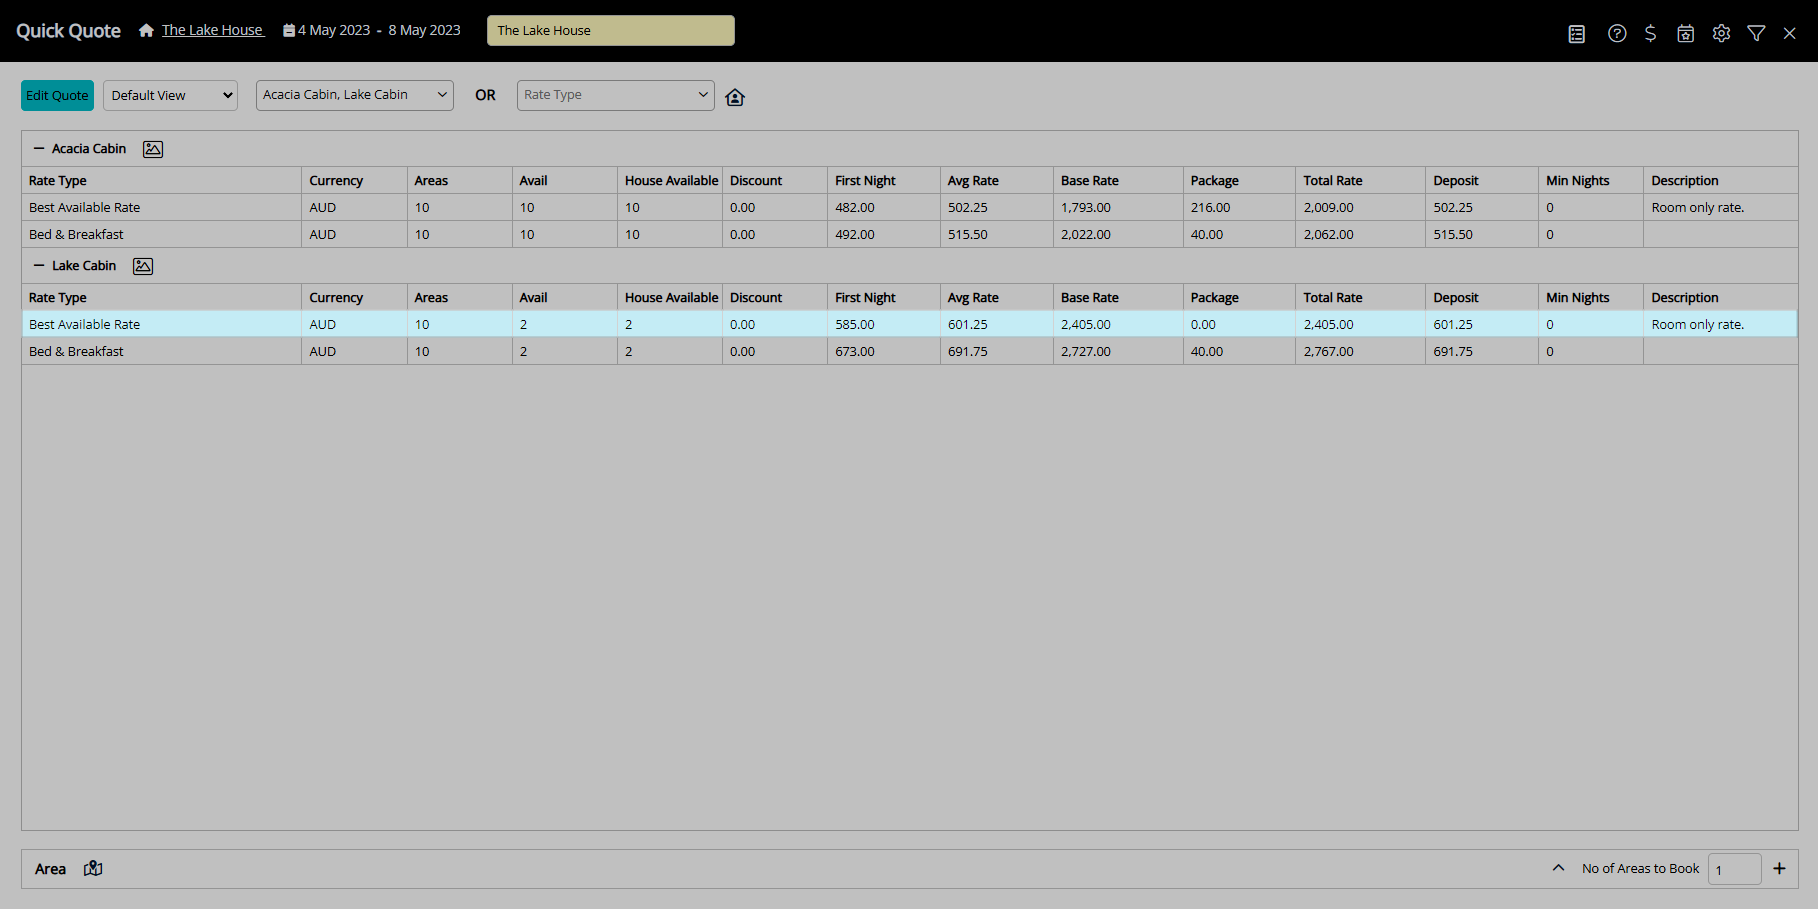
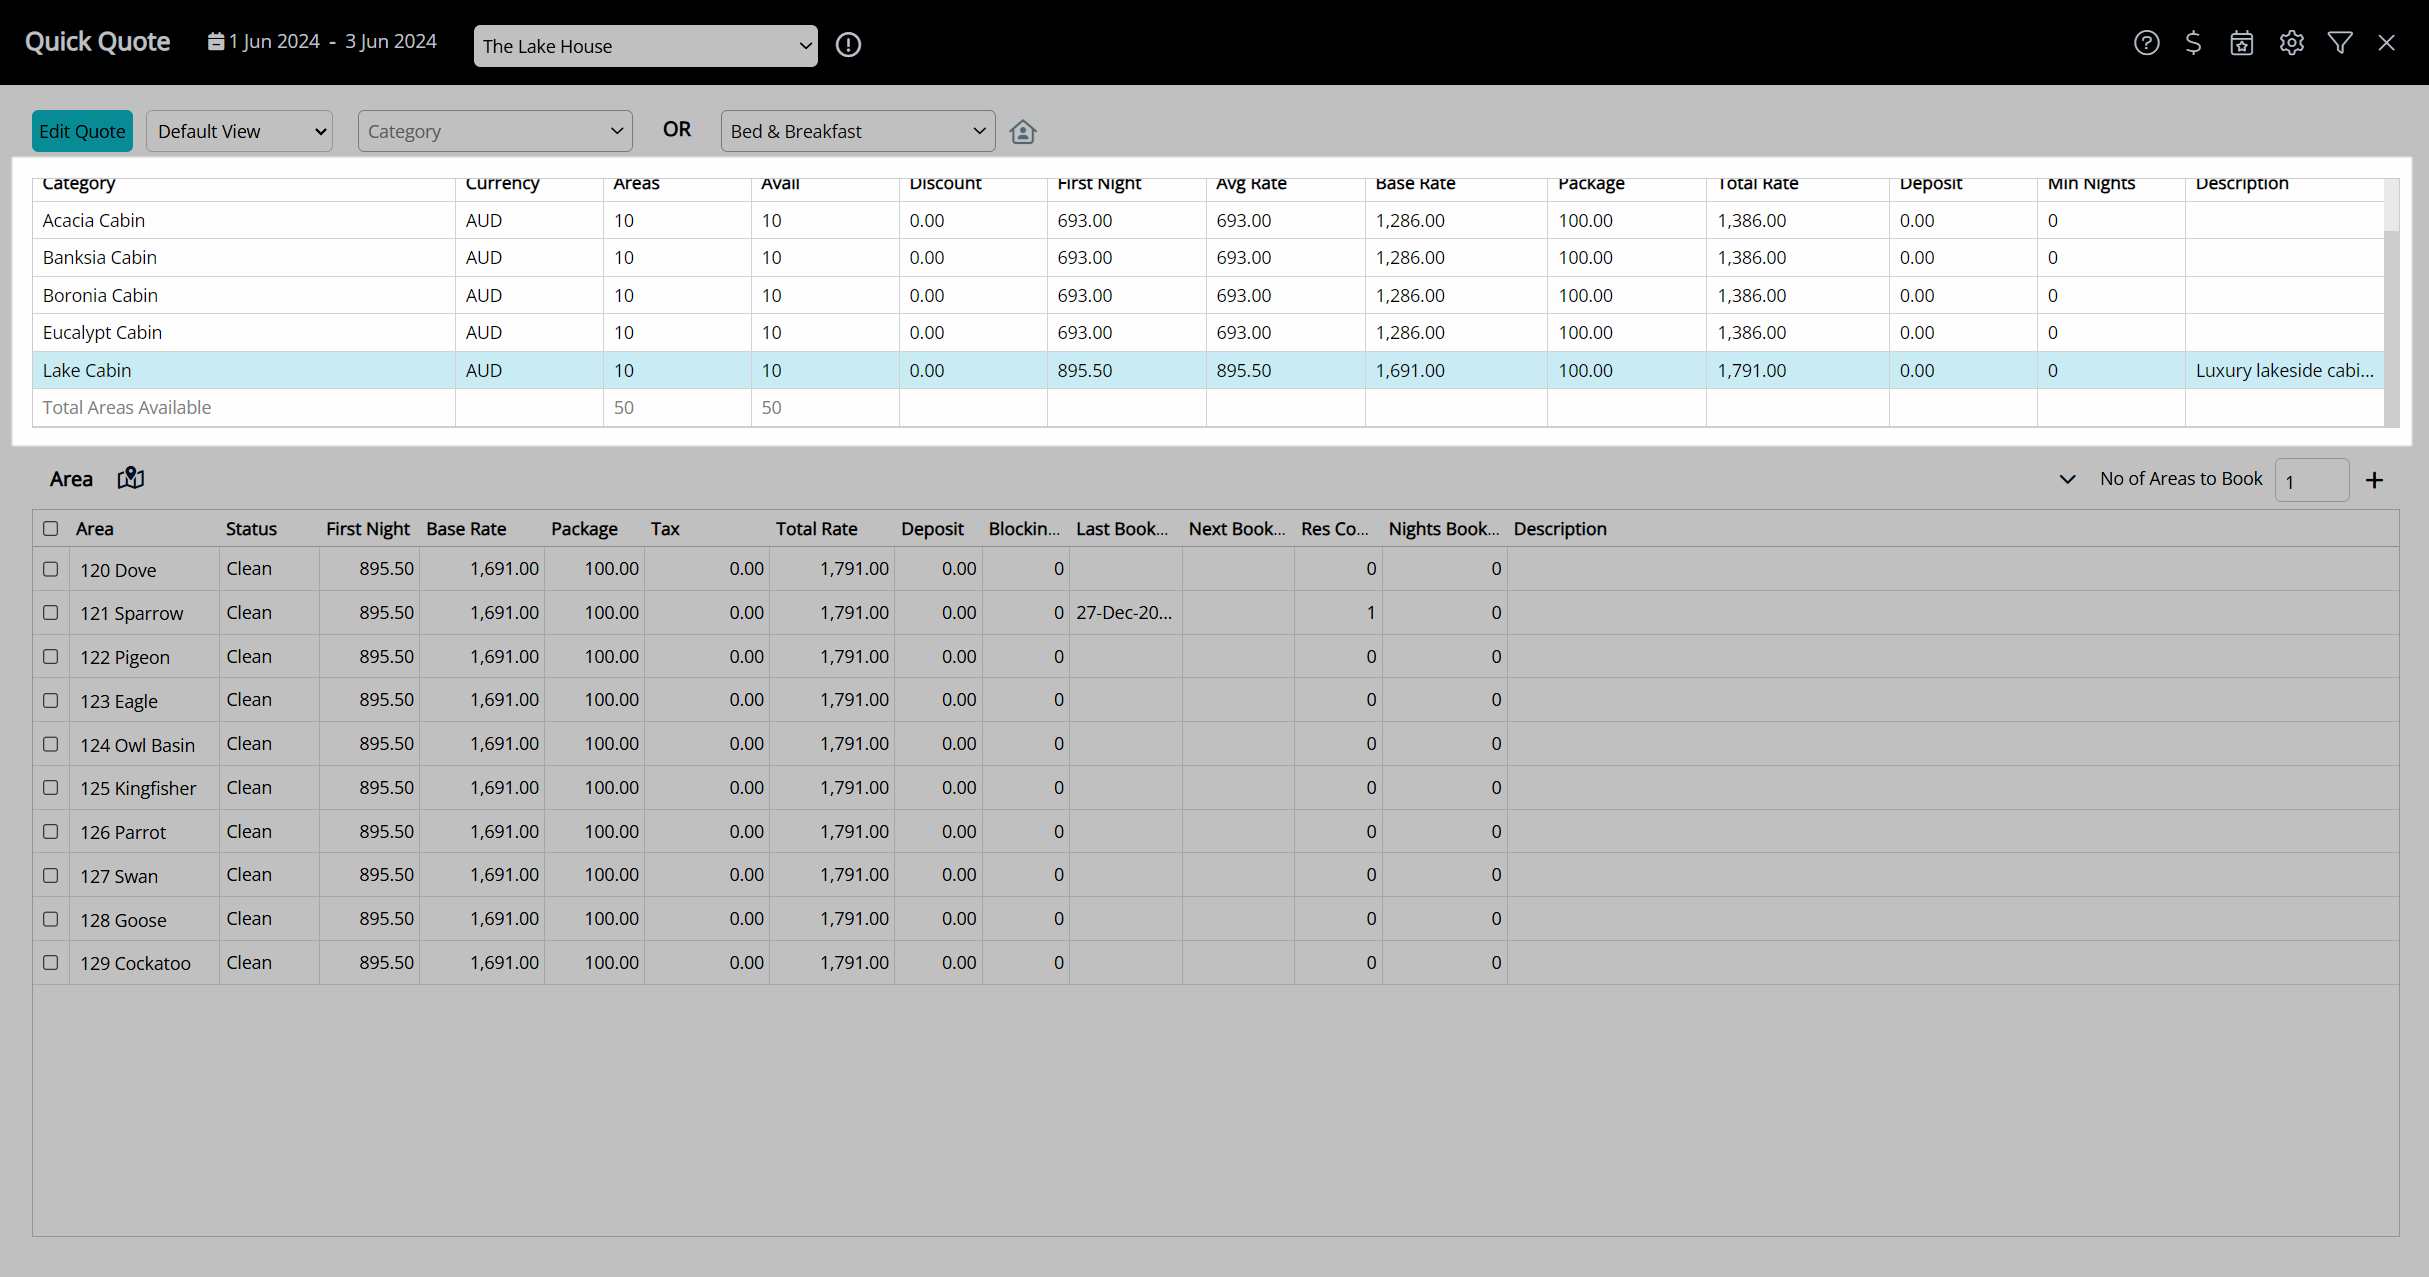
- Select a Category or Rate Type.
- Select the checkbox for the Areas to Book or enter the Number of Areas to Book.
- Select the
 'Add to Reservation' icon.
 - Select 'Proceed'.
- Enter the Group Name.
- Enter the Guest Details.
- Save/Exit.
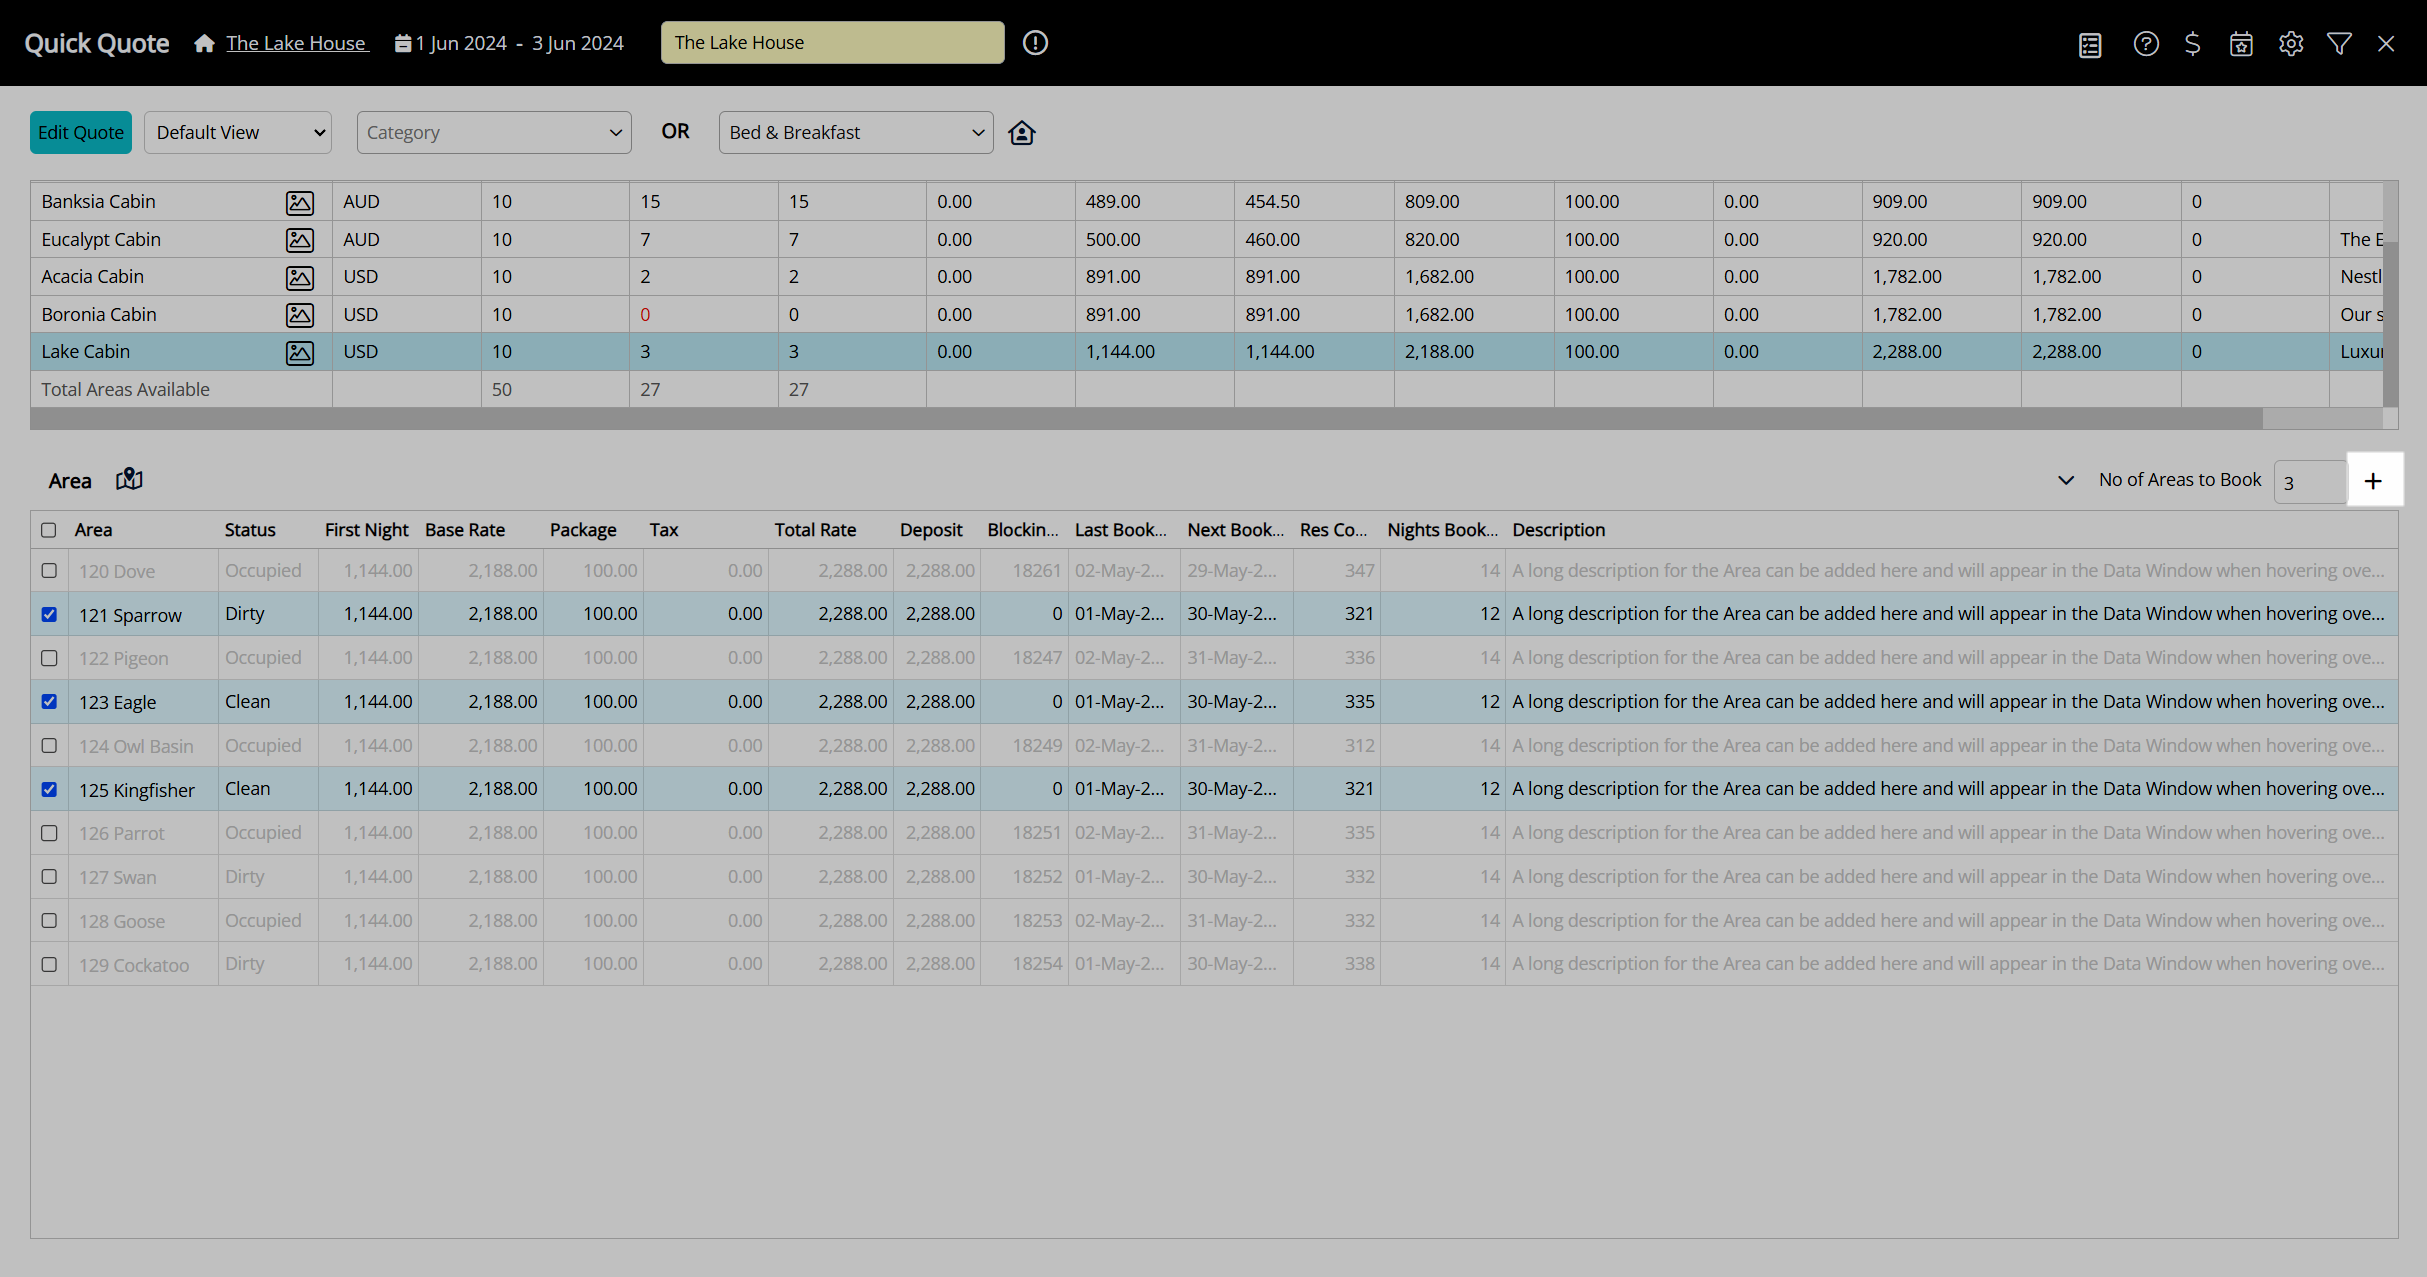
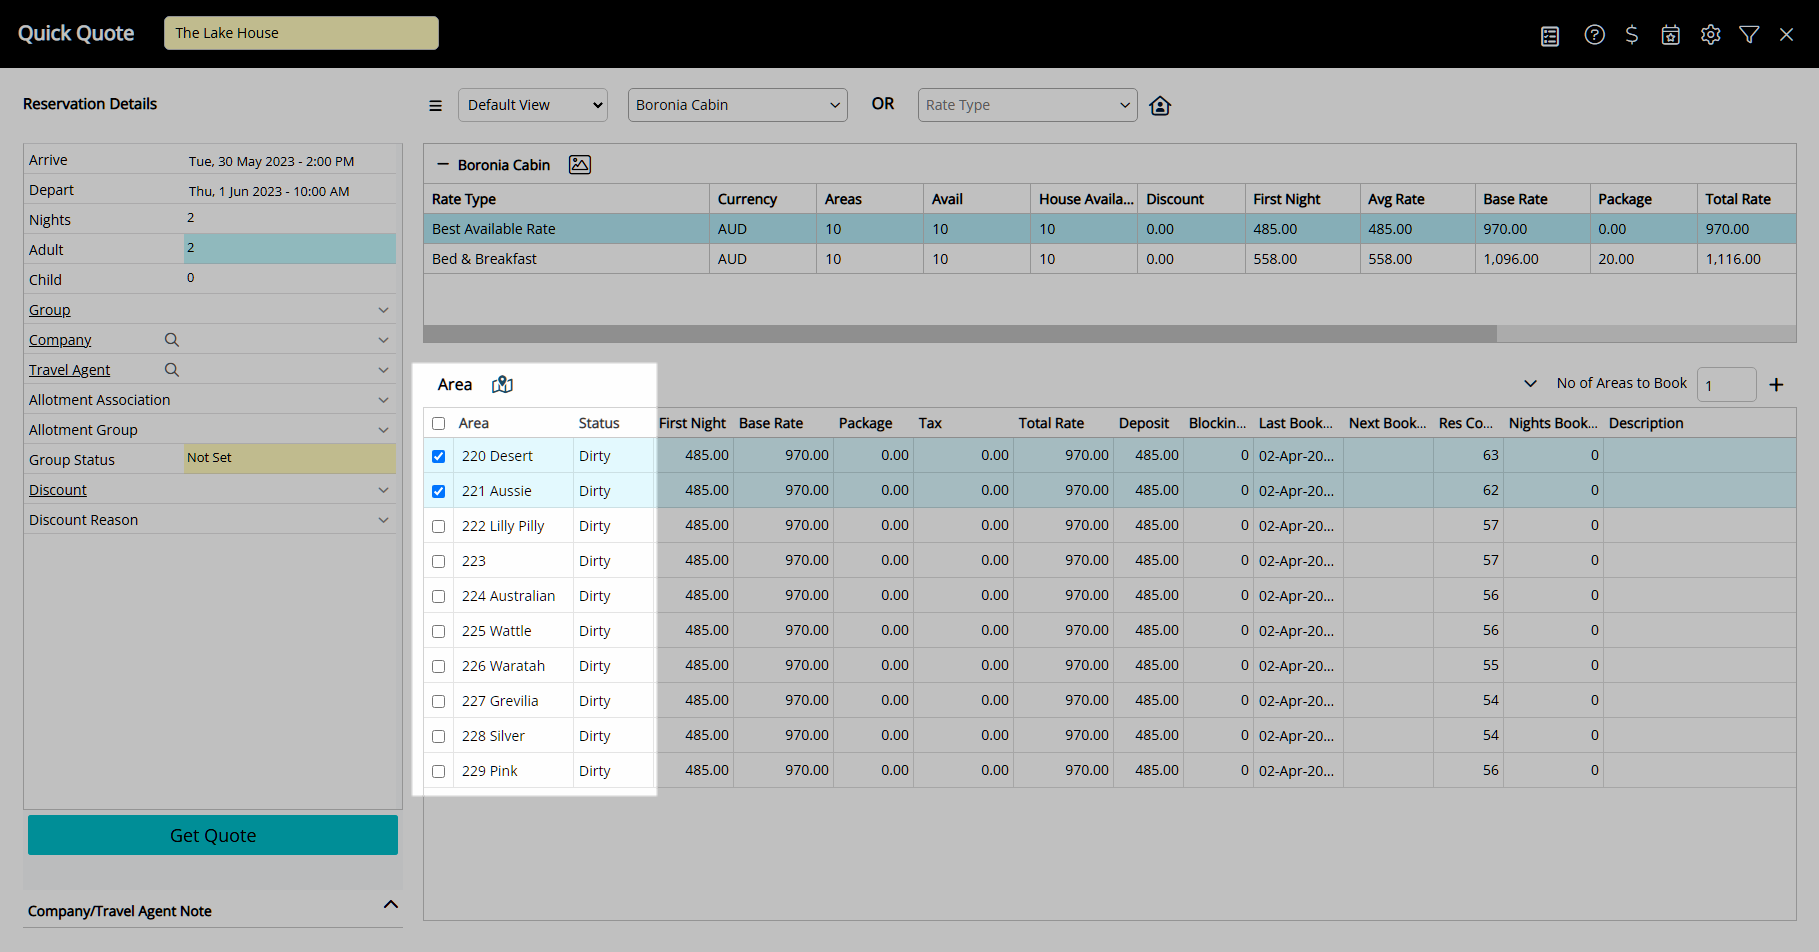
Go to Reservations > Quick Quote in the Side Menu of RMS.
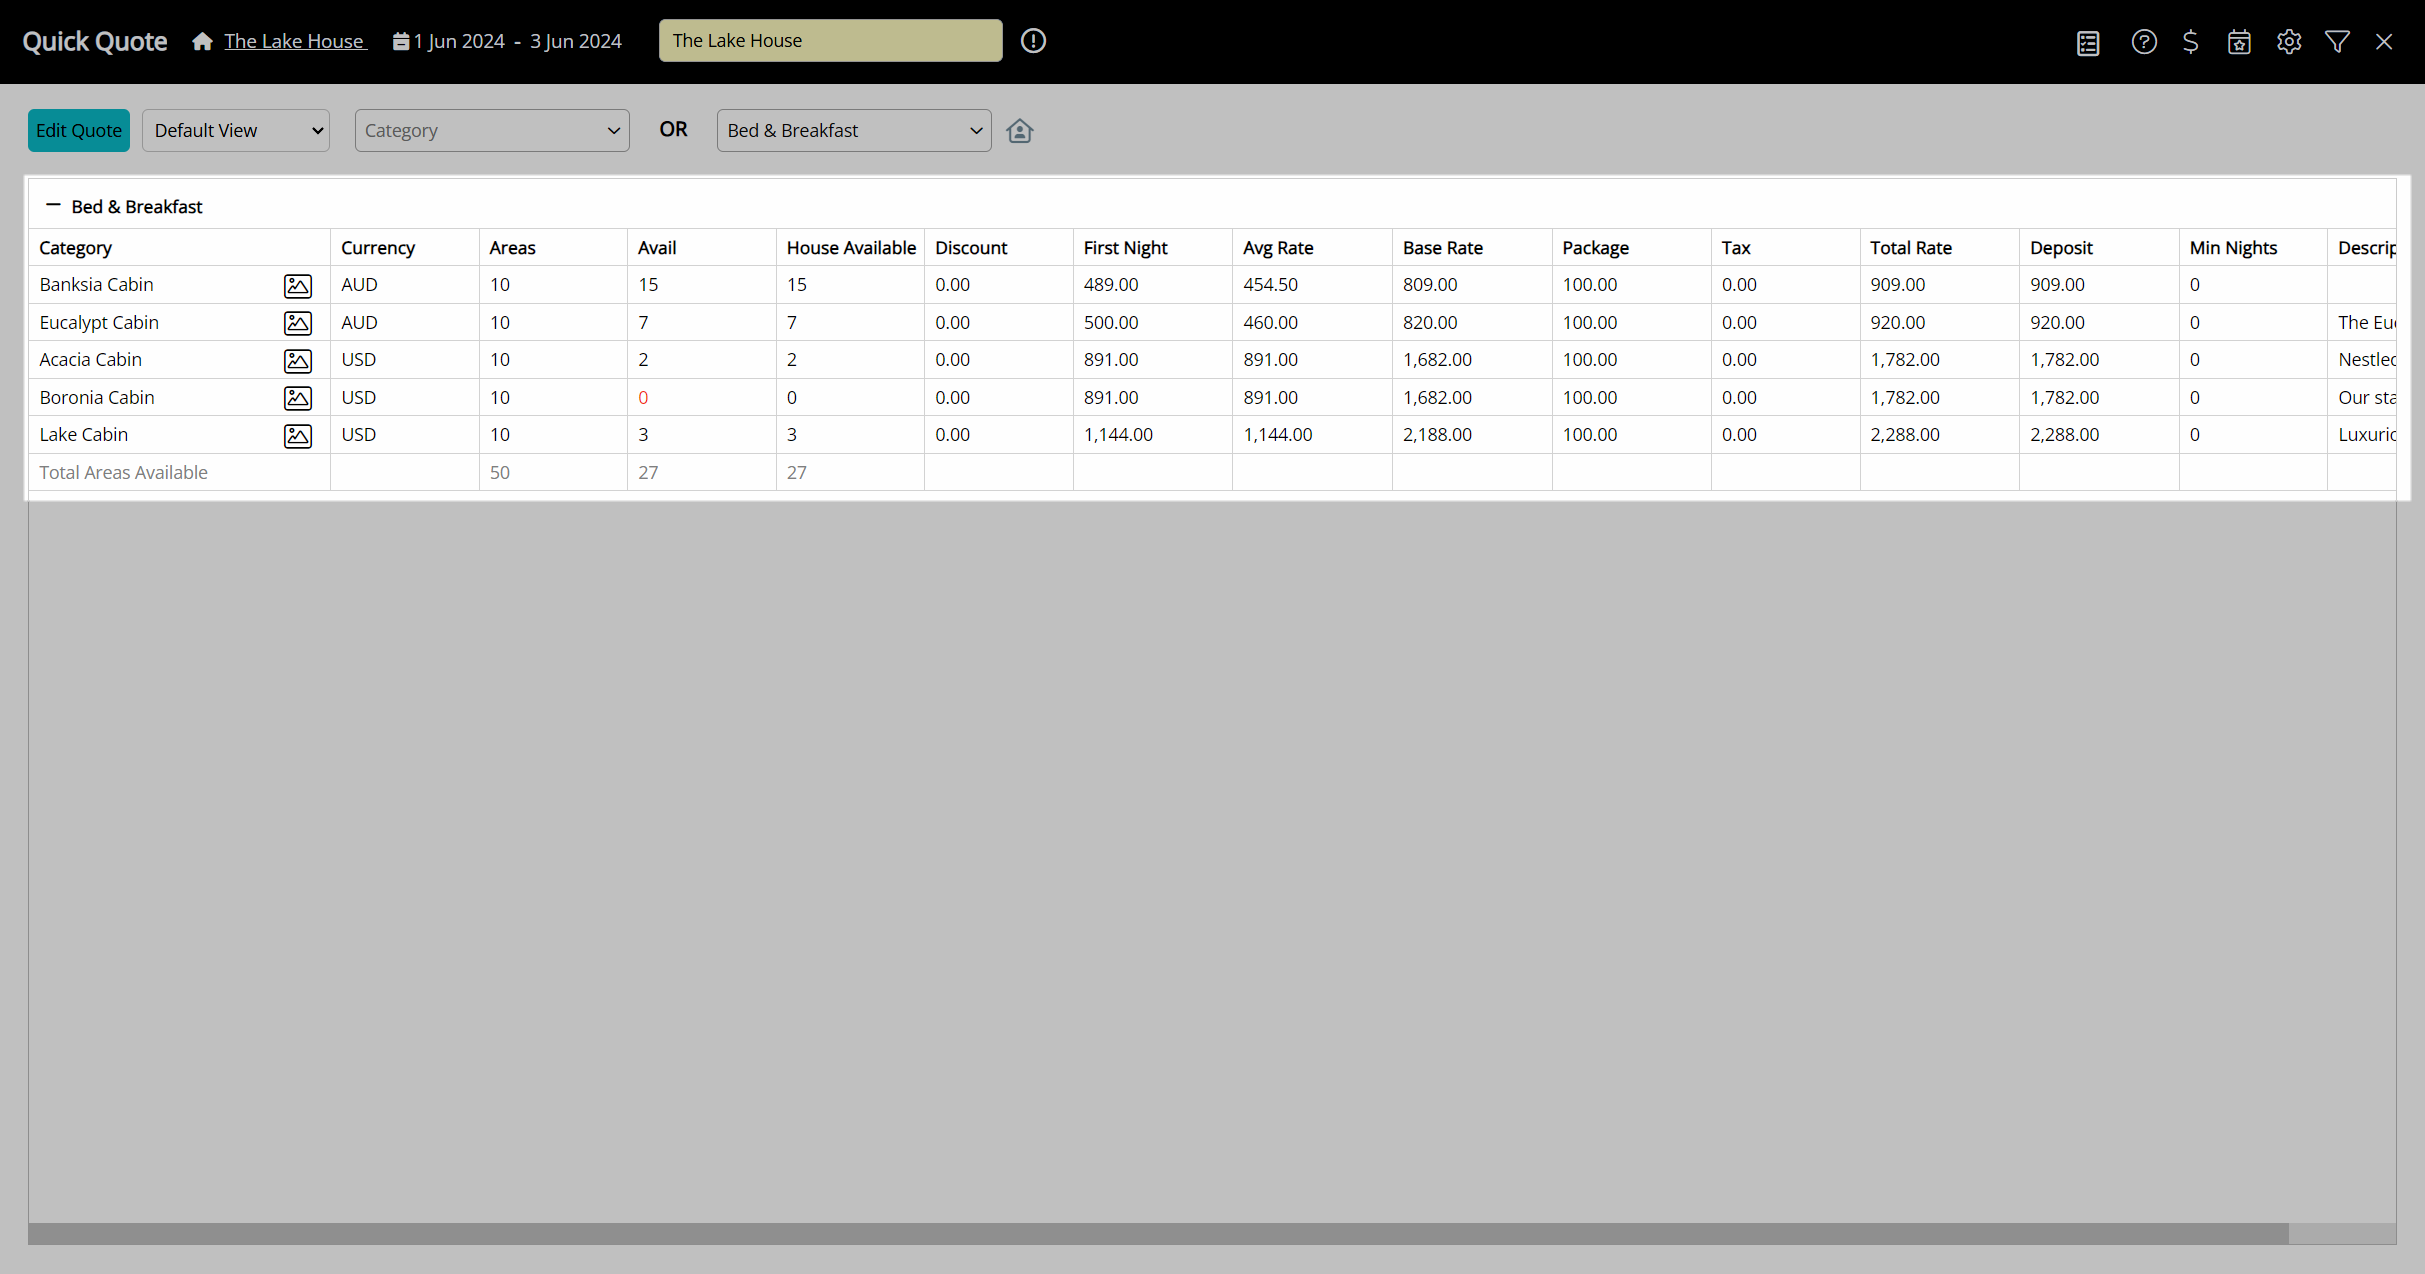
Perform a Quick Quote Search and select 'Get Quote'.
Select a Category or Rate Type.
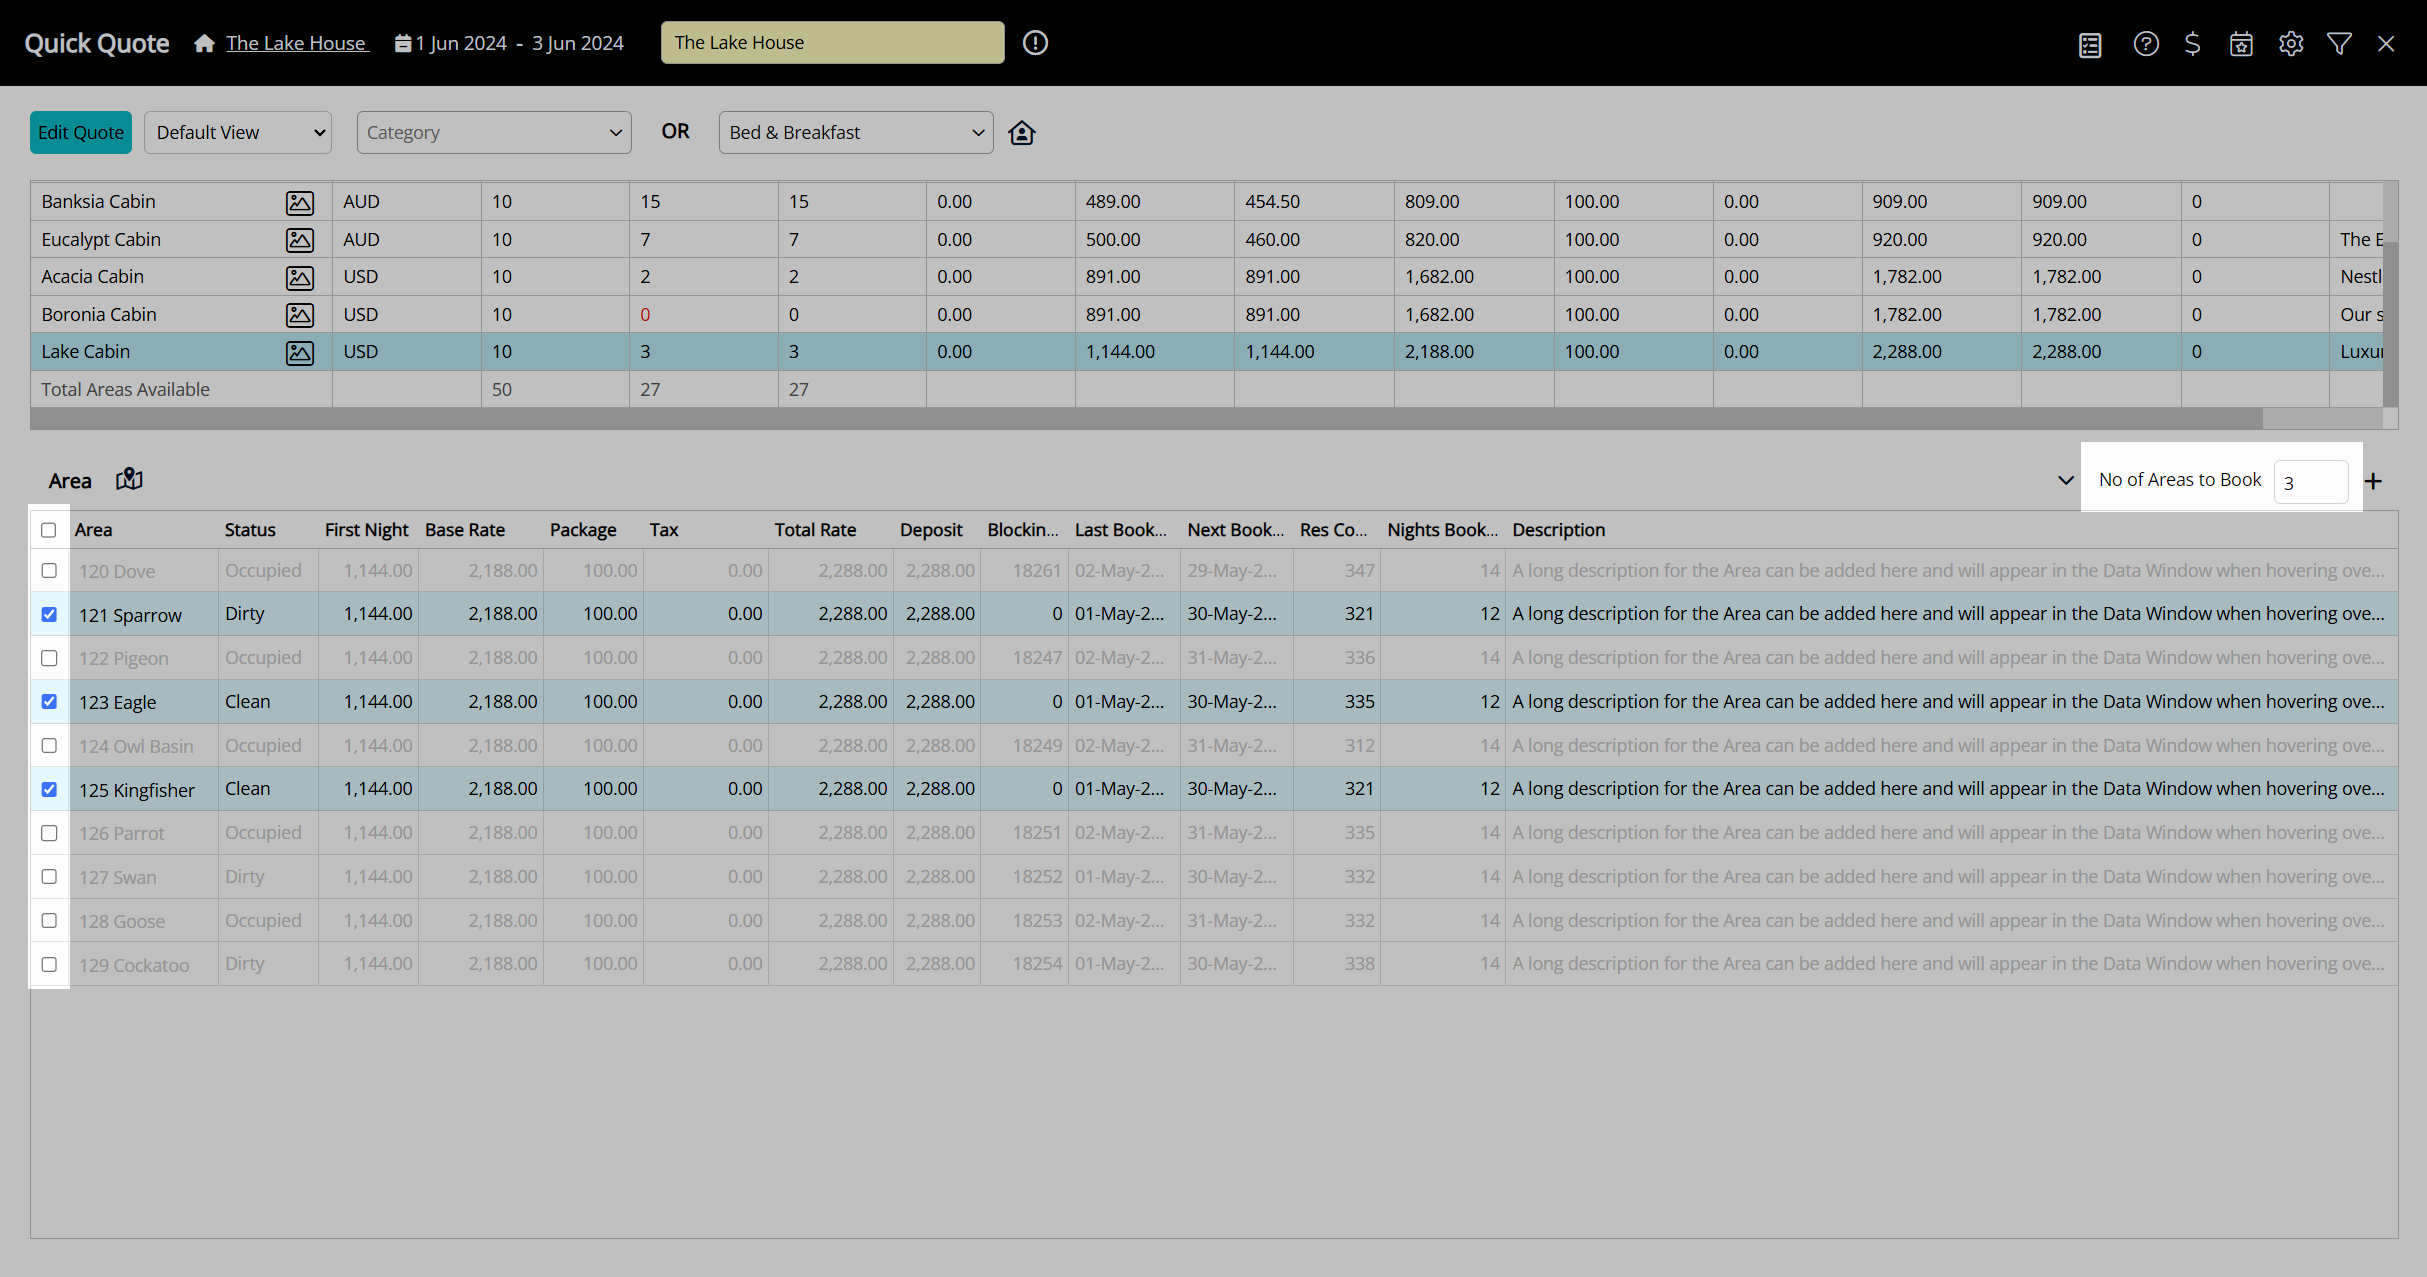
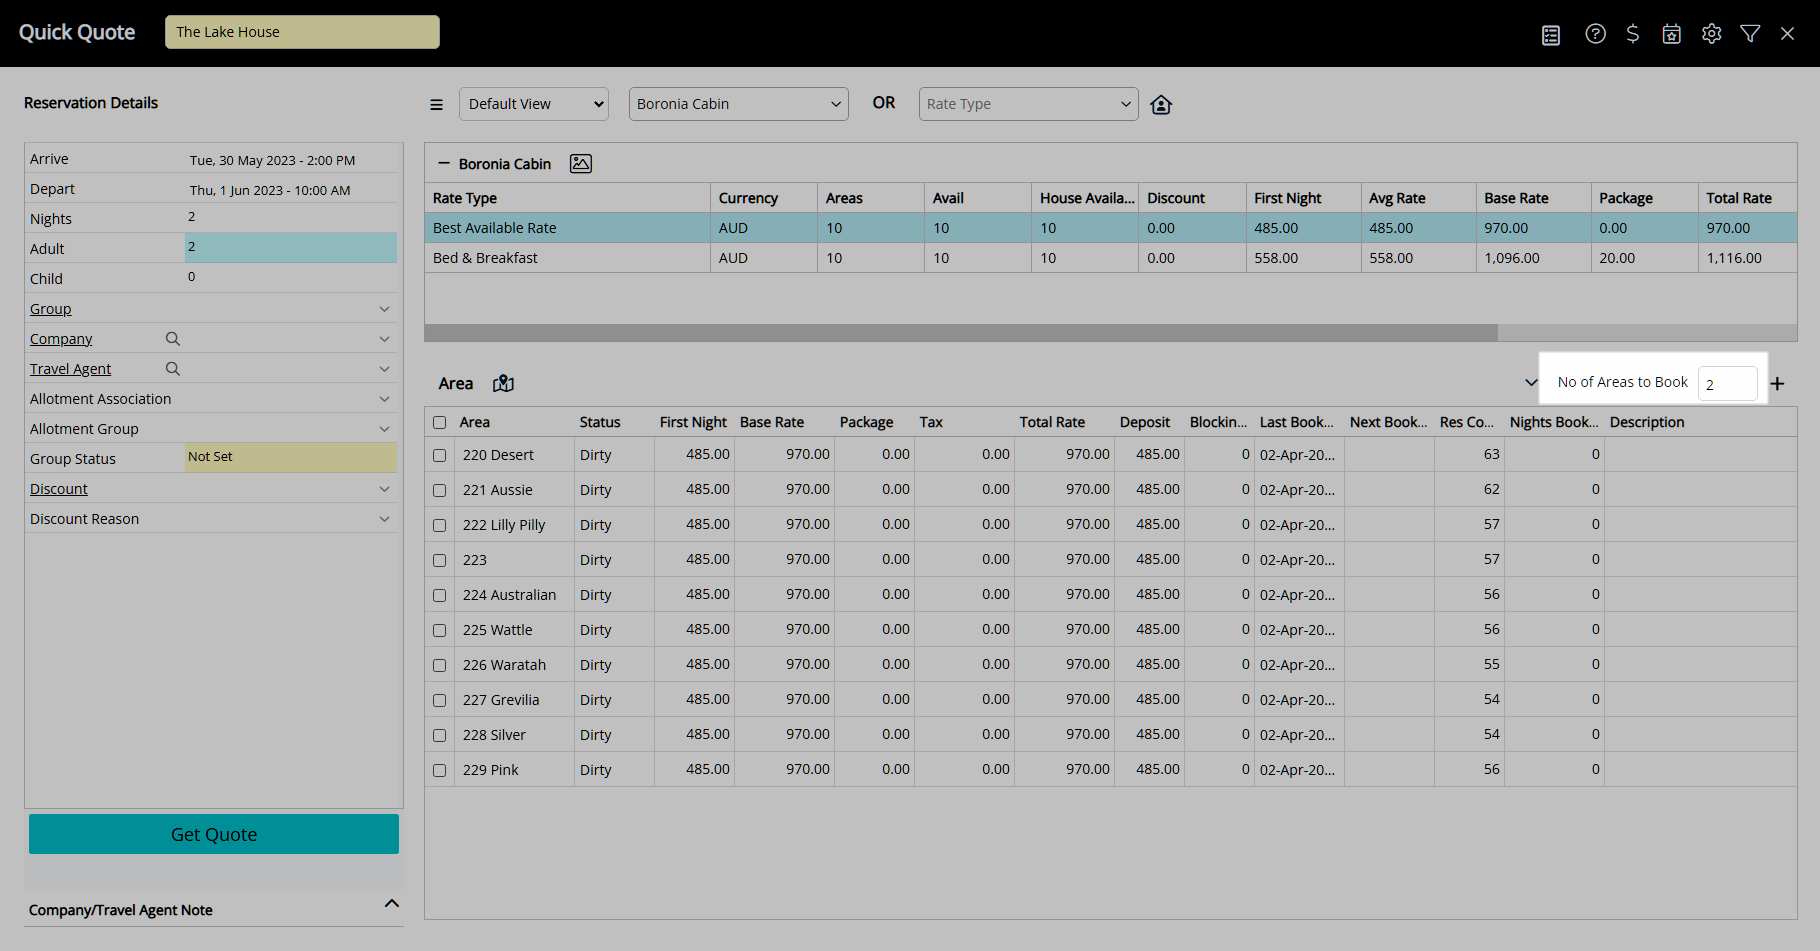
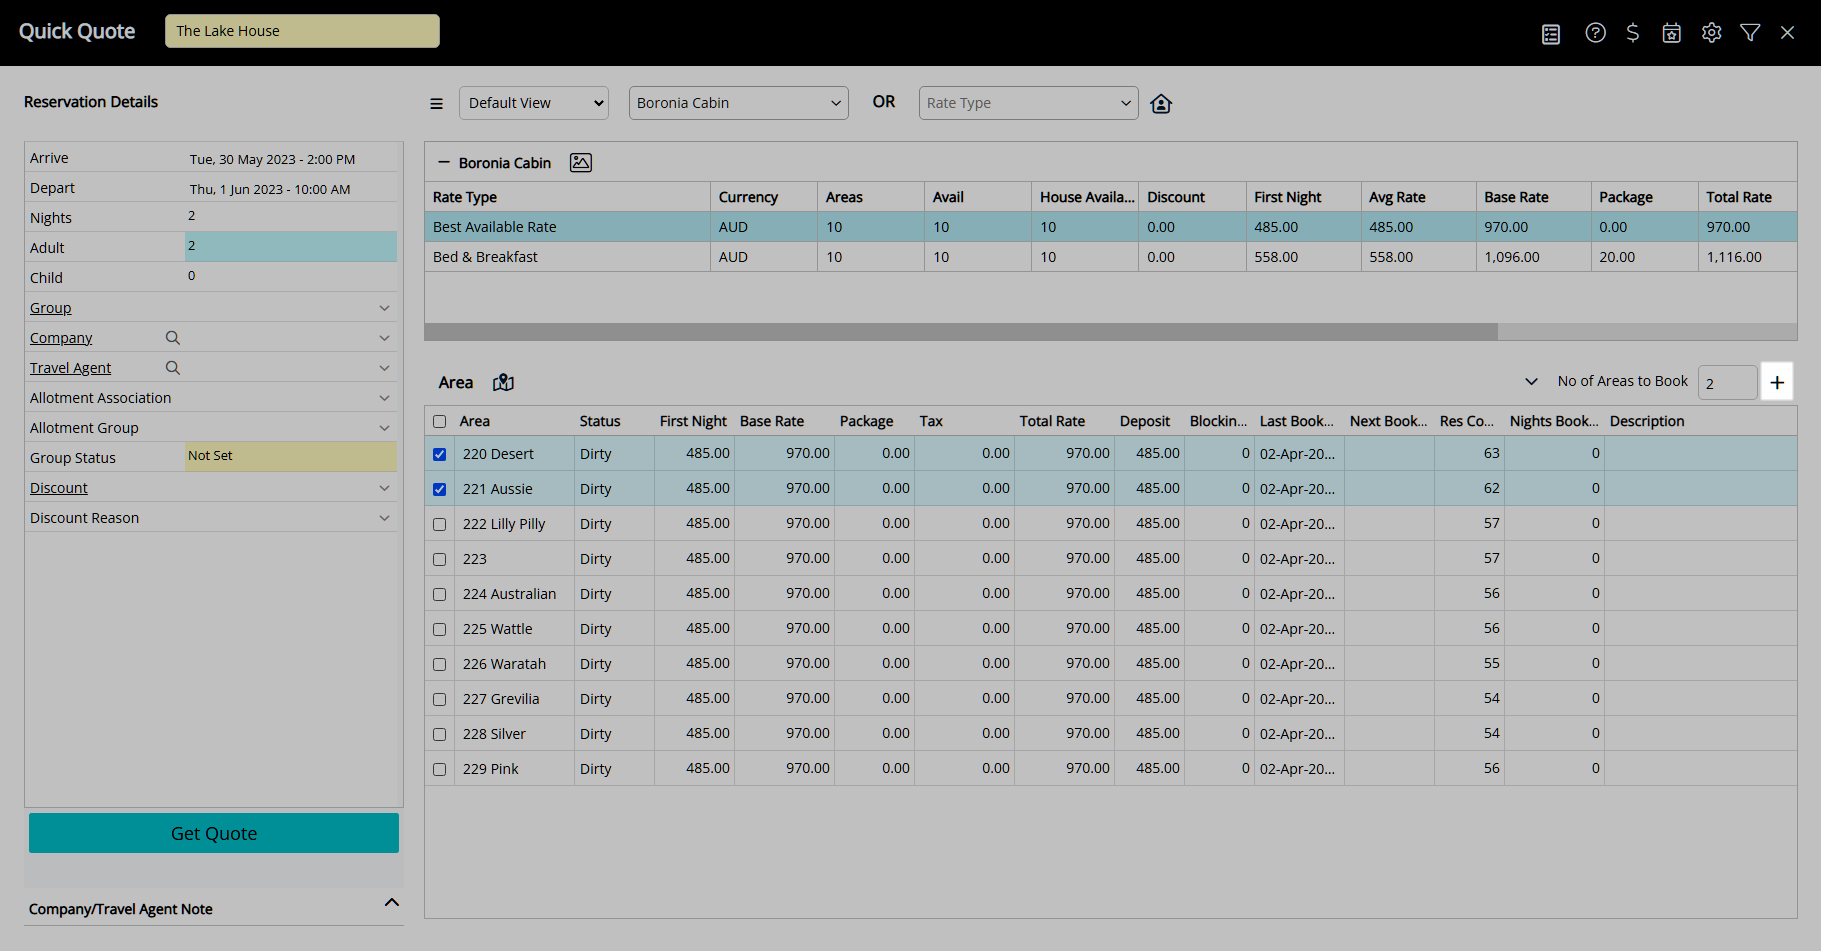
Select the checkbox for the Areas to Book or enter the Number of Areas to Book.
Select the ![]() 'Add to Reservation' icon.
'Add to Reservation' icon.
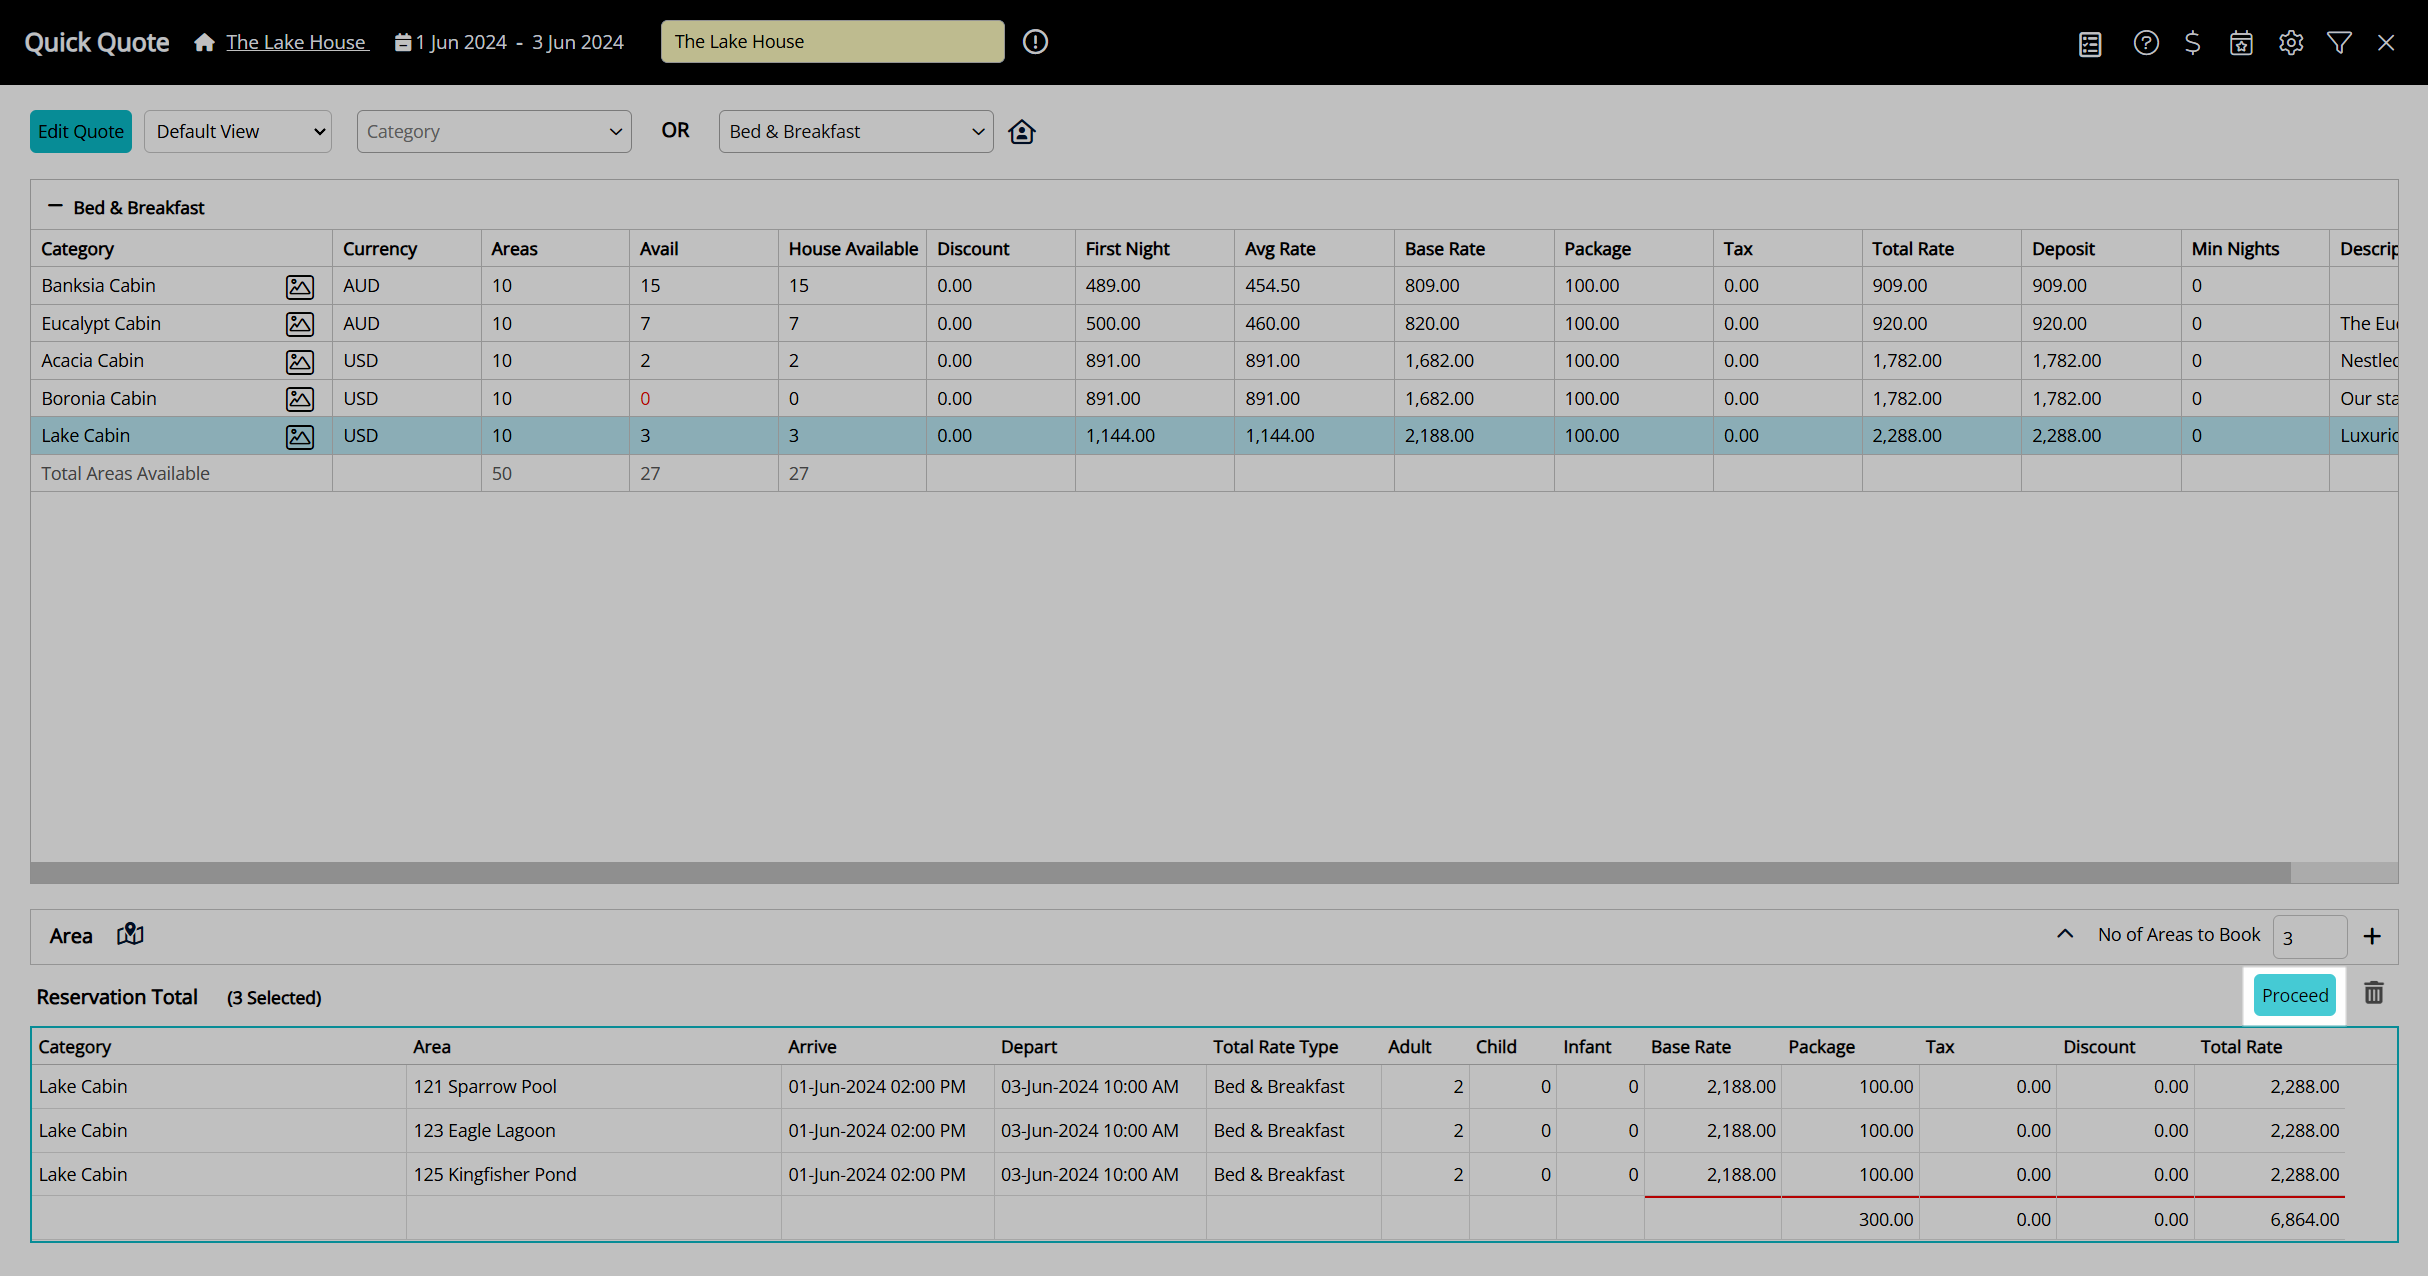
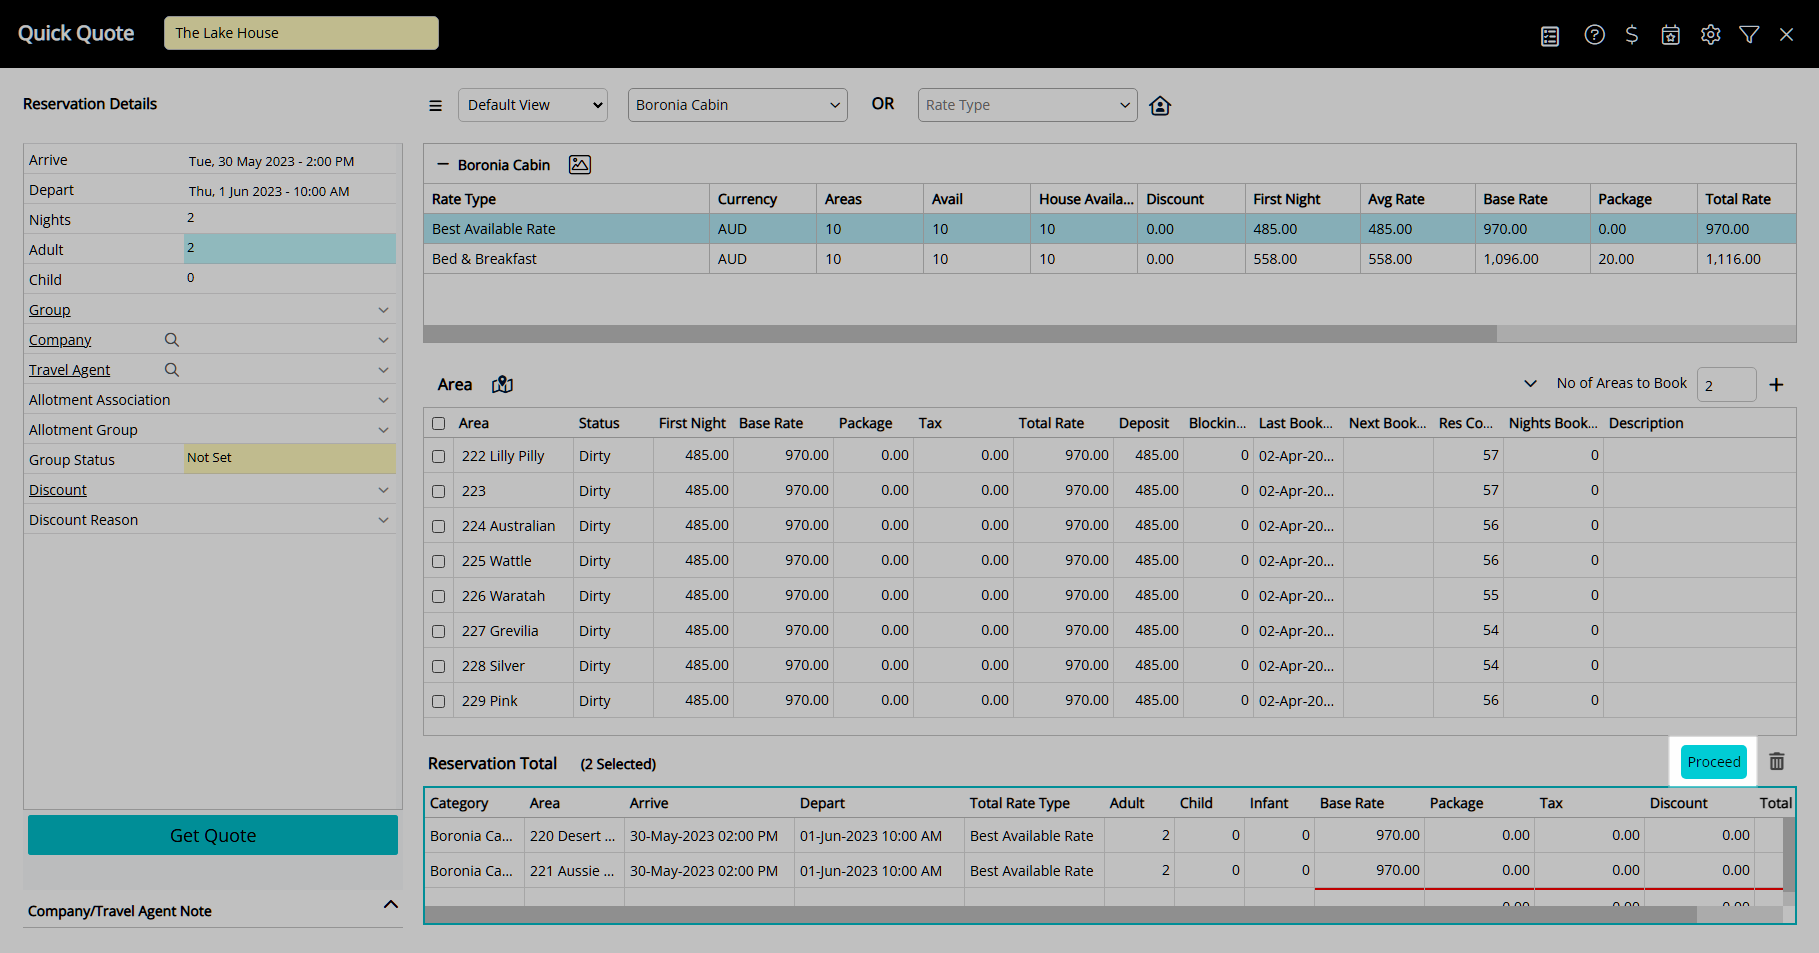
Select 'Proceed'.
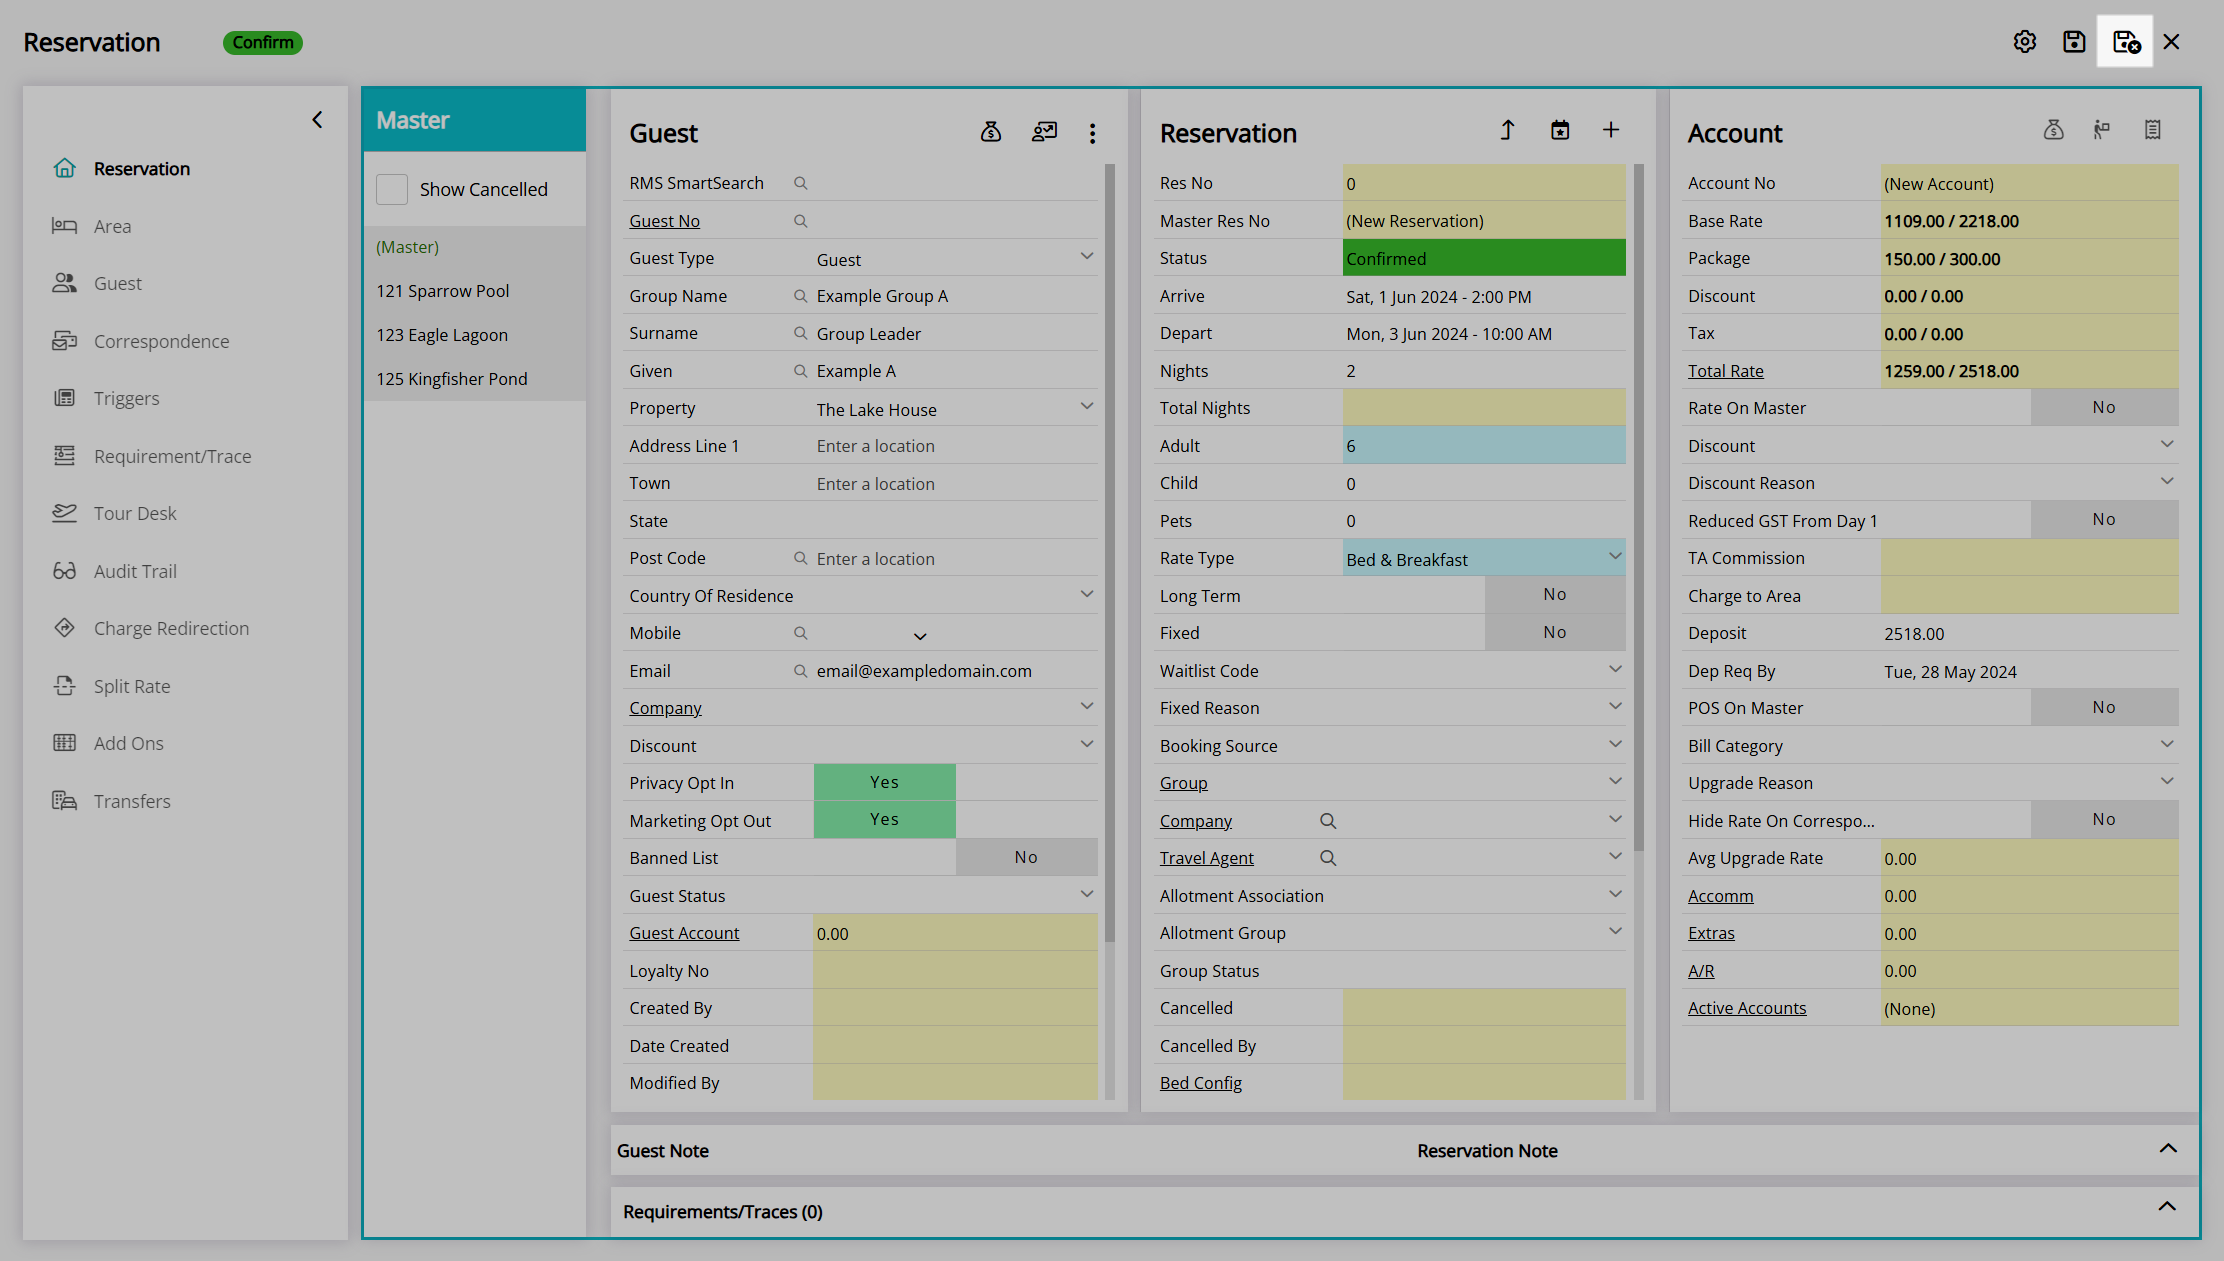
Enter a Group Name.
Enter the Guest Details.

Select 'Save/Exit' to store the changes made and leave the Master Reservation.
Multi-Property Stay
Enterprise customers with guests travelling and staying at more than one property can manage these group reservations independently or consolidate them into a single group reservation with the reservation stay dates at each property in one group.
- Go to Reservations > Quick Quote in the Side Menu of RMS.
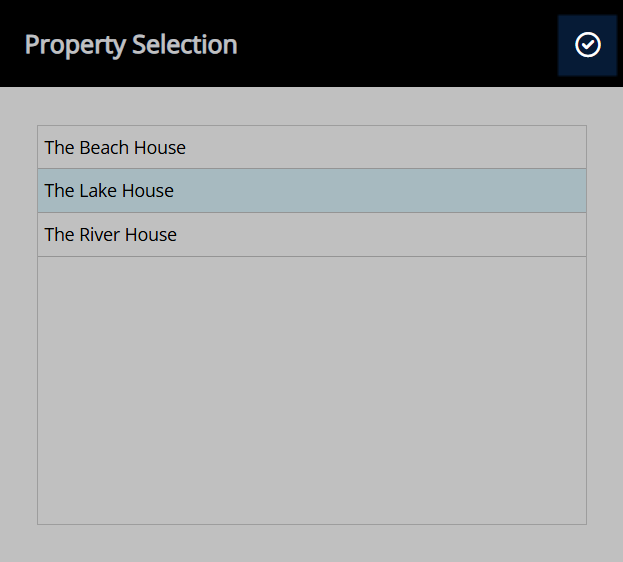
- Select a Property and choose the
 'Apply' icon.
 - Perform a Quick Quote Search and select 'Get Quote'.
- Select a Category or Rate Type.
- Select the checkbox for the Areas to Book or enter the Number of Areas to Book.
- Select the
 'Add to Reservation' icon.
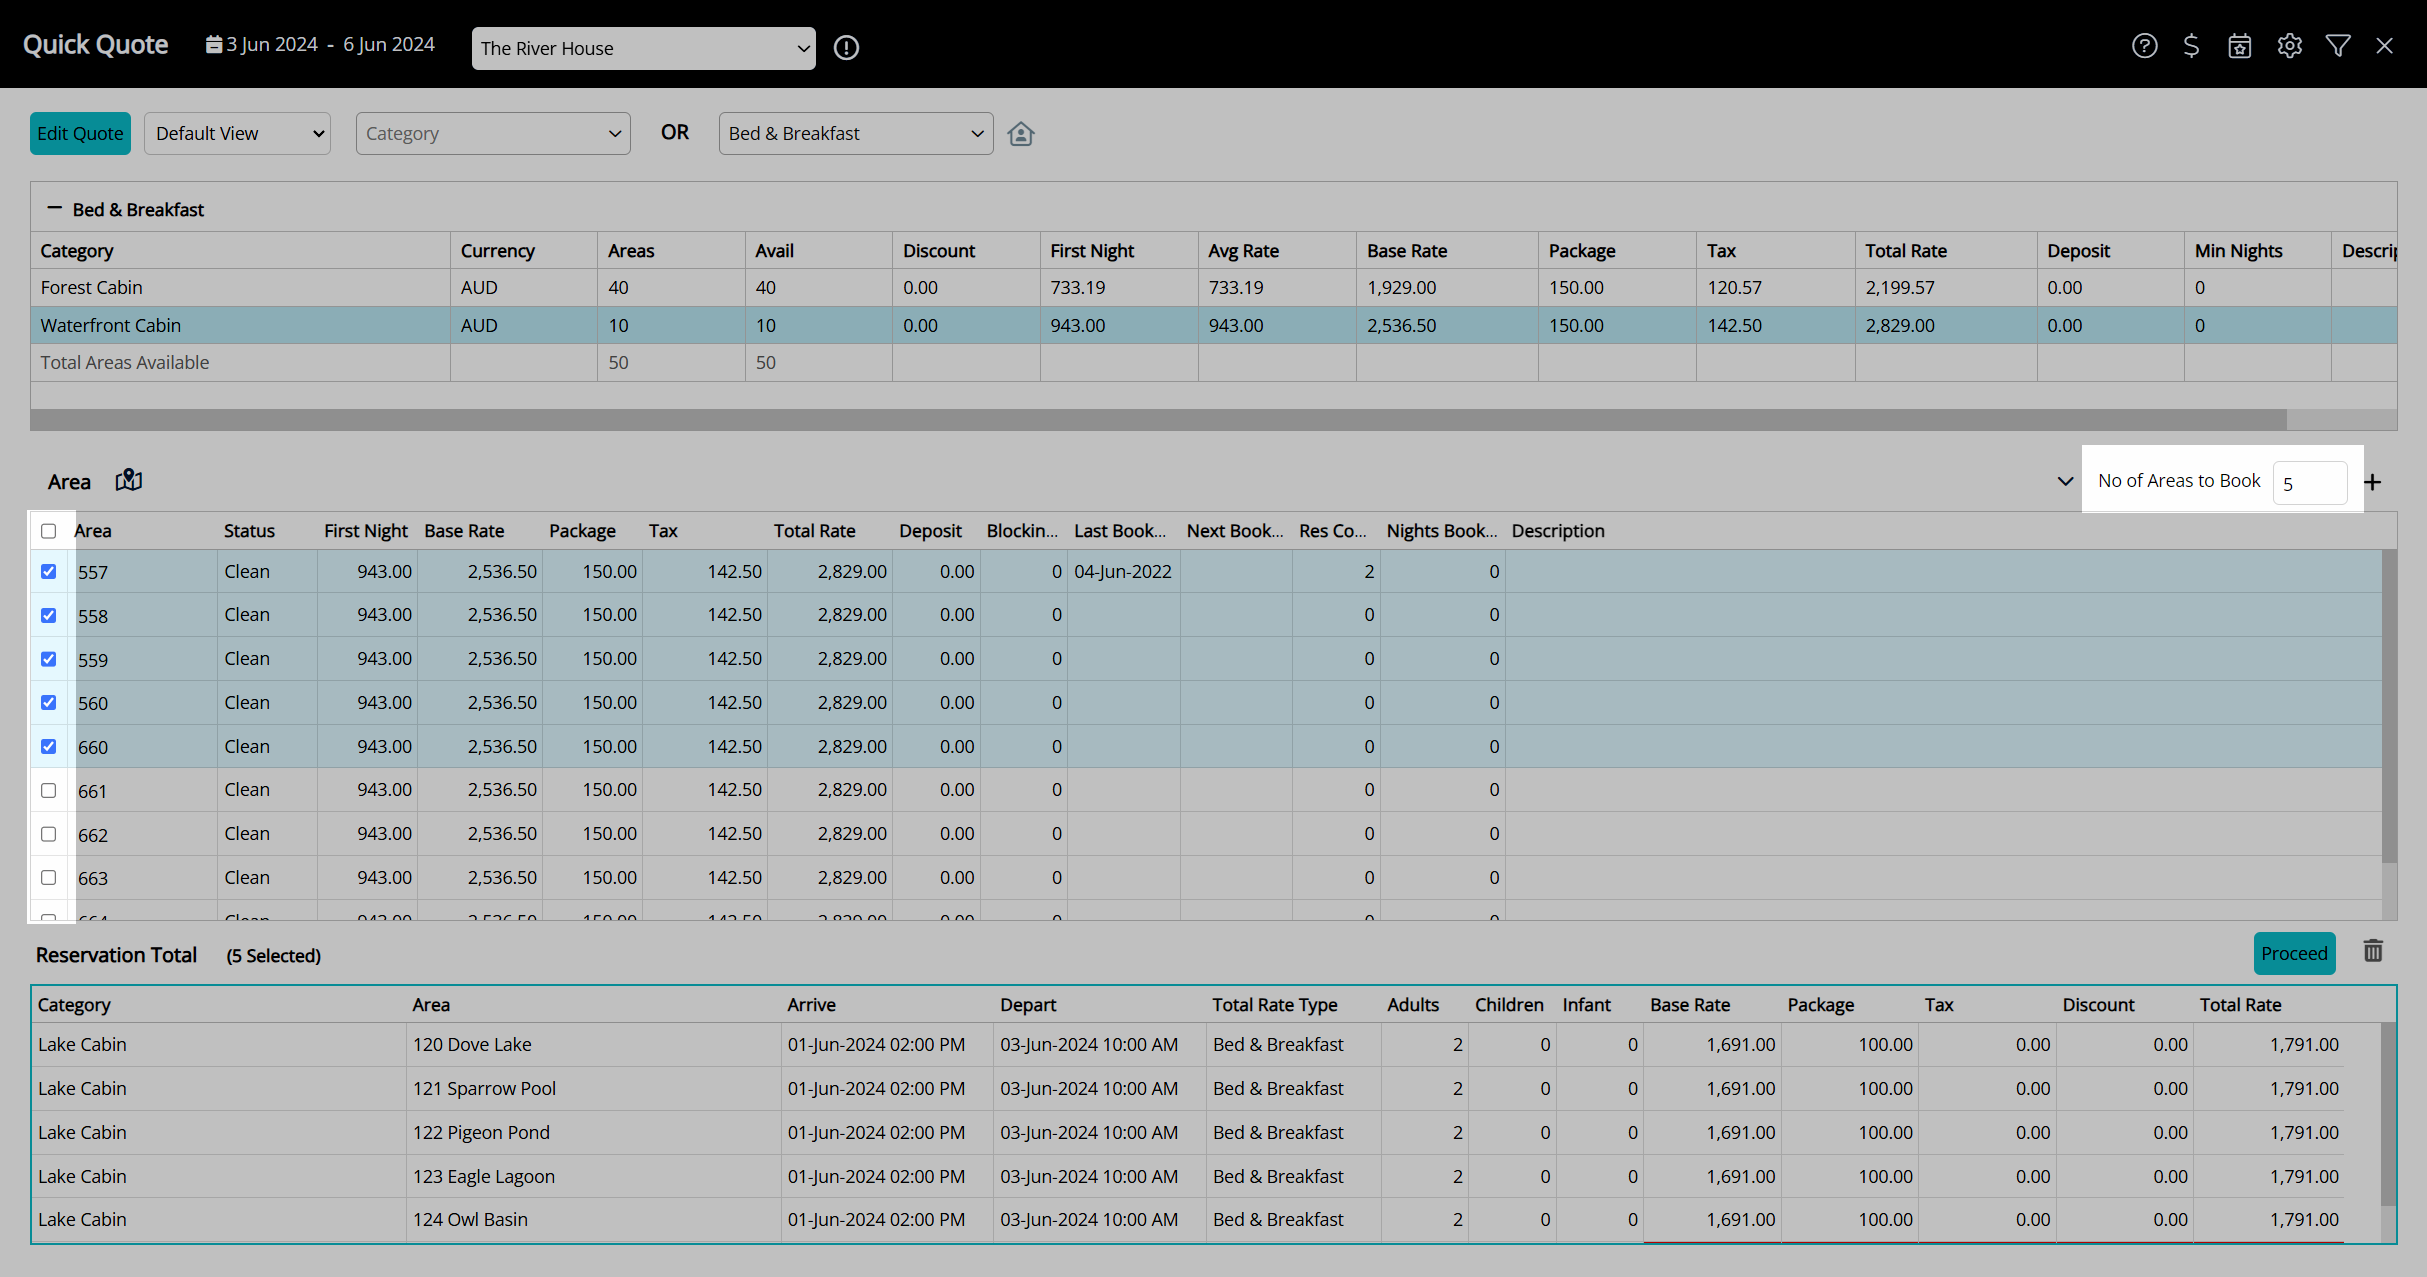
 - Select 'Edit Quote'.
- Select a Property.
- Perform a Quick Quote Search and select 'Get Quote'.
- Select a Category or Rate Type.
- Select the checkbox for the Areas to Book or enter the Number of Areas to Book.
- Select the
 'Add to Reservation' icon.
 - Select 'Proceed'.
- Enter the Group Name.
- Enter the Guest Details.
- Save/Exit.
Go to Reservations > Quick Quote in the Side Menu of RMS.

Select a Property and choose the  'Apply' icon.
Perform a Quick Quote Search and select 'Get Quote'.
Select a Category or Rate Type.
Select the checkbox for the Areas to Book or enter the Number of Areas to Book.
Select the  'Add to Reservation' icon.
Select 'Edit Quote'.
Select a Property.

Perform a Quick Quote Search and select 'Get Quote'.

Select a Category or Rate Type.

Select the checkbox for the Areas to Book or enter the Number of Areas to Book.
Select the  'Add to Reservation' icon.

Select 'Proceed'.

Enter the Group Name.
Enter the Guest Details on the group cover page.
Select the  'Save/Exit' icon to store the changes made and leave the reservation.
The navigator pane will show all areas or categories selected at each property for this group reservation.
The same Guest Profile can be added to the reservations at each property to reflect where each guest in the group stays.
Mixed Rate Group
Using the Quick Quote Rate Mixer feature, a group reservation can be created with a different rate on one or more reservations.
- Go to Reservations > Quick Quote in the Side Menu of RMS.
- Select the 'Availability View'.
- Select the Rate Mixer Toggle.
- Select the checkbox for each Rate Type.
- Perform a Quick Quote Search and select 'Get Quote'.
- Select a Category.
- Select the checkbox for the Areas to Book or enter the Number of Areas to Book.
- Select the
 'Add to Reservation' icon.
 - Repeat Steps 6-8 for each reservation.
- Select 'Proceed'.
- Enter the Group Name.
- Enter the Guest Details.
- Save/Exit.
Go to Reservations > Quick Quote in the Side Menu of RMS.
Select the 'Availability View'.
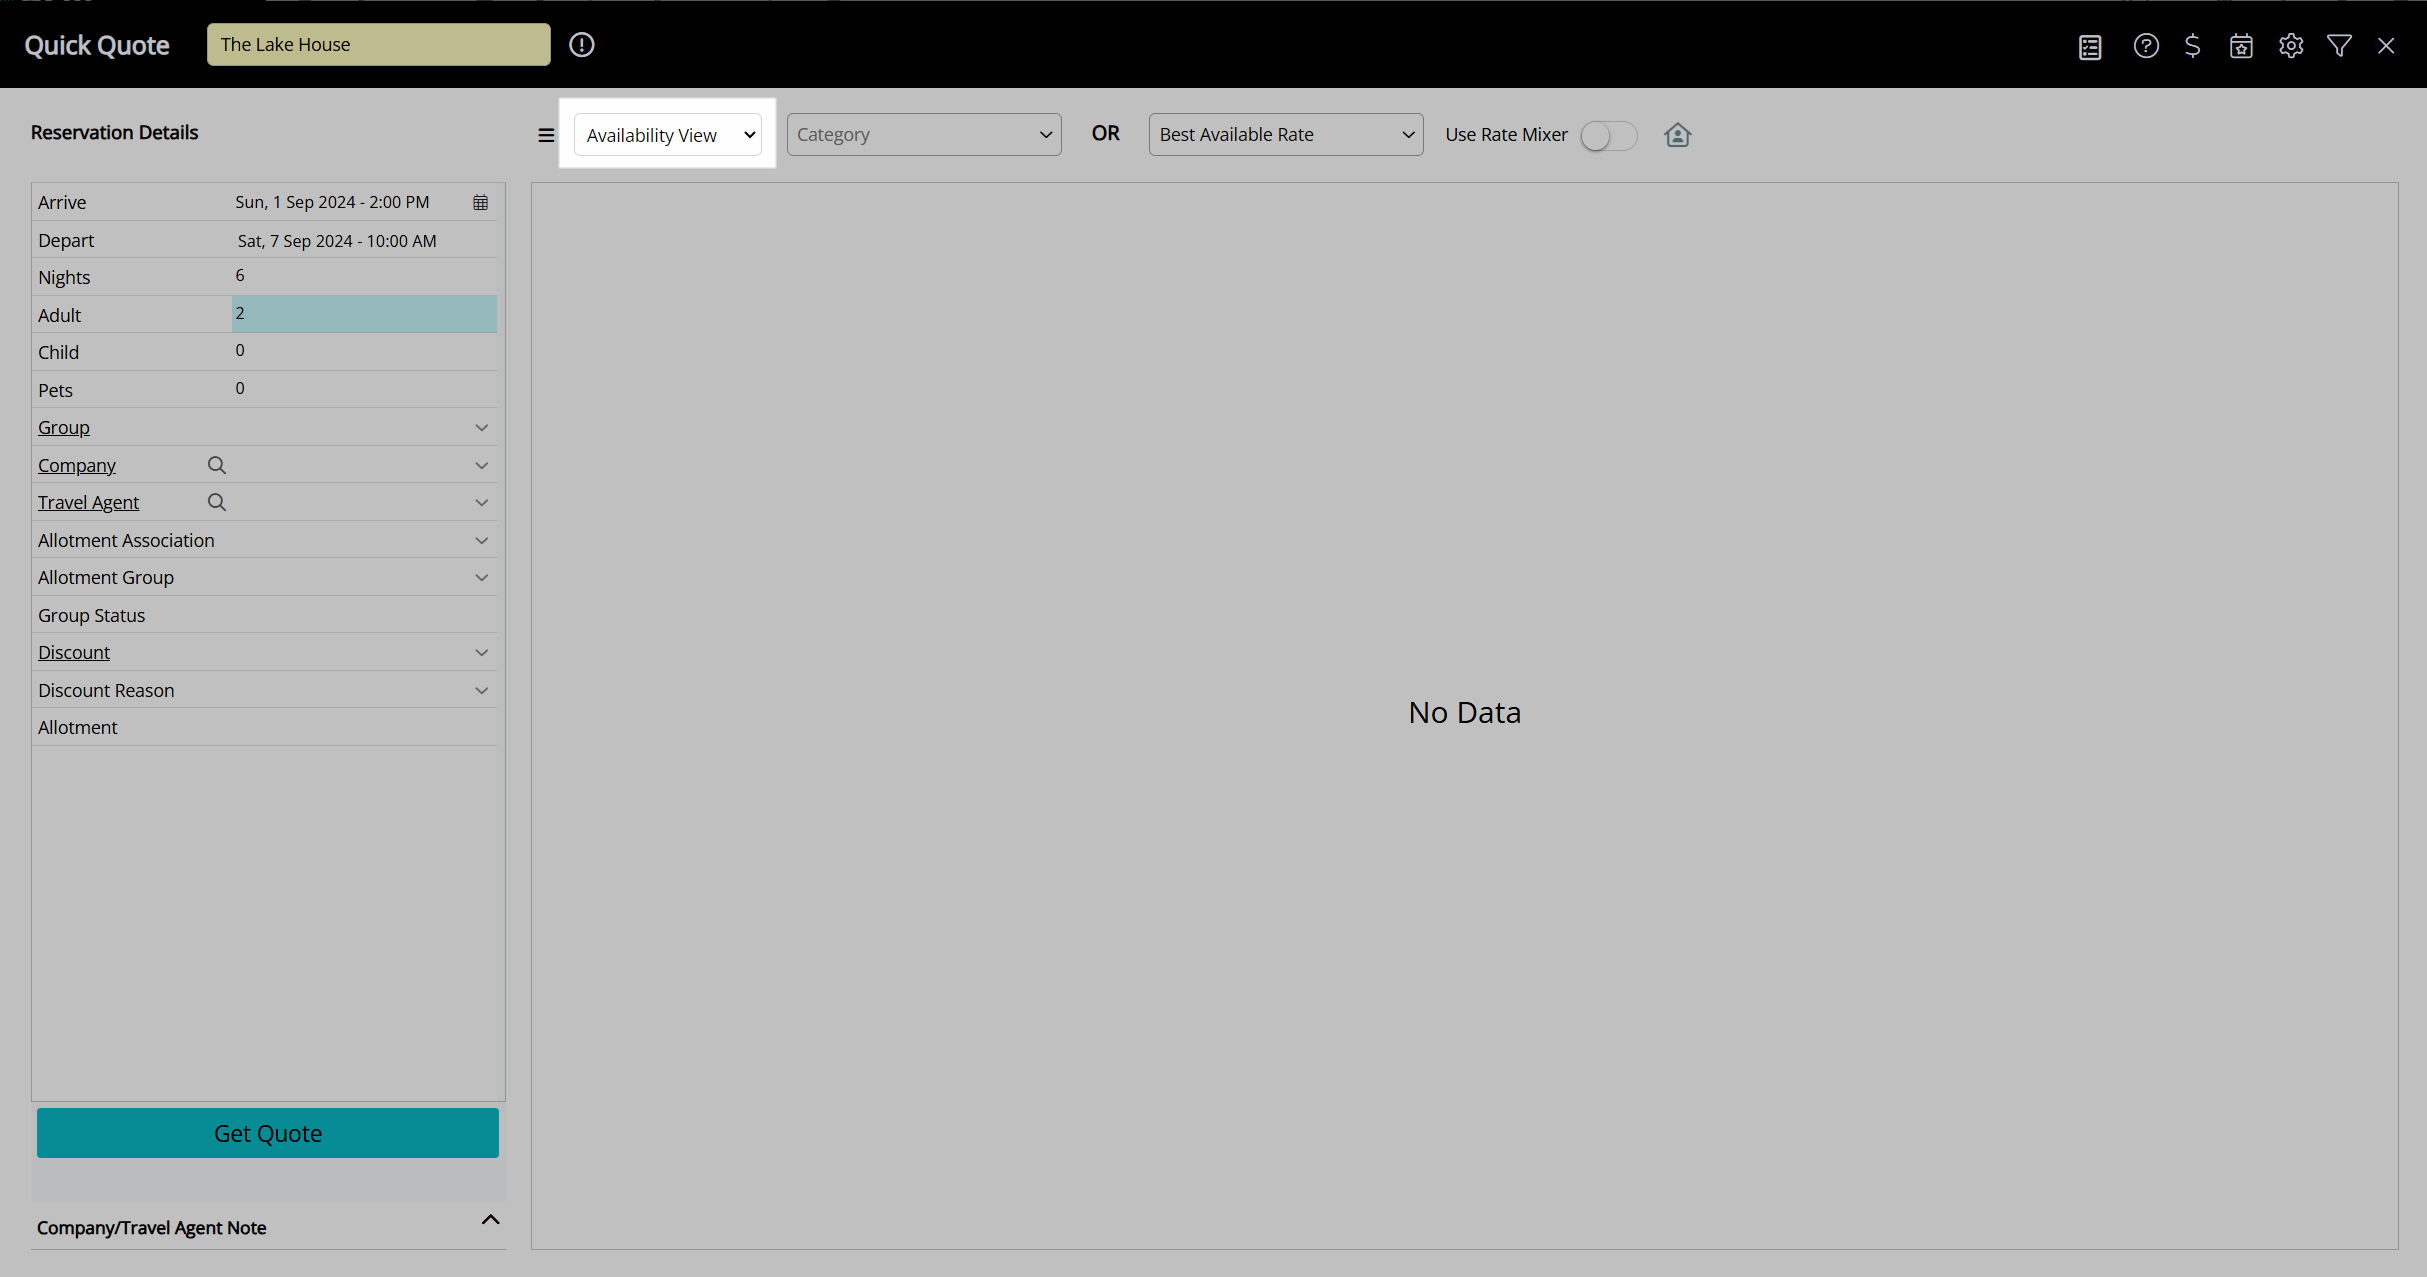
Select the Rate Mixer Toggle.
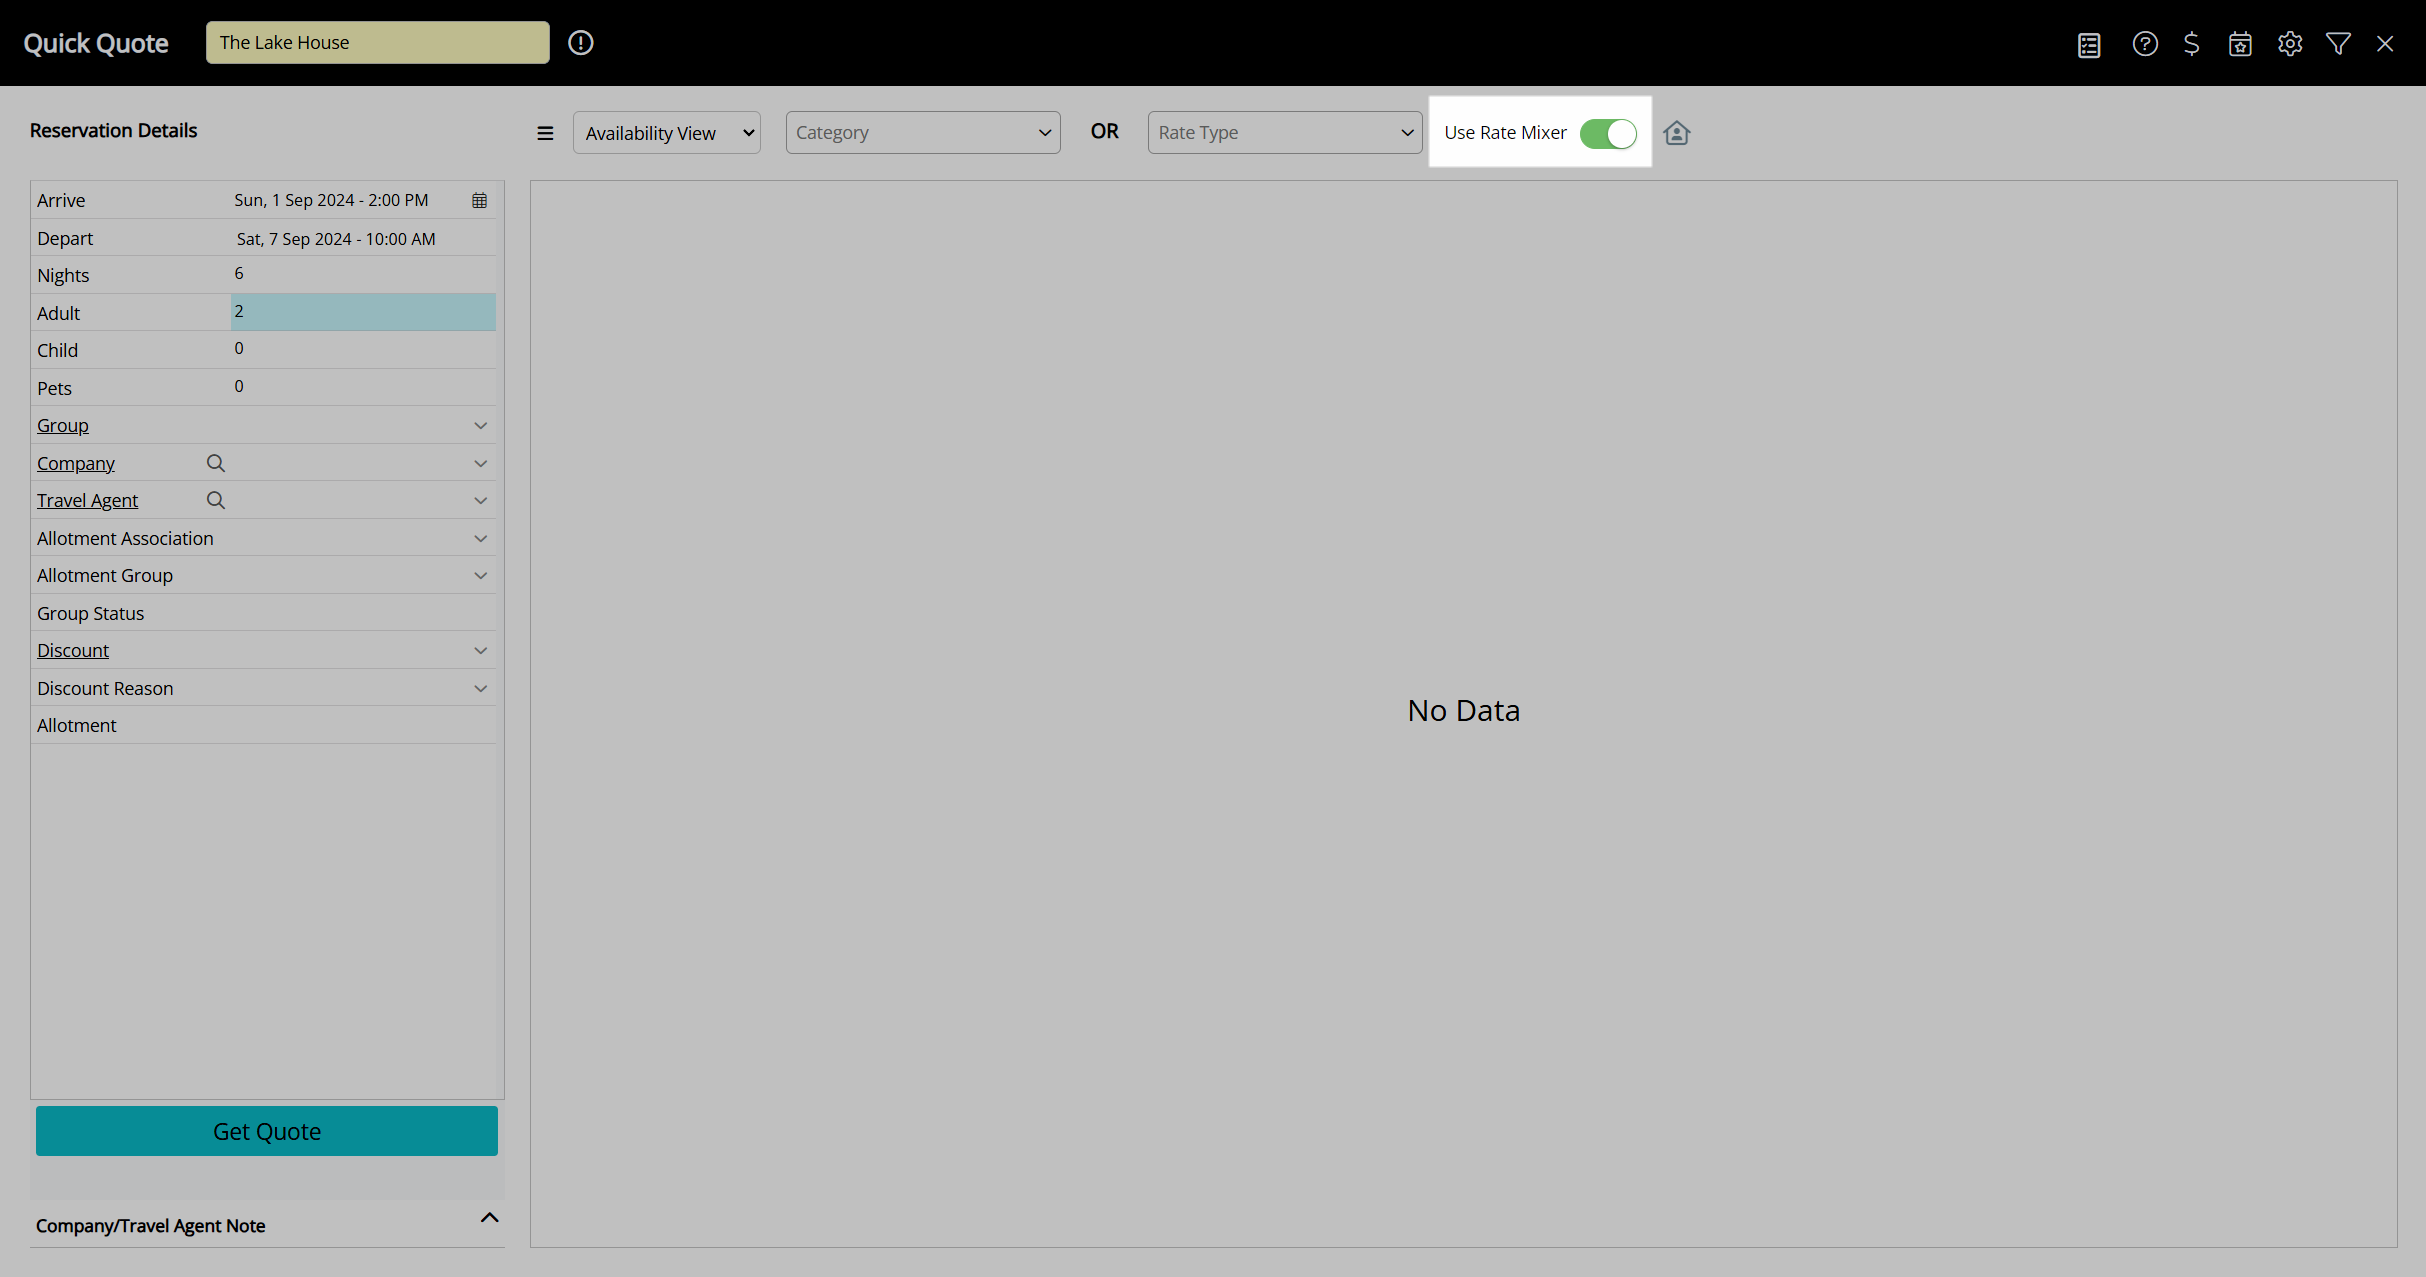
Select the checkbox for each Rate Type.

Perform a Quick Quote Search and select 'Get Quote'.
Select a Category.

Select the checkbox for the Areas to Book or enter the Number of Areas to Book.
Select the ![]() 'Add to Reservation' icon.
'Add to Reservation' icon.

Repeat the above for each reservation in the group.
Select 'Proceed'.
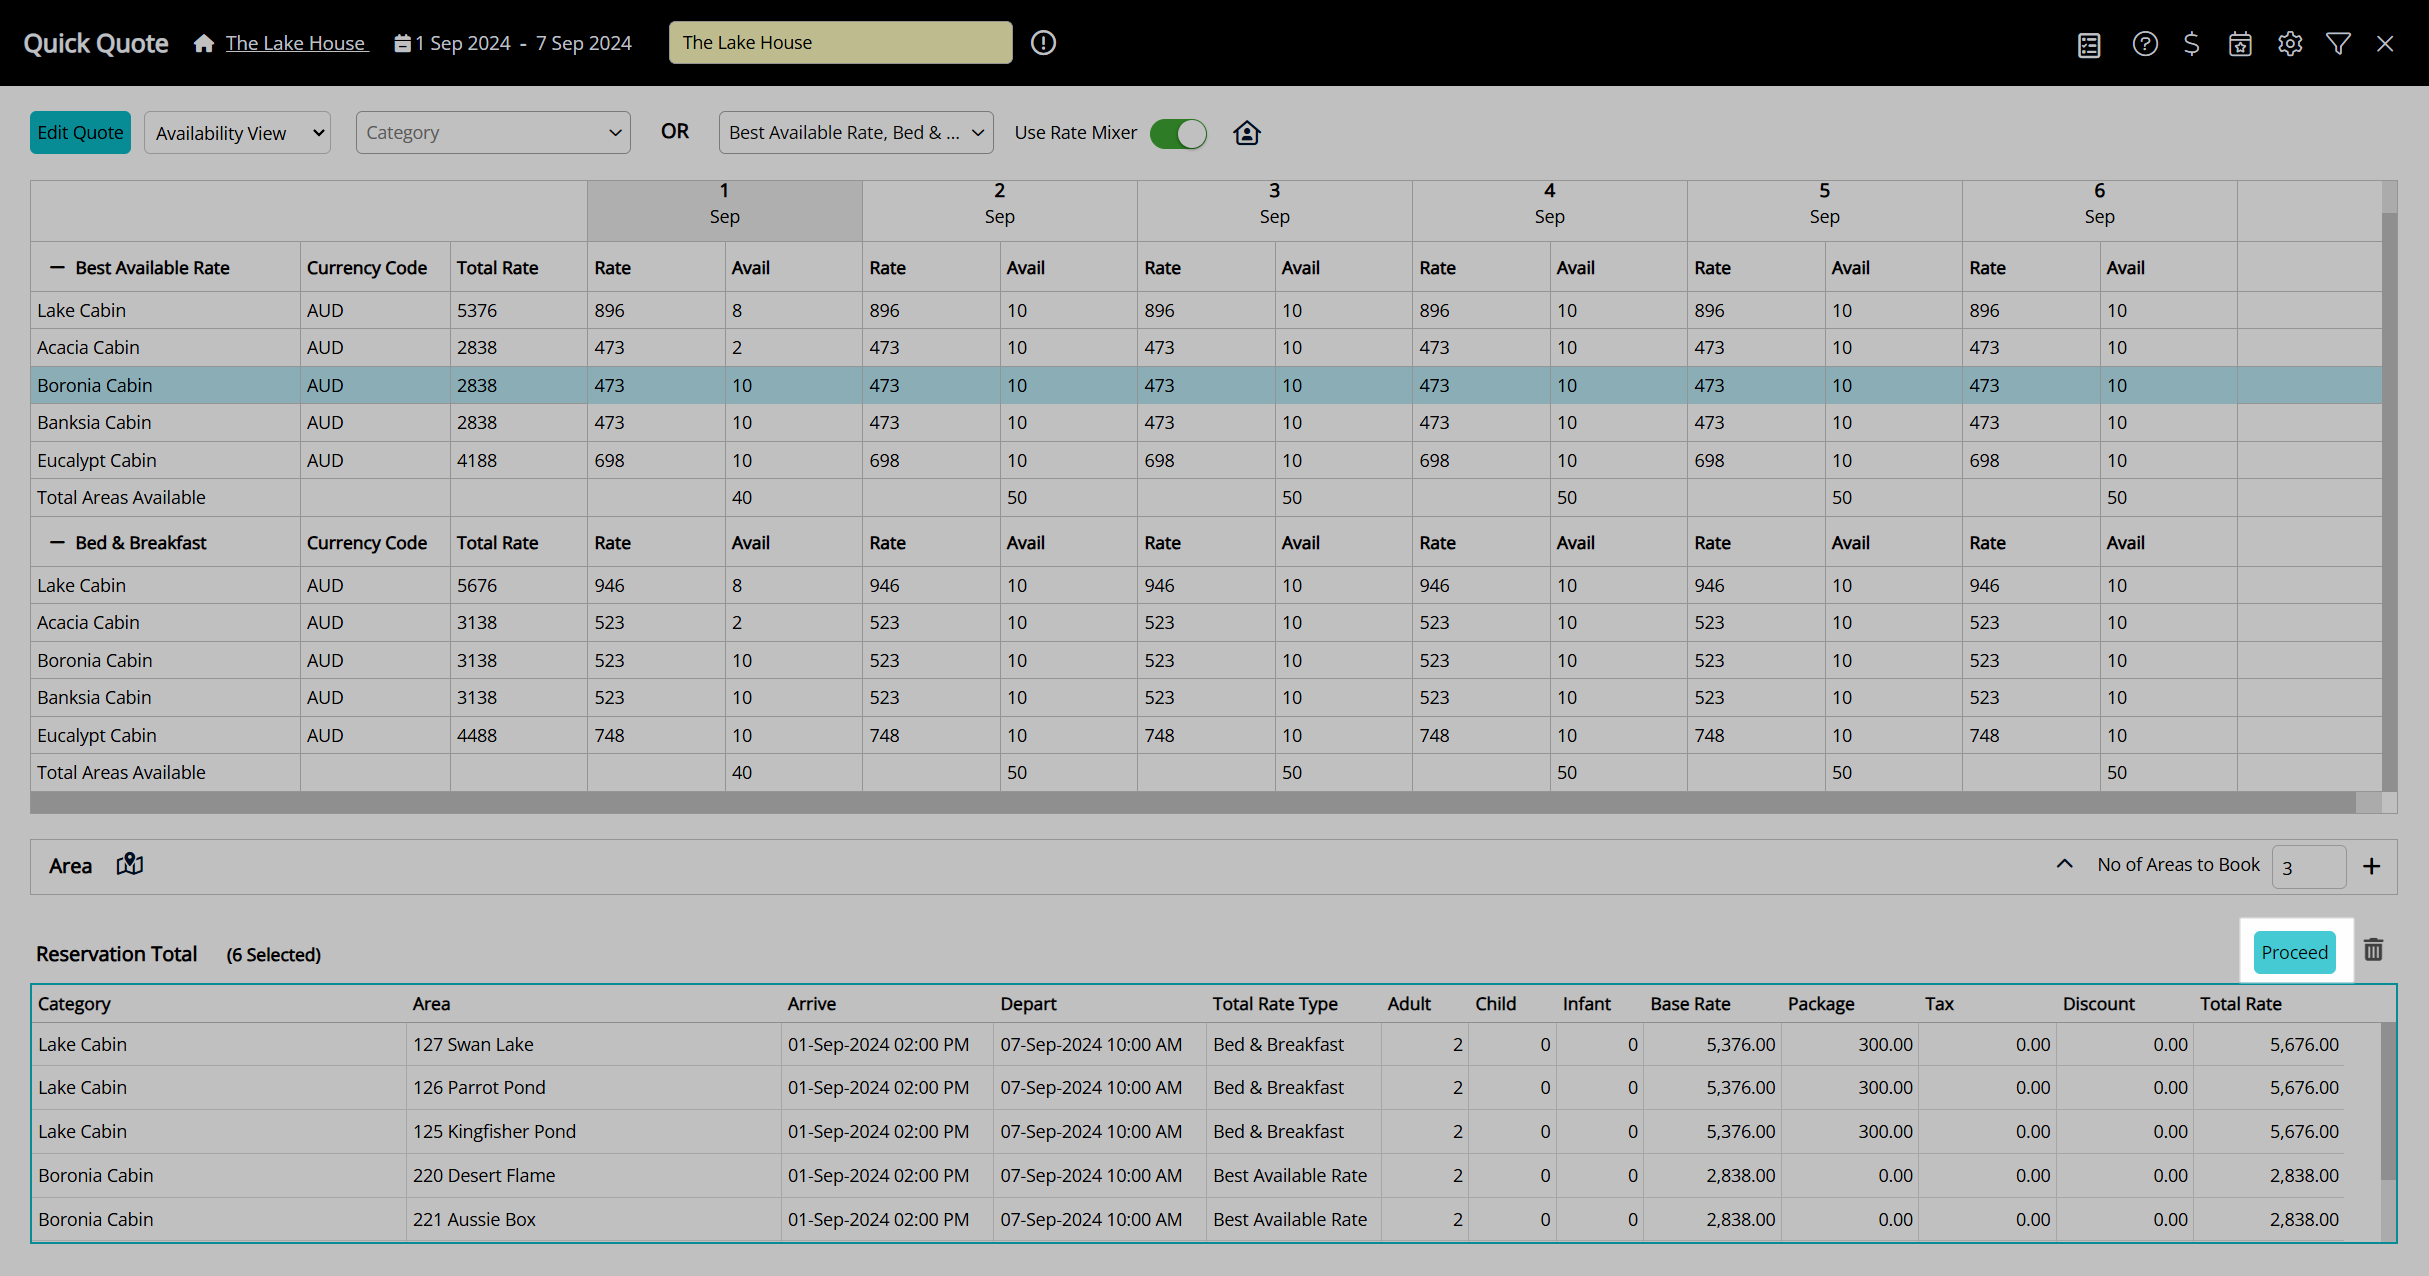
Enter the Group Name.
Enter the Guest Details on the group cover page.
Select the  'Save/Exit' icon to store the changes made and leave the reservation.

The group reservation will have a different rate on each of the reservations based on the selections made in Quick Quote.
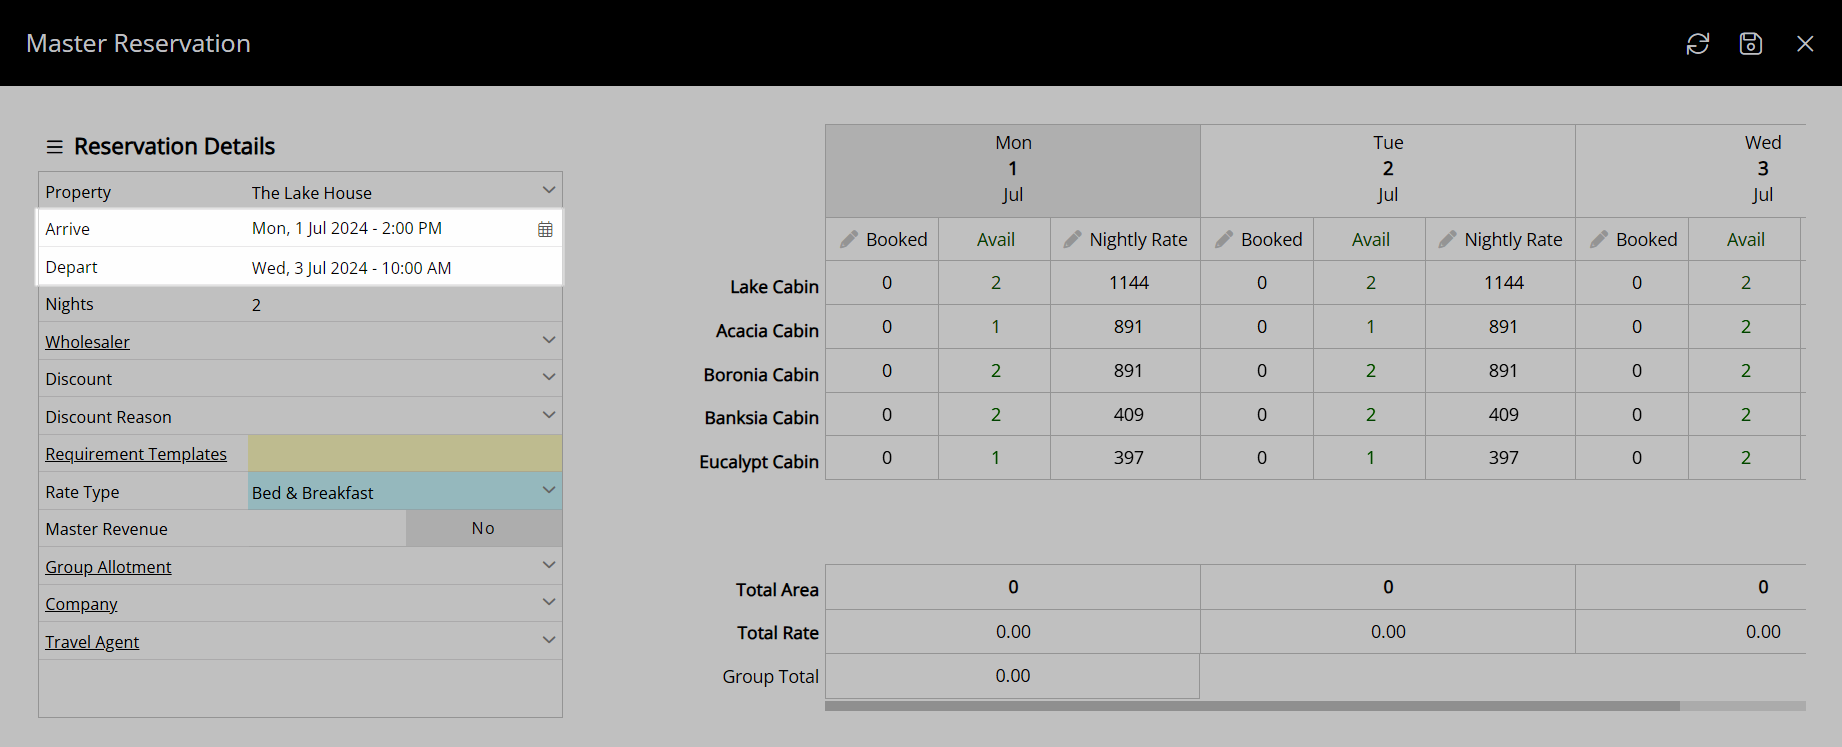
Add Master Reservation - Book by Category Only
- Go to Reservations > Master Reservation in the side menu of RMS.
- Select an Arrive and Depart Date.
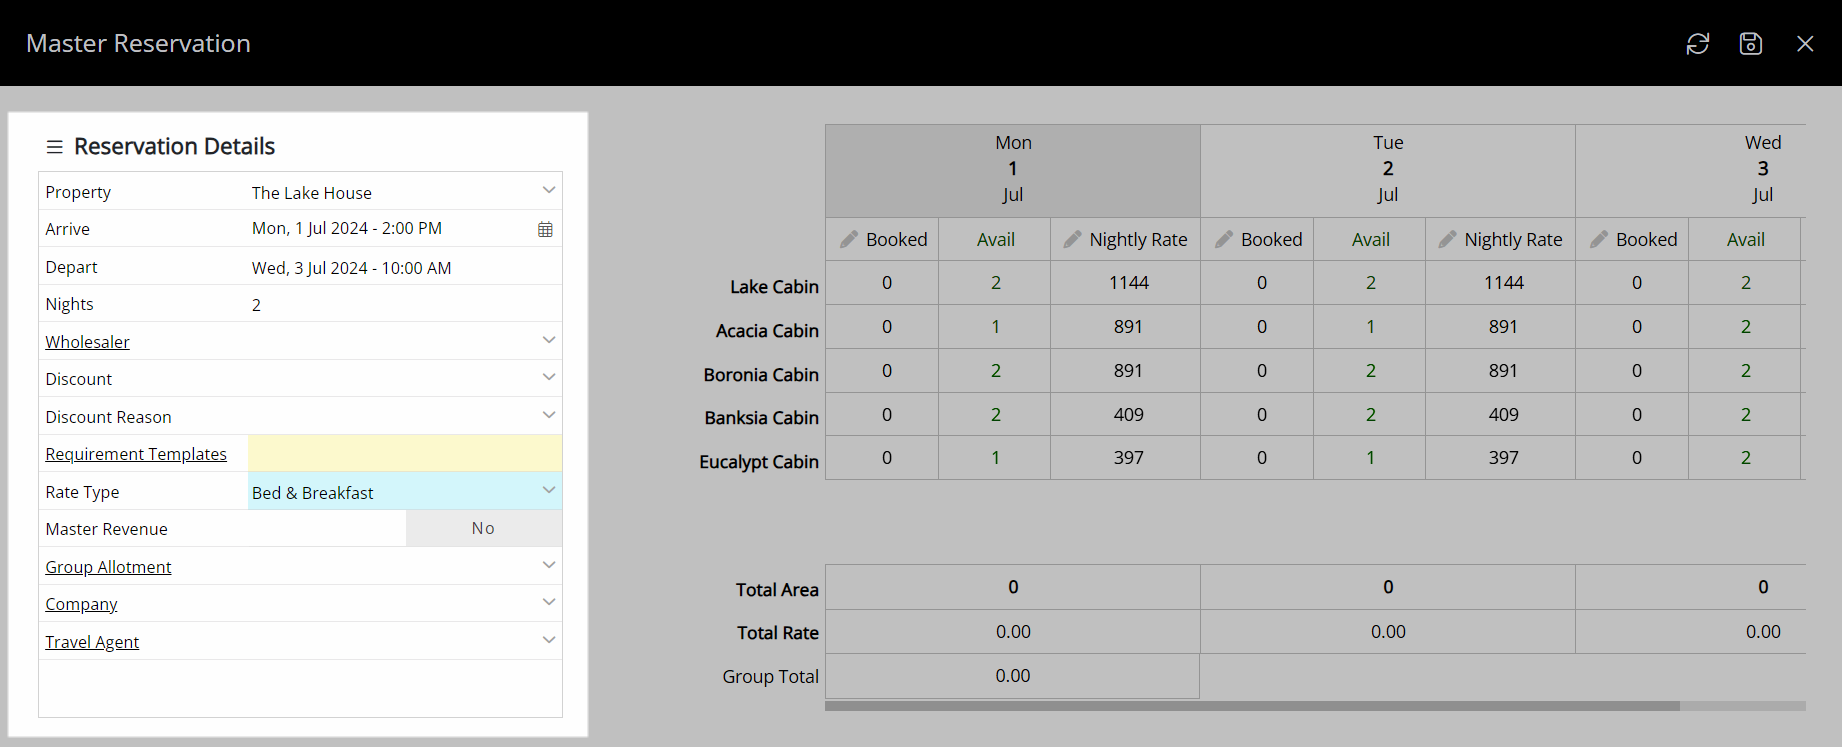
- Select the Reservation Details and Rate Type.
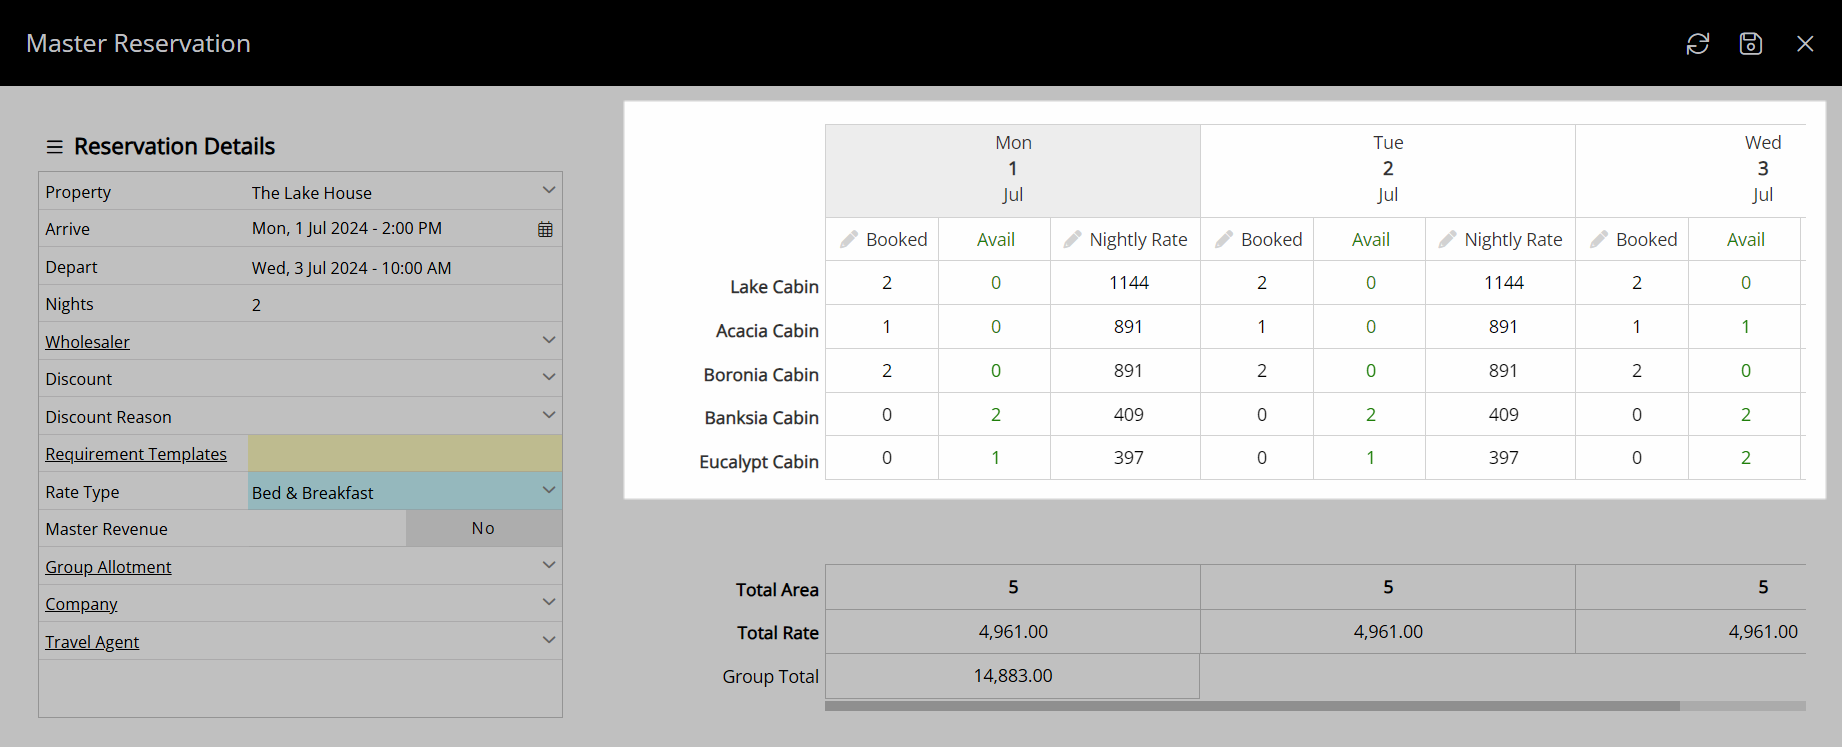
- Enter the Number to Book for each date.
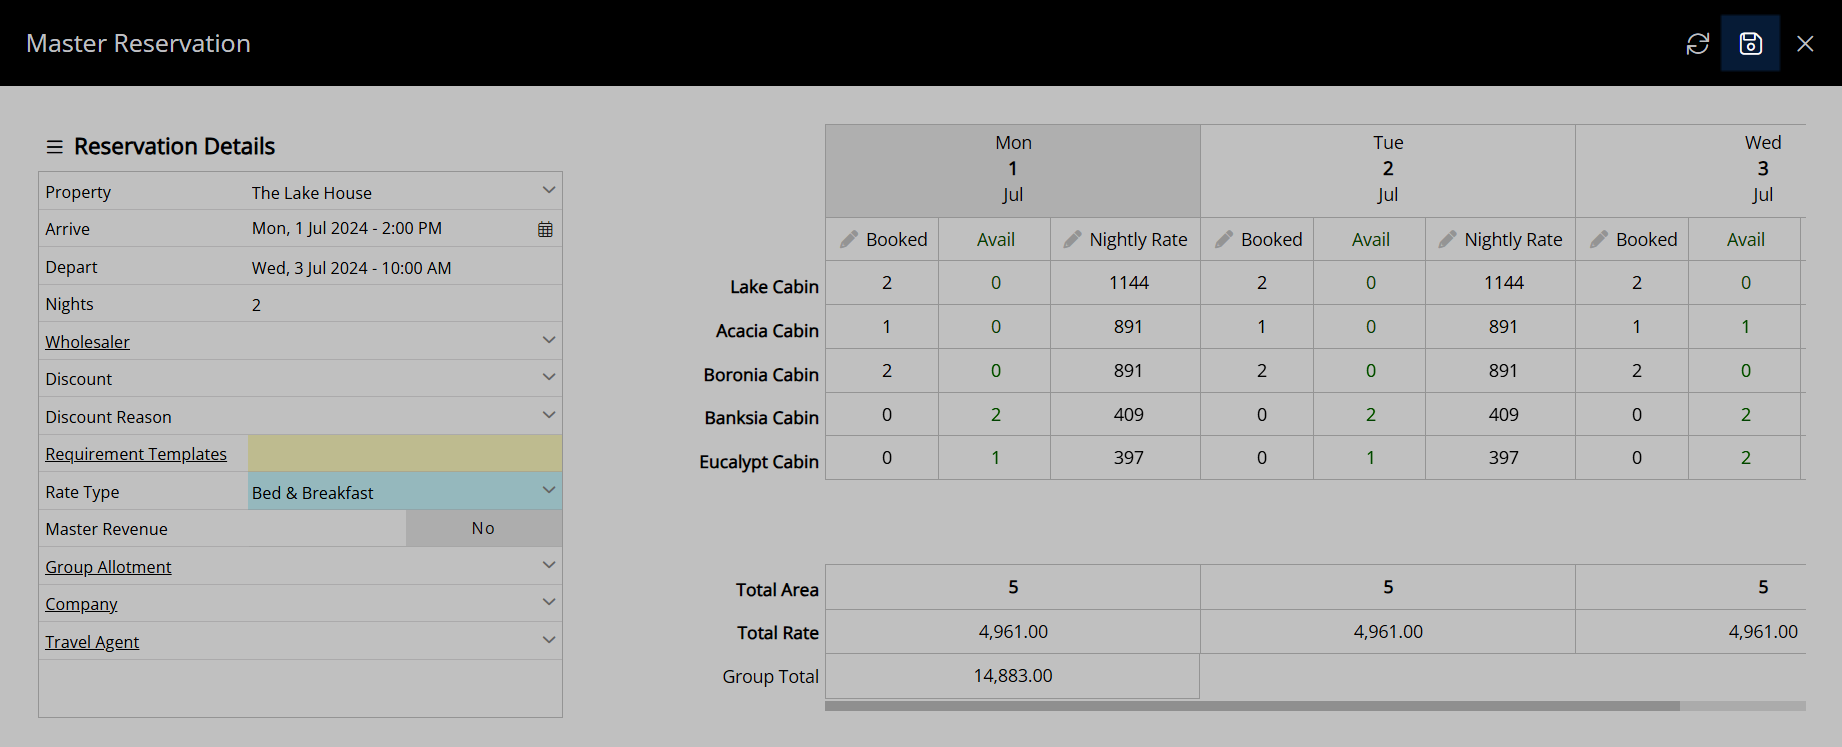
- Save.
- Enter a Group Name.
- Enter the Group Leader Guest Details.
- Save/Exit.
Go to Reservations > Master Reservation in the side menu of RMS.
Select an Arrive and Depart Date.
Select the Reservation Details and Rate Type.
Enter the Number to Book for each date.
Select the  'Save' icon to continue to the reservation screen.
Enter a Group Name.
Enter the Group Leader Guest Details.
Select the  'Save/Exit' icon to store the changes made and create the Master Reservation.
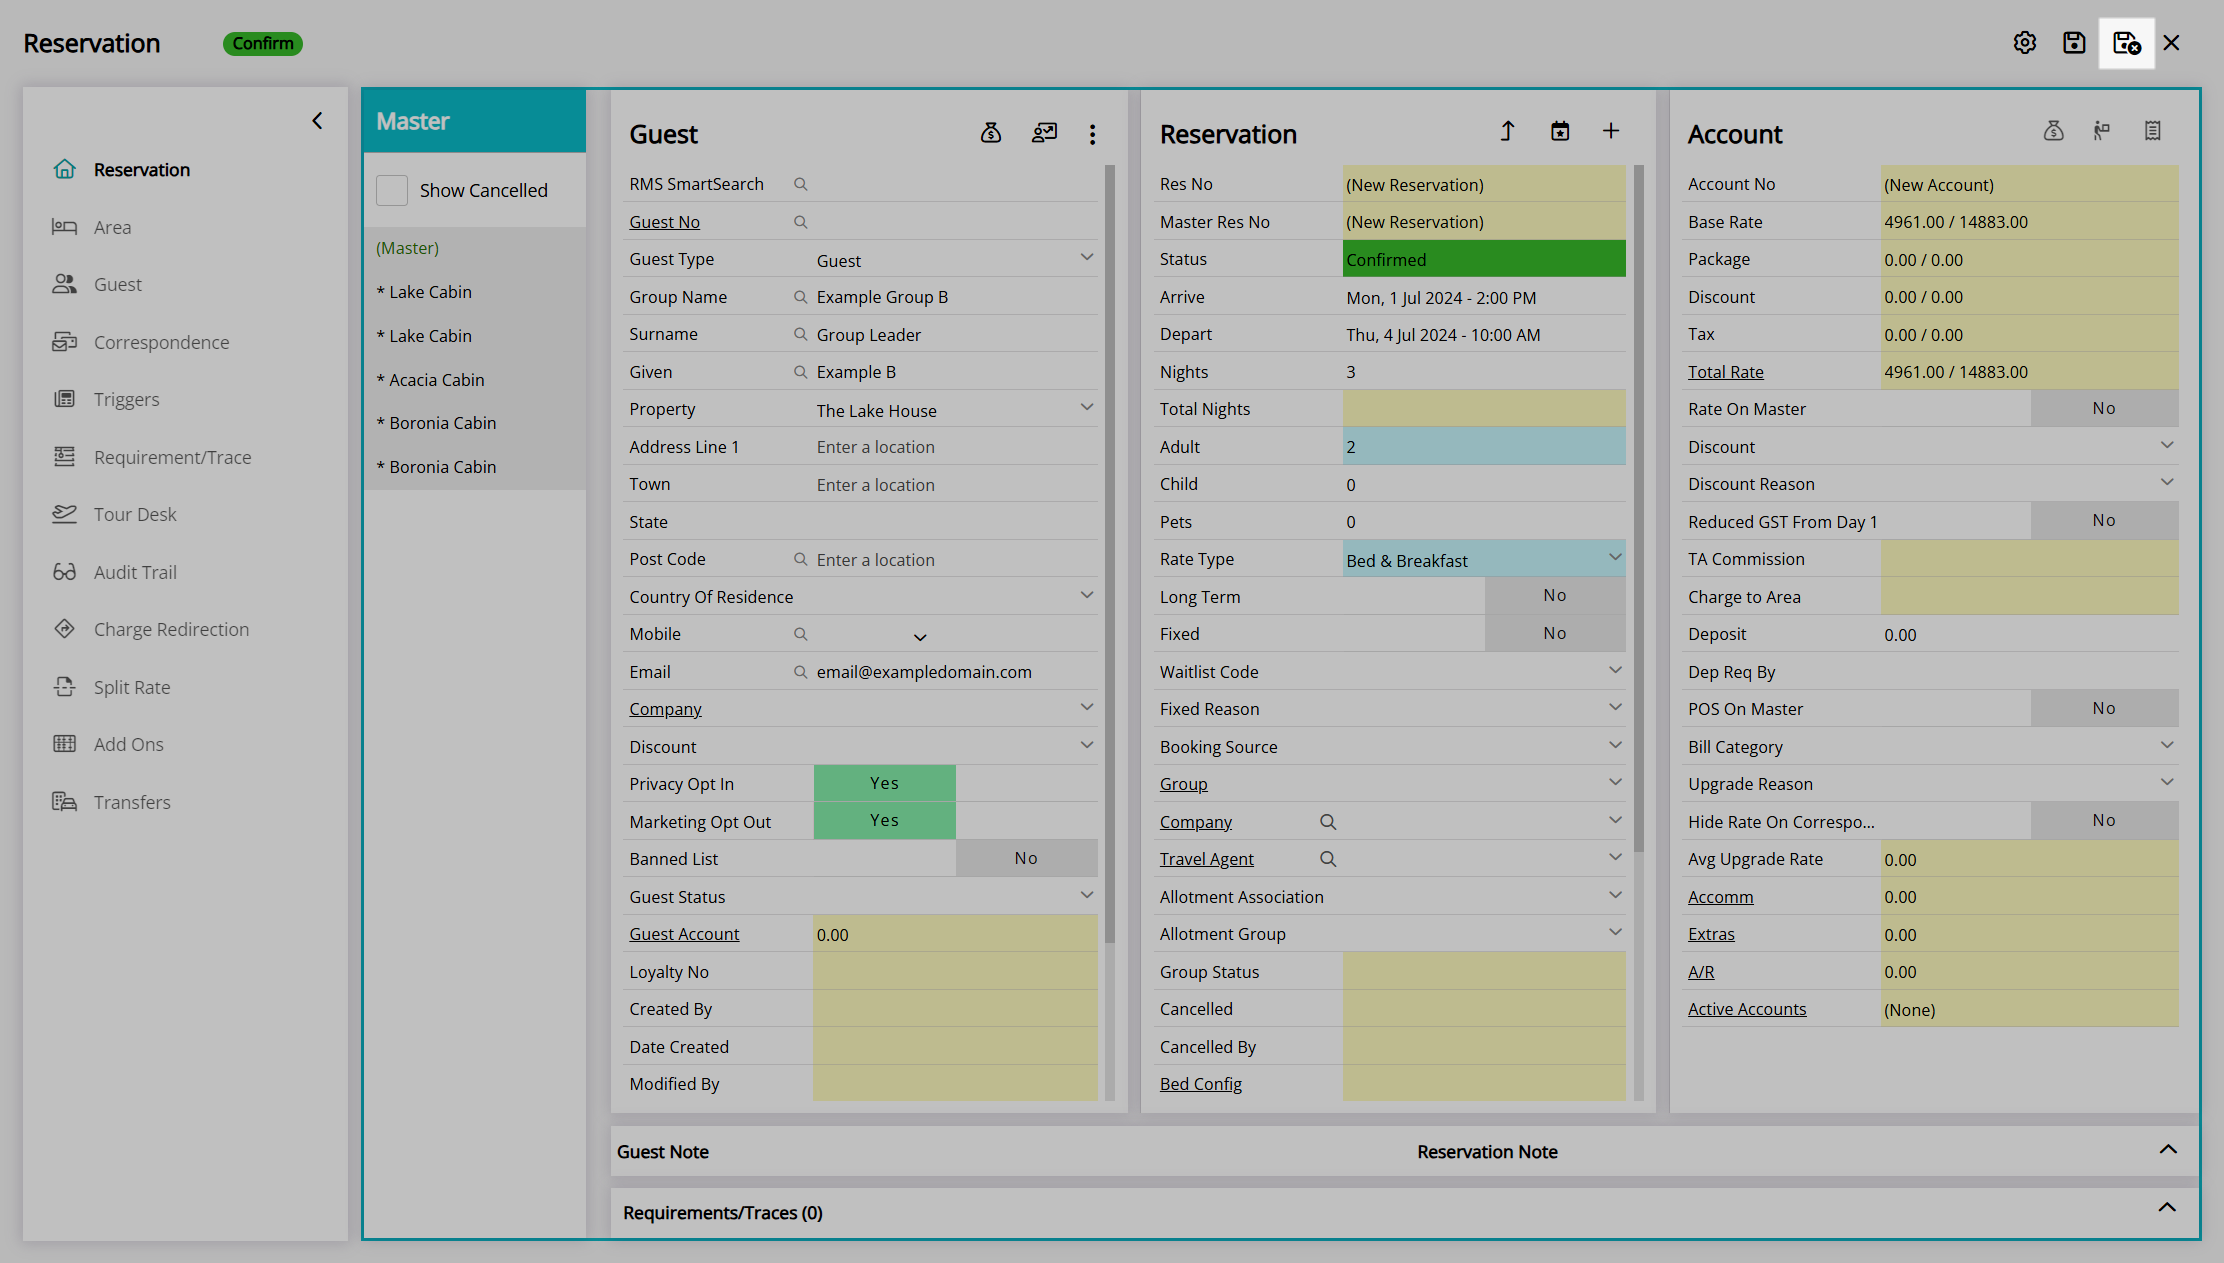
The group reservation will be created with a group reservation number, cover page, and group account.