Booking Chart Data Window
Customise and use the Data Window on the Booking Chart in RMS.
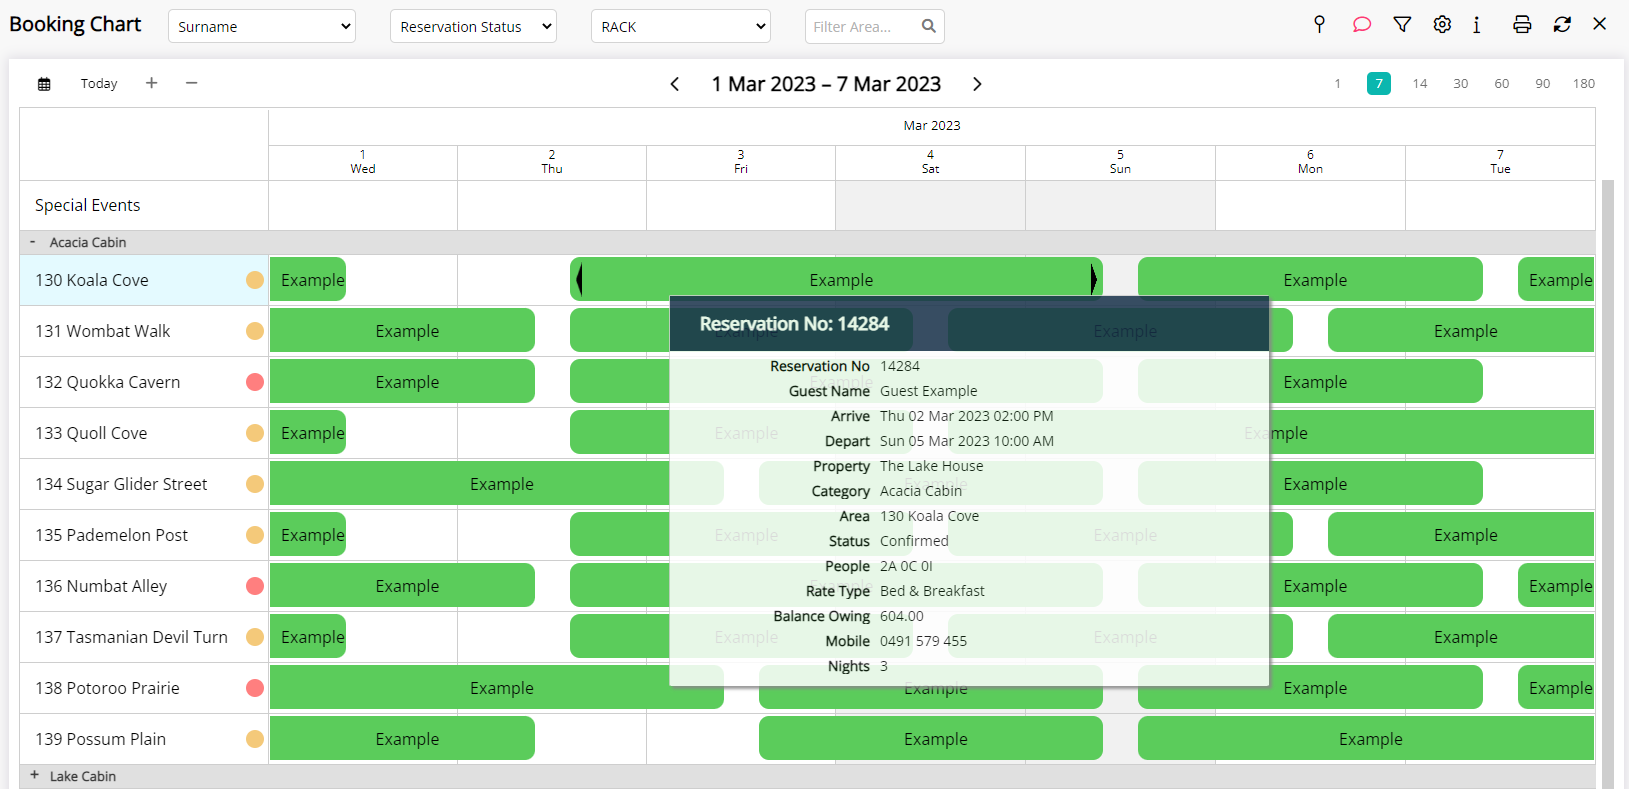
The Data Window is a pop-up bubble on the Booking Chart displaying additional information when hovering over a Reservation or Area.
-
Information
-
Use
- Add Button
Information
The Data Window is a pop-up bubble on the Booking Chart displaying additional information when hovering over a Reservation or Area.
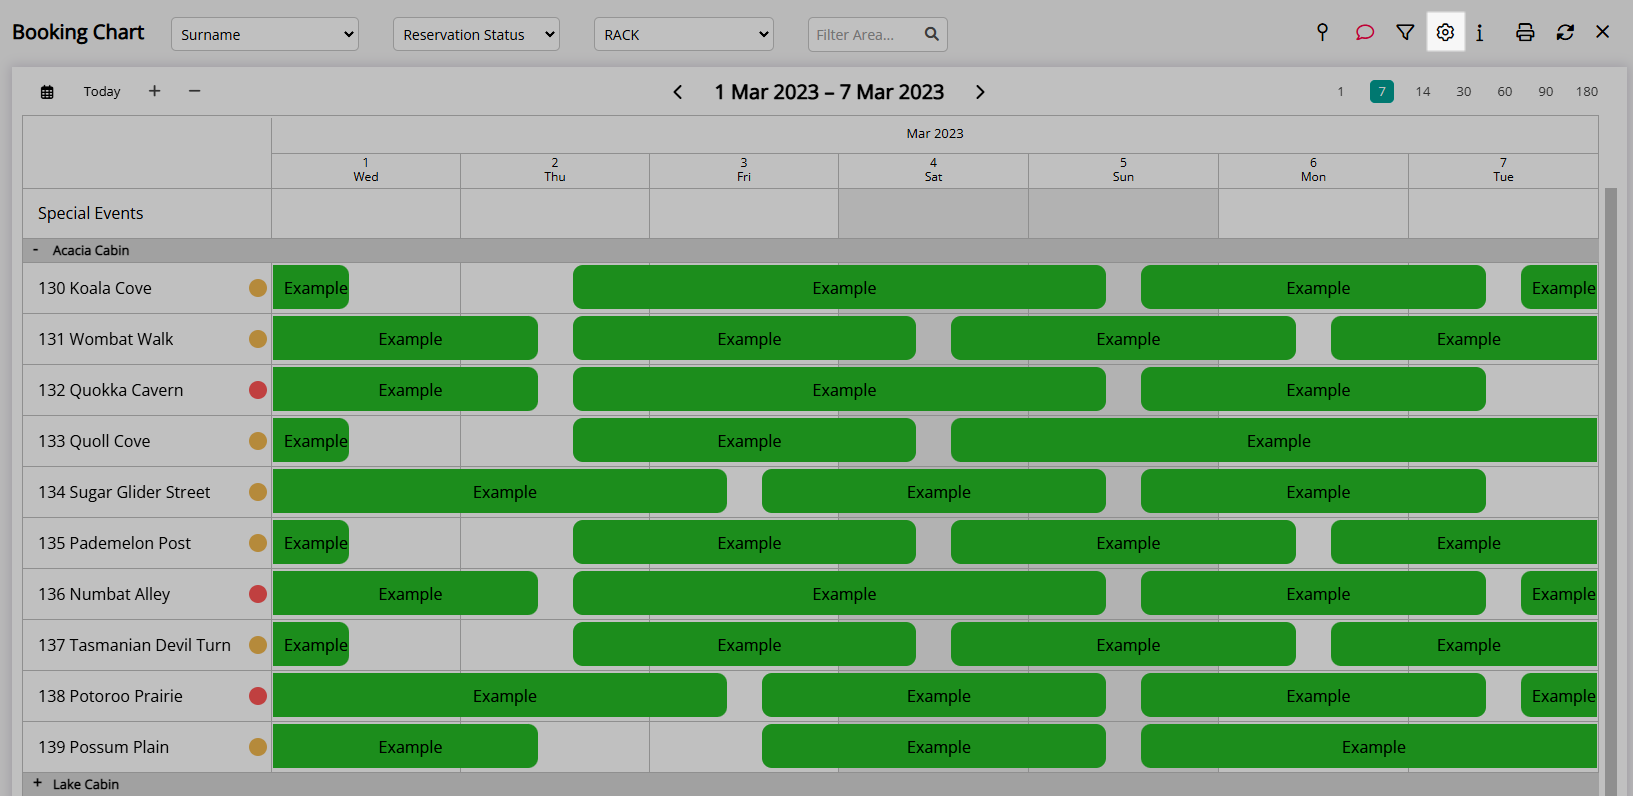
The Booking Chart is a visual representation of all Reservations with an Area allocated at the selected Property for the viewed date range.
Users can Create, Edit, Move, Check-in, Check-out or Park Reservations across large date ranges in a single view.
Each User can set the Data Window to be on or off during a login session and exiting the Booking Chart will save the preference for the next visit.
Field customisation for the Data Window is an individual User preference determined in the Booking Chart options.
The Data Window can be customised to display a variety of information for the Guest, Reservation and Account.
The  'Data Window' icon will display as
  when enabled.

Reservation, Area and Guest are default System Labels that can be customised.

Users will require Security Profile access to use this feature.
-
Use
- Add Button
Use
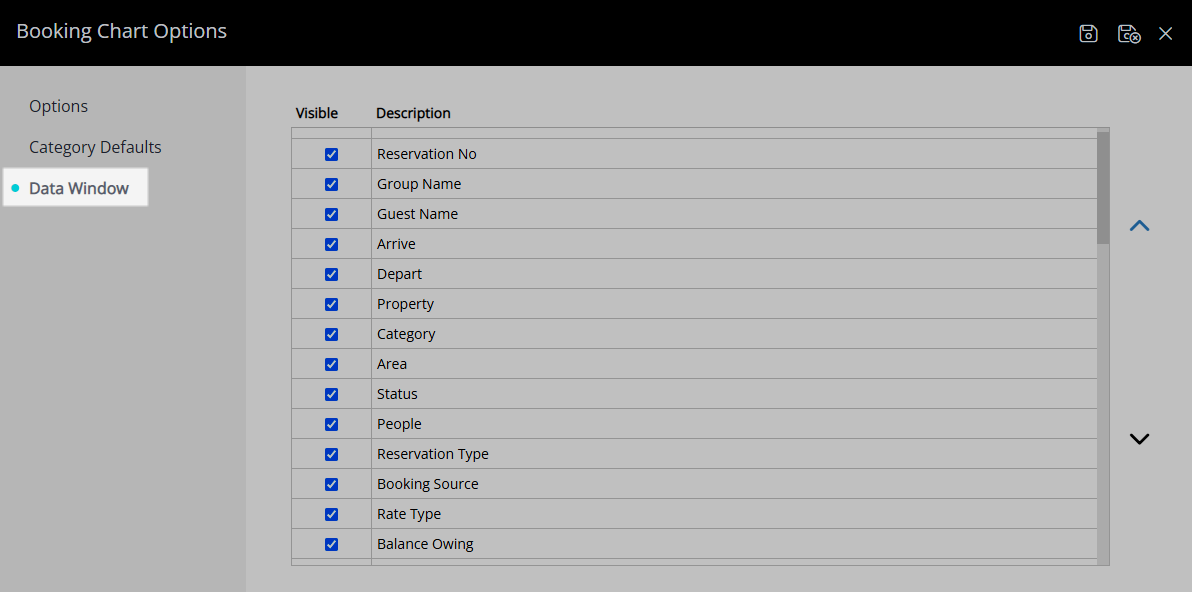
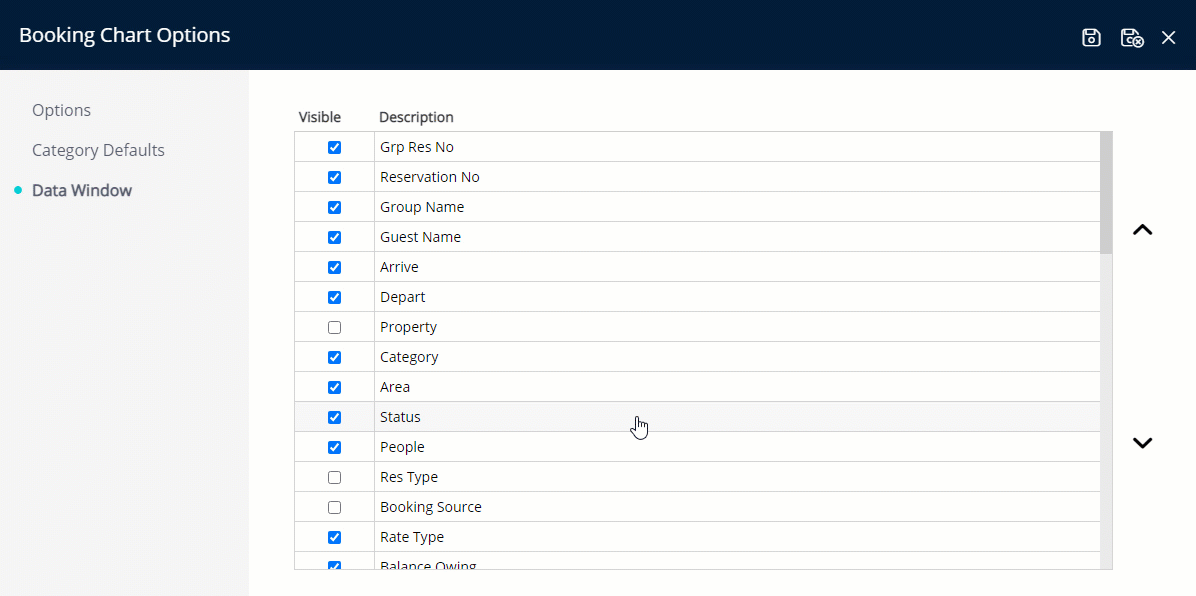
- Go to Charts > Booking Chart in the Side Menu of RMS.
- Select the
 'Options' icon.
 - Navigate to the 'Data Window' tab.
- Select the checkbox for the Visible Fields.
-
Optional: Reposition the Visible Fields.
- Select a Visible Field.
- Select the Up
 or Down
  button to move.
- Save/Exit.

Add the ![]() 'Booking Chart' icon to the Toolbar Menu for quick access from anywhere in RMS.
'Booking Chart' icon to the Toolbar Menu for quick access from anywhere in RMS.
Select the  'Data Window' icon to enable or disable the Data Window when hovering over a Reservation or Area.
-
Guide
- Add Button
Guide
Go to Charts > Booking Chart in the Side Menu of RMS.

Select the  'Options' icon.
Navigate to the 'Data Window' tab.

Select the checkbox for the Visible Fields.
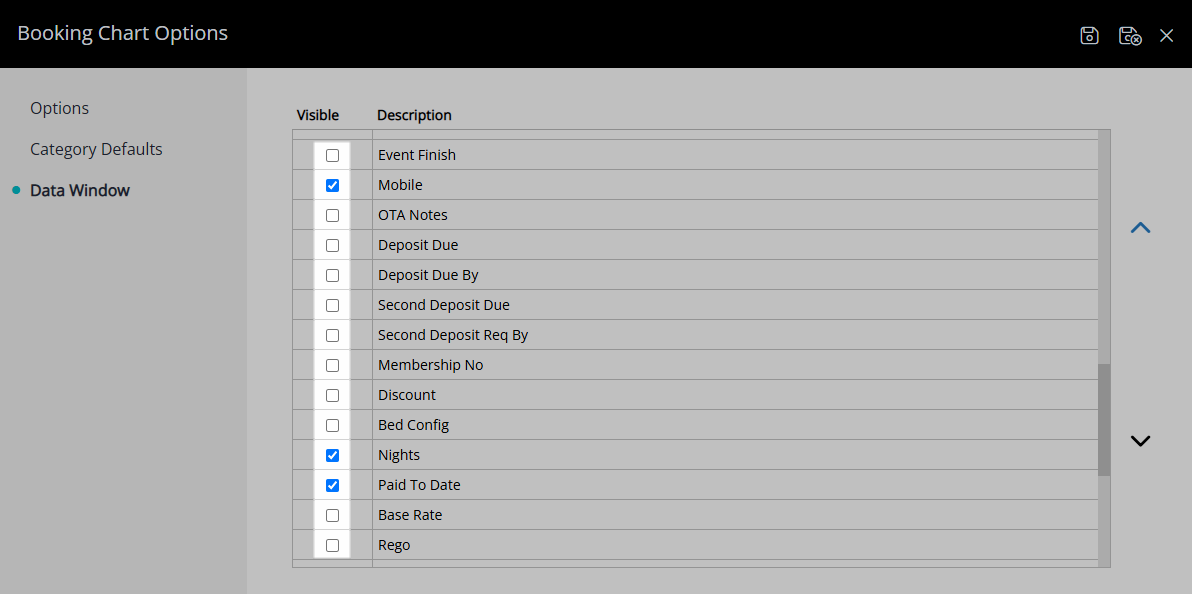
Optional: Reposition the Visible Fields.
Select a Visible Field and choose the Up![]() or Down
or Down![]() button to move.
button to move.
Select the  'Save/Exit' icon to store the changes made and return to the Booking Chart.
The selected Visible Fields will be displayed in the Data Window when hovering over a Reservation or Area on the Booking Chart.

Use
- Go to Charts > Booking Chart in the Side Menu of RMS.
- Select the
 'Options' icon.
 - Navigate to the 'Data Window' tab.
- Select the checkbox for the Visible Fields.
-
Optional: Reposition the Visible Fields.
- Select a Visible Field.
- Select the Up
 or Down
  button to move.
- Save/Exit.

Add the ![]() 'Booking Chart' icon to the Toolbar Menu for quick access from anywhere in RMS.
'Booking Chart' icon to the Toolbar Menu for quick access from anywhere in RMS.
Select the ![]() 'Data Window' icon to enable or disable the Data Window when hovering over a Reservation or Area.
'Data Window' icon to enable or disable the Data Window when hovering over a Reservation or Area.
-
Guide
- Add Button
Guide
Go to Charts > Booking Chart in the Side Menu of RMS.

Select the ![]() 'Options' icon.
'Options' icon.

Navigate to the 'Data Window' tab.
Select the checkbox for the Visible Fields.

Optional: Reposition the Visible Fields.
Select a Visible Field and choose the Up ![]() or Down
or Down ![]() button to move.
button to move.
Select the  'Save/Exit' to store the changes made and return to the Booking Chart.

The selected Visible Fields will be displayed in the Data Window when hovering over a Reservation or Area on the Booking Chart.