Channel Connection
Connect to a channel in the RMS Channel Manager.
The RMS Channel Manager enables connection to a variety of Online Travel Agents, Booking Engines, Distributors and Global Distribution Systems.
-
Information
-
Setup
- Add Button
Information
The RMS Channel Manager enables connection to a variety of Online Travel Agents, Booking Engines, Distributors and Global Distribution Systems.
Mapping of a Category and Rate combination determines the prices and inventory availability used by the connected channel.
There are two methods of mapping used in the RMS Channel Manager determined by the channel connection selected.
A Property setup to use Alternate Currency can select the currency Rates are to be provided to the channel in.
The 'Use Source Travel Agent' option is available for Distributors and Third Party connections to include the origin of the Reservation instead of the channel connection as the Travel Agent on the Reservation.
Each Channel Connection determines the type of information accepted including Availability, Rates and Control Panel Restrictions.
The following types of channel connection are included in the RMS Channel Manager.
| Connection Type | Description |
|---|---|
| Booking Engine | An online portal providing Guests the ability to book directly with the Property including the RMS Internet Booking Engine. |
| Distributor | Third party channel managers and applications that connect a Property Management System to a Booking Engine, GDS or Online Travel Agent. |
| Global Distribution System | The GDS is the Global Distribution System, a centralised booking system used by Travel Agents worldwide to book accommodation, flights, tours and more including Sabre, Galileo, Amadeus and Worldspan. |
| Online Travel Agent | A retail website providing customers options to self-book accommodation. |

Guest, Rate and Reservation are default System Labels that can be customised.
The RMS Online Module is required to use the RMS Channel Manager.

System Administrators will require Security Profile access to setup this feature.
-
Setup
- Add Button
Setup
Have your System Administrator complete the following.
- Contact the Channel Provider and advise of the Property's intention to connect.
- Go to Setup > Online Bookings > Channel Management in RMS.
- Select the View as 'Unconnected'.
- Select a Channel and choose 'Connect'.
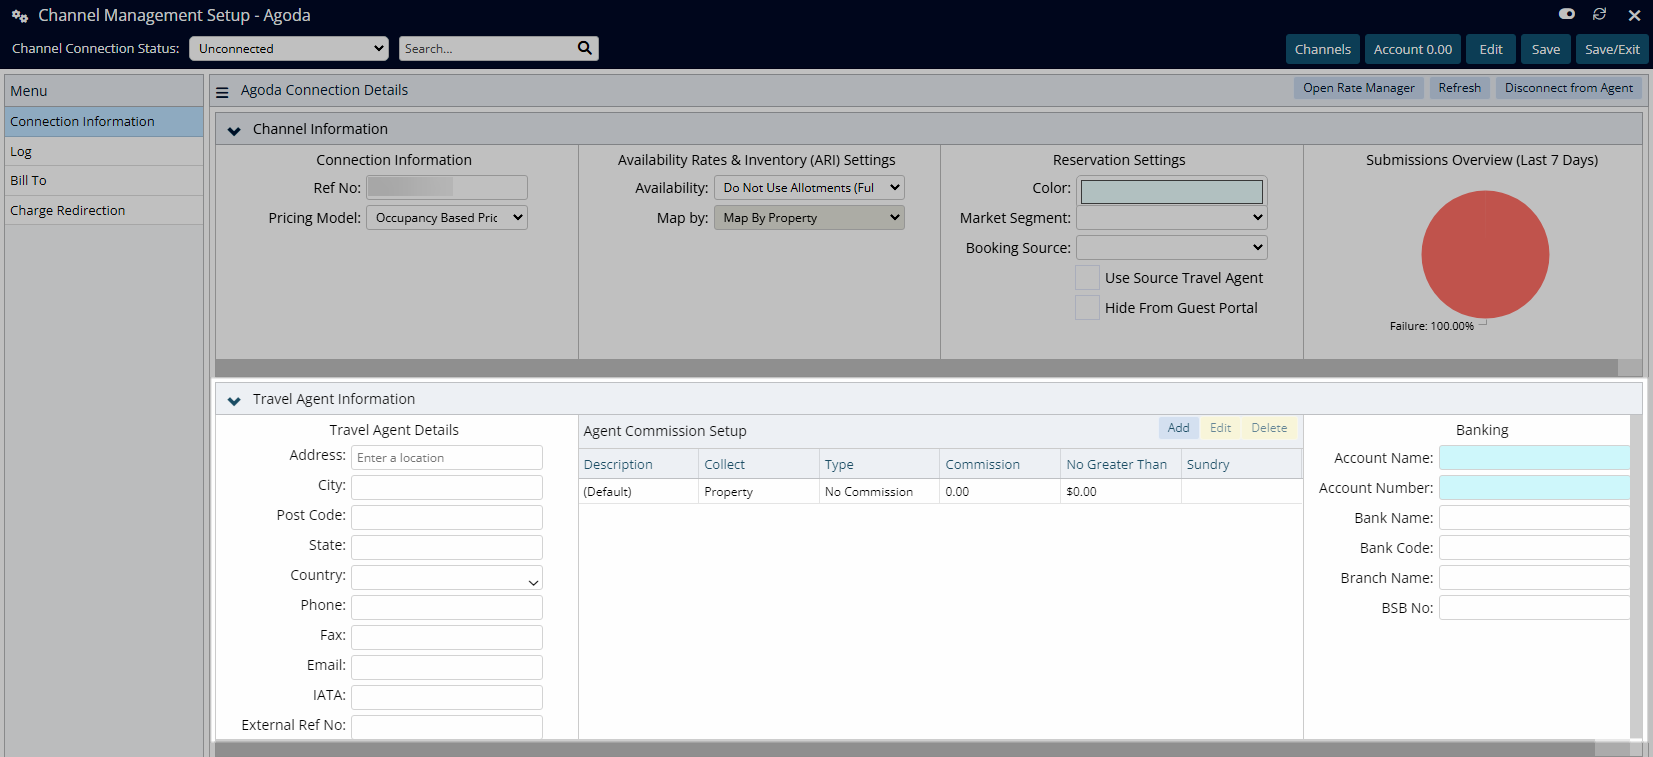
- Navigate to the 'Connection Information' tab.
- Enter the Connection Information provided by the Channel.
- Select the Additional Connection Information.
- Select the Availability, Rates & Inventory options.
-
Optional: Setup Reservation Settings.
- Optional: Select a Colour.
- Optional: Select a Market Segment.
- Optional: Select a Booking Source.
- Optional: Select the checkbox 'Use Source Travel Agent'.
- Optional: Select the checkbox 'Hide from Guest Portal'.
- Optional: Enter the Travel Agent Information or setup a Travel Agent Commission.
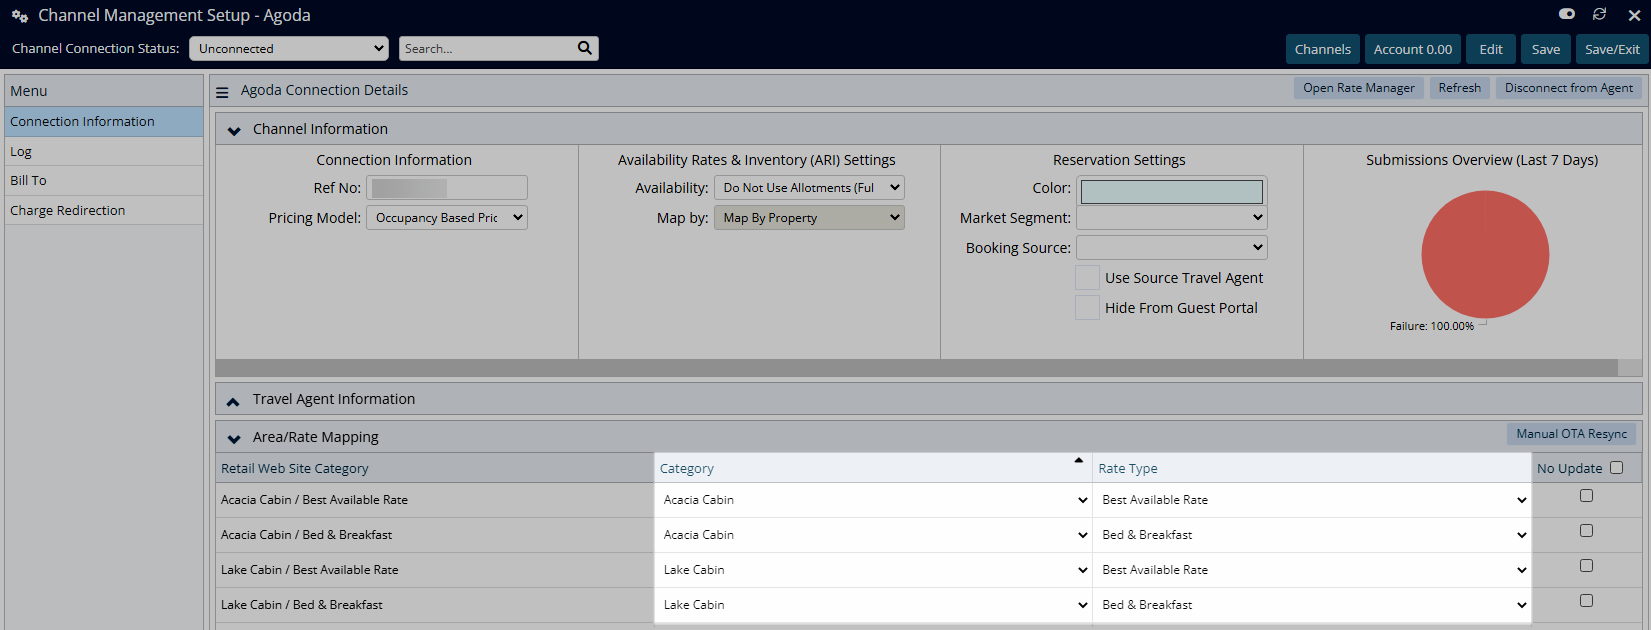
- Complete the Category & Rate Mapping.
-
Method One:
- Select 'Connect to Retrieve Categories'.
- Select the RMS Category and Rate Type for each combination.
-
Method Two:
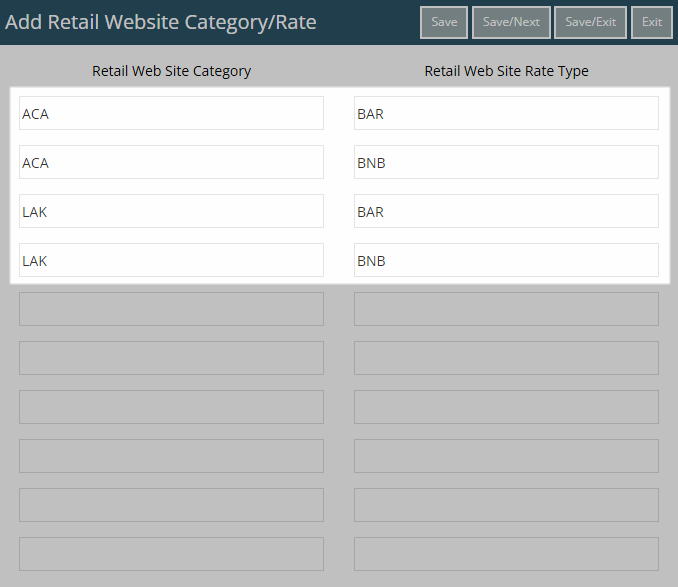
- Select 'Add Category/Rate Types'.
- Enter the Channel Category & Rate Type combinations.
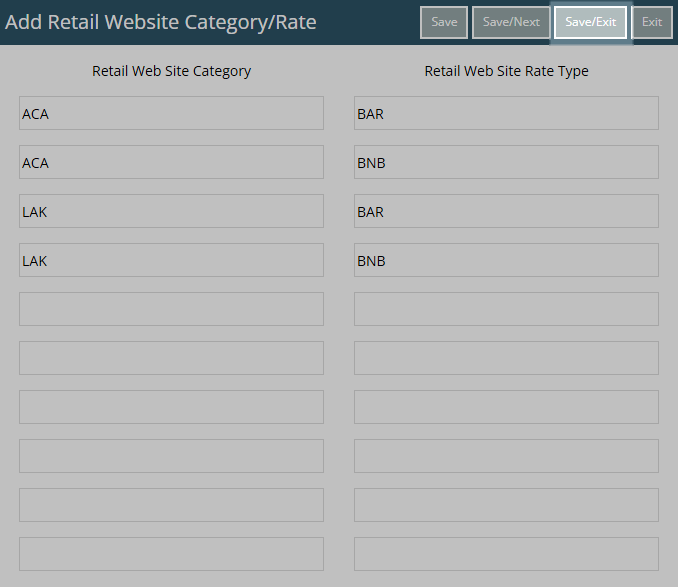
- Save/Exit.
- Select the RMS Category & Rate Type for each combination.
-
Method One:
- Save/Exit.

The Connection Information and Category & Rate Type Mapping method used will vary based on the channel selected.
Not all options are available to all channel connections.
See the Channels section of the Help Centre for more information on each available connection.
-
Guide
- Add Button
Guide
Contact the Channel Provider and advise of the Property's intention to connect.
Go to Setup > Online Bookings > Channel Management in RMS.

Select the View as 'Unconnected'.

Select a Channel and choose 'Connect'.

Navigate to the 'Connection Information' tab.

Enter the Connection Information provided by the Channel.

Select the Additional Connection Information.

Select the Availability, Rates & Inventory options.

Optional: Setup Reservation Settings.
Optional: Select a Colour.

Optional: Select a Market Segment.

Optional: Select a Booking Source.

Optional: Select the checkbox 'Use Source Travel Agent'.

Optional: Select the checkbox 'Hide from Guest Portal'.

Optional: Enter the Travel Agent Information or setup a Travel Agent Commission.

Complete the Category & Rate Mapping.
Method One:
Select 'Connect to Retrieve Categories'.

Select the RMS Category and Rate Type for each combination.

Method Two:
Select 'Add Category/Rate Types'.

Enter the Channel Category & Rate Type combinations.

Select 'Save/Exit' to store the changes made and return to the Channel Management setup.

Select the RMS Category & Rate Type for each combination.

Select 'Save/Exit' to store the changes made and leave the setup.

The first sync of Rates and Availability can take up to thirty minutes to complete and will depend on if the channel connection receives information sent by RMS or retrieves information on their schedule.
See the Channel Manager Connections article for more information on each available connection.
Setup
Have your System Administrator complete the following.
- Contact the Channel Provider and advise of the Property's intention to connect.
- Go to Setup > Online Bookings > Channel Management in RMS.
- Select the View as 'Unconnected'.
- Select a Channel and choose 'Connect'.
- Navigate to the 'Connection Information' tab.
- Enter the Connection Information provided by the Channel.
- Select the Additional Connection Information.
- Select the Availability, Rates & Inventory options.
-
Optional: Setup Reservation Settings.
- Optional: Select a Colour.
- Optional: Select a Market Segment.
- Optional: Select a Booking Source.
- Optional: Select the checkbox 'Use Source Travel Agent'.
- Optional: Select the checkbox 'Hide from Guest Portal'.
- Optional: Enter the Travel Agent Information or setup a Travel Agent Commission.
- Complete the Category & Rate Mapping.
-
Method One:
- Select 'Connect to Retrieve Categories'.
- Select the RMS Category and Rate Type for each combination.
-
Method Two:
- Select 'Add Category/Rate Types'.
- Enter the Channel Category & Rate Type combinations.
- Save/Exit.
- Select the RMS Category & Rate Type for each combination.
-
Method One:
- Save/Exit.

The Connection Information and Category & Rate Type Mapping method used will vary based on the channel selected.
Not all options are available to all channel connections.
See the Channels section of the Help Centre for more information on each available connection.
-
Guide
- Add Button
Guide
Contact the Channel Provider and advise of the Property's intention to connect.
Go to Setup > Online Bookings > Channel Management in RMS.

Select the View as 'Unconnected'.

Select a Channel and choose 'Connect'.

Navigate to the 'Connection Information' tab.

Enter the Connection Information provided by the Channel.

Select the Additional Connection Information.

Select the Availability, Rates & Inventory options.

Optional: Setup Reservation Settings.
Optional: Select a Colour.

Optional: Select a Market Segment.

Optional: Select a Booking Source.

Optional: Select the checkbox 'Use Source Travel Agent'.

Optional: Select the checkbox 'Hide from Guest Portal'.

Optional: Enter the Travel Agent Information or setup a Travel Agent Commission.

Complete the Category & Rate Mapping.
Method One:
Select 'Connect to Retrieve Categories'.

Select the RMS Category and Rate Type for each combination.

Method Two:
Select 'Add Category/Rate Types'.

Enter the Channel Category & Rate Type combinations.

Select 'Save/Exit' to store the changes made and return to the Channel Management setup.

Select the RMS Category & Rate Type for each combination.

Select 'Save/Exit' to store the changes made and leave the setup.

The first sync of Rates and Availability can take up to thirty minutes to complete and will depend on if the channel connection receives information sent by RMS or retrieves information on their schedule.
See the Channel Manager Connections article for more information on each available connection.