Pre Check-in
Pre-arrival process for Guests to complete using the Guest Portal in RMS.
Pre Check-in is an optional feature available for the Guest Portal to prompt Guests to complete the required pre-arrival information.
-
Information
-
Setup
- Add Button
Information
Pre Check-in is an optional feature available for the Guest Portal to prompt Guests to complete the required pre-arrival information.
Information collected during Pre Check-in can be used to complete the selected Registration Card and properties setup with a Payment Gateway can obtain payment through the Guest Portal as part of the Pre Check-in process.
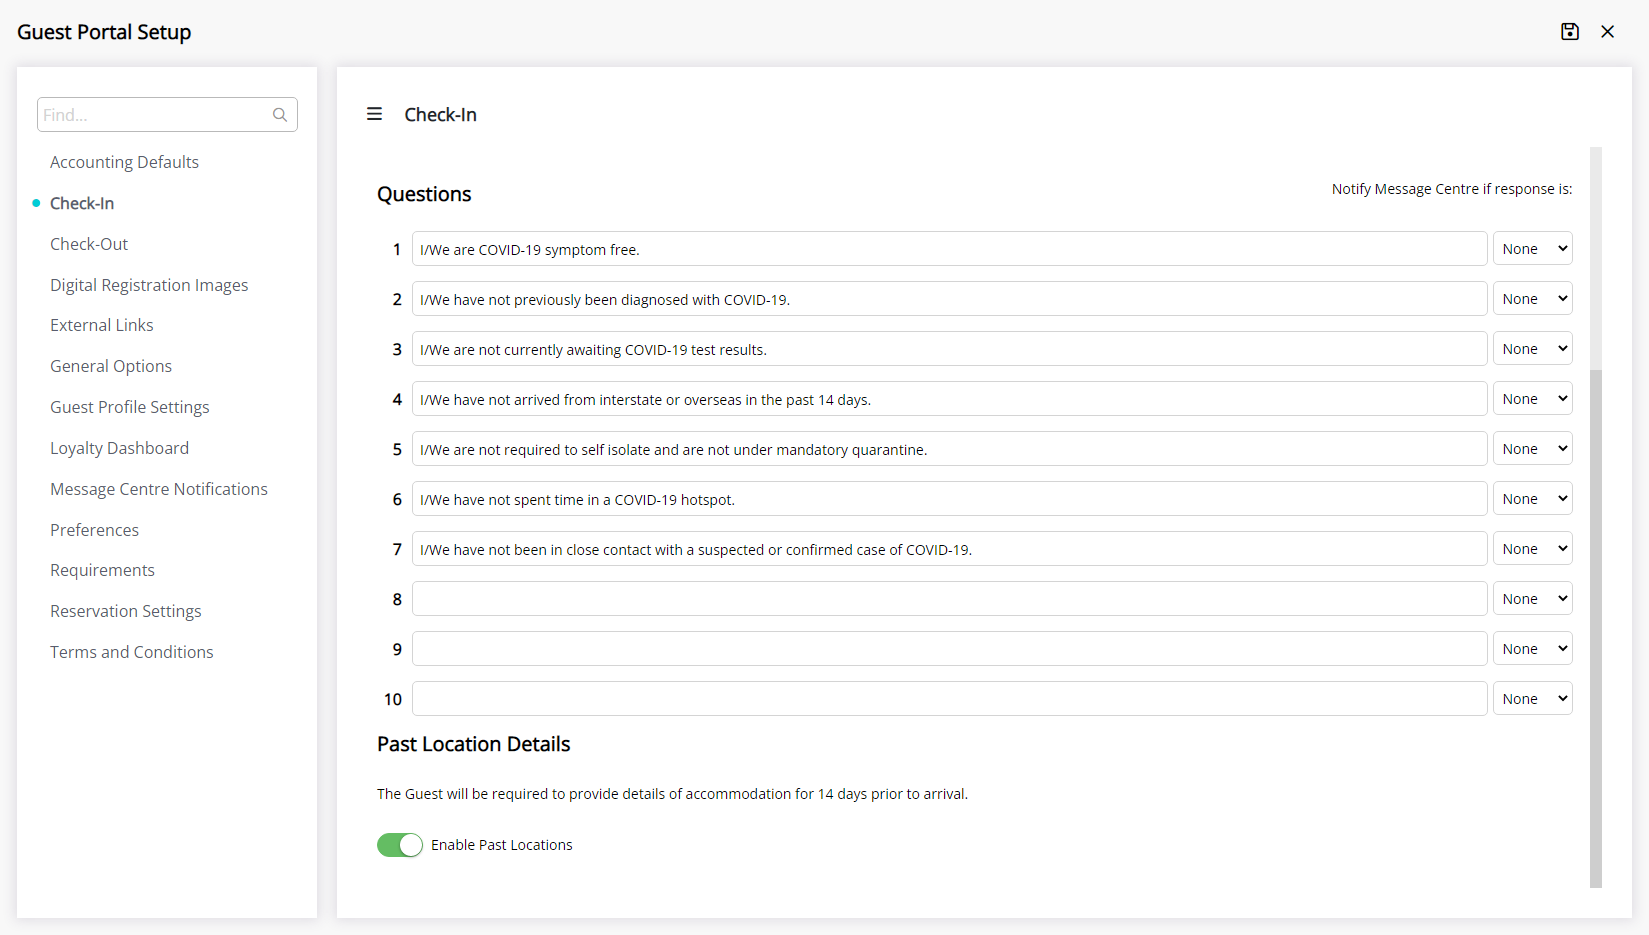
Additional information includes the ability to required additional Guest information, photo identification uploads and an optional Guest Declaration is available which can have up to ten yes or no questions with questions answered as 'No' by the Guest sending a notification to the Message Centre.
Location contact tracing is also available as part of the Guest Declaration.
Pre Check-in can be used standalone or as part of the Digital Check-in for a complete self service option.
A Payment Gateway is required to accept payments through the Guest Portal.
Pre Authorisation is only available to properties using RMS Pay or Stripe as the Payment Gateway.
The selected Form Letter will be used to store the information entered during Pre Check-in on the 'Correspondence' tab of the Reservation.
Excluding Travel Agents from Pre Check-in will prevent Reservations being prompted to complete Pre Check-in when the excluded Travel Agent is selected on the Reservation.
The Guest Declaration will be enabled by default and can be disabled at Step 13.
Disabling the Guest Declaration at Step 13 will exclude the Acknowledgement Questions & Past Locations from Pre Check-in.

Reservation and Guest are default System Labels that can be customised.

System Administrators will require Security Profile access to setup this feature.
-
Setup
- Add Button
Setup
Have your System Administrator complete the following.
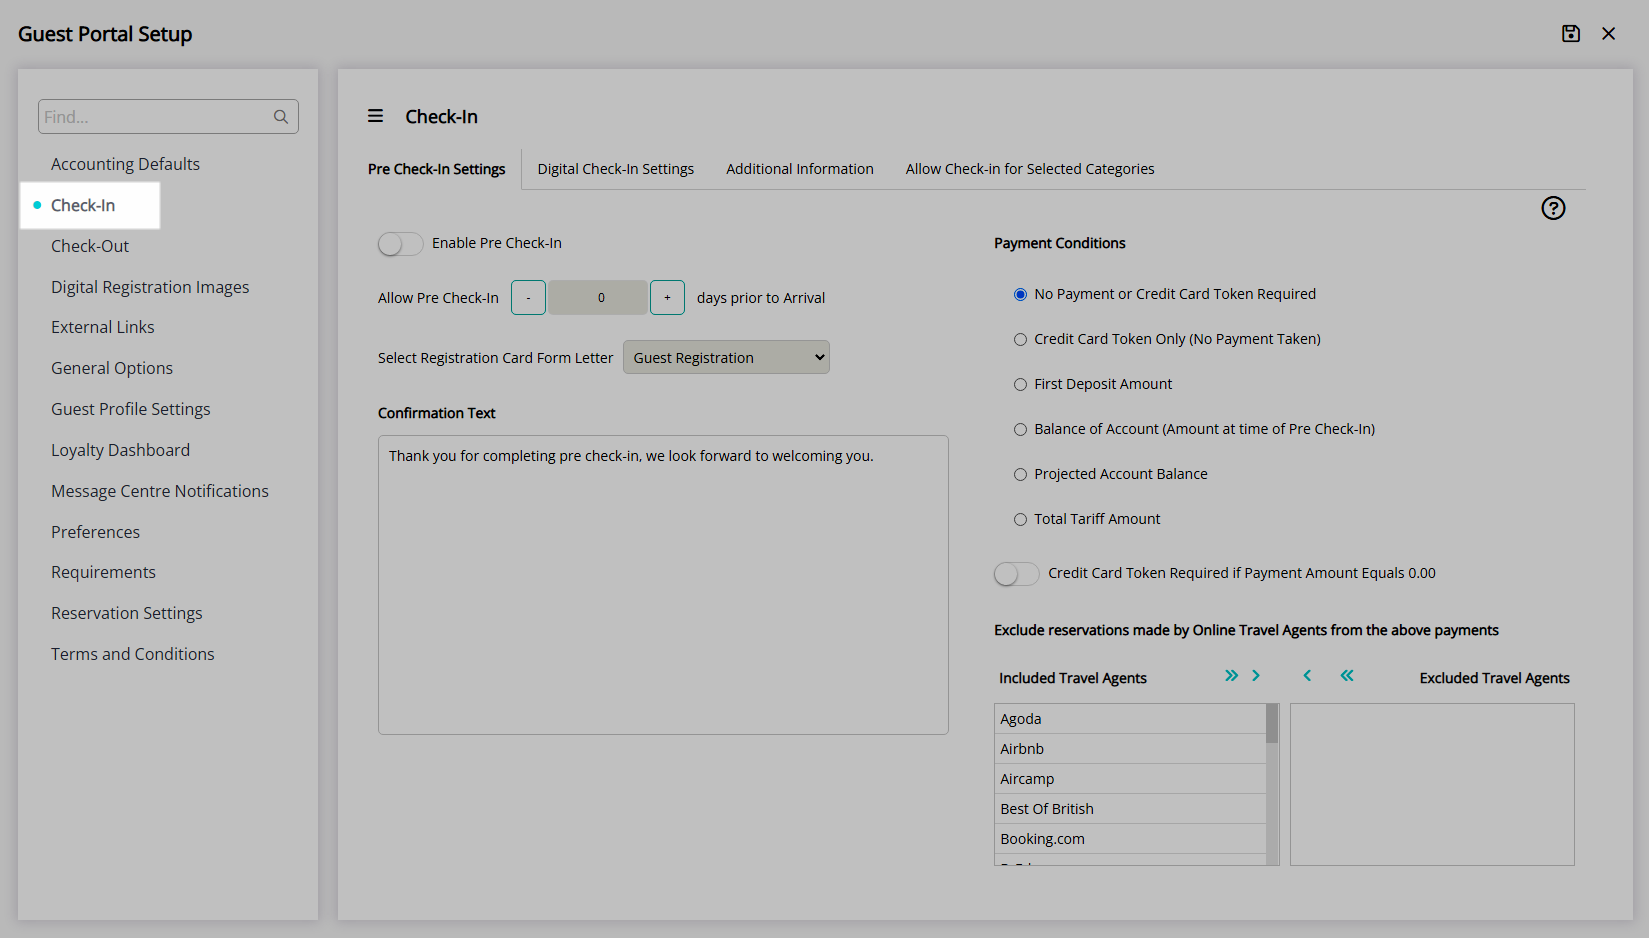
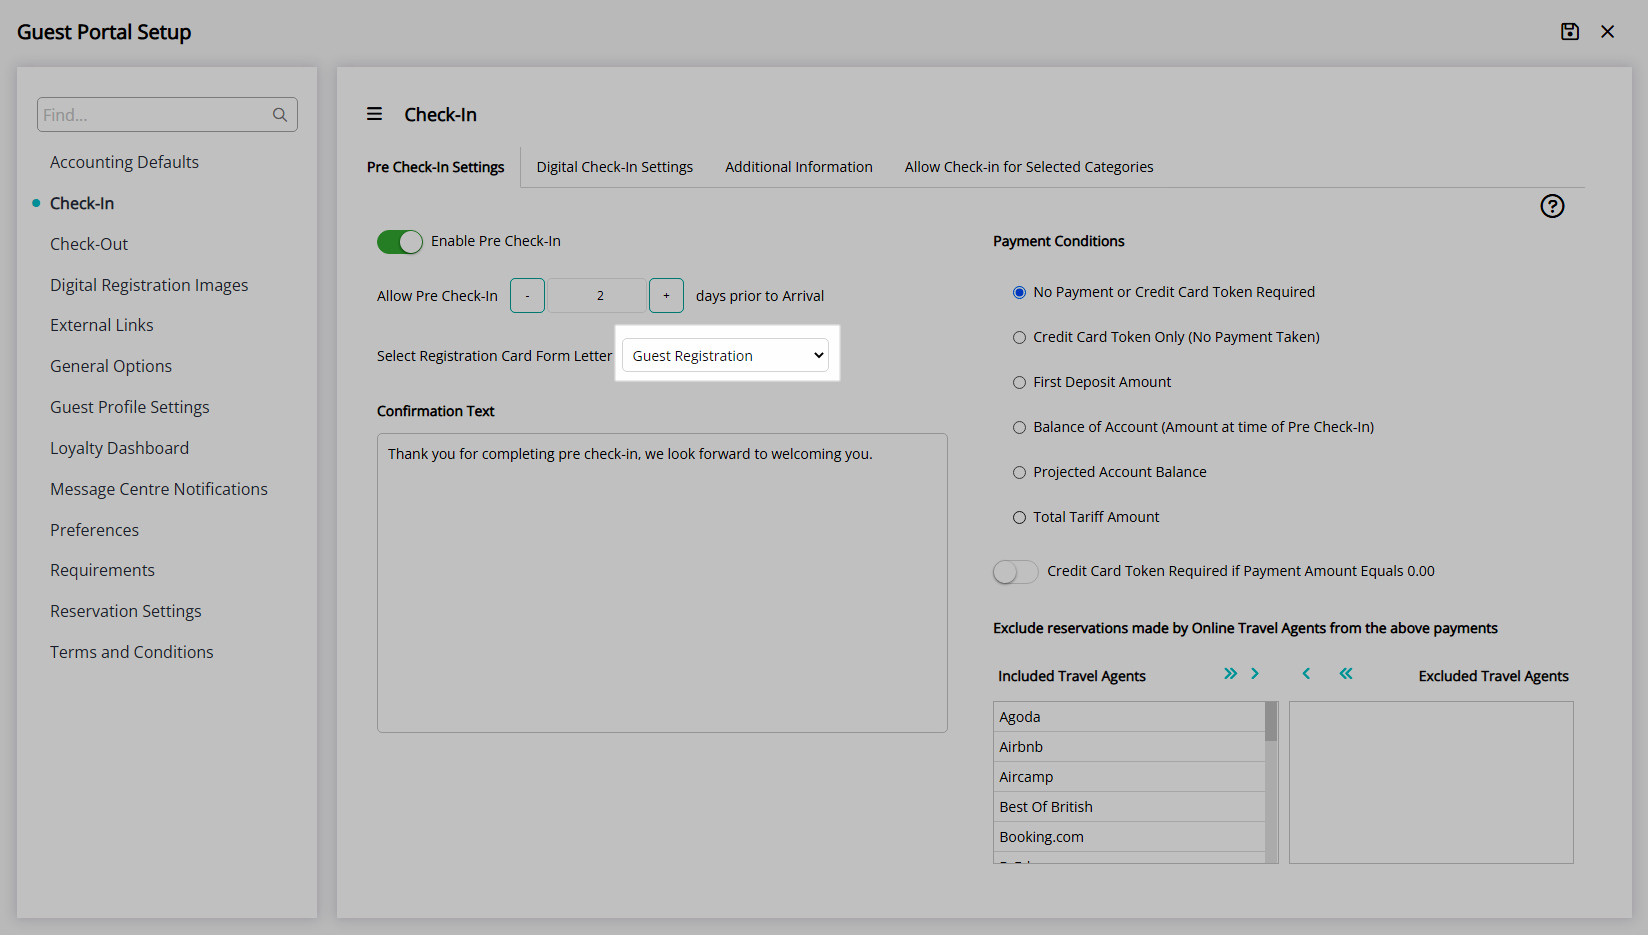
- Go to Setup > Portal Access > Guest Portal in the Side Menu of RMS.
- Navigate to the 'Check-in' tab.
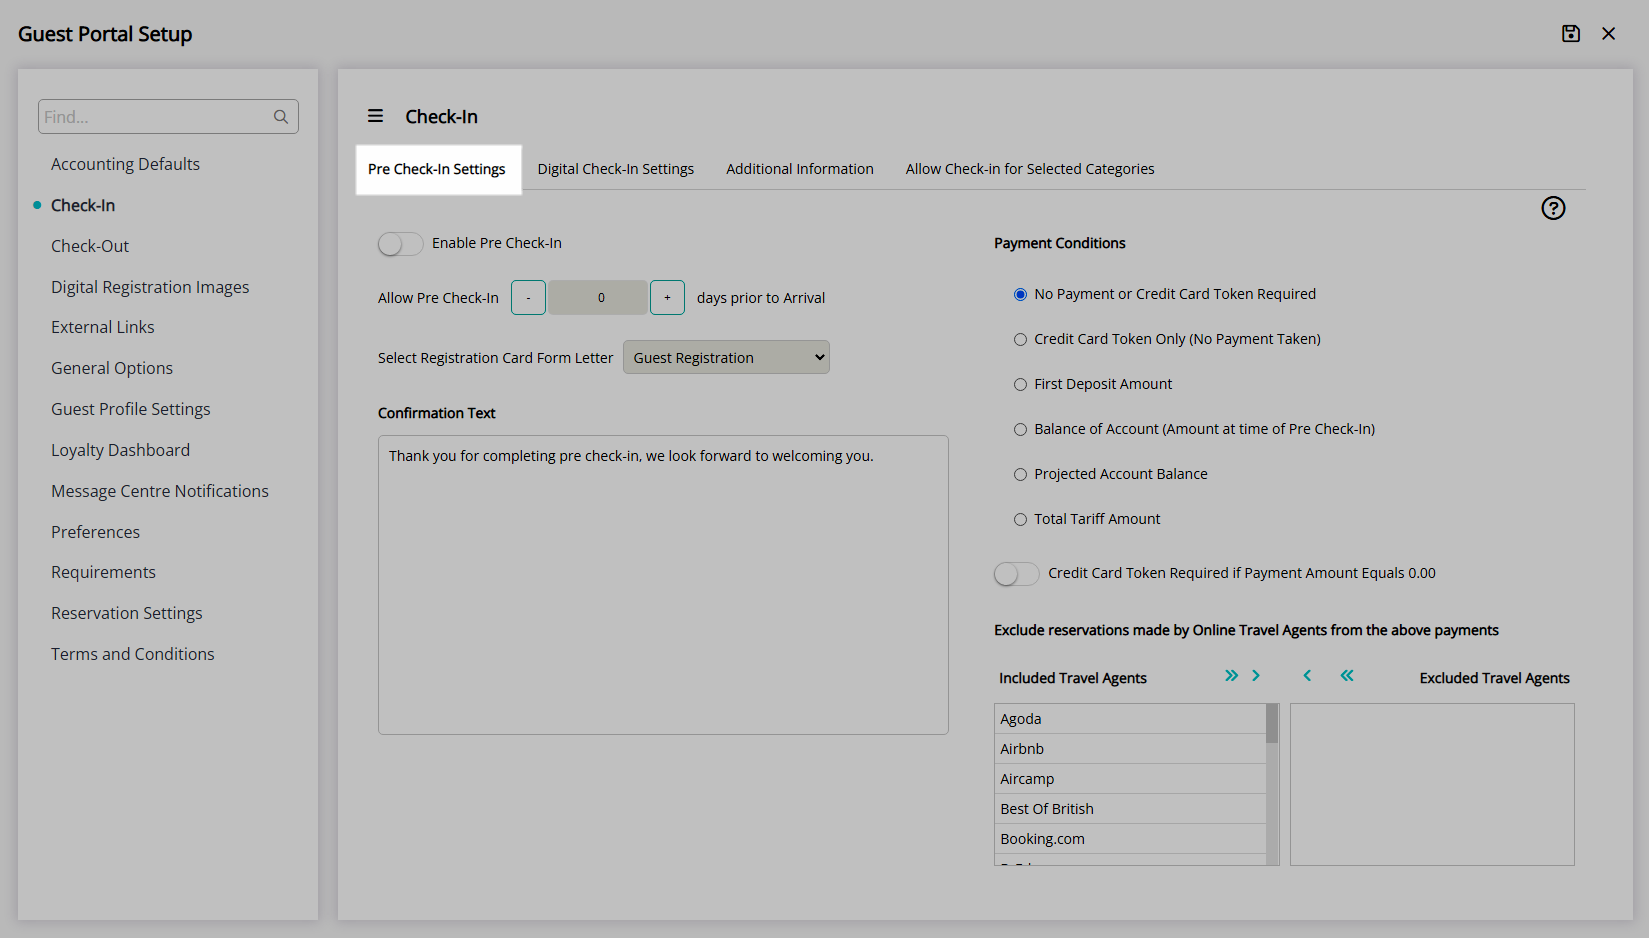
- Navigate to the 'Pre Check-in Settings' tab.
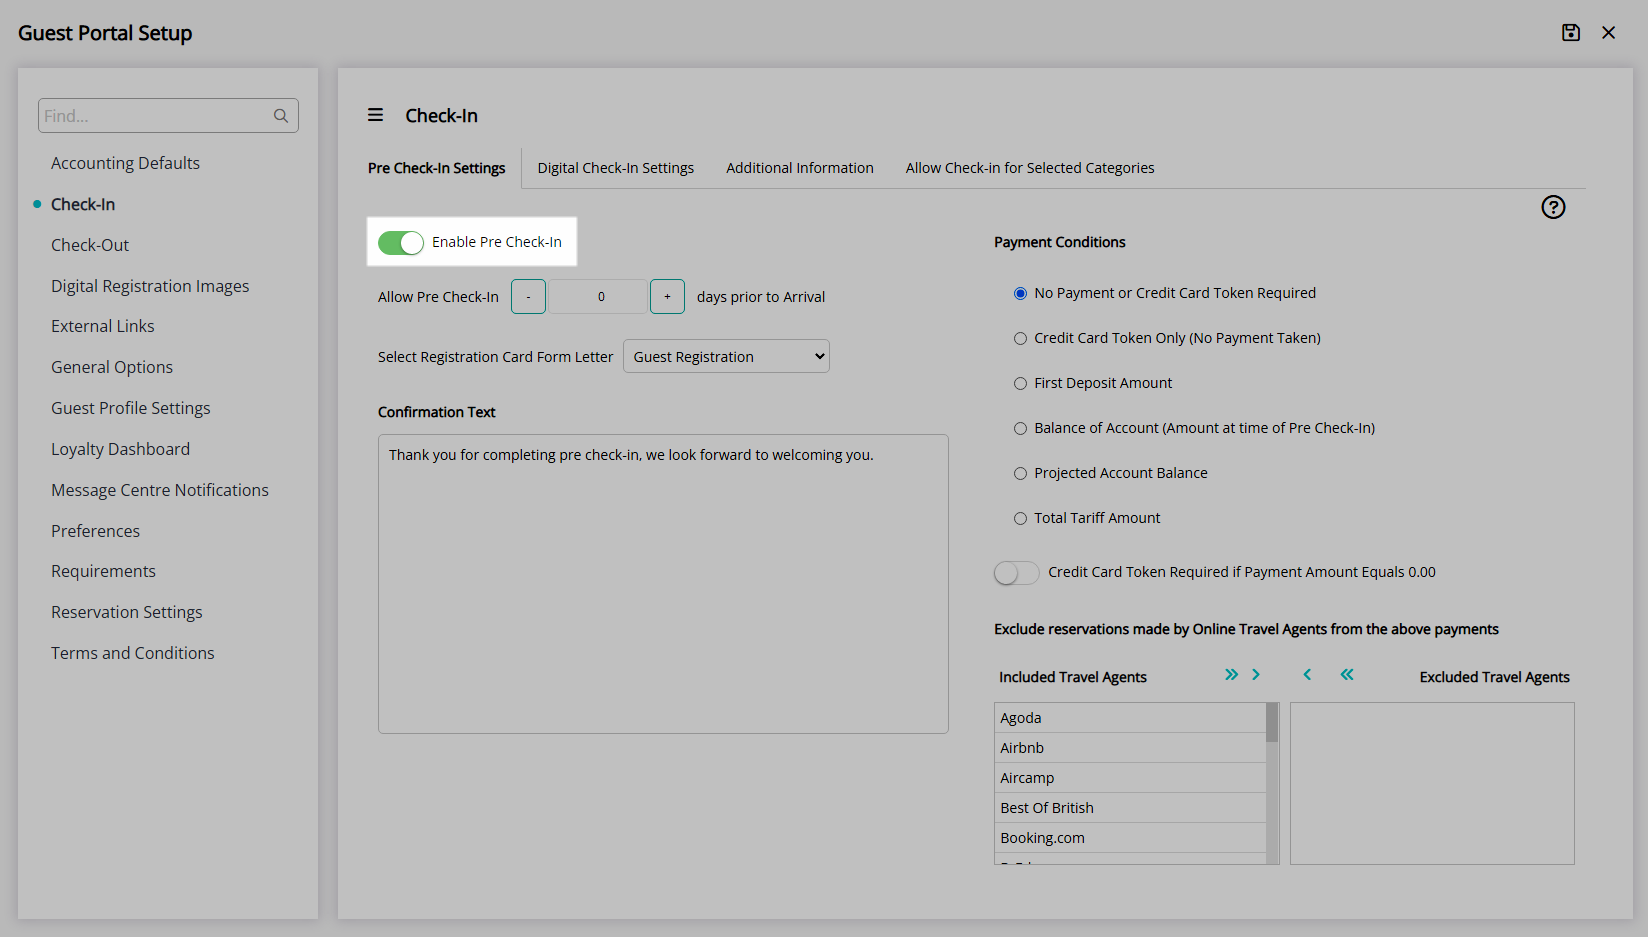
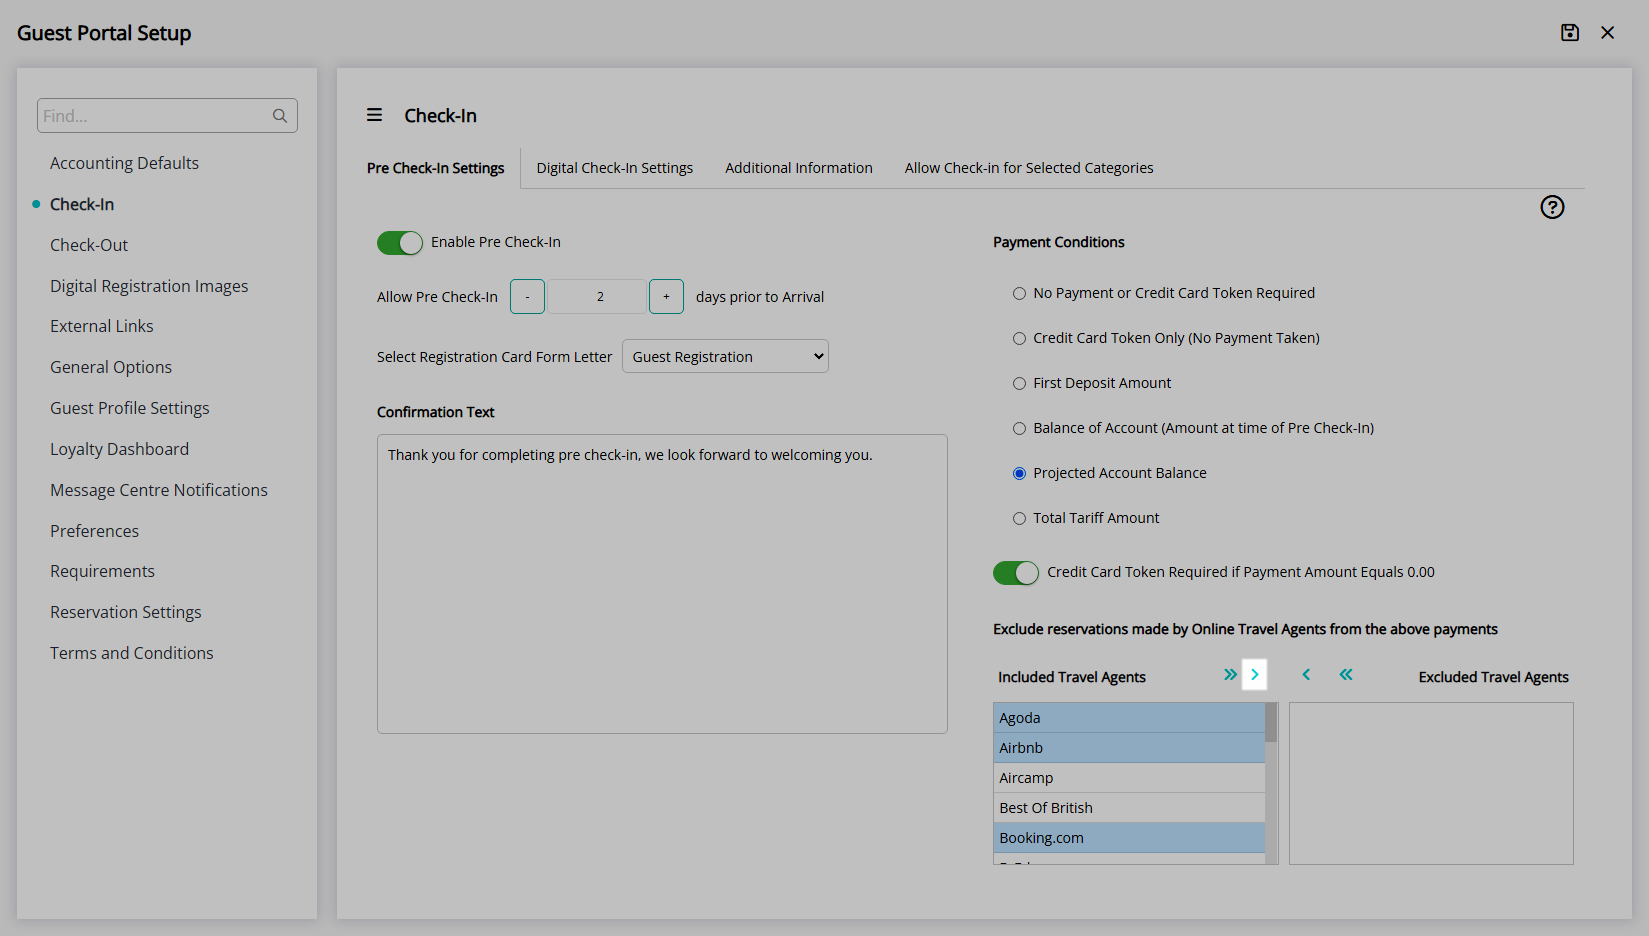
- Select the toggle 'Enable Pre Check-in'.
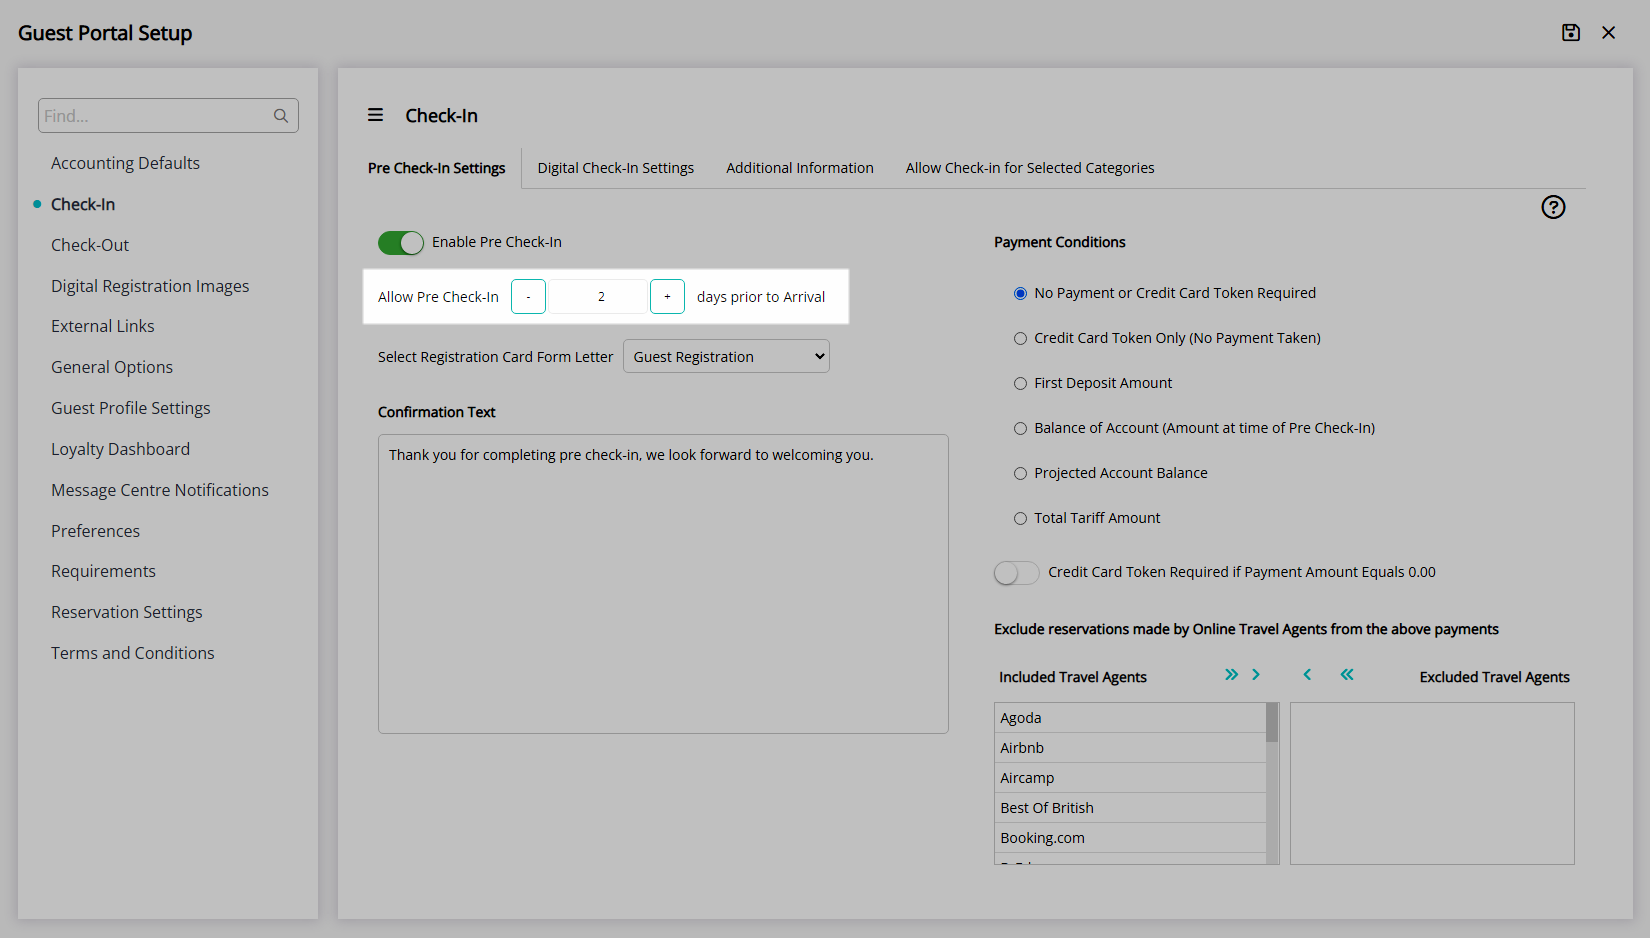
- Select the Number of Days Prior to Arrival to allow Pre Check-in.
- Select a Form Letter to use as the Registration Card.
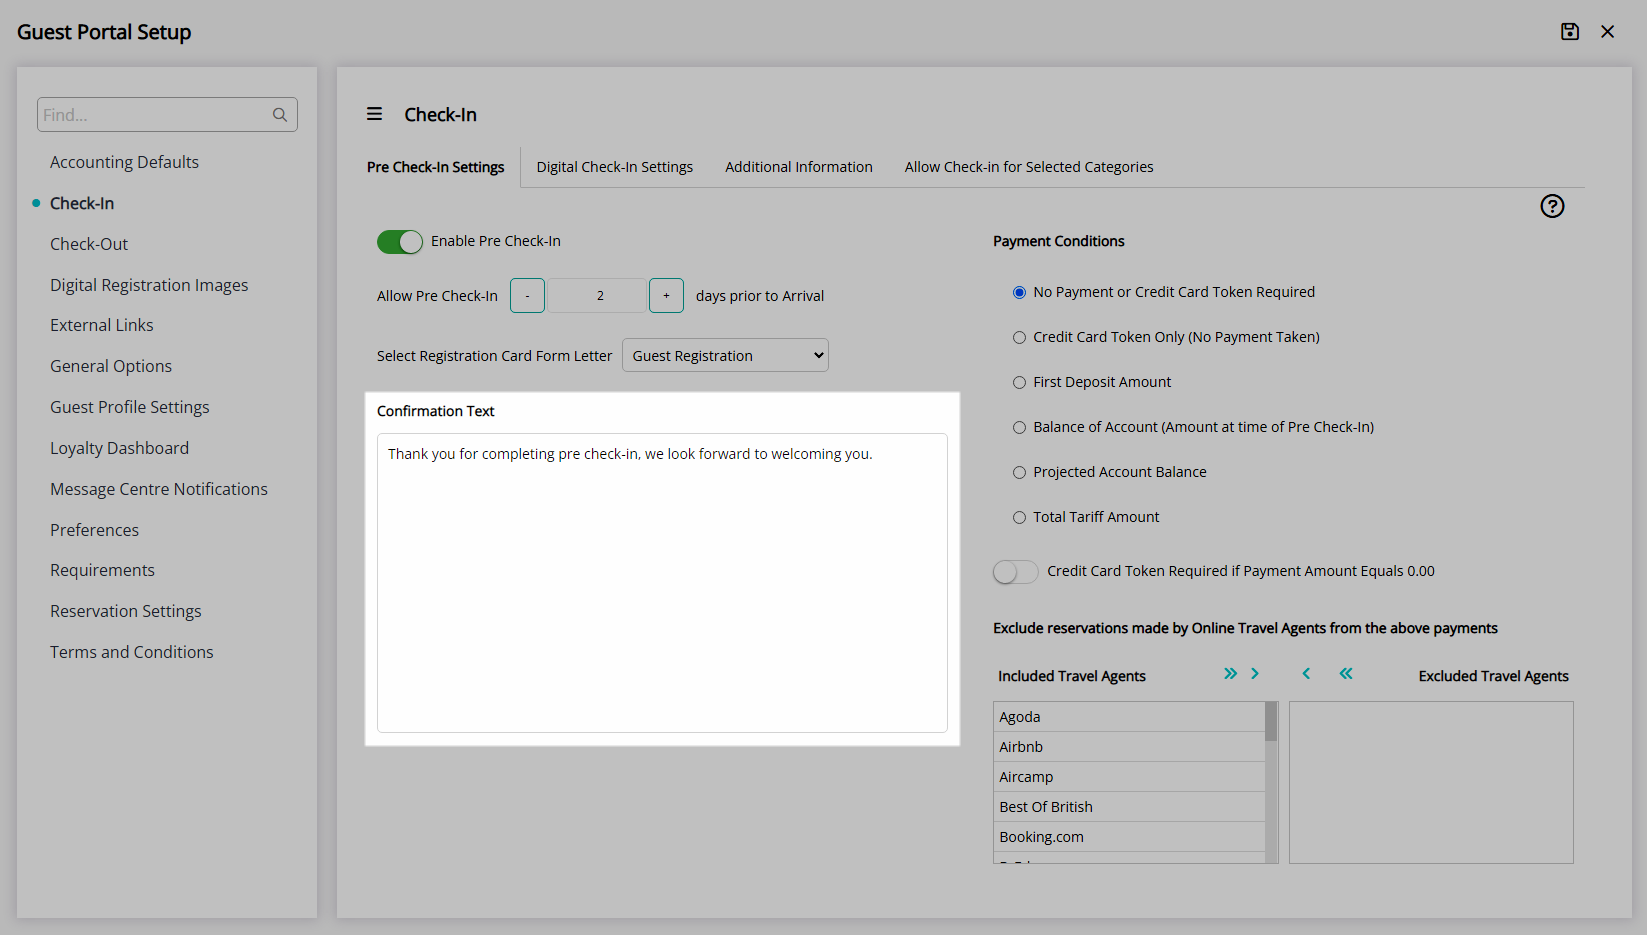
- Enter the Confirmation Text displayed on Pre Check-in completion.
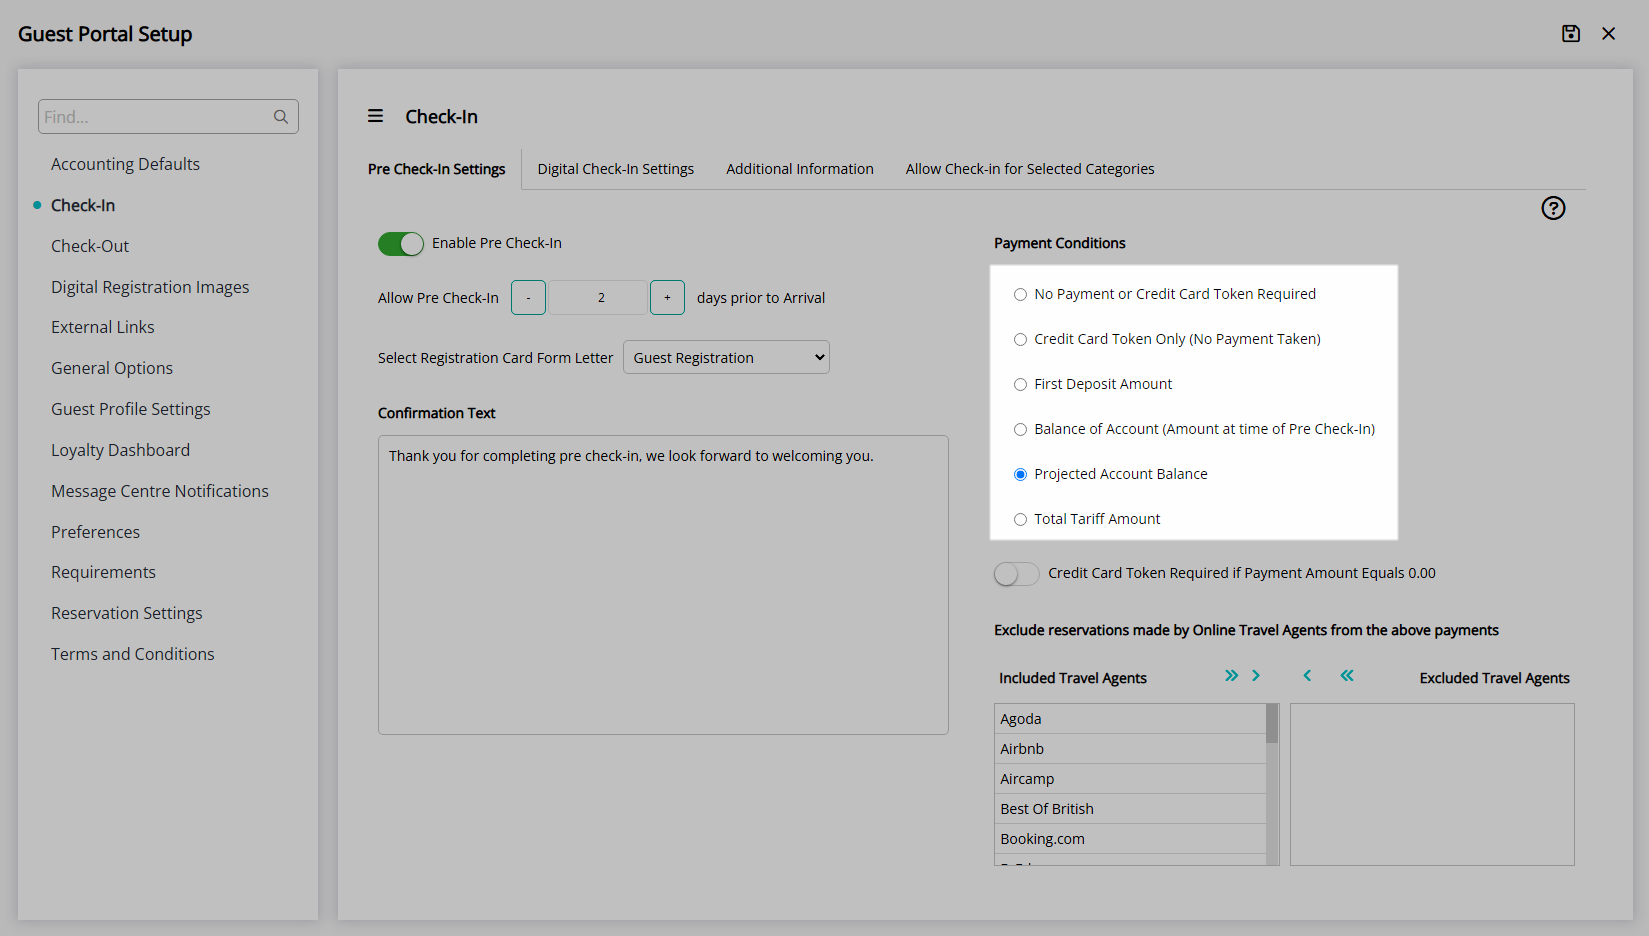
- Select the Payment Conditions.
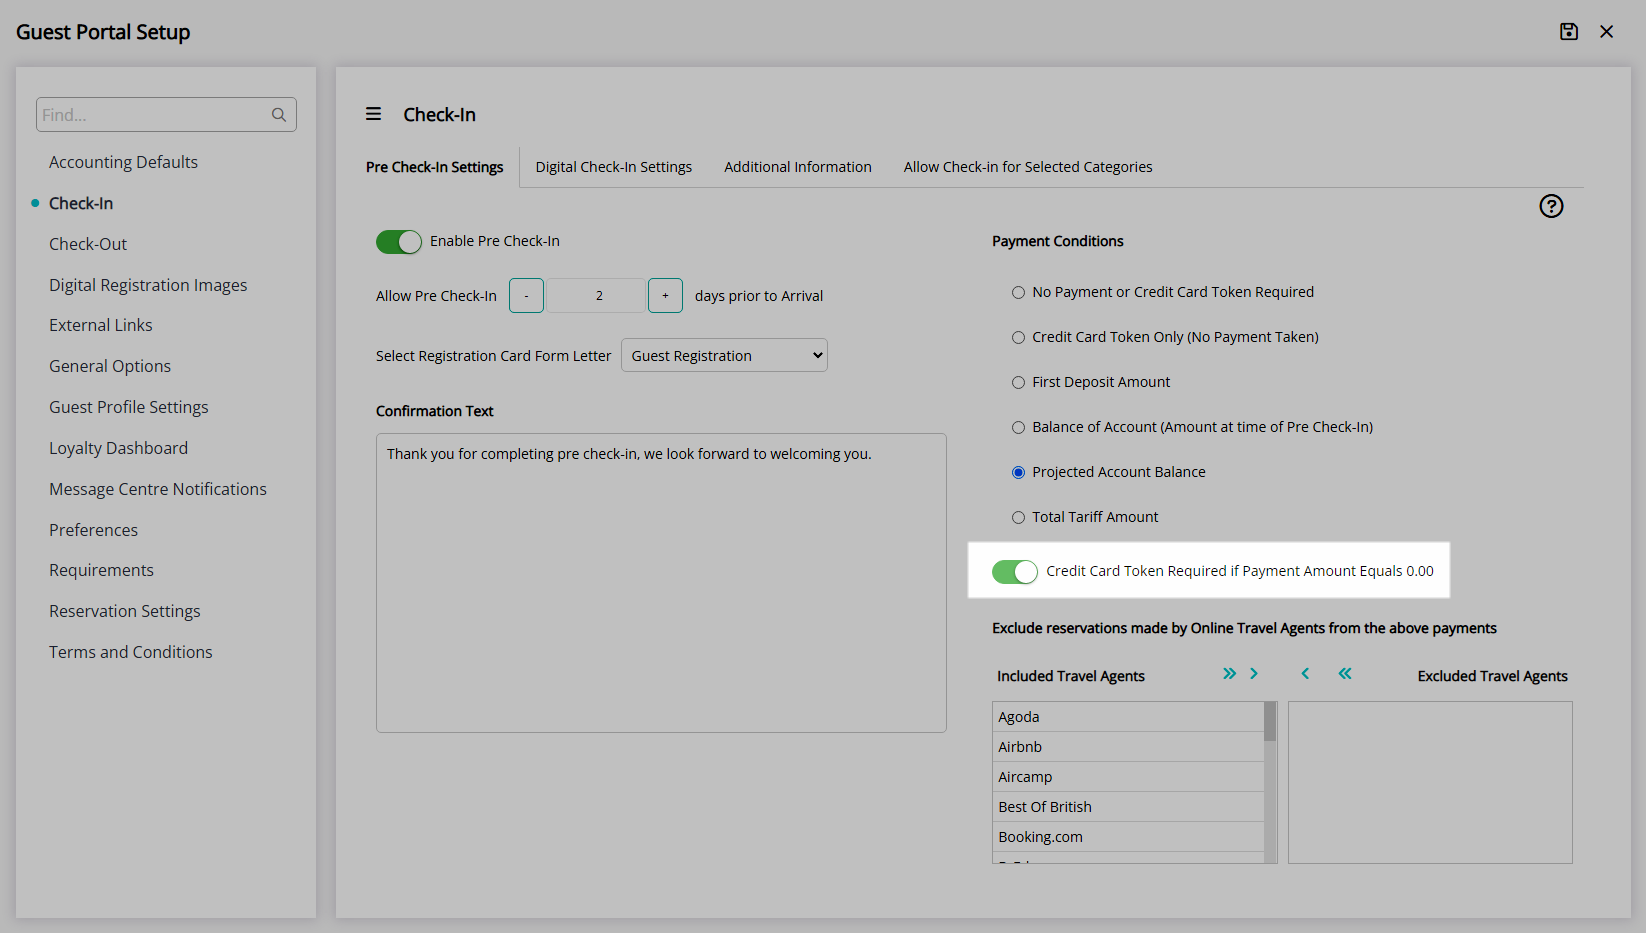
- Optional: Select the toggle 'Credit Card Token Required if Payment Amount Equals 0.00'.
-
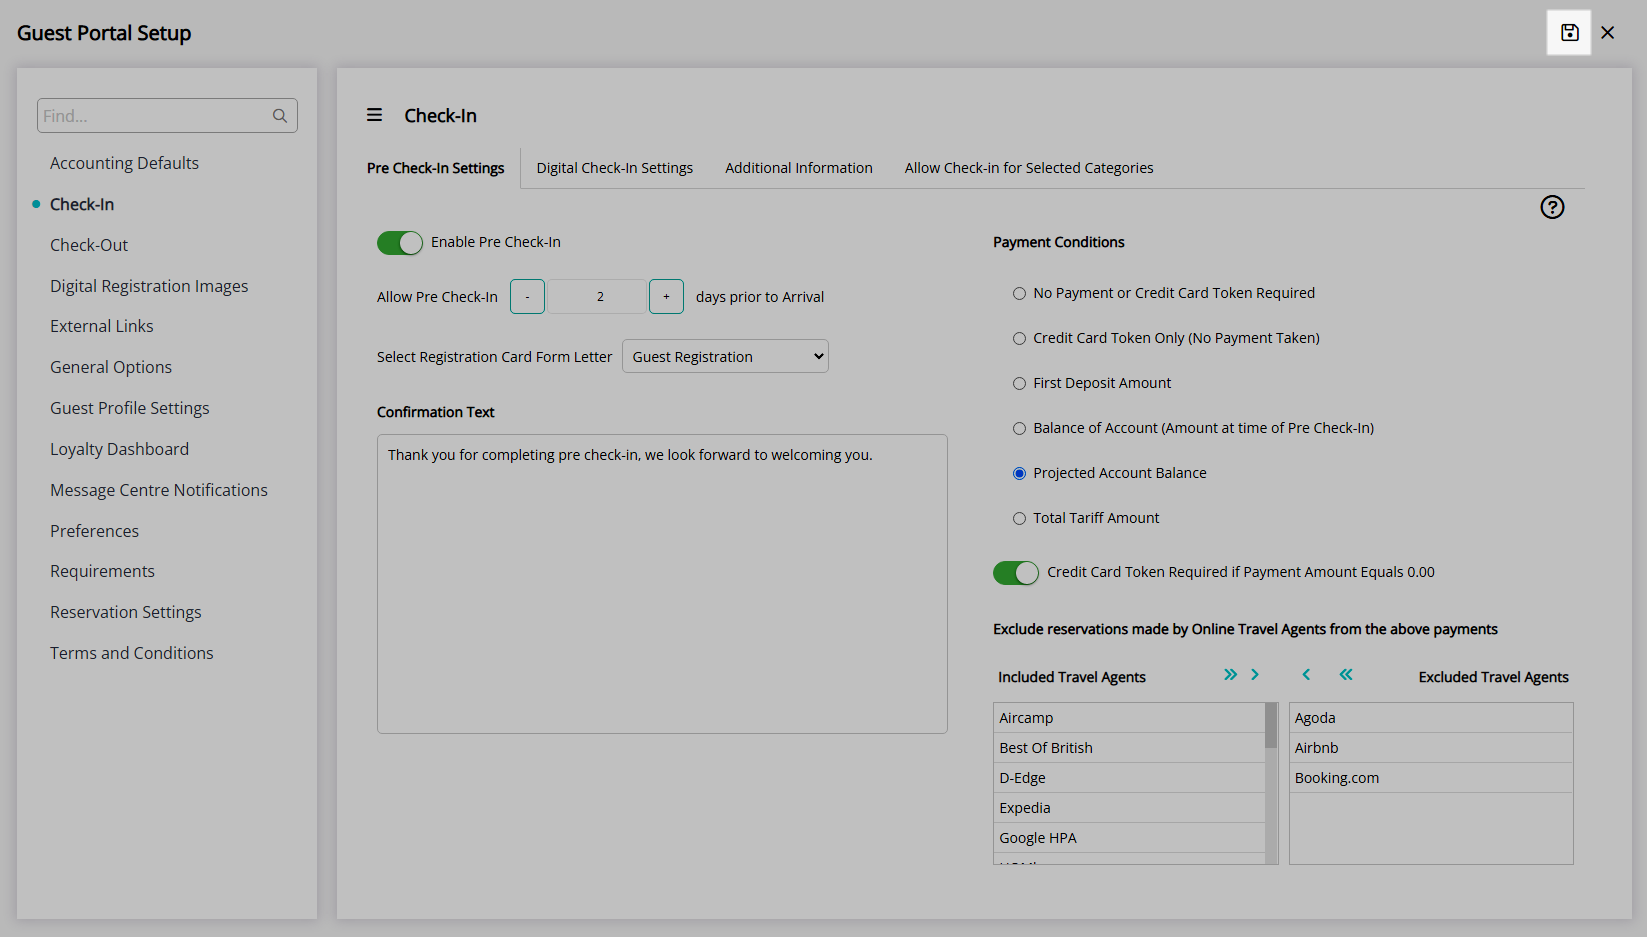
Optional: Exclude Travel Agents.
- Select the Travel Agent and choose the
 button.
- Select the Travel Agent and choose the
- Save.
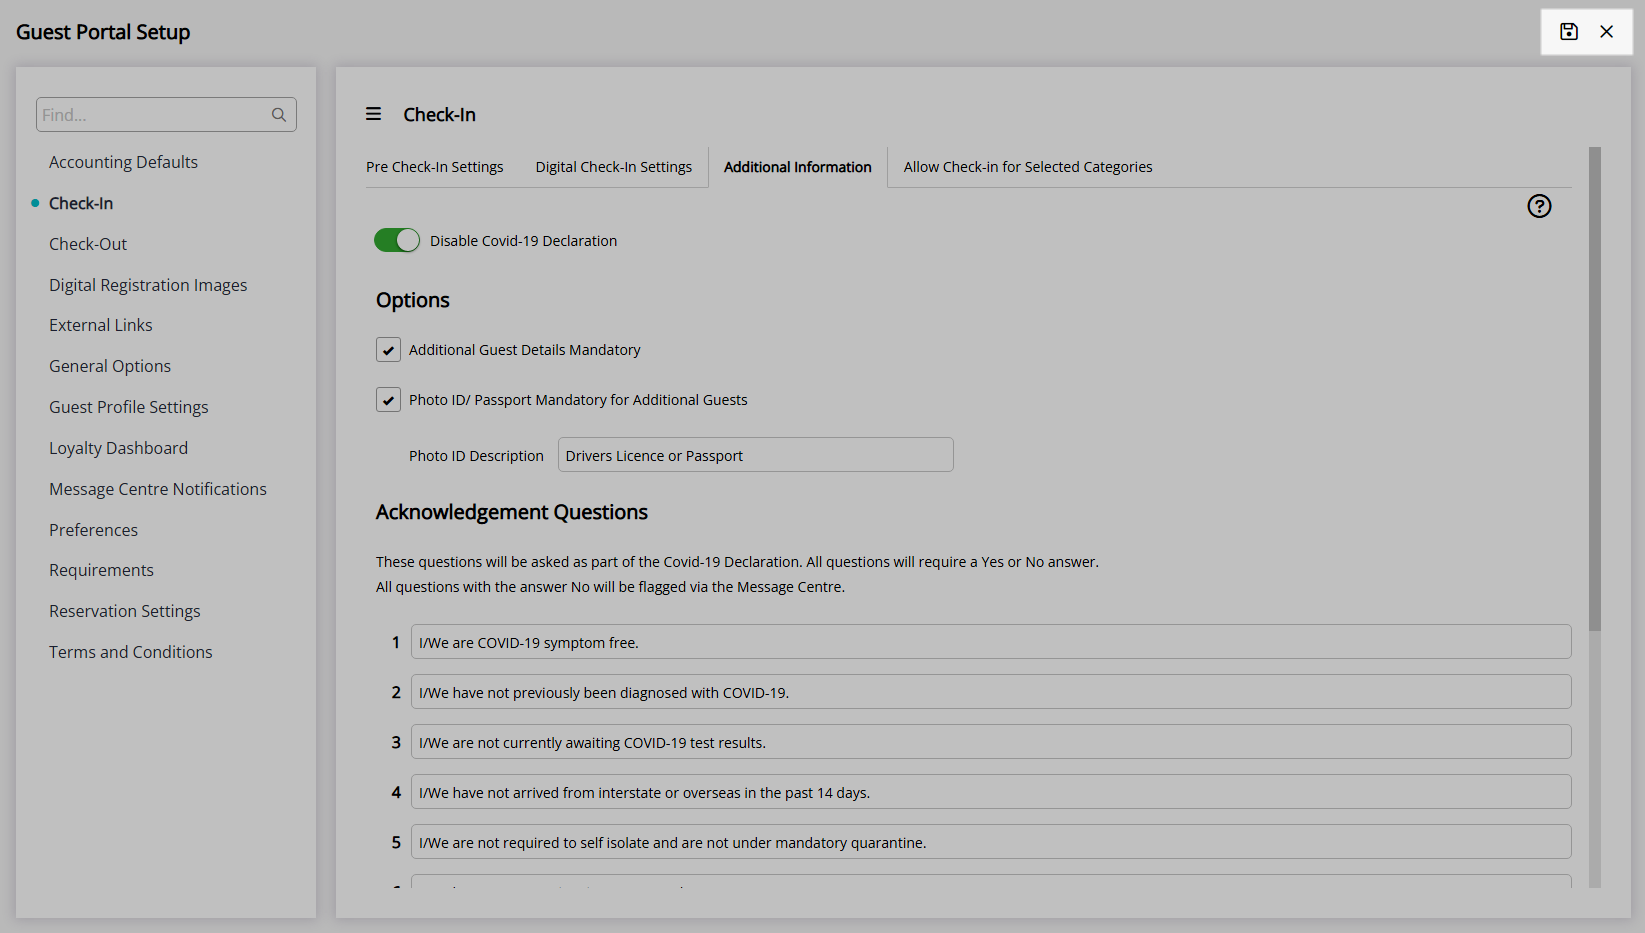
- Navigate to the 'Additional Information' tab.
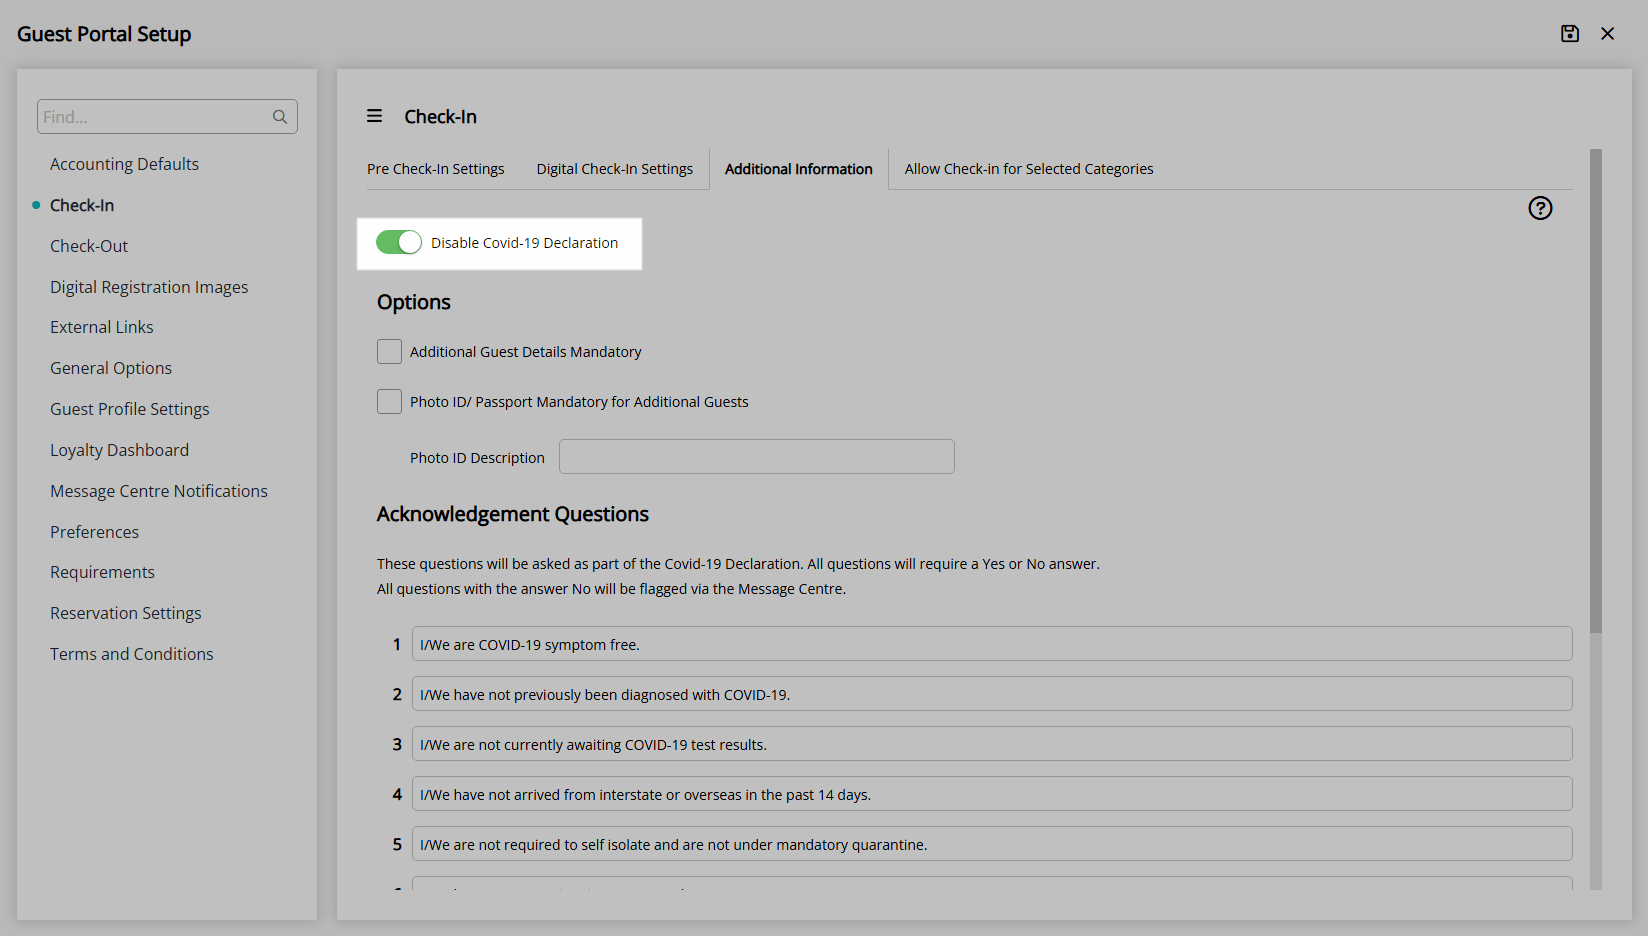
- Optional: Select the toggle 'Disable Covid-19 Declaration'.
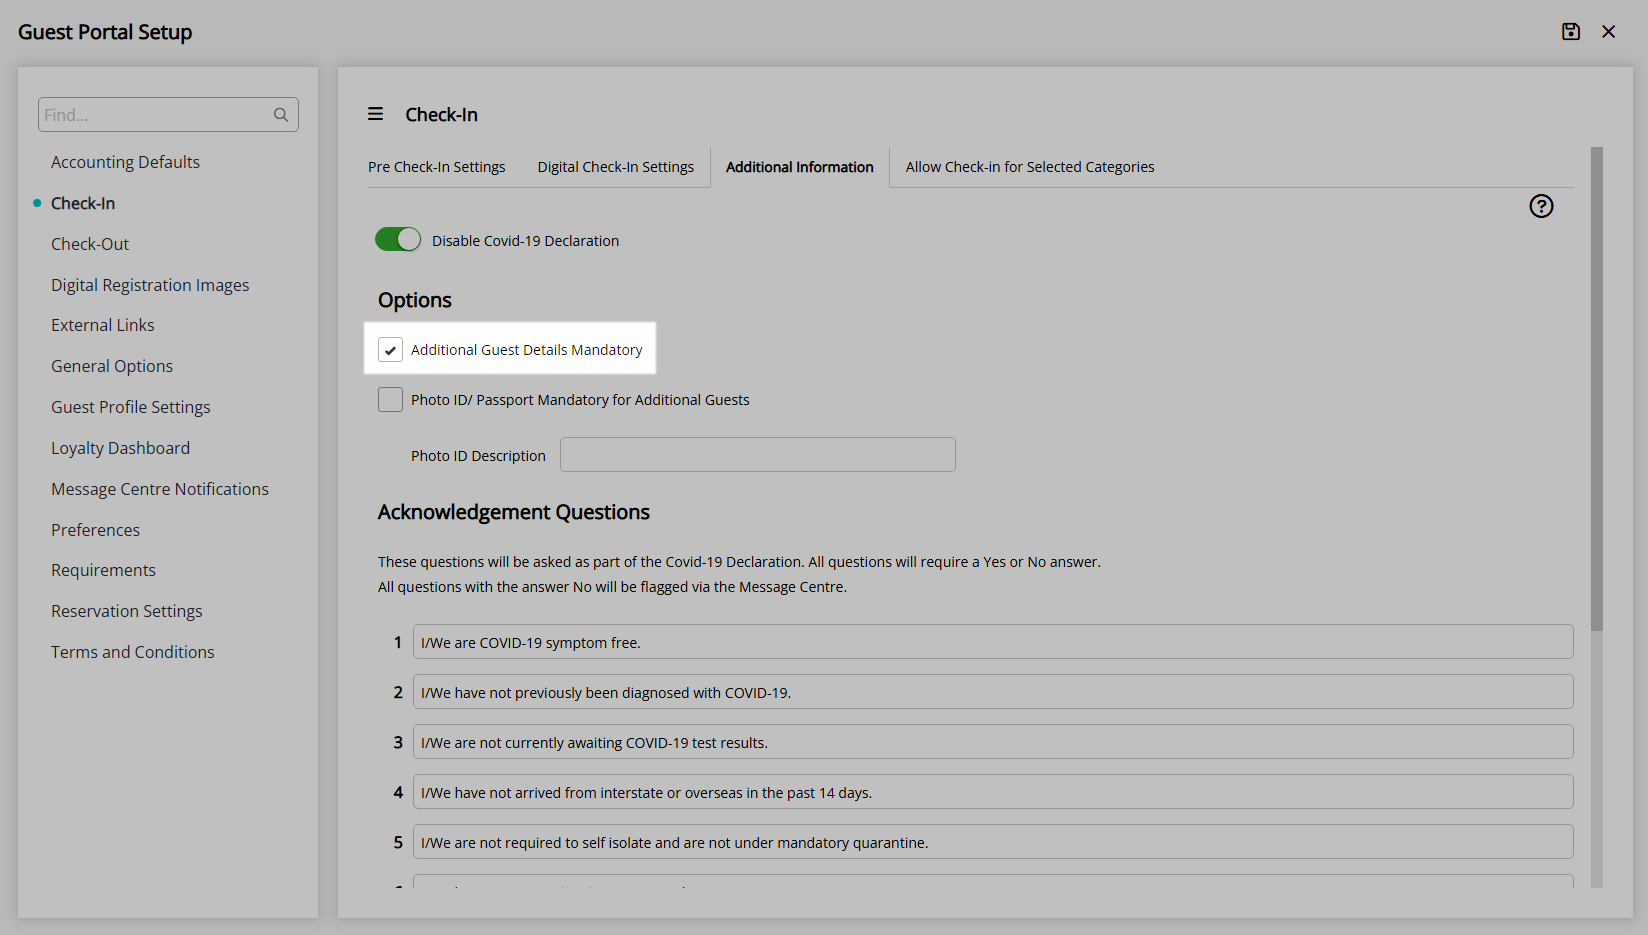
- Optional: Select the checkbox 'Additional Guest Details Mandatory'.
-
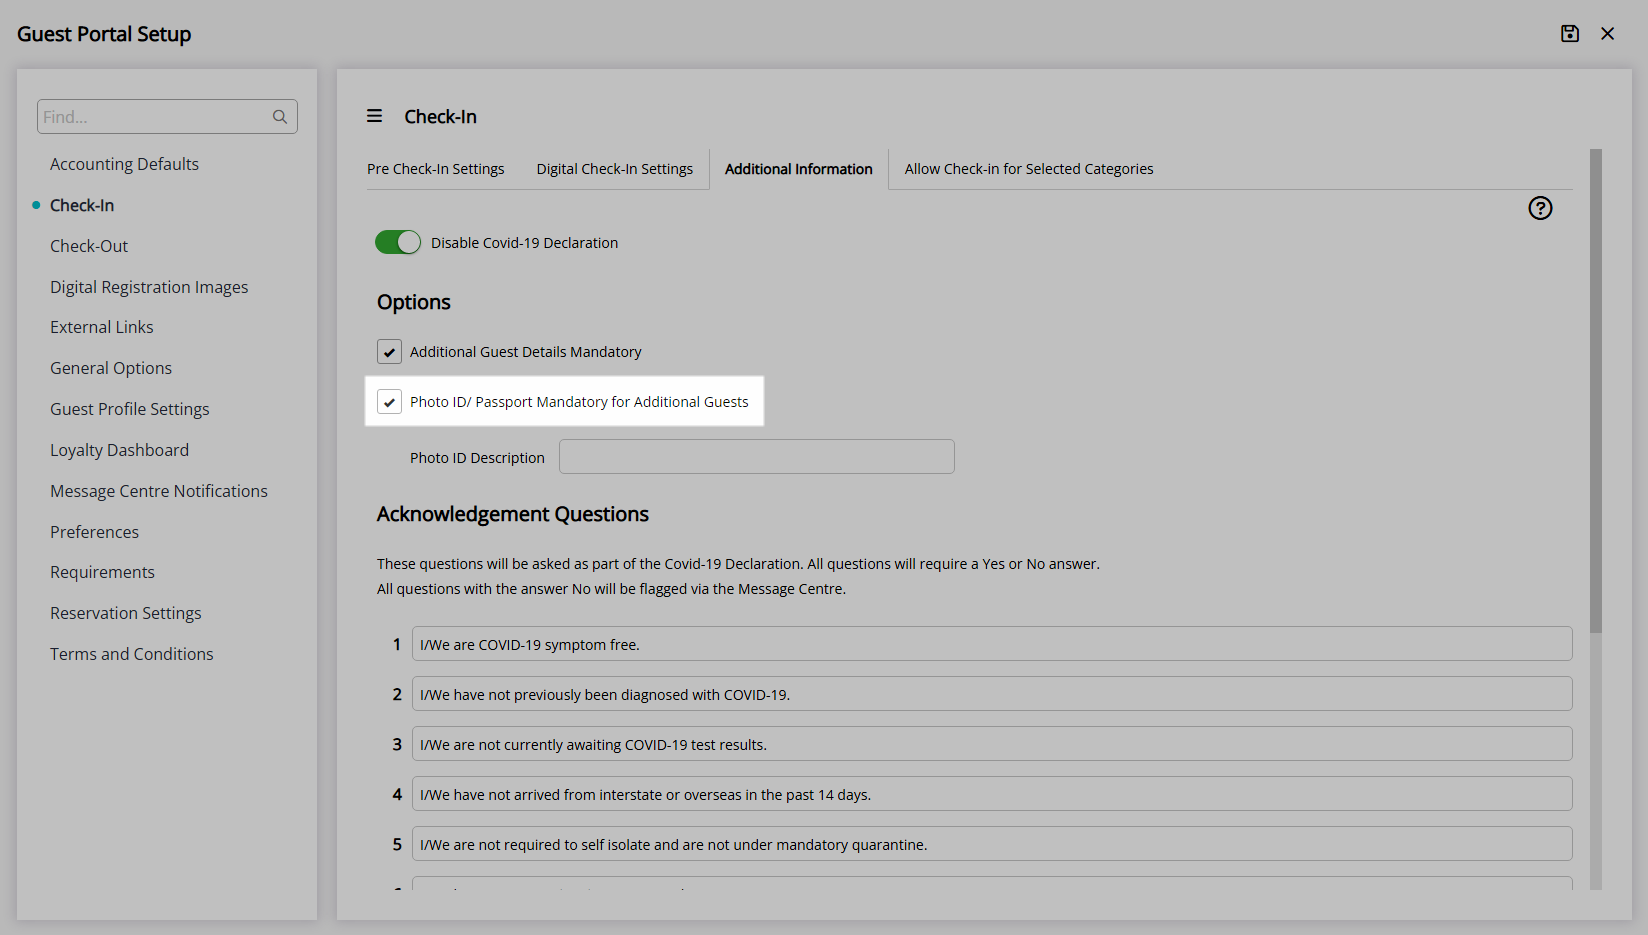
Optional: Select the checkbox 'Photo ID/Passport Mandatory for Additional Guests'.
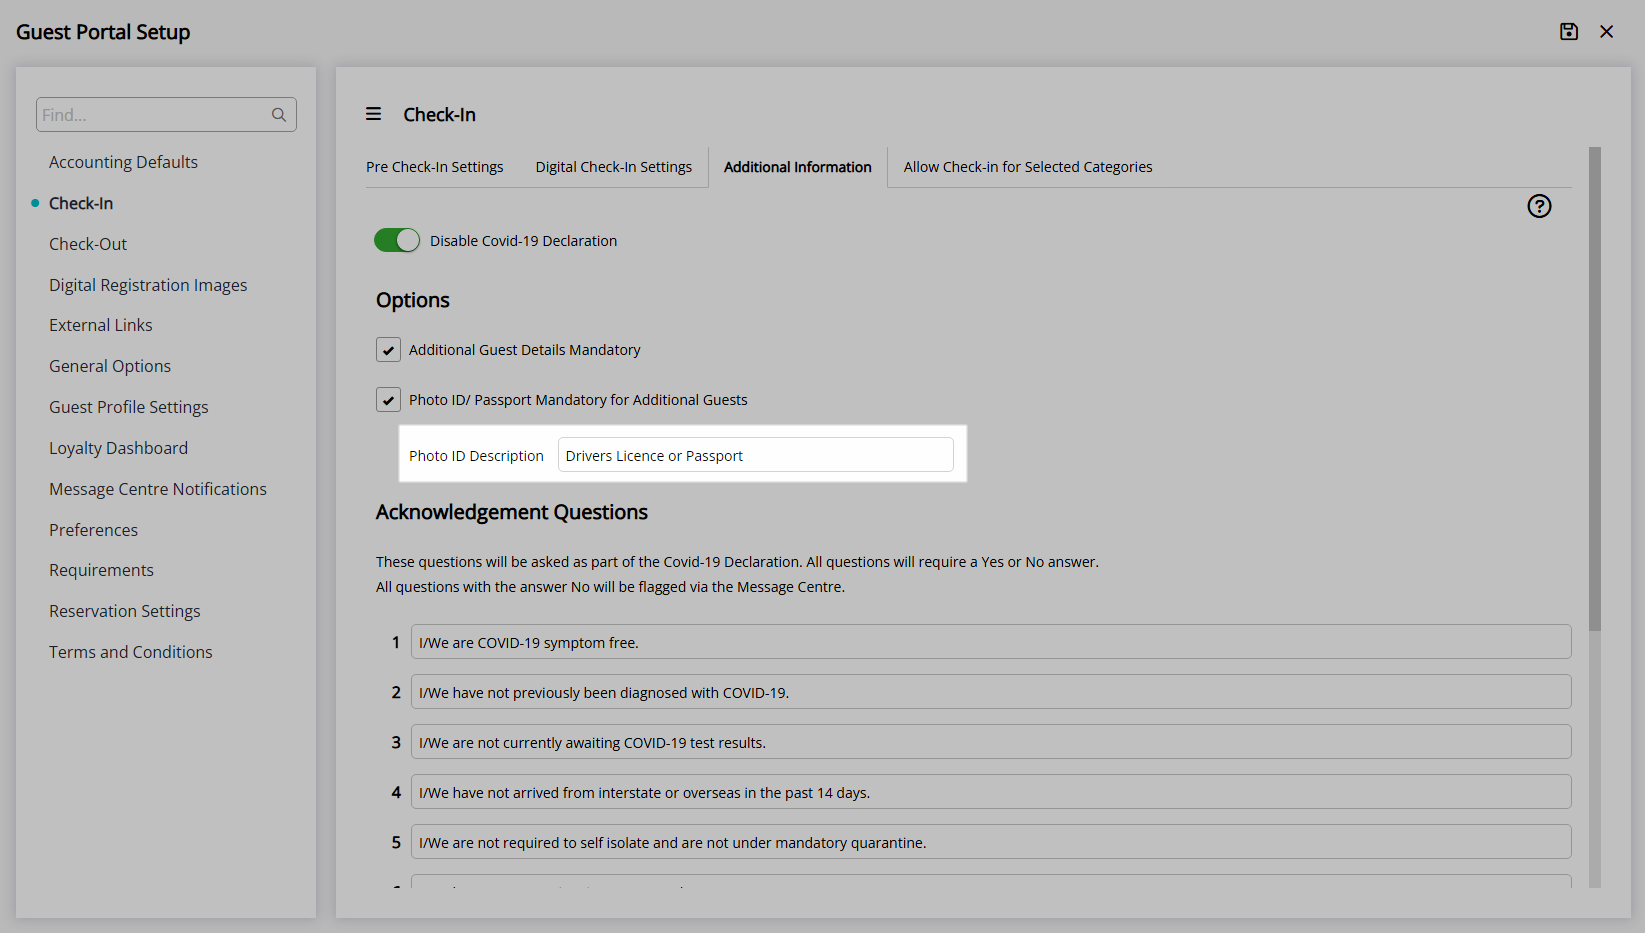
- Enter a Photo ID Description to display in the Guest Portal.
- Optional: Setup the Guest Declaration.
- Save/Exit.

A Payment Gateway is required to accept payments through the Guest Portal.
Pre Authorisation is only available to properties using RMS Pay or Stripe as the Payment Gateway.
The selected Form Letter will be used to store the information entered during Pre Check-in on the 'Correspondence' tab of the Reservation.
Excluding Travel Agents from Pre Check-in will prevent Reservations being prompted to complete Pre Check-in when the excluded Travel Agent is selected on the Reservation.
The COVID-19 Declaration will be enabled by default.
Disabling the COVID-19 Declaration will remove the COVID specific questions from the Guest Declaration.
Use Triggered Correspondence to send an SMS or Email to Guests prompting completion of Pre Check-in ahead of their arrival.
-
Guide
- Add Button
Guide
Go to Setup > Portal Access > Guest Portal in the Side Menu of RMS.

Navigate to the 'Check-in' tab.
Navigate to the 'Pre Check-in Settings' tab.
Select the toggle 'Enable Pre Check-in'.
Select the Number of Days Prior to Arrival to allow Pre Check-in.
Select a Form Letter to use as the Registration Card.
Enter the Confirmation Text displayed on Pre Check-in completion.
Select the Payment Conditions.
Optional: Select the toggle 'Credit Card Token Required if Payment Amount Equals 0.00'.
Optional: Exclude Travel Agents.
Select the Travel Agent and choose the  button.
Select 'Save' to store the changes made.
Navigate to the 'Additional Information' tab.
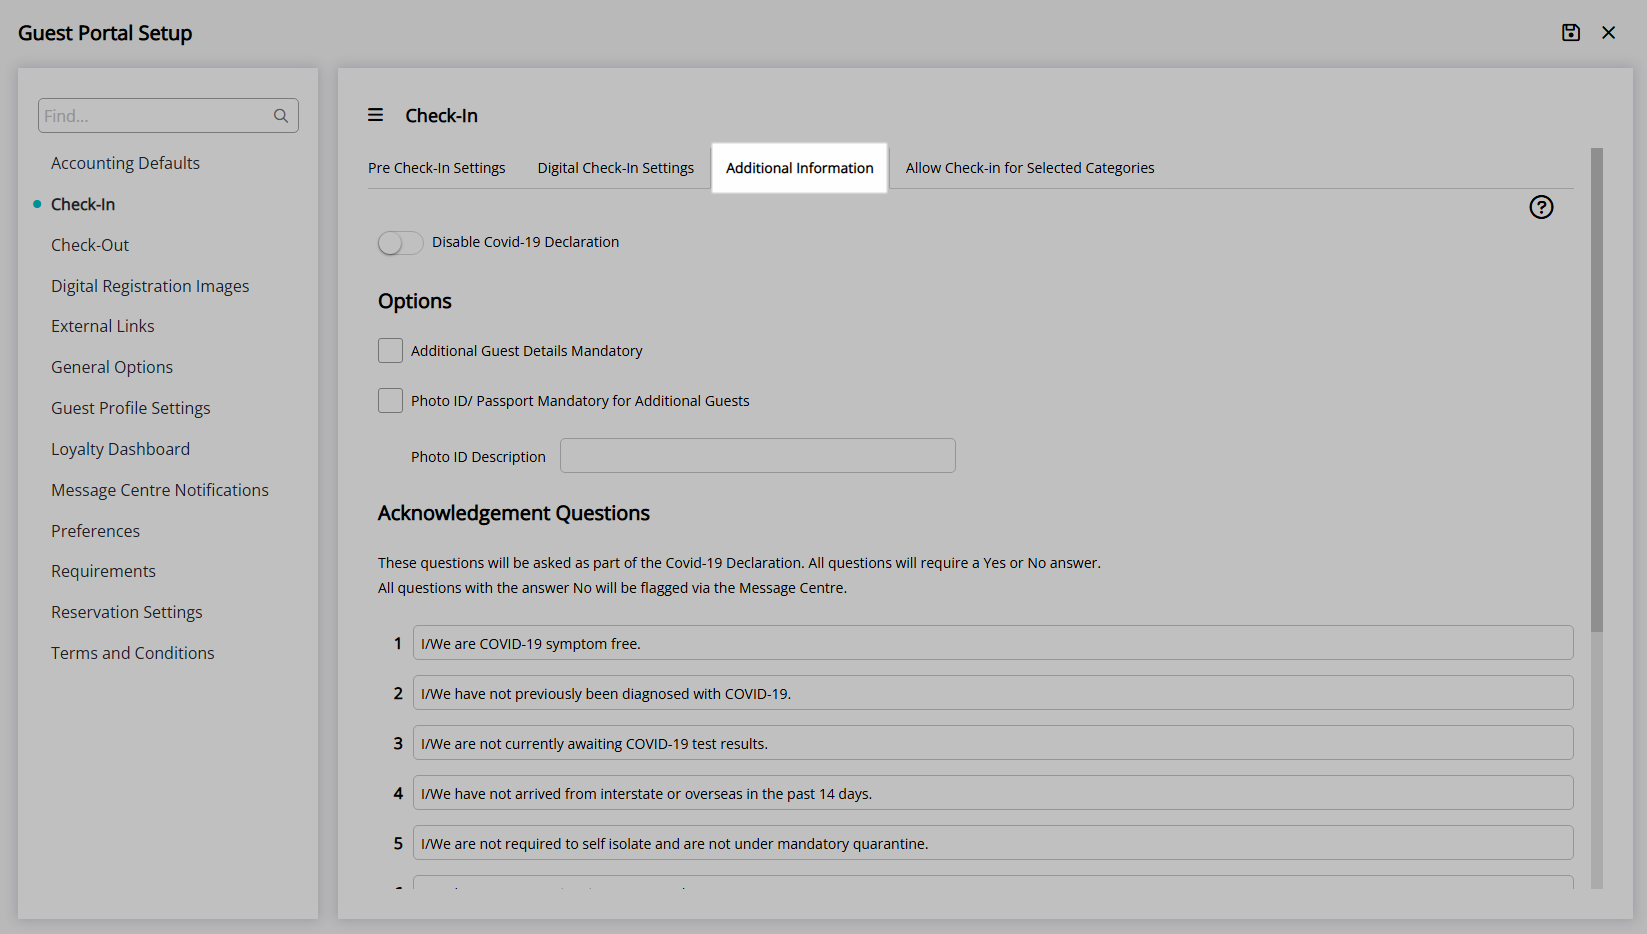
Optional: Select the toggle 'Disable Covid-19 Declaration'.
Optional: Select the checkbox 'Additional Guest Details Mandatory'.
Optional: Select the checkbox 'Photo ID/Passport Mandatory for Additional Guests'.
Enter a Photo ID Description to display in the Guest Portal.
Optional: Setup the Guest Declaration.
Select 'Save//Exit' to store the changes made and leave the setup.
Guests who log into the Guest Portal within the selected period of time ahead of their arrival will be prompted to complete Pre Check-in.
Setup
Have your System Administrator complete the following.
- Go to Setup > Portal Access > Guest Portal in the Side Menu of RMS.
- Navigate to the 'Check-in' tab.
- Navigate to the 'Pre Check-in Settings' tab.
- Select the toggle 'Enable Pre Check-in'.
- Select the Number of Days Prior to Arrival to allow Pre Check-in.
- Select a Form Letter to use as the Registration Card.
- Enter the Confirmation Text displayed on Pre Check-in completion.
- Select the Payment Conditions.
- Optional: Select the toggle 'Credit Card Token Required if Payment Amount Equals 0.00'.
-
Optional: Exclude Travel Agents.
- Select the Travel Agent and choose the button.
- Select the Travel Agent and choose the
- Save.
- Navigate to the 'Additional Information' tab.
- Optional: Select the toggle 'Disable Covid-19 Declaration'.
- Optional: Select the checkbox 'Additional Guest Details Mandatory'.
-
Optional: Select the checkbox 'Photo ID/Passport Mandatory for Additional Guests'.
- Enter a Photo ID Description to display in the Guest Portal.
- Optional: Setup the Guest Declaration.
- Save/Exit.
A Payment Gateway is required to accept payments through the Guest Portal.
Pre Authorisation is only available to properties using RMS Pay or Stripe as the Payment Gateway.
The selected Form Letter will be used to store the information entered during Pre Check-in on the 'Correspondence' tab of the Reservation.
Excluding Travel Agents from Pre Check-in will prevent Reservations being prompted to complete Pre Check-in when the excluded Travel Agent is selected on the Reservation.
The COVID-19 Declaration will be enabled by default.
Disabling the COVID-19 Declaration will remove the COVID specific questions from the Guest Declaration.
Use Triggered Correspondence to send an SMS or Email to Guests prompting completion of Pre Check-in ahead of their arrival.
-
Guide
- Add Button
Guide
Go to Setup > Portal Access > Guest Portal in the Side Menu of RMS.
Navigate to the 'Check-in' tab.
Navigate to the 'Pre Check-in Settings' tab.
Select the toggle 'Enable Pre Check-in'.
Select the Number of Days Prior to Arrival to allow Pre Check-in.
Select a Form Letter to use as the Registration Card.
Enter the Confirmation Text displayed on Pre Check-in completion.
Select the Payment Conditions.
Optional: Select the toggle 'Credit Card Token Required if Payment Amount Equals 0.00'.
Optional: Exclude Travel Agents.
Select the Travel Agent and choose the button.
Select 'Save' to store the changes made.
Navigate to the 'Additional Information' tab.
Optional: Select the toggle 'Disable Covid-19 Declaration'.
Optional: Select the checkbox 'Additional Guest Details Mandatory'.
Optional: Select the checkbox 'Photo ID/Passport Mandatory for Additional Guests'.
Enter a Photo ID Description to display in the Guest Portal.
Optional: Setup the Guest Declaration.
Select 'Save//Exit' to store the changes made and leave the setup.
Guests who log into the Guest Portal within the selected period of time ahead of their arrival will be prompted to complete Pre Check-in.