POS Lite
Built-in point of sale for shop sales and returns in RMS.
POS Lite is the built-in point of sale that enables shop sales and returns to be processed in RMS using POS Lite Sundry Charges.
-
Information
-
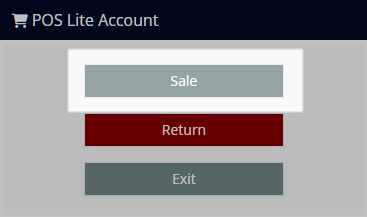
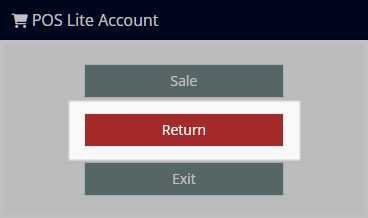
Sale
-
Return
- Add Button
Information
POS Lite is the built-in point of sale that enables shop sales and returns to be processed in RMS using POS Lite Sundry Charges.
Only a Sundry Charge setup as a POS Lite Sundry Charge will be available for selection in POS Lite.
A Sundry Charge is an incidental charge for any item that is not a Rate or Receipt including Add Ons, Credit Notes, Commissions, Deferred Revenue, Expenses, Transfers, Job Maintenance, Meals, POS Lite, Refundable Charges or Bonds, Rental Fees, Requirements and Surcharges.
A POS Lite Sundry Charge can be setup with a barcode to use a barcode scanner or with Stock Control to manage inventory with POS Lite.
A Sale includes the option to Charge to Area or create a Receipt for upfront payment.
A Return will record a Refund and can be used when the Sale included payment upfront.
A Return for a Sale that used Charge to Area can be managed directly on the Reservation Account.
A POS Lite Sundry Charge setup with Stock Control will have the inventory level adjusted for any Sale or Return processed using POS Lite.
The Stock Control Report can be used to view inventory movement of any Sundry Charge setup with Stock Control.
The Sundry Usage Report provides a summary of Sundry Charges used for a selected date range and can be used to track sales for POS Lite Sundry Charges.
The Audit Trail Report includes an option to only display the Account Classification of 'POS Lite' and can be used to view all financial transactions processed in POS Lite for the selected date range.
The Cash Transactions Report includes an option to only display the Account Classification of 'POS Lite' and will show any Receipt created for a Sale in POS Lite.
Transactions created through POS Lite are not created on a single POS Lite Account and can be viewed using the Audit Trail Report and/or Cash Transactions Report.

Area, Reservation, Guest, Account Types, Receipt Types, Sundry, Rate and Tax are default System Labels that can be customised.
A Payment Gateway is required to use charge a Credit Card directly from RMS.

Users will require Security Profile access to use this feature.
-
Sale
-
Return
- Add Button
Sale
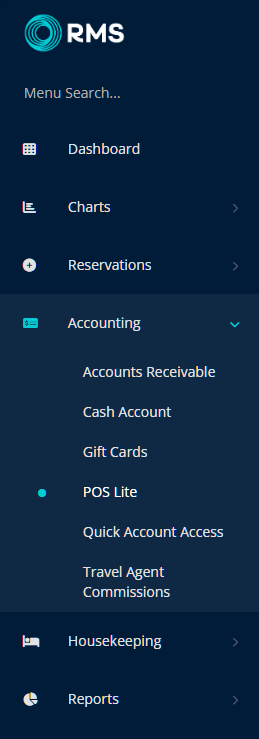
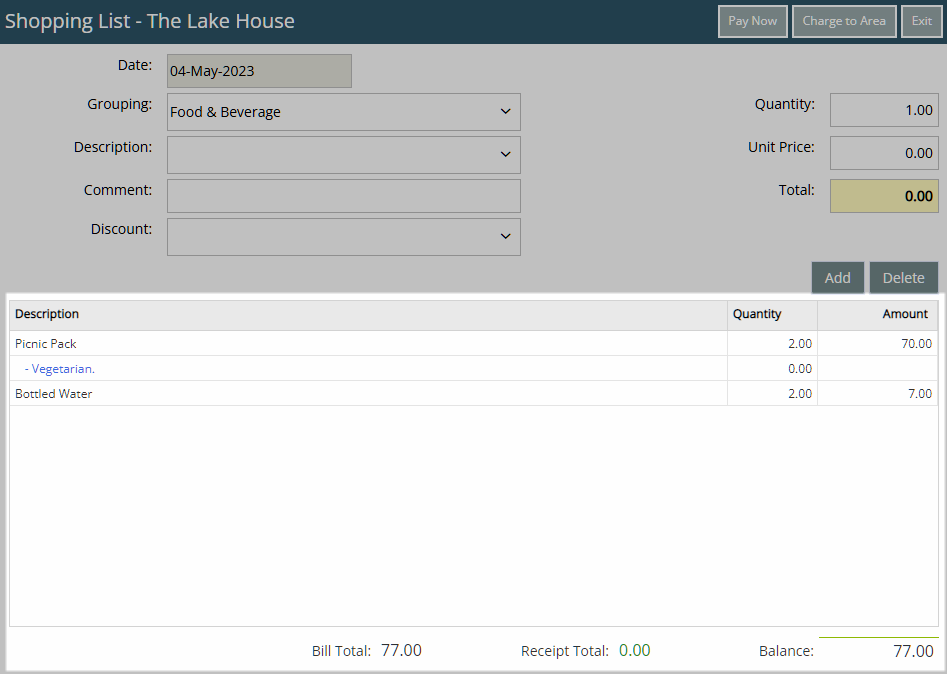
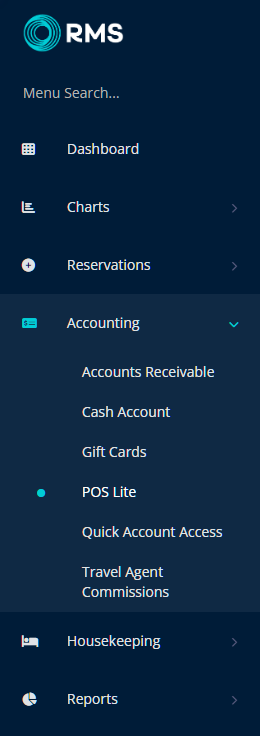
- Go to Accounting > POS Lite in the Side Menu of RMS.
- Select 'Sale'.
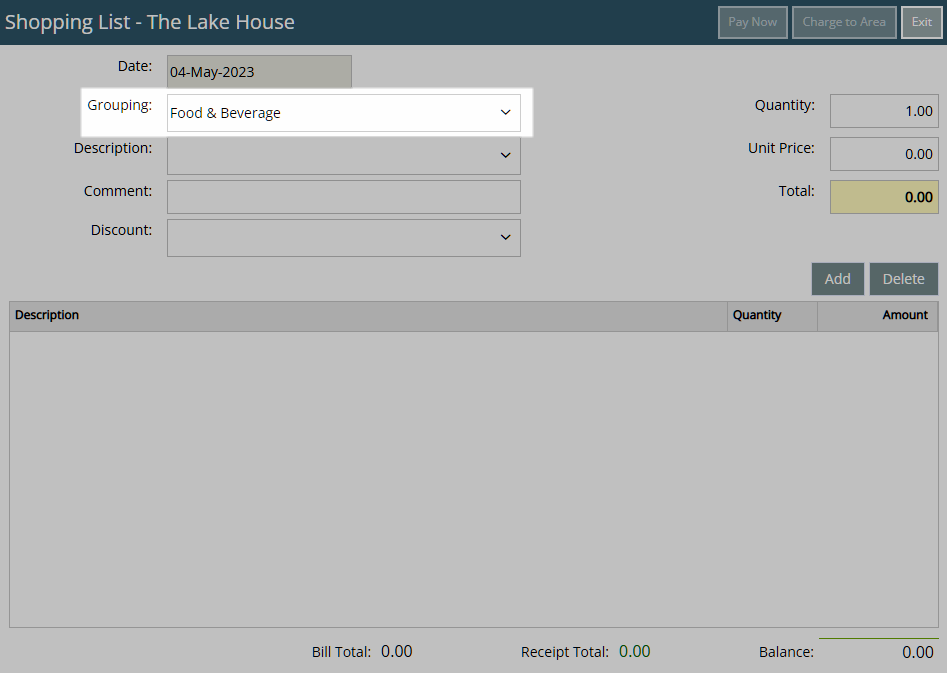
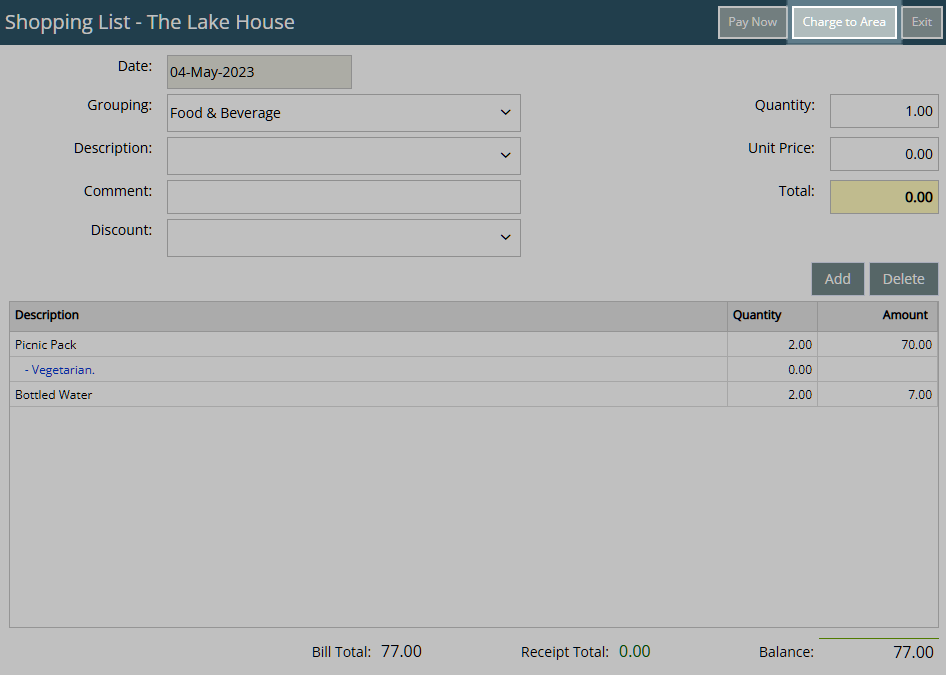
- Optional: Select a Grouping.
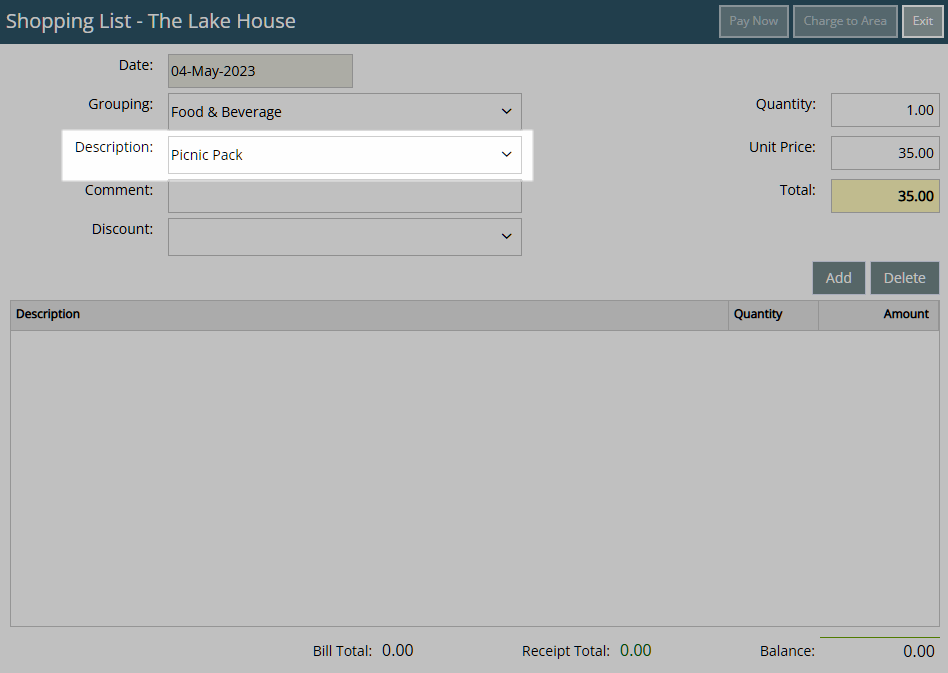
- Select a Sundry Charge.
- Optional: Enter a Transaction Comment.
- Optional: Select a Discount.
- Enter a Quantity.
- Enter a Unit Price.
- Select 'Add'.
- Repeat Steps 3-9 for all Sale Items.
-
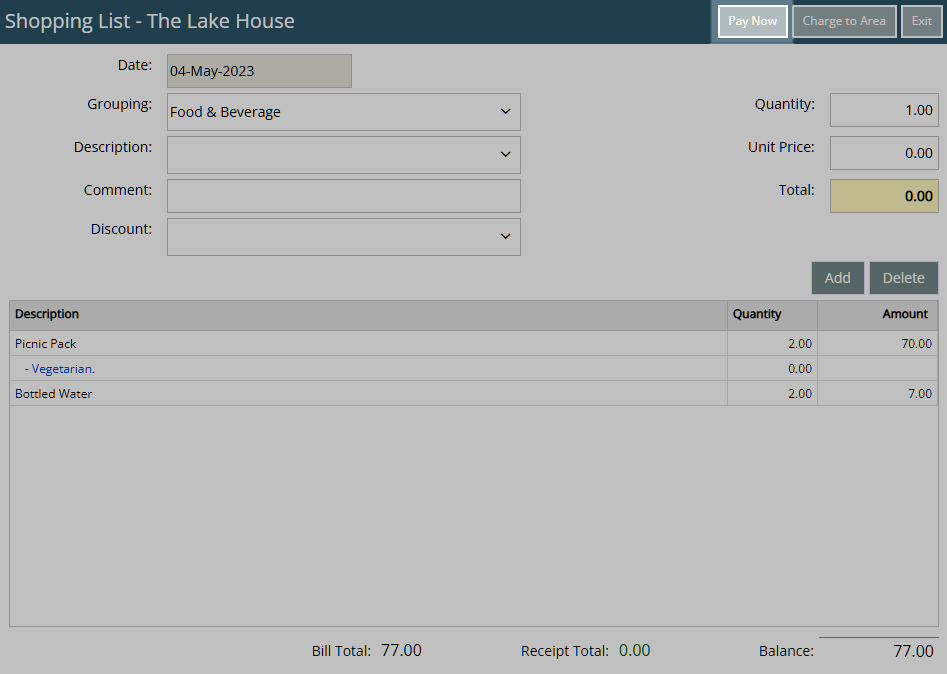
Complete Sale: Pay Now.
- Select 'Pay Now'.
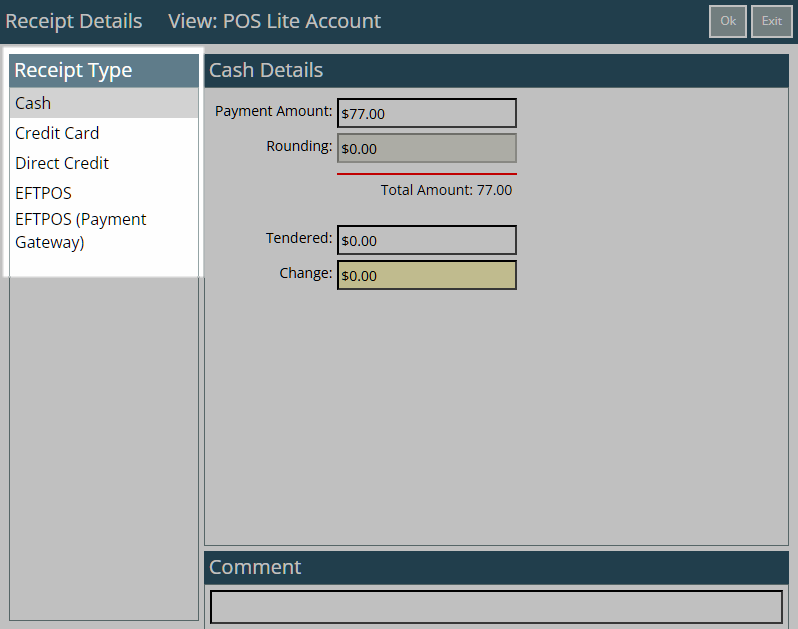
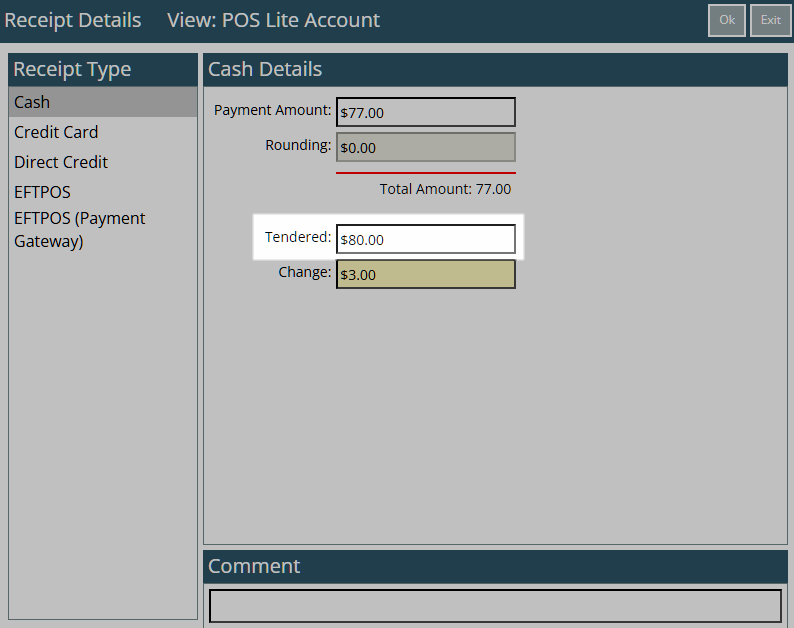
- Select & Enter the Payment Details.
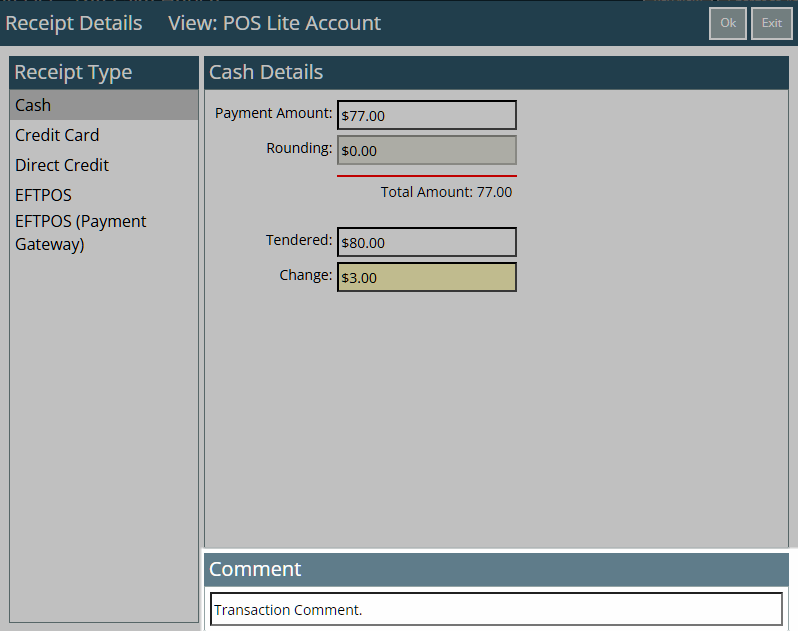
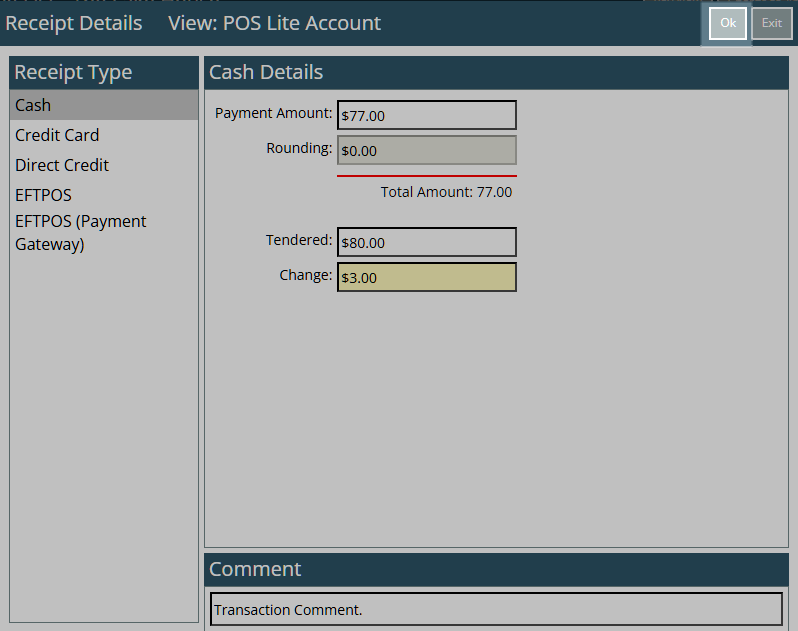
- Cash: Enter the Tendered Amount.
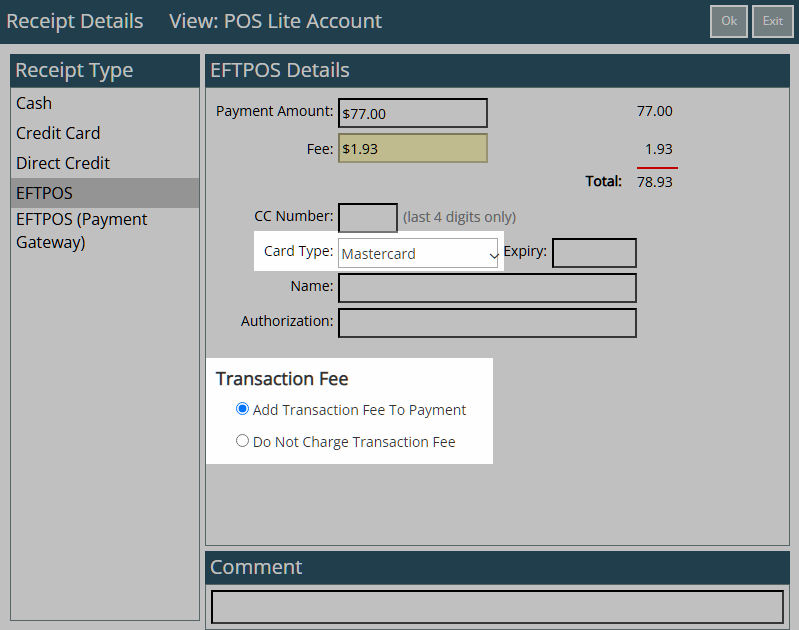
- EFTPOS: Select the Card Type & Transaction Fee option.
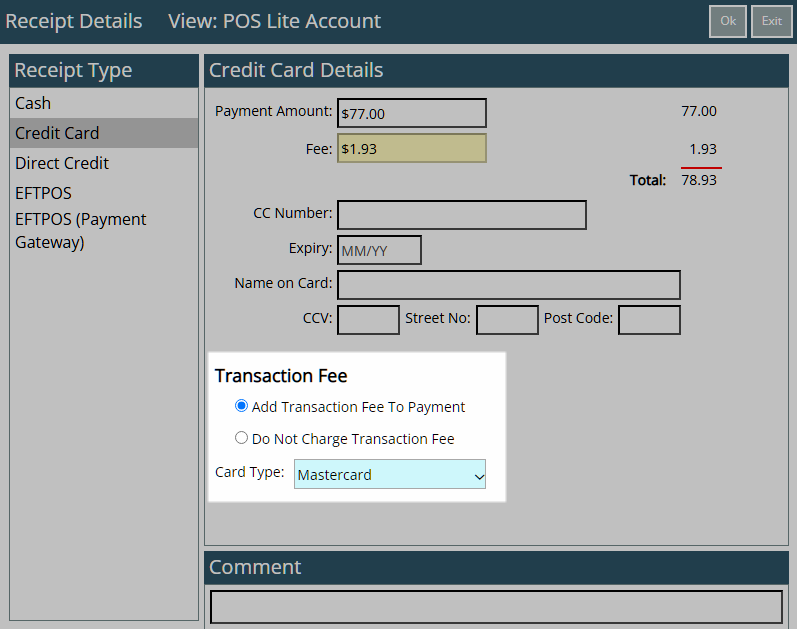
- Credit Card: Select the Card Type and Transaction Fee option.
- EFTPOS (Payment Gateway): Select the EFTPOS Terminal & Card Type.
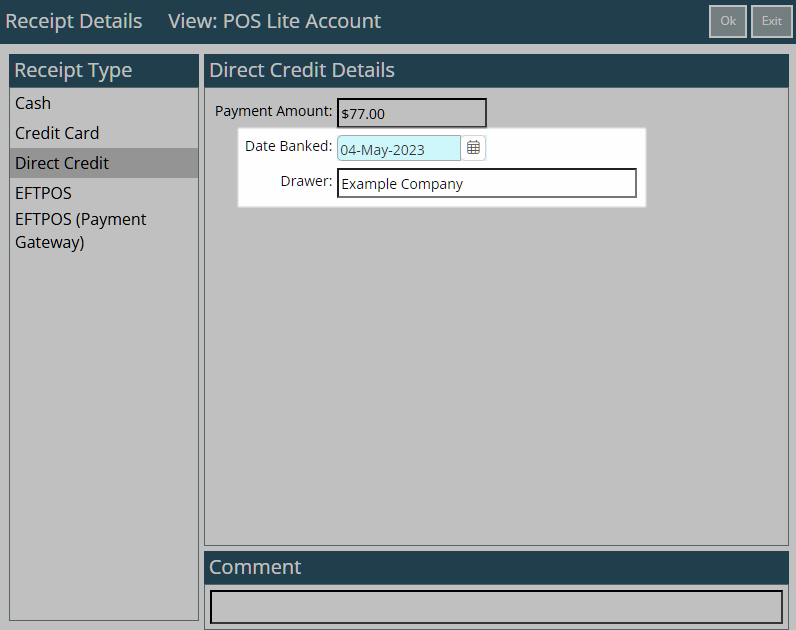
- Direct Credit: Select the Date Banked and enter the Drawer.
- Optional: Enter a Transaction Comment.
- Select 'Ok'.
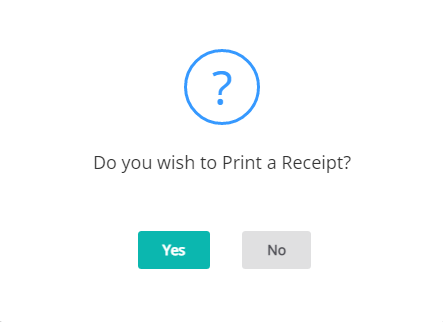
- Select a Print Receipt option.
-
Complete Sale: Charge to Area.
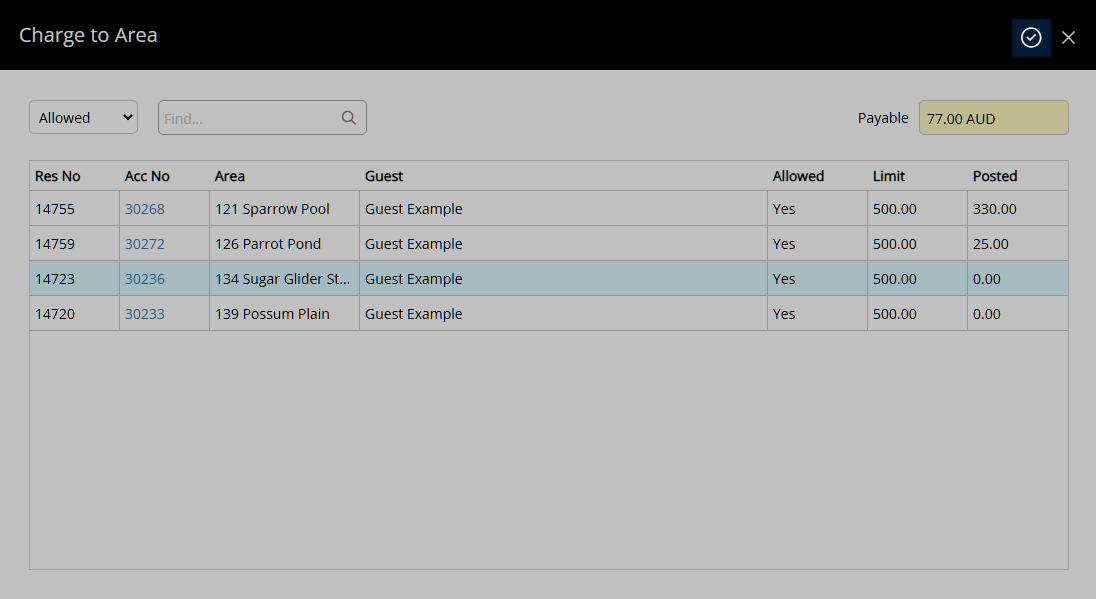
- Select 'Charge to Area'.
- Select the View as 'Allowed'.
- Select a Reservation.
- Select the
 'Charge Back' icon.
 - Optional: Select the checkbox 'Post on Extras'.
- Select 'Yes' to confirm.
- Exit.

The available Receipt Types are determined by the Accounting Options.
Select the View as 'Not Allowed' on Charge to Area to see Reservations with Charge to Area set to 'No'.
The Audit Trail Report, Cash Transactions Report and Sundry Usage Report can be used to view transactions for a Sale completed in POS Lite.
-
Guide
- Add Button
Guide
Go to Accounting > POS Lite in the Side Menu of RMS.
Select 'Sale'.
Optional: Select a Grouping.
Select a Sundry Charge.
Optional: Enter a Transaction Comment.
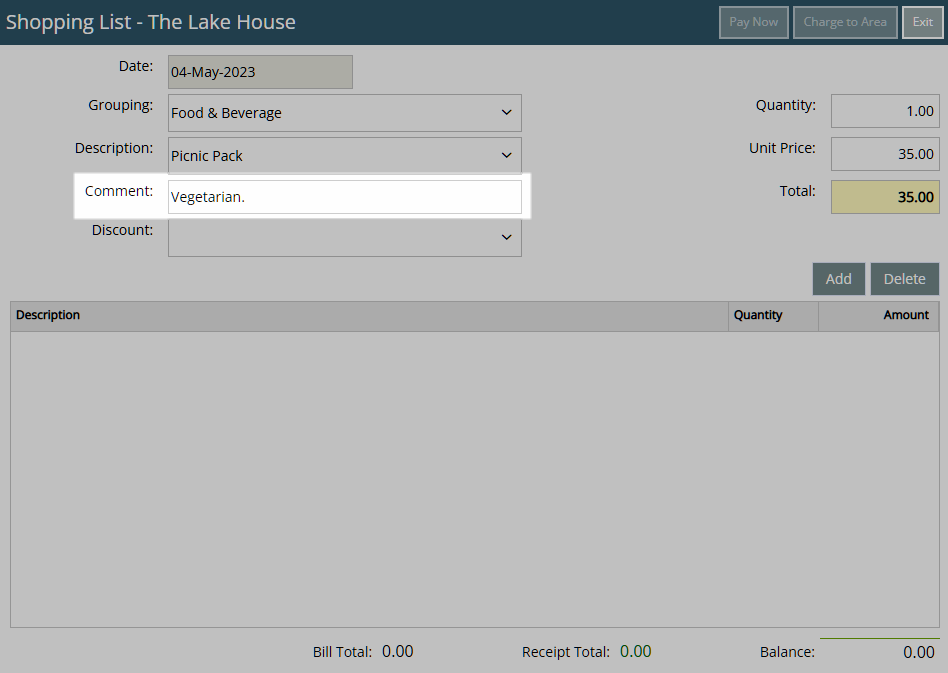
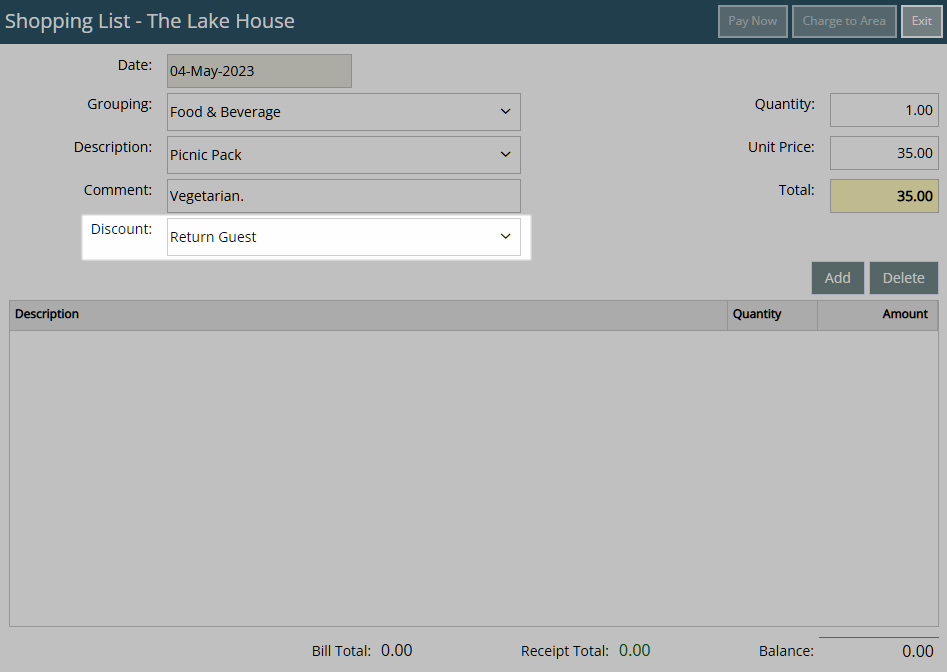
Optional: Select a Discount.
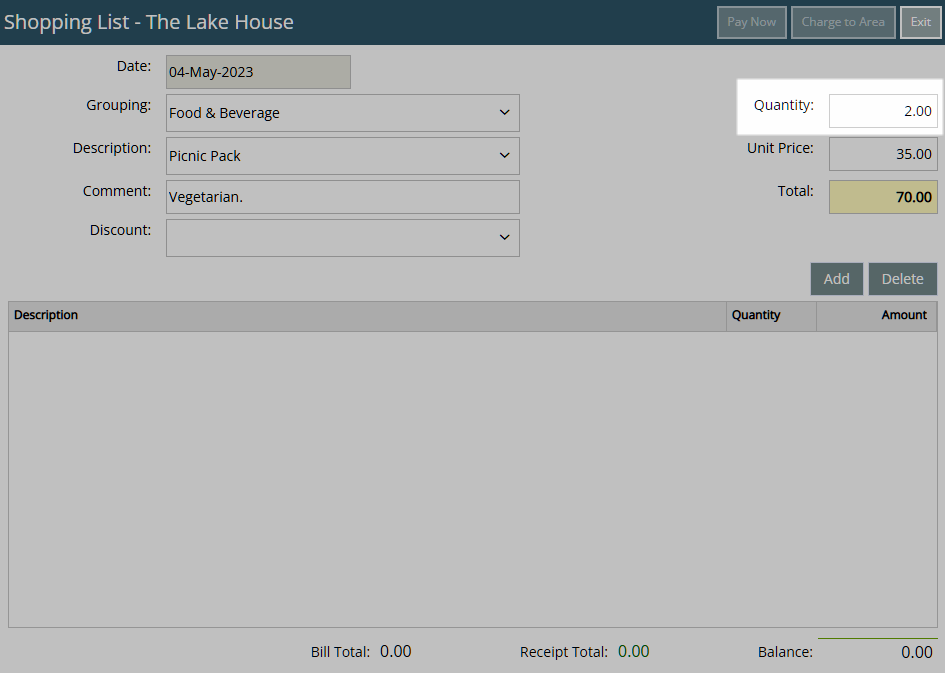
Enter a Quantity.
Enter a Unit Price.

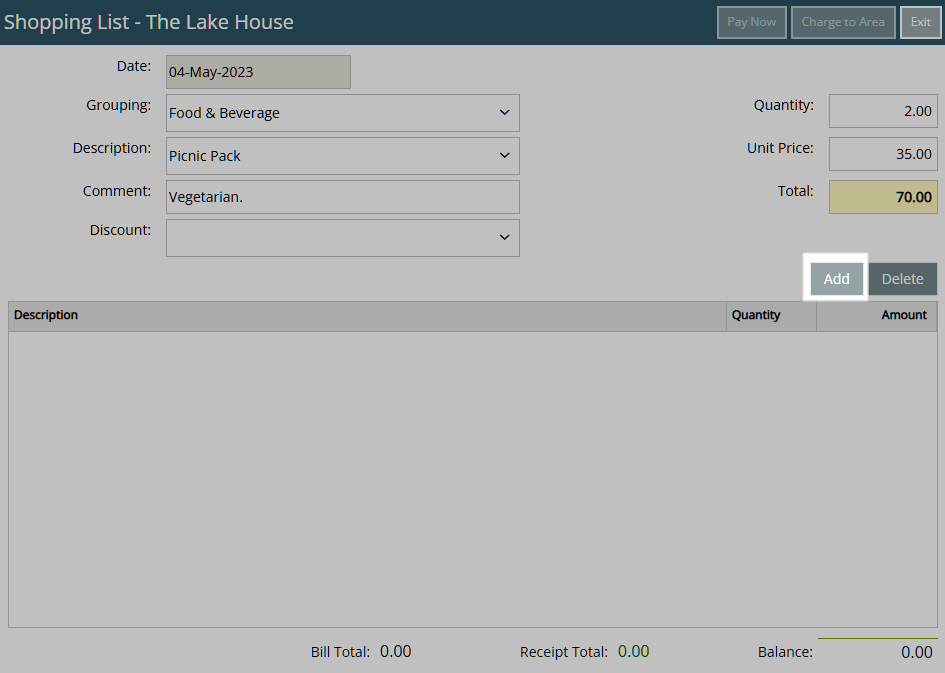
Select 'Add'.
Repeat Steps 3-9 for all Sale Items.
Complete Sale: Pay Now.
Select 'Pay Now'.
Select & Enter the Payment Details.
Cash: Enter the Tendered Amount.
EFTPOS: Select the Card Type & Transaction Fee option.
Credit Card: Select the Card Type and Transaction Fee option.
EFTPOS (Payment Gateway): Select the EFTPOS Terminal & Card Type.
Direct Credit: Select the Date Banked and enter the Drawer.
Optional: Enter a Transaction Comment.
Select 'Ok' to create a Receipt and finalise the Sale.
Select a Print Receipt option.
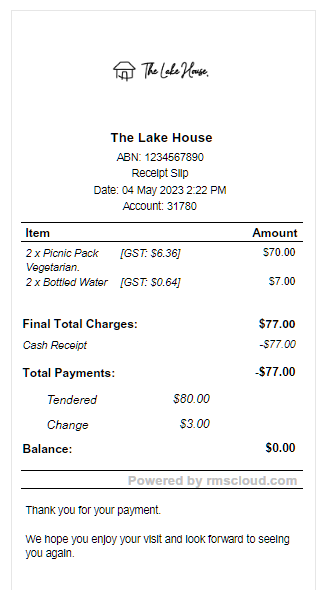
The Receipt will itemise all Sale Items and the payment taken.
Complete Sale: Charge to Area.
Select 'Charge to Area'.
Select the View as 'Allowed'.
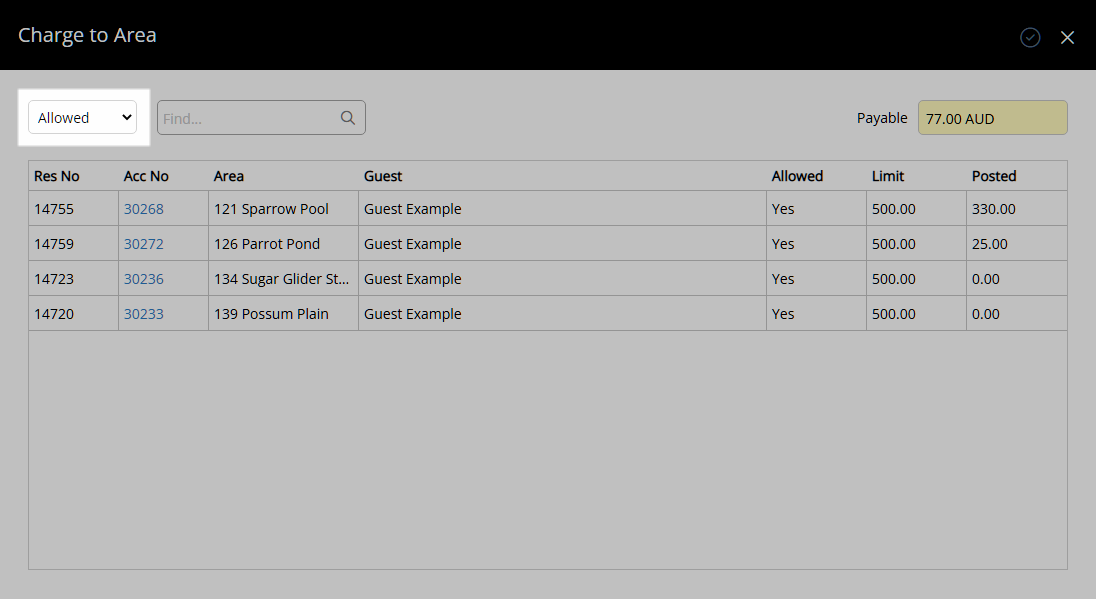
Select a Reservation and choose the  'Charge Back' icon.
Optional: Select the checkbox 'Post on Extras'.
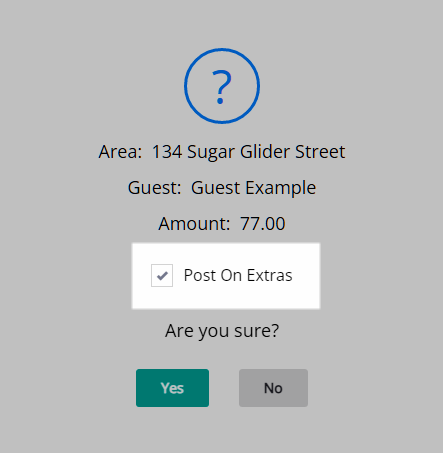
Select 'Yes' to confirm.
The Area Charge Slip will itemise all Sale Items and includes a signature line for the Guest to sign.

Select 'Exit' to leave the Receipt, Area Charge Slip or POS Lite.
The Sale for the selected Sundry Charges will be complete.
The Audit Trail Report, Cash Transactions Report and Sundry Usage Report can be used to view transactions for a Sale completed in POS Lite.
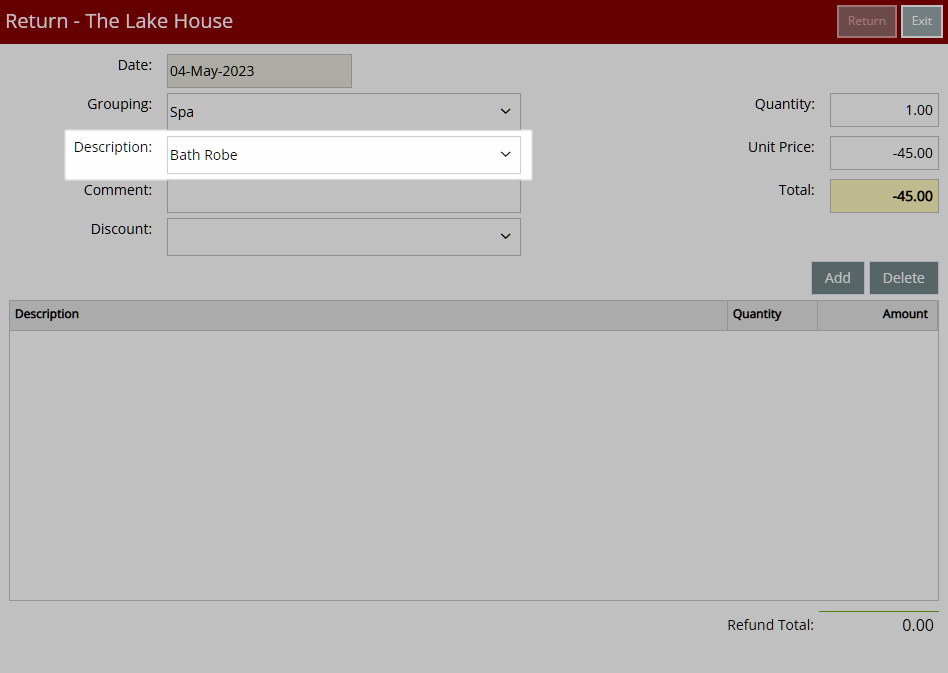
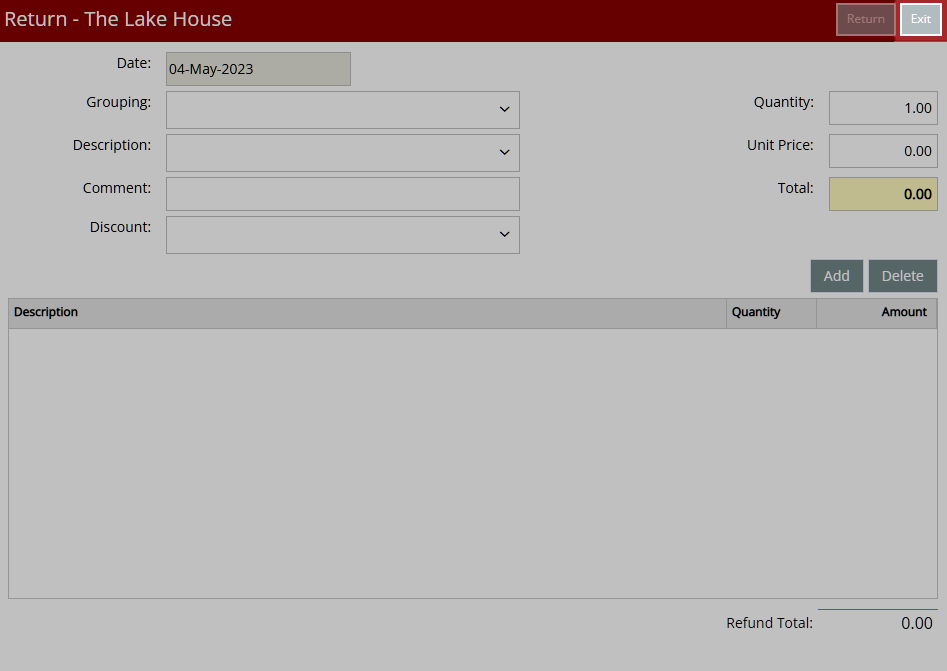
Return
- Go to Accounting > POS Lite in the Side Menu of RMS.
- Select 'Return'.
- Optional: Select a Grouping.
- Select a Sundry Charge.
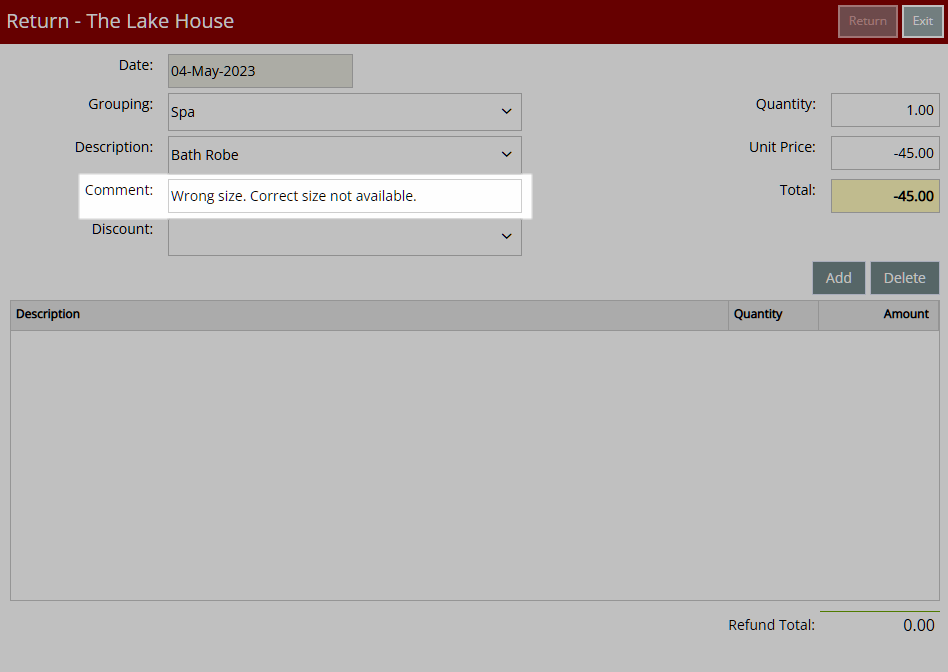
- Optional: Enter a Transaction Comment.
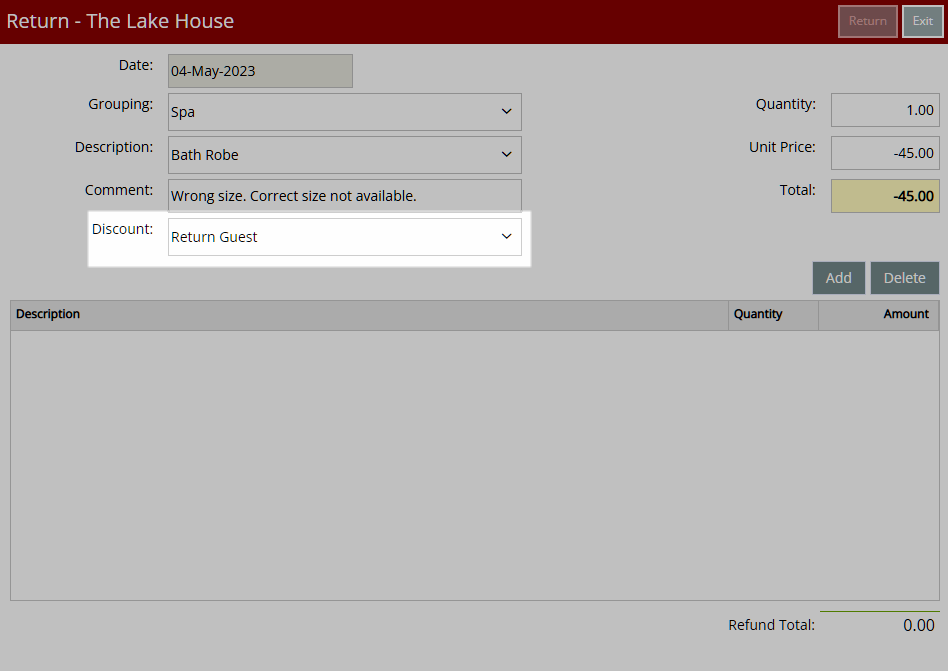
- Optional: Select a Discount.
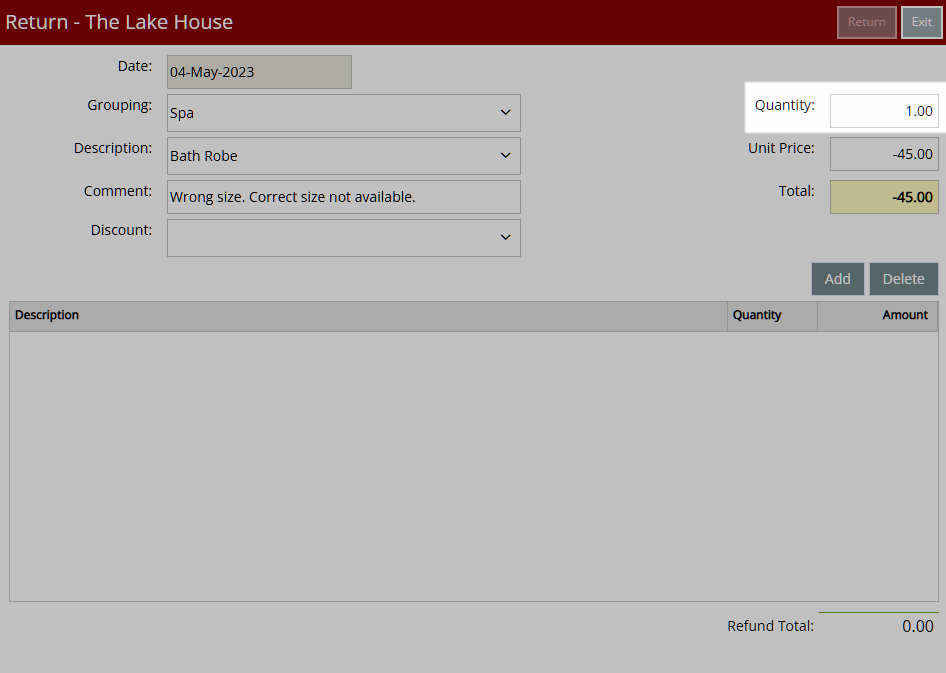
- Enter a Quantity.
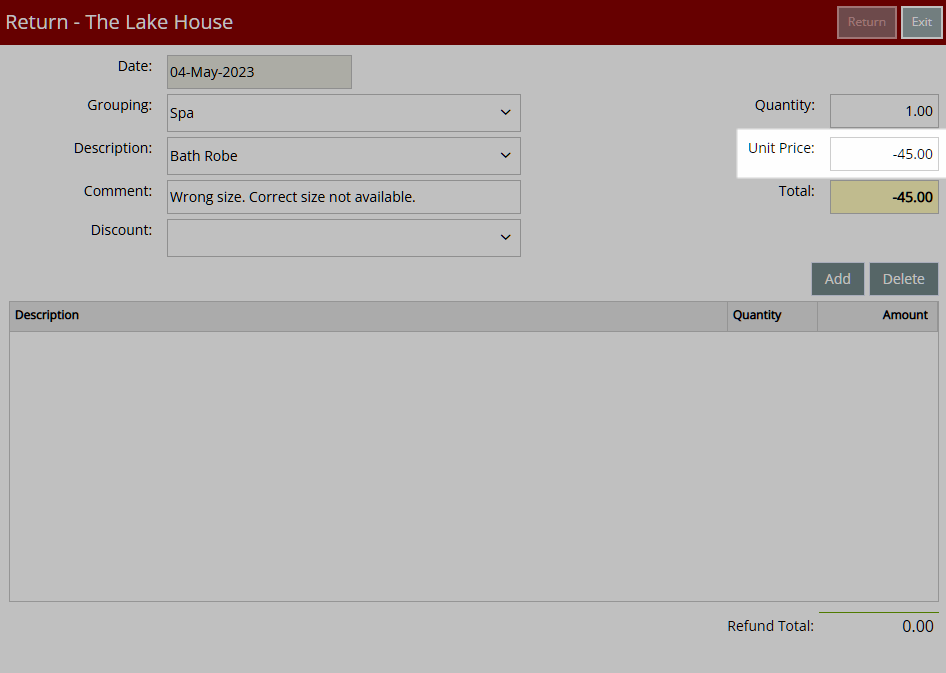
- Enter a Unit Price.
- Select 'Add'.
- Repeat Steps 3-9 for all Return Items.
-
Complete Return:
- Select 'Return’.
- Select & Enter the Refund Details.
- Cash: Select the Refund Type as 'Cash'.
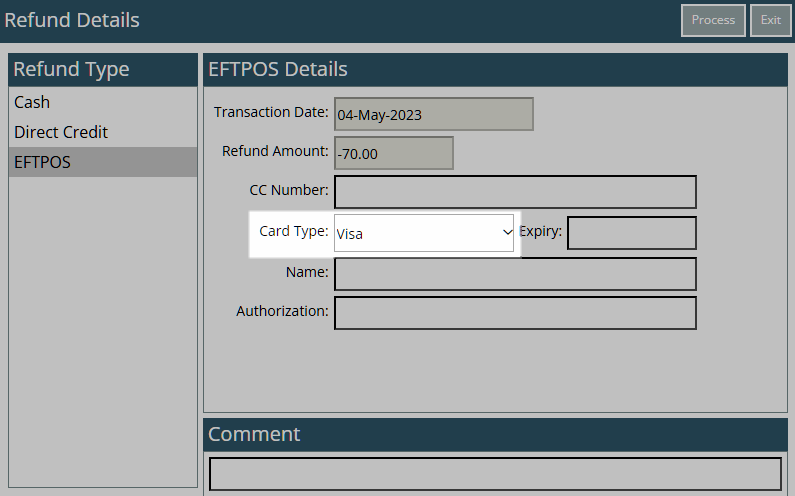
- EFTPOS: Select the Card Type.
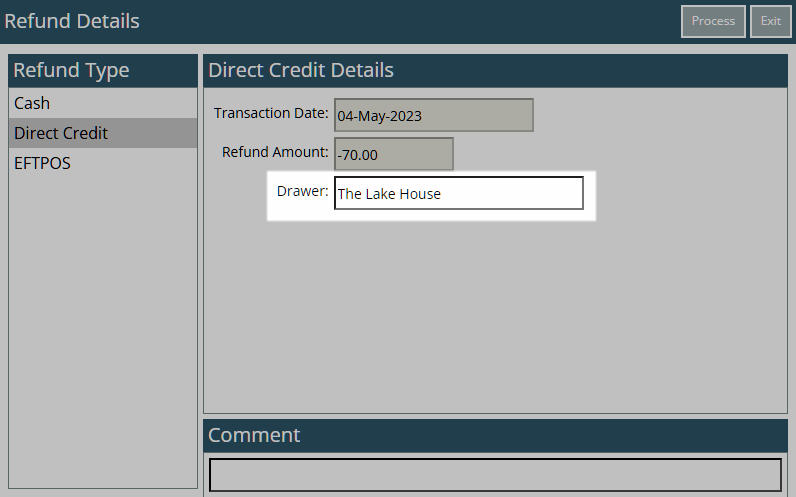
- Direct Credit: Enter the Drawer.
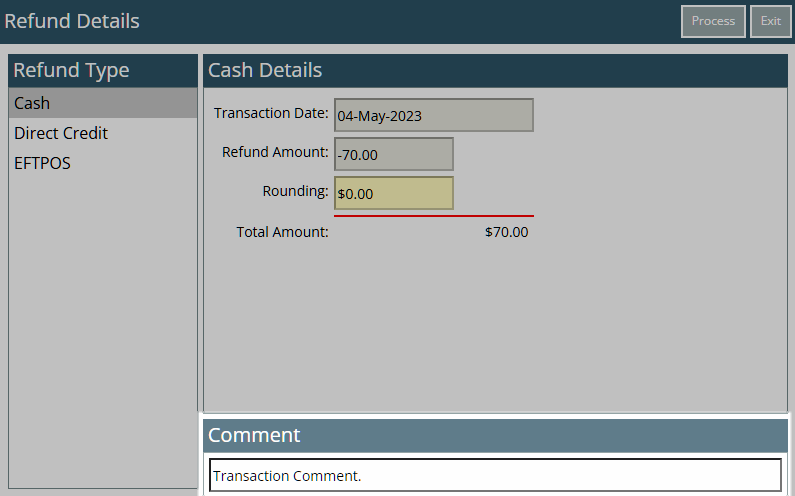
- Optional: Enter a Transaction Comment.
- Select 'Process'.
- Select a Print Receipt option.
- Exit.

The available Refund Types are determined by the Receipt Types setup in Accounting Options.
A Return for a Sale completed using Charge to Area must be processed on the Reservation Account.
A Return for a Sale with payment taken using a Payment Gateway can be entered in RMS with the 'EFTPOS' Refund Type and the Credit Card manually refunded using an EFTPOS terminal or directly in the Payment Gateway account.
The Audit Trail Report and Cash Transactions Report can be used to view Returns processed in POS Lite.
-
Guide
- Add Button
Guide
Go to Accounting > POS Lite in the Side Menu of RMS.
Select 'Return'.
Optional: Select a Grouping.

Select a Sundry Charge.
Optional: Enter a Transaction Comment.
Optional: Select a Discount.
Enter a Quantity.
Enter a Unit Price.
Select 'Add'.
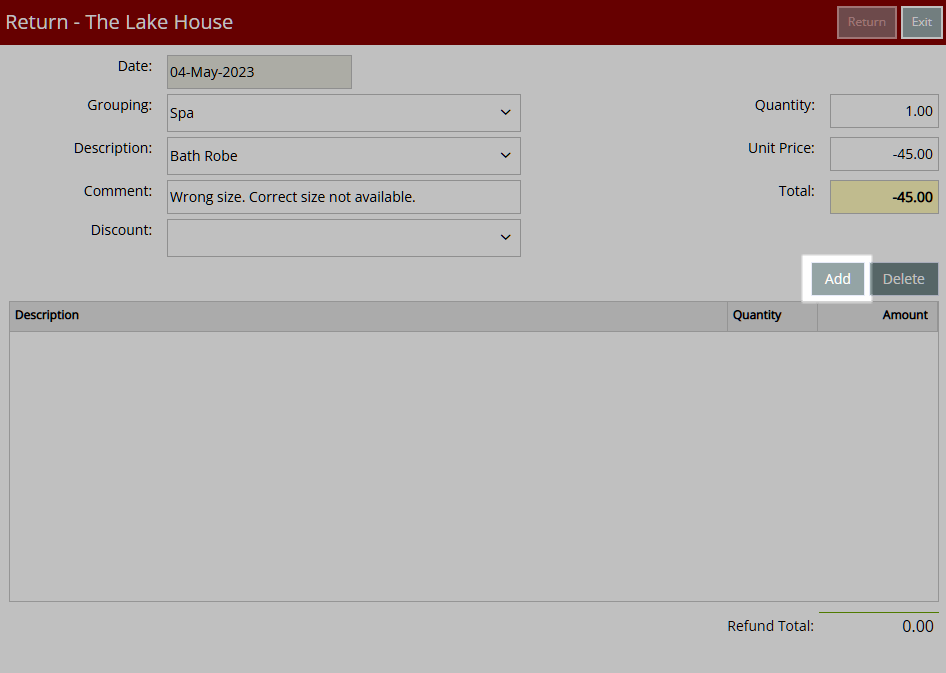
Repeat Steps 3-9 for all Return Items.
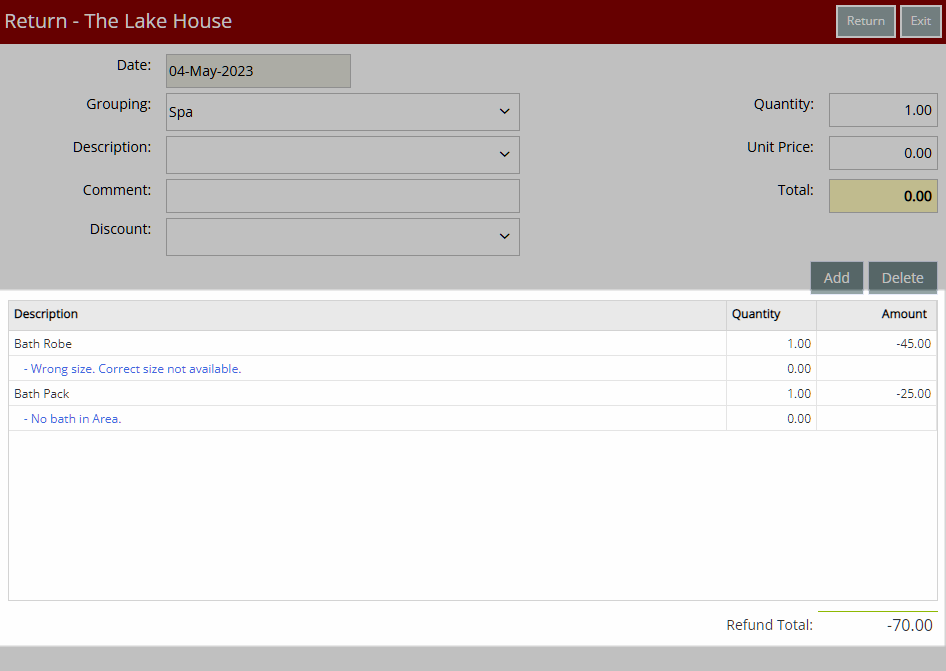
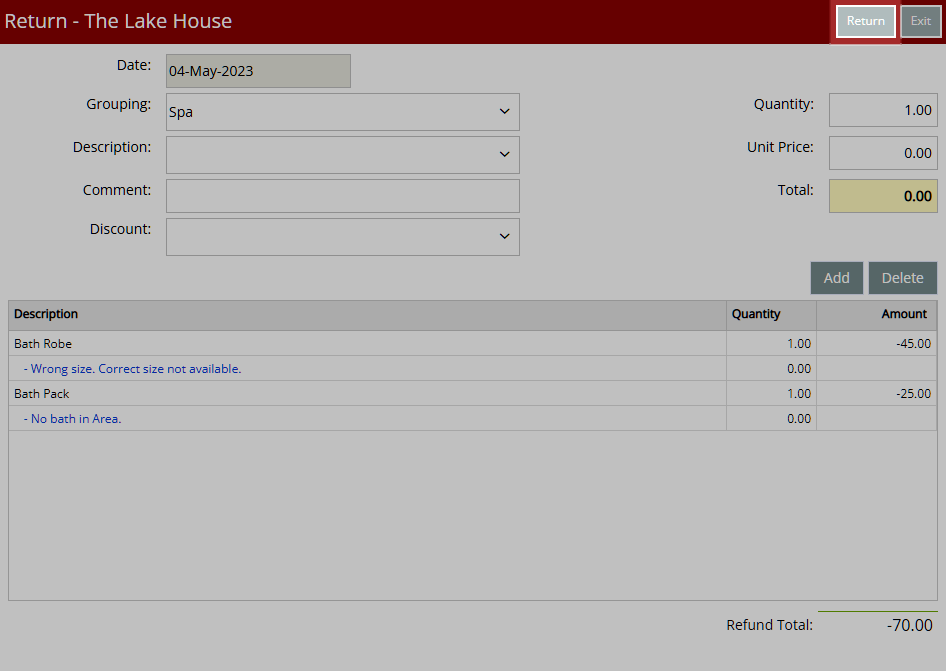
Complete Return:
Select 'Return’.
Select & Enter the Refund Details.
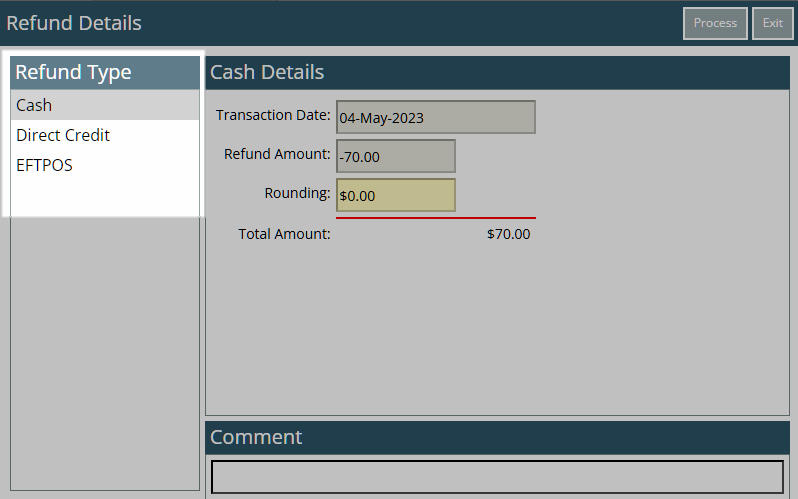
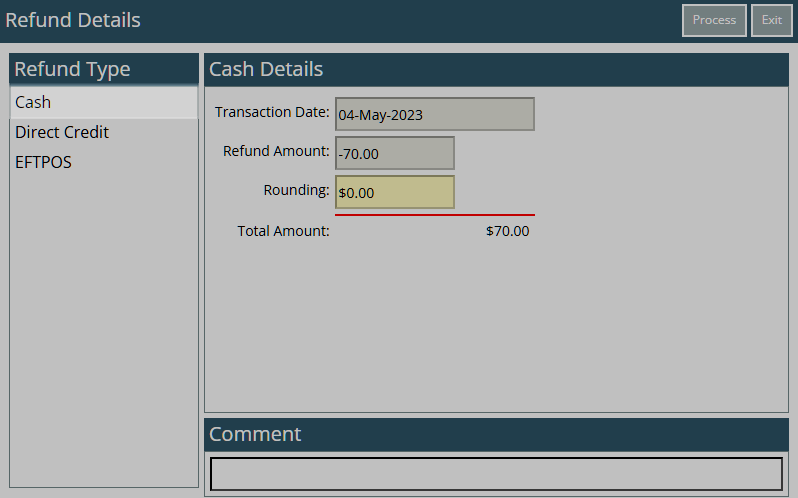
Cash: Select the Refund Type as 'Cash'.
EFTPOS: Select the Card Type.
Direct Credit: Enter the Drawer.
Optional: Enter a Transaction Comment.
Select 'Process'.

Select a Print Receipt option.
Select 'Exit' to leave the Refund Slip or POS Lite.
The Refund will be completed and can be viewed on the Audit Trail Report or Cash Transactions Report with the 'Refunds' option selected.
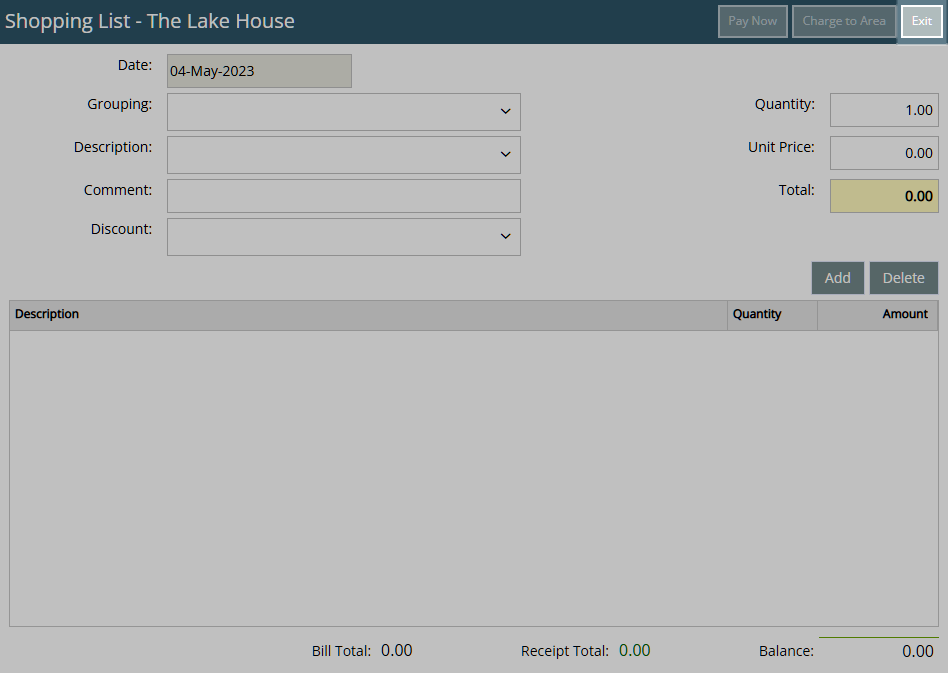
Sale
- Go to Accounting > POS Lite in the Side Menu of RMS.
- Select 'Sale'.
- Optional: Select a Grouping.
- Select a Sundry Charge.
- Optional: Enter a Transaction Comment.
- Optional: Select a Discount.
- Enter a Quantity.
- Enter a Unit Price.
- Select 'Add'.
- Repeat Steps 3-9 for all Sale Items.
-
Complete Sale: Pay Now.
- Select 'Pay Now'.
- Select & Enter the Payment Details.
- Cash: Enter the Tendered Amount.
- EFTPOS: Select the Card Type & Transaction Fee option.
- Credit Card: Select the Card Type and Transaction Fee option.
- EFTPOS (Payment Gateway): Select the EFTPOS Terminal & Card Type.
- Direct Credit: Select the Date Banked and enter the Drawer.
- Optional: Enter a Transaction Comment.
- Select 'Ok'.
- Select a Print Receipt option.
-
Complete Sale: Charge to Area.
- Select 'Charge to Area'.
- Select the View as 'Allowed'.
- Select a Reservation.
- Select the 'Charge Back' icon.
- Optional: Select the checkbox 'Post on Extras'.
- Select 'Yes' to confirm.
- Exit.
The available Receipt Types are determined by the Accounting Options.
Select the View as 'Not Allowed' on Charge to Area to see Reservations with Charge to Area set to 'No'.
The Audit Trail Report, Cash Transactions Report and Sundry Usage Report can be used to view transactions for a Sale completed in POS Lite.
-
Guide
- Add Button
Guide
Go to Accounting > POS Lite in the Side Menu of RMS.
Select 'Sale'.
Optional: Select a Grouping.
Select a Sundry Charge.
Optional: Enter a Transaction Comment.
Optional: Select a Discount.
Enter a Quantity.
Enter a Unit Price.
Select 'Add'.
Repeat Steps 3-9 for all Sale Items.
Complete Sale: Pay Now.
Select 'Pay Now'.
Select & Enter the Payment Details.
Cash: Enter the Tendered Amount.
EFTPOS: Select the Card Type & Transaction Fee option.
Credit Card: Select the Card Type and Transaction Fee option.
EFTPOS (Payment Gateway): Select the EFTPOS Terminal & Card Type.
Direct Credit: Select the Date Banked and enter the Drawer.
Optional: Enter a Transaction Comment.
Select 'Ok' to create a Receipt and finalise the Sale.
Select a Print Receipt option.
The Receipt will itemise all Sale Items and the payment taken.
Complete Sale: Charge to Area.
Select 'Charge to Area'.
Select the View as 'Allowed'.
Select a Reservation and choose the 'Charge Back' icon.
Optional: Select the checkbox 'Post on Extras'.
Select 'Yes' to confirm.
The Area Charge Slip will itemise all Sale Items and includes a signature line for the Guest to sign.
Select 'Exit' to leave the Receipt, Area Charge Slip or POS Lite.
The Sale for the selected Sundry Charges will be complete.
The Audit Trail Report, Cash Transactions Report and Sundry Usage Report can be used to view transactions for a Sale completed in POS Lite.
Return
- Go to Accounting > POS Lite in the Side Menu of RMS.
- Select 'Return'.
- Optional: Select a Grouping.
- Select a Sundry Charge.
- Optional: Enter a Transaction Comment.
- Optional: Select a Discount.
- Enter a Quantity.
- Enter a Unit Price.
- Select 'Add'.
- Repeat Steps 3-9 for all Return Items.
-
Complete Return:
- Select 'Return’.
- Select & Enter the Refund Details.
- Cash: Select the Refund Type as 'Cash'.
- EFTPOS: Select the Card Type.
- Direct Credit: Enter the Drawer.
- Optional: Enter a Transaction Comment.
- Select 'Process'.
- Select a Print Receipt option.
- Exit.
The available Refund Types are determined by the Receipt Types setup in Accounting Options.
A Return for a Sale completed using Charge to Area must be processed on the Reservation Account.
A Return for a Sale with payment taken using a Payment Gateway can be entered in RMS with the 'EFTPOS' Refund Type and the Credit Card manually refunded using an EFTPOS terminal or directly in the Payment Gateway account.
The Audit Trail Report and Cash Transactions Report can be used to view Returns processed in POS Lite.
-
Guide
- Add Button
Guide
Go to Accounting > POS Lite in the Side Menu of RMS.
Select 'Return'.
Optional: Select a Grouping.
Select a Sundry Charge.
Optional: Enter a Transaction Comment.
Optional: Select a Discount.
Enter a Quantity.
Enter a Unit Price.
Select 'Add'.
Repeat Steps 3-9 for all Return Items.
Complete Return:
Select 'Return’.
Select & Enter the Refund Details.
Cash: Select the Refund Type as 'Cash'.
EFTPOS: Select the Card Type.
Direct Credit: Enter the Drawer.
Optional: Enter a Transaction Comment.
Select 'Process'.
Select a Print Receipt option.
Select 'Exit' to leave the Refund Slip or POS Lite.
The Refund will be completed and can be viewed on the Audit Trail Report or Cash Transactions Report with the 'Refunds' option selected.