Requirements
Setup an extra item or service in RMS.
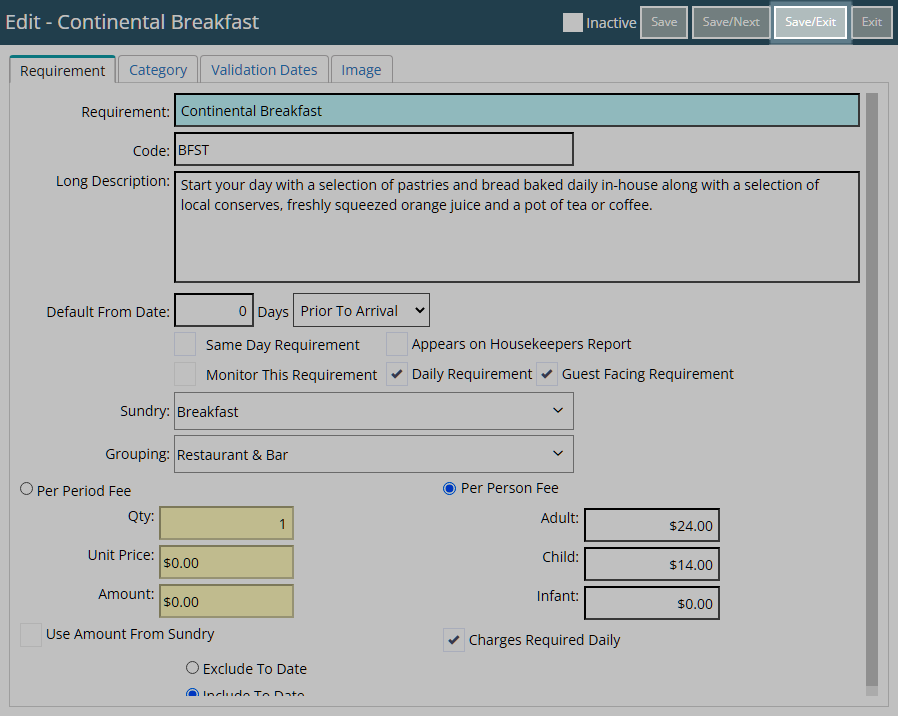
A Requirement is an extra item or service for the Guest that includes the option to charge a fee using a Sundry Charge.
-
Information
-
Setup
- Add Button
Information
A Requirement is an extra item or service for the Guest that includes the option to charge a fee using a Sundry Charge.
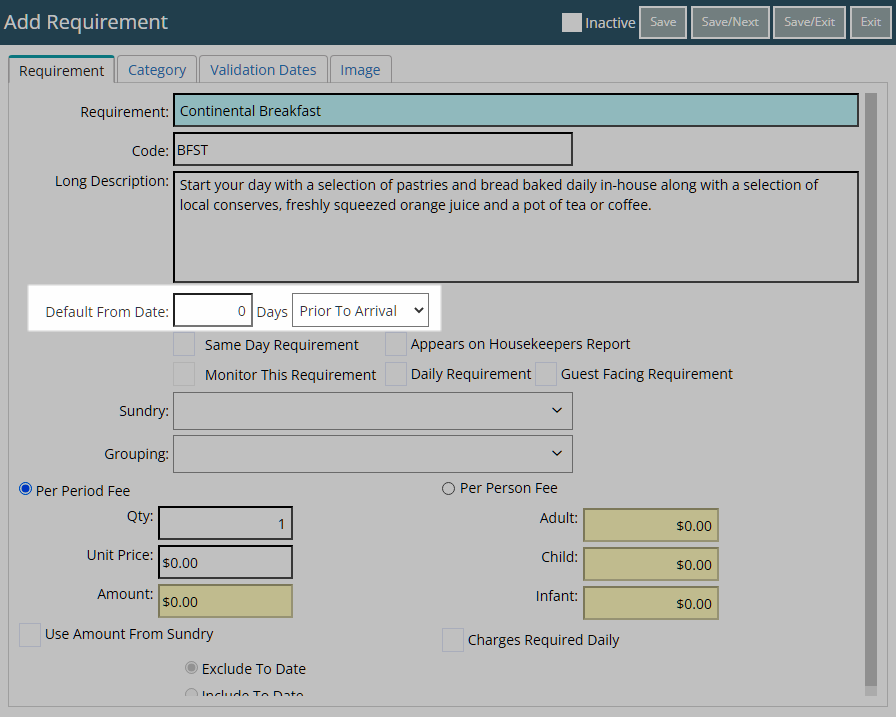
The ‘Default From Date’ option enables setting a Requirement to apply x amount of days Prior to Arrival, From Date Made or From Departure and can be used to create a Requirement that only applies on a certain day including the Arrive Date, Depart Date or any period determined by the number of days entered.
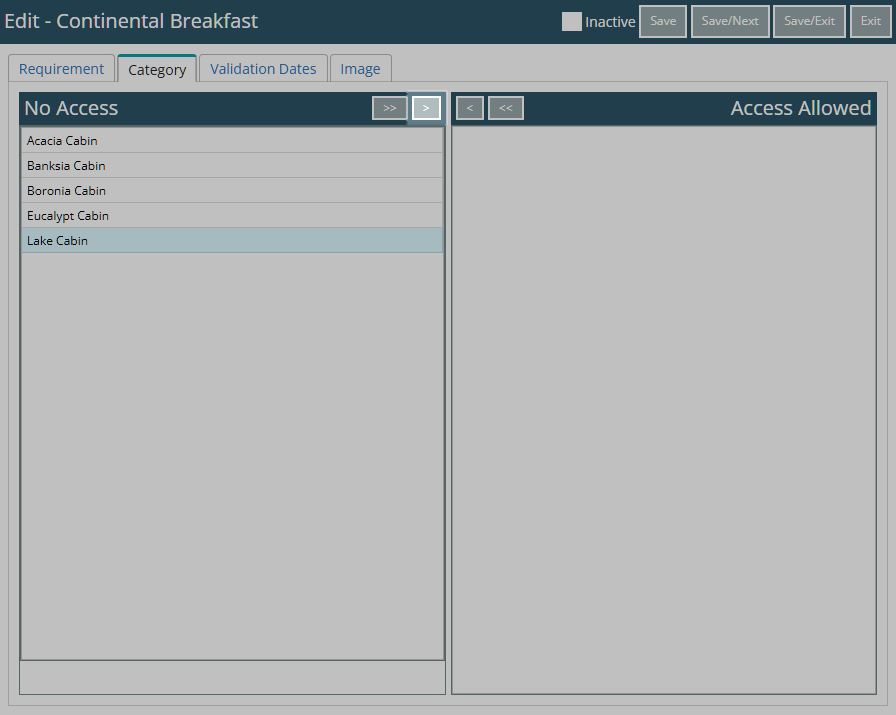
Category Access will limit the Requirement to only be available for a Reservation in a selected Category.
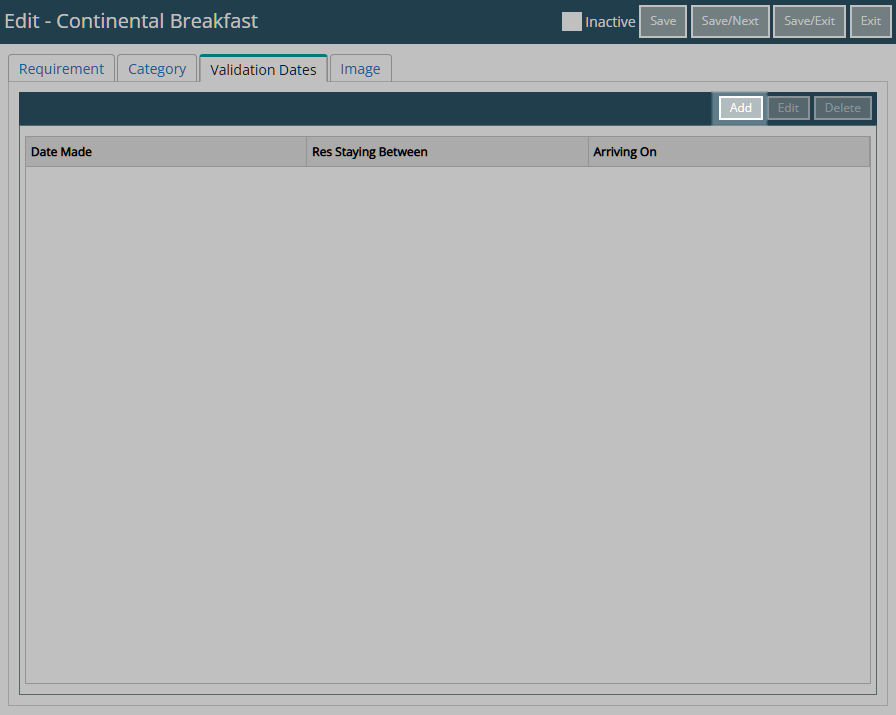
Validation Dates will only apply the Requirement to a Reservation if the Reservation meets the criteria for the selected Date Made From and/or Reservation Staying From date ranges.
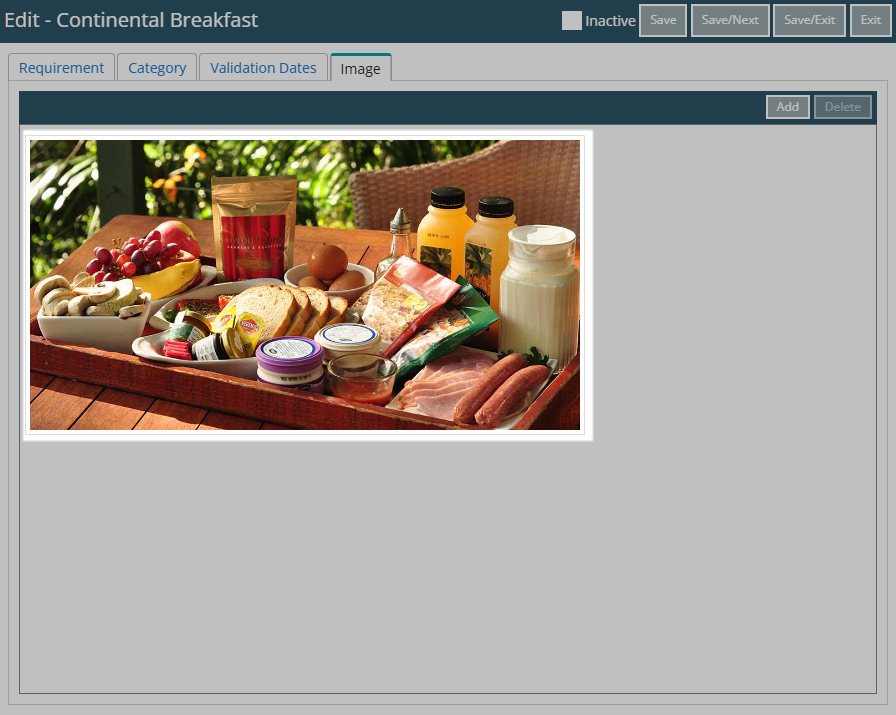
The Photo will be used on the RMS Internet Booking Engine and Guest Portal to represent the Requirement to Guests given the option to add the Requirement to their Reservation.
The Sundry Charge selected on the Requirement will be created on the Reservation Account at the same time as the Rate.
The Reservation Account Type the Sundry Charge is created on is determined by the Property's Accounting Options.
When using Split Accounts and the option to create Requirement Charges on the Accommodation Account Type is not selected the Sundry Charge for the Requirement will be created on the 'Extras' Account Type.
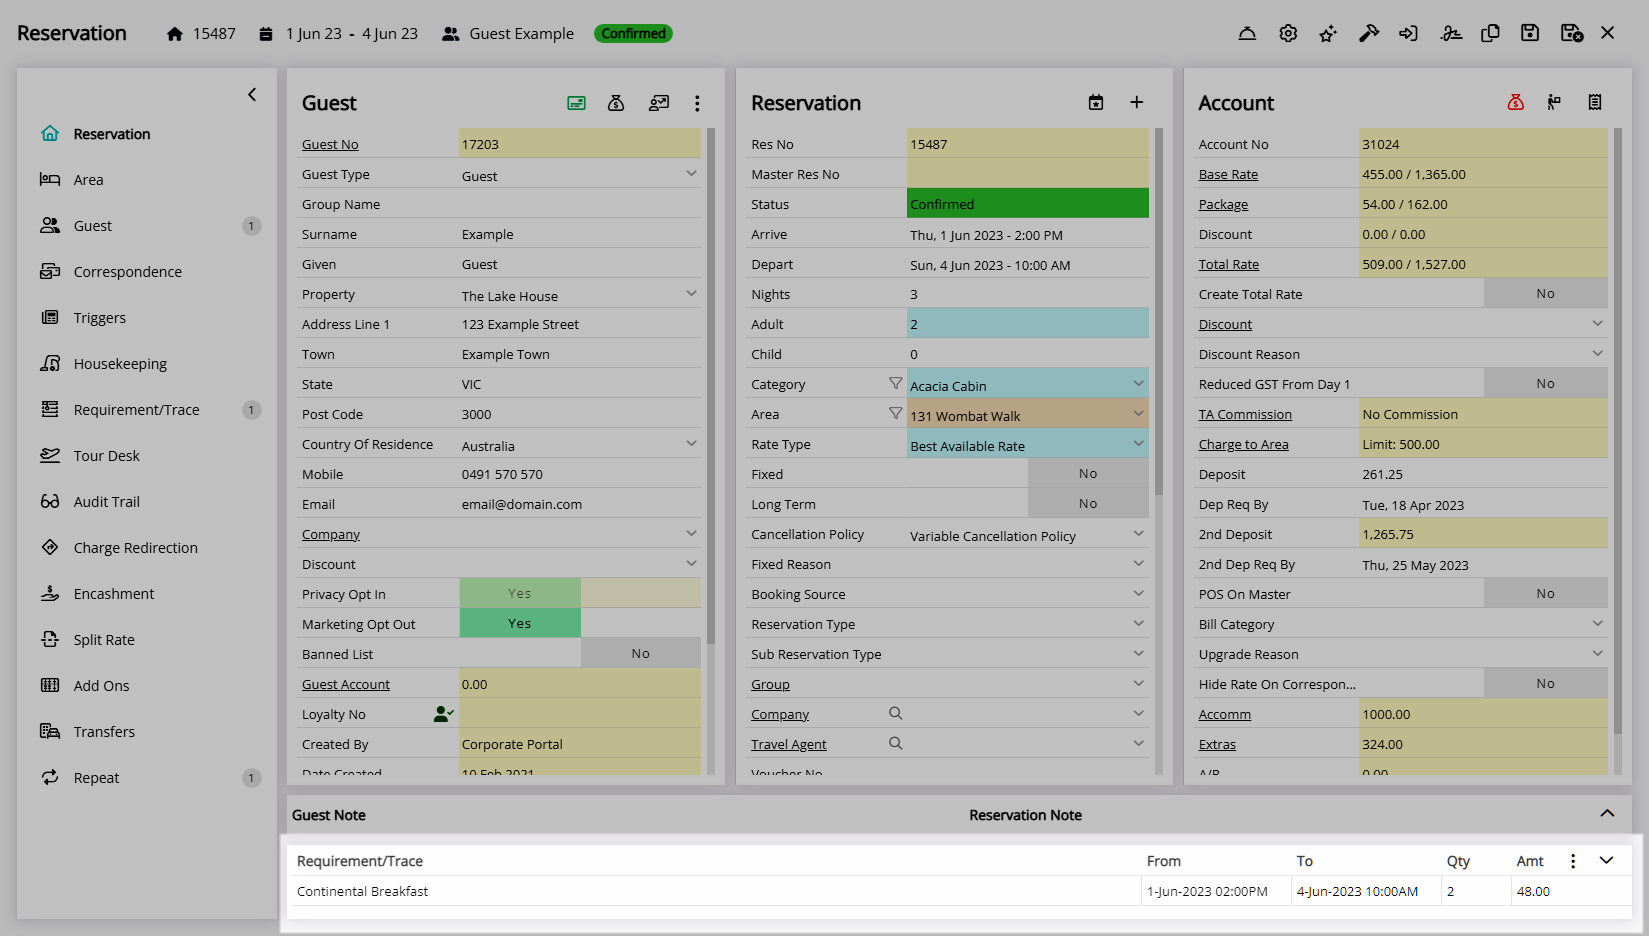
A Requirement can be selected on a Reservation or added to a Company, Guest, Reservation, Travel Agent or Group to automatically create on the Reservation when the entity is selected.
Requirements can be viewed or managed on the ![]() 'Requirement/Trace' section or tab of the Reservation and on the To Do Chart.
'Requirement/Trace' section or tab of the Reservation and on the To Do Chart.
A Requirement can be created on the To Do Chart for any item or service not related to a Reservation.
A Requirement Template can be used to create a set of Requirements on the Company, Guest, Reservation, Travel Agent or Group.
A Monitored Requirement is a same day Requirement that must be marked 'Completed' and can be managed on the To Do Chart.
A Guest Facing Requirement is an optional filter than can be used to limit the Requirements a Guest sees on correspondence sent using any of the 'Guest Facing Requirements' Merge Fields in the Reservation Merge Table on the Form Letter.
A Requirement can be set as a Daily Requirement to apply every Reservation Stay Date with the option to be included on the Housekeepers Report.
A Requirement can be automatically posted to the Account when the reservation is created using the option "Create on Reservation Creation".
If this option is Not selected, the Requirement Charge will post to the when the reservation is checked in.
A Requirement can be used for any item or service provided to the Guest that is scheduled for a particular date and time with the added option of including fees charged to the Guest.
A Trace is an inter or intra-departmental note that can be used to communicate or delegate a task to a Department for an Area, Reservation, Company, Travel Agent, Guest or Group.
-
Setup
- Add Button
Setup
Have your System Administrator complete the following.
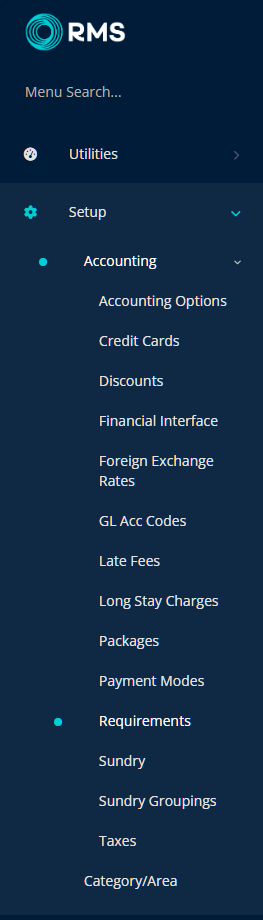
- Go to Setup > Accounting > Requirements in the Side Menu of RMS.
- Select the
 'Add' icon.
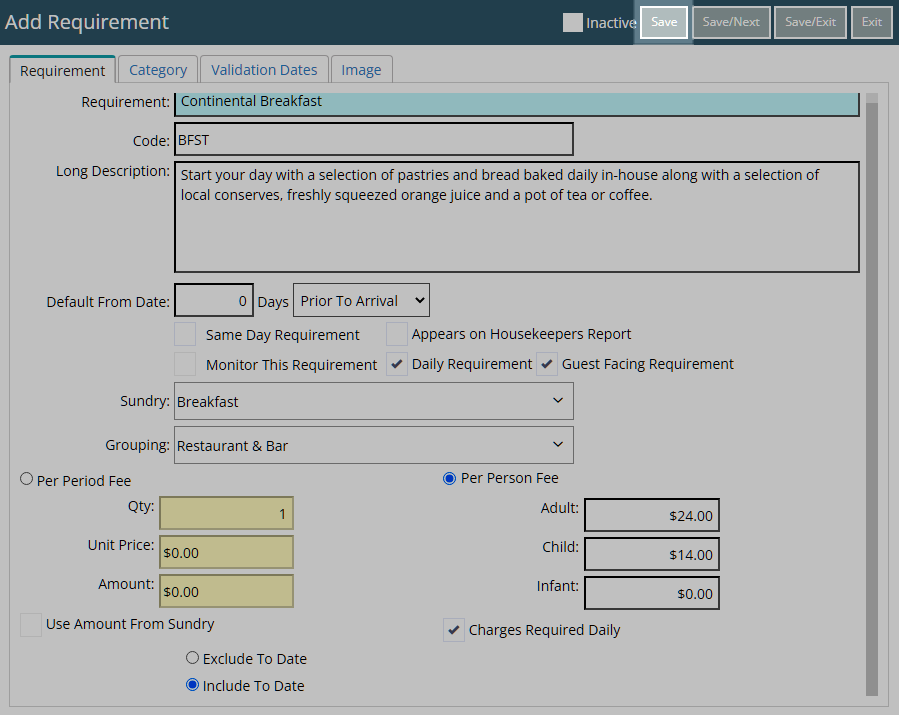
 - Enter a Description.
- Optional: Enter a Code.
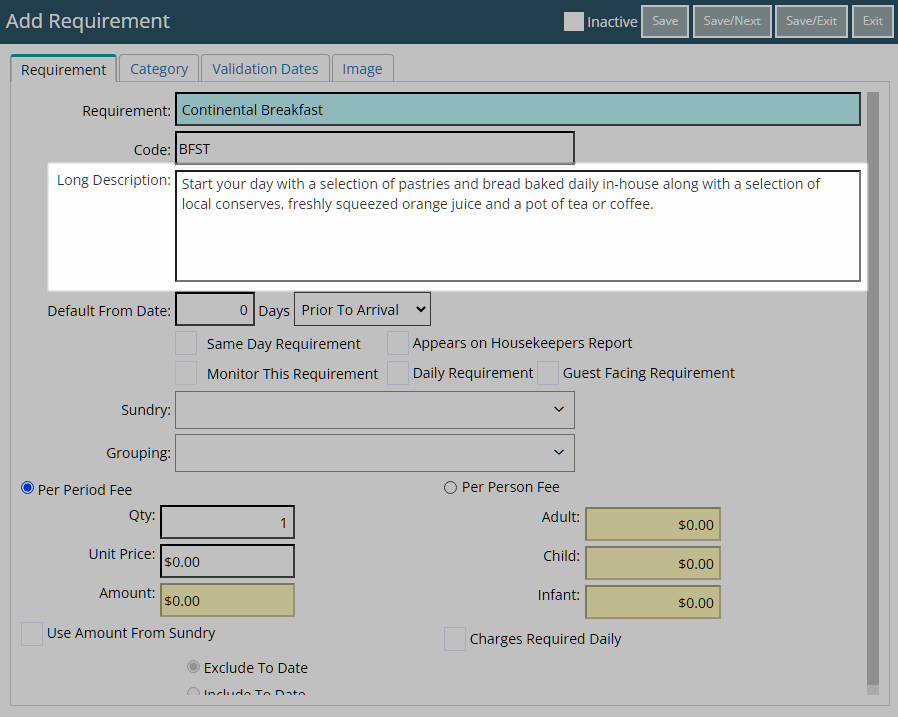
- Optional: Enter a Long Description.
- Select and enter the Default From Date.
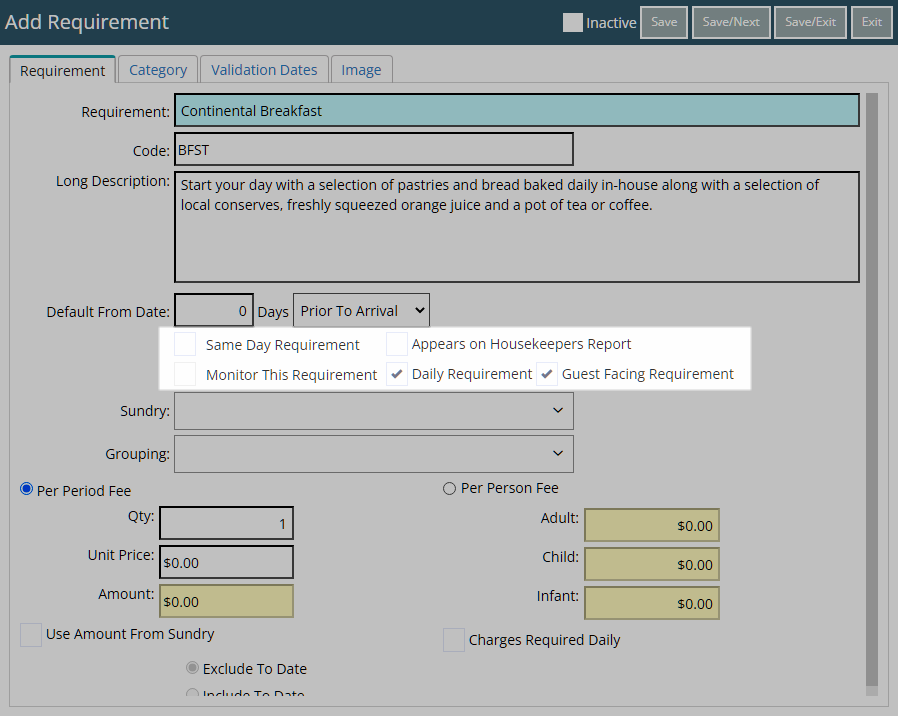
- Optional: Select the checkbox for the Requirement Options.
-
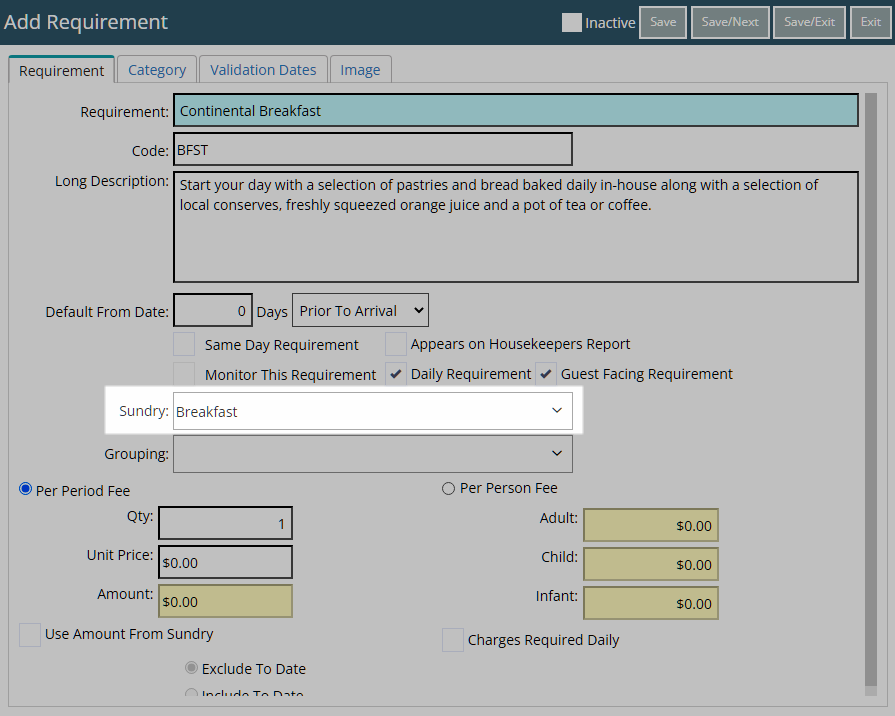
Optional: Select a Sundry Charge.
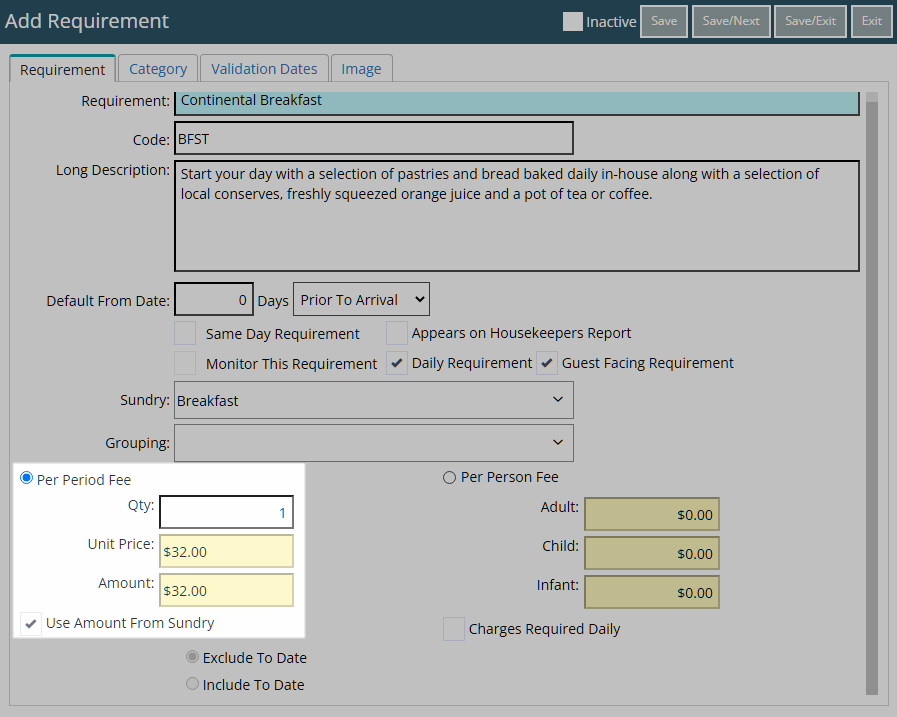
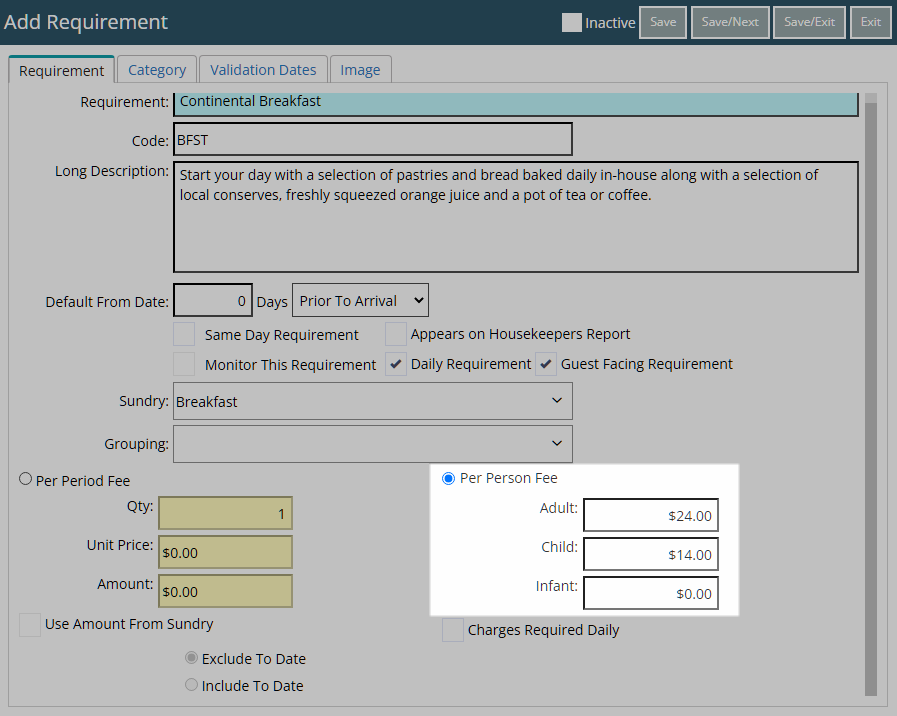
- Select a Fee Option.
- Per Period Fee: Enter the Unit Price or select the checkbox 'Use Amount from Sundry.
- Per Person Fee: Enter the Amount Per Person.
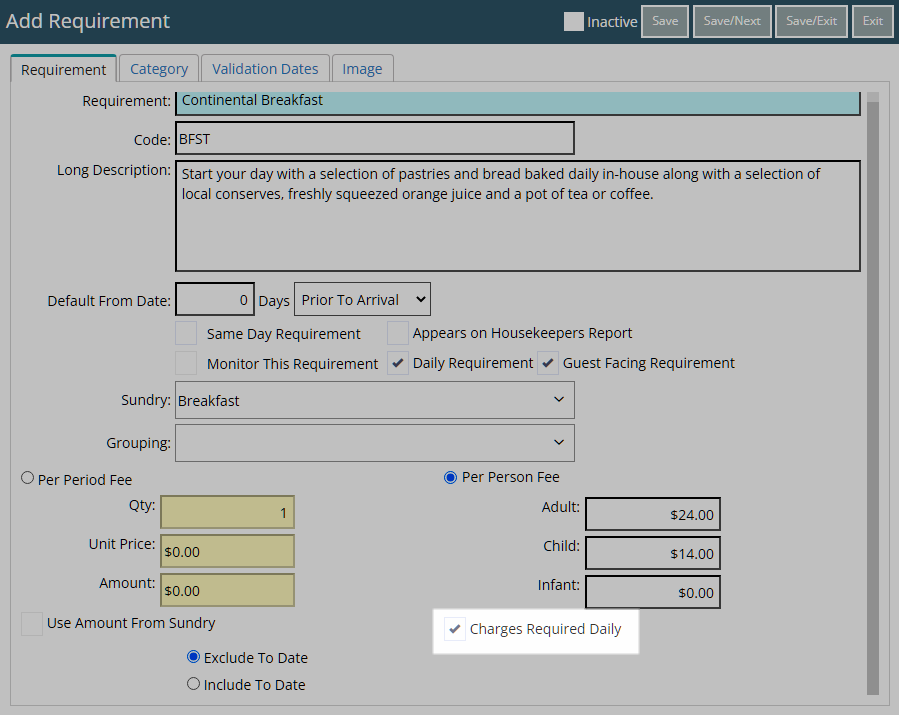
- Optional: Select the checkbox 'Charges Required Daily'.
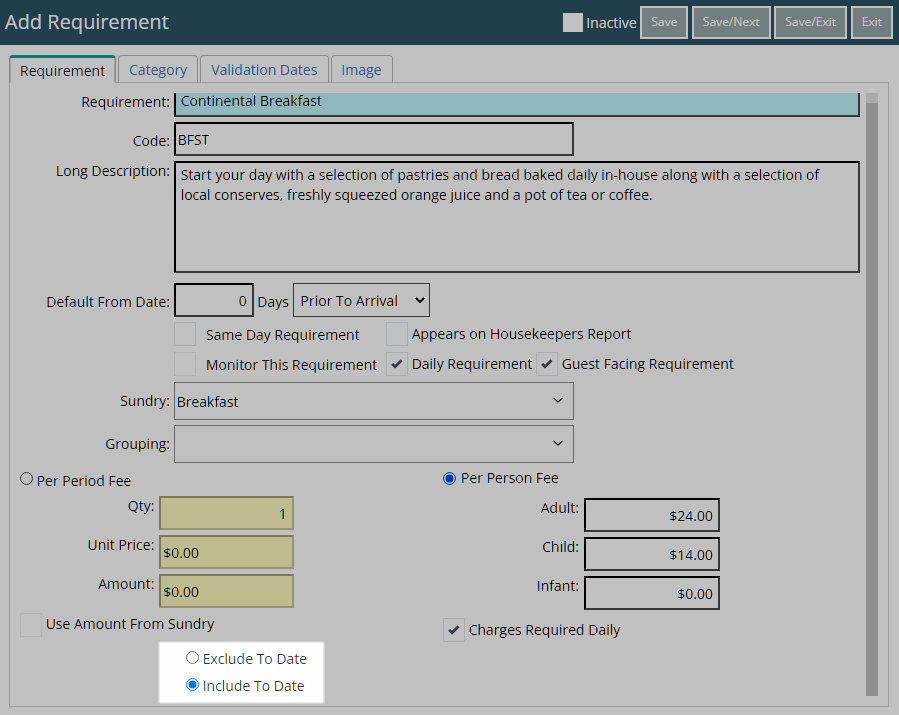
- Select to Include or Exclude the To Date of the Requirement.
- Select a Fee Option.
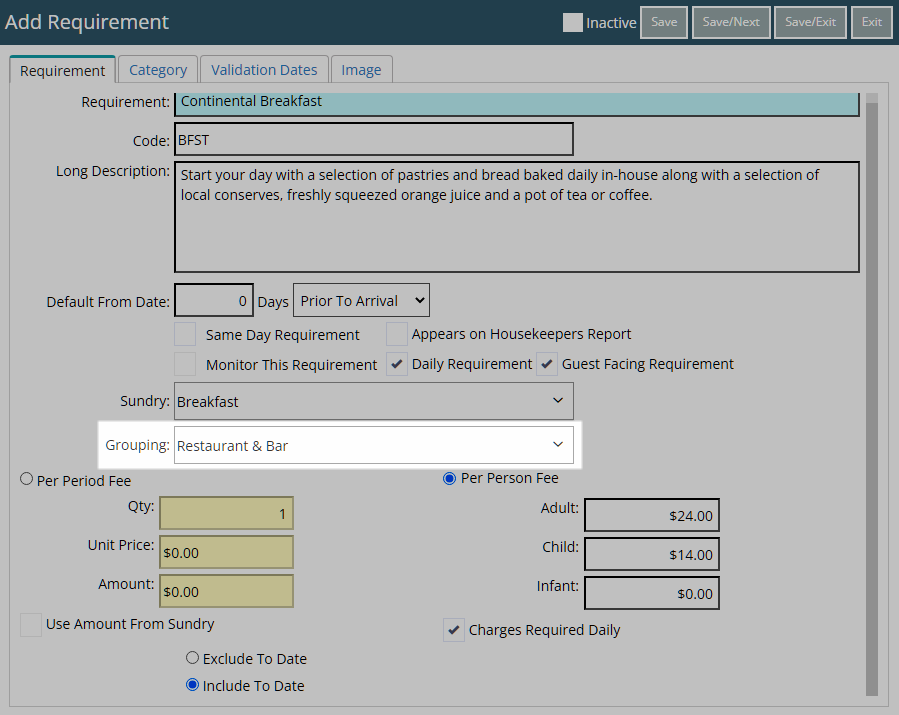
- Optional: Select a Grouping.
- Save.
-
Optional: Setup Category Access.
- Navigate to the 'Category' tab.
- Select a Category and choose the
 button.
-
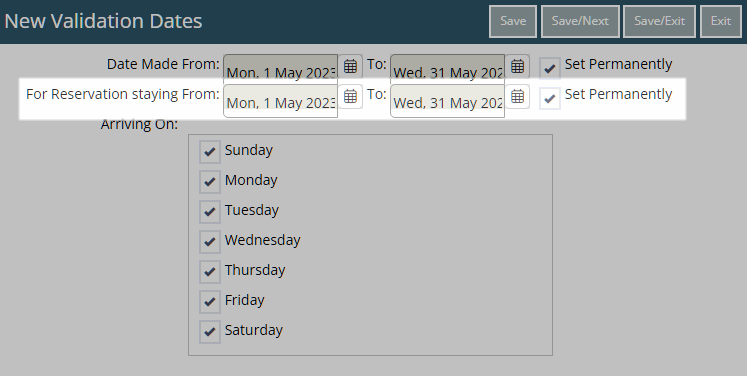
Optional: Setup Validation Dates.
- Navigate to the 'Validation Dates' tab.
- Select 'Add'.
- Select the Date Made From Date Range or select the checkbox 'Set Permanently'.
- Select the Reservation Staying From Date Range or select the checkbox 'Set Permanently'.
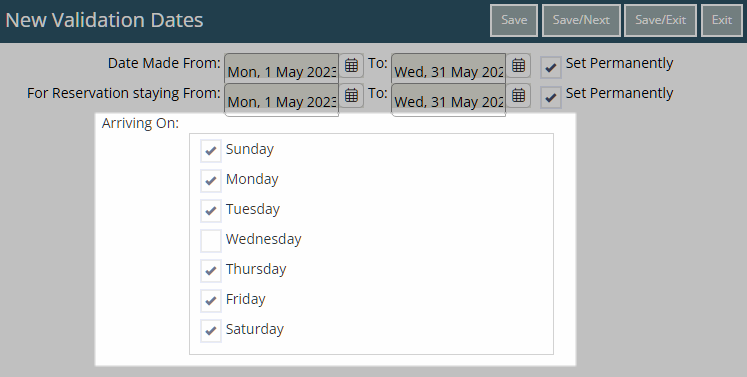
- Optional: Select the checkbox for Days of the Week.
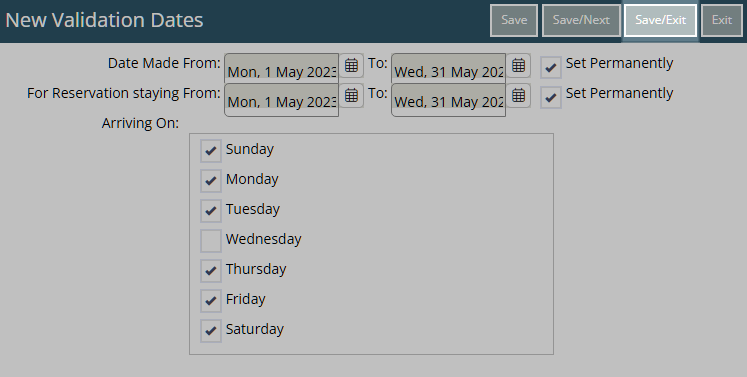
- Save/Exit.
-
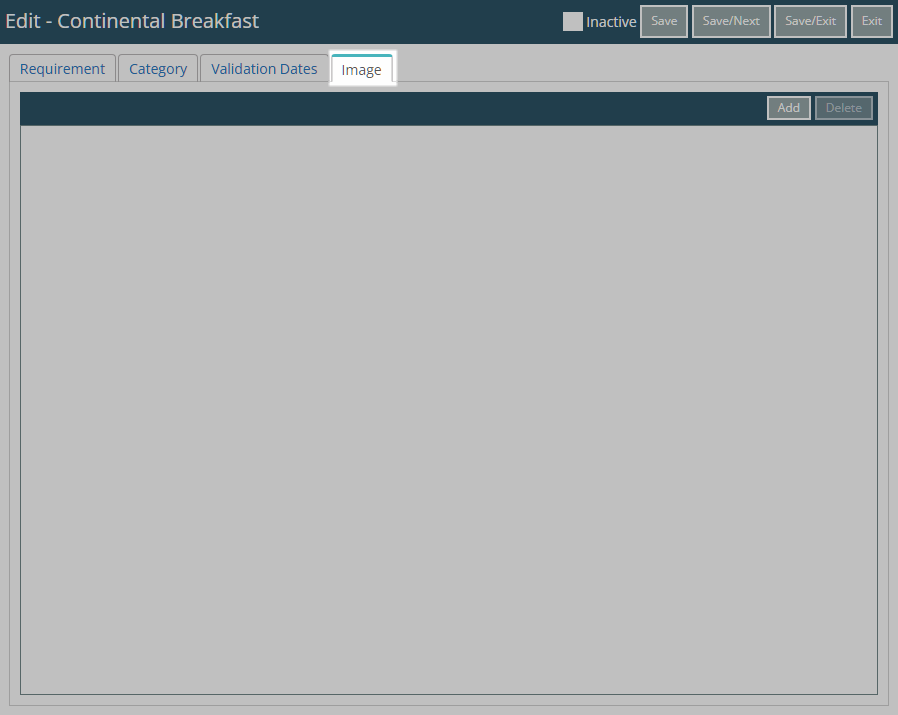
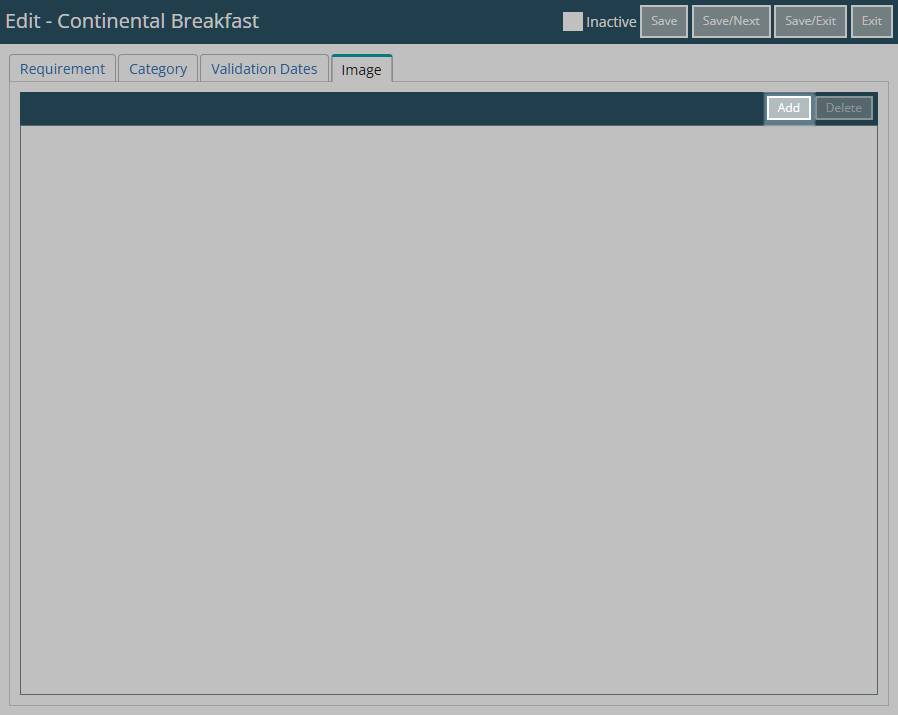
Optional: Setup a Photo.
- Navigate to the 'Image' tab.
- Select 'Add'.
- Select an Image File and choose 'Ok'.
- Save/Exit.
-
Guide
- Add Button
Guide
Go to Setup > Accounting > Requirements in the Side Menu of RMS.
Select the ![]() 'Add' icon.
'Add' icon.

Enter a Description.

Optional: Enter a Code.
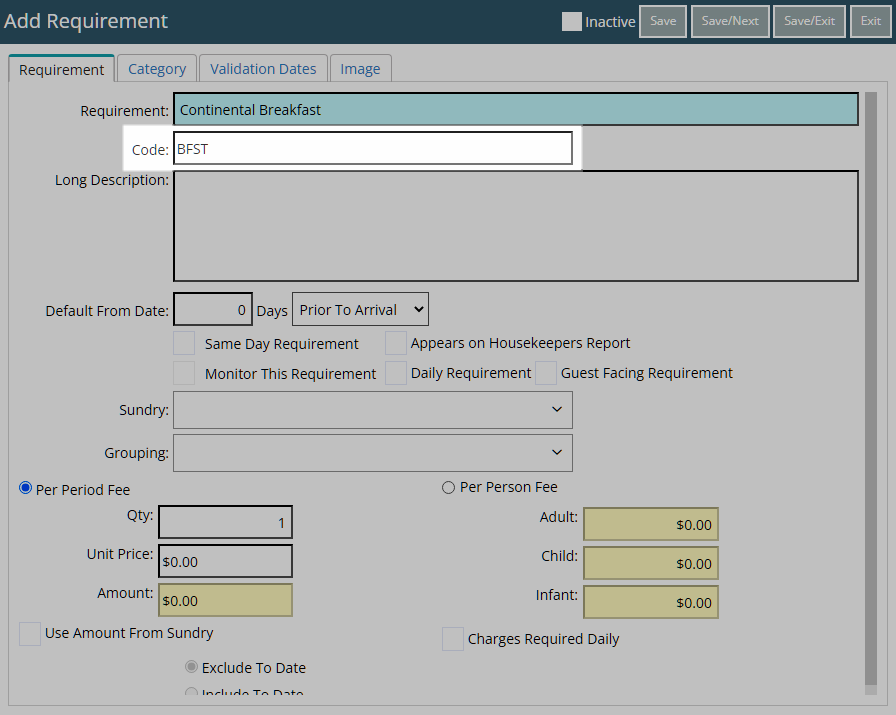
Optional: Enter a Long Description.
Select and enter the Default From Date.
Select the checkbox for the Requirement Options.
Optional: Select a Sundry Charge.
Select a Fee Option.
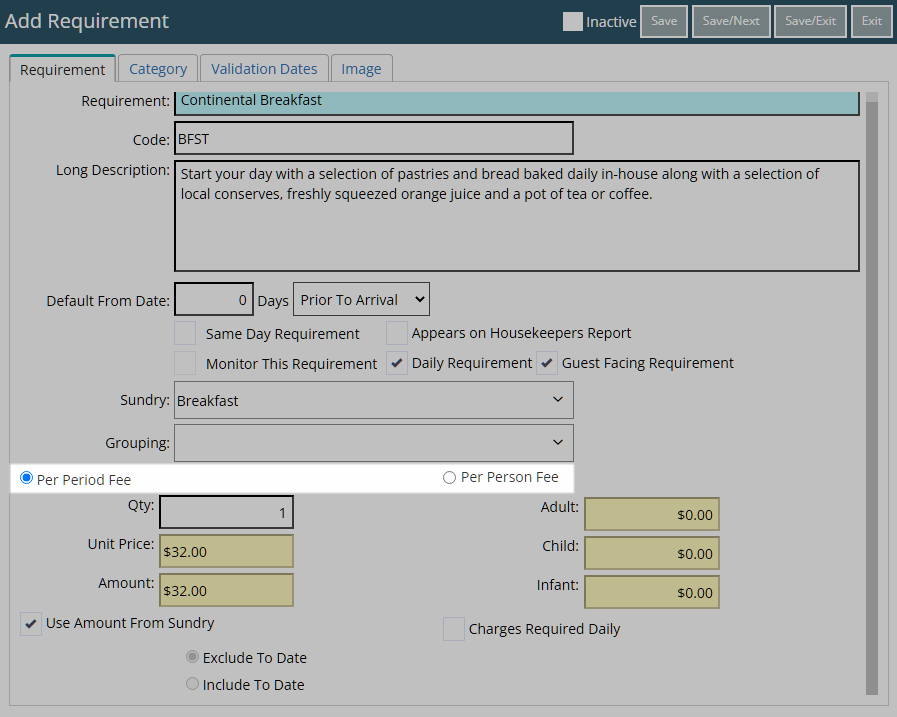
Per Period Fee: Enter the Unit Price or select the checkbox 'Use Amount from Sundry.
Per Person Fee: Enter the Amount Per Person.
Optional: Select the checkbox 'Charges Required Daily'.
Select to Include or Exclude the To Date of the Requirement.
Optional: Select a Grouping.
Select 'Save' to store the changes made.
Optional: Setup Category Access.
Navigate to the 'Category' tab.

Select a Category and choose the ![]() button.
button.
Optional: Setup Validation Dates.
Navigate to the 'Validation Dates' tab.

Select 'Add' to create a new set of Validation Dates.
Select the Date Made From Date Range or select the checkbox 'Set Permanently'.
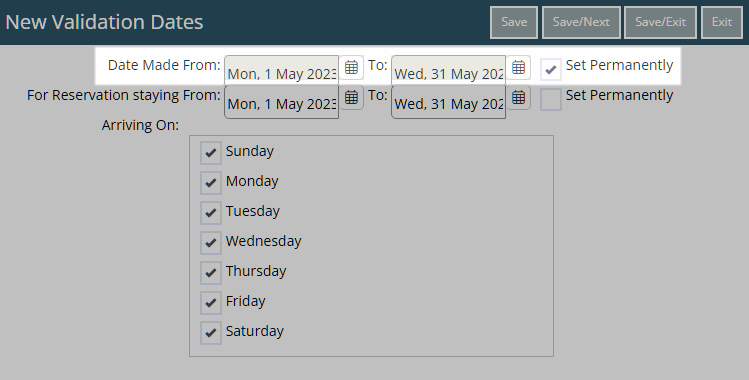
Select the Reservation Staying From Date Range or select the checkbox 'Set Permanently'.
Optional: Select the checkbox for Days of the Week.
Select 'Save/Exit' to store the changes made and return to the Requirement.
Optional: Setup a Photo.
Navigate to the 'Image' tab.
Select 'Add'.
Select an Image File and choose 'Ok'.
Select 'Save/Exit' to store the changes made and leave the setup.
The Requirement will be available for selection on the To Do Chart or a Company, Guest, Reservation, Travel Agent or Group
Setup
Have your System Administrator complete the following.
- Go to Setup > Accounting > Requirements in the Side Menu of RMS.
- Select the 'Add' icon.
- Enter a Description.
- Optional: Enter a Code.
- Optional: Enter a Long Description.
- Select and enter the Default From Date.
- Optional: Select the checkbox for the Requirement Options.
-
Optional: Select a Sundry Charge.
- Select a Fee Option.
- Per Period Fee: Enter the Unit Price or select the checkbox 'Use Amount from Sundry.
- Per Person Fee: Enter the Amount Per Person.
- Optional: Select the checkbox 'Charges Required Daily'.
- Select to Include or Exclude the To Date of the Requirement.
- Select a Fee Option.
- Optional: Select a Grouping.
- Save.
-
Optional: Setup Category Access.
- Navigate to the 'Category' tab.
- Select a Category and choose the button.
-
Optional: Setup Validation Dates.
- Navigate to the 'Validation Dates' tab.
- Select 'Add'.
- Select the Date Made From Date Range or select the checkbox 'Set Permanently'.
- Select the Reservation Staying From Date Range or select the checkbox 'Set Permanently'.
- Optional: Select the checkbox for Days of the Week.
- Save/Exit.
-
Optional: Setup a Photo.
- Navigate to the 'Image' tab.
- Select 'Add'.
- Select an Image File and choose 'Ok'.
- Save/Exit.
-
Guide
- Add Button
Guide
Go to Setup > Accounting > Requirements in the Side Menu of RMS.
Select the ![]() 'Add' icon.
'Add' icon.
Enter a Description.
Optional: Enter a Code.
Optional: Enter a Long Description.
Select and enter the Default From Date.
Select the checkbox for the Requirement Options.

Optional: Select a Sundry Charge.
Select a Fee Option.
Per Period Fee: Enter the Unit Price or select the checkbox 'Use Amount from Sundry.
Per Person Fee: Enter the Amount Per Person.
Optional: Select the checkbox 'Charges Required Daily'.
Select to Include or Exclude the To Date of the Requirement.
Optional: Select a Grouping.
Select 'Save' to store the changes made.
Optional: Setup Category Access.
Navigate to the 'Category' tab.
Select a Category and choose the ![]() button.
button.
Optional: Setup Validation Dates.
Navigate to the 'Validation Dates' tab.
Select 'Add' to create a new set of Validation Dates.
Select the Date Made From Date Range or select the checkbox 'Set Permanently'.
Select the Reservation Staying From Date Range or select the checkbox 'Set Permanently'.
Optional: Select the checkbox for Days of the Week.
Select 'Save/Exit' to store the changes made and return to the Requirement.
Optional: Setup a Photo.
Navigate to the 'Image' tab.
Select 'Add'.
Select an Image File and choose 'Ok'.
Select 'Save/Exit' to store the changes made and leave the setup.
The Requirement will be available for selection on the To Do Chart or a Company, Guest, Reservation, Travel Agent or Group